
Tutorial/Free Cut File
Spiral Betty Tutorial.
Hello!
We thought you may like something a little different this week, so we have created this tutorial, due to popular request for a Spiral Betty.
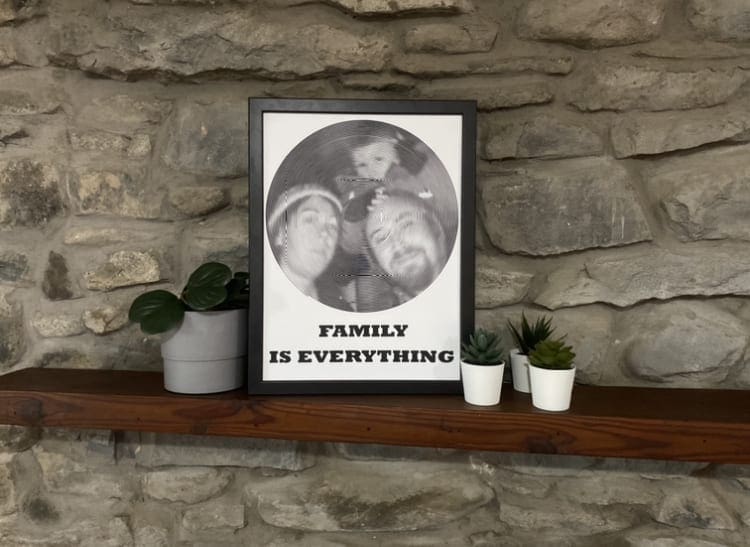
This could be turned into a box frame picture, gift bag labels, cards, T-shirts, glass light blocks we have made a few ideas and hope to inspire you with them!
We would love to see what you make! Have you found our You Tube channel yet? The video showing this and all of our other tutorials are available on there, as well as exclusive demos, inspiration and more! Join us on Facebook , Instagram or Tiktok or send us an email to sales@gmcrafts.co.uk we would love to hear from you!
***watch this being made here***

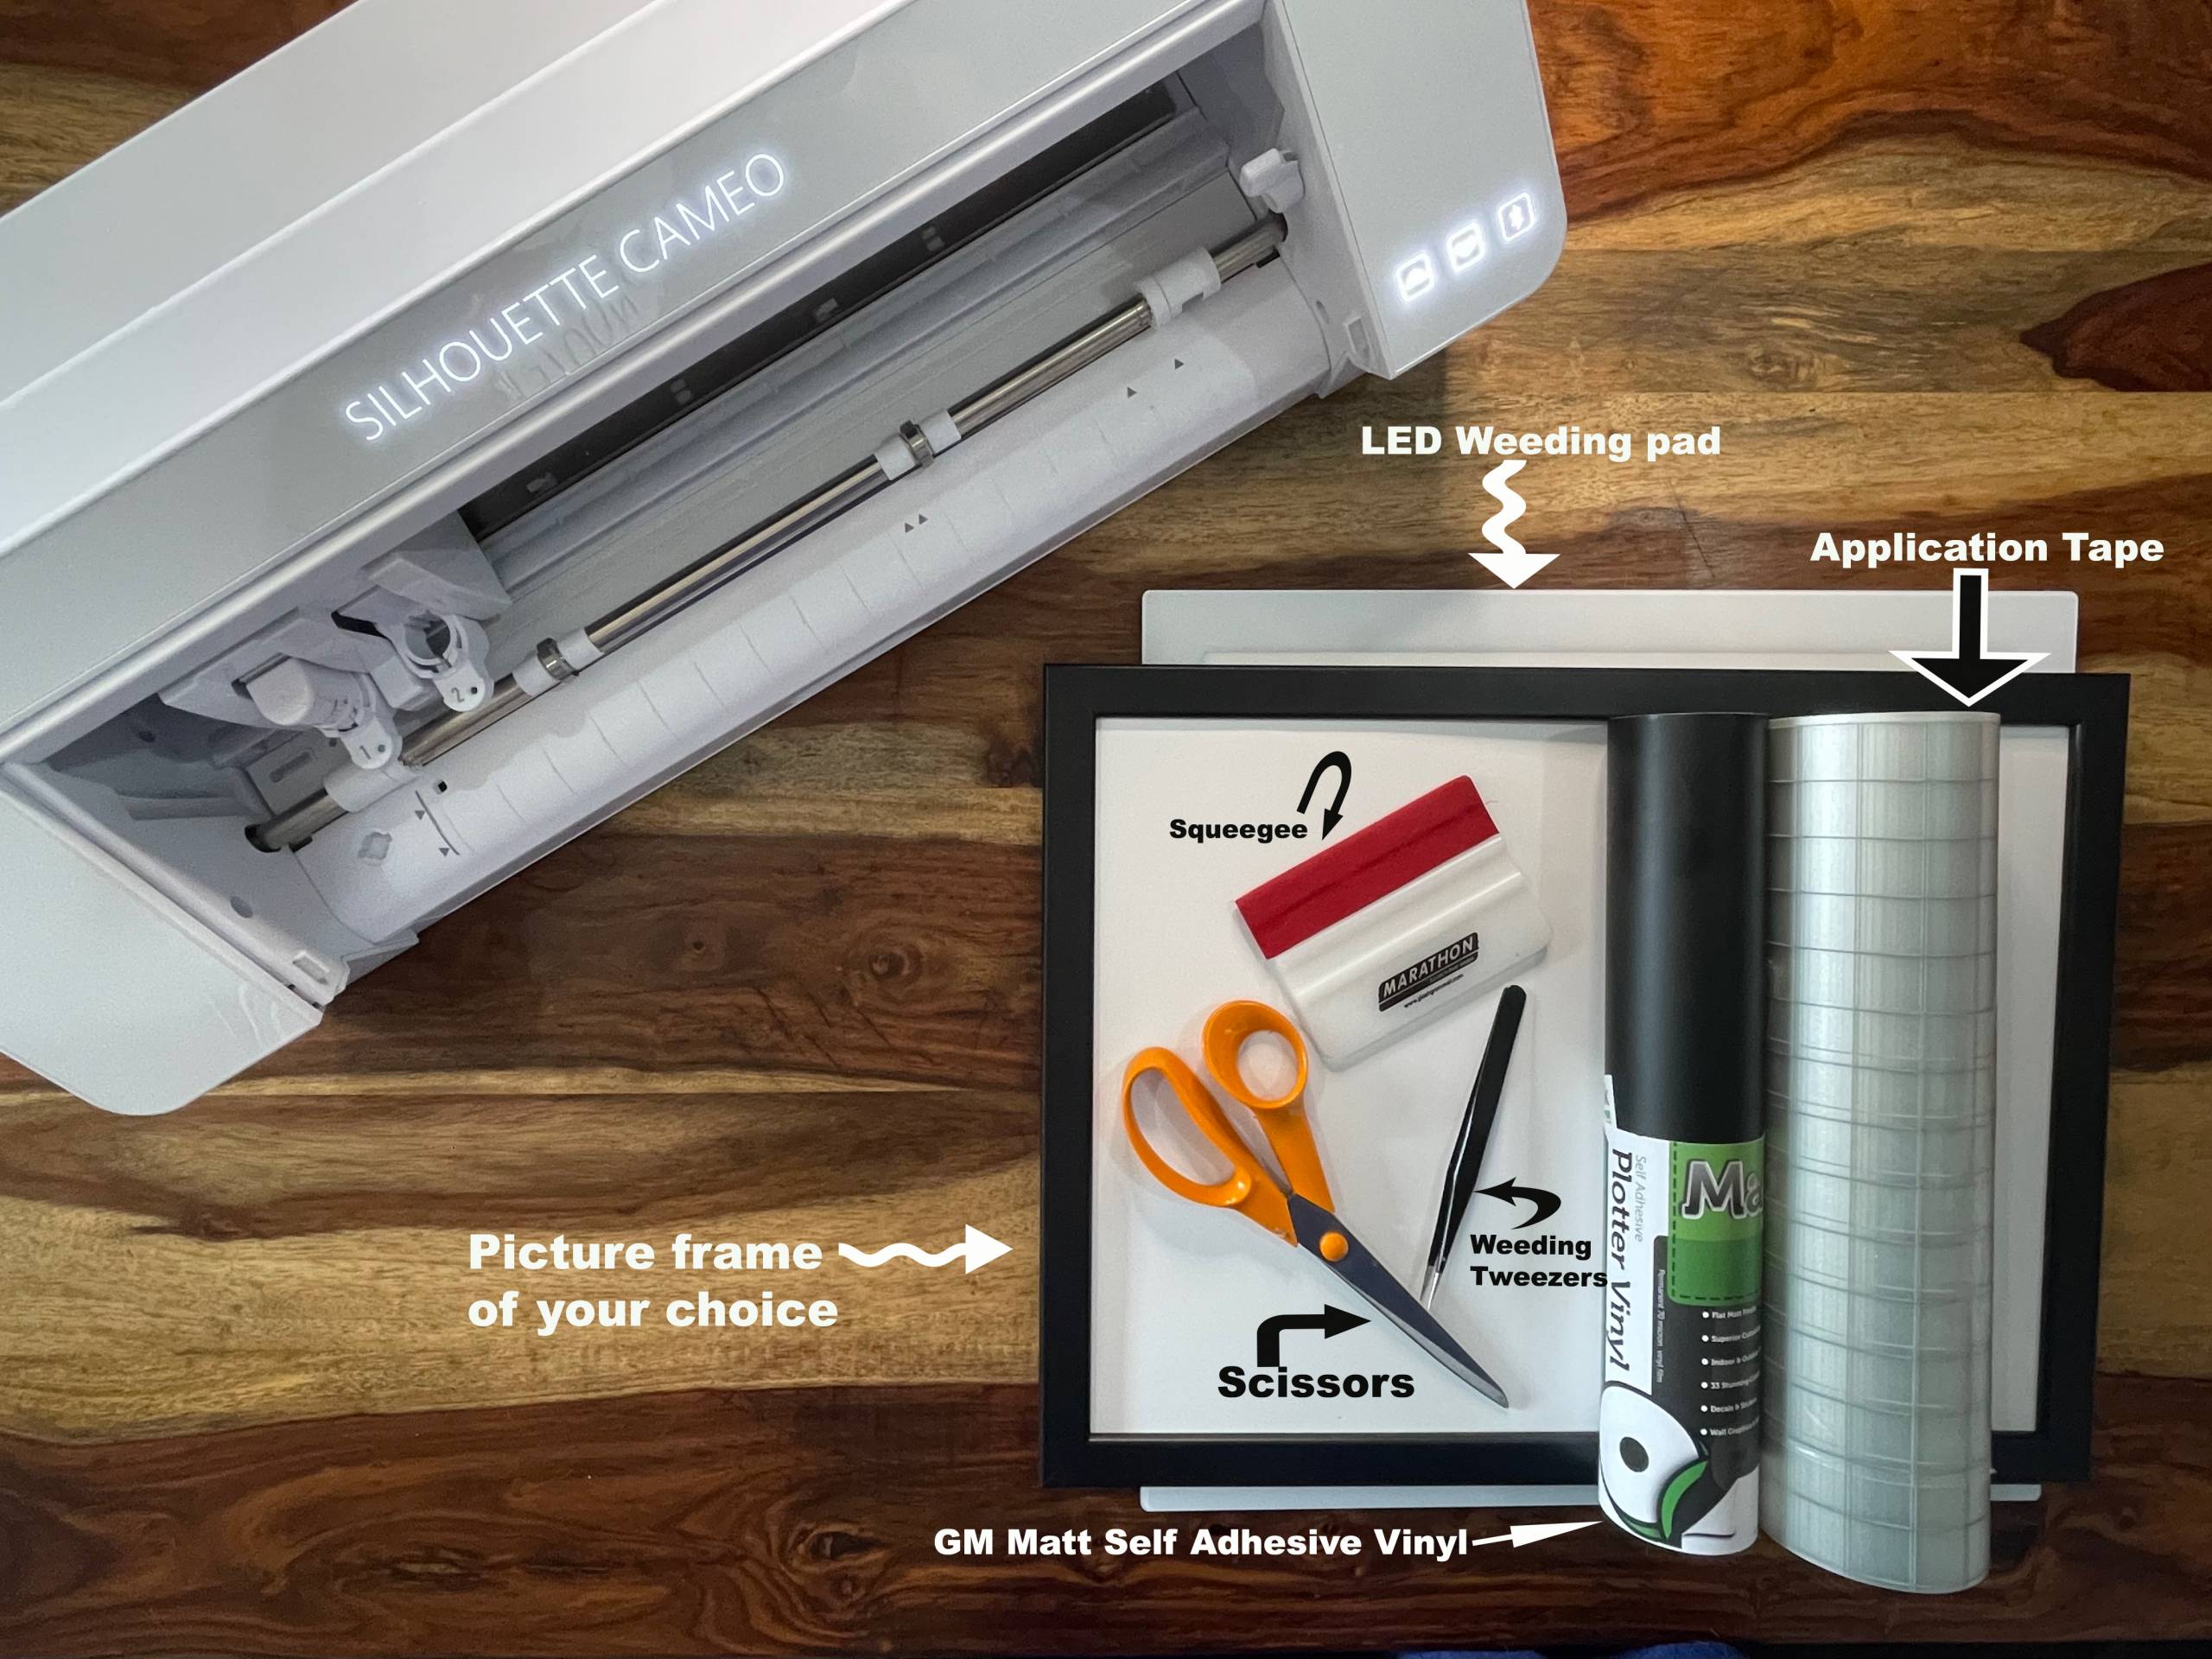
What you’ll need:
- Silhouette Cameo 4. Available here
- Transfer tape. Available here.
- Matt self adhesive Vinyl. Available here.
- LED weeding pad. Available here.
- Squeegee. Available here.
- Weeding tweezers . Available here.
- Scissors.
- Picture frame. Available here
- Cut files, links to create with your own image, are free below! Including Silhouette. Cricut and Brother instructions to follow at the end.
Instructions:
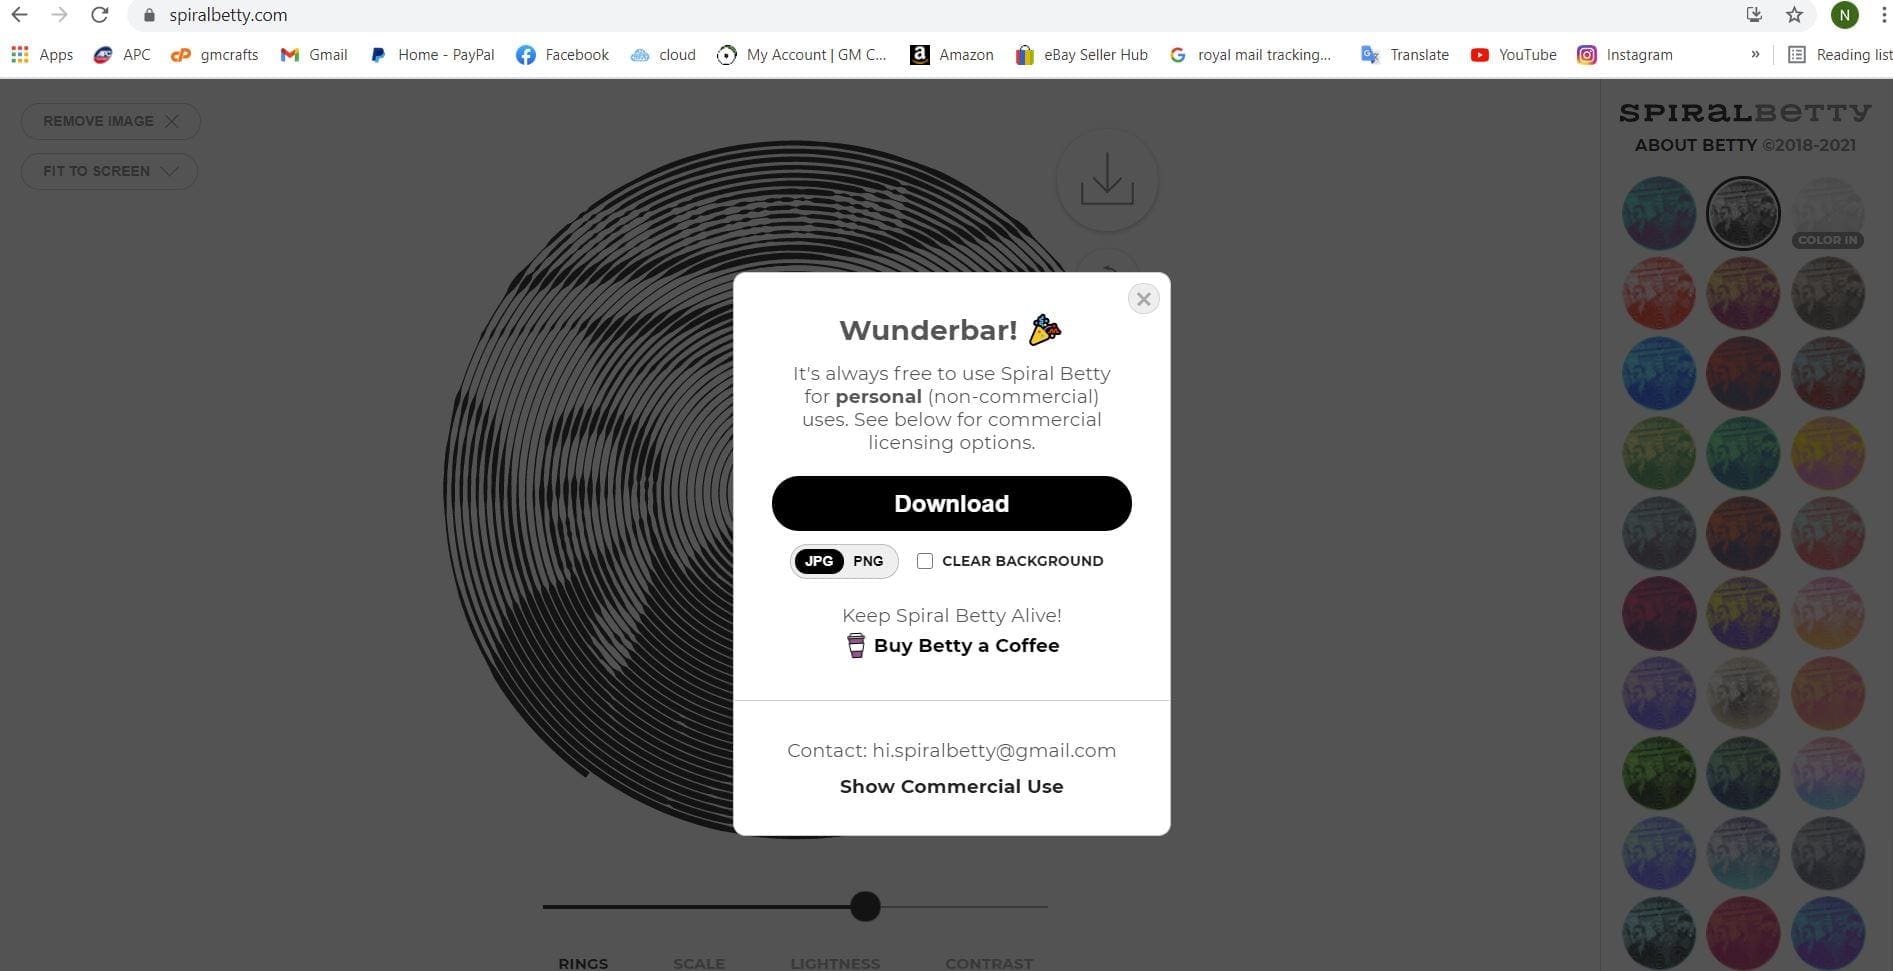
1, Go to https://spiralbetty.com/ Before you start, you need to upload a picture, clicking the centre of the disk image see below. You may need to fiddle with the slider bar under when created, and choose the black and white option, before clicking to download.
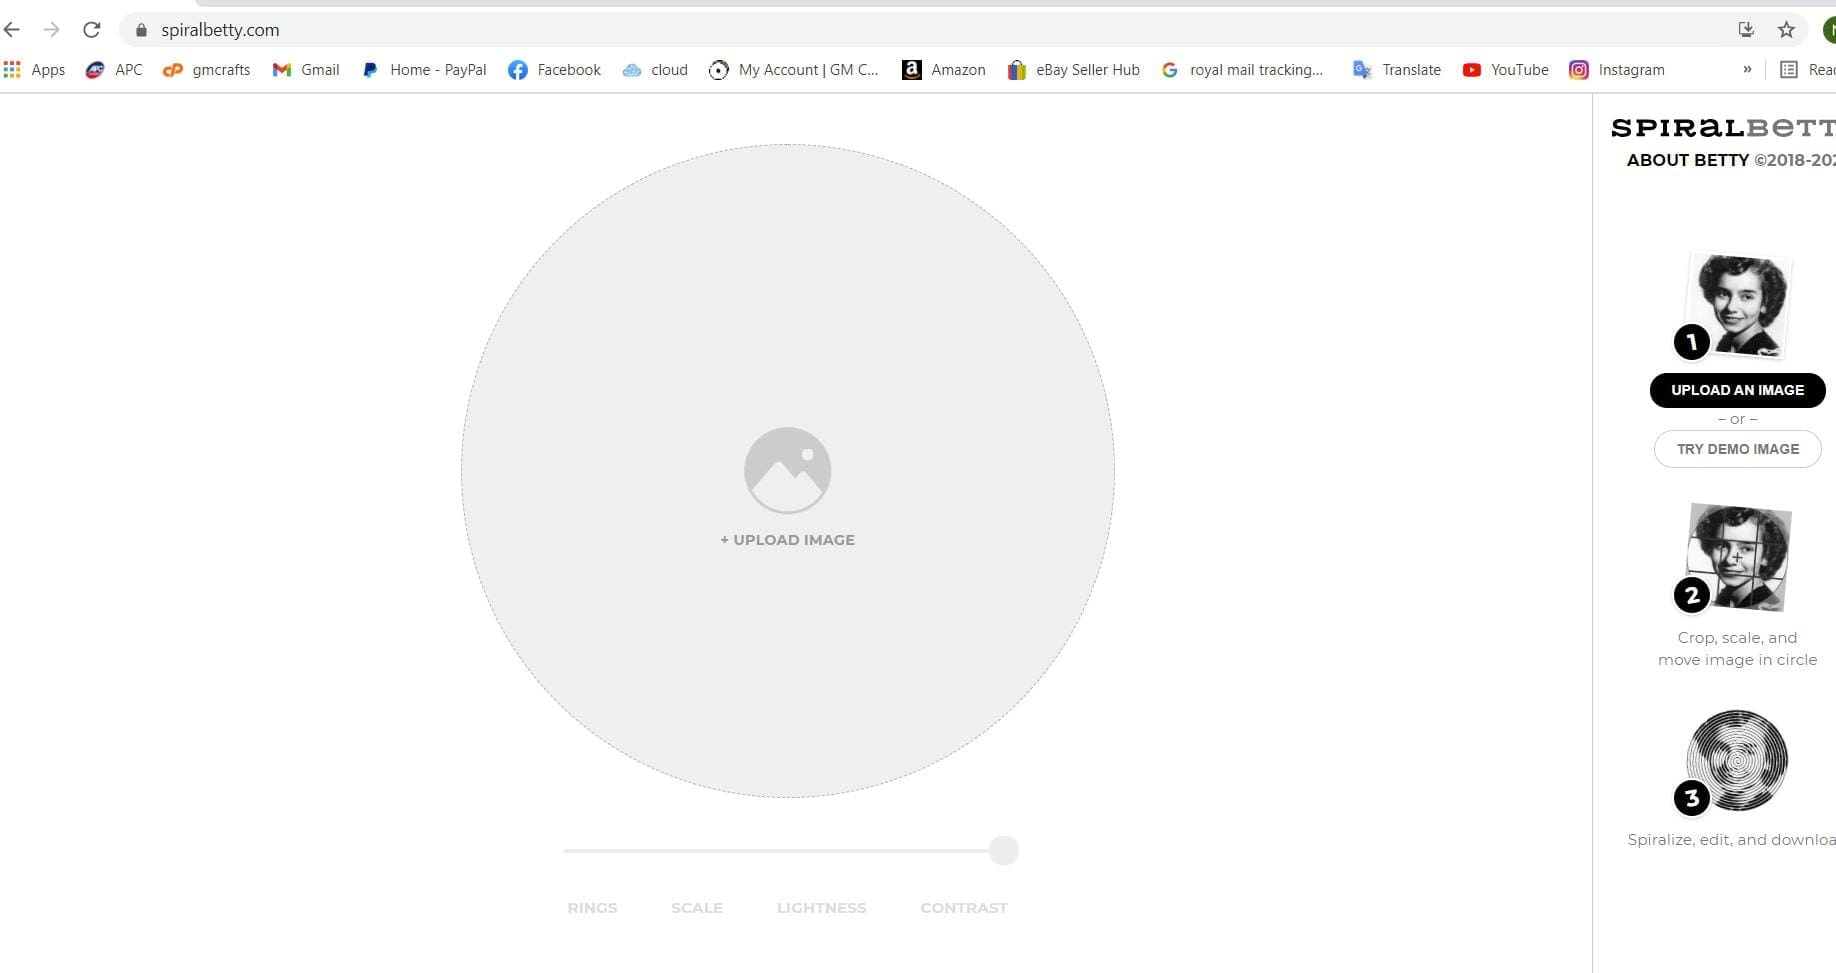
2. When downloading for all machines, choose PNG and click the clear backing option prior to download (Please remember to choose a commercial copy if you choose to sell your makes)
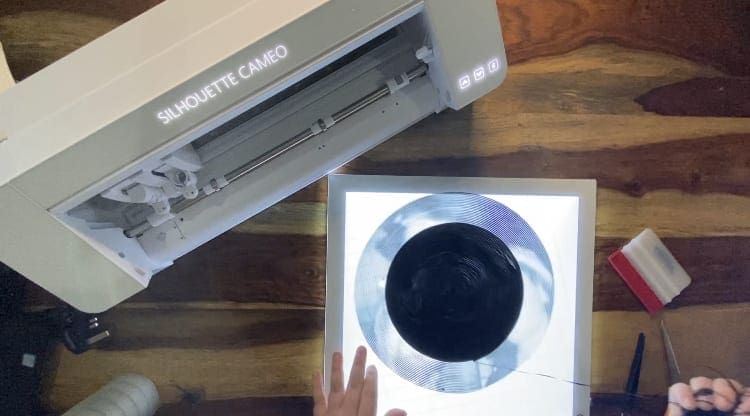
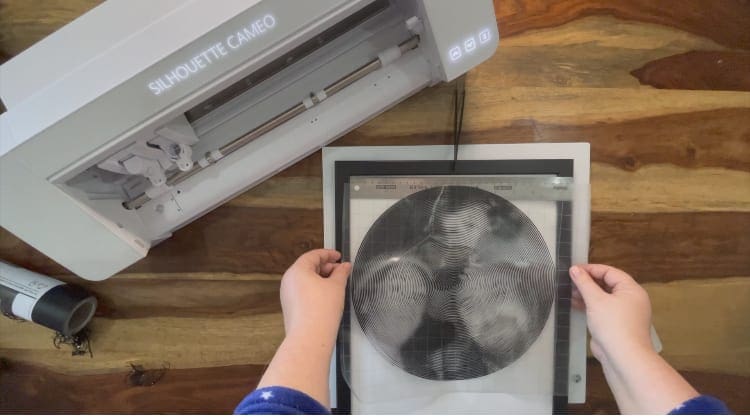
3. Upload the cut file into Silhouette Studio and resize as necessary, We resized ours so that it was 28cm across. Place the Vinyl of your choice (we used Black Matt self adhesive) onto the whole of the cutting matt. Load the mat into the machine, press SEND and amend your settings as below.
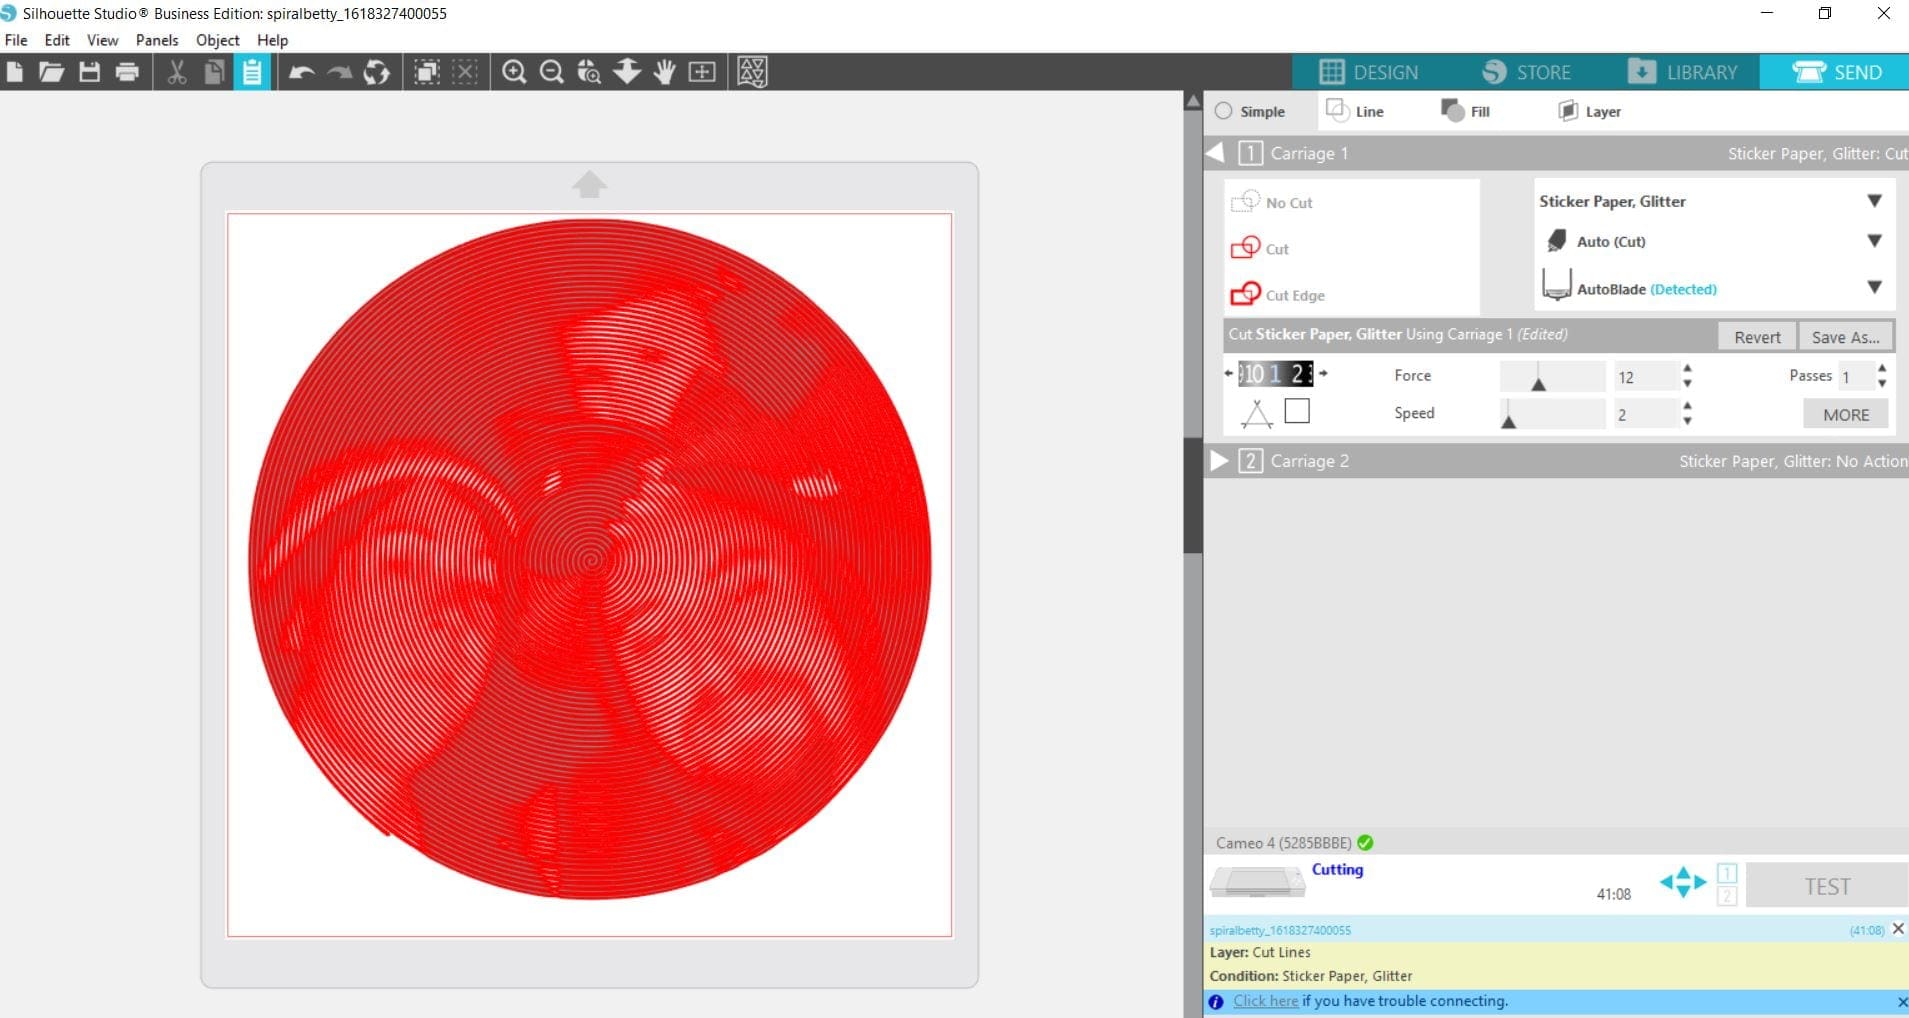
Cut settings: (**please test cut if not used Vinyl before)
Auto blade: 1 (you can also use a ratchet)
Speed:2
Force: 12
Passes: 1
**A reminder that these settings, including the blade setting, are specific to the materials and machine we’re using, adjustments may be necessary if using different materials and machine**
We always recommend before proceeding, you test cut your materials when first using so if you have not recently cut our Vinyl, please test cut for your chosen machine found on our Application guide, and also Blog, Silhouette Cameo is here and portrait is here.
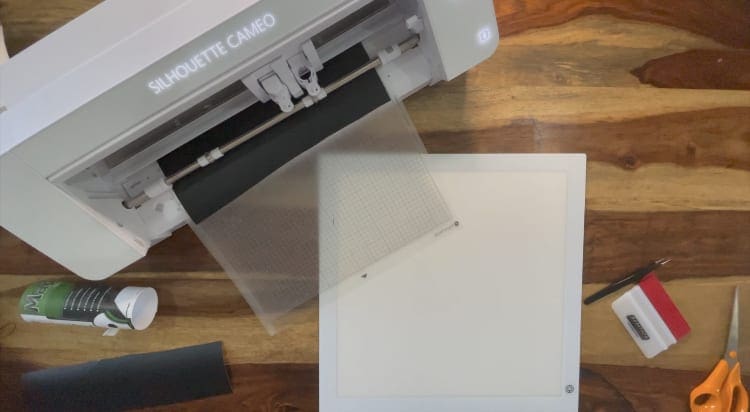
4. Load your Mat using the up arrow on the machine , select ‘SEND’ in the bottom right of the screen after making sure your machine is connected.
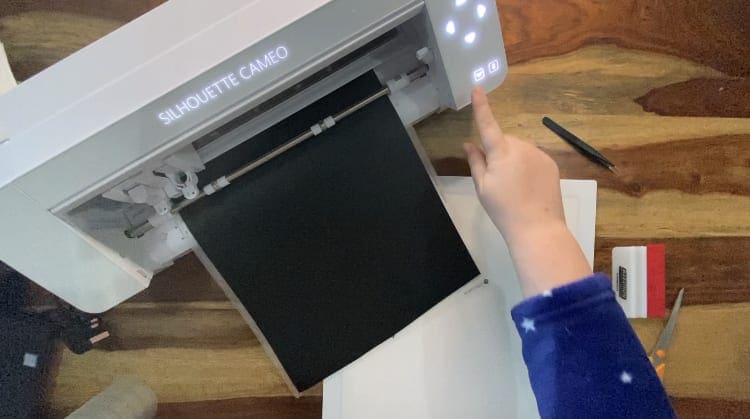
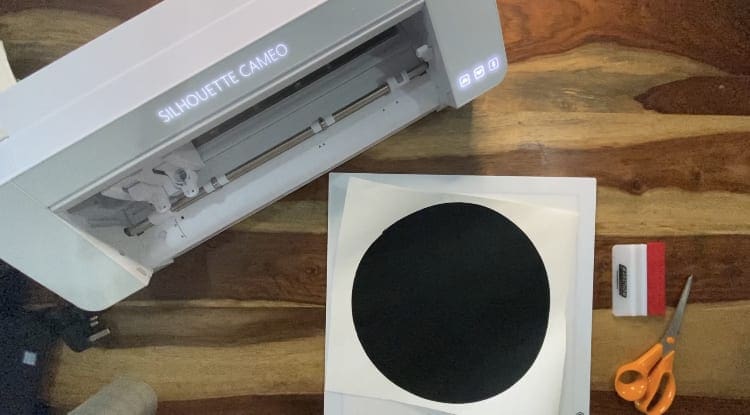
5. When cut, unload the mat by pressing the machine’s down arrow, Remove the vinyl from the mat and weed the larger outer area of vinyl surrounding the design.
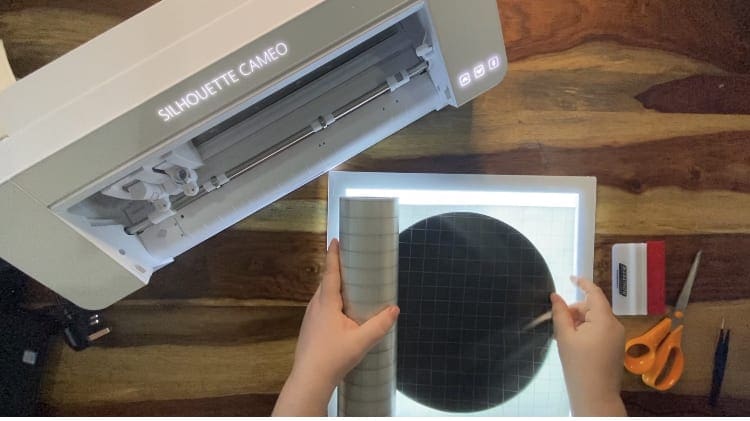
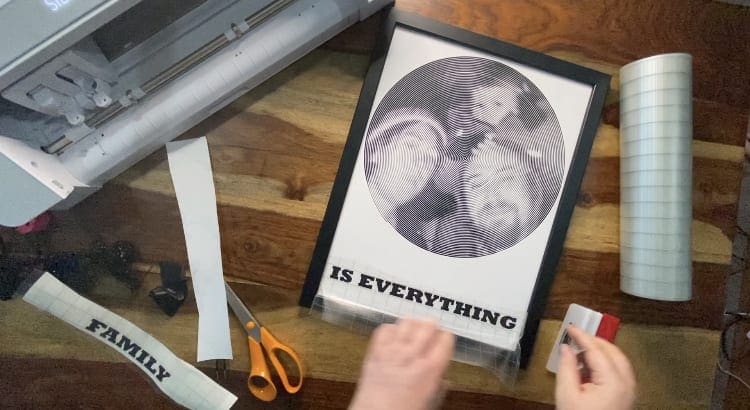
6. Before weeding further due to the fine details, we recommend getting the application tape and applying it to the front of the vinyl, you just need to cut a piece of transfer tape to fit your project and smooth it down on top of the design. Once smoothed down, please turn it over and rub the back of the vinyl so it adheres to the transfer tape from behind the vinyl, using a squeegee. If it has not transferred fully to the tape keep rubbing with more force with the transfer tape on the table and the back of the vinyl paper facing you so you push it onto the transfer tape,( not back onto the backing paper). You can then peel the transfer tape up, bringing the decal with it and off of the backing. Your decal has now moved to the transfer paper and is ready to be weeded.
7. Taking the fist part of the 1st inner line remove the waste and turning as you go, you will find it easier and quicker to weed like this.
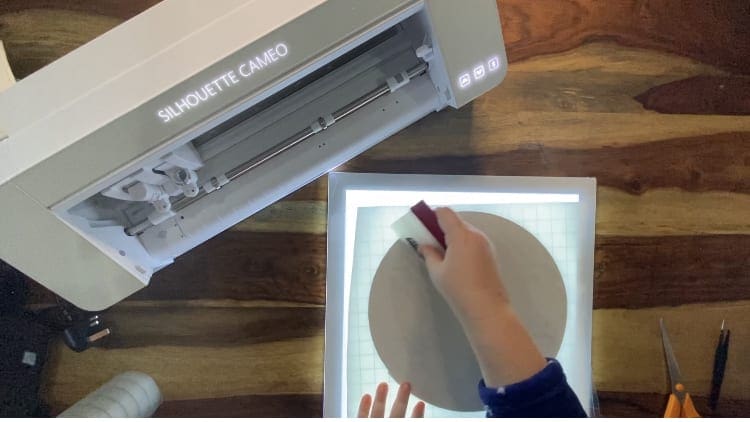
8. PREPARING YOUR SURFACE FOR THE VINYL –It is best to prepare the surface by wiping the entire surface with rubbing alcohol with a clean lint free cloth, not wipes as they have emulsifiers to keep the wipe moist and can leave a hidden layer behind, leave to completely air dry and proceed to the application process. (For this project we chose a frame with a plain white layer already inside and applied it directly onto the front of clear plastic sheet. (Glass alternative)
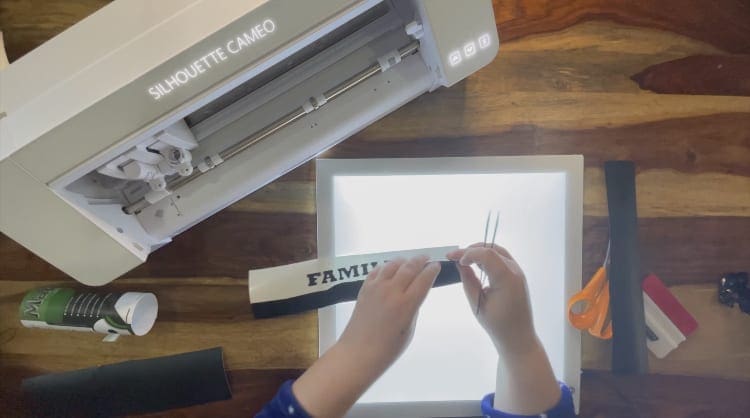
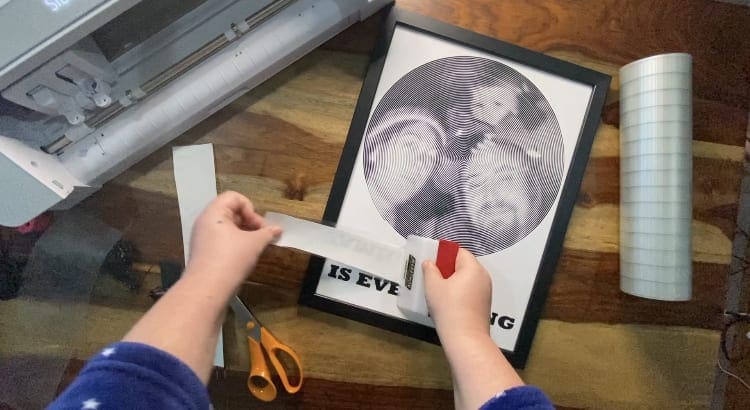
9. Whilst waiting for the frame to airdry, repeat steps 3-5 this time instead of the Betty file use the Software onboard font to type and create a matching phrase, sentiment or message should you wish to put one on, Weed and transfer to Application tape.
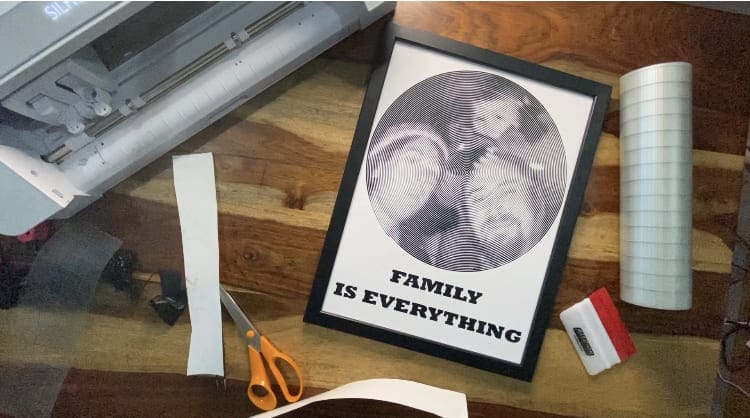
10. After first washing your hands to remove any risk of surface contamination, Apply the Betty first, holding over the frame until you are happy then press the centre down first, and work your way out from the middle of the design to get a even finish, using your finger tips. Then use your application squeegee (link above) to burnish the decal onto your surface. Remember, the vinyl’s adhesive is activated through pressure, so give it a good rub to get it to stick well. Take care to repeat with more pressure over delicate cut areas as needed. Finally, peel off your transfer tape flat back towards itself, do not pull it upwards, and you are all done! Please leave in a room temperature area for 48 hours preferably out of direct sun and moisture for the adhesive to reach it’s maximum adhesion.
11.Repeat step 10 for any wording or sentiment you wish to add.
We’d love to see your makes on our social media pages! Or email them in!
Cricut
Follow steps above then To import these files into the Cricut Design Space:
Click “Upload Image” on the left-hand Design Panel, and navigate to the cut files you want to open. Select ‘Insert image’ and select image type ‘simple’ when prompted. Next you’ll be asked to delete any space that does not get cut, you can skip this part by pressing ‘continue’. When asked if they’re print-then-cut images or just cut images, select cut images. Click save. Insert the images onto the canvas and resize to suit your project.
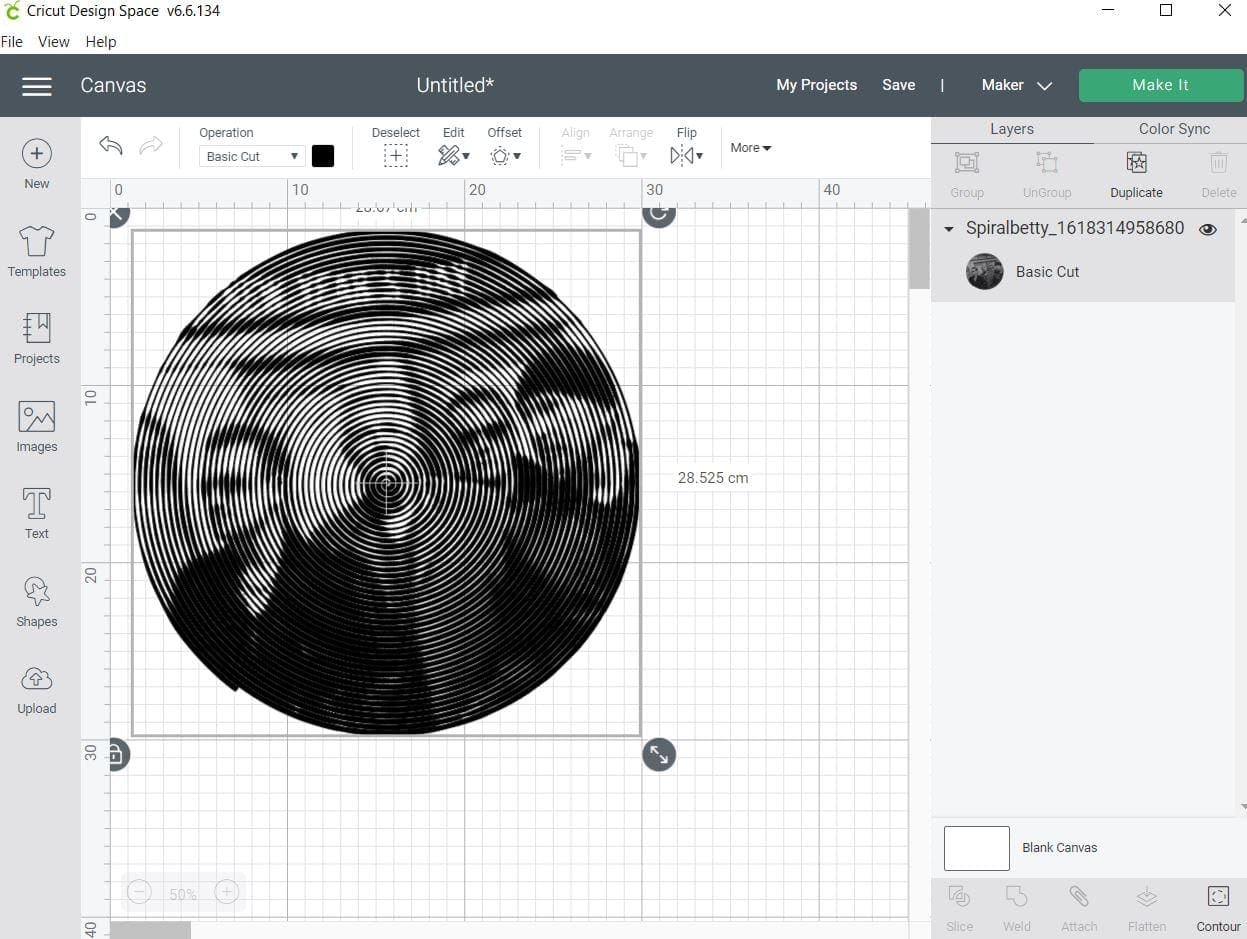
Reminder –
Cut settings are found here for JOY, AIR2, MAKER
Brother Cut File
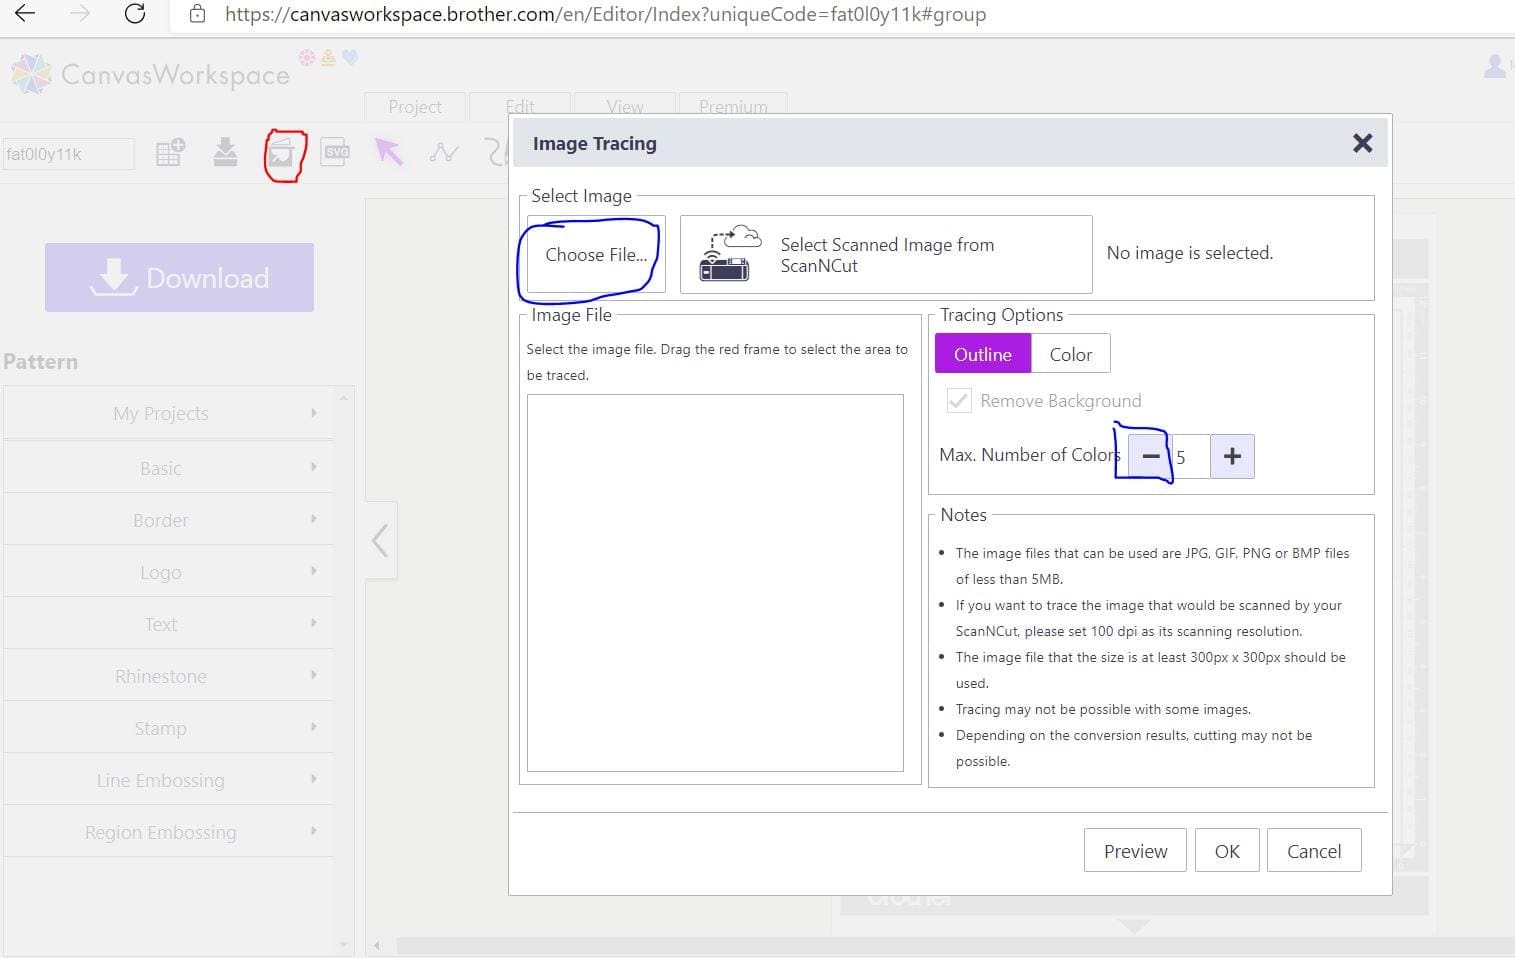
To import these files into the Brother Canvas Workspace:
After downloading, please log in as usual to your design space account, open a new project mat, then left click on the trace icon in the top left bar in canvas, this will then allow you to import your files. Once you left click this icon, a pop up box appears with you to choose where to import file from, choose to import the file from your downloads list.
Choose max colours 2 and then “preview” if the image isn’t good then go back and reduce the amount of rings on the Spiral betty file page, reload and try again.
Reminder –
Cut settings are found here
Just incase you need the link CanvasWorkspace (brother.com)
Hope you’ve enjoyed this week’s blog post, are you wondering yet what tutorial we have in store next week? 🙂