
Tutorial/Free Cut File
GM Crafts How To Layer HTV With Free Cut files And Font.

Hello!
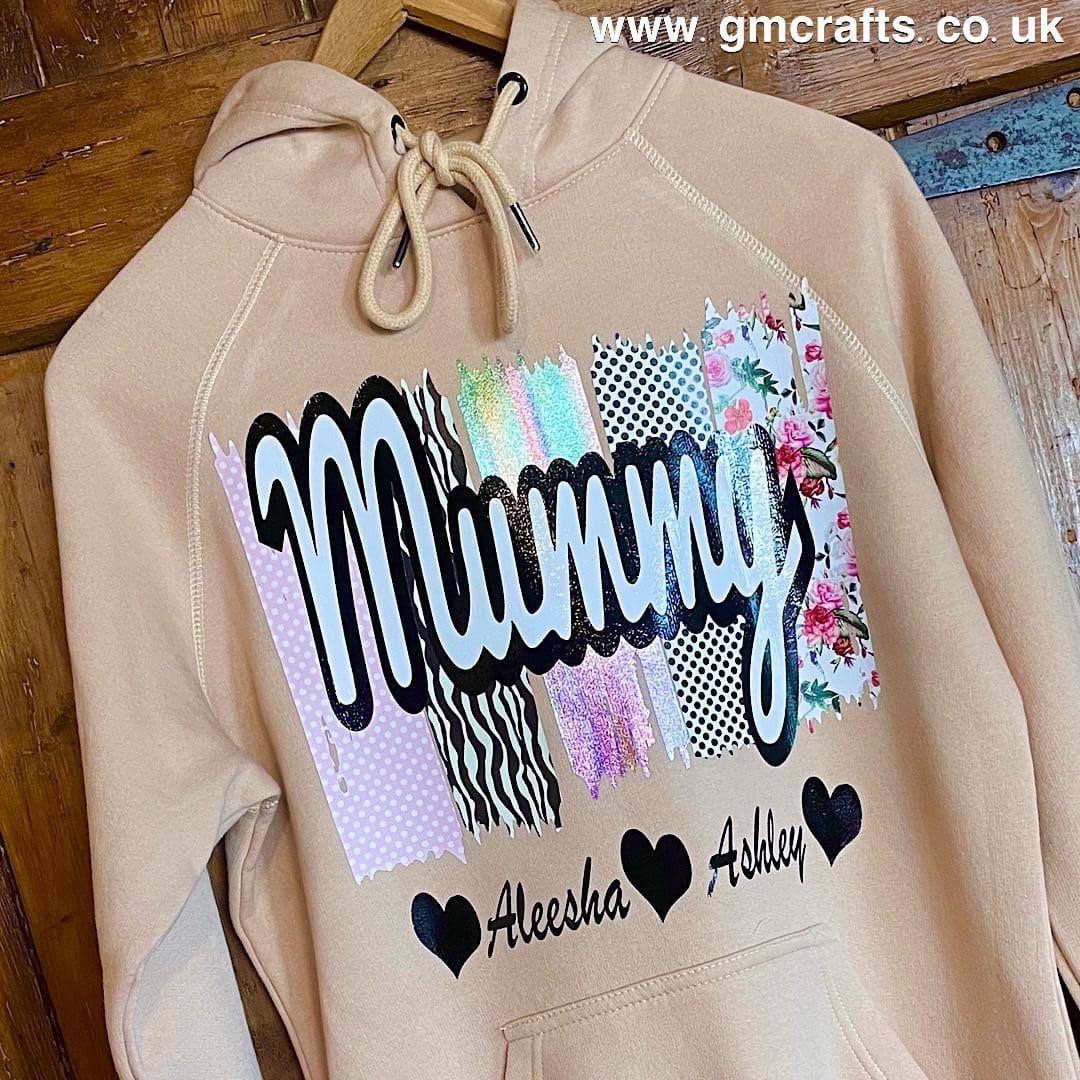
Good to see you! For this weeks blog, in the spirit of self care and family, we thought we’d share some crafting love with you and show you how to create your own personalised hoodies and tops!
There is a particular font that is incredibly popular at present, so we thought this time we would provide you with the ability to recreate this on your own machine at home below.
This design can of course be used on t-shirts, water bottles, and almost anything that you wish to personalise. (see water bottle tutorial here)
We would love to see what you make! Have you found our You Tube channel yet? The video showing this and all of our other tutorials are available on there, as well as exclusive demos, inspiration and more! Join us on Facebook , Instagram or Tiktok or send us an email to sales@gmcrafts.co.uk we would love to hear from you!
As always you are free to use our files to make, create, and even make items to sell, all we ask is you don’t pass the files on, instead if you wish to share them, please ask your friend or acquaintance, to download them from our website themselves from within this blog. No reselling or passing on, of any part of the cut file is permitted, and no using the cut files to create other files to sell or pass on is allowed. But do enjoy them, and we hope your makes earn you a little with them too.
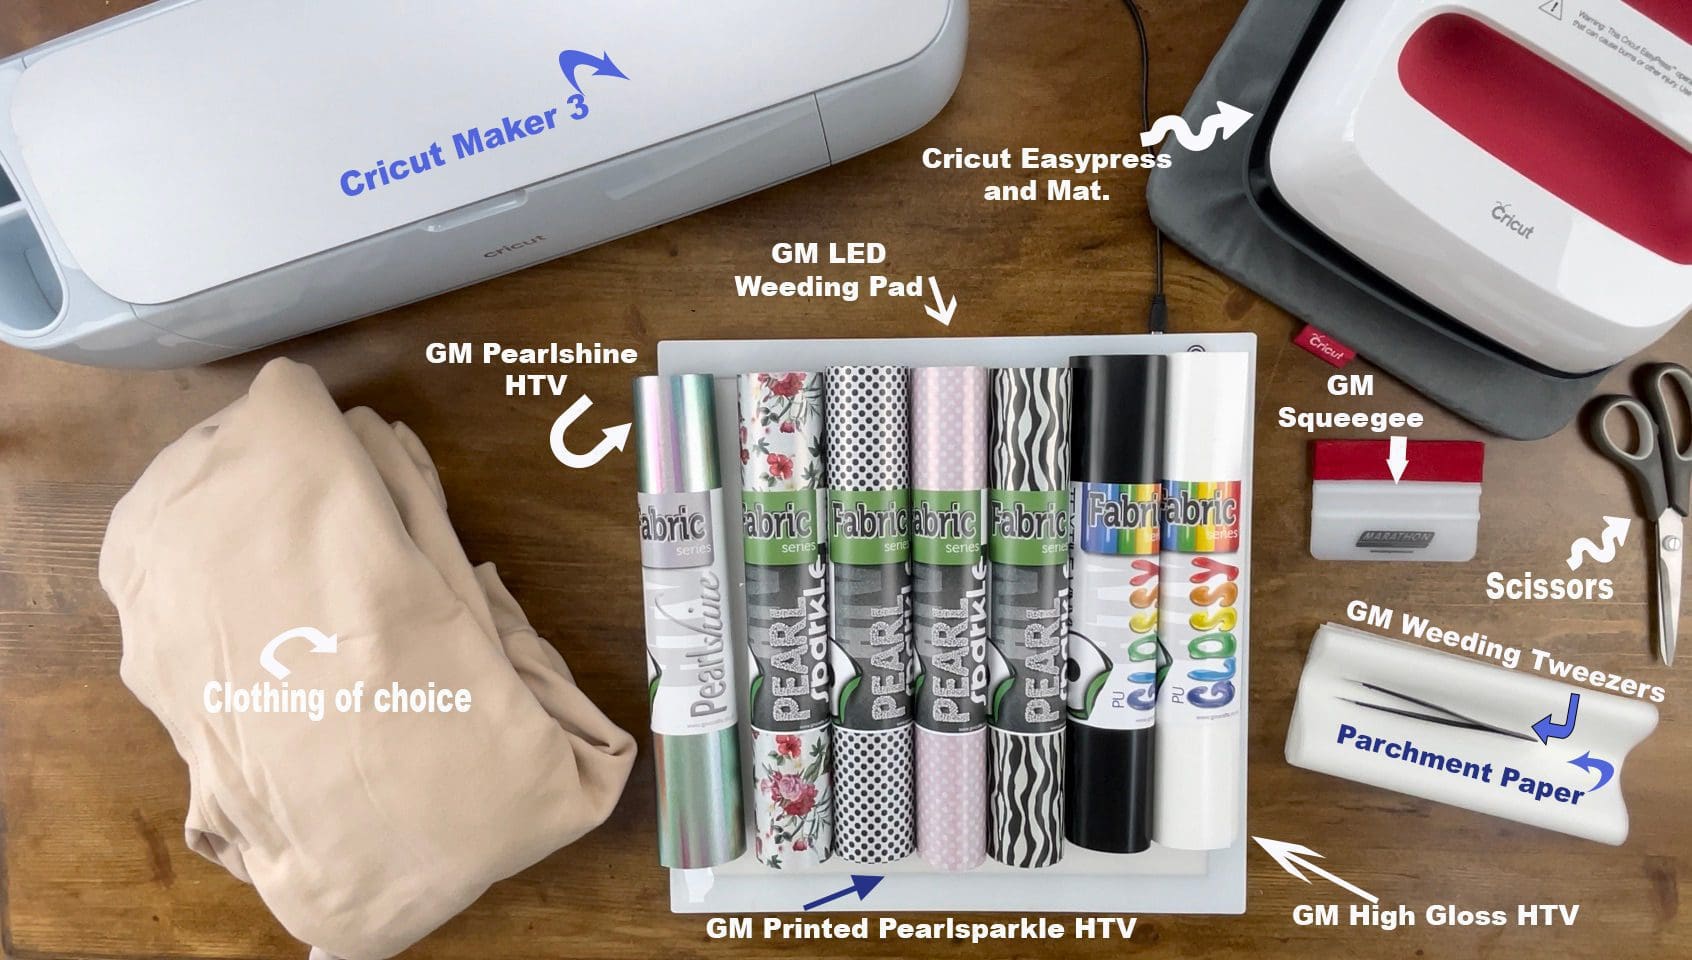
What you’ll need:
- Cricut maker . Available Here
- Or Silhouette Cameo 4. Available Here (Instructions for the cameo and Brother machines at the bottom!)
- Cricut Easypress and Easypress Mat Here
- GM Pattern Pearlsparkle HTV Vinyl Available Here
- GM Pearlshine HTV Vinyl Available Here
- GM High Gloss HTV Vinyl Available Here
- LED weeding pad. Available Here
- Squeegee. Available Here
- Weeding tweezers . Or Weeding hook. Available Here
- Scissors.
- Hoodie or Top of your choice.
- Silicone Paper, this is like the baking paper you can buy in the supermarket on a roll for the kitchen- DO NOT USE TEFLON
- Cut files Download link below, for all machines, Silhouette and Brother instructions are at the bottom of the page.
- link to create with your own wording, is free below! Including Silhouette. Cricut and Brother instructions to follow at the end.
Hoodie cut files click here
Instructions;
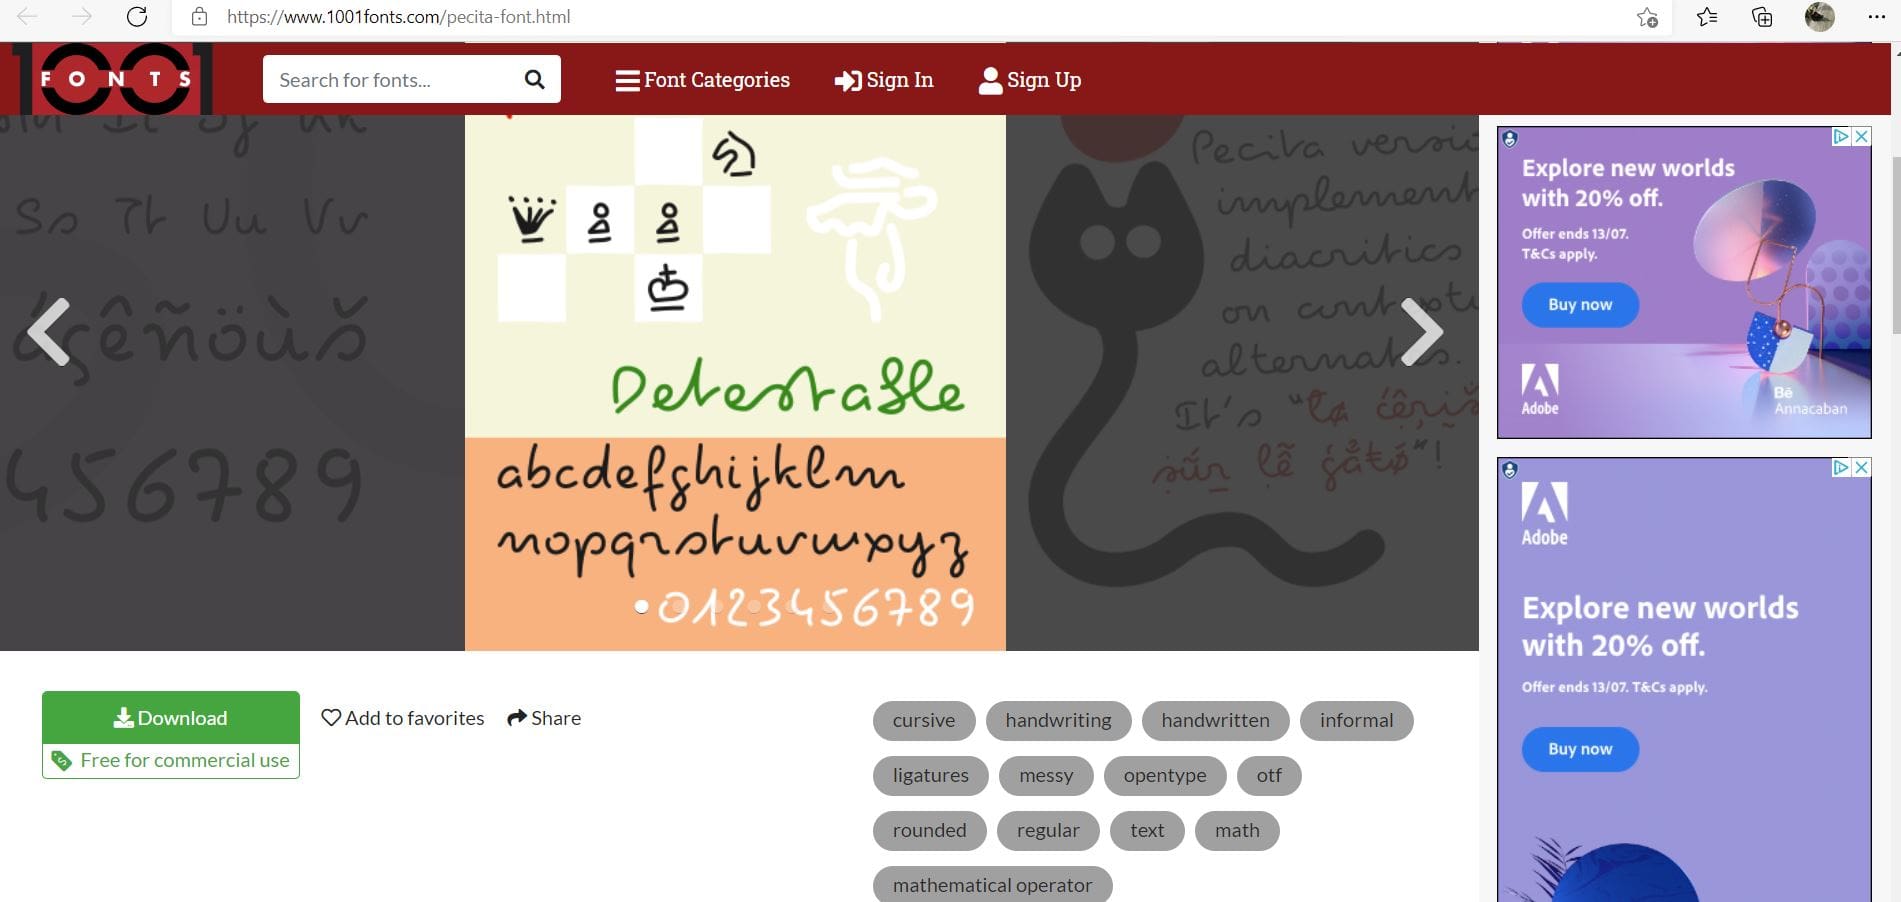
1. Before you start you will need to visit this webpage and download the font to your machine; https://www.1001fonts.com/pecita-font.html click on the green download button and wait for it to download, you will find it in your download files on your computer, See below.
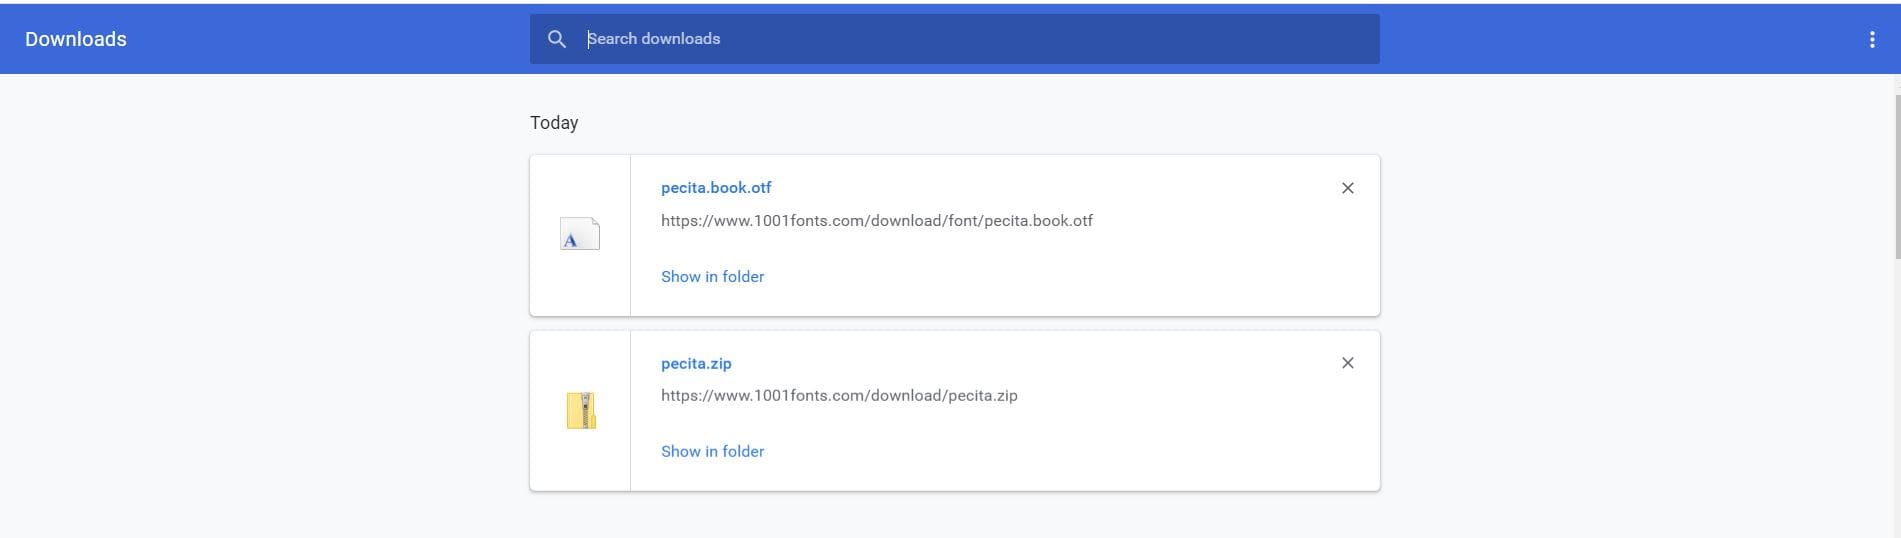
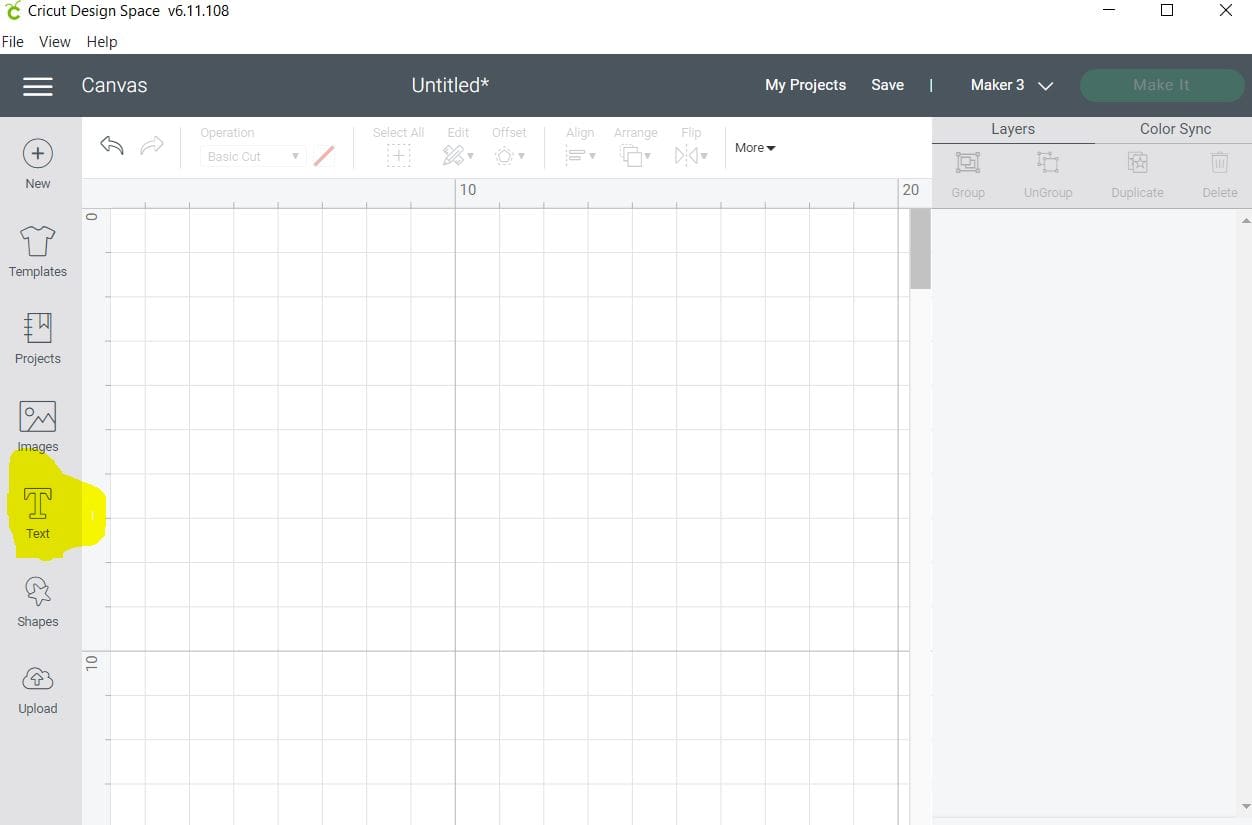
2. Right click on the Zip folder to unzip it, then right click on the font file itself and choose install. Once it has installed, please fully close your design space app (if open) then restart your computer, re open Cricut design space, and click the text tool on the left hand bar, see below.
3. Now when you click the text button you can choose Pecita in the font box, see below.
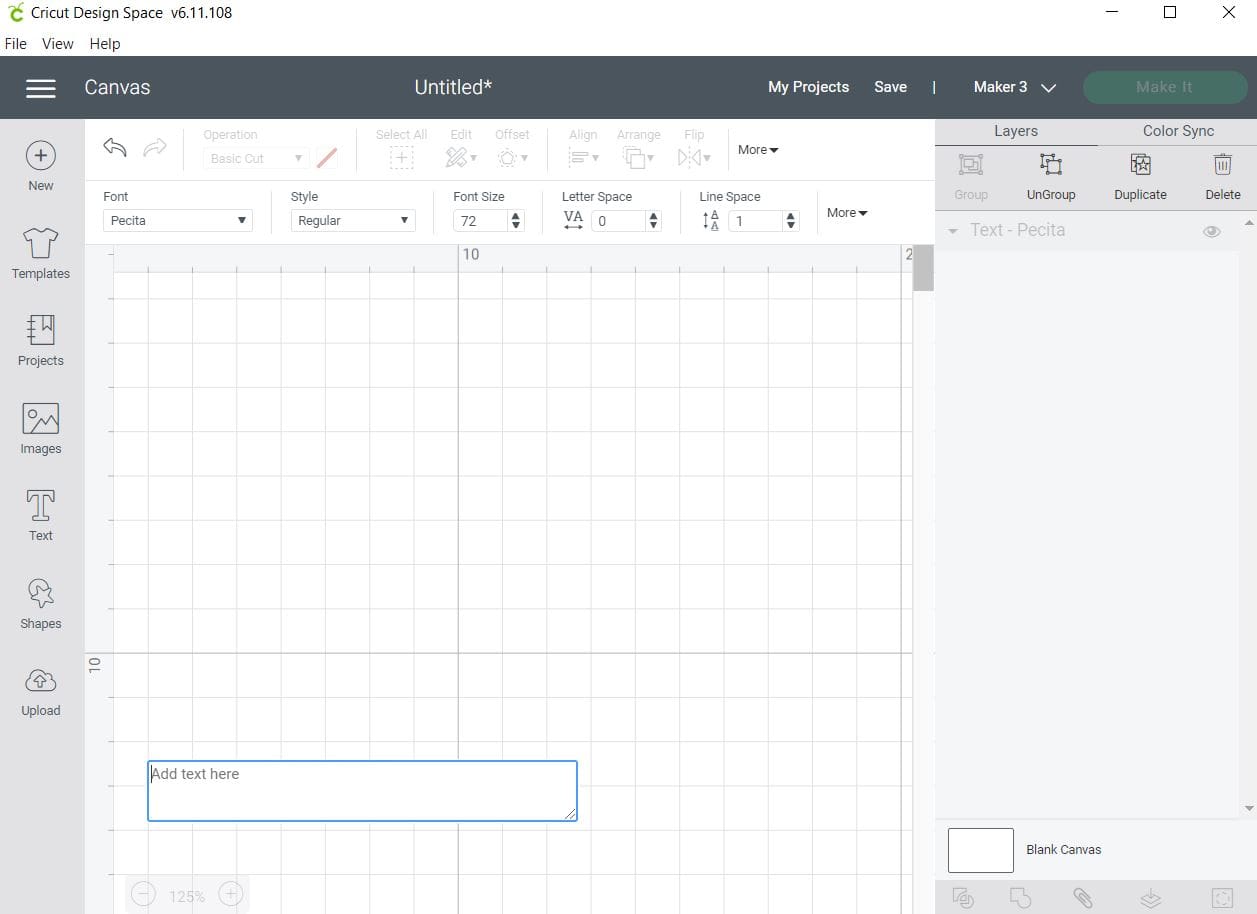
4. I type each individual letter as a single character, then re click text to type the next one, so that you can then bring the font together and weld it to get it to look as close to those fashionable styles as possible. See steps below. Be sure to move each letter as you type it otherwise the software will lay them all on top of each other.
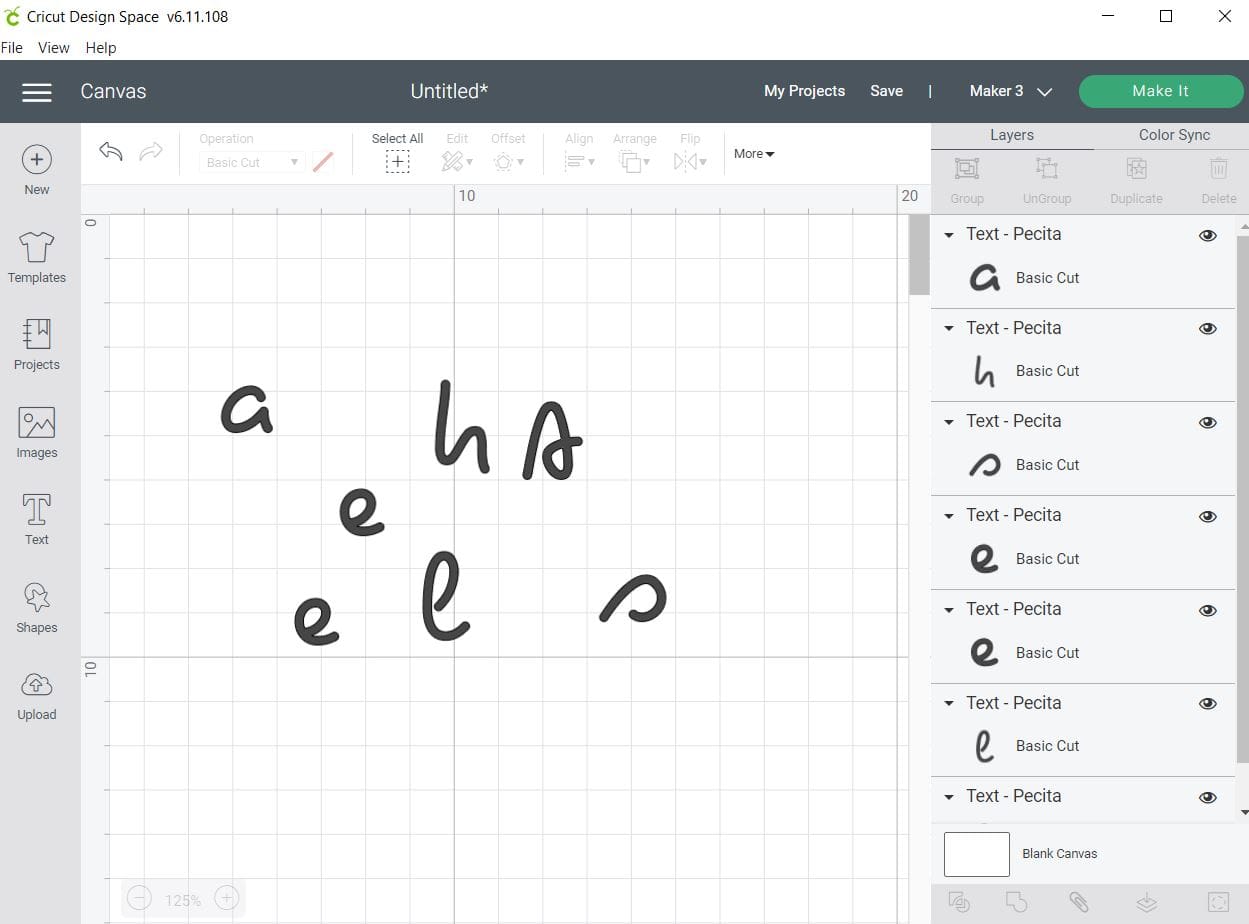
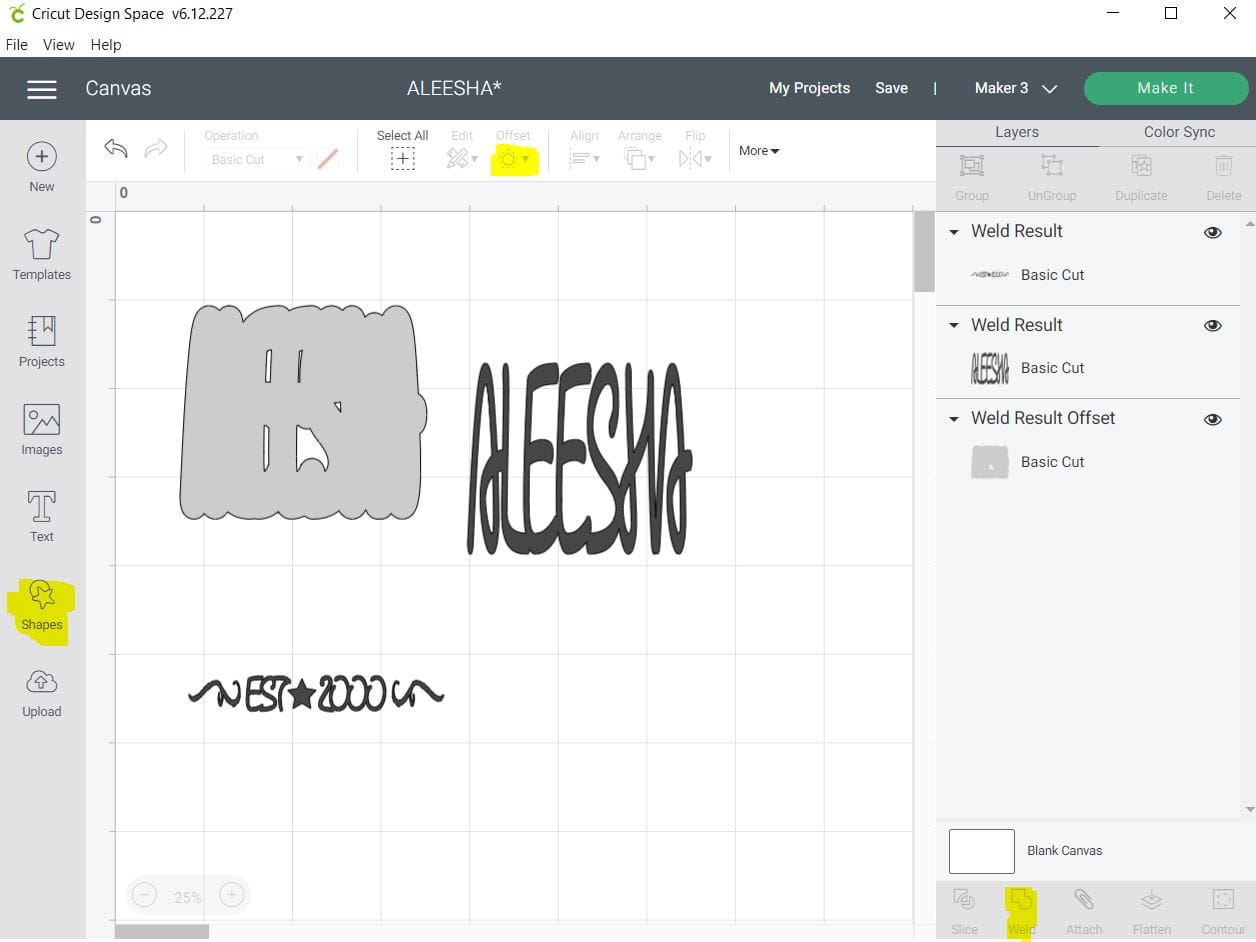
5. Line up the letters as required, you can use the Align tool circled in blue to help you. To use highlight the letters you want and choose to align to the bottom. Once you are happy with their placement, choose the weld function circled in red below.
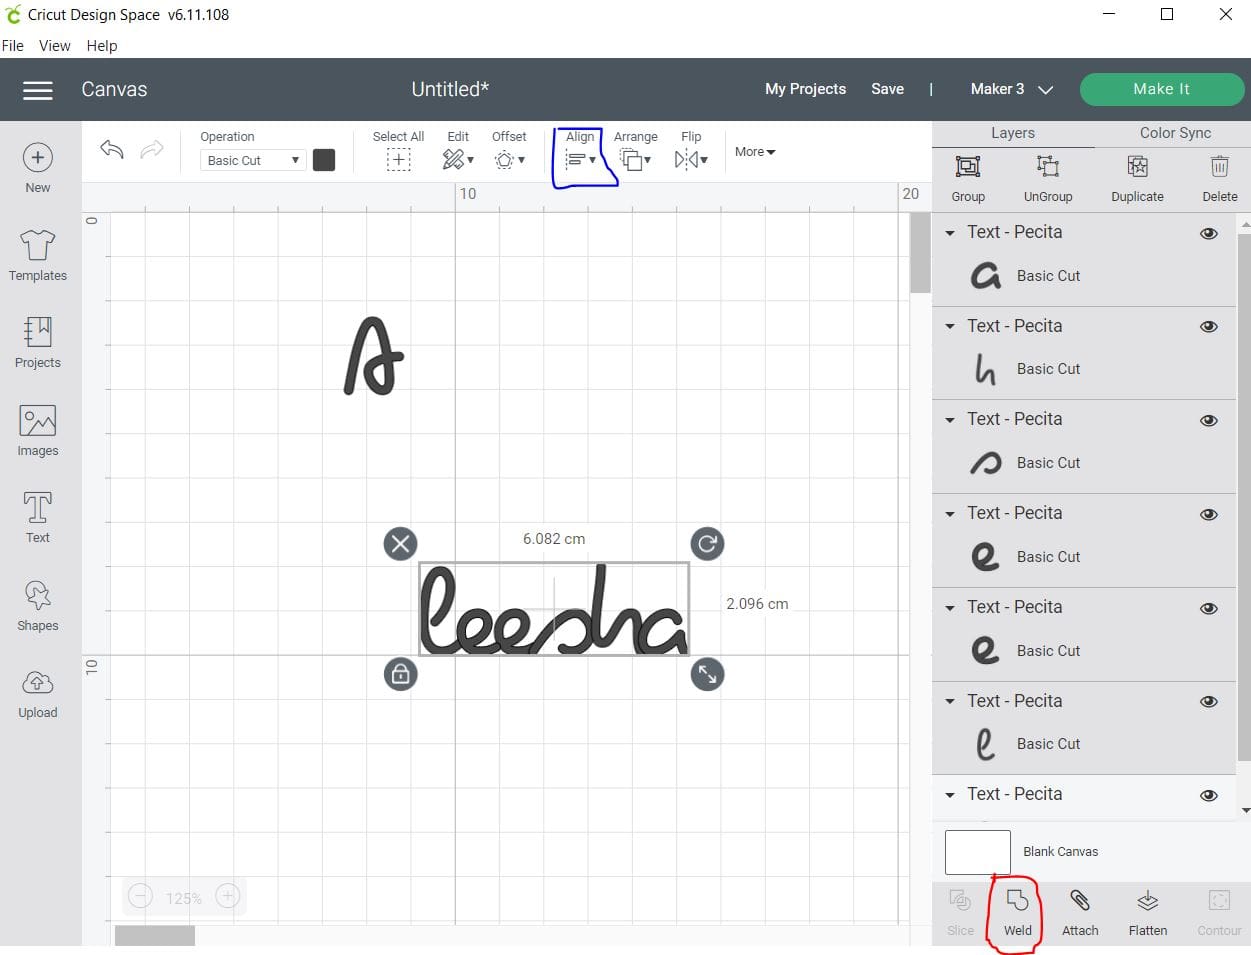
6. Once welded, then align the First letter should you have chosen to keep them separate, using the align function again in Blue, you can ensure they are straight, I slightly increased the size of the A before doing this, and then to make sure it cuts perfectly, choose to group them again highlighted in red. And then lastly Weld again. This will make sure it cuts as one file. I then choose offset to create the next layer, see below, highlighted in yellow.

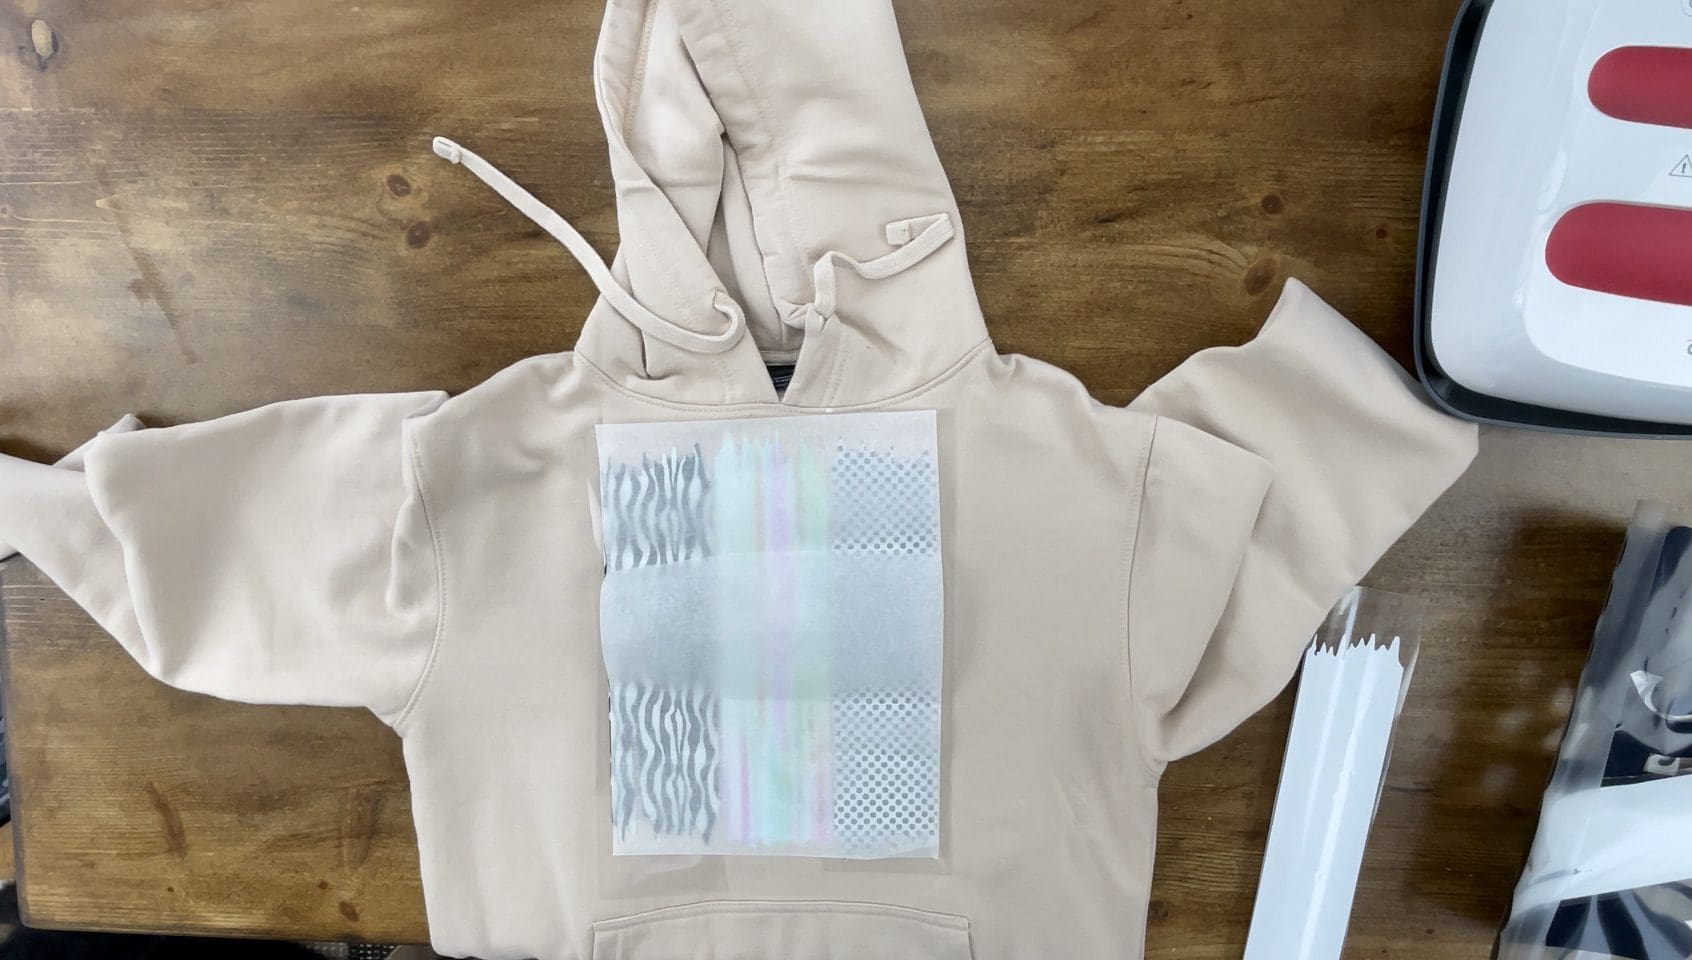
7. Resize the word to fit your chosen item, I then bring in the cut files, Next you will need to download the cut files for your chosen machine, link above. Unzip the file to use it by right clicking it in your downloads. Upload the PNG into the design space. Click “Upload Image” on the left-hand Design Panel, and navigate to the files you want to open. Select ‘Insert image’ and select image type ‘simple’ when prompted. Next you’ll be asked to delete any space that does not get cut, you can skip this part by pressing ‘continue’. When asked if they’re print-then-cut images or just cut images, select cut images. Click save. When it has been uploaded, Insert all the images onto the canvas and resize to suit your project, I use the softwares own shapes to create the star, or the heart in the design at the bottom. Then I Recolour each vinyl layer or piece differently, so I can cut the different Vinyl for each layer, which means I don’t have to keep returning to the design page, see below, then click make it to move on to the next screen. 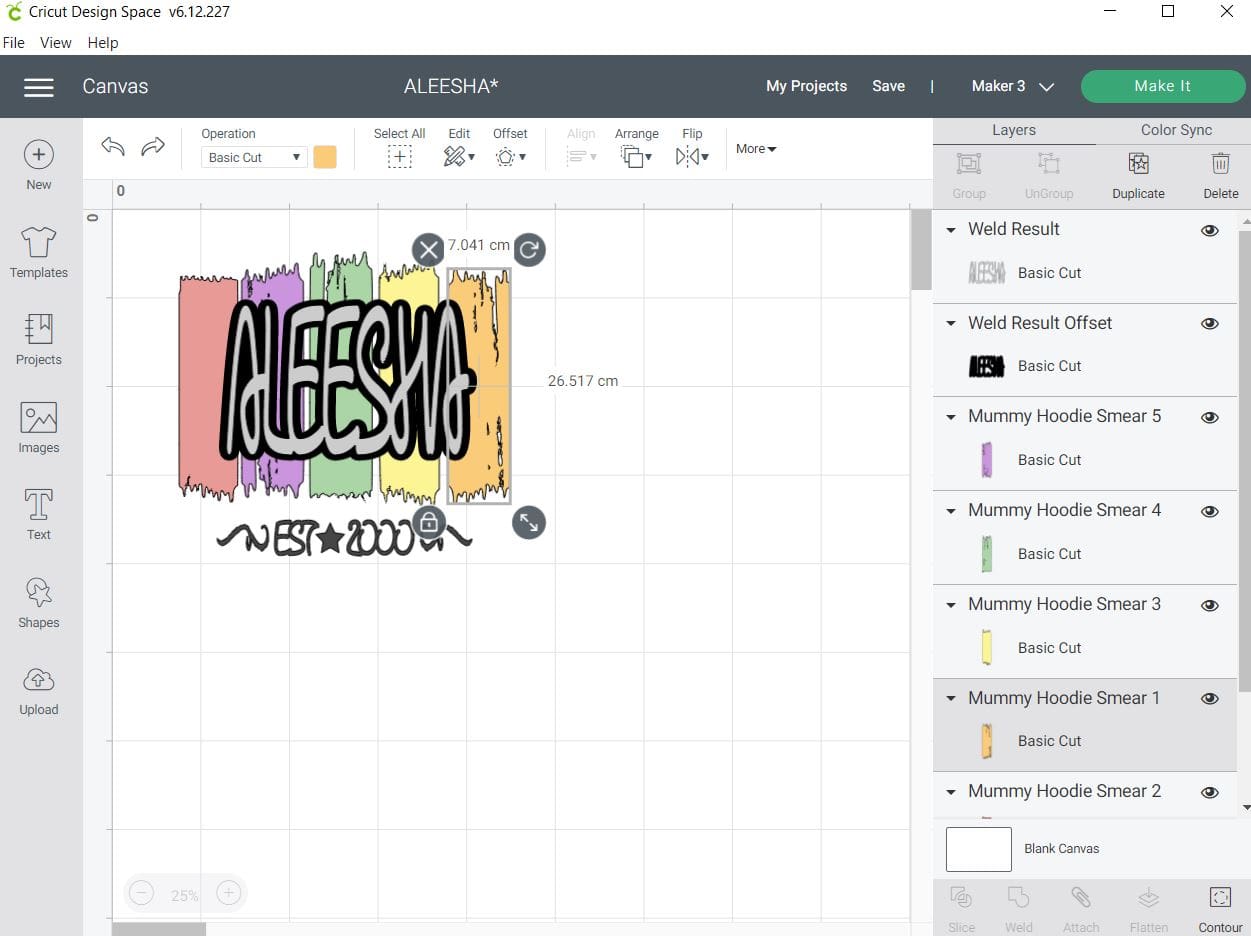
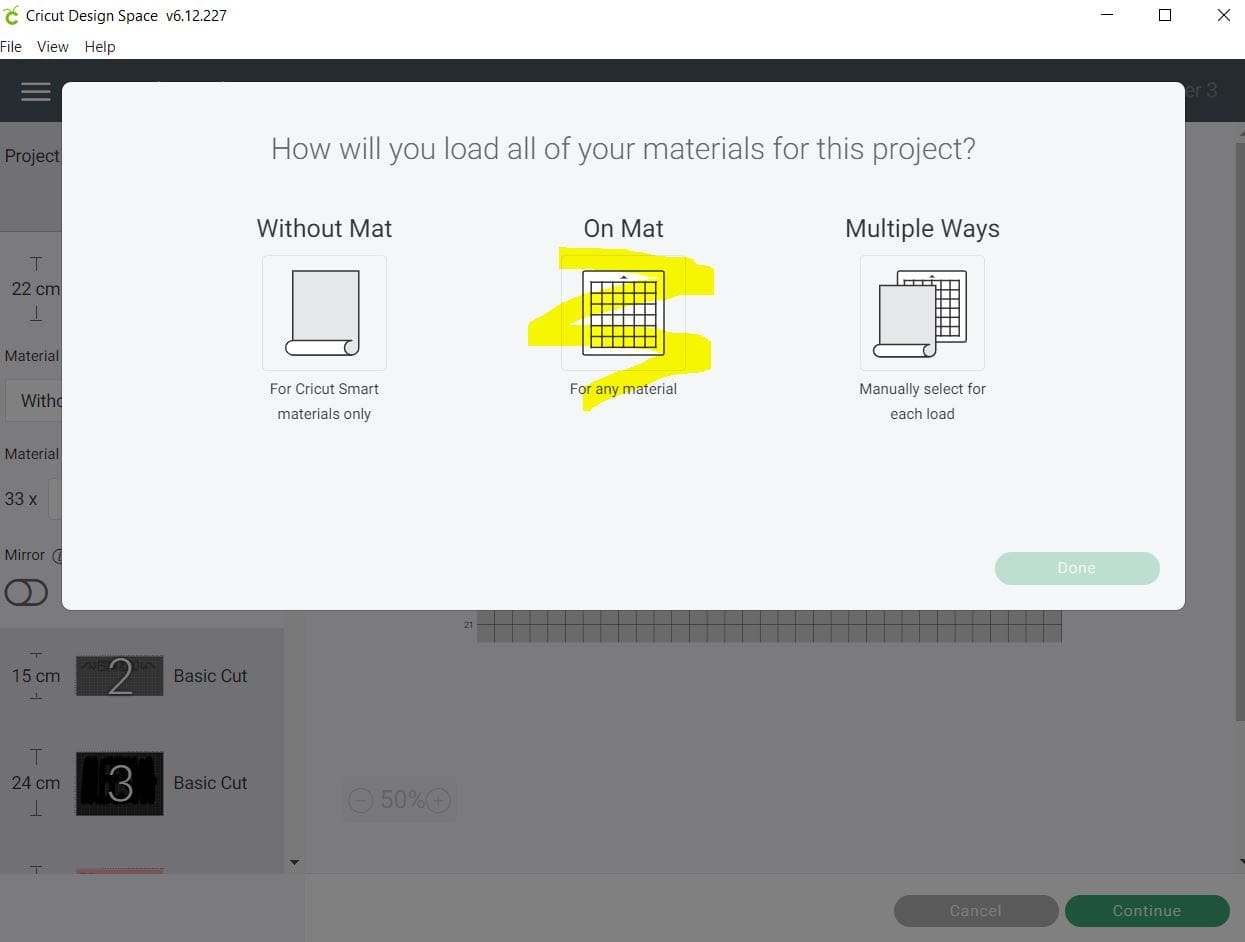
8. On the next screen, If using the Cricut Maker 3 then you will need to choose to cut on the mat (unless using smart media) then click done.
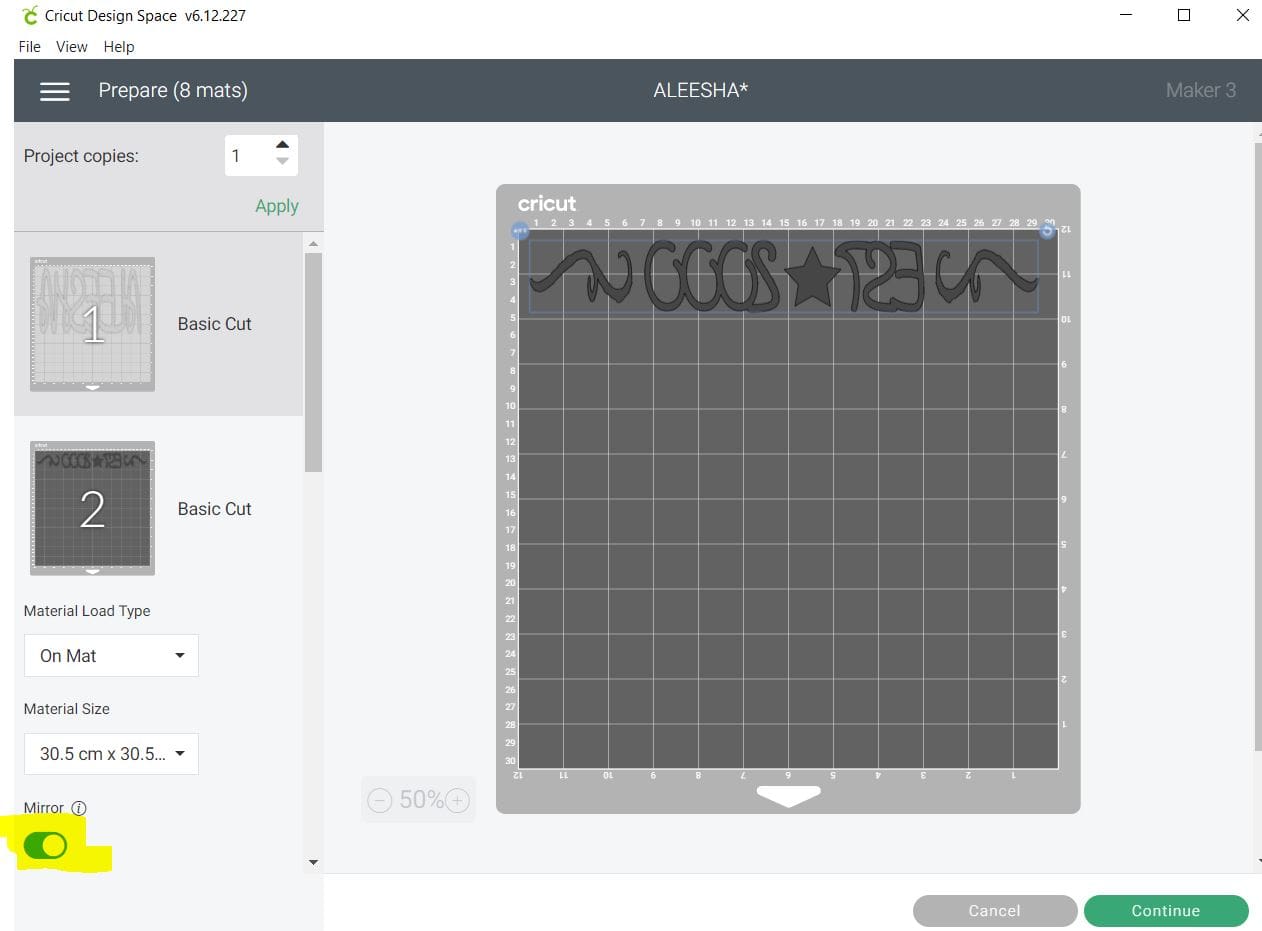
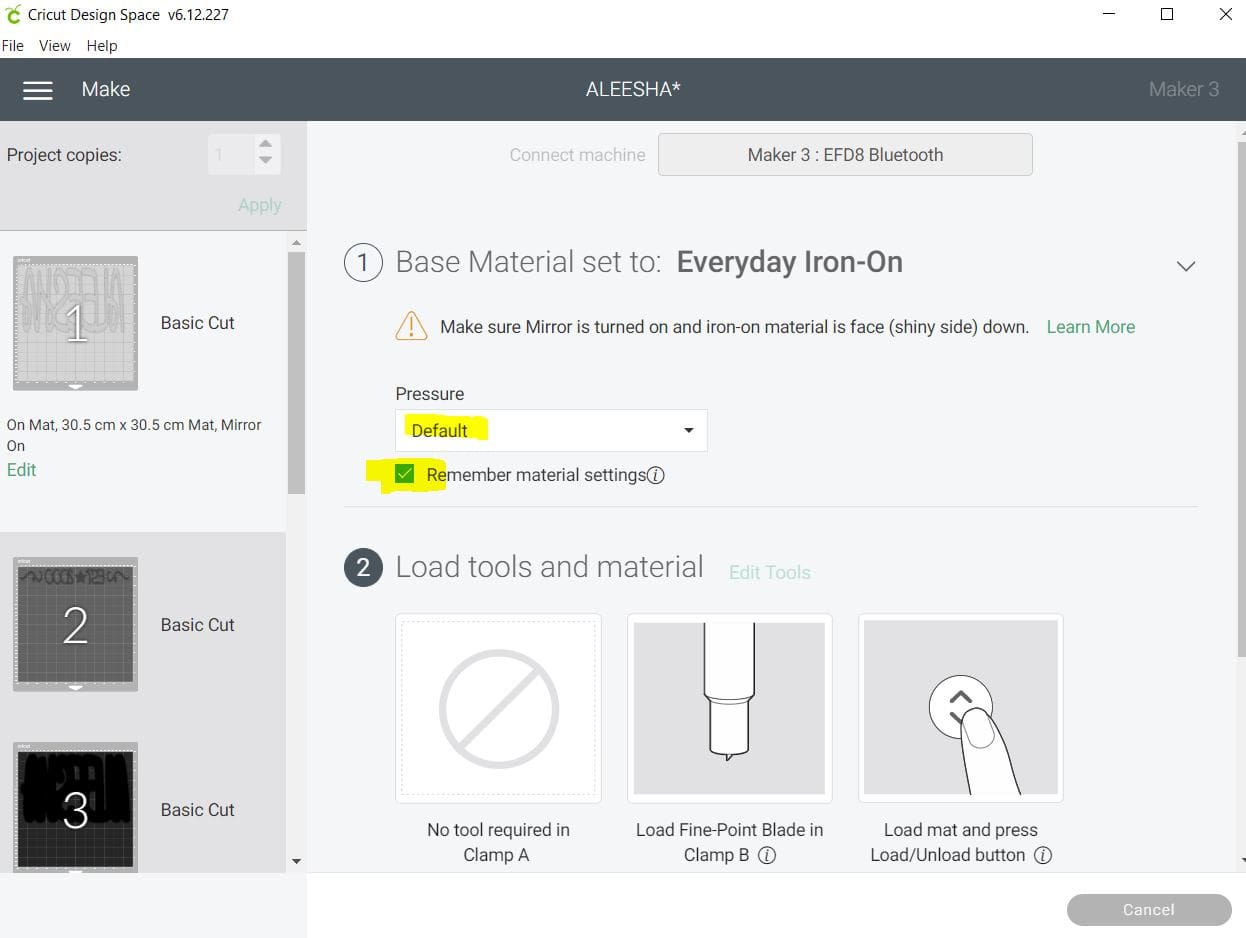
9. Click continue in the bottom right on the next screen. Be sure to MIRROR your words unless using pattern HTV. In the next window make sure your settings are all set to the successful settings from your test cut and ensure your machine is linked before proceeding to cut. Cut settings: (**please test cut) Press the flashing Cricut symbol on your maker to cut, after loading the sheet into the machine. Apply the settings needed for your chosen Vinyl, we made it with our GM Glow Pearlsparkle, Pearlshine and High Gloss HTV on the maker 3, and used the Everyday Iron on setting on the Cricut maker 3 with Default pressure.
**A reminder that these settings, including the blade setting, are specific to the materials and machine we’re using, adjustments may be necessary if using different materials and machine**
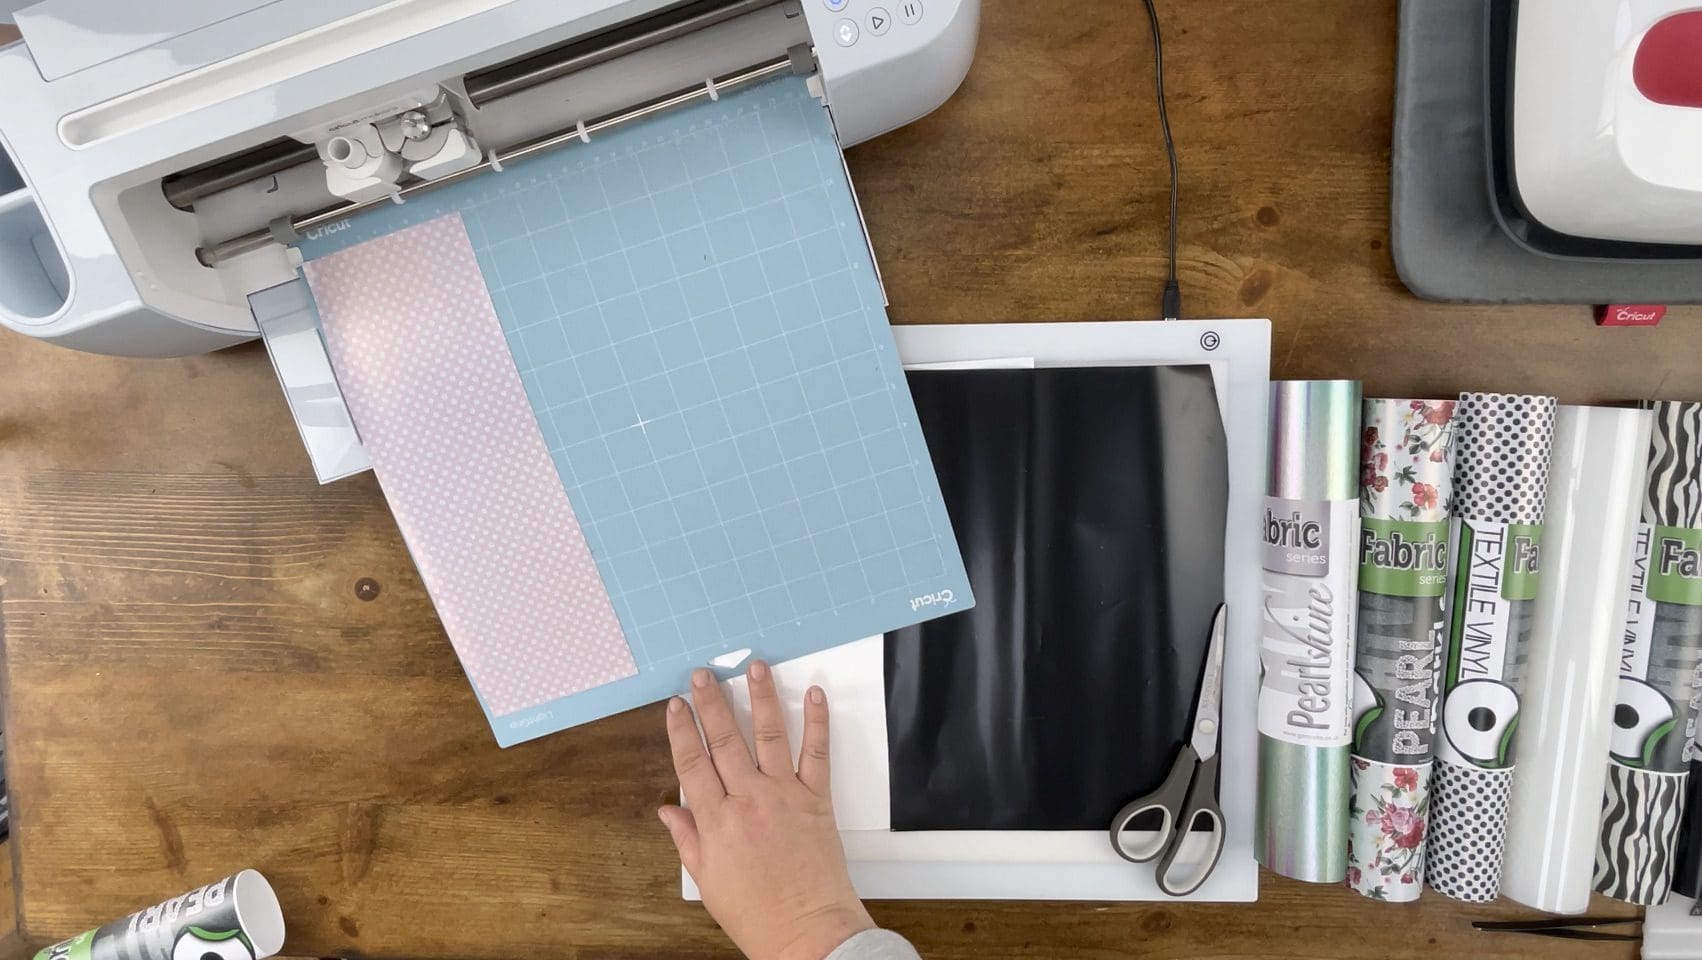
We always recommend before proceeding, you test cut your materials when first using so if you have not recently cut our Vinyl please test cut for your chosen machine found on our Application guide, and also Blog. Load the Vinyl chosen individually for each layer.
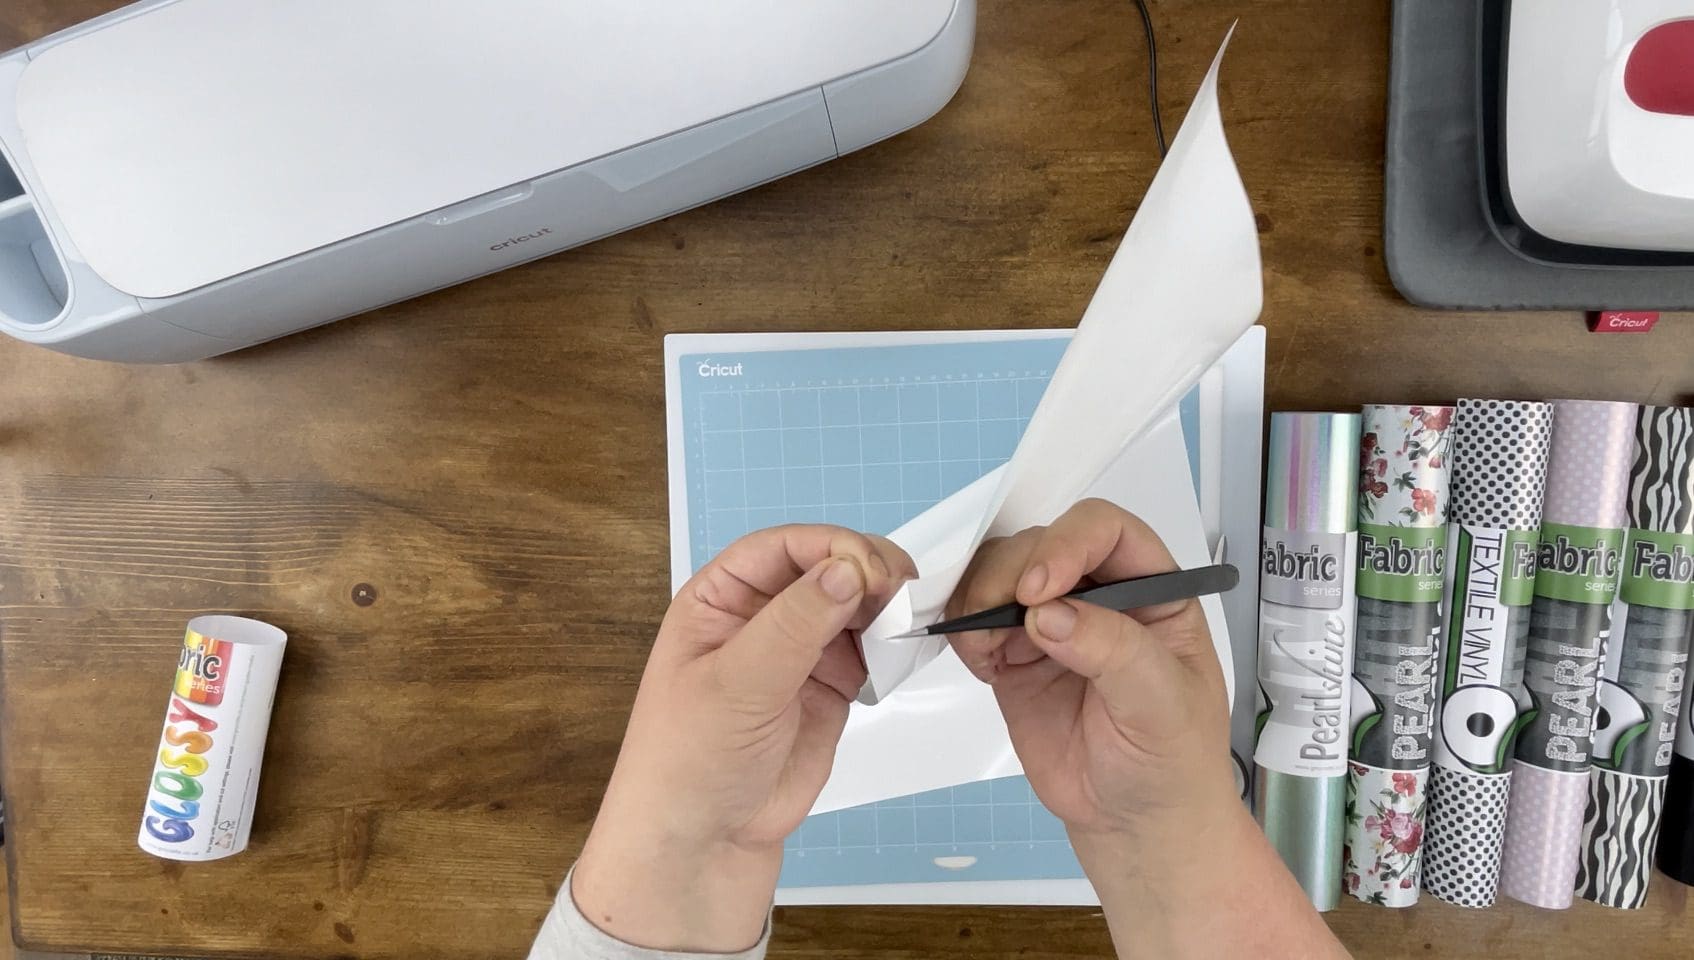
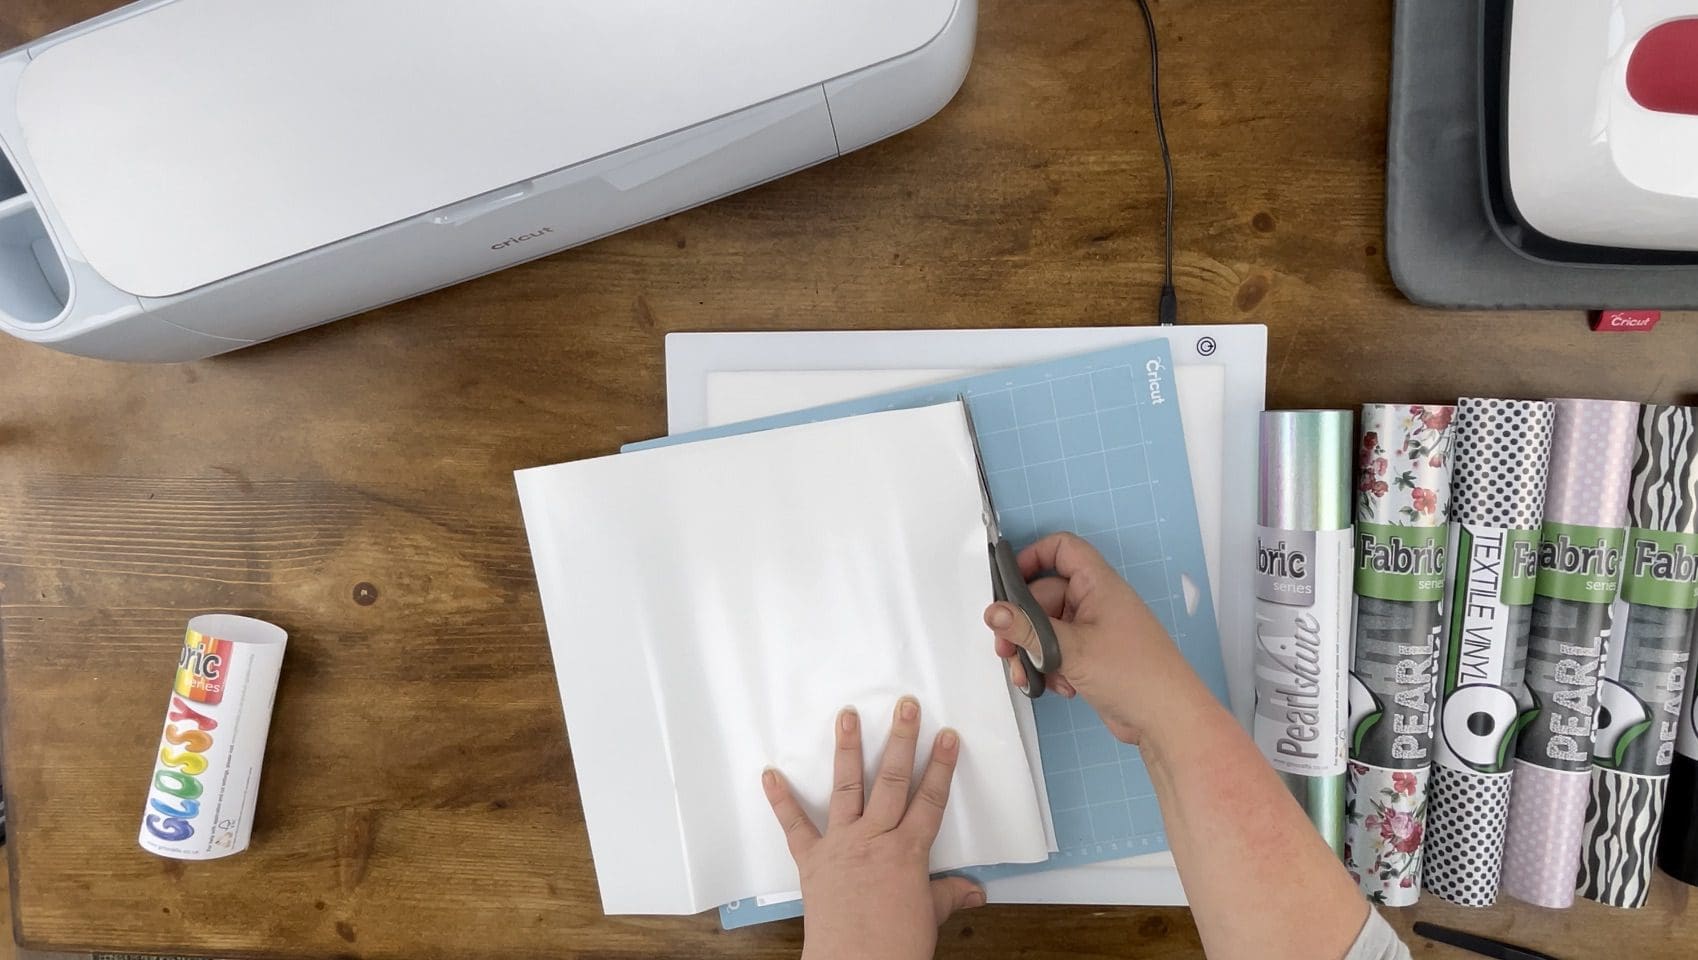
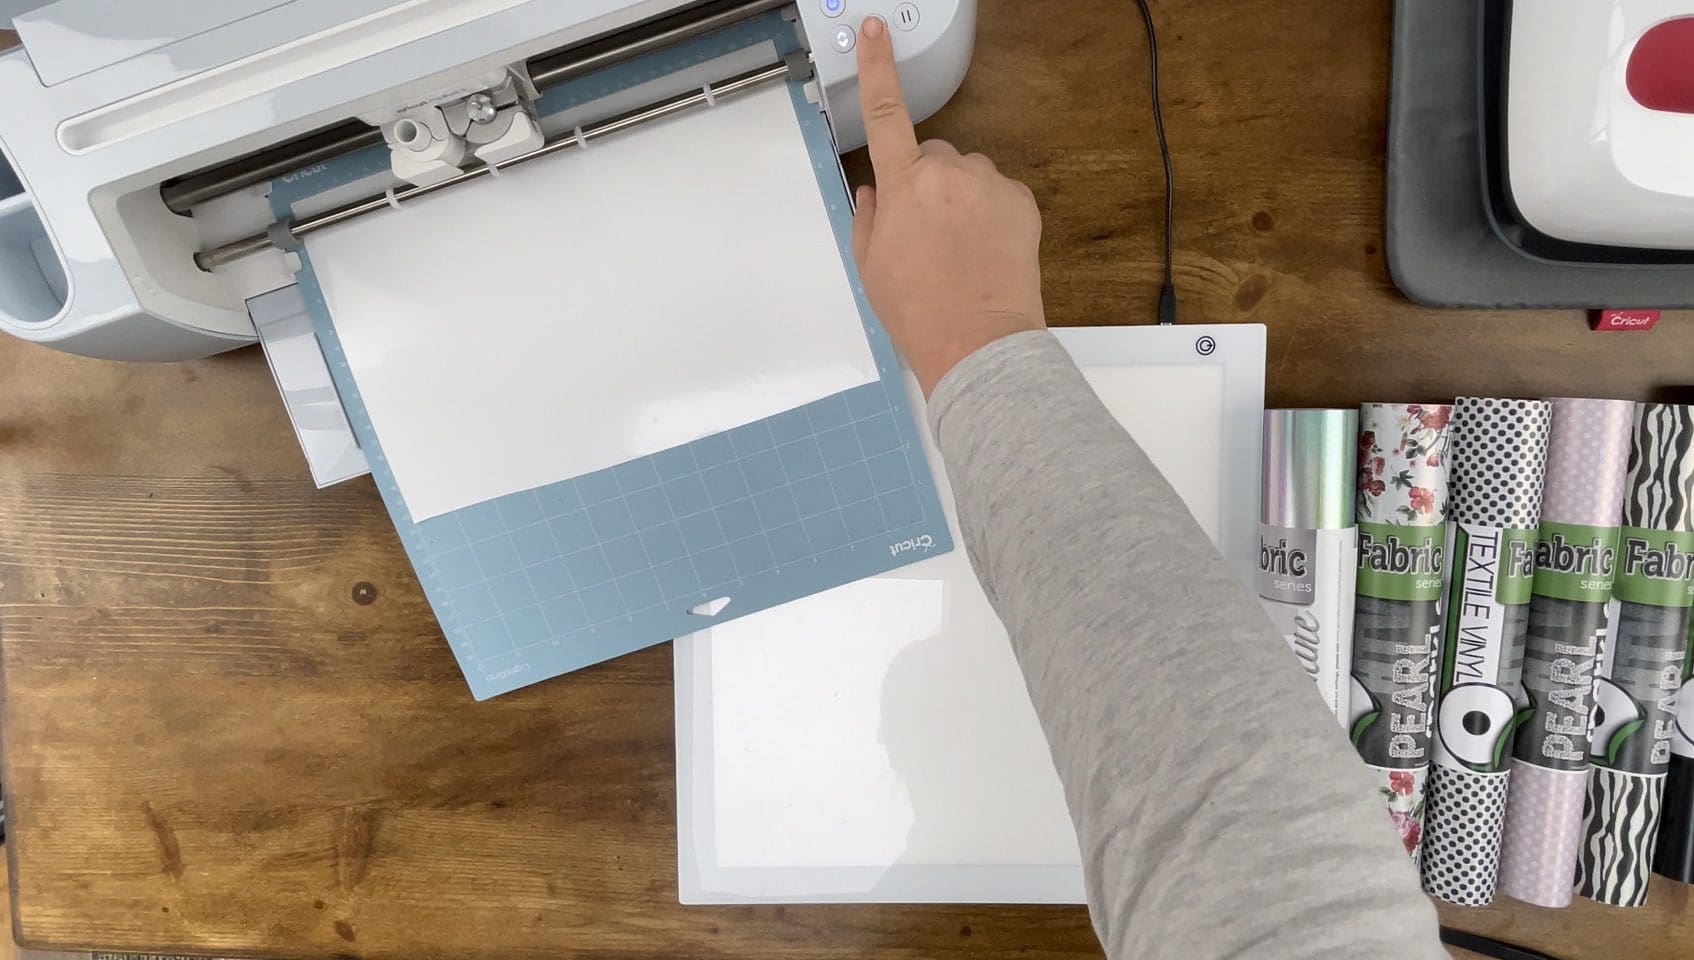
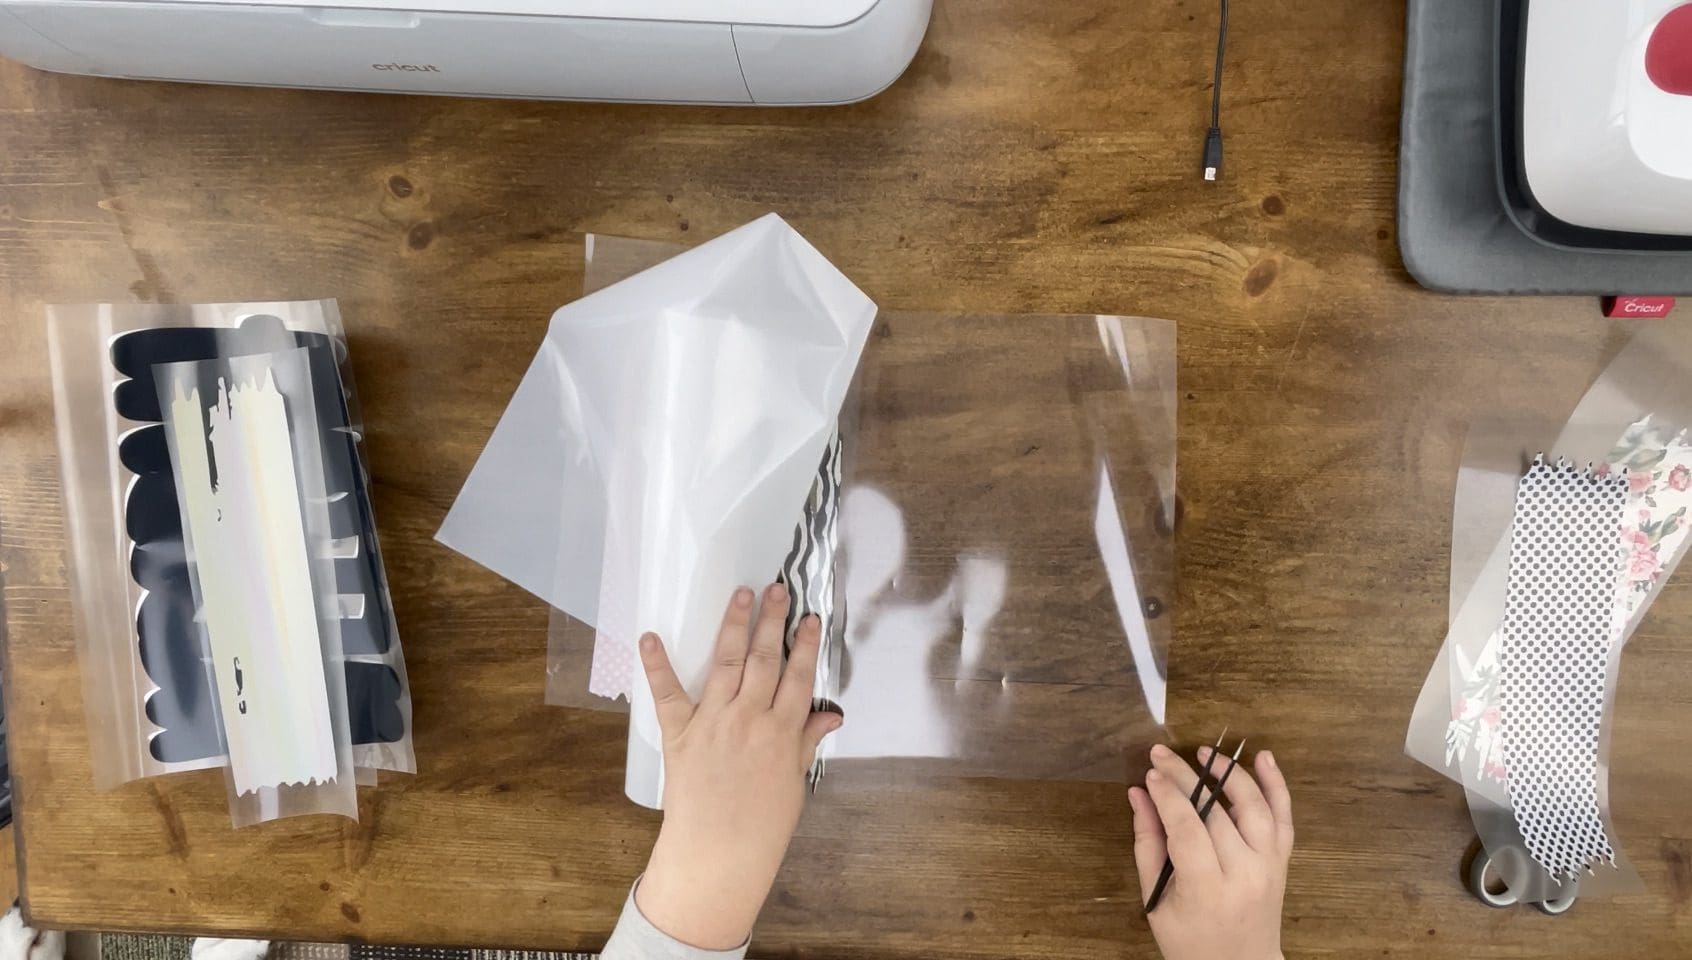
10. Take the chosen Vinyl (we use our Gloss, Pearlshine and Pearlsparkle) Peel the corner as shown below. especially when using gloss to check you have the correct side face up, the clear sheet always goes to the mat and vinyl faces you, cut it to fit the mat, use your squeegee to rub it flat, press the bottom left button on the machine with the arrows on to load your mat, see below. Then press the middle “play” button to cut (with a triangle on it)
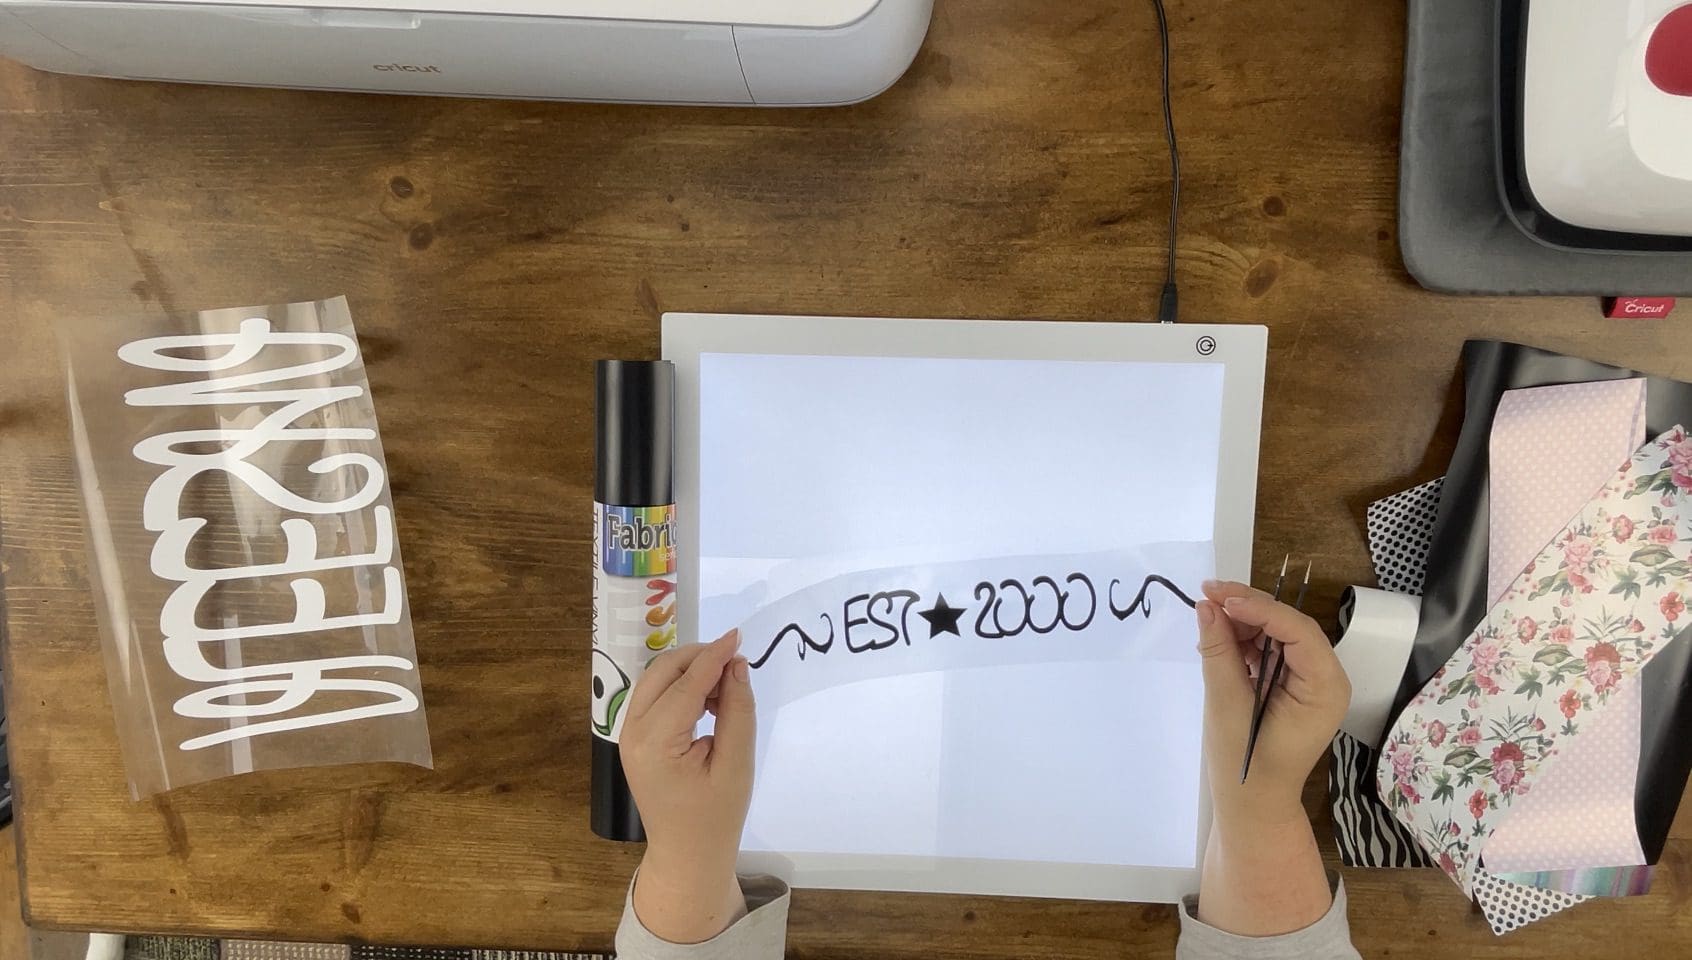
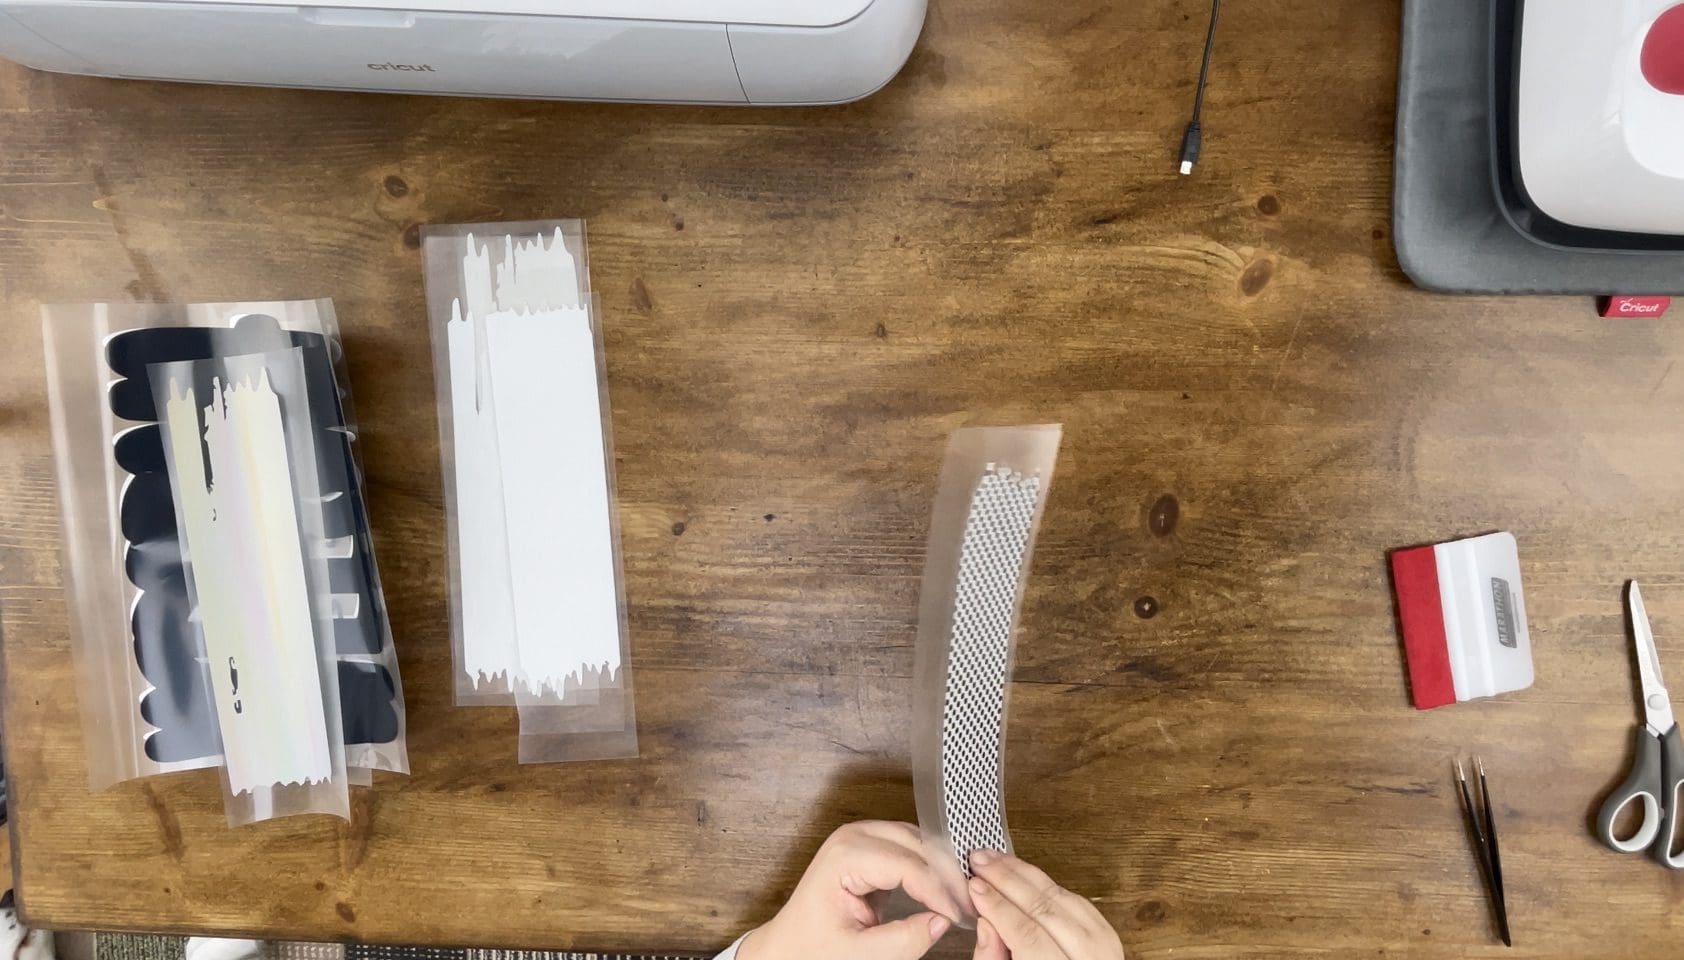
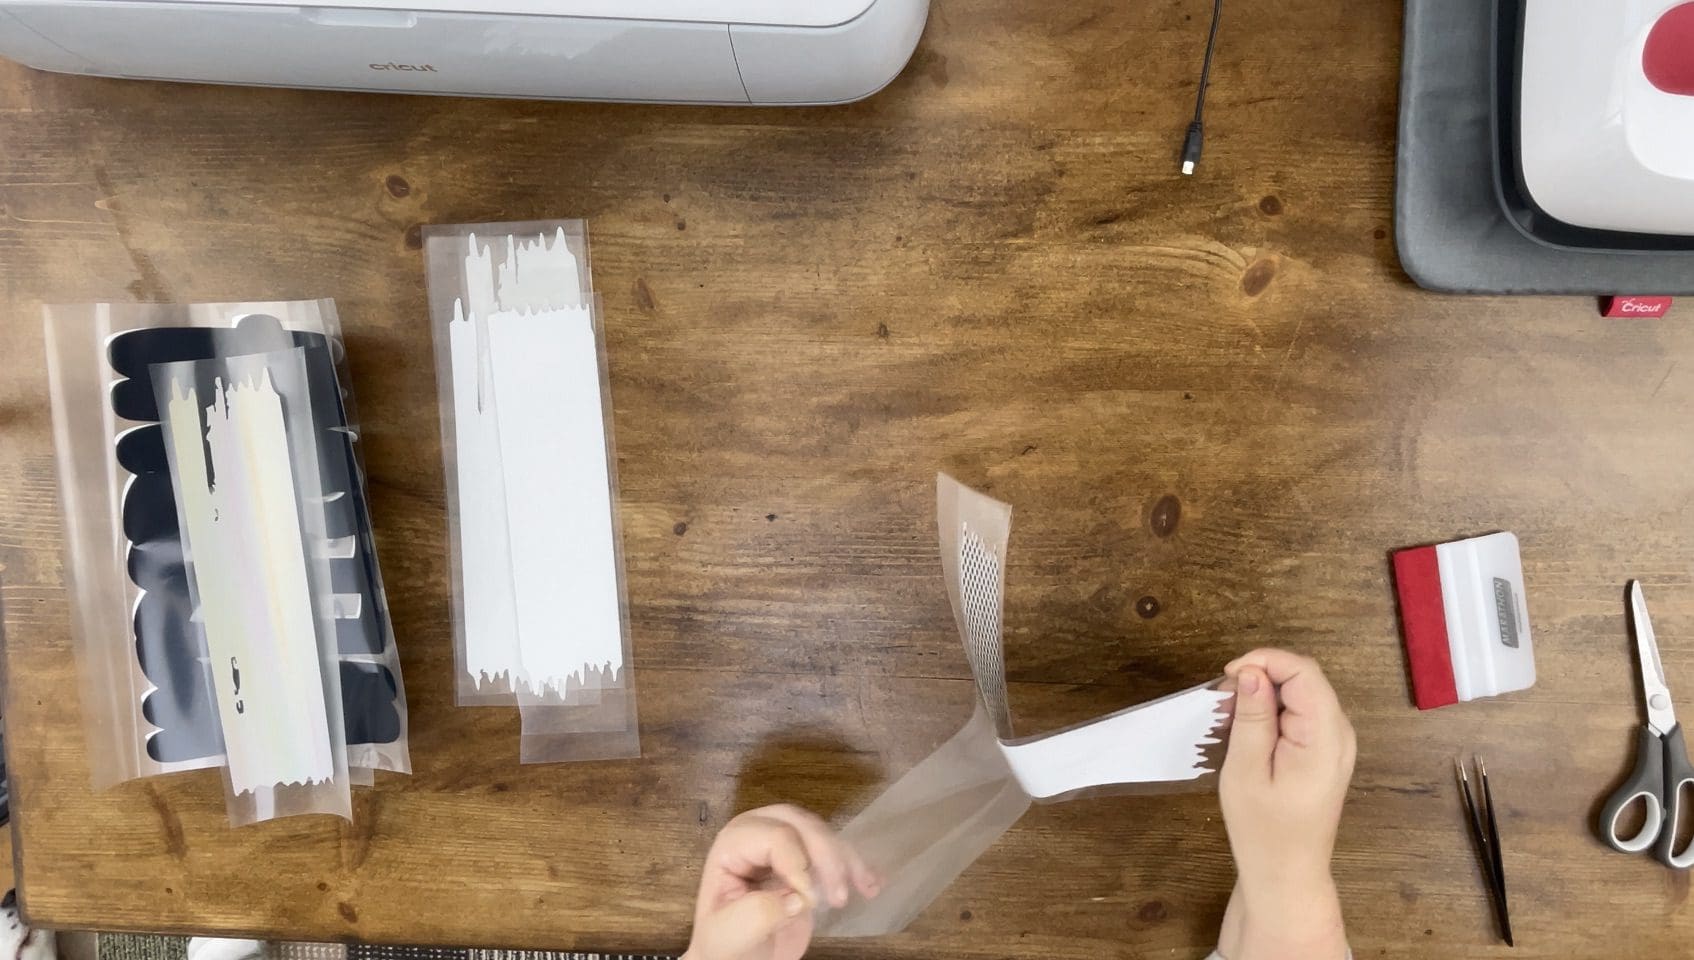
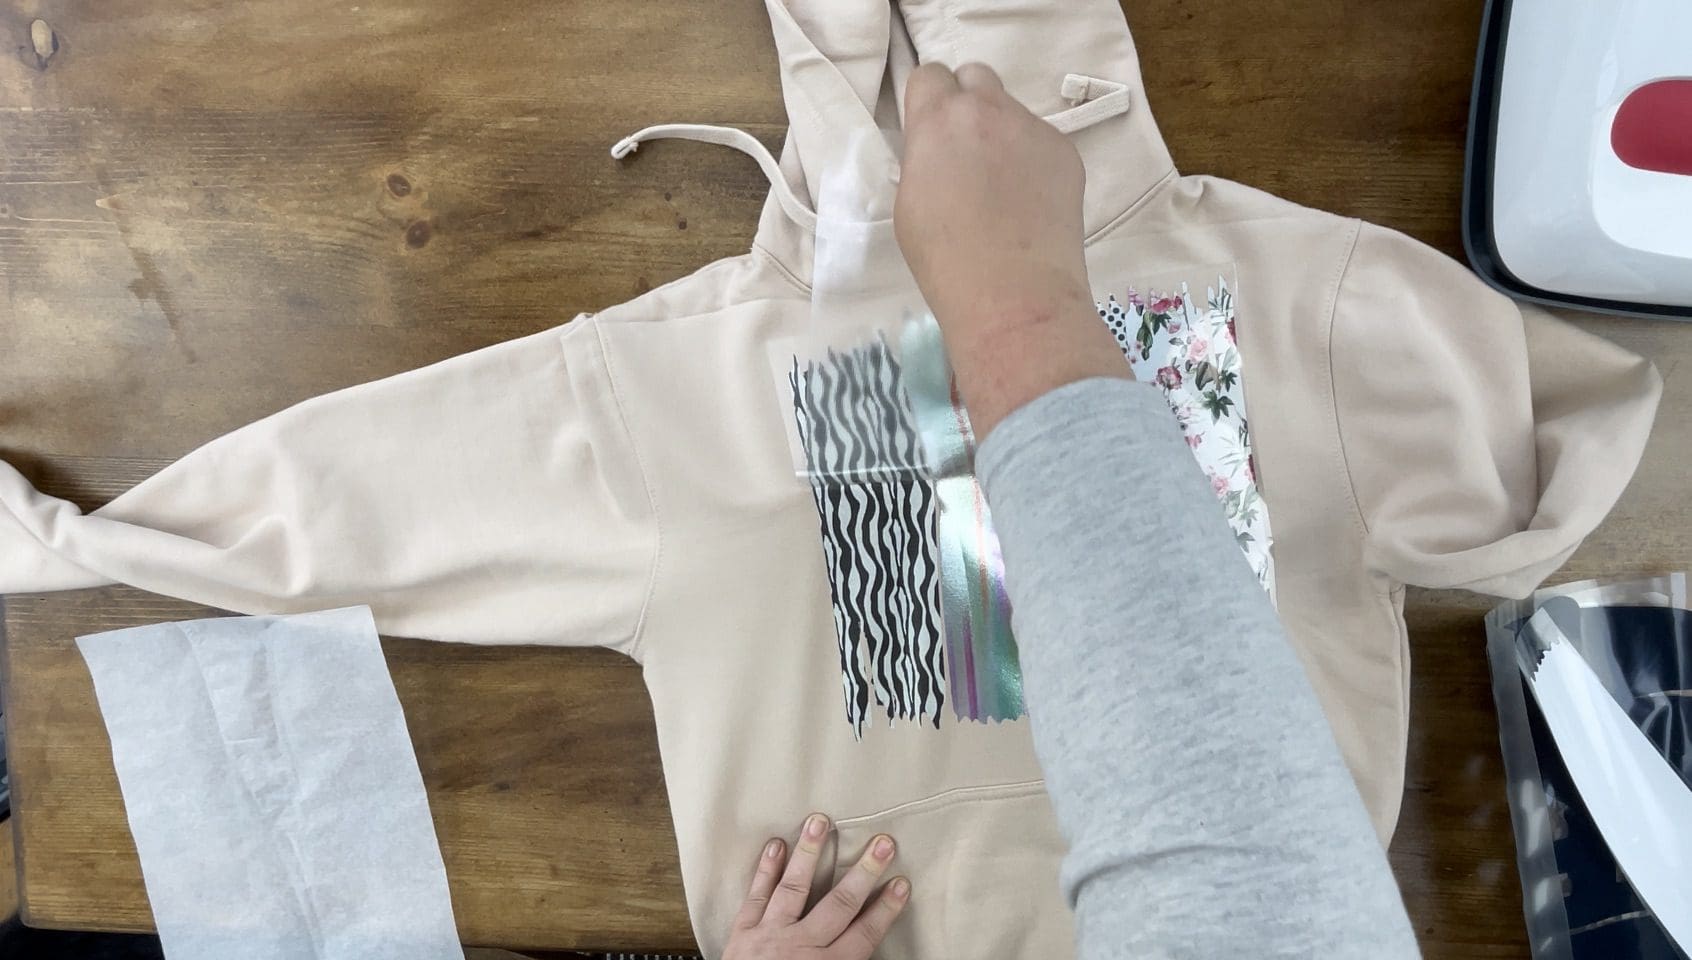
11. Remove the Vinyl from the mat by gently flexing the mat away from the vinyl and pull to one side to release the sheet. Once all layers are cut switch on your LED mat and prepare to weed, ready to take the excess waste vinyl away (weeding).
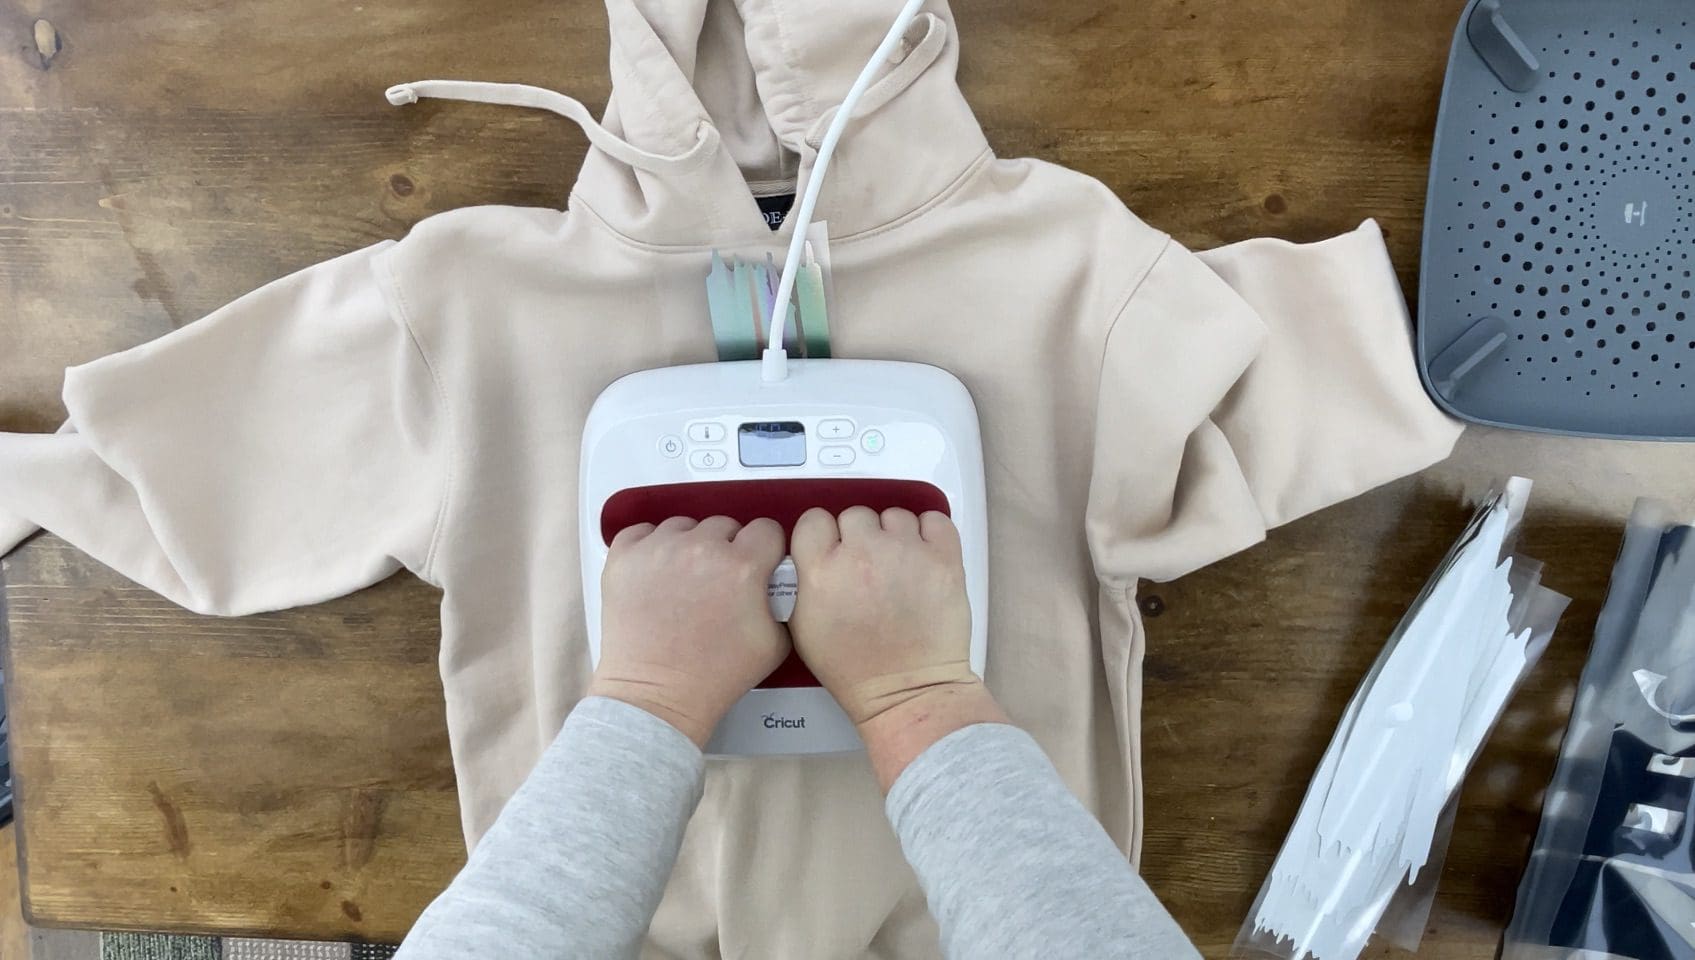
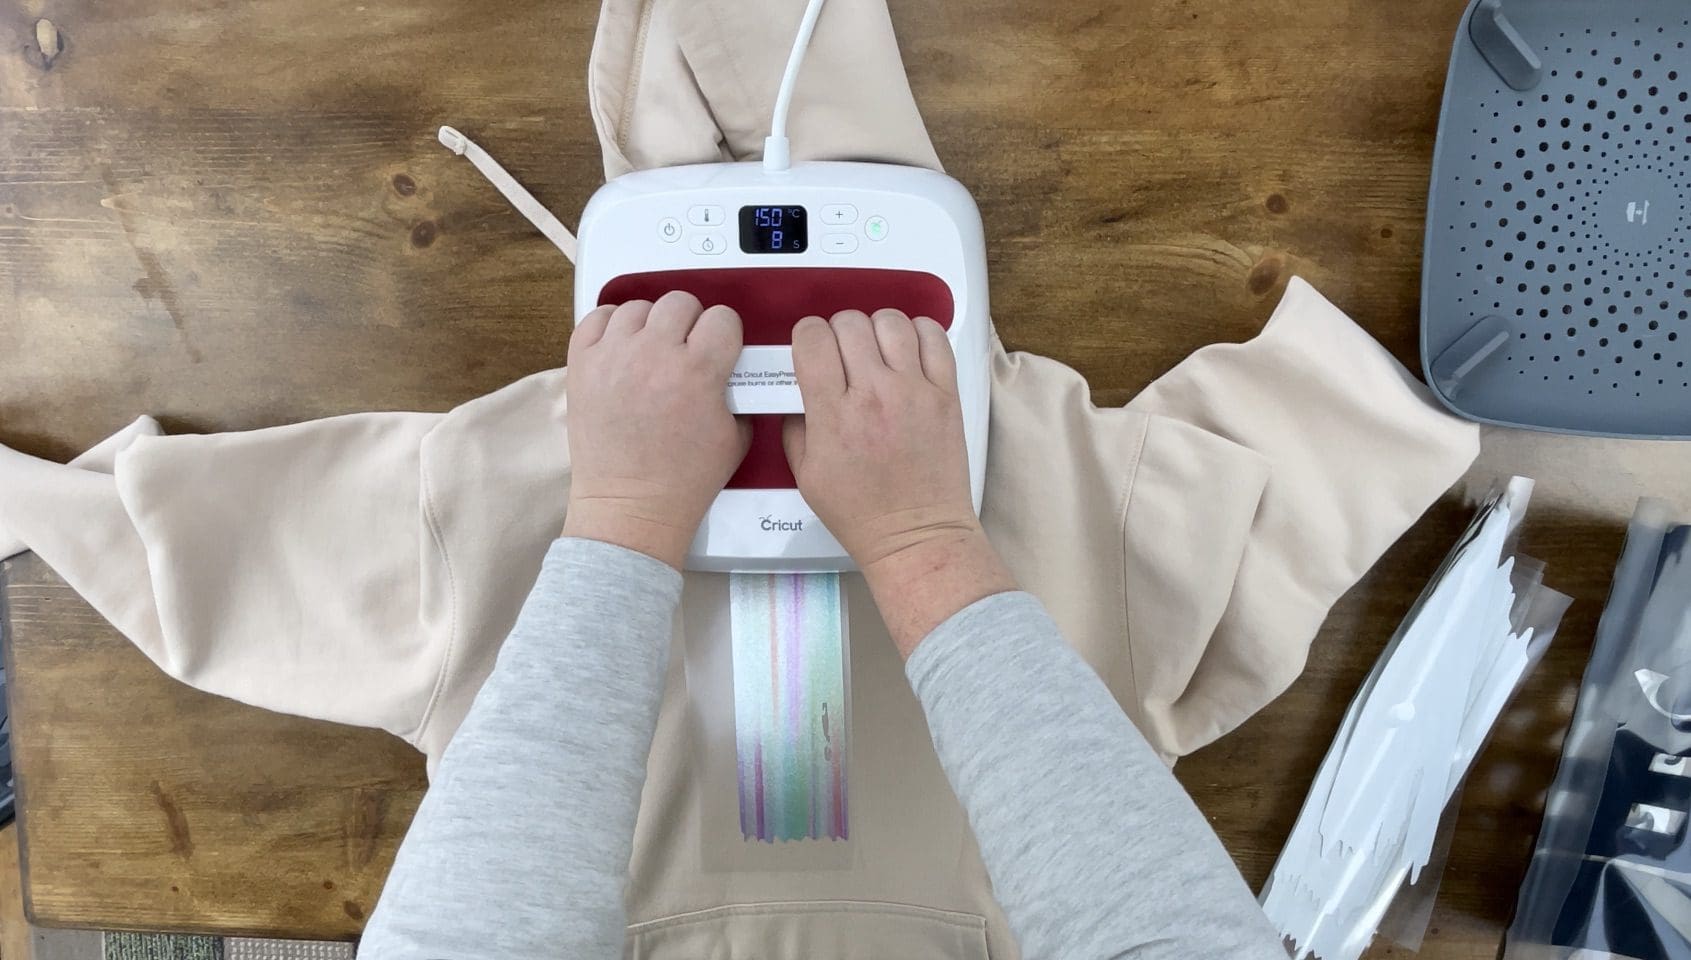
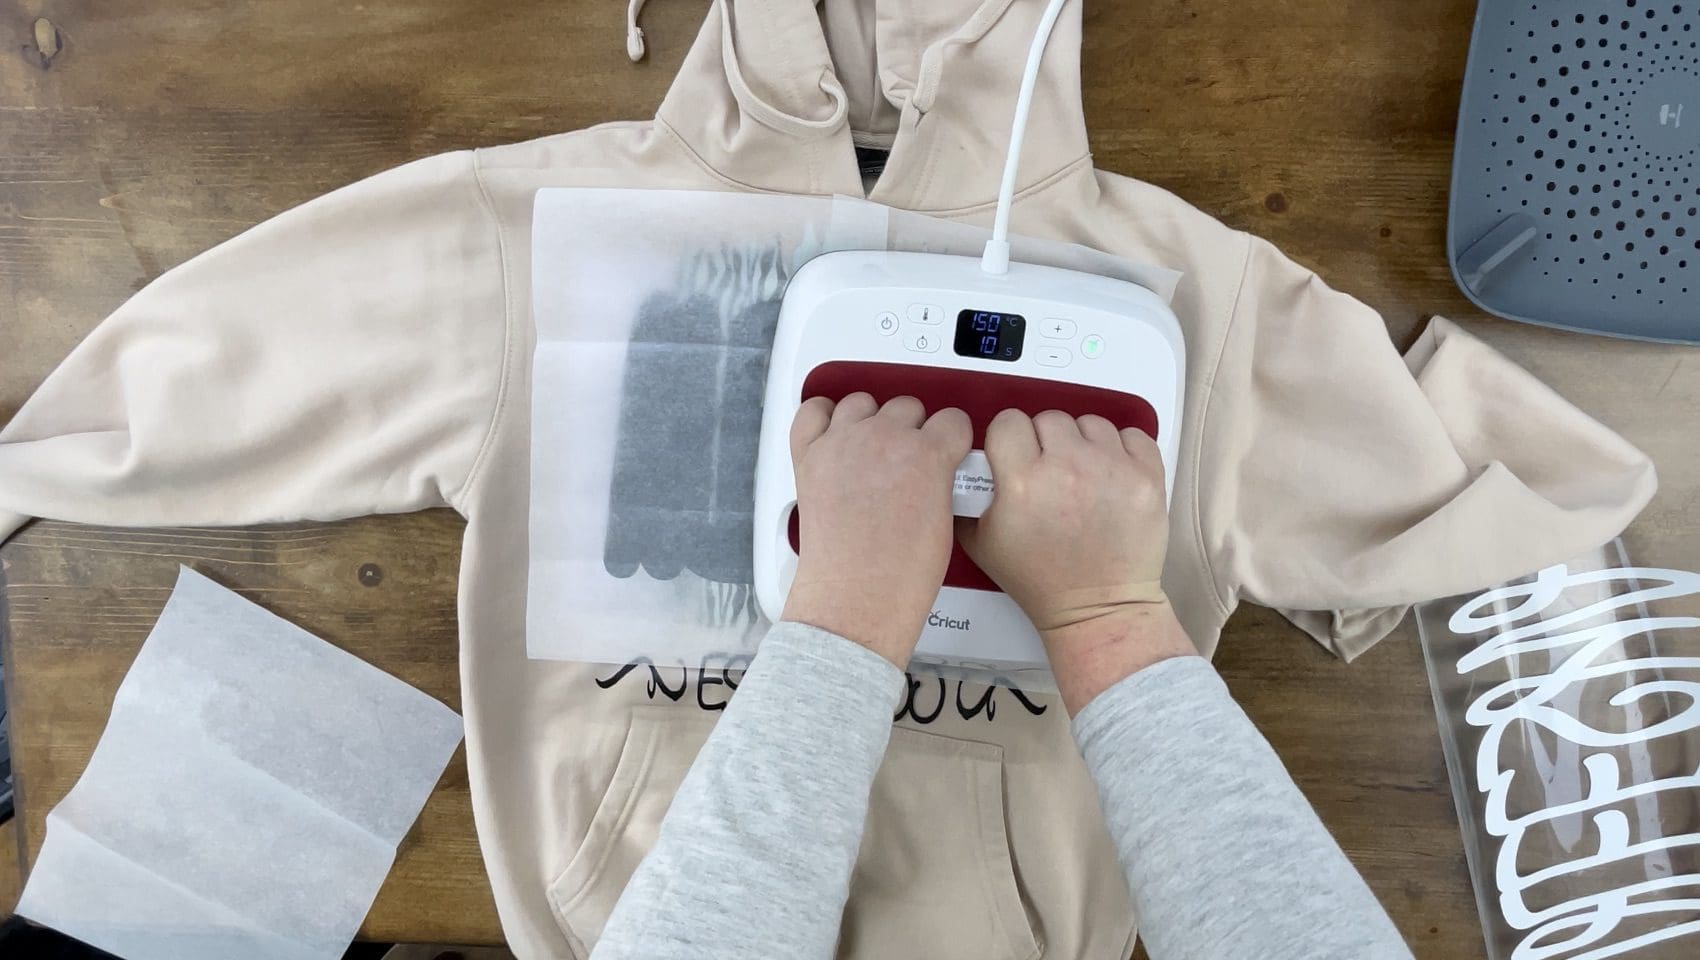
12. Switch your Easy press on, and set the temperature to 150’c and the timer to 10 seconds, (Please note settings for this when pressing a single layer only are Pressing Temperature: 150°C Pressing Time: 15 seconds Warm/Cool Peel Suitable for cotton, polyester and blends.) For other Vinyl please refer to our Application guide, When Layering it is important to reduce the layering times so not to over heat the vinyl.
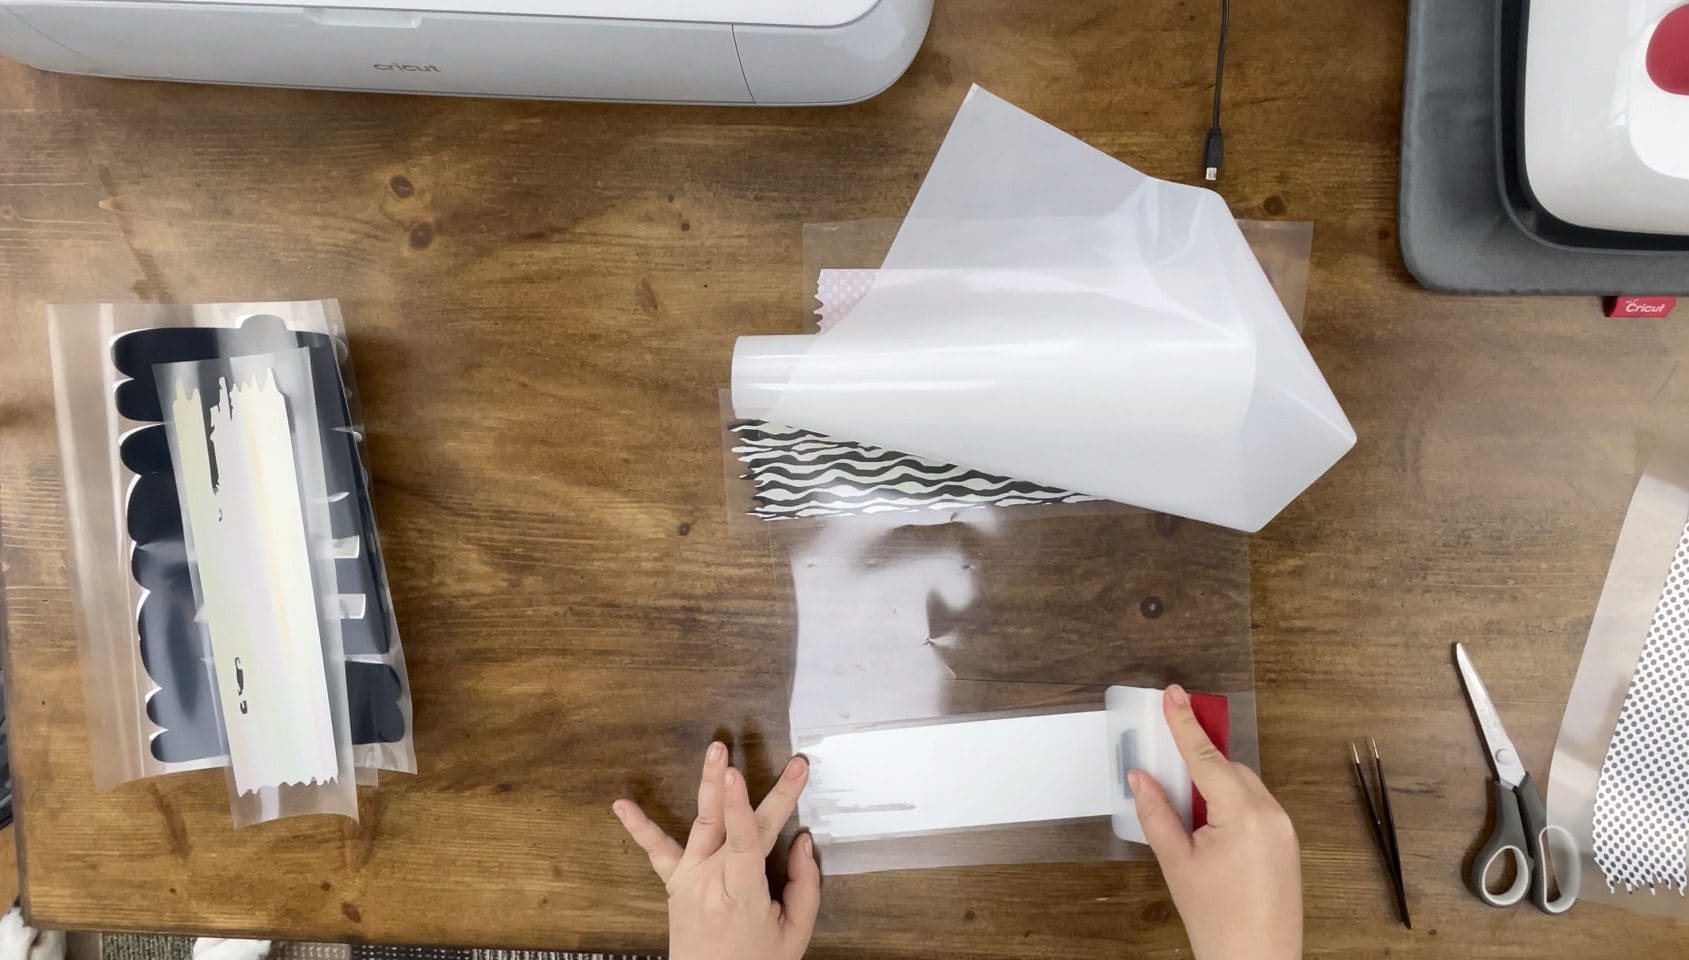
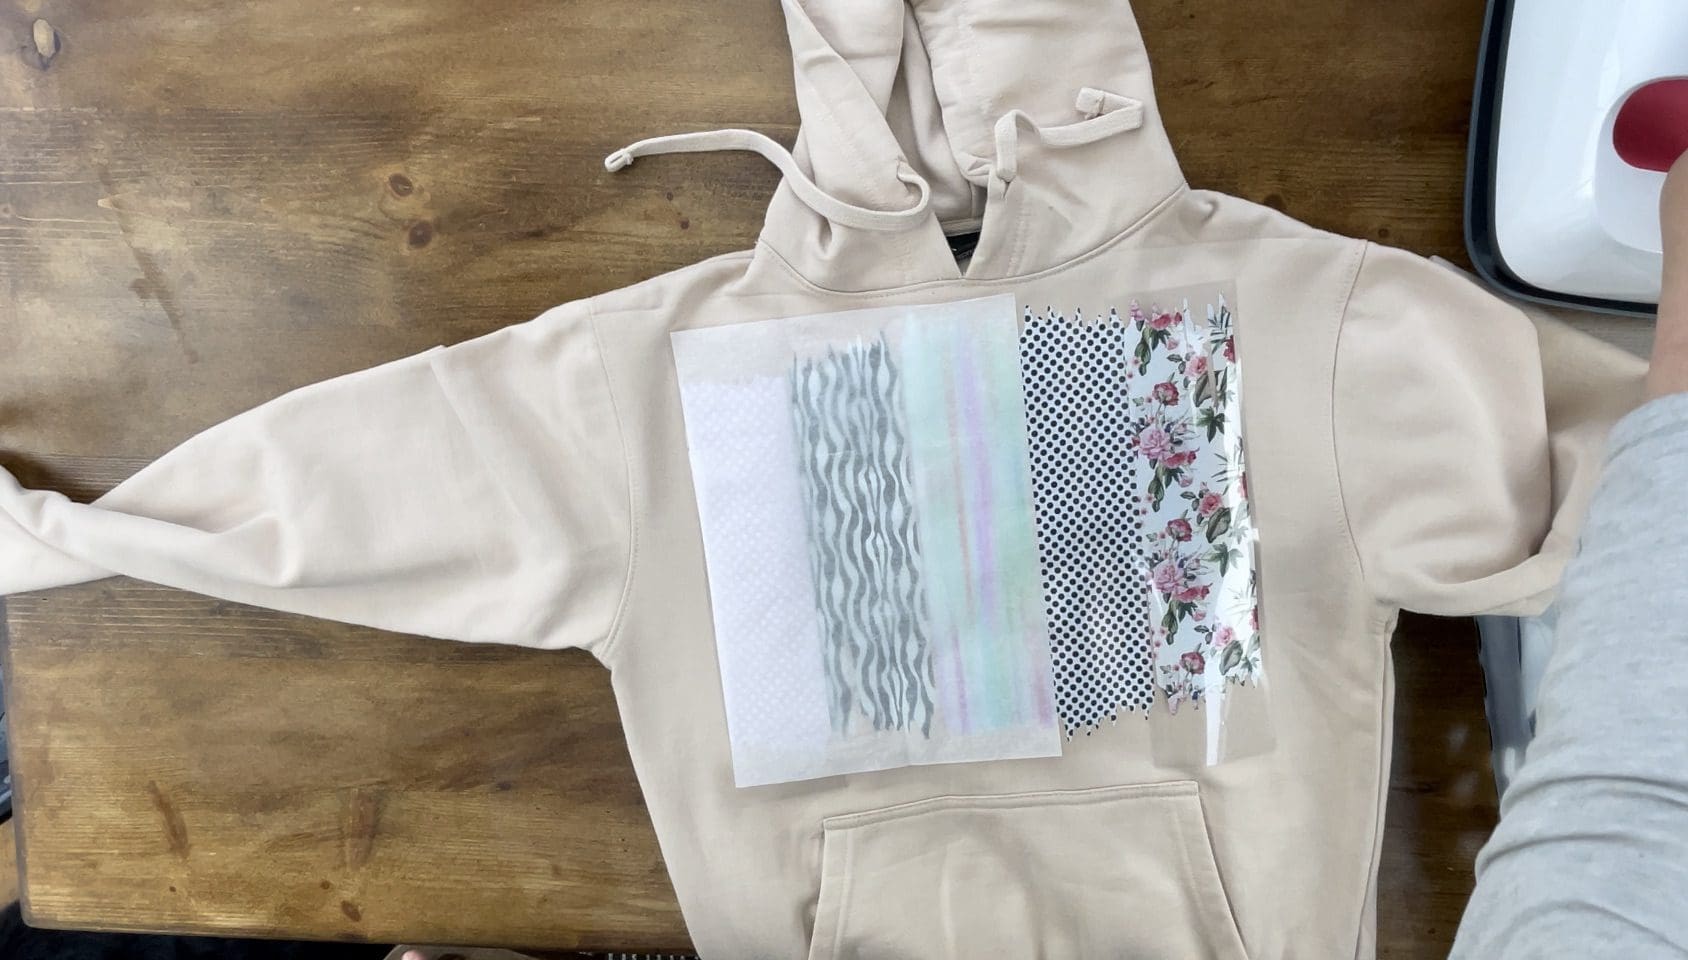
13. Whilst the press heats up, take the Clear milky roll of transfer tape included with the GM Printed Pearlsparkle Vinyl, remove the milky protective sheet and place the sticky side facing up, before the placing the weeded side of your design onto the sticky sheet, this is stuck to the front of your design after weeding. Smooth out with your squeegee, rub with the squeegee on the reverse to ensure it transfers easily, then remove the carrier sheet that was originally on the back of the Vinyl, trim excess away as shown below.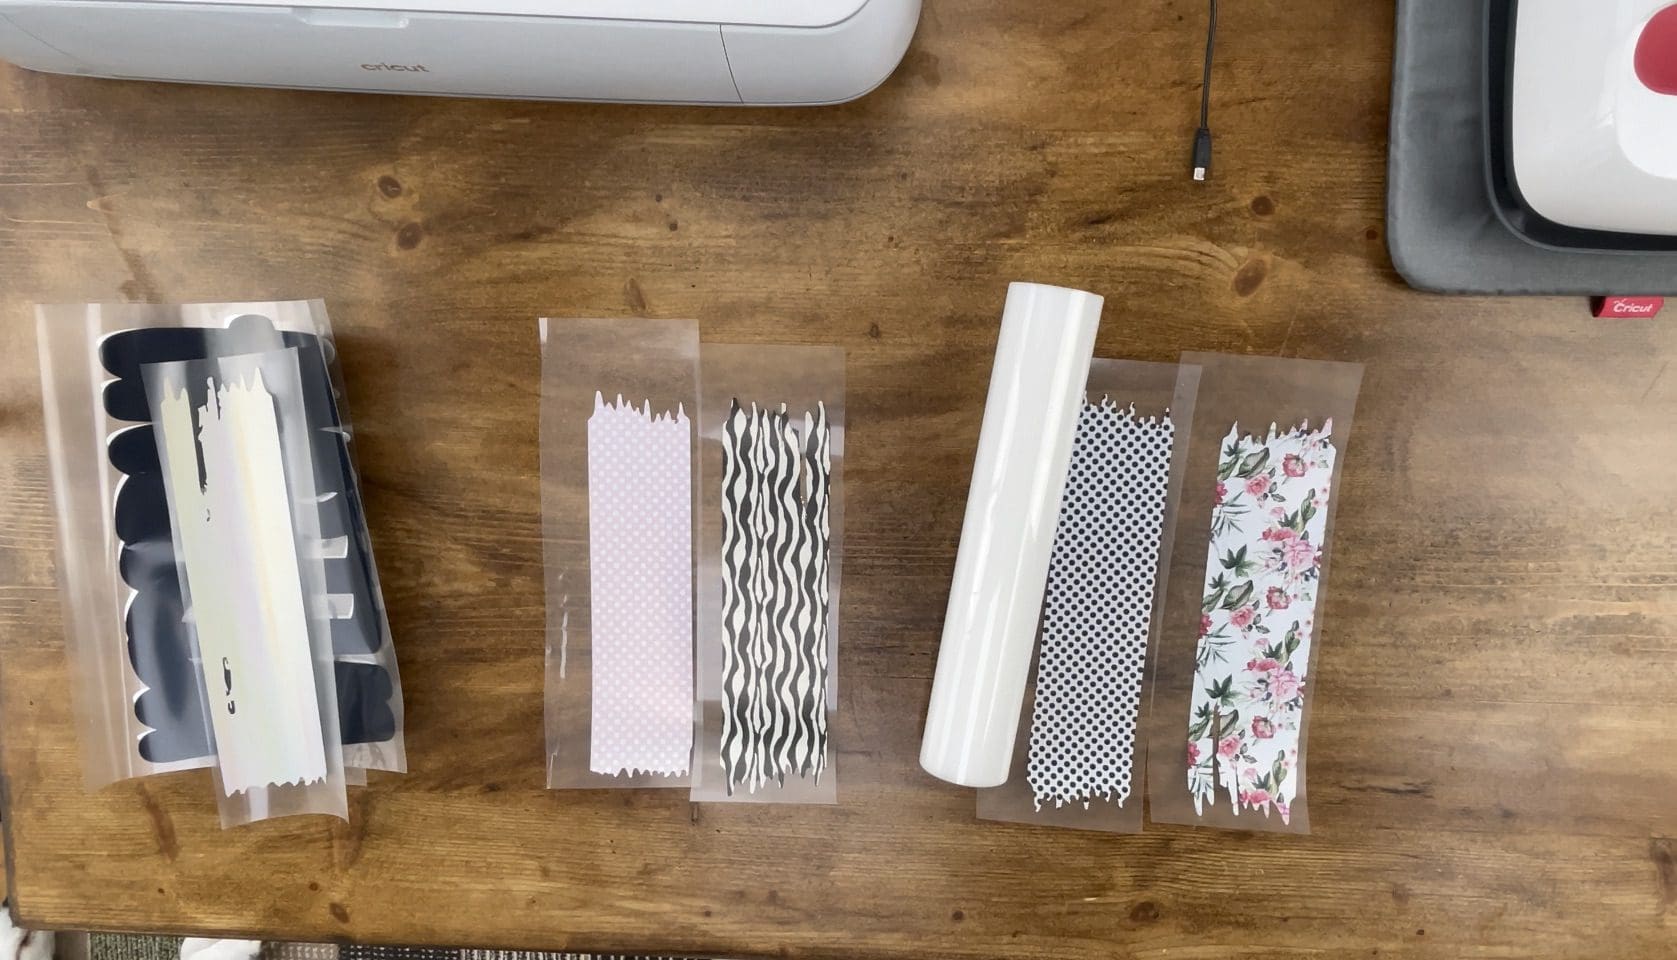
14. Place the easy press mat under the Hoodie, Bag, T-shirt or whatever you are applying it to, and preheat once the press is ready for 10 seconds to remove any moisture. Lay the design already on the transfer tape in the correct place facing up, and ensure it is on a hard surface, or Cricut Easy press matt and on a hard surface, check our guide here for more information on applying and using HTV successfully. Press each area once only for 10 seconds firmly using your upper body weight over the press. Because we are Layering, I have not used the full press time, and I will leave the transfer sheet to go cool before removing, if any areas lift once doing this- repress for a few more seconds- please note ensure any collar or seams are off the pressing mat so not to interfere with the pressure needed. See Below.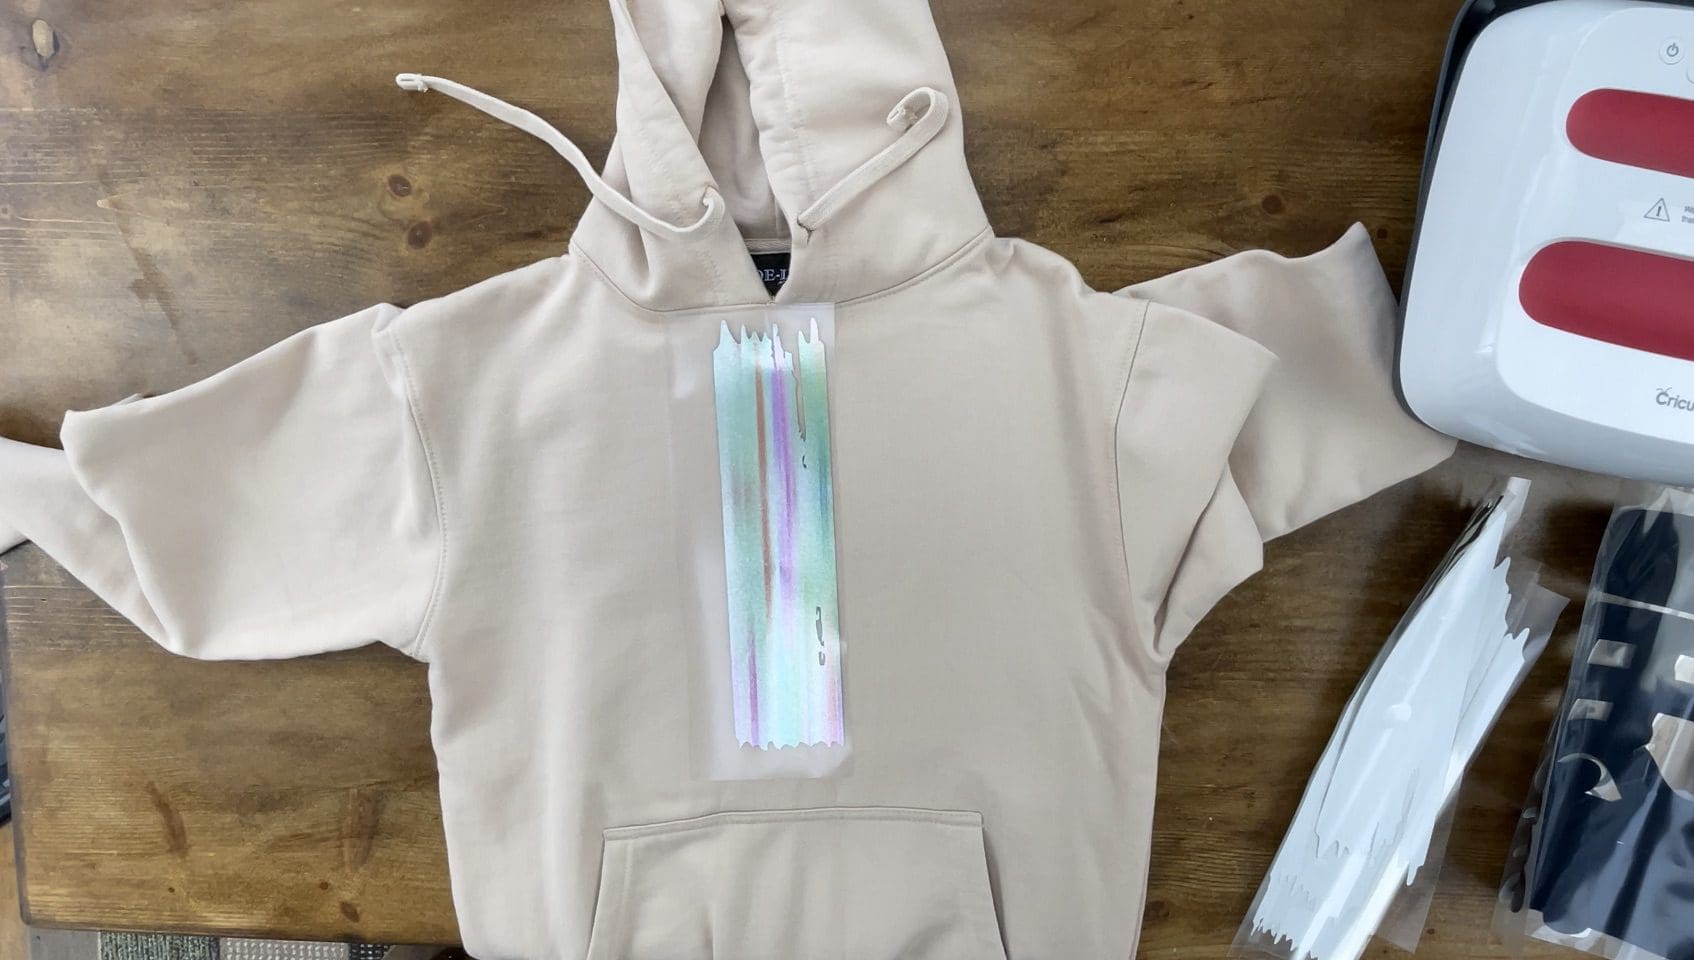
15. Move the garment on the pressing mat, and repeat step above to apply the next layers step by step. Ensure you protect your design as shown with the silicone paper. (If need be use Baking paper for this) Top tips for layering, reduce layer times as above, let cool between layers for best results and only use full press time for the top layer. If using Glitter only use for the top layer.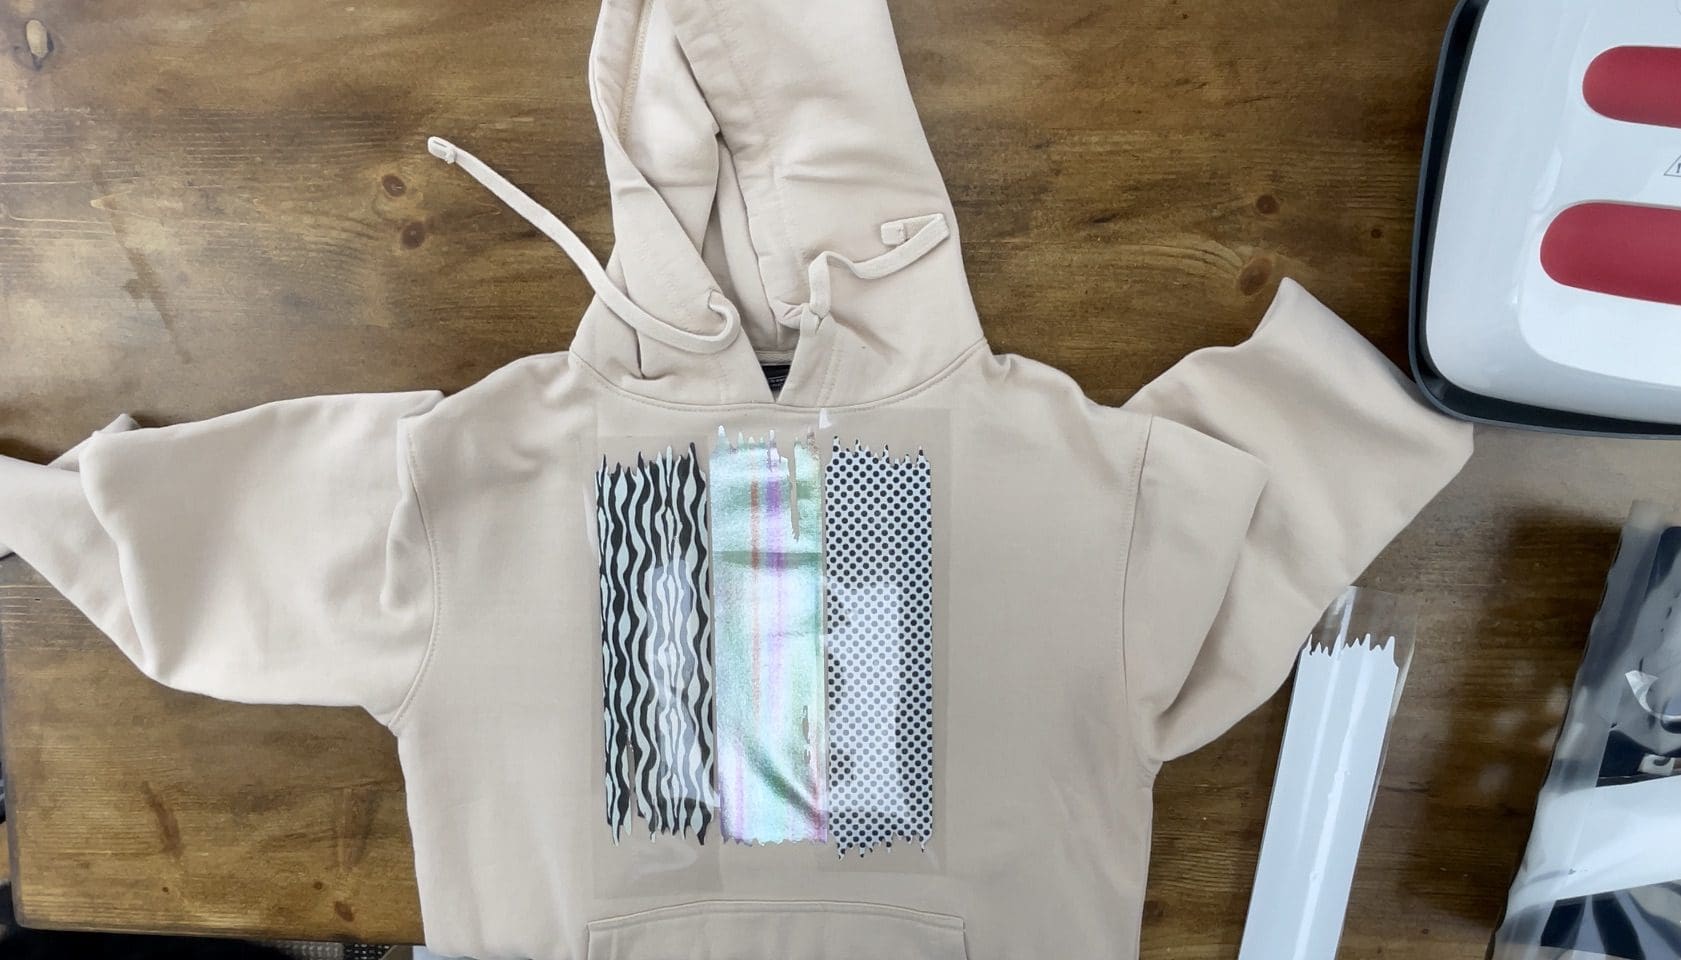
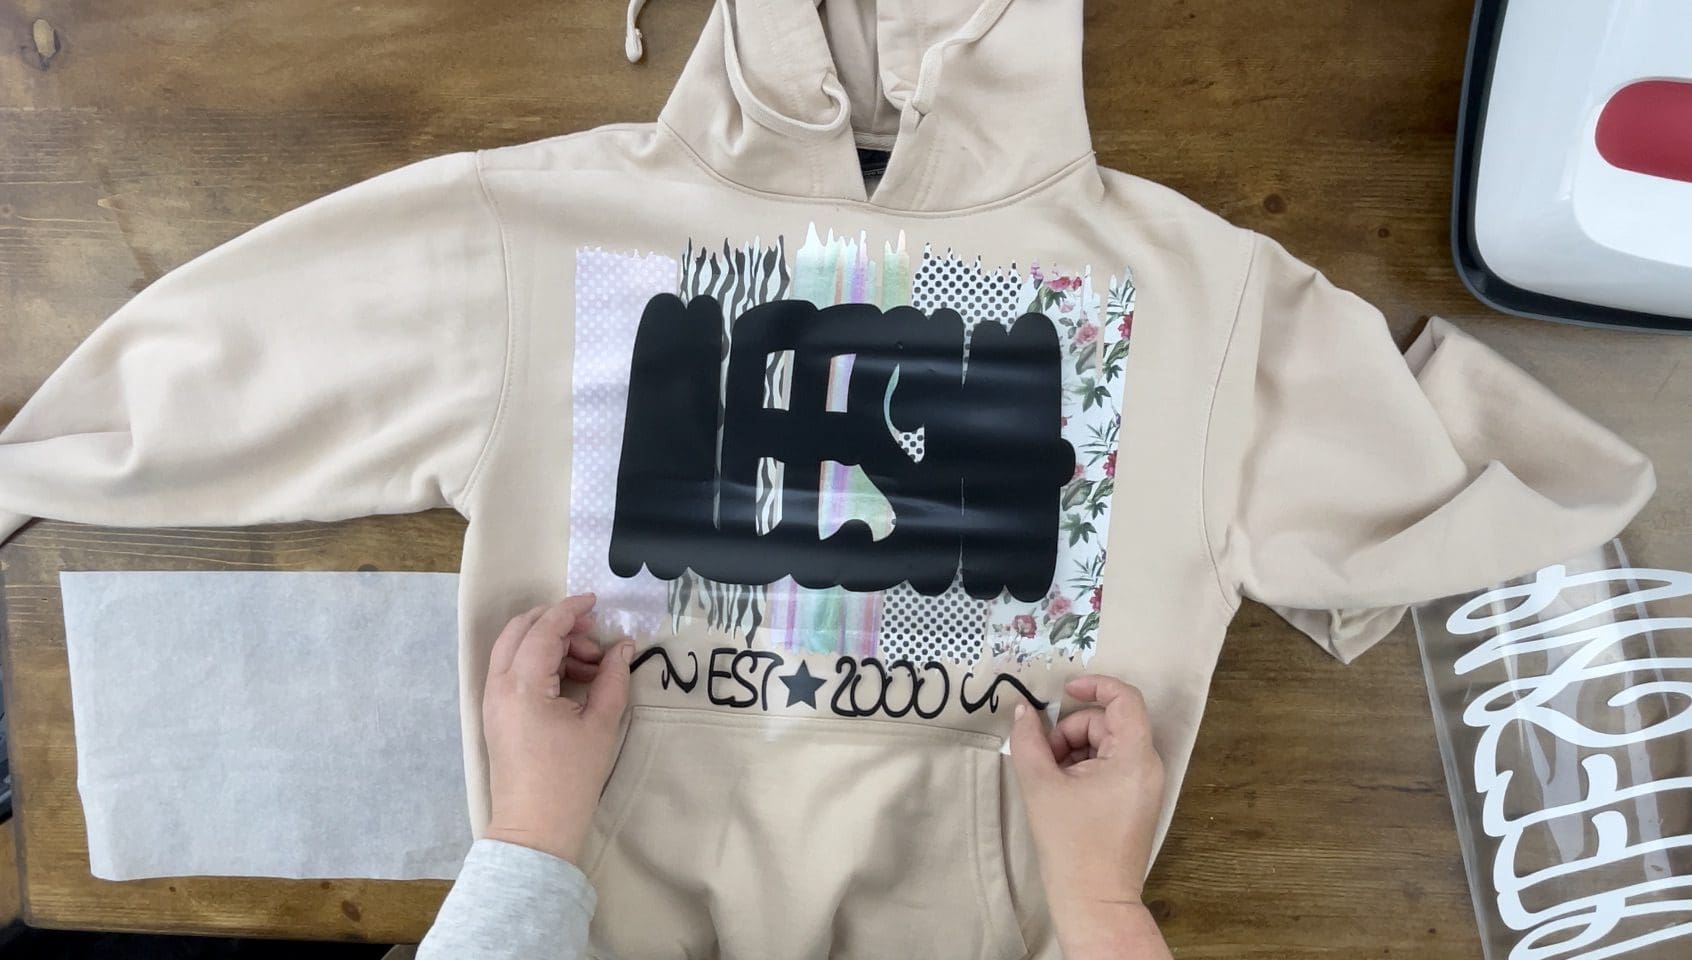
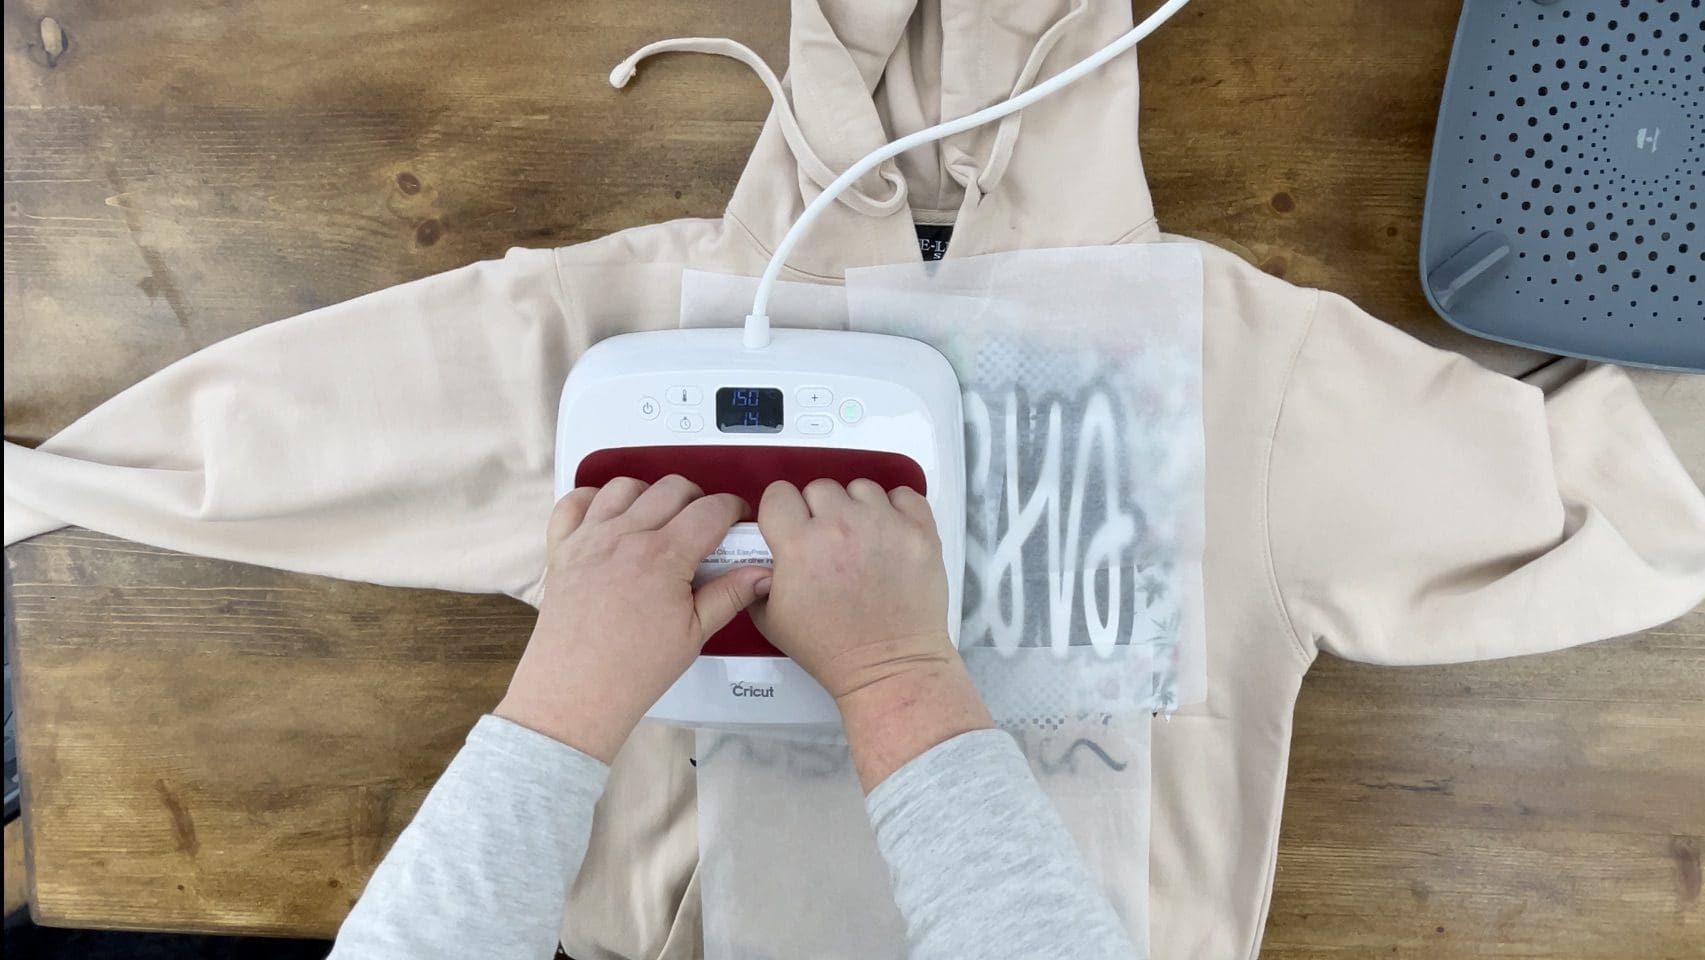
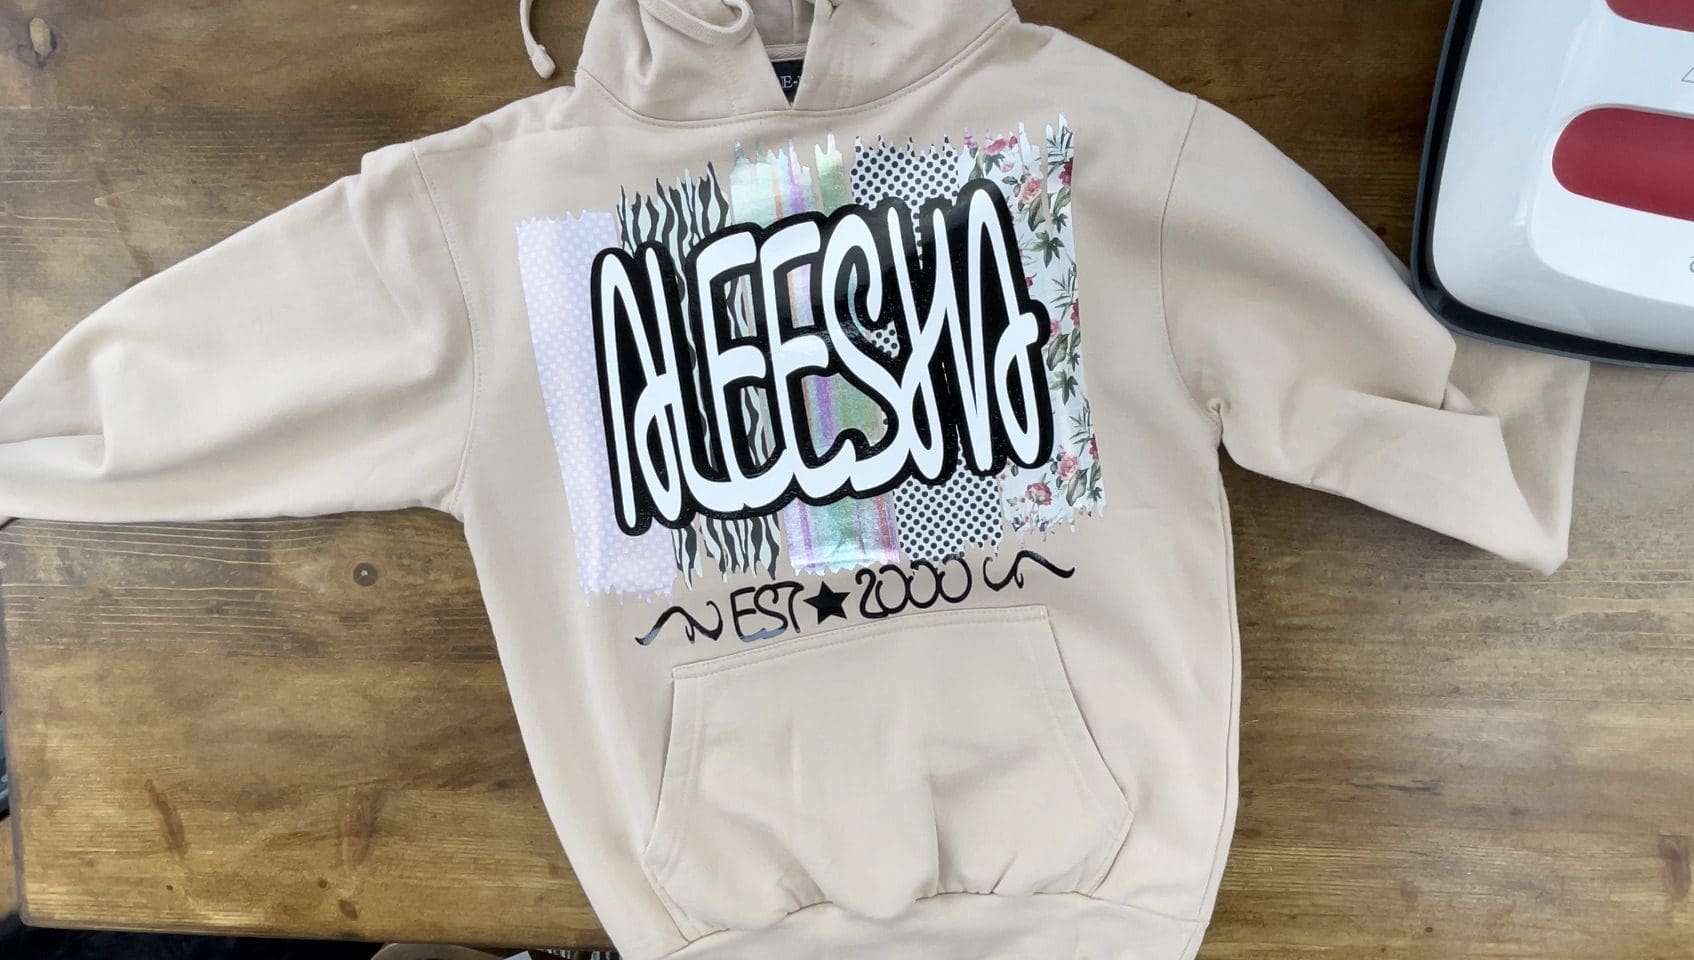
16. If after removing the top cover sheet, the design is looking a bit untidy then recover with a sheet of Silicone Paper or baking parchment and quickly repress smoothing over it like an iron would, but quickly so not to over heat. Don’t forget your finished design can be matched by using any material cut using a cutting file, card, self adhesive vinyl or even HTV. We’d love to see your makes on our social media pages! Or email them in!
Silhouette Cut File
Instructions:
Before you start, you need to download the font file, follow steps above 1 & 2 to do this, Open Silhouette Studio. Click the font icon and your new font will now appear in the font menu! follow the steps above to create the deign including welding. Remember to test cut if necessary and cut settings are found here along with test cut guidelines for every machine.
Brother Cut File
To install the font if you don’t know how to use a different font in Brother’s converter software see here
Cut settings are found here
Just incase you need the link CanvasWorkspace (brother.com)