
Tutorial/Free Cut File
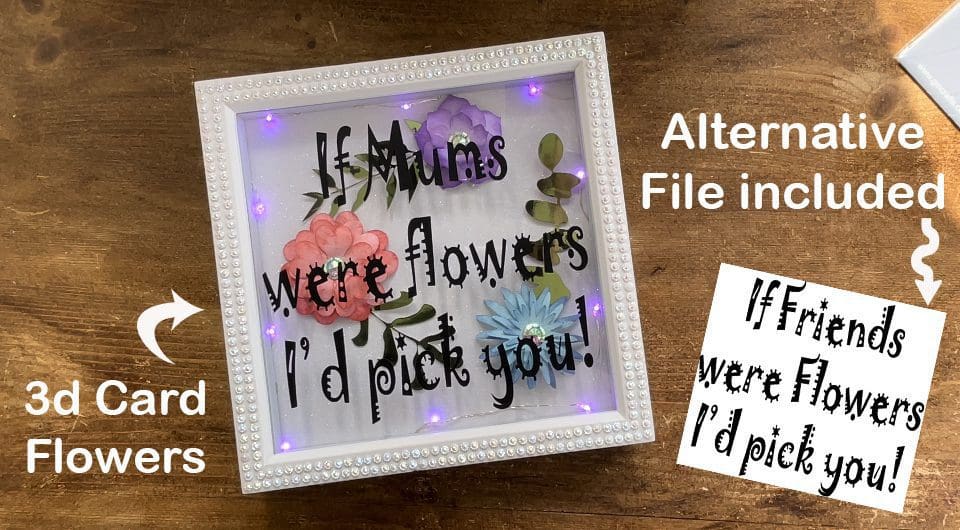
3D Shadow Box Frame Tutorial- How to create 3d Flowers with our Card for Mum or Friends with Free Cut Files
Hi! Great to see you!
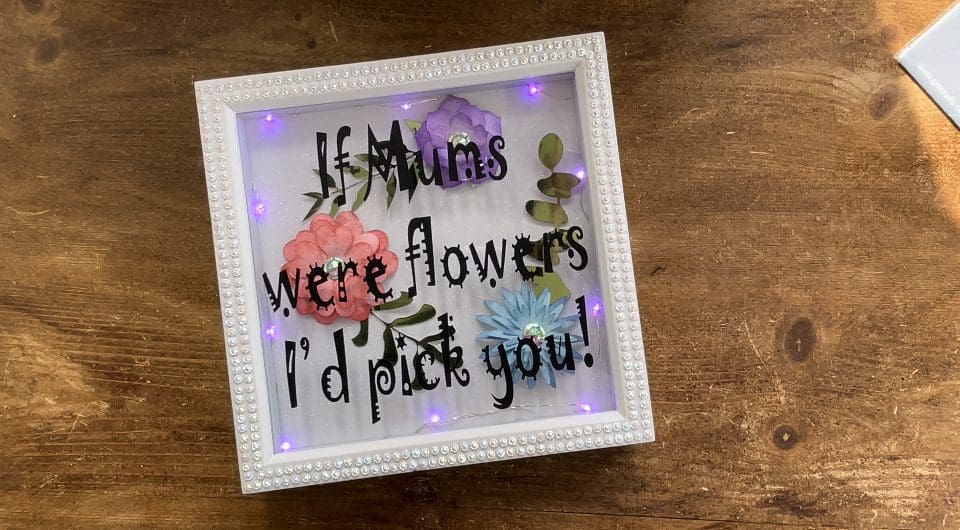
We thought we would treat you to an extra blog this week, you have all been asking for another box frame idea- and with Mother’s day almost upon us, we thought this would be ideal. Of course we have also created this for you to use for your flower loving friends too! Mum’s and Mother figures come in a variety of forms don’t they, from those that gave birth to you, those that are genetically your parent, to those that raise you, or to a special friend whom fulfils that role – or just a friend that needs a bit of appreciation. So we have given you a choice of files in this weeks link, to allow you to adjust your design to suit your own target audience.
Of course as always this file isn’t just suited to a box frame, you could use it with HTV create a bag, a T-shirt, or even a canvas, mix it with self adhesive, or even dried flowers, add it to a vase, or a glass block. Why not create a card with it instead? Whichever way you choose to use it, we would love to see! Have you found our You Tube channel yet? The video showing this and all of our other tutorials are available on there, as well as exclusive demos, inspiration and more! Join us on Facebook , Instagram or Tiktok or send us an email to sales@gmcrafts.co.uk we would love to hear from you!
You are free to use our files to make, create, and even make items to sell, all we ask is you don’t pass the files on. Instead, if you wish to share them, please ask your friend or acquaintance to download them from our website themselves from within this blog. No reselling or passing on, of any part of the cut file is permitted, and no using the cut files to create other files to sell or pass on is allowed. But we do hope you enjoy them, and we hope your makes earn you a little extra with them too.
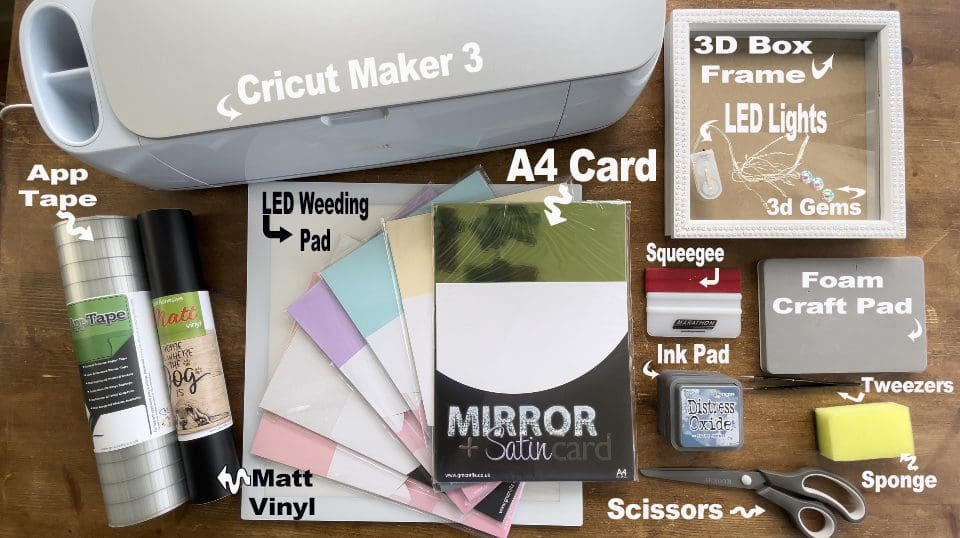
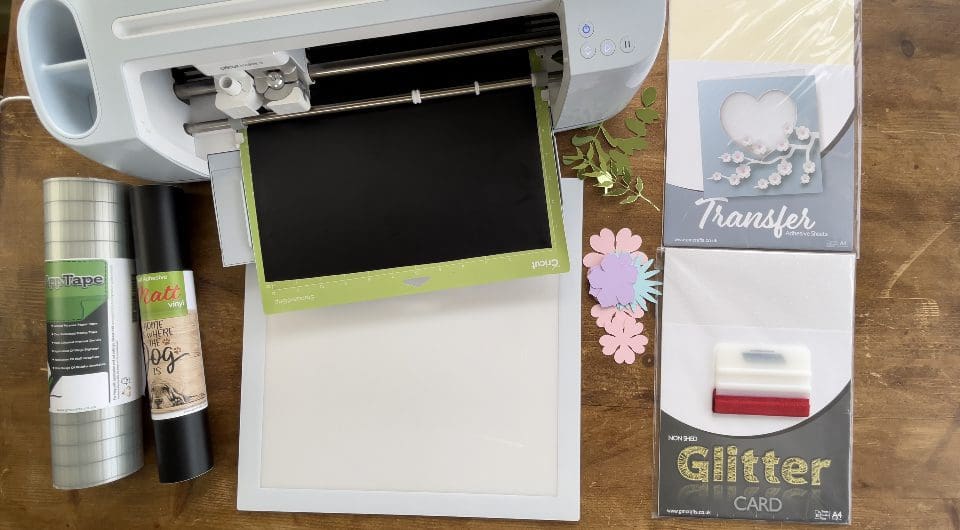
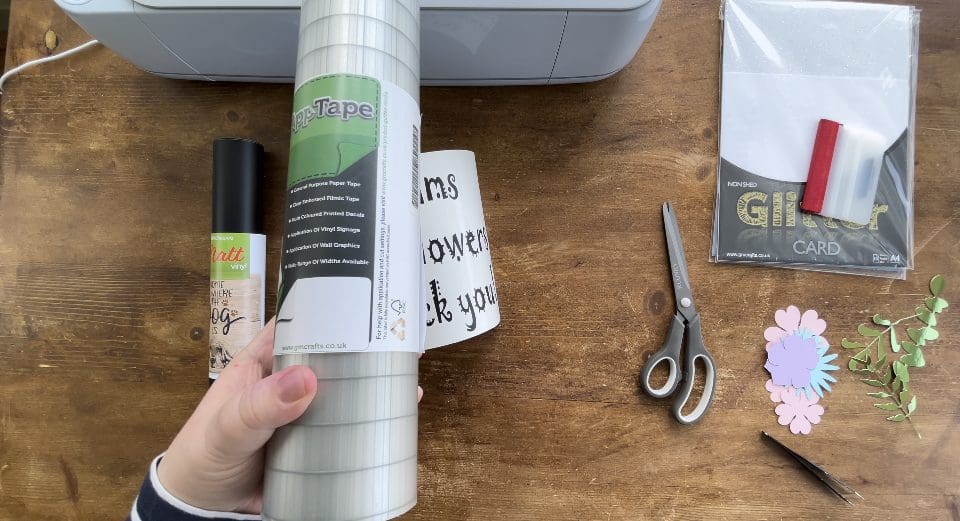
What you’ll need:
- Cricut machine Available here Or Silhouette Cameo 4. Available here
- A4 Card packs of your choice Available here
- We used Spring Green Mirror card, Pastel Pink, Purple and Blue card, and White Rainbow Glitter card from our papercrafts section.
- A4 Pack of Transfer Adhesive Available here
- App tape Available here
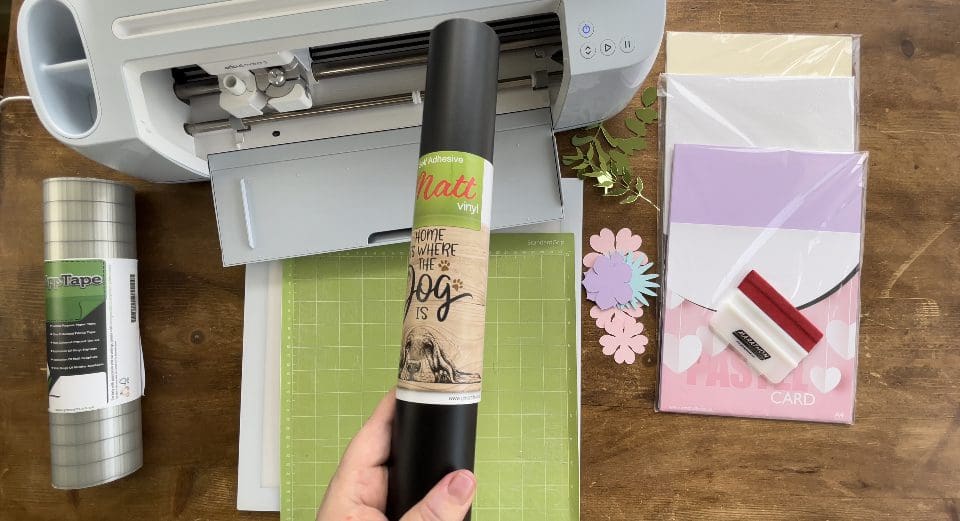
- Matt Black Self Adhesive Vinyl Available here
- LED weeding pad. Available here
- Squeegee. Available here
- Weeding tweezers . Available here
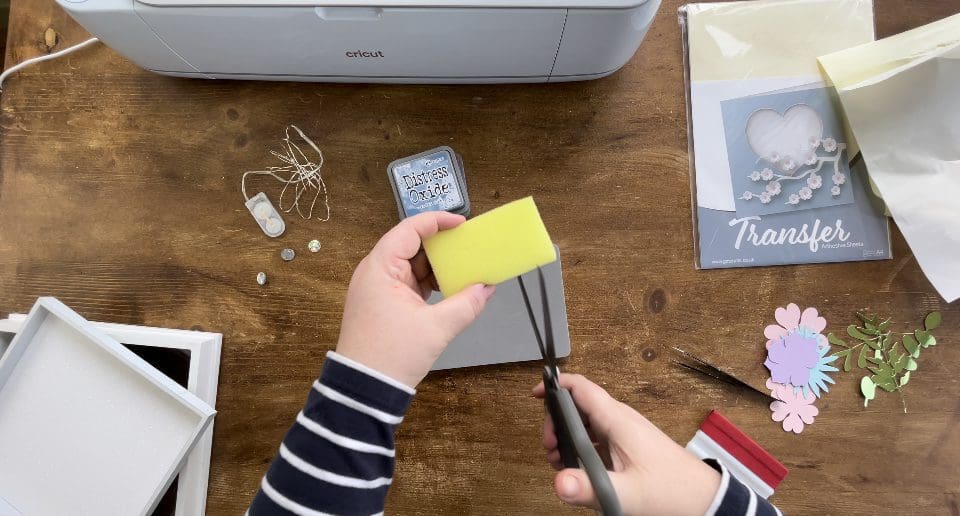
- Scissors, Ink Pads, household washing up sponge, Foam pad and 3D Gems from your own stash
- Shadow box frames are available from a variety of places such as if you click here
- LED Fairy Lights available in a variety of shops such as this link if you click here
- Cut files, which are free below! Including, Cricut, Silhouette and Brother cut files.
3d Flowers box frame files Click here to download for all machines
Instructions;
1. Before you start you will need to download the cut files for your chosen machine, link above. Unzip the file to use it by right clicking it in your downloads. There is now 1 File for Cricut- 1 for Silhouette and 1 for Brother.
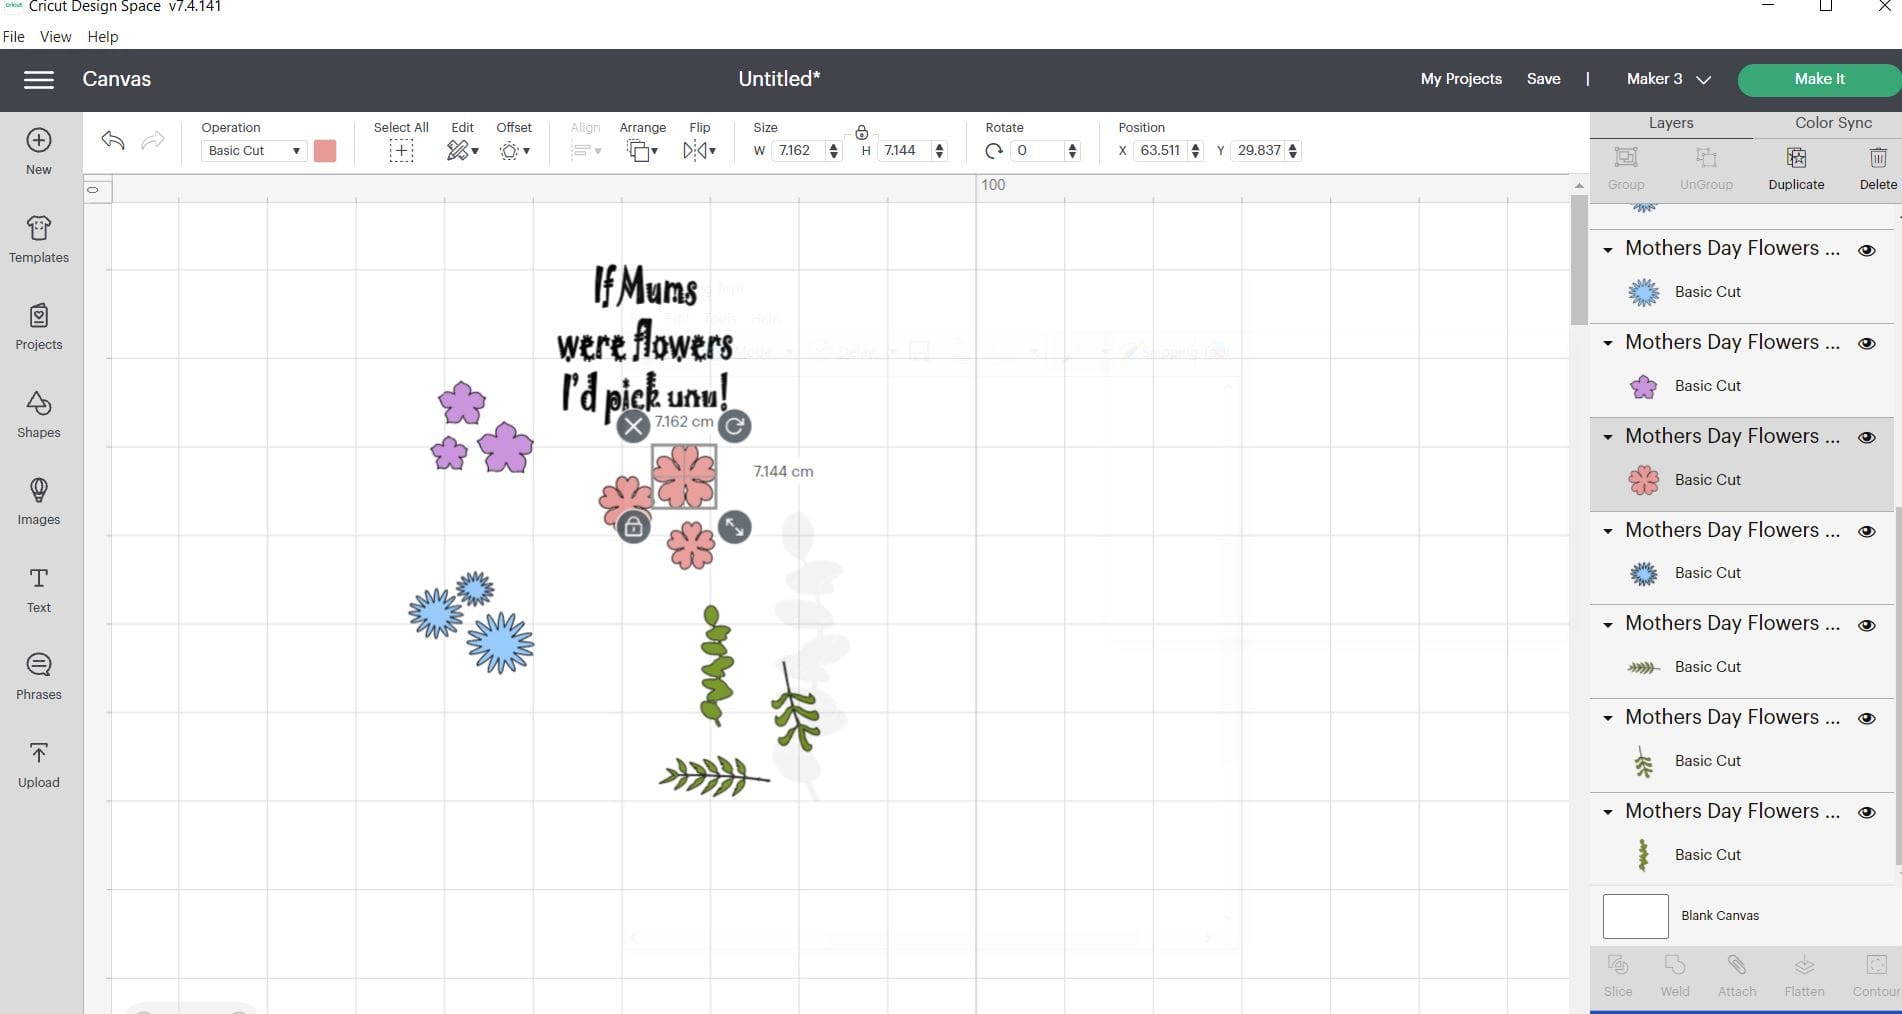
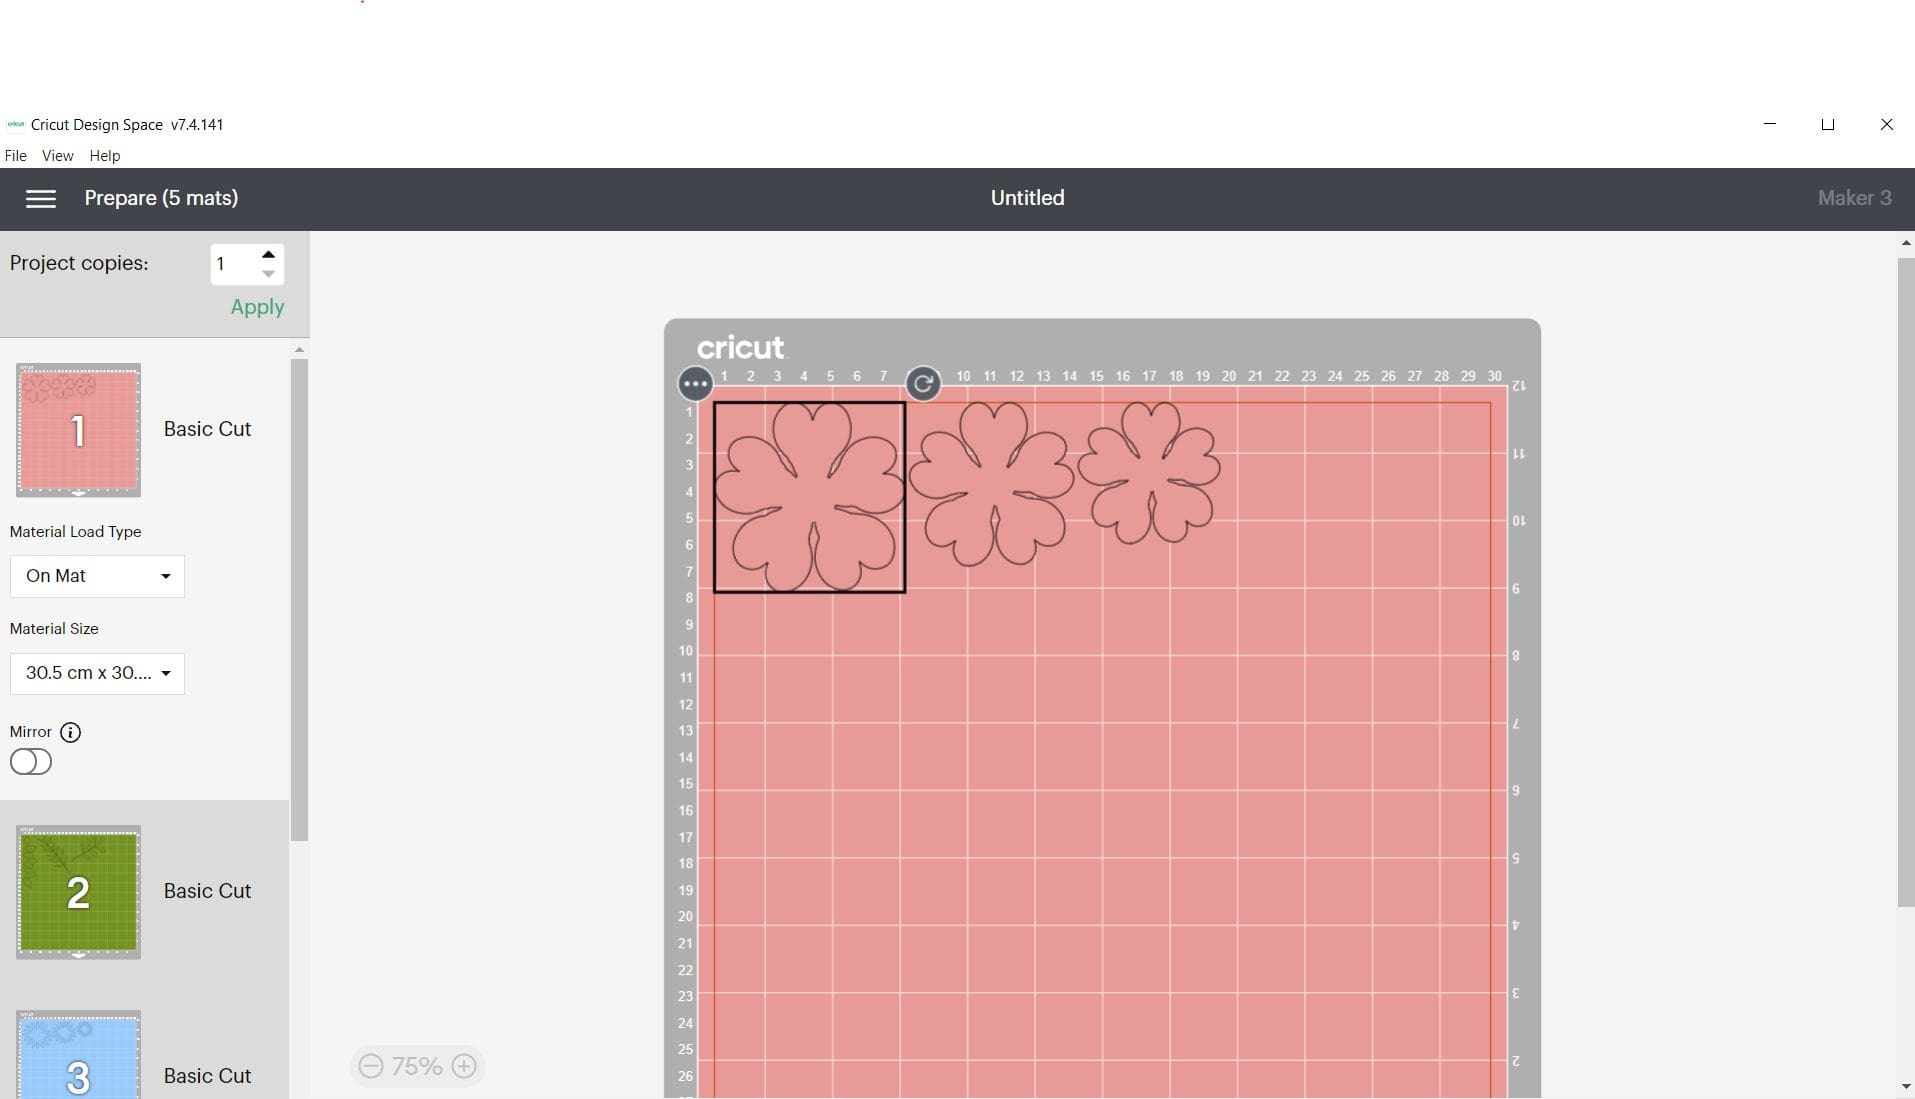
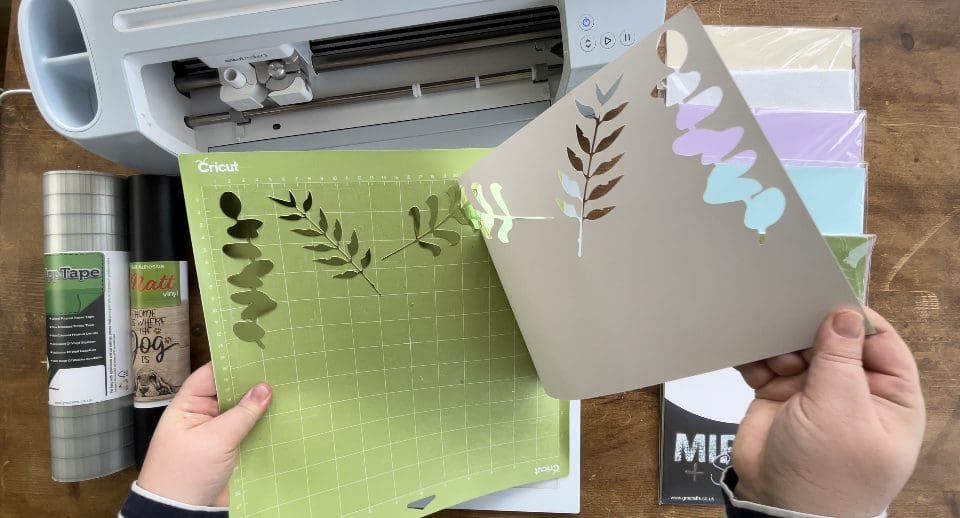
2. Upload the SVG into the design space. Click “Upload Image” on the left-hand Design Panel, and navigate to the files you want to open. Select ‘Insert image’. When asked, select cut images. Click save. When it has been uploaded, Insert the images onto the canvas and resize to suit your project, You need to right click them to ungroup to be able to move them and choose each one individually. I re-colour each part differently, to match the material I am using, as shown below, so I can cut the different Card or Vinyl for each layer, which means It creates a variety of cutting mats in one go, and I don’t have to keep returning to the design page, see below.
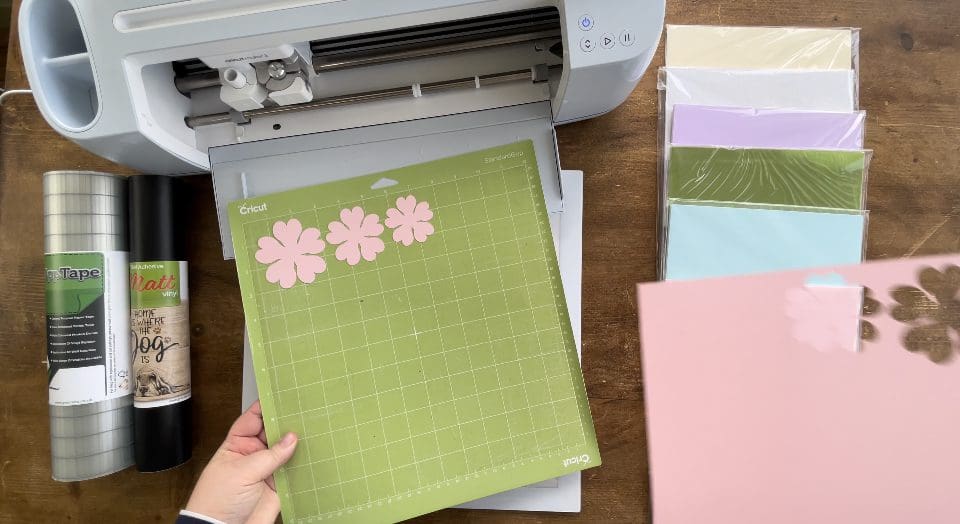
Once you are happy with your images, click WELD for any areas you want cut exactly as they are laid out, so that when they go onto the next screen they don’t bunch up, ( I welded the words) – we duplicated each flower to create 3 of each (for layering later) resize them so they are different each design then has 3 sizes – We made the pink one 7.5cm , then reduced each duplicate by .5cm – we created the Blue one 7cm and again reduced each duplicate by .5cm and lastly the purple one was 6.5 and again reduced the 2 remaining duplicates by .5cm each time so the smallest purple flower was 5.5cm approximately, then click make it to move on to the next screen.
On the next screen, If using the Cricut Maker 3 then you will need to choose to cut on the mat (unless using smart media) We have provided you with 2 different wording choices, please delete the one you don’t want in this screen before clicking Make It.
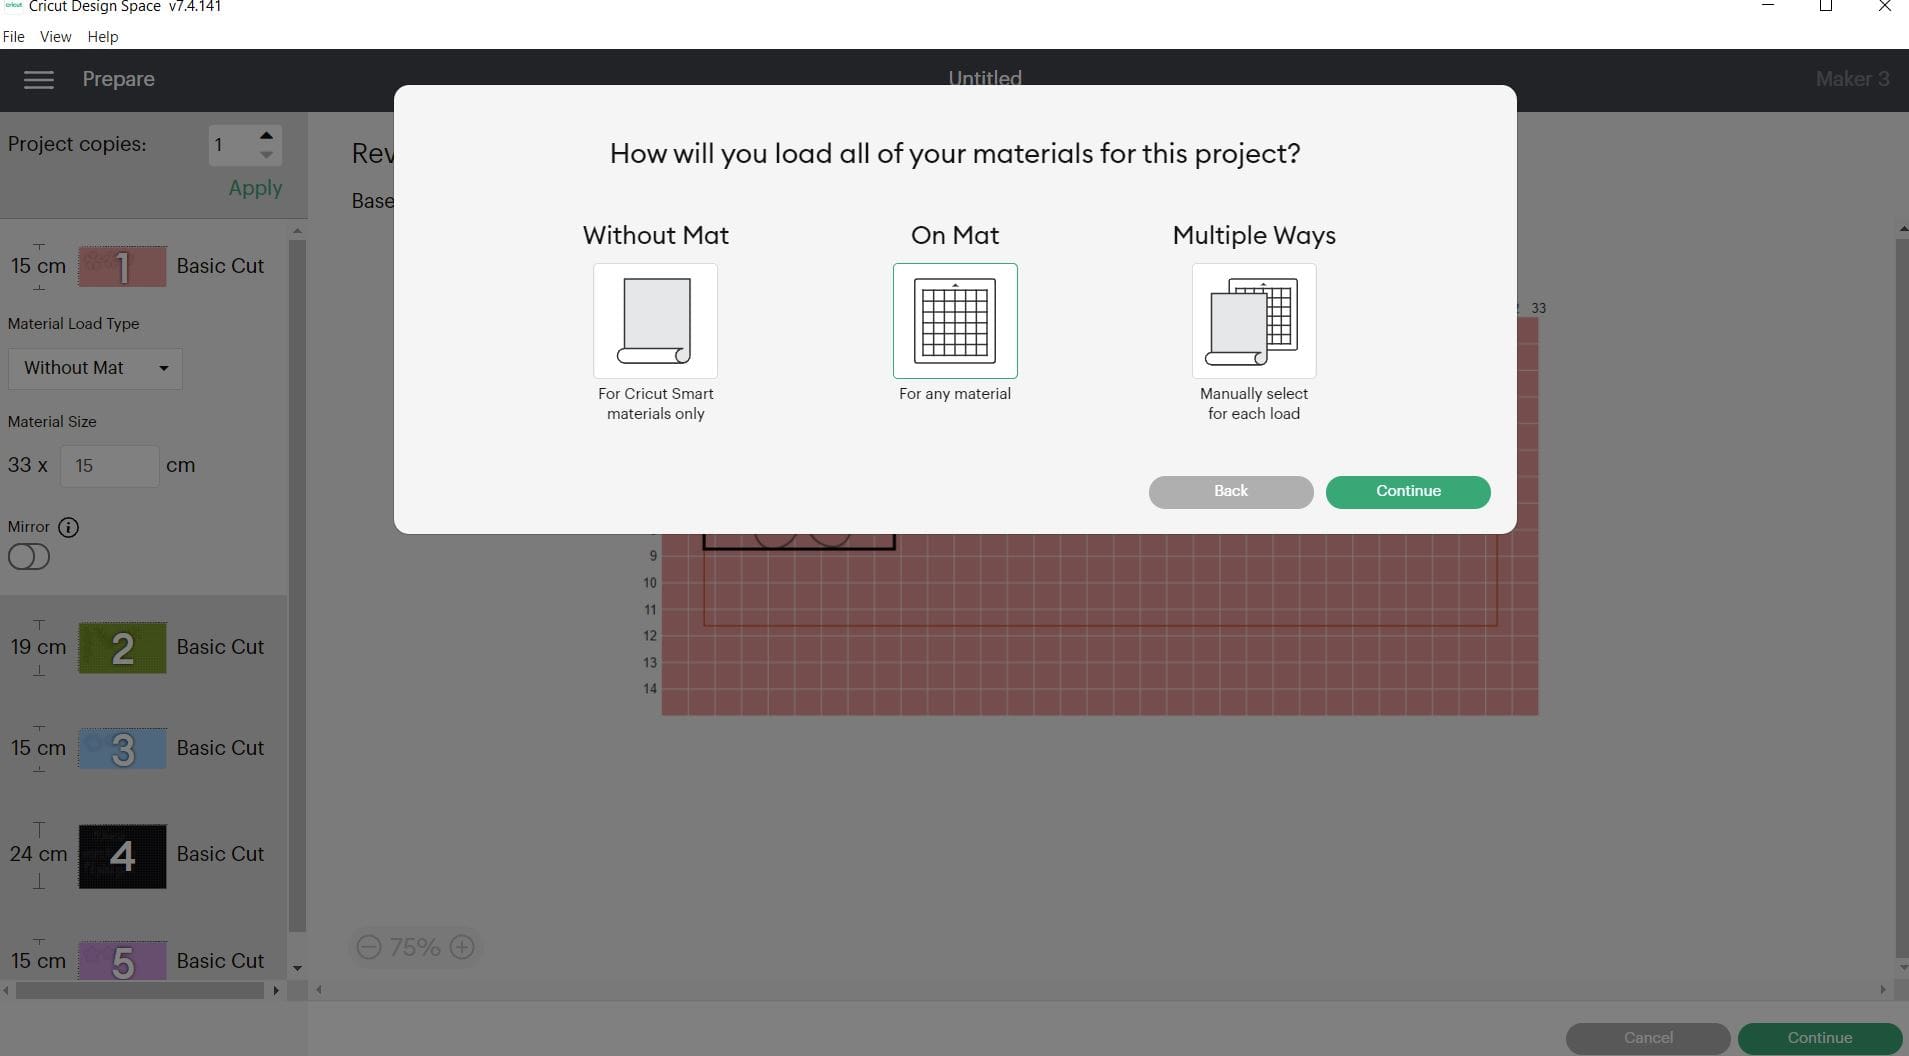
3. Click continue in the bottom right on the next screen (Shown above, DO NOT MIRROR unless using HTV) . In the next window make sure your settings are all set to the successful settings from your test cut and ensure your machine is linked before proceeding to cut. Cut settings: (**please test cut) Press the flashing Cricut symbol on your maker to cut, after loading the sheet into the machine. Apply the settings needed for your chosen Card (or Vinyl), we made it with our GM Solid core Pastel card, Mirror card on the maker 3, and used the Heavy Card stock setting on the Cricut maker 3 with Default pressure, as we have just replaced our blade. If your blade is older- you may need to increase this to more. Do test cut.
**A reminder that these settings, including the blade setting, are specific to the materials and machine we’re using, adjustments may be necessary if using different materials and machine**
We always recommend before proceeding, you test cut your materials when first using so if you have not recently used this product in your machine. Please test cut for your chosen machine found on our Application guide, and also Blog. Load the Card or Vinyl chosen individually for each layer.
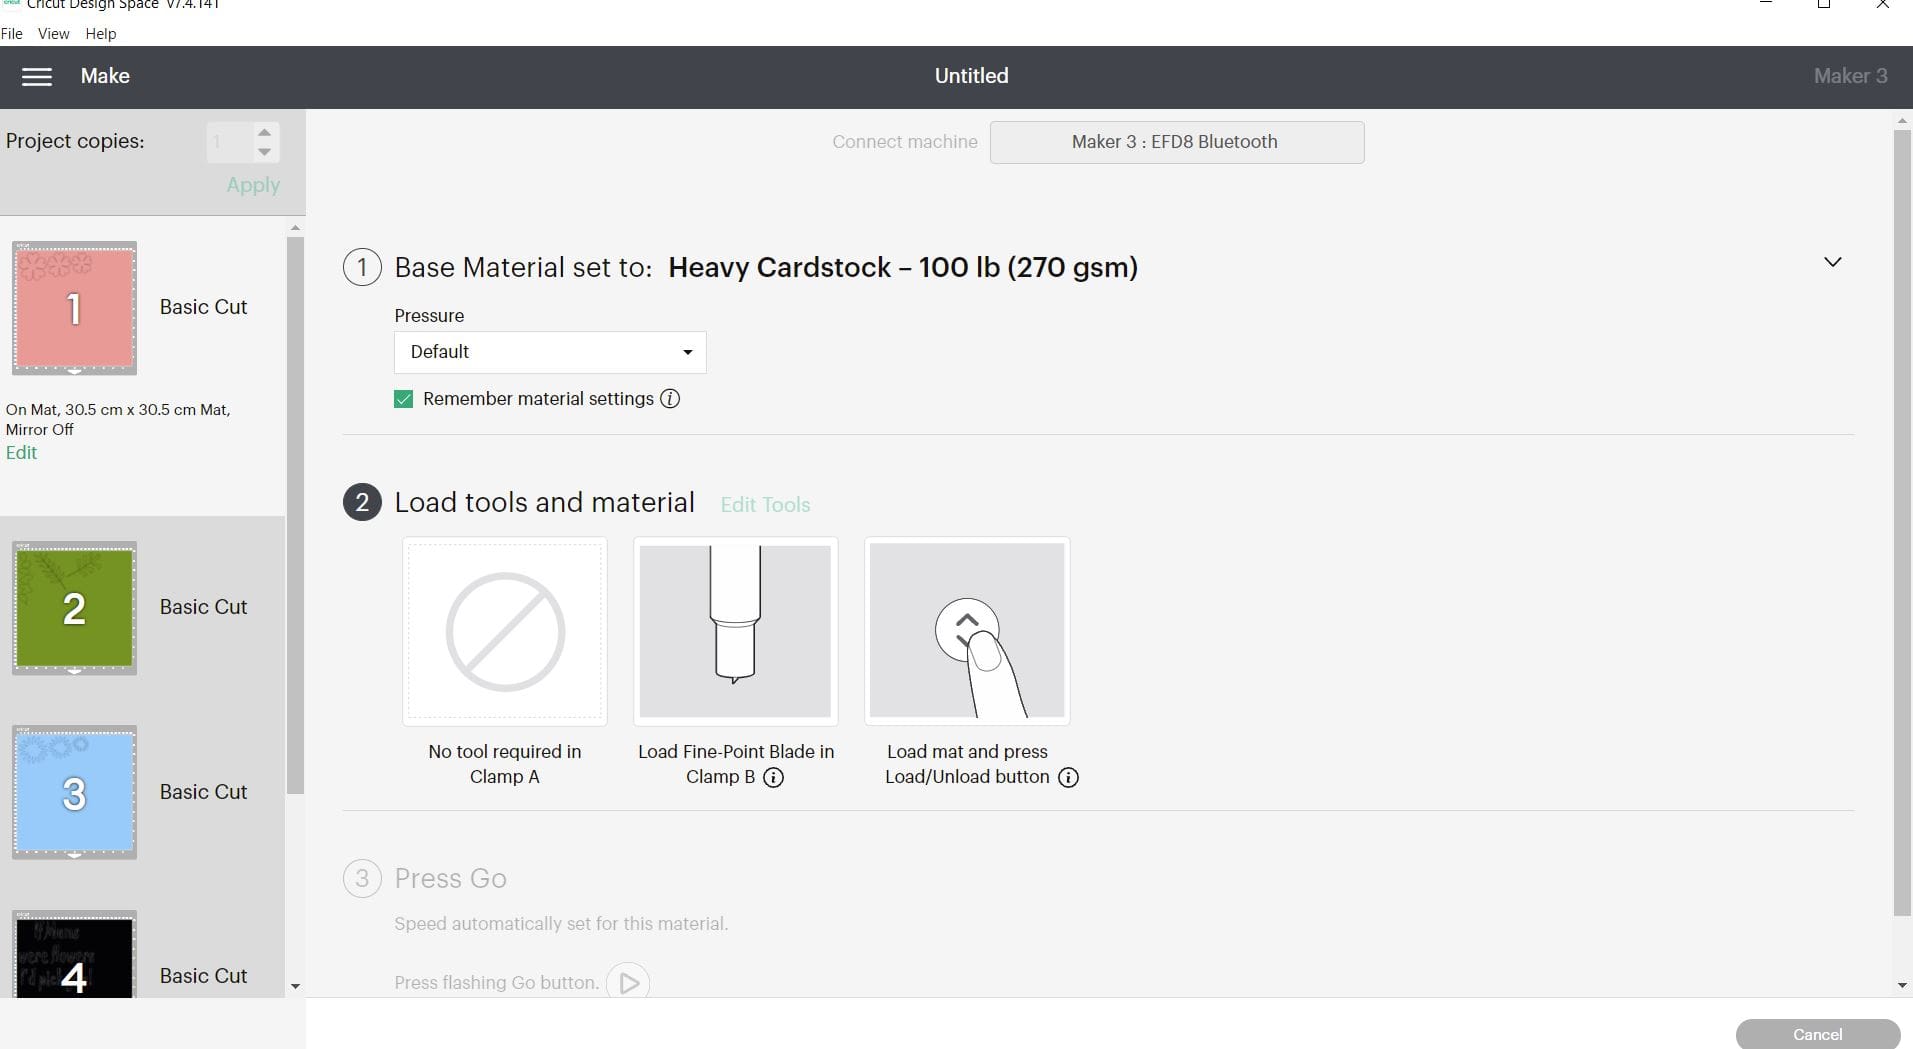
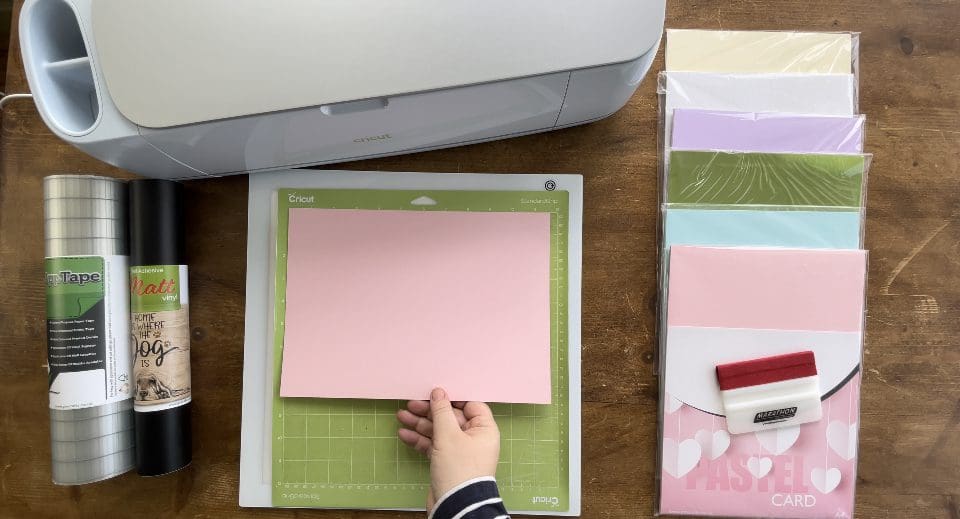
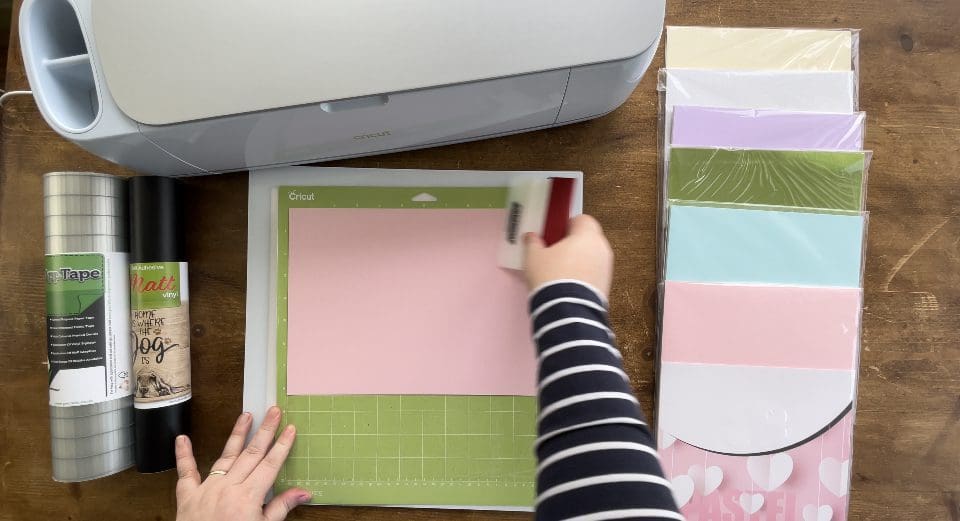
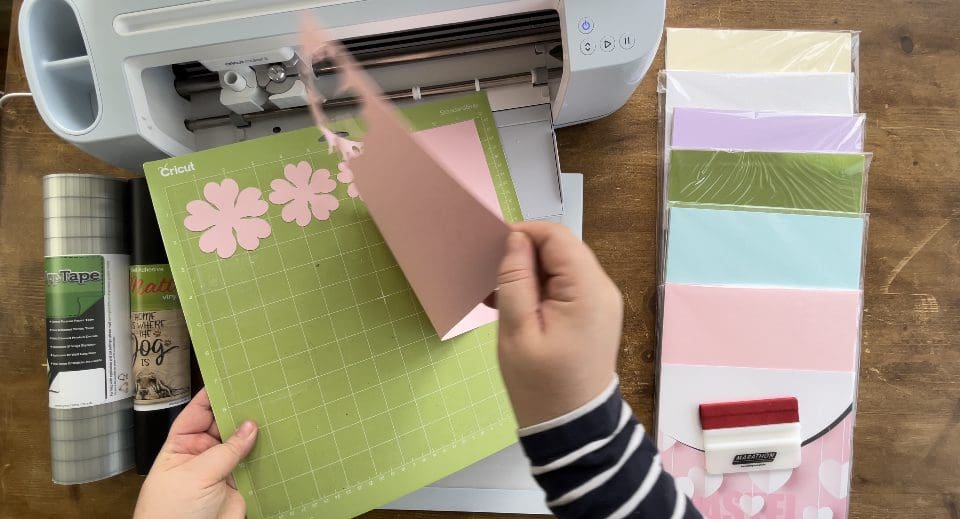
4. Place the Card for the First layer you are cutting on the mat. Press the up arrow to load the mat, and press the flashing light to proceed to cut on the machine. Repeat this step for all the different card layers.
(remember to change your setting before cutting the vinyl)
5. Next you need to load your mat with material on. I used the Cut setting Premium Vinyl , Pressure setting-Less. Please remember to test cut if you have not used this vinyl.
6. Proceed to trim the excess uncut areas away from the vinyl (you can save these scraps to use on other projects), before proceeding to weed all the unwanted vinyl, see below.
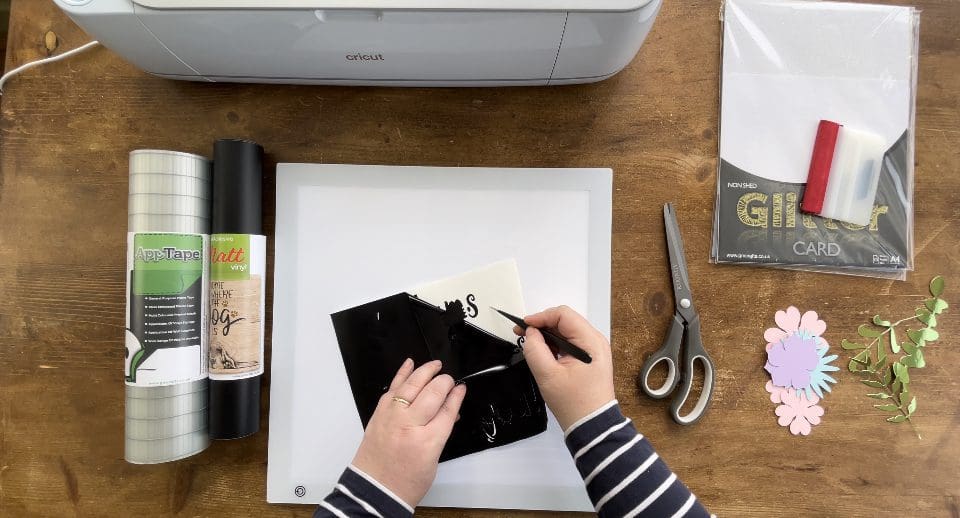
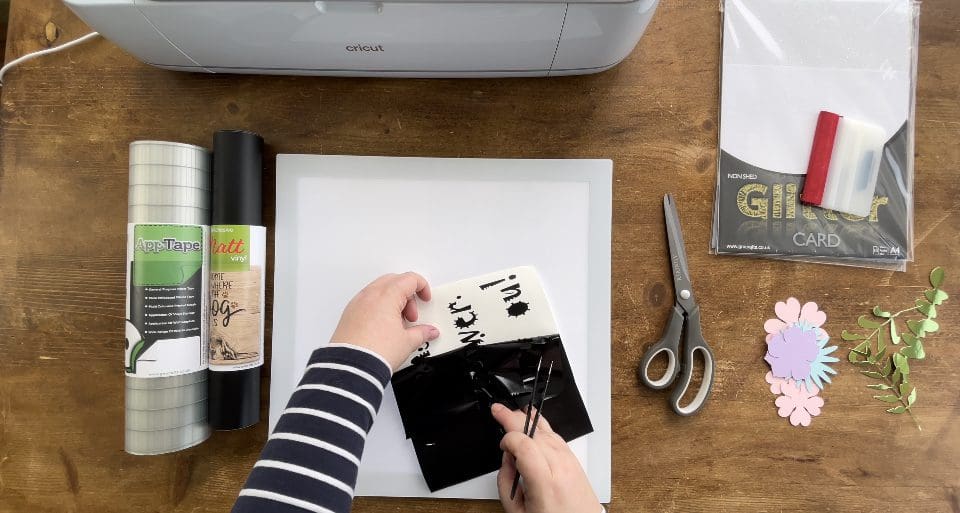
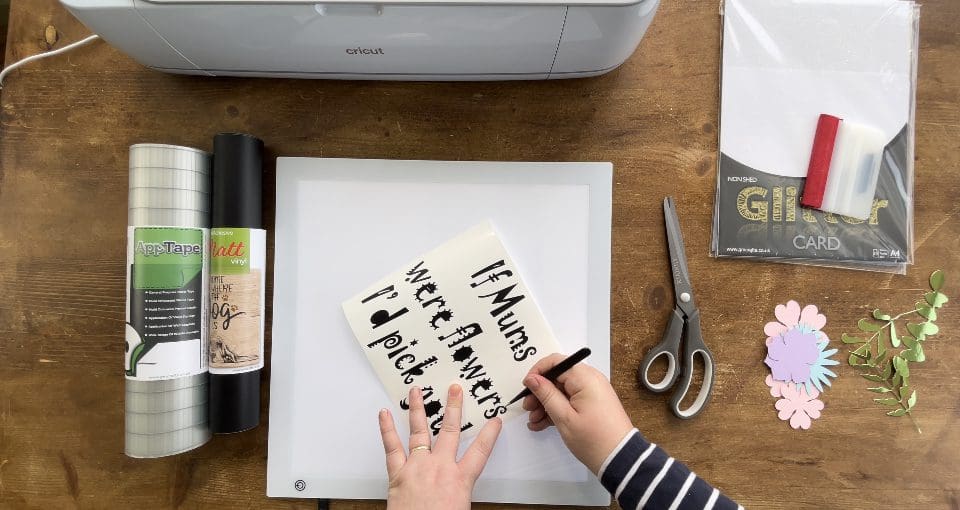
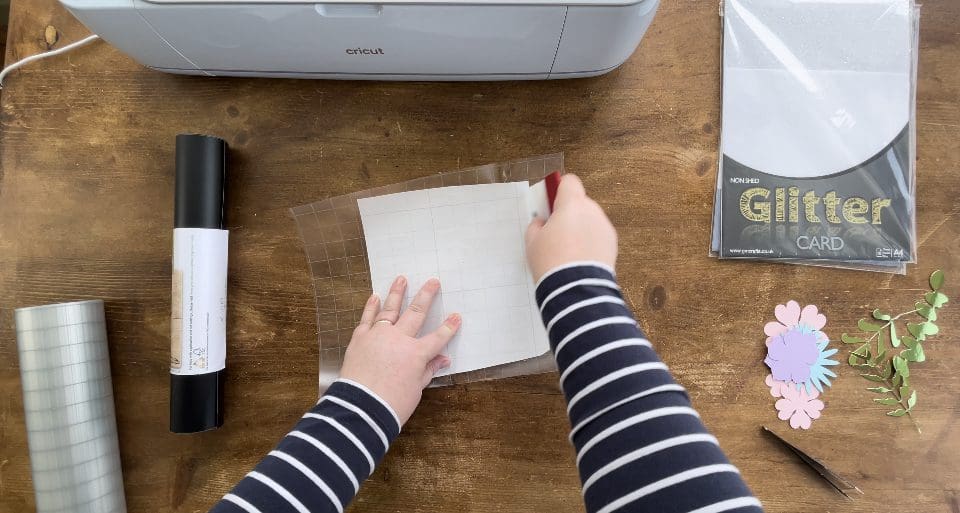
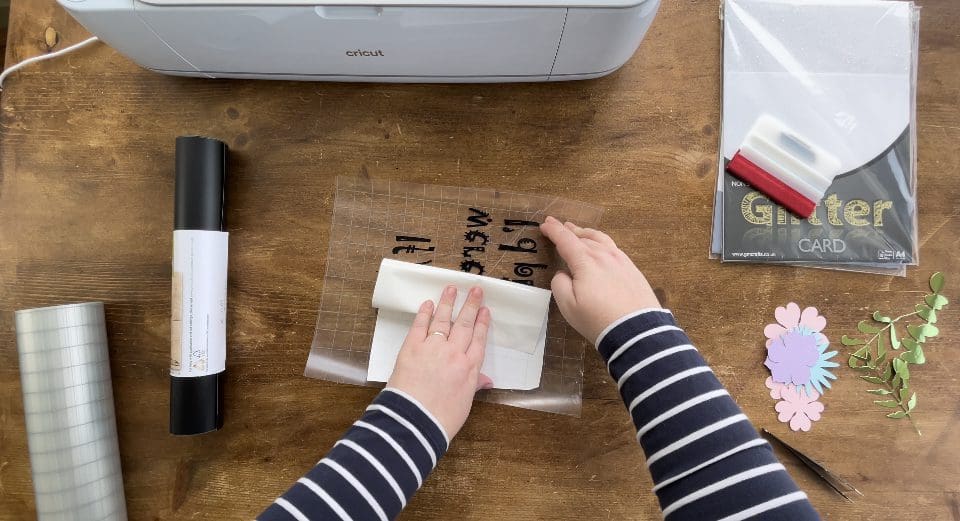
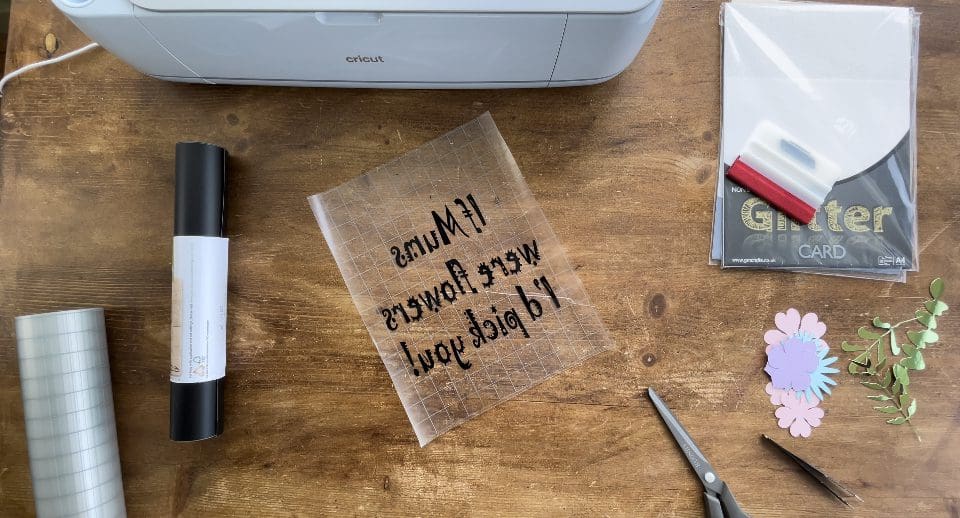
7. Take your application tape, lay the weeded vinyl layer face up on the table, place over the app tape sticky side face down. Smooth with your hand, before turning over and rubbing firmly with the squeegee to transfer it to the app tape, before peeling the backing paper away. If any area lifts with it, re rub with the squeegee firmly on the back and retry.

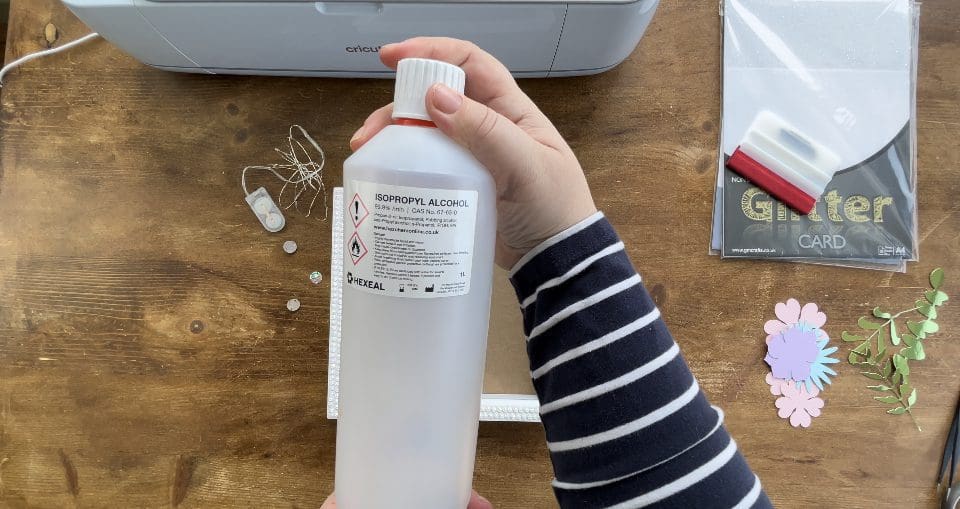
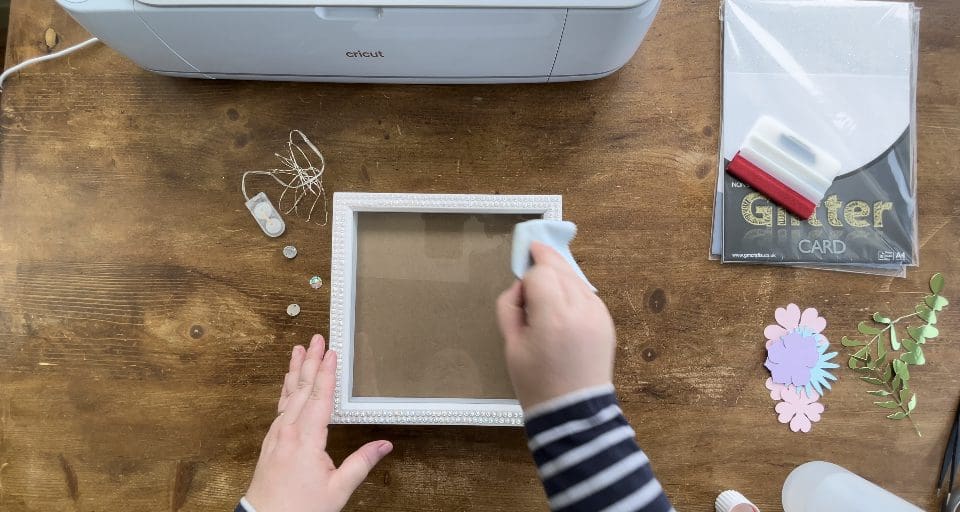
8. We now move onto your frame, put the lights to one side, ready to use. Take some pure rubbing alcohol and a lint free cloth, rub this over the hard surface and let it dry. 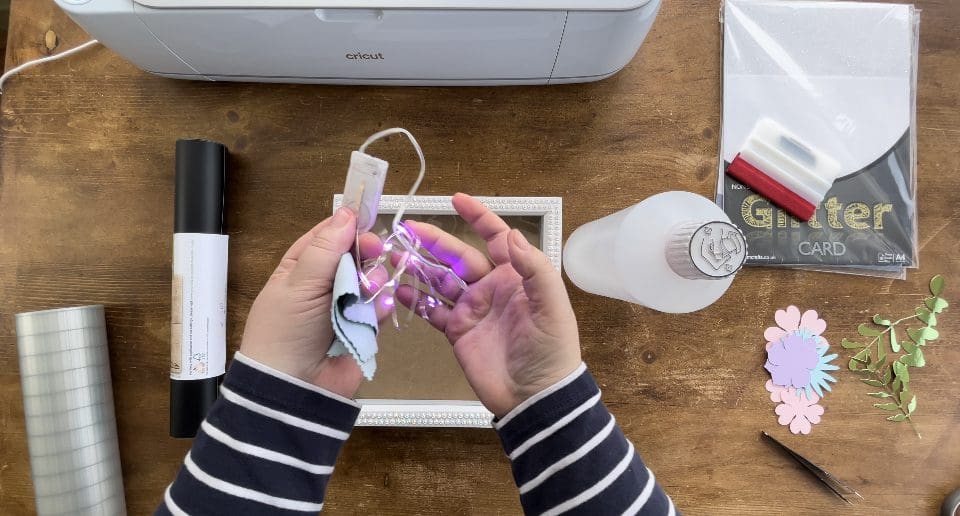
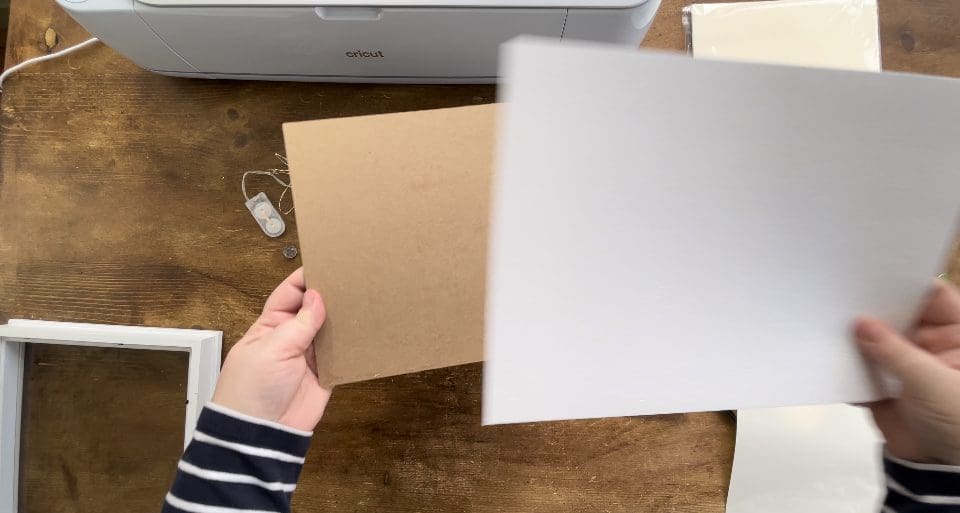
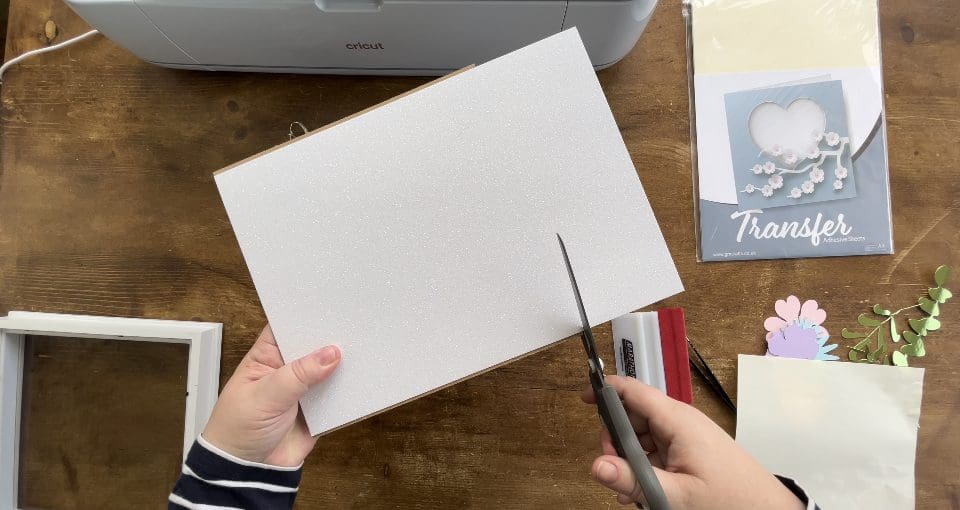
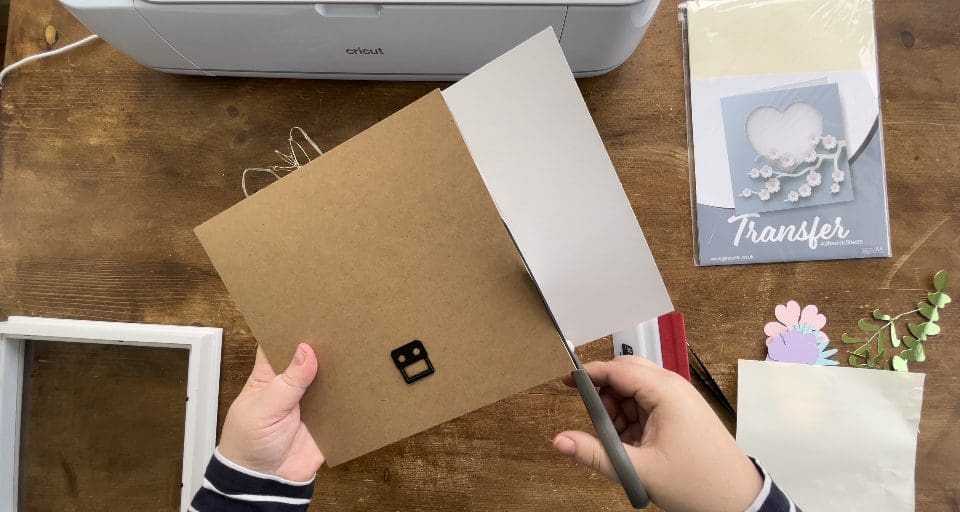
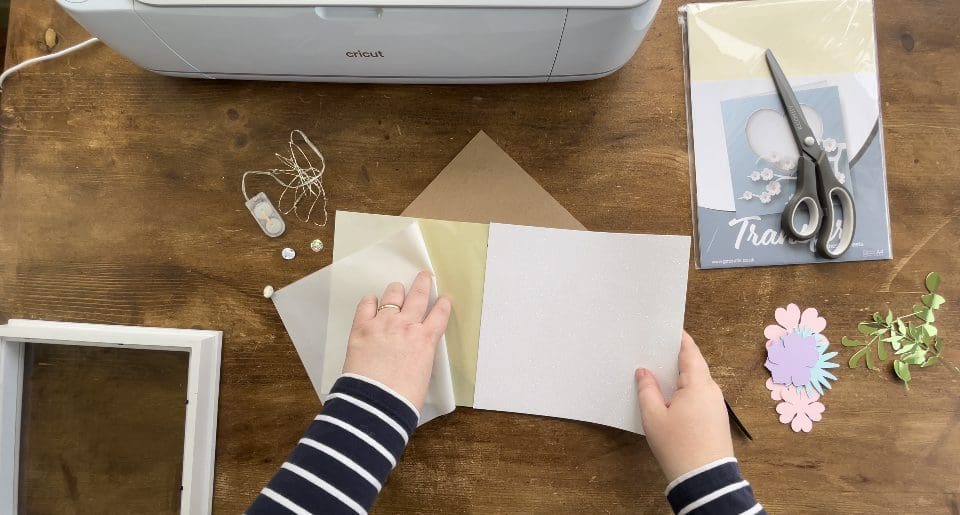
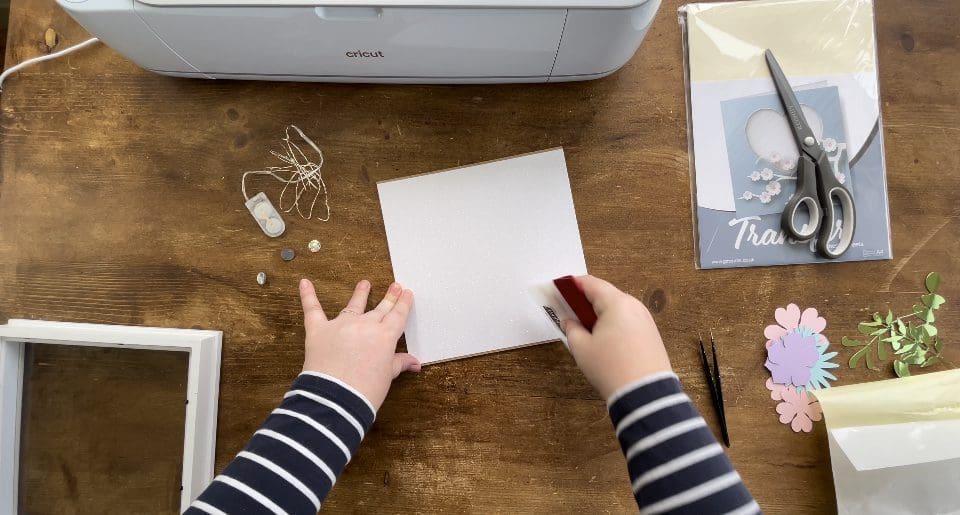
9. We then used a sheet of our non shed Rainbow White Glitter card, and trimmed it to the same size as the frame backing board.

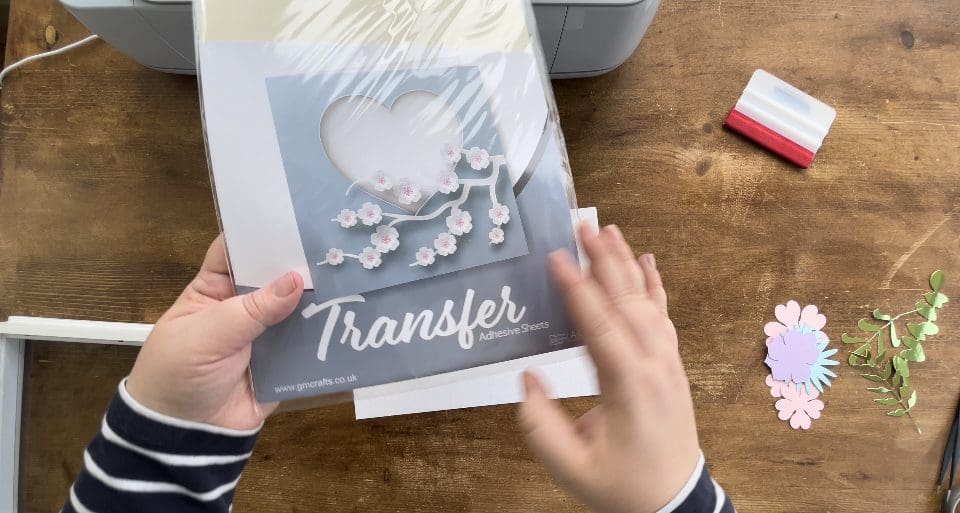
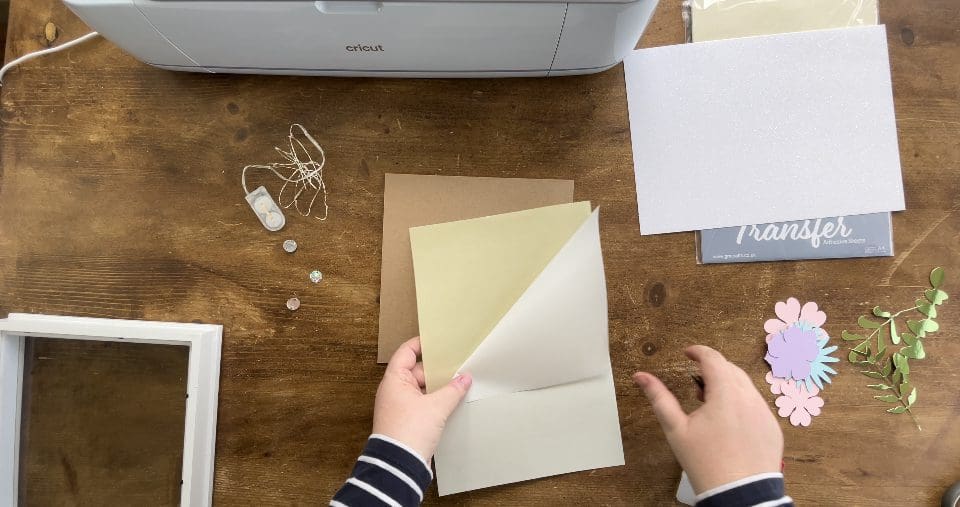
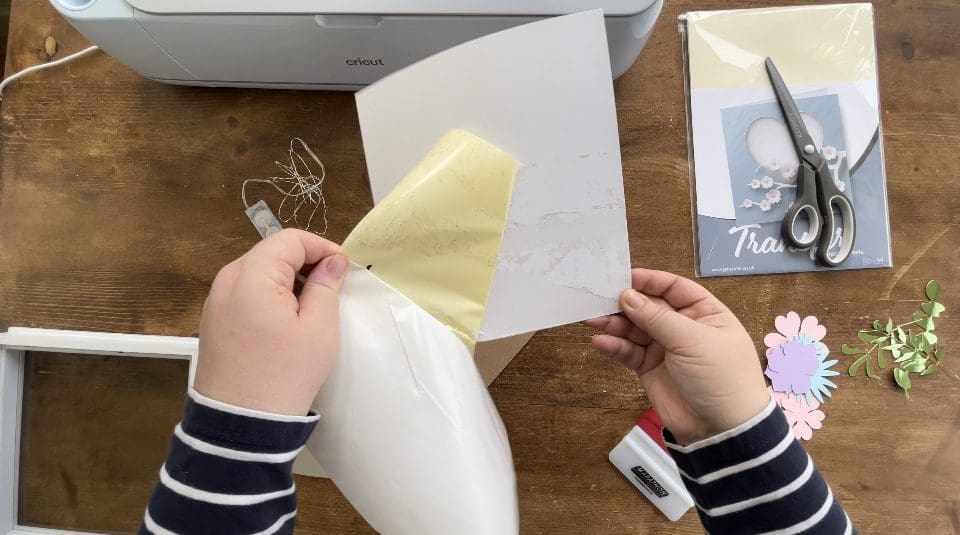
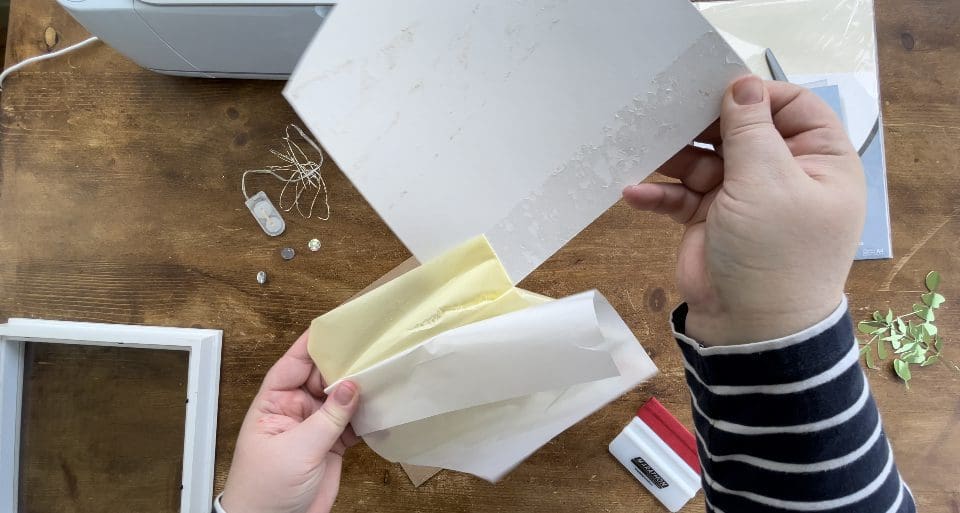
10. Using the transfer adhesive sheets (also available in a roll). Take a sheet of the transfer adhesive, as shown below, use it with the white sheet facing up, fold it back on its self to reveal the adhesive layer underneath as shown below and place the back of the glitter card onto it ready to apply to the backing board of your shadow box. See below. You can place the white sheet back over and rub should you wish. Be very careful not to tear your card when lifting off the adhesive sheet, as it is very sticky.
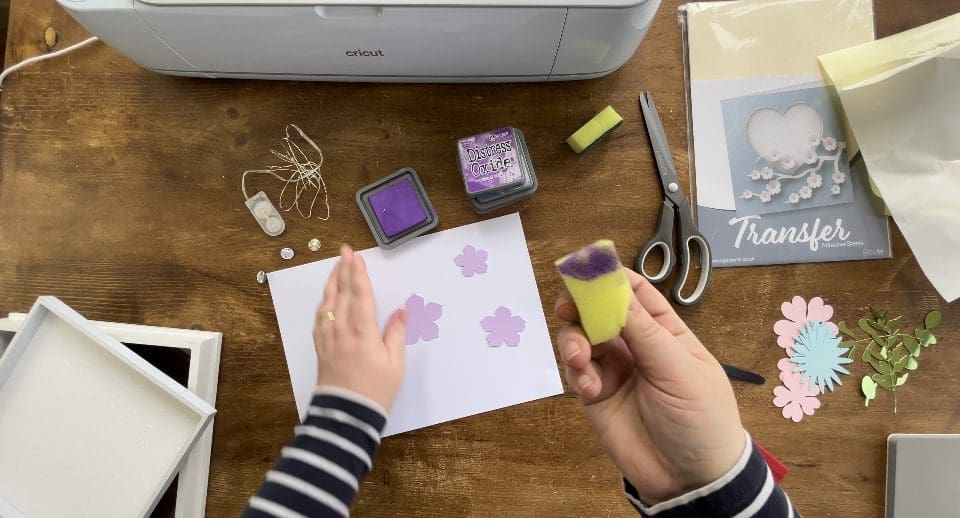
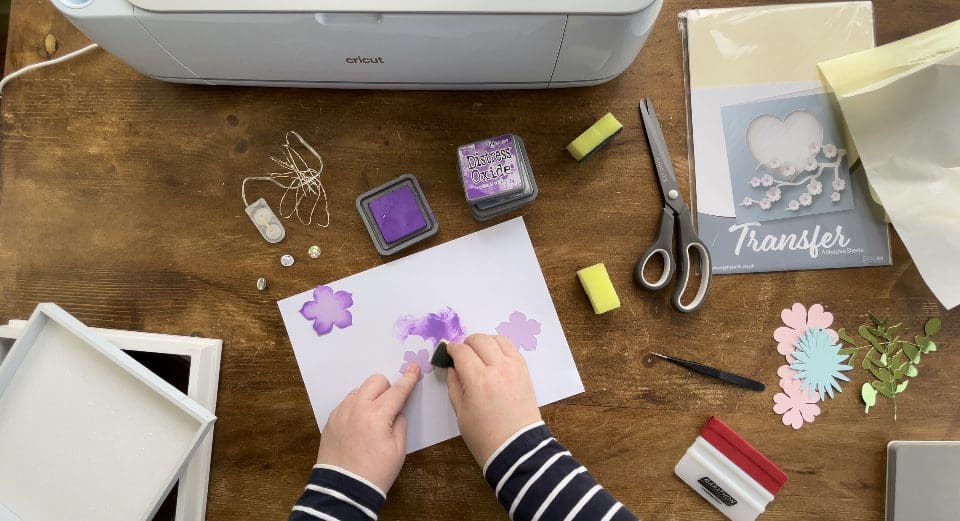
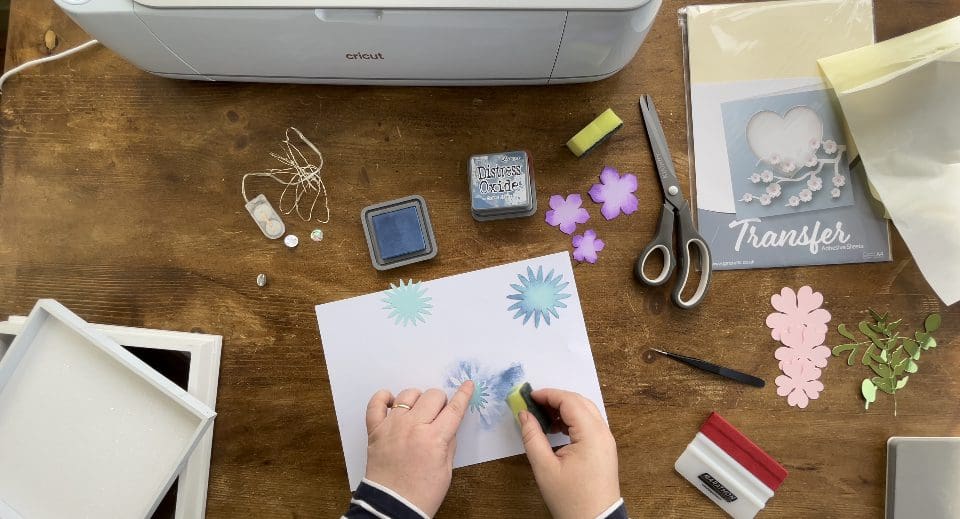
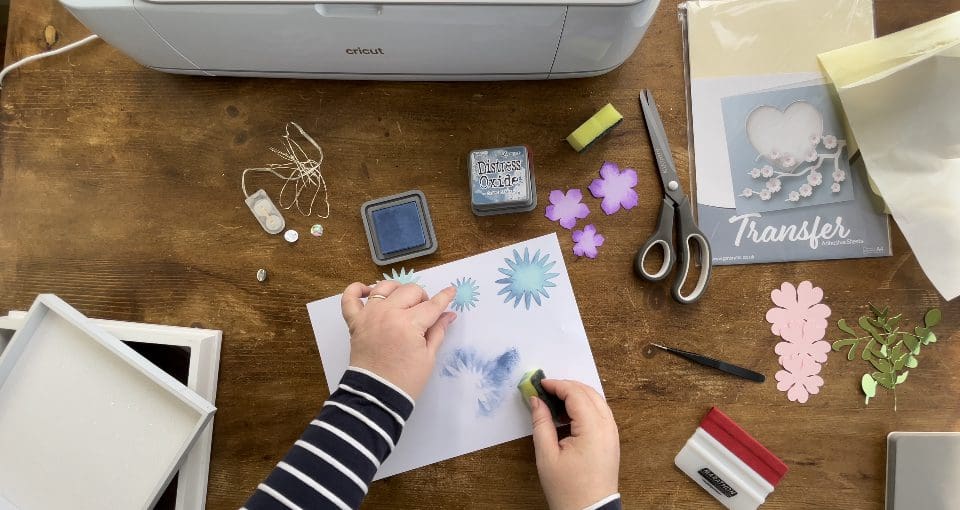
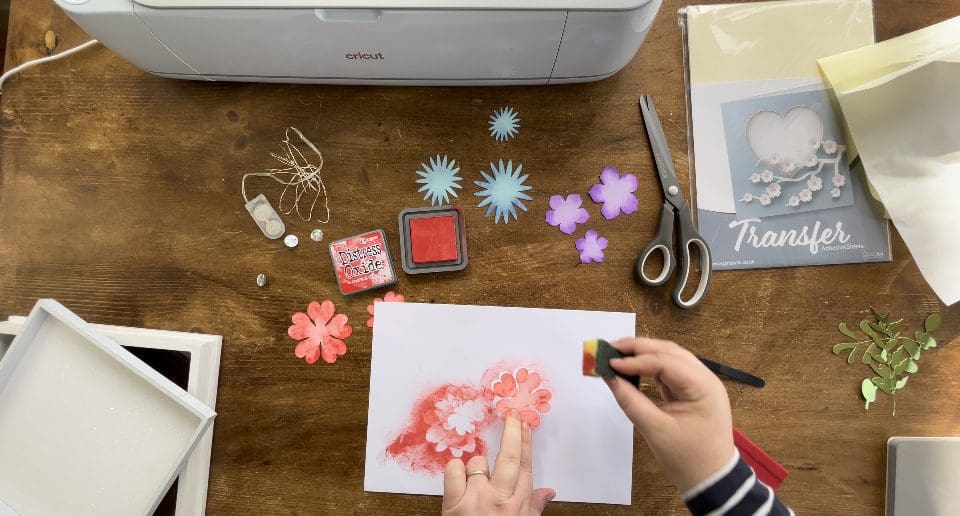
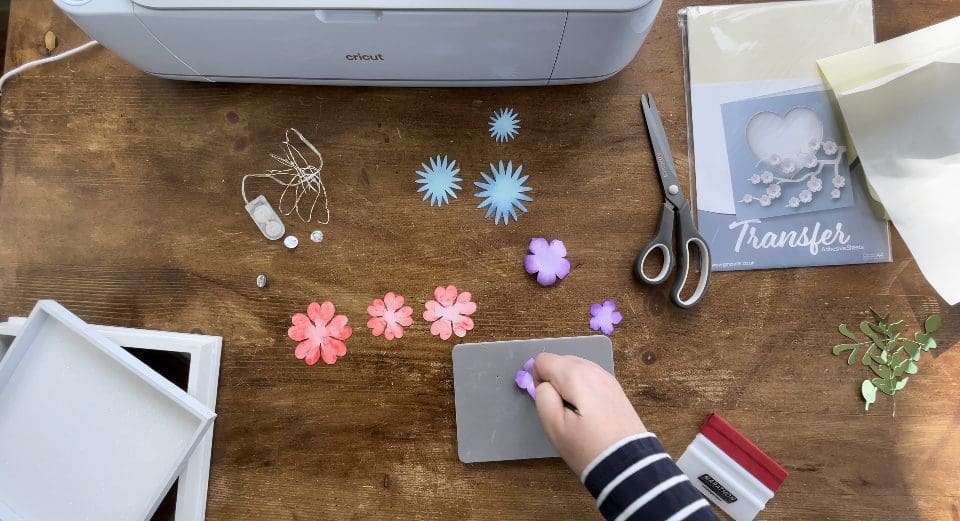
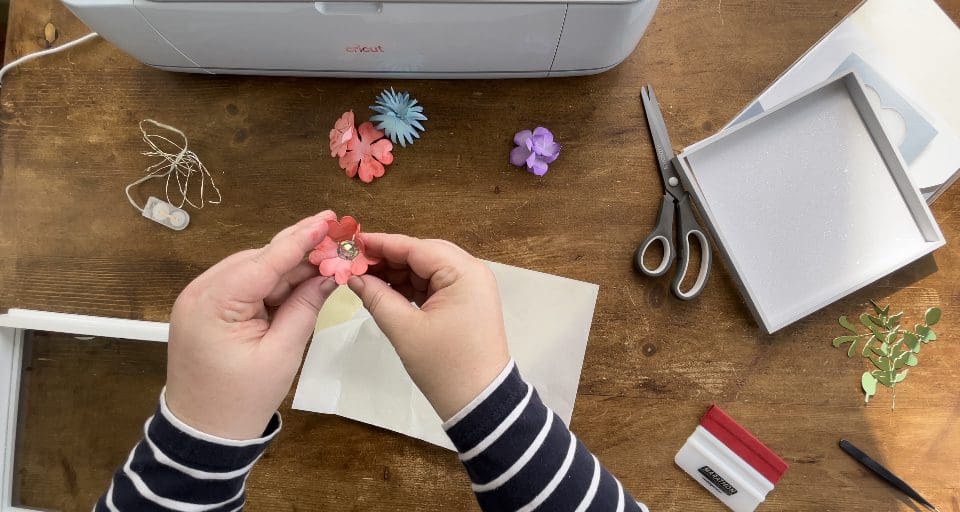
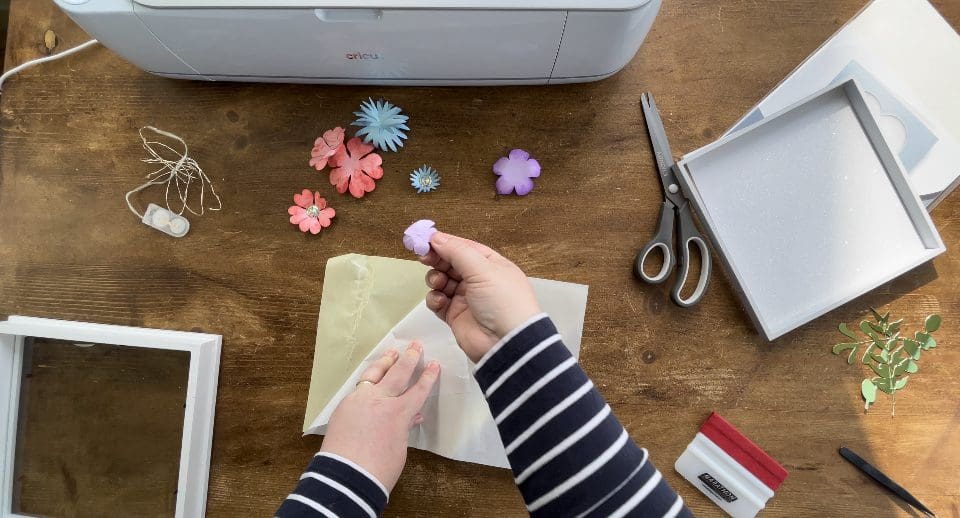
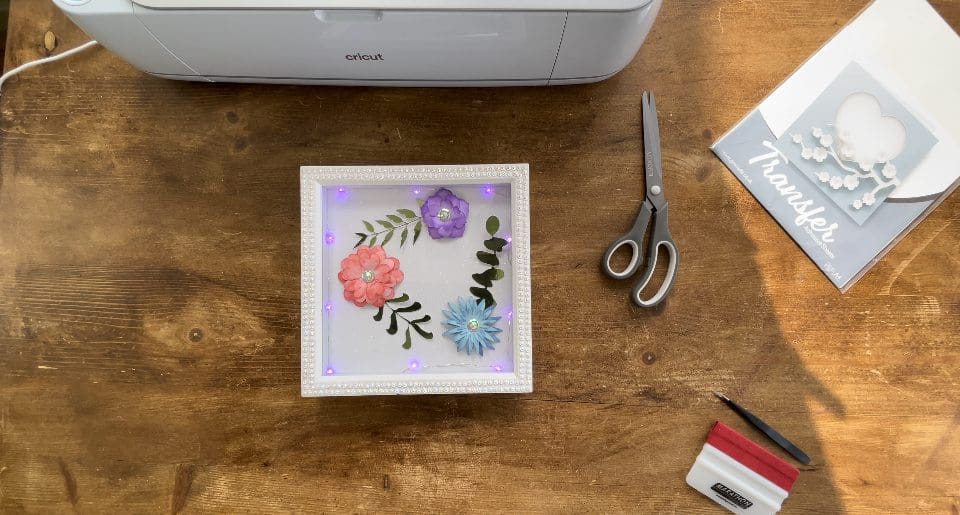
11. Now take your household washing up sponge, and cut as shown below- to use with your chosen ink pads to colour your flowers around the edges, which will give them some definition when sculpted in the next step. Dab one edge of the sponge on the ink, take a piece of paper to protect your table, and place the chosen flowers on the paper. With your sponge in your hand, move it around the flower edges only, in circular movements. You will see the ink gets lighter as you do each flower, which gives them a more natural look. I choose to ink my 3 flowers as follows- biggest (bottom flower) is the darkest so I ink this first, then the top smaller flower, leaving the middle flower last to create a more natural finish, and more contrast between layers.
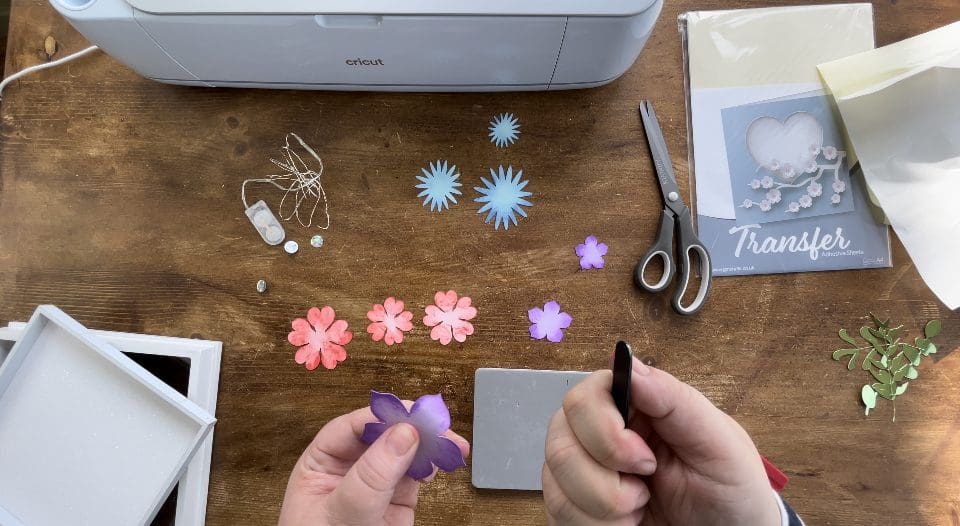
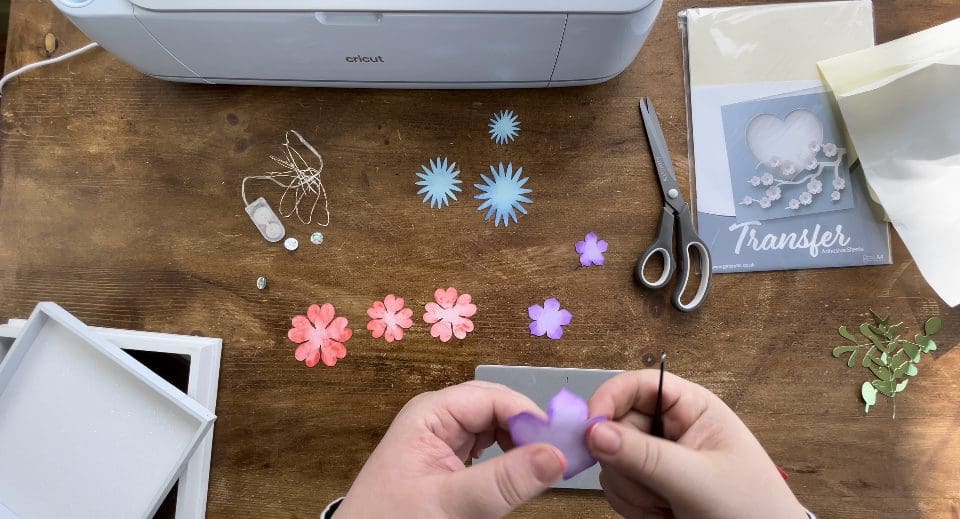
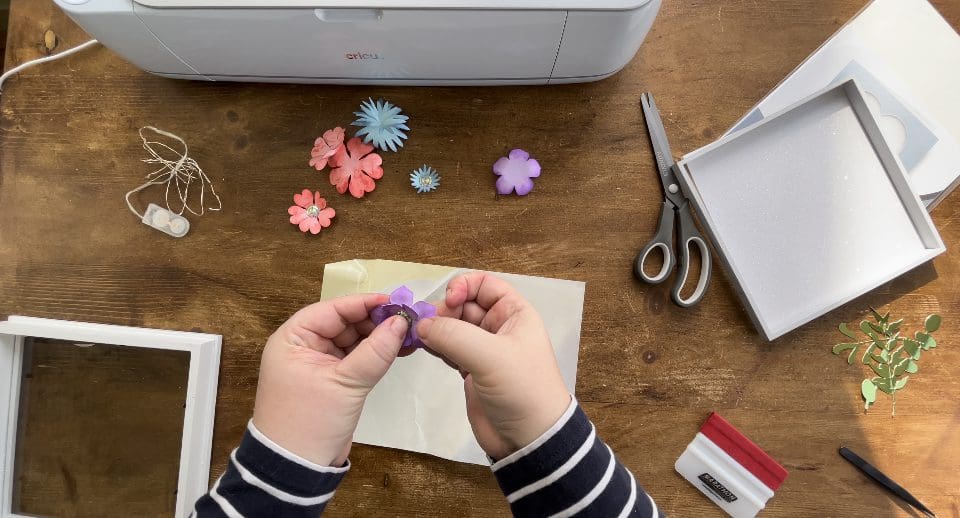
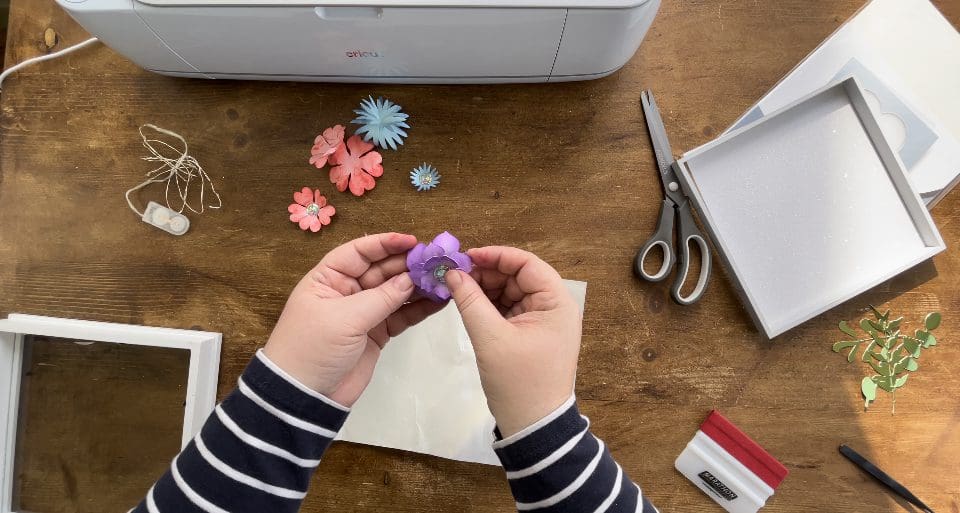
12. Now take your tweezers, (link above in what you need) using the top of the handle, as this is a straight edge, from the centre of the flower, firmly (not too hard that you rip) use the flat edge almost like when curling ribbon to shape your flower. Again when doing the 3 layers, I do the underside of the bottom layer, then the underside of the middle layer- before sitting this middle layer on the foam block and pushing the handle into the middle with the inked side of the flower, face up- to create a pinch, I repeat this in 2 directions to create a natural flower shape. Lastly take the top flower, and this time shape the inked side, and again place on the mat to create the centre pinch.
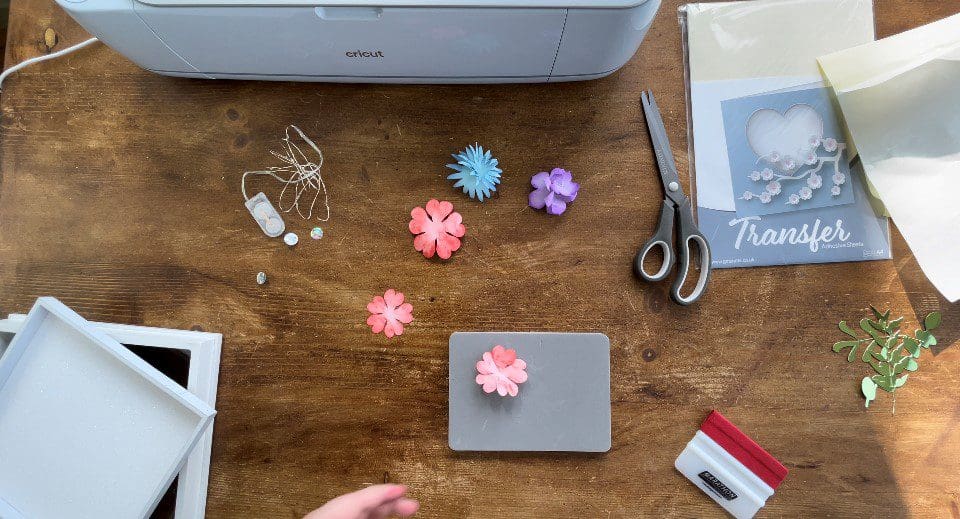
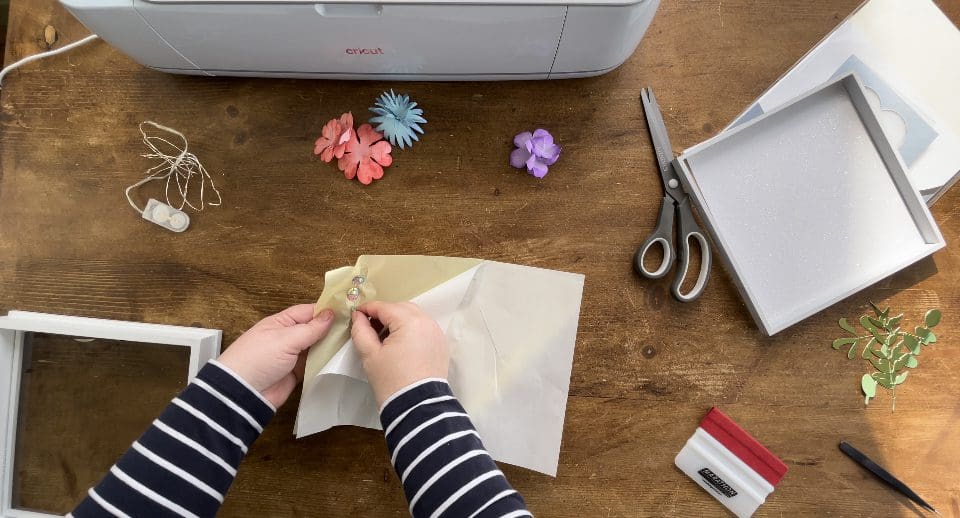
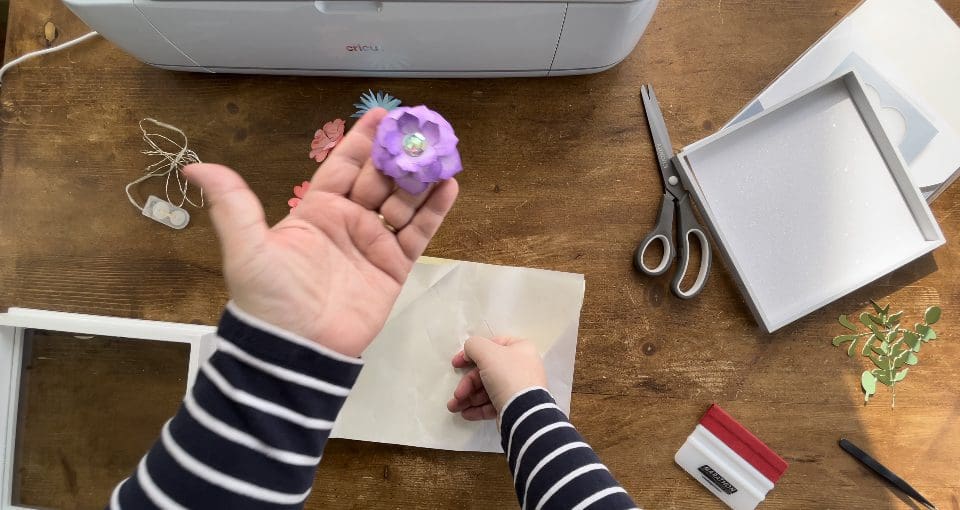
13. To start building the flowers, take your 3d gems you are using for the middles- with the same sheet of transfer adhesive you used in step 10. Place the flat backs onto the adhesive sheet and give them a good press, I do this in a couple of places, to ensure a good layer of adhesive is applied. Attach this to your top layer for each flower, once pressed firmly onto the flower, pinch the petals around the gem to create a more 3d effect.
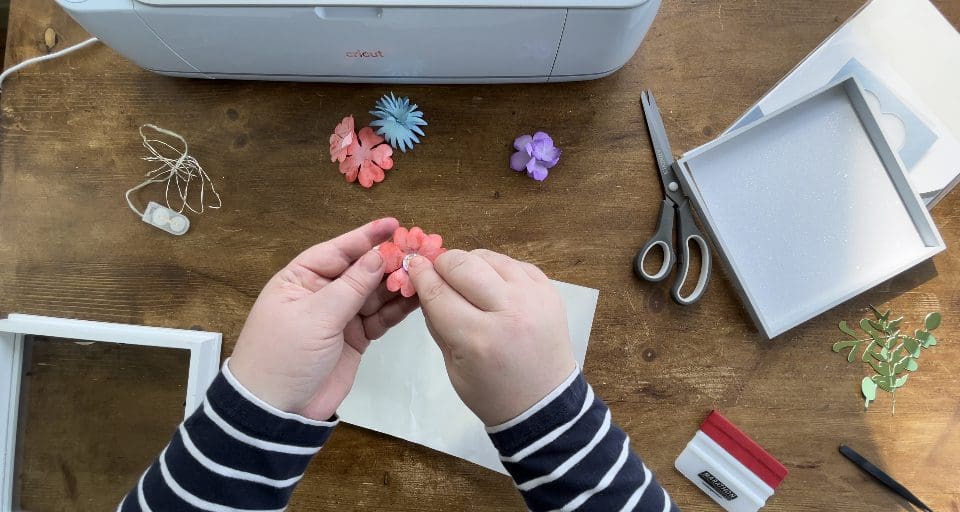
14. Once all 3 top flowers have the gems applied, take the top flower, again press the back of it onto the transfer adhesive sheet and then apply these to the middle flower layer, before repeating for the 3rd layer, Repeat this for all 3 flowers.
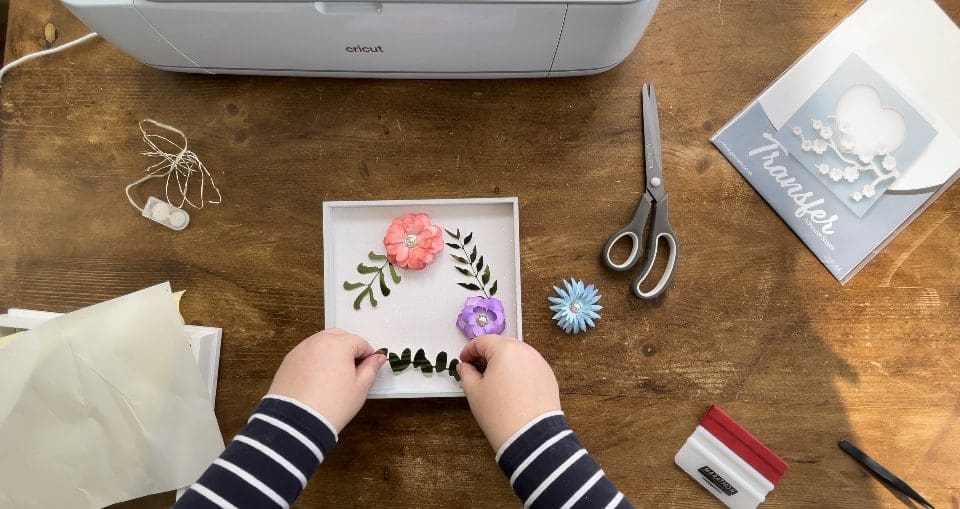
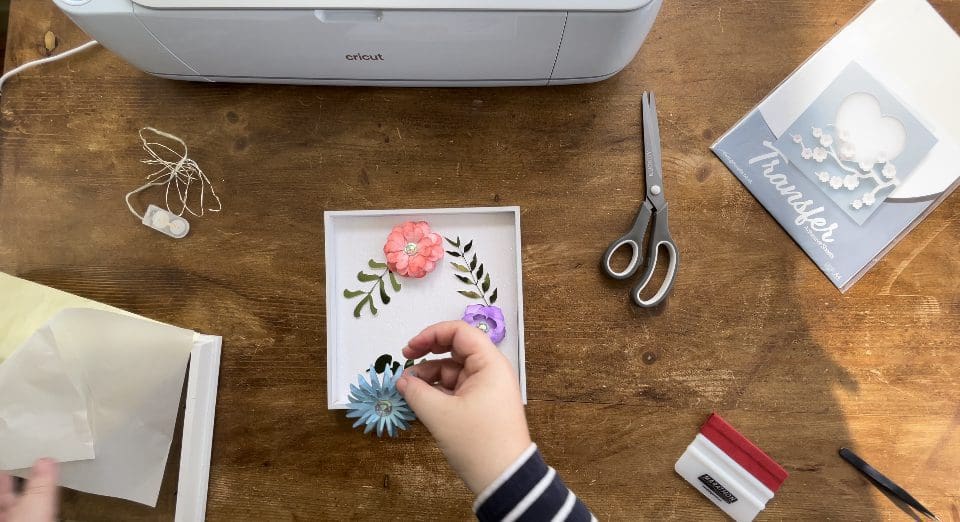
15. I then take my shadow box insert and place it over the back board that we already stuck the glitter card to, just so I can decide on my preferred layout, placing the foliage and flowers and moving them around until I am happy with how they look.
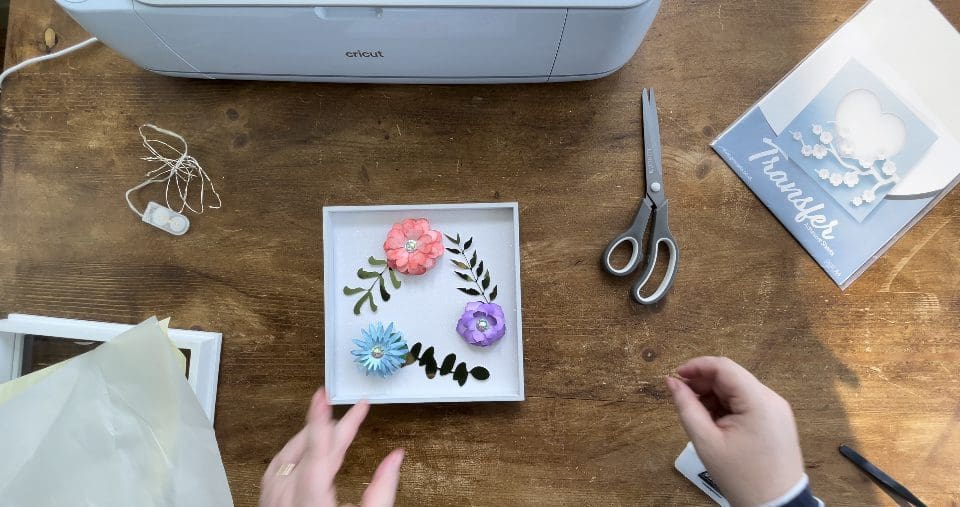
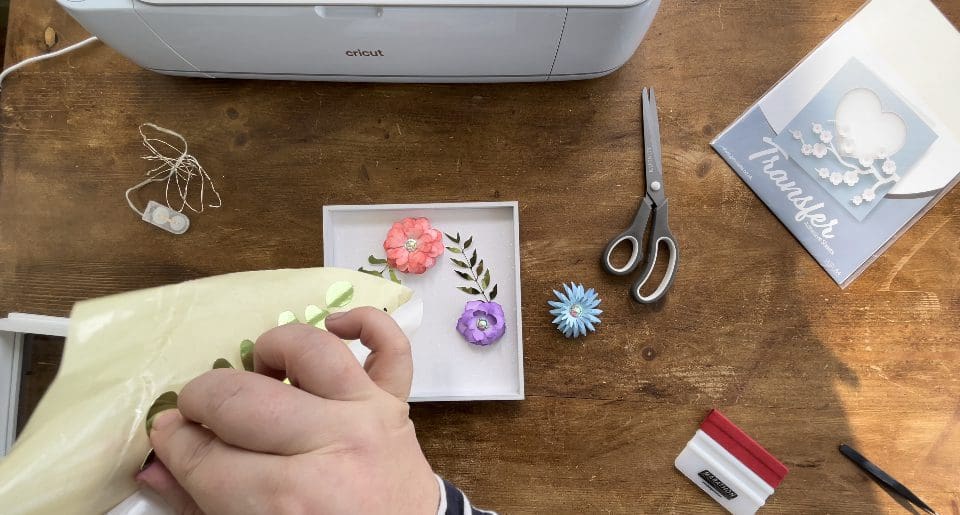
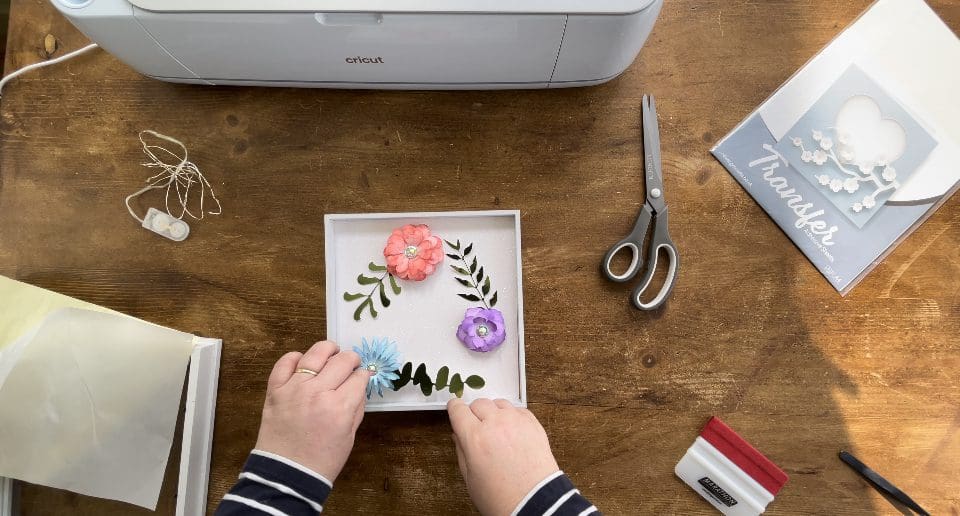
16. Once I have found the correct placement- again I go back to my sheet of transfer adhesive, and use this to stick my foliage in place, before then using it to apply to the back of the flowers, and stick them to my glitter background- you can use self adhesive 3d Foam pads should you prefer, or even dry clear glue.
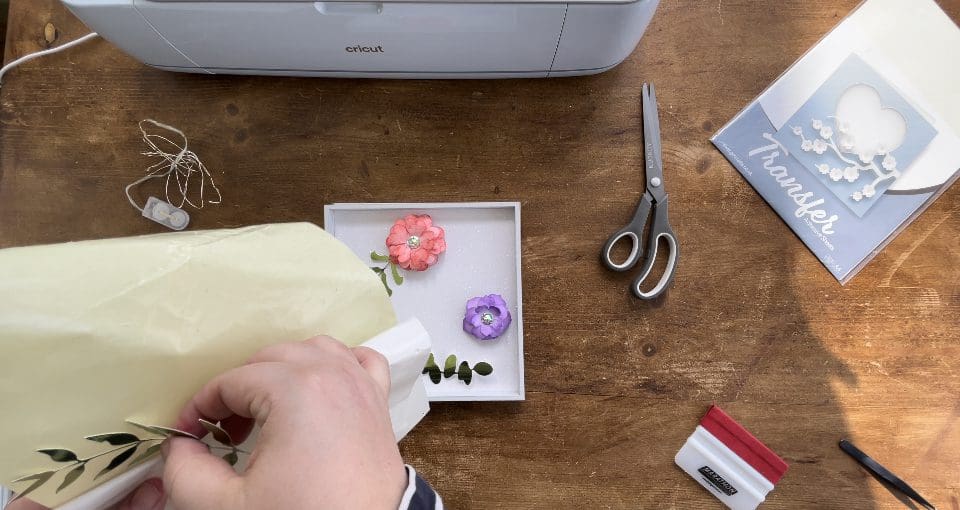
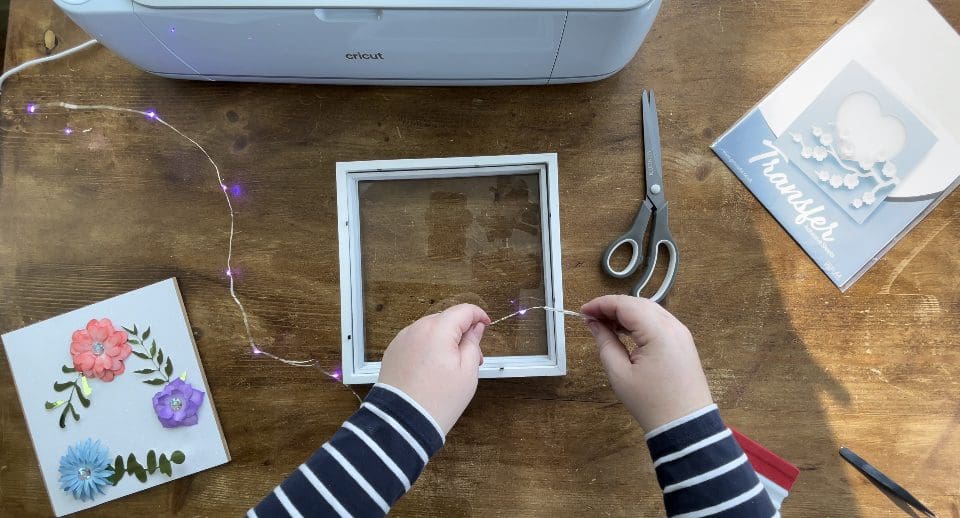
17. Once I am finished sticking everything down, I then pop the frame insert for the shadow box, back inside, and take my LED lights, poking the wire between the frame and the insert to trap the lights in place as I place them around the inside edges. If your box frame doesn’t have one, you can use clear tape, glue gel, or tiny scraps of your white card and the transfer adhesive to hold the lights in place should you need to. Ensure you keep the wire hanging out the back to switch on and off later.
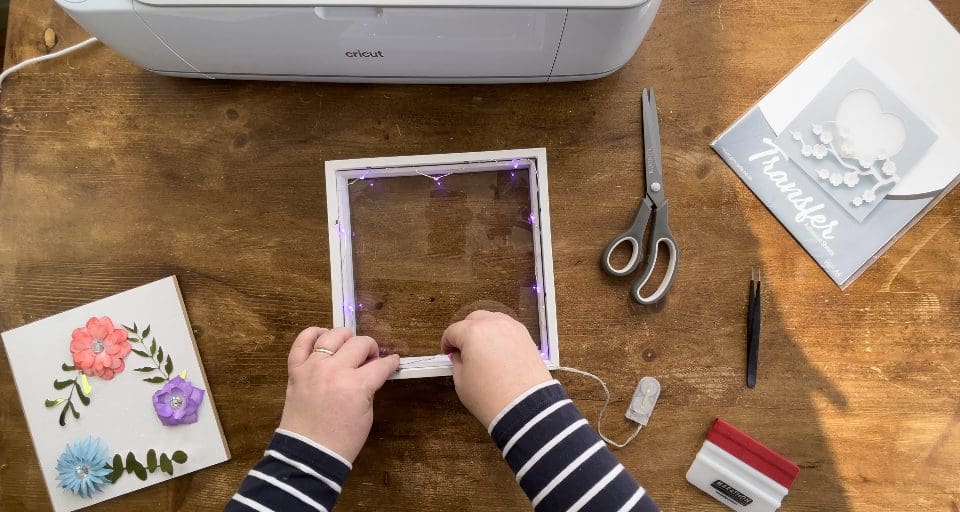
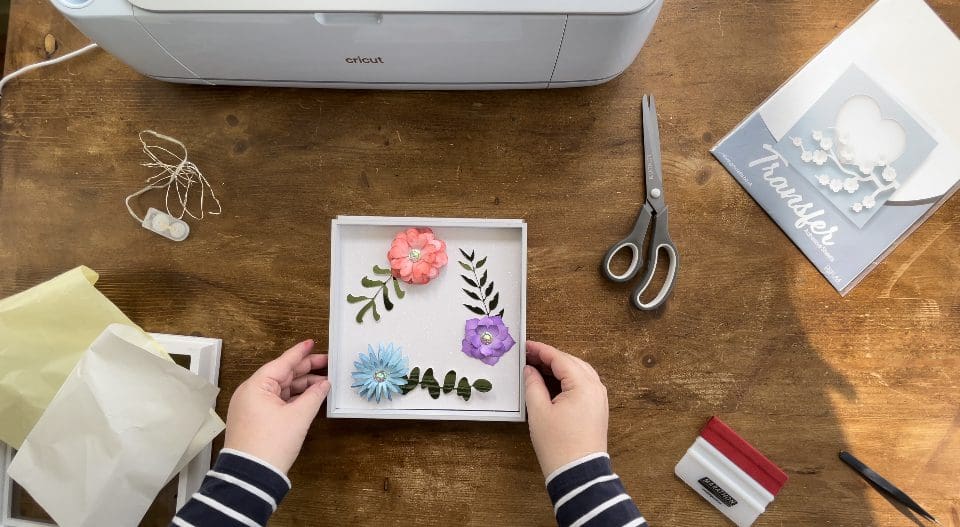
18. Place the back board on, secure with it’s own clips, and turn the frame over- I used the hook on the back to tuck into my battery pack, keeping everything neat- see the video.
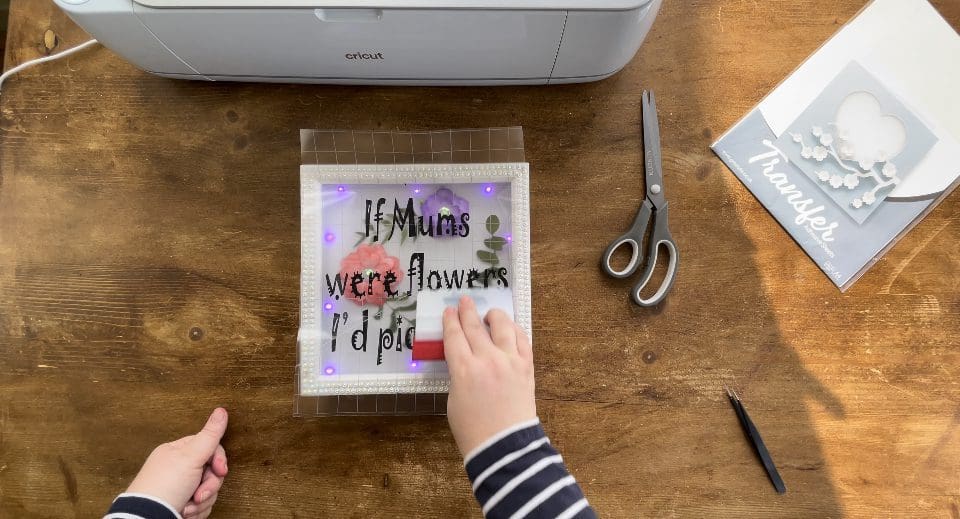
19. Lastly take your vinyl on the application tape you prepared earlier in step 7, lay it in the correct position on the frame before rubbing firmly with your squeegee to apply. Remove the app tape by carefully peeling backwards on it self see below. If any areas lift whilst doing this, put the app tape back down and re rub those areas, before repeating.
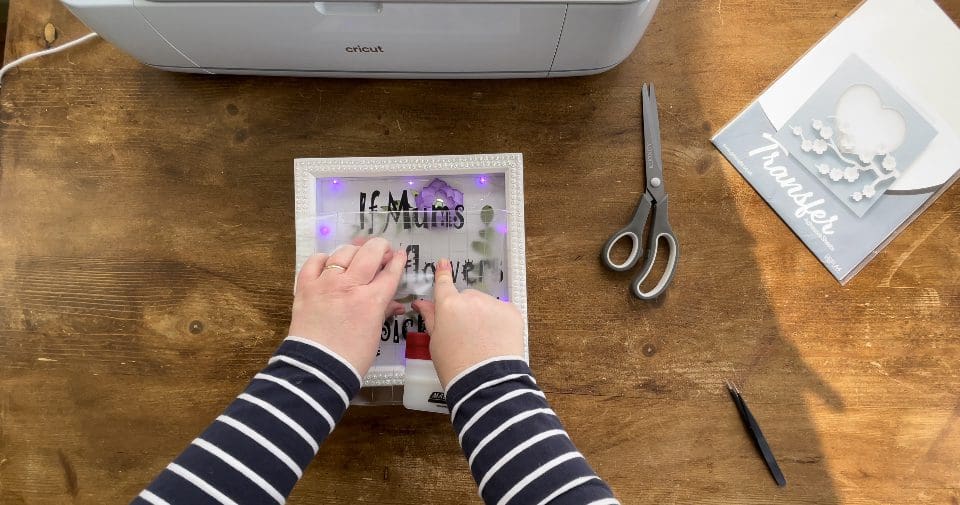
REMEMBER THAT YOU CAN USE HTV OR SELF ADHESIVE. FOR LAYERING ADVICE FOR HTV SEE THIS BLOG BY CLICKING HERE. SEE BELOW FOR BROTHER AND SILHOUETTE INSTRUCTIONS.
Instructions:
Before you start, you need to download the cut file, Upload the cut file into Silhouette Studio, click the file and choose release compound path to separate each layer, and resize or regroup as necessary, (when resizing bring all layers into the design software and select all at once to get the correct offset layers and save the adjusted file, so you can cut layers individually at that correct scale you have chosen) Remember to test cut if necessary and cut settings are found here along with test cut guidelines for every machine.
Brother Cut File
To import these files into the Brother Canvas Workspace:
After downloading, please log in as usual to your design space account, open a new project mat, then left click on the SVG icon in the top left bar in canvas, this will then allow you to import your files. Once you left click this icon, a pop up box appears with you to choose where to import file from, choose to import the file from your downloads list or where you have chosen to save when unzipped. ENSURE YOU GROUP FILES BEFORE RESIZING OR MOVING- FOR EXAMPLE THE BUNNY EARS.
Cut settings are found here
Just incase you need the link CanvasWorkspace (brother.com)