
Tutorial/Free Cut File
Valentine’s Day Gift Boxes Tutorial – Silhouette Portrait 3

Hello!
Welcome to the first GM Crafts tutorial blog posts of 2021. 2020 was a challenging year for everyone, but we hope you at least ended the years happy and healthy. 2021 brings with it new possibilities and also 365 new days to get crafting! We’re here to help you get started with these cute Valentine’s Day gift boxes. Everyone could use a pick-me-up at the moment, and these thoughtful boxes are the perfect way to let someone know they’re loved this February 14th – whether that be your significant other, friend, family or your neighbour who lives alone. You can fill them with whatever you want and they’re the perfect letter box size.
We would love to see what you make! Have you found our You Tube channel yet? The video showing this and all of our other tutorials are available on there, as well as exclusive demos, inspiration and more! Join us on Facebook , Instagram or Tiktok or send us an email to sales@gmcrafts.co.uk we would love to hear from you!
***watch this being made here***

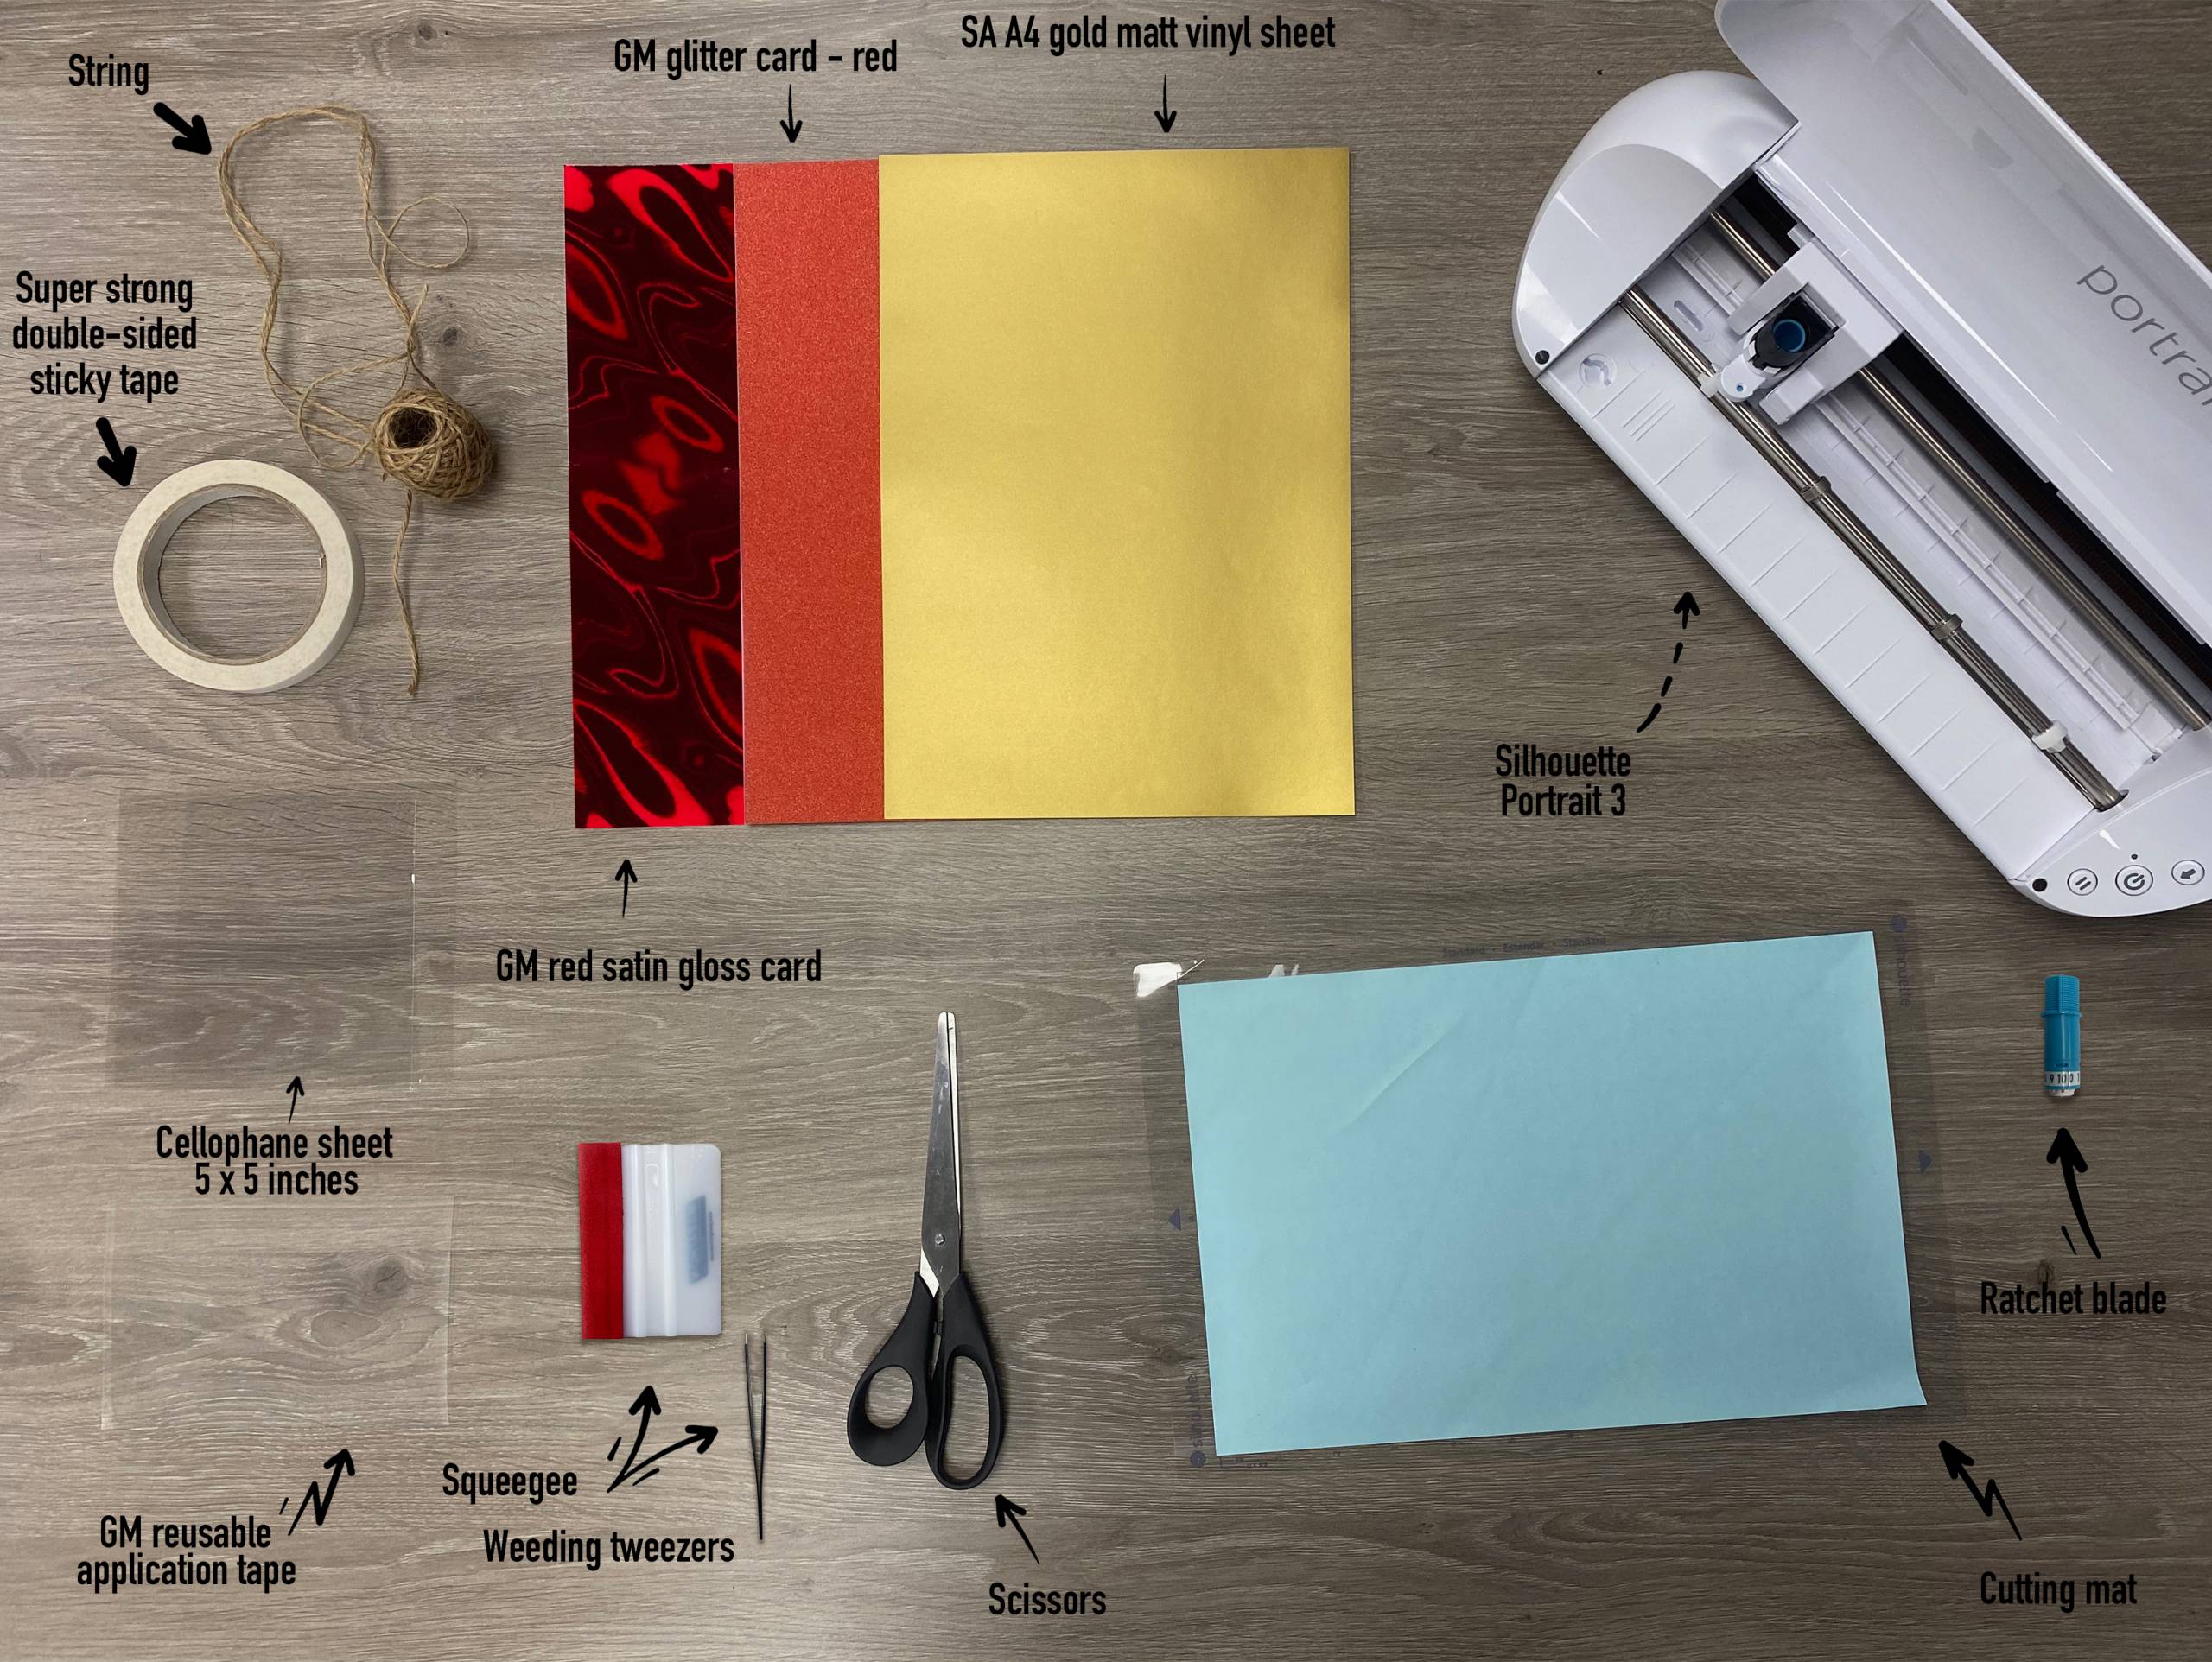
What you’ll need:
- A cutting machine. (We used a Silhouette Portrait 3 machine and the instructions/cut settings used are specific to this machine. That doesn’t mean you can’t play around and use another machine, just always make sure to test cut).
- Cut mat
- Ratchet blade
- Scissors
- Weeding tweezers
- Squeegee. Available here
- Super double-sided adhesive tape. Available here
- GM reusable application tape. Available here
- GM Red Glitter card. Available here
- We used GM Red Satin Gloss card. Available here
- GM Self-Adhesive A4 Gold Matt vinyl sheets. Available here
- Cellophane sheet 5×5 inches. Available here
- The box cut files, which we are giving to you for free below!
Silhouette Instructions:
** A reminder that the cut settings used in these instructions are specific to the material we are using. Prior test cutting is necessary if using different materials**
1. Download your cut files. You’ll need to cut the base, whichever top you want and the writing cut files. There’s 3 to choose from ‘Thinking of you’, ‘Miss you’ or ‘Love you’. The text cut file needs to be the same as your cover cut file. Download the zip file with these in below, it will download as a zip file which you will have to double click to open as a normal file:
2. Open the cut files in silhouette studio. The cut files sizes are already set to make a 5 x 5 inch box. If you’d like a larger box, you can resize them. If you do this, make sure the lid remains slightly bigger than the base so that there’s room for it to slide onto the base. Also make sure the writing is the correct size to fit the cover. You can copy and paste the writing and resize against the lid, if you wish. Just remember to delete the writing from the lid cut file before sending it to cut.
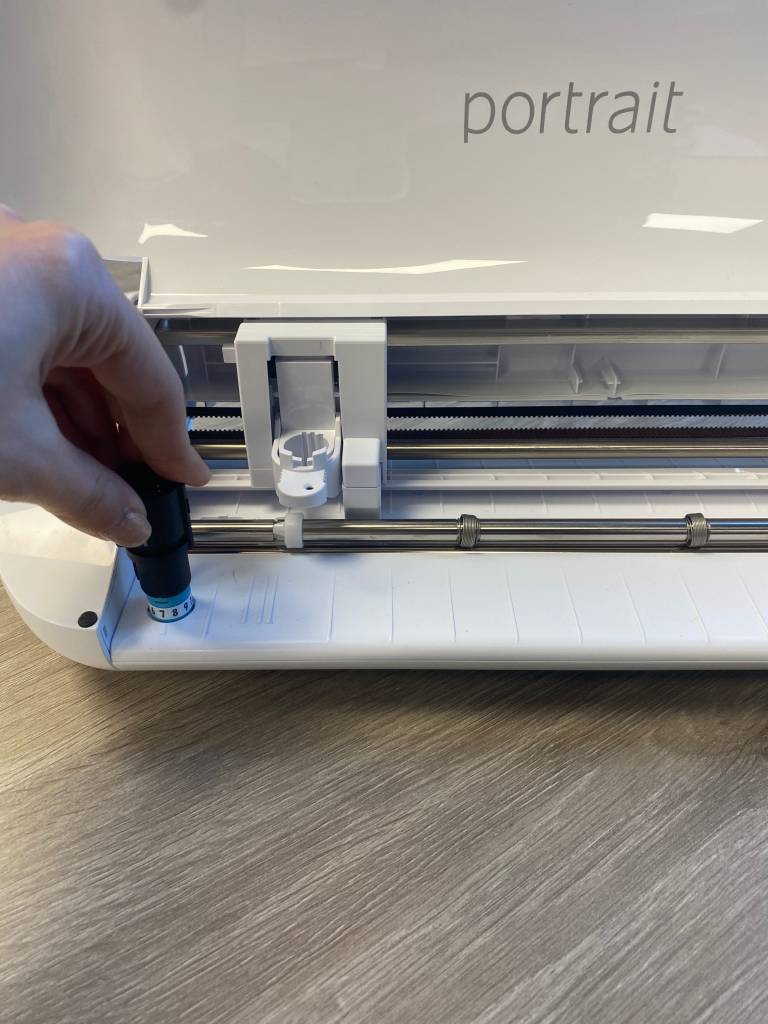
3. Make sure the ratchet blade is set to 7.
4. Position the GM Red Glitter card on the cutting mat and lighting press down on it to make sure it’s secure. Load the mat onto the machine by pressing the upwards arrow button on the machine.
5. In the send panel make sure sure you select the ‘Line’ option so that the different coloured lines are differentiated. This way you can set the red lines as cut lines and blue lines as score lines. Set the cut settings as the following:
Cut settings for the red (cut) line:
Material – Cardstock, Glitter
Action – Cut
Carriage – Ratchet
Force – 28
Speed – 3
Passes – 1
Cut settings for the blue (score) line:
Material – Cardstock, Plain
Action – Score
Carriage – Ratchet
Force – 14
Speed – 3
Passes – 1
**A reminder that these settings, including the blade setting, are specific to the materials and machine we’re using, adjustments may be necessary if using different materials and machine**
6. Test Cut by selecting the ‘Test’ button at the bottom right of the screen. Adjust settings if necessary. When happy with how your material is cutting press ‘send’ to cut the base.
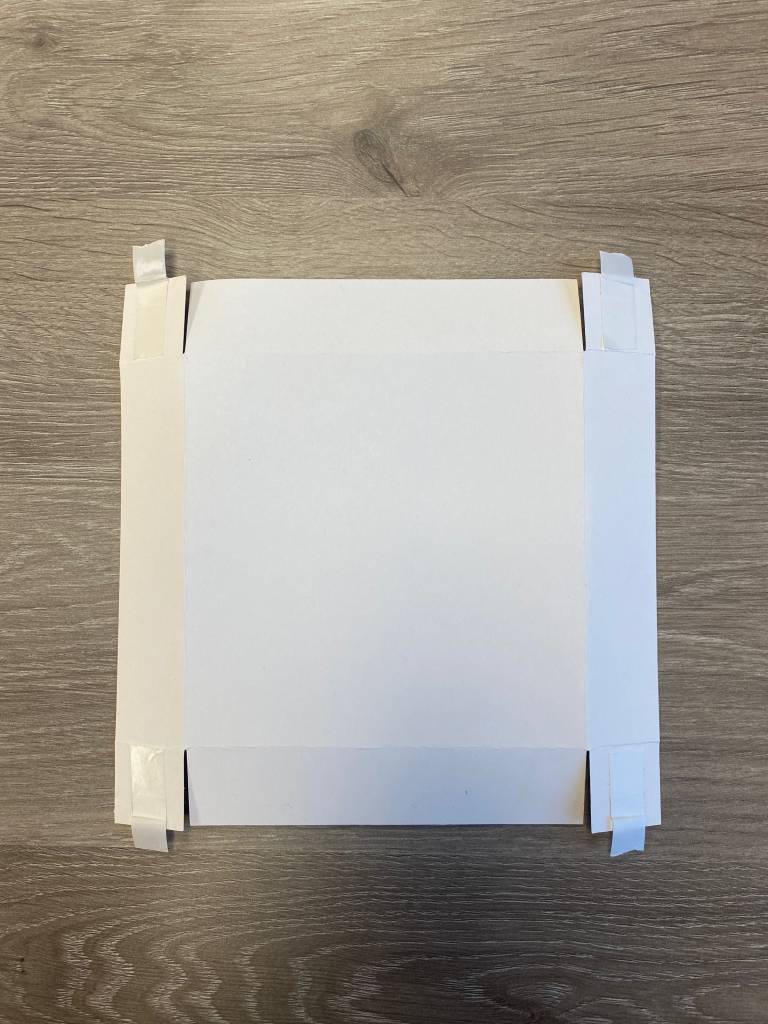
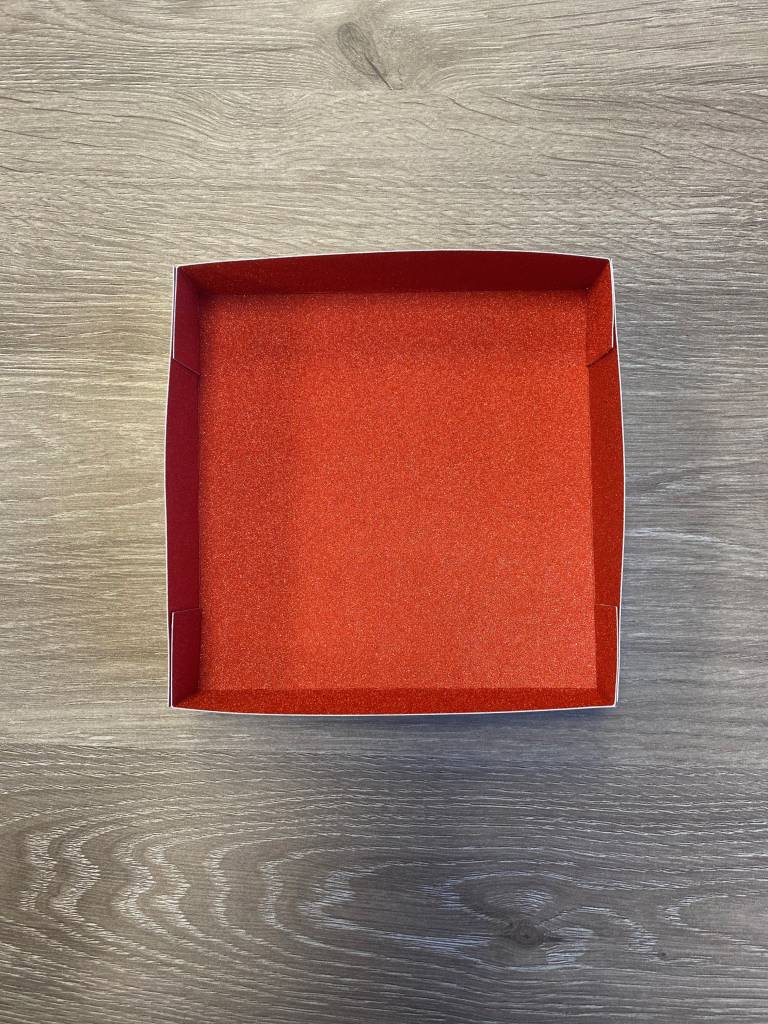
7. Release the cutting mat from the machine and peel off the design making sure the design is clean cut. Gently fold the score lines, then turn over and apply sticky tape to each corner. Assemble the base.
8. Open the lid cut file in silhouette studio. Again in the send panel make sure sure you select the ‘Line’ option so that the different coloured lines are differentiated. Set the cut settings as the following:
Cut settings for the red (cut) line:
Material – Cardstock, Glitter
Action – Cut
Carriage – Ratchet
Force – 27
Speed – 3
Passes – 1
Cut settings for the blue (score) line:
Material – Cardstock, Plain
Action – Score
Carriage – Ratchet
Force – 5
Speed – 3
Passes – 1
9. Position the GM Red Satin Gloss Card on the cutting mat and lighting press down on it to make sure it’s secure. Load the mat onto the machine. When happy with your test cut, send the design to cut.
10. Release the cutting mat from the machine and peel off the design making sure the design is clean cut. Put to one side.
11. Time to cut the vinyl. Make sure the ratchet blade is now set to 1. Open your writing cut file in silhouette studio.
12. Position the vinyl on the cutting mat and lighting press down on it to make sure it’s secure. Load the mat onto the machine.
13. In the send panel make sure sure you select these settings:
Material – Vinyl, Matte
Action – Cut
Tool – Ratchet blade
Force – 15
Speed – 5
Passes – 1
14. Test cut and adjust settings if necessary. When happy with your test cut, send the design to sut.
15. Release the cutting mat from the machine and cut a square around the writing. Weed the design leaving just the writing on the white release liner.
16. Cut your application tape to size. Apply your application tape and use the squeegee to firmly rub the app tape making sure the vinyl sticks to it. Turn over and peel off the white carrier sheet so that the vinyl writing is left on the application tape.
17. Position the design on the lid card and stick to the card. Turn the card over and using a squeegee firmly rub the design area. Turn back over and slowly peel off the application tape, leaving the vinyl on the box lid.
18. Apply the sticky tape to the edge of the open ‘window’ as shown below. Position the cellophane square and stick onto the card.

19. With the white side facing upwards, gently fold the score lines. Turn over and apply tape to the corner flaps, then assemble the cover.
20. Fill with whatever you want! We tried cookies and sweets. We wrapped the cookies in baking paper and added a jute twine bow for decoration.
Hope you enjoyed this blog post. If you do end up making some of these lovely boxes please tag GM Crafts in a photo of them on Facebook or Instagram! We would love to see them.
What materials we used for the other boxes:
Miss you box:
Base: GM Flamingo Pink Glitter Card. Available here
Lid: GM Rose Gold Satin Card. Available here
Vinyl: GM Self-Adhesive A4 Silver Matt vinyl sheets. Available here
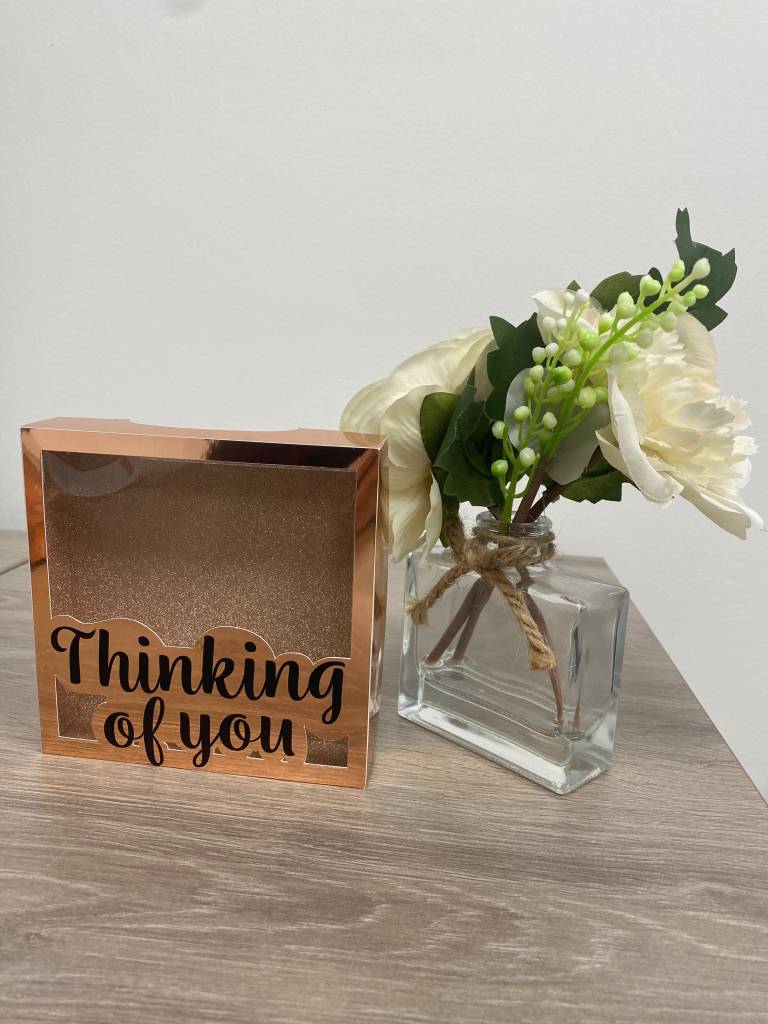
Thinking of you box:
Base: GM Champagne Glitter Card. Available here
Lid: GM Rose Gold Mirror Card (Coming soon!). Similar available here
Vinyl: GM Self-Adhesive A4 Black Matt vinyl sheets. Available here
Cricut Cut Files
To import these files into the Cricut Design Space:
Click “Upload Image” on the left-hand Design Panel, and navigate to the cut files you want to open. Select ‘Insert image’ and select image type ‘simple’ when prompted. Next you’ll be asked to delete any space that does not get cut, you can skip this part by pressing ‘continue’. When asked if they’re print-then-cut images or just cut images, select cut images. Click save and do this for all 3 cut files. When all 3 have been uploaded insert them onto your canvas. Resize them as necessary. When cutting the files make sure each design is on a different mat on the design screen.
Reminder – if you’d like to add score lines instead of scoring by hand, these will need to be added in the design space. To do so, select ‘Images’ from the design panel on the left, search ‘score line’, select the free downloadable score line and insert the image. Place where appropriate as shown below.
Cut settings (According to the material we used):
Base: Material – Heavy cardstock, Pressure – Default
Lid – Material – Heavy cardstock, Pressure – Default
Vinyl – Material – Premium Vinyl, Pressure Less
Brother Cut Files
To import these files into the Brother Canvas Workspace:
After downloading, please log in as usual to your design space account, open a new project mat, then left click on the SVG icon in the top left bar in canvas, this will then allow you to import your files. Once you left click this icon, a pop up box appears with you to choose where to import file from, choose to import the file from your downloads list or where you have chosen to save when unzipped. As a reminder it is best to download all 3 files to your mat, and save them as a new project to the design space before grouping to resize if you wish.
Just incase you need the link CanvasWorkspace (brother.com)