
Tutorial/Free Cut File
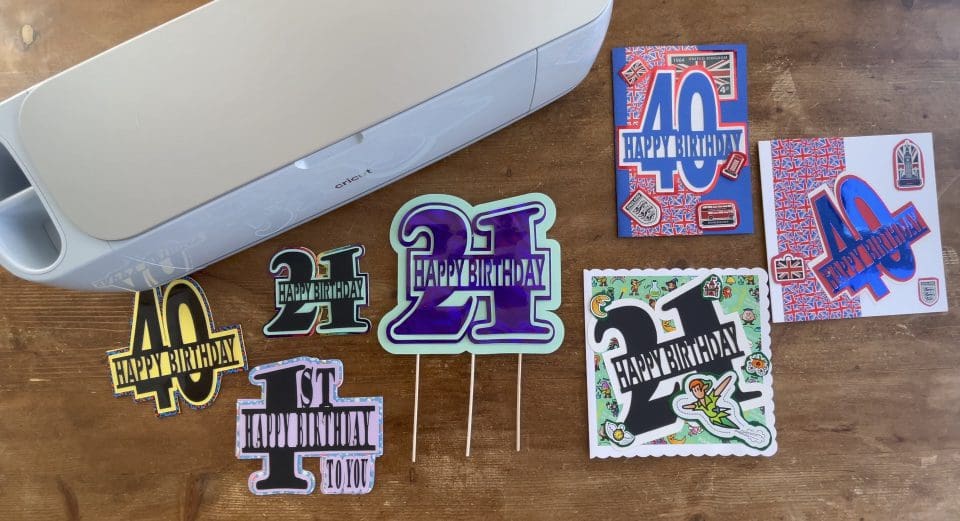
How to make a 3D shaker Cake topper and Number Birthday cards tutorial with free cut files
Hi!
Welcome to another weekly Blog post, and free cut file! Our cut files are suitable for all machines, and include a SVG for Cricut, Brother and a PNG for Silhouette studio, so no matter which software you run, they are all tried and tested and open perfectly on the free accounts for you. We also have a JPG image with the file to show you how it is potentially laid out to help you in using it.
As always our cut files can be used in a number of ways, including as shown above, you can also use the individual elements and layers differently too, resize them, use them with HTV to create a T-shirt or bag, the possibilities are endless and the choice is entirely yours.
We would love to see what you make! Have you found our You Tube channel yet? The video showing this and all of our other tutorials are available on there, as well as exclusive demos, inspiration and more! Join us on Facebook , Instagram or Tiktok or send us an email to sales@gmcrafts.co.uk we would love to hear from you!
As always you are free to use our files to make, create, and even make items to sell, all we ask is you don’t pass the files on, instead if you wish to share them, please ask your friend or acquaintance, to download them from our website themselves from within this blog. No reselling or passing on, of any part of the cut file is permitted, and no using the cut files to create other files to sell or pass on is allowed. But do enjoy them, and we hope your makes earn you a little with them too.
WATCH THESE FILES BEING MADE INTO THE 3D CARDS IN THIS REPEAT OF OUR FACEBOOK LIVE FROM A FEW WEEKS AGO BELOW;
WATCH THIS FILE BEING MADE INTO A 3D CAKE TOPPER WITH SHAKER IN THE VIDEO BELOW.
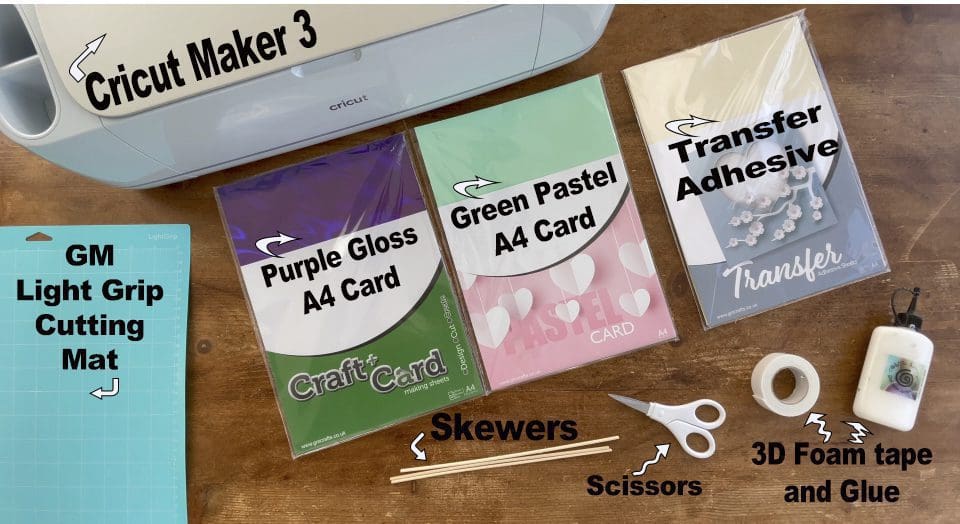
What you’ll need:
- Cricut maker . Available Here
- Cutting Mat. Available Here
- Or Silhouette Cameo 4. Available Here (Instructions for the cameo and Brother machines at the bottom!)
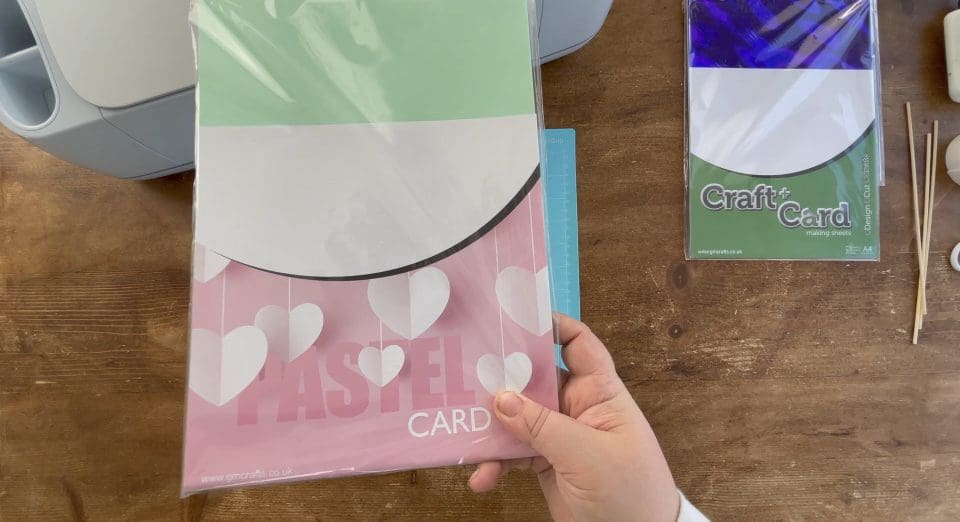
- A4 Pastel card pack we used Green. Available Here
- A4 Satin Gloss card pack we used Purple. Available Here
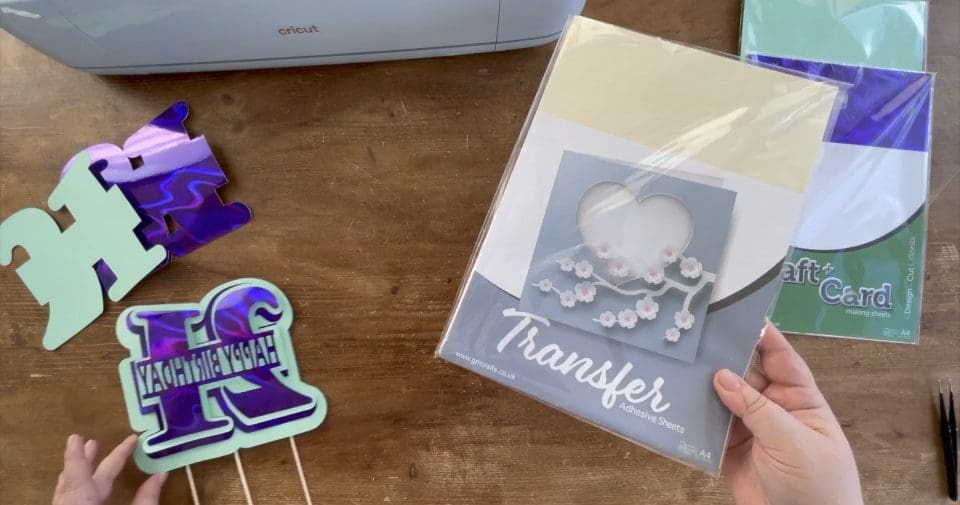
- Transfer Adhesive. Available Here.
- 3 foam self adhesive pads, Acrylic glue, flat back tiny gems or confetti for the shaker and Skewers from your own stash.
- Squeegee and Scissors from the tool kit. Available Here.
- Cut files Download link below, for all machines, Silhouette and Brother instructions are at the bottom of the page
CLICK HERE TO DOWNLOAD ALL 3 CUT FILES FOR ALL MACHINES
Instructions;
1. Before you start you will need to download the cut files for your chosen machine, link above. Unzip the file to use it by right clicking it in your downloads.
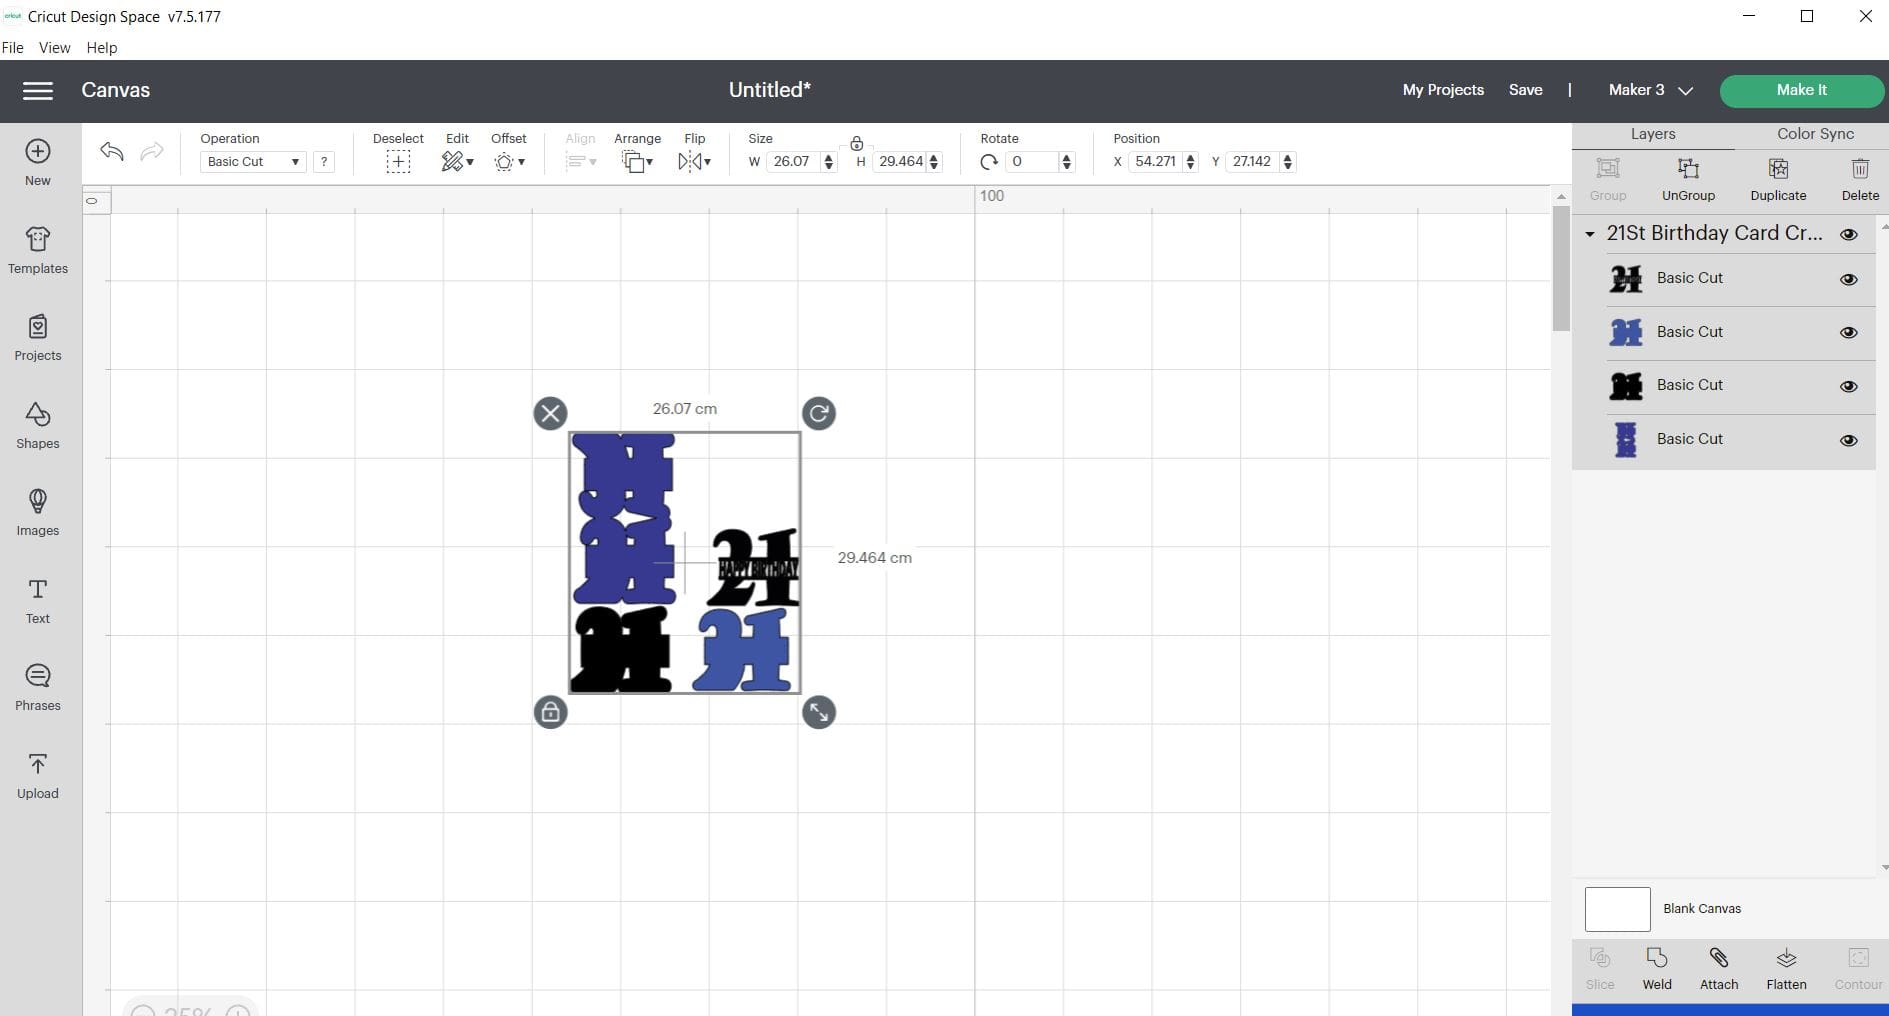
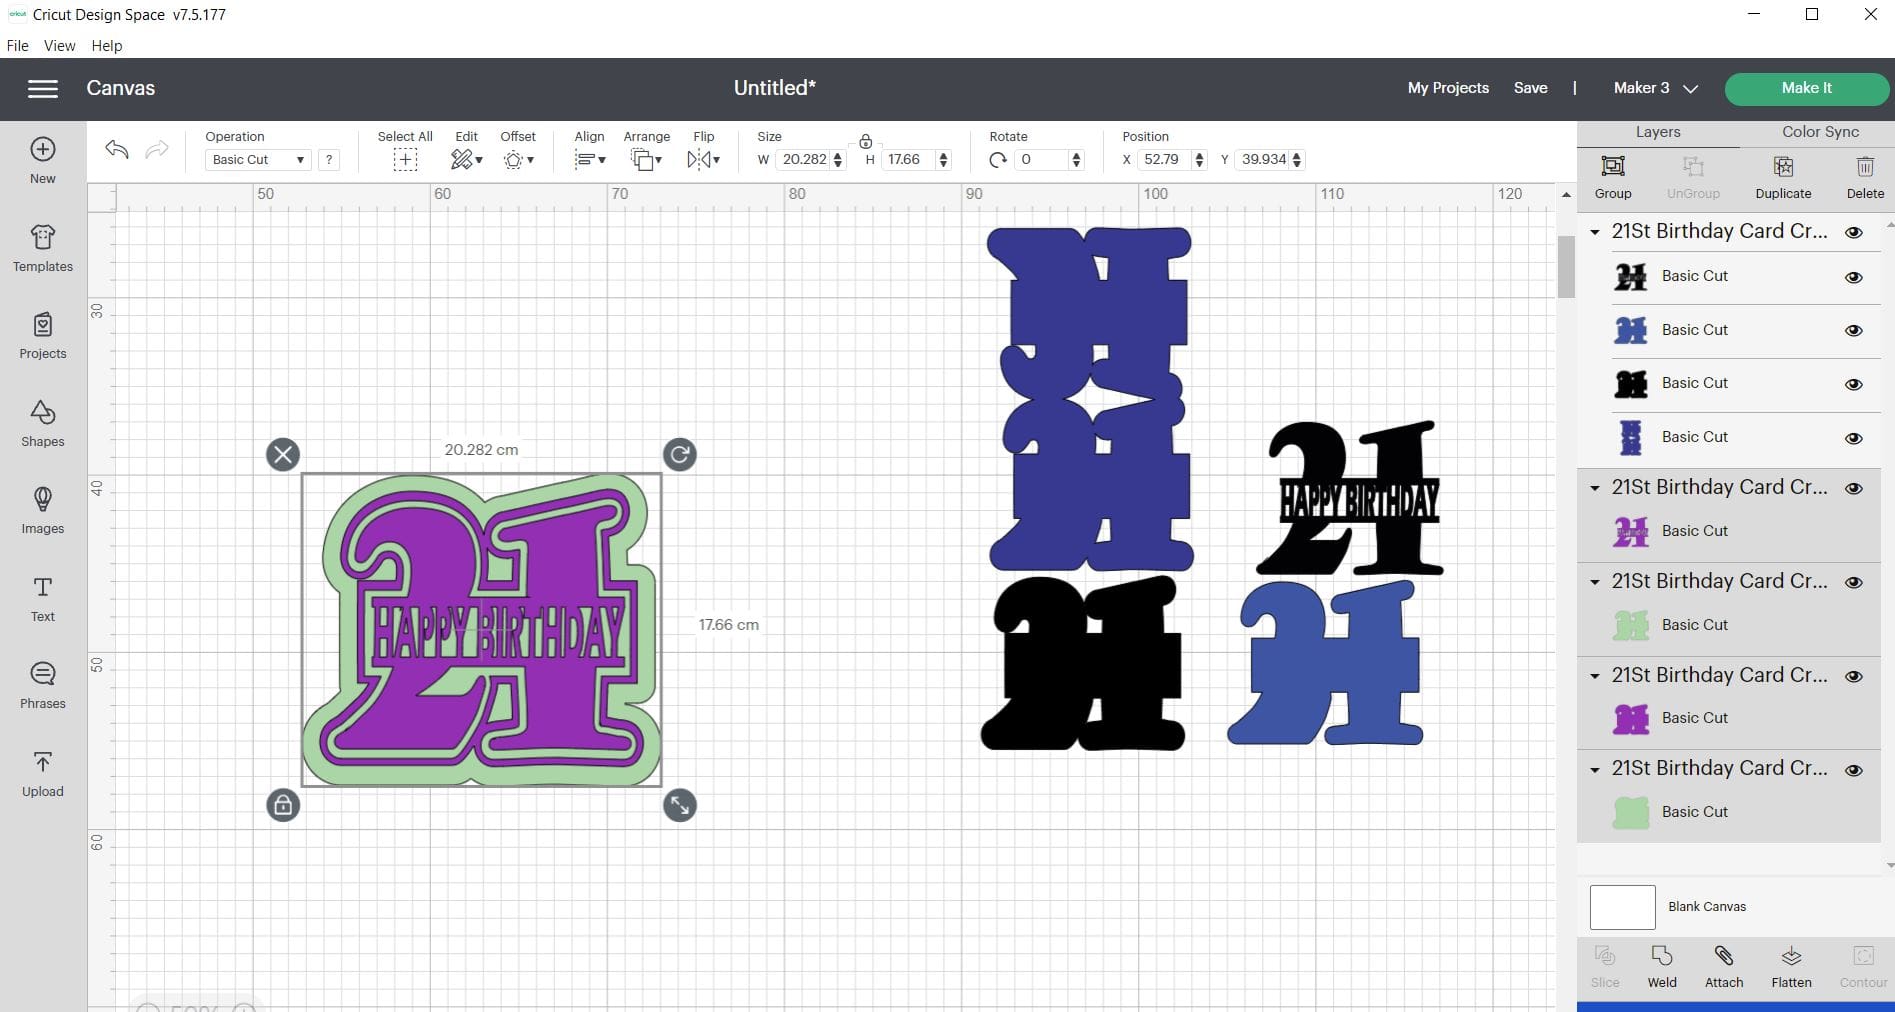
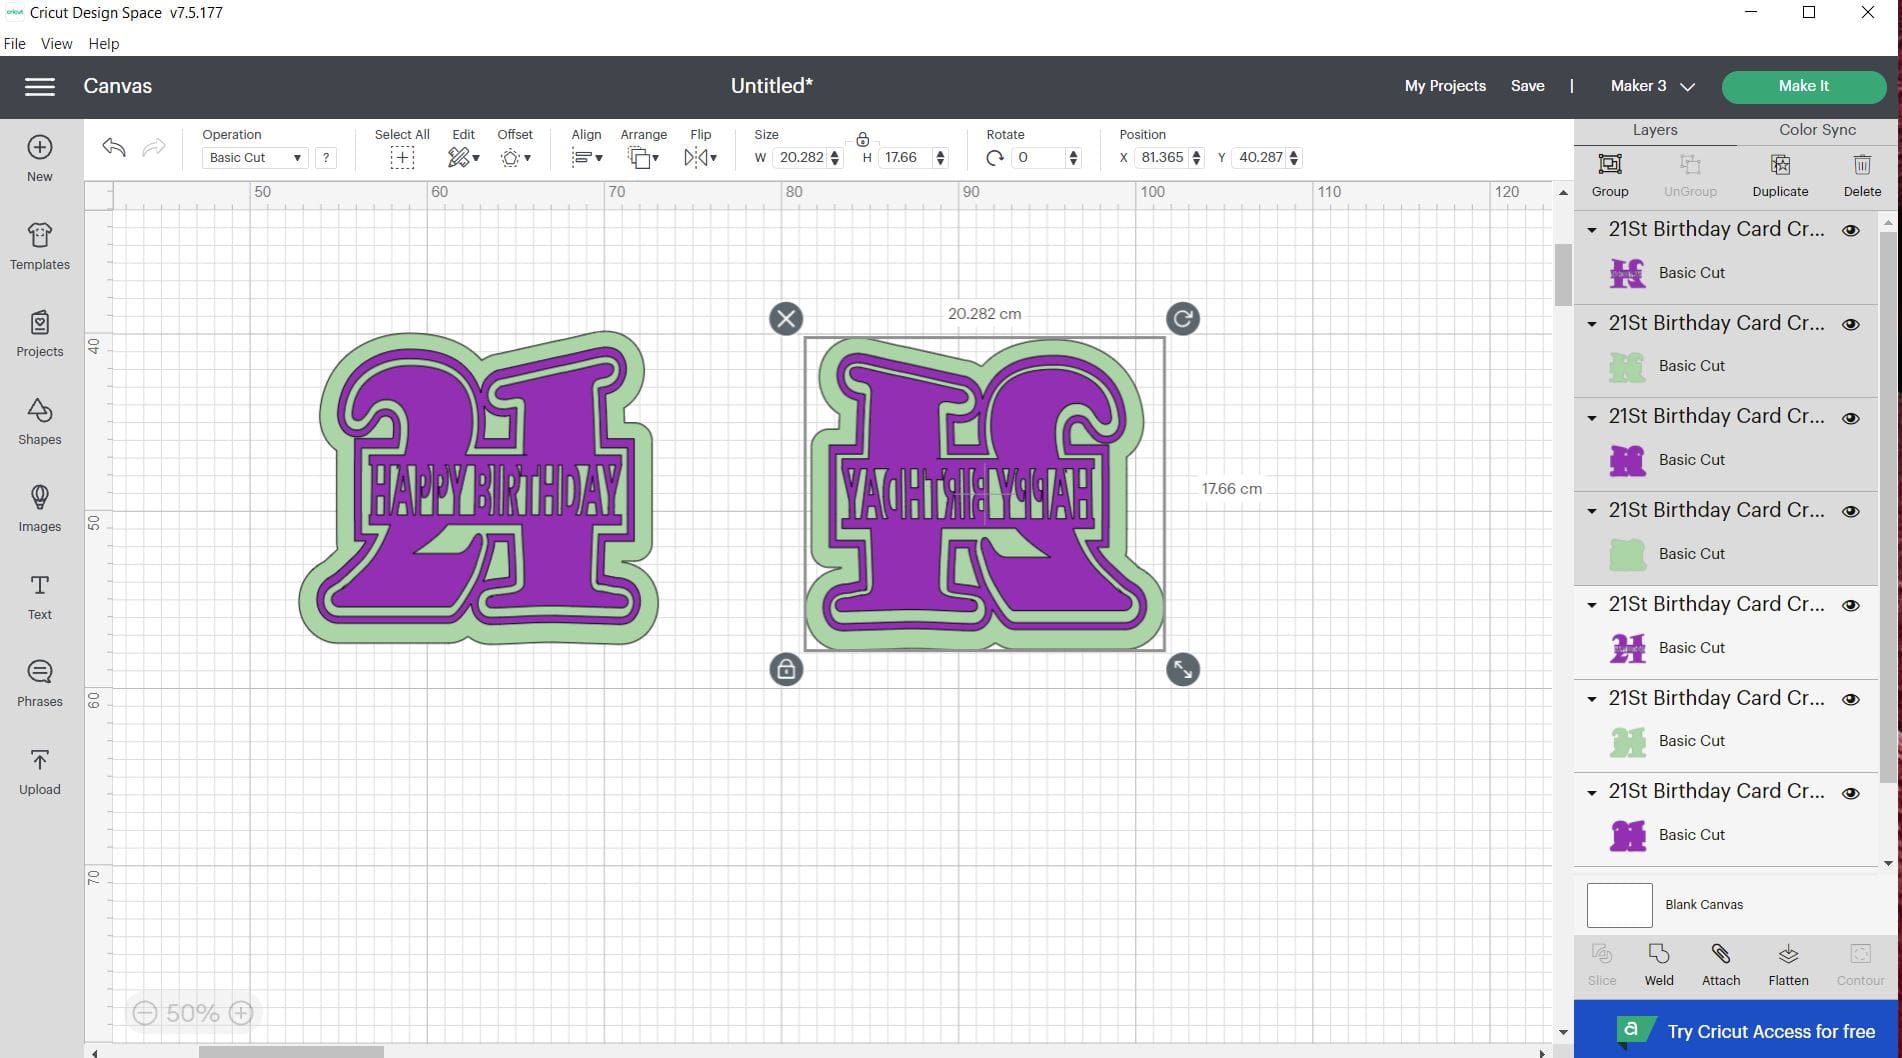
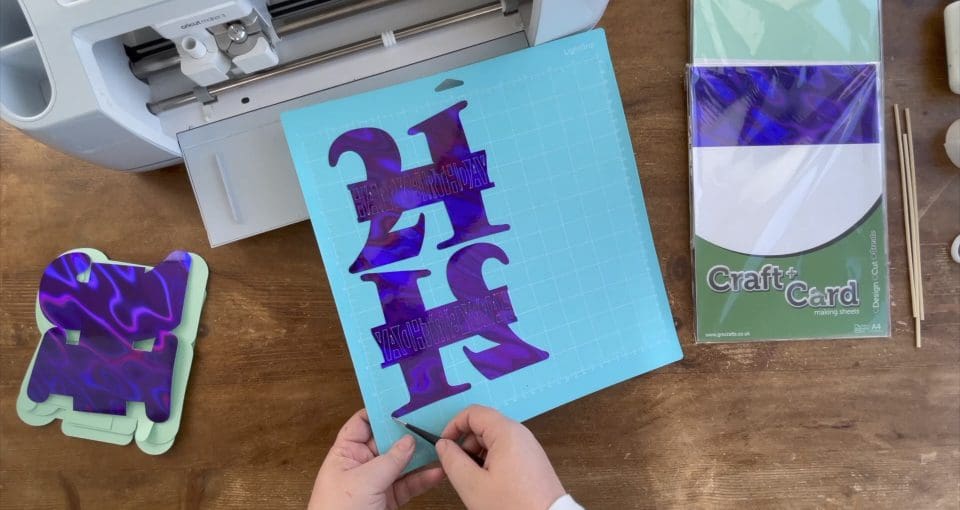
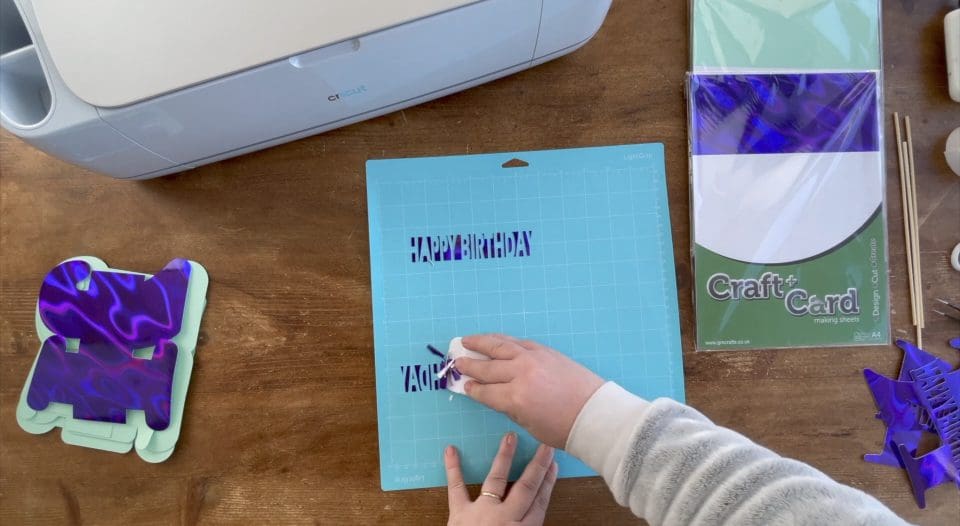
2. Upload the SVG into the design space. Click “Upload Image” on the left-hand Design Panel, and navigate to the files you want to open. Select ‘Insert image’ and select cut images. Click save. When it has been uploaded, Insert the images onto the canvas and resize to suit your project, I then right click and ungroup, before I delete any parts I don’t want. Recolour each layer differently, so it can cut the different Card, Vinyl etc for each layer, which means you don’t have to keep returning to the design page, see below.
Weld. any parts that you wish to keep in place. Please see below we have resized this to create a big cake topper. If you are wanting to create just the 3d cards, keep the whole image as shown in the first screen, Ungroup resize and cut.
I have deleted the full card and taken the first (back) layer highlighted it, and clicked Offset, this is found in the top menu along the top of the screen, I used the setting it offered. This gave me a thicker back layer as I want to create a hidden shaker element in it. Once i did this, I layered them all together, highlighted them, and duplicated them, and finally I then flipped the duplicate, again this option is found in the top menu on the screen. I did this so we can create a full matching mirrored back to the cake topper, which you will see why as we go through putting this together.
When you are ready click make it to move on to the next screen. On the next screen, If using the Cricut Maker 3 then you will need to choose to cut on the mat (unless using smart media) Click done, and then continue on the next screen
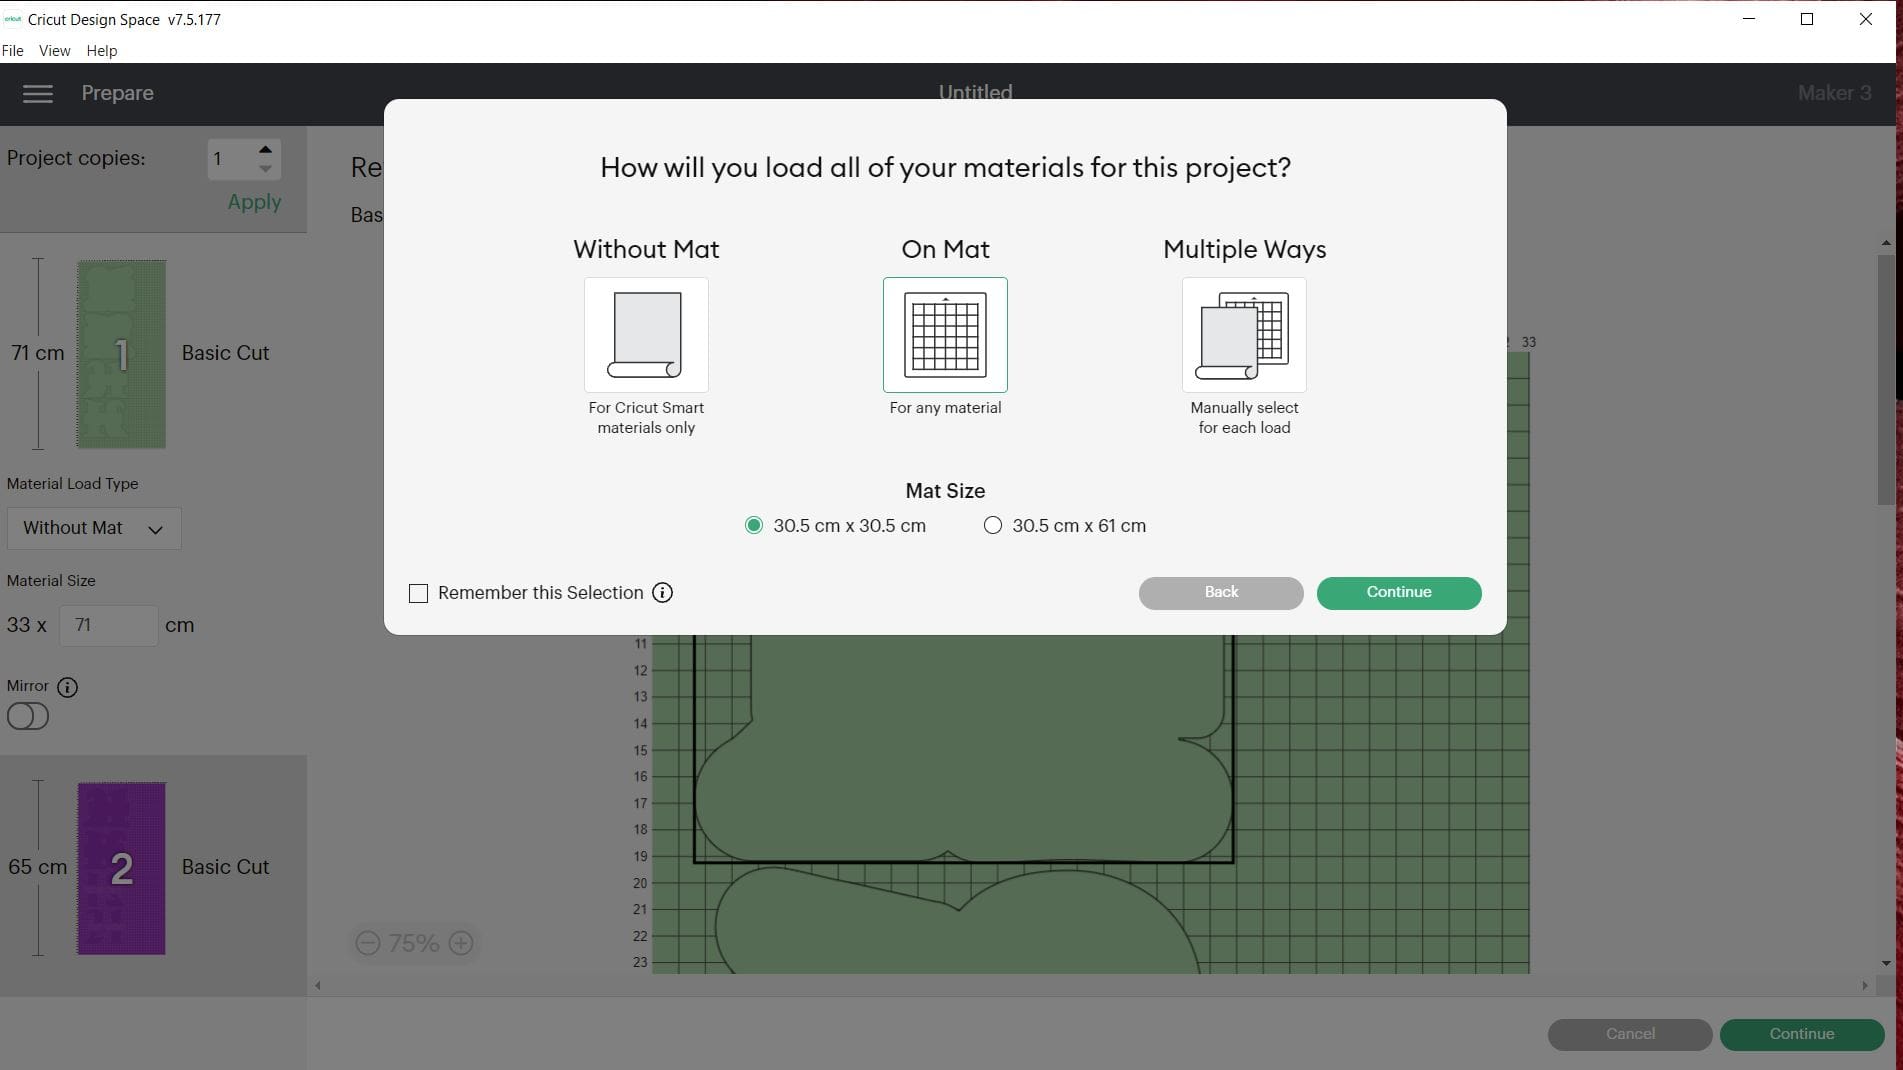
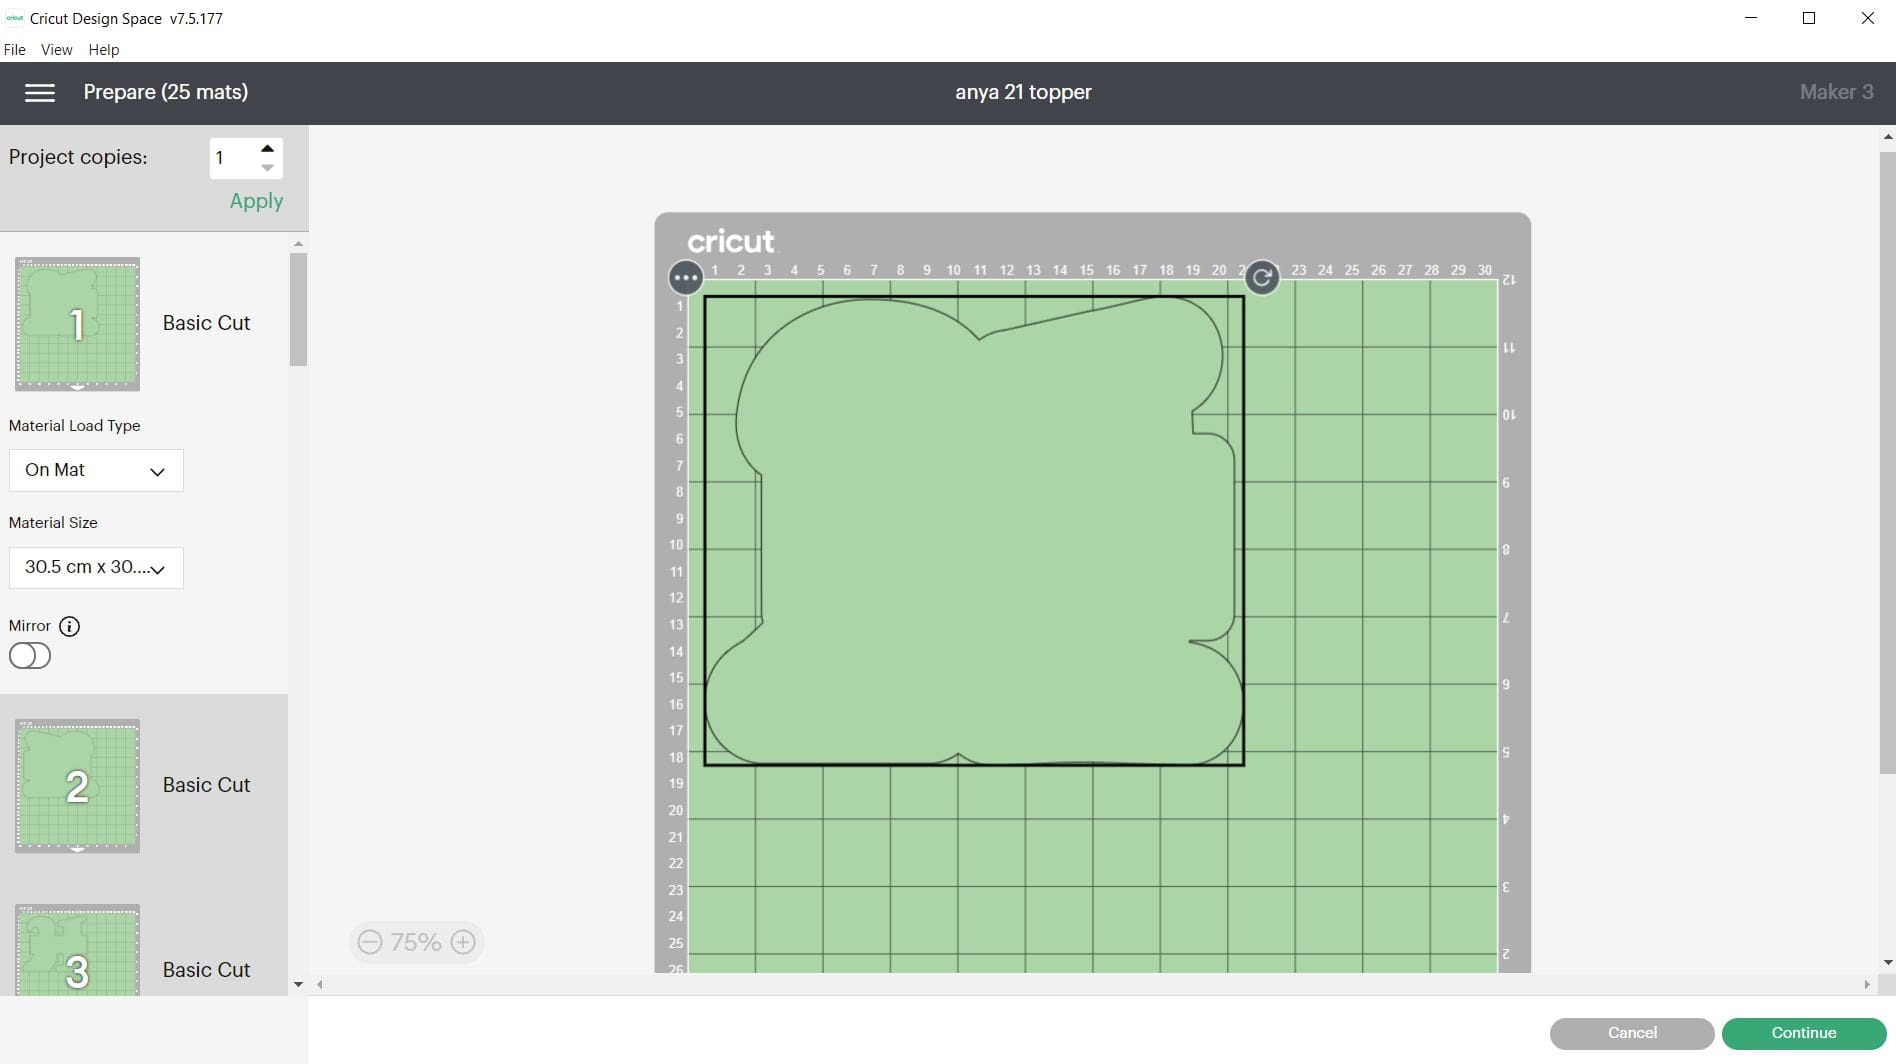
3. Click continue in the bottom right on the next screen. In the next window make sure your settings are all set to the successful settings from your test cut and ensure your machine is linked before proceeding to cut. Cut settings: (**please test cut) Press the flashing Cricut symbol on your maker to cut, after loading the sheet into the machine. Apply the settings needed for your chosen Card or Vinyl, we made it with our GM card on the maker 3, and used the Heavy Card stock setting on the Cricut maker 3 with More pressure.
**A reminder that these settings, including the blade setting, are specific to the materials and machine we’re using, adjustments may be necessary if using different materials and machine**
We always recommend before proceeding, you test cut your materials when first using so if you have not recently used this product in your machine. Please test cut for your chosen machine found on our Application guide, and also Blog. Load the Vinyl chosen individually for each layer.
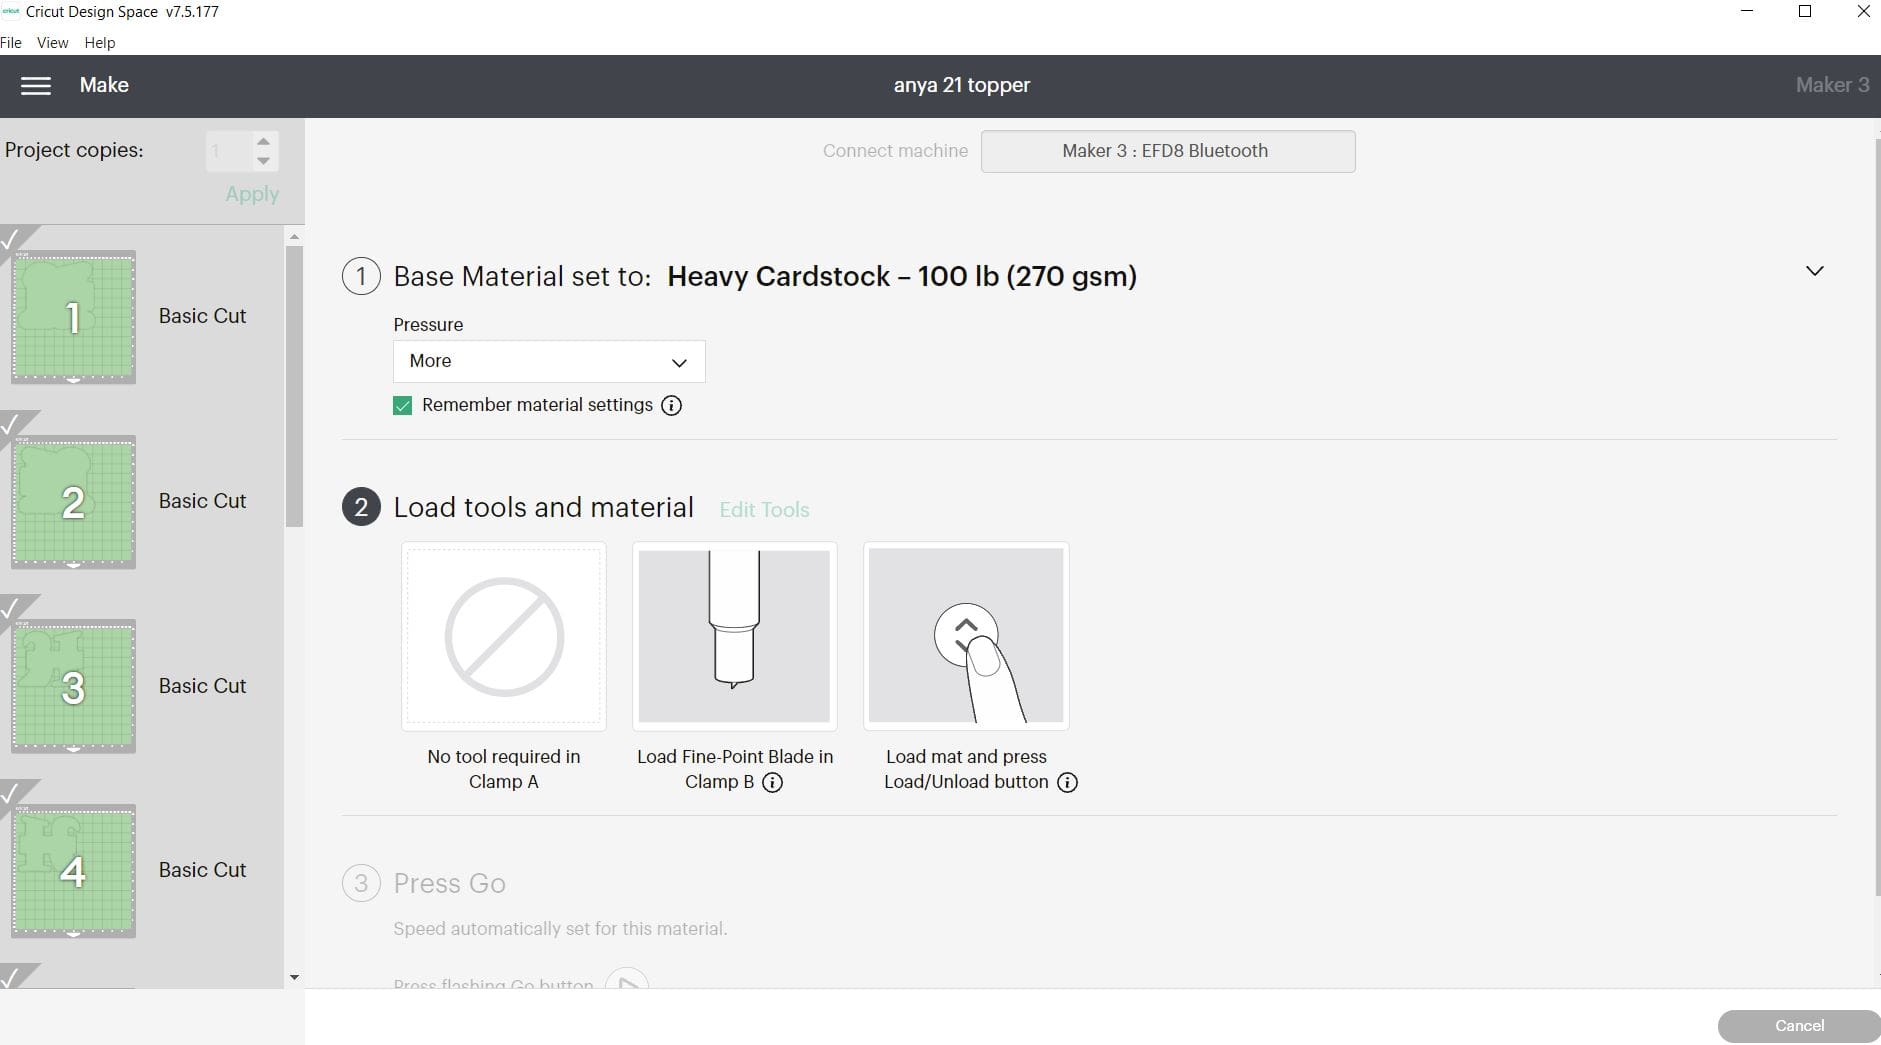
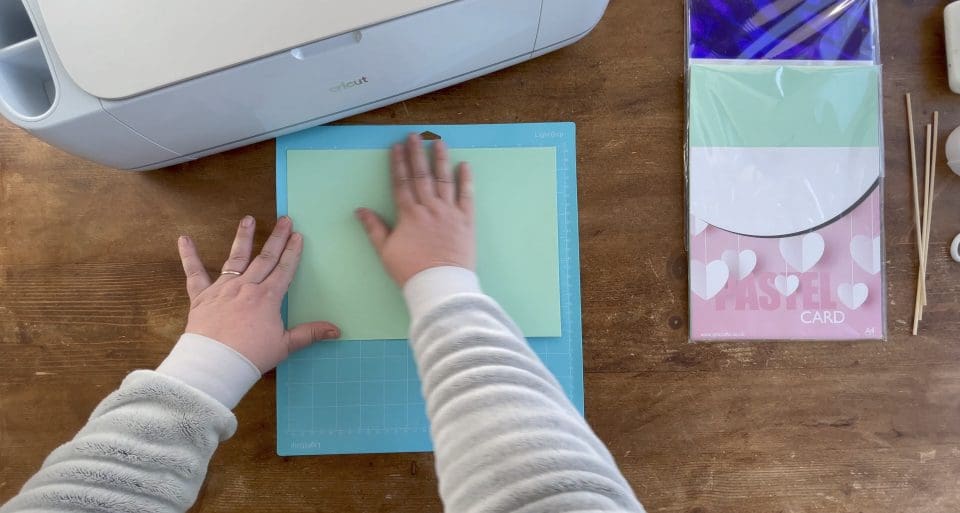
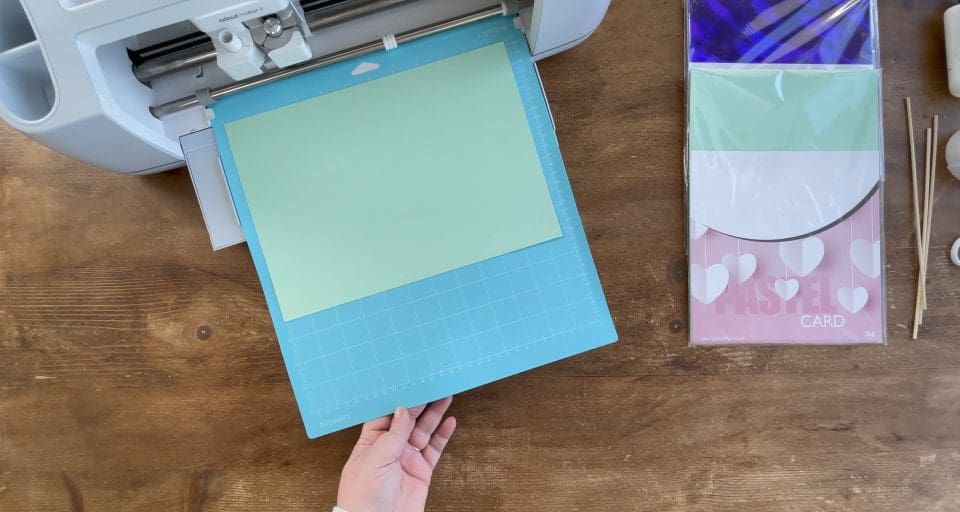
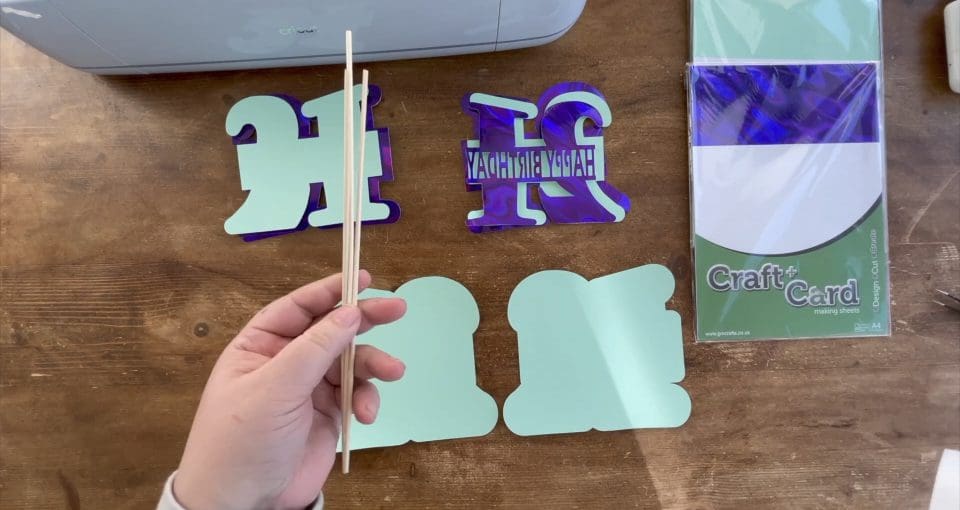
4. Place the Card for the first layer you are cutting on the mat. Press the up arrow to load the mat, and press the flashing light to proceed to cut on the machine. When cut remove the mat from the machine, and flex the mat away from the back of the card to allow easier removal. Repeat this step for all the Card layers.
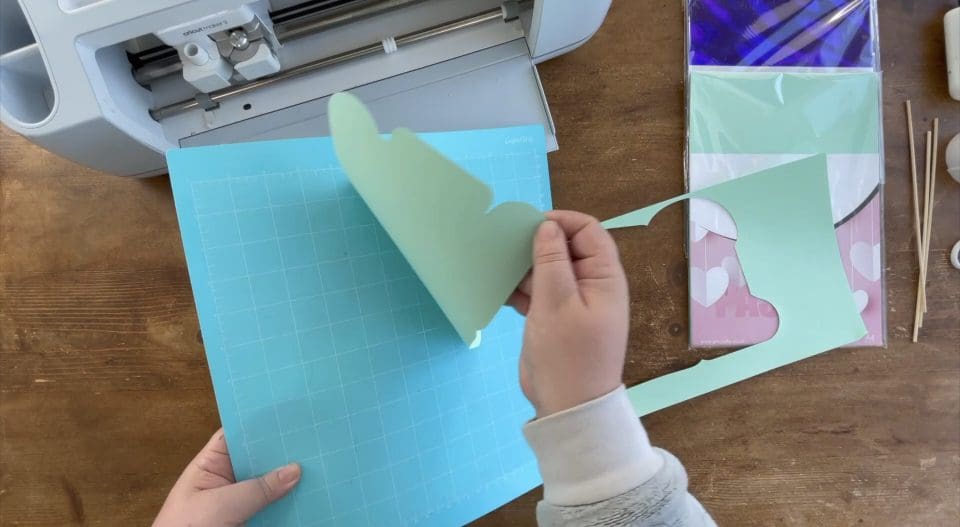
TOP TIP SCRAPE YOUR CARD SCRAPS EASILY OFF THE MAT WITH OUR SQUEEGEE IN THE TOOL KIT
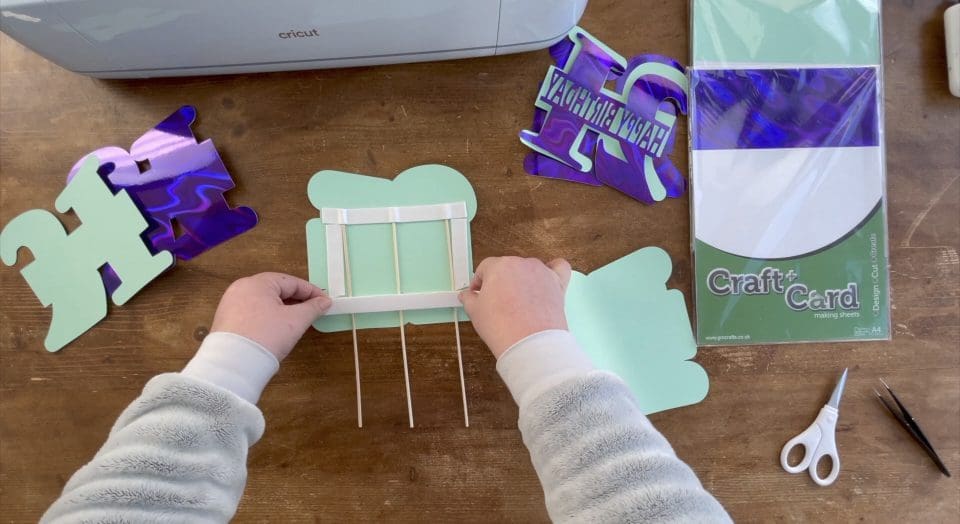
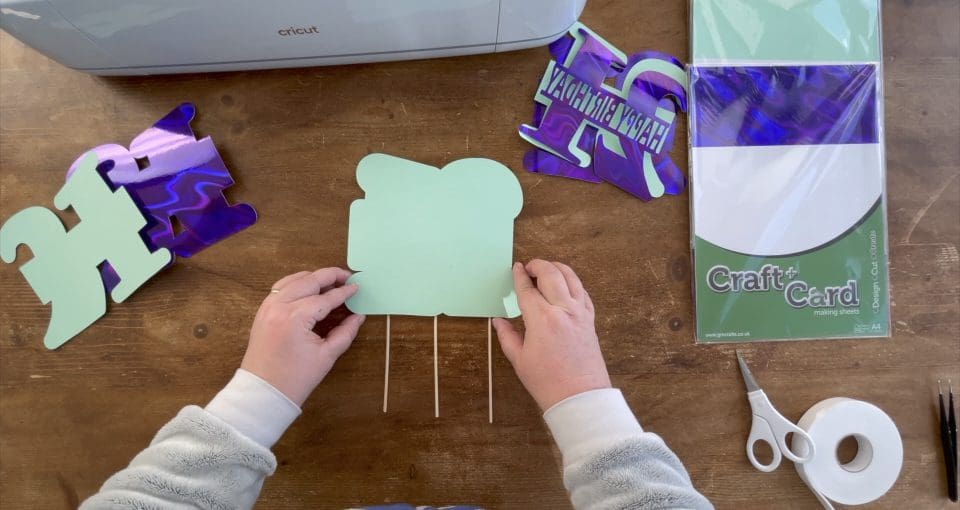
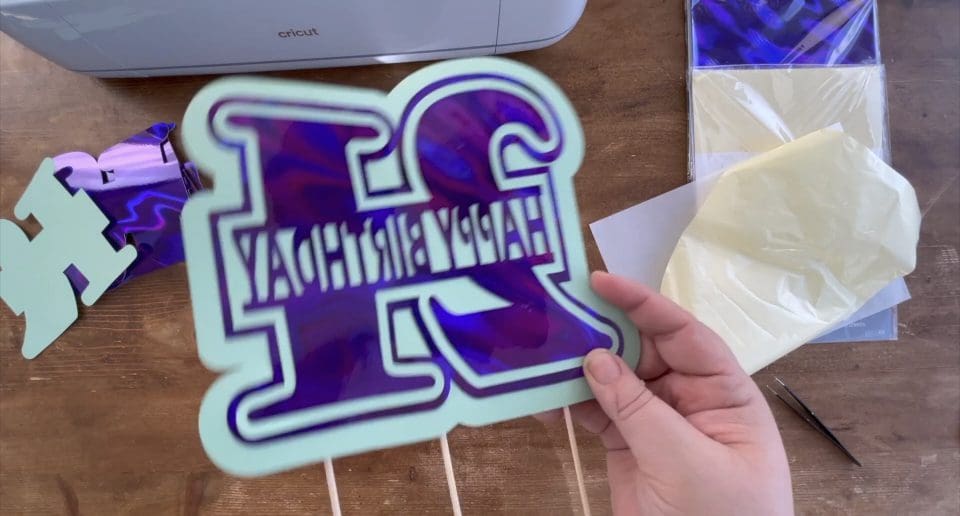
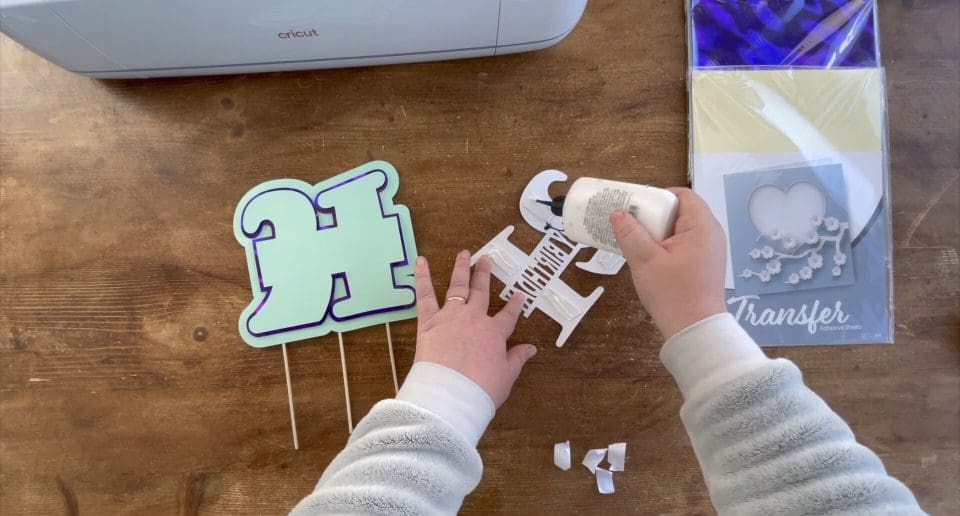
5. Taking your skewers (I use BBQ ones) and your 3d double sided self adhesive foam, (you can use the pads or tape) lay the skewers onto the inside of the largest card layer for the back, as shown below, attaching the 3d foam to create a fully joined square so we have space to put the shaker bits in shortly, see below.

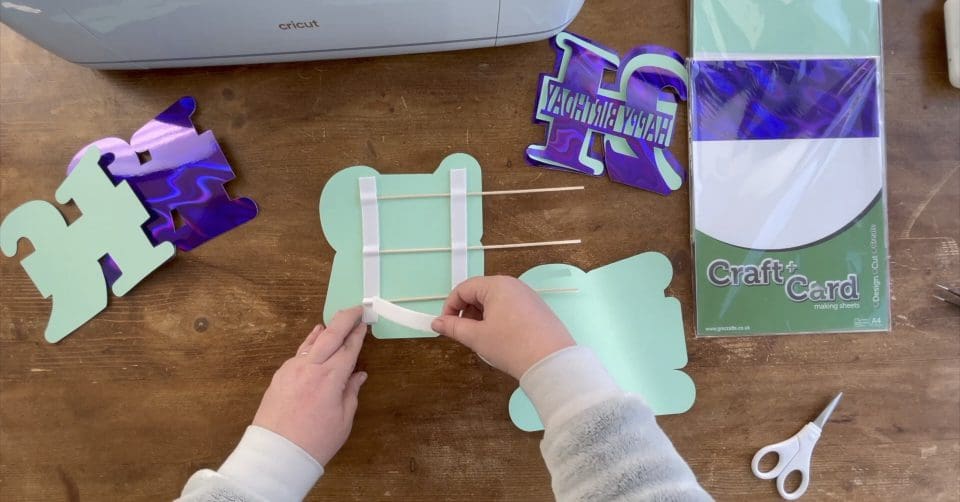
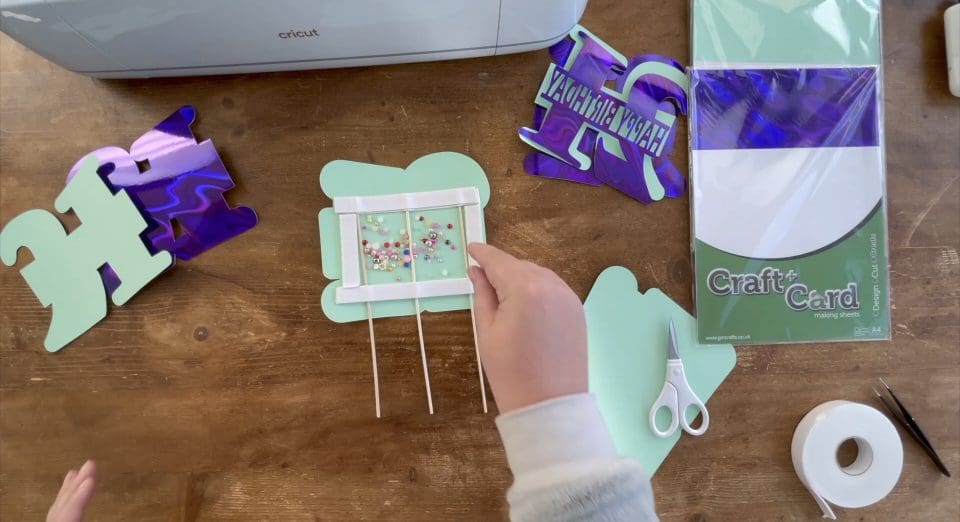
6. I use flat backed craft pearls for my shaker, you can use little plastic beads, plastic confetti or even foil table confetti to create your shaker sound, or if you wish dry rice. Just be sure to seal the edges of the space to keep it inside. I used 2 layers of 3d foam to give the shaker lots of room.
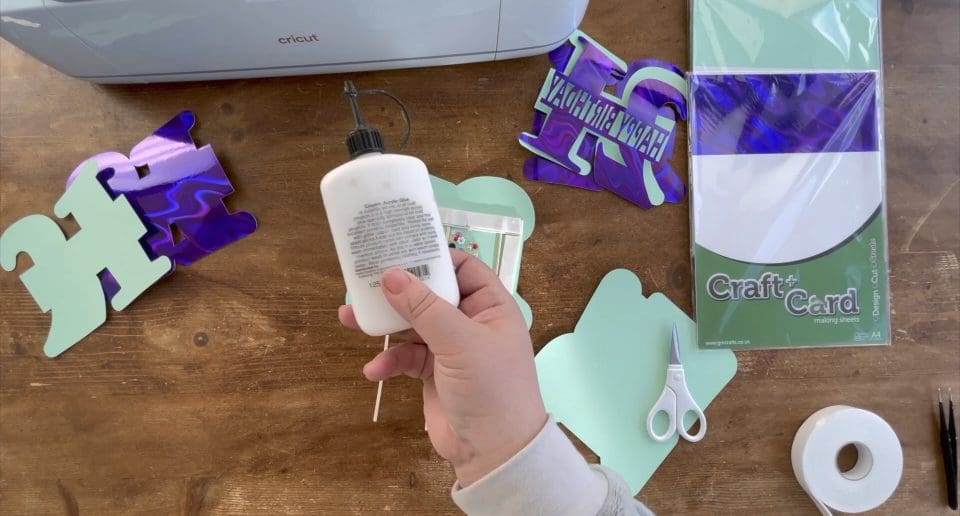
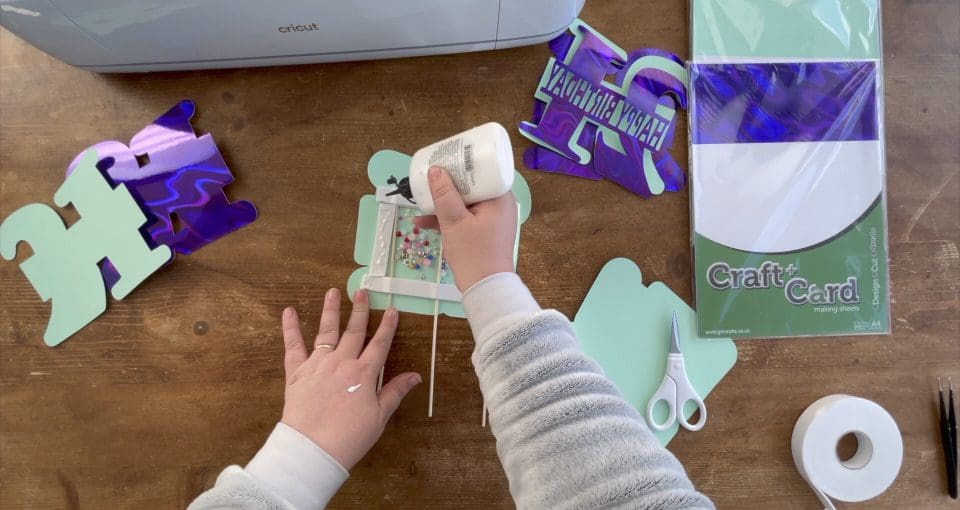
TOP TIP BEFORE APPLYING THE OTHER SIDE TO SEAL THE SHAKER IN, I ALWAYS USE FAST DRYING ACRYLIC CRRAFT GLUE ALONG IN A THIN LINE, ON MY FOAM; THIS GIVES ME A FEW SECONDS WIGGLE ROOM TO GET THE PERFECT ALIGHNMENT OF LAYERS, BEFORE FIRMLY PRESSING IN PLACE SEE BELOW.

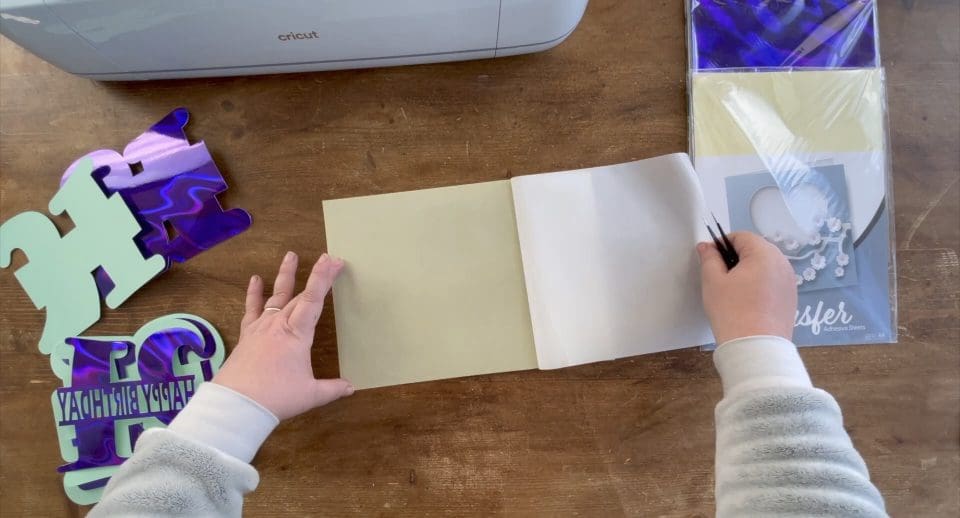
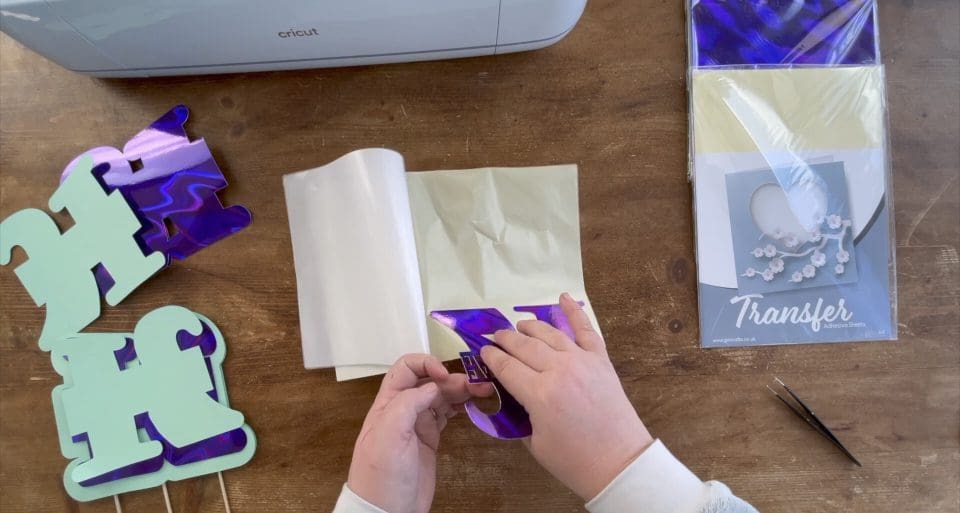
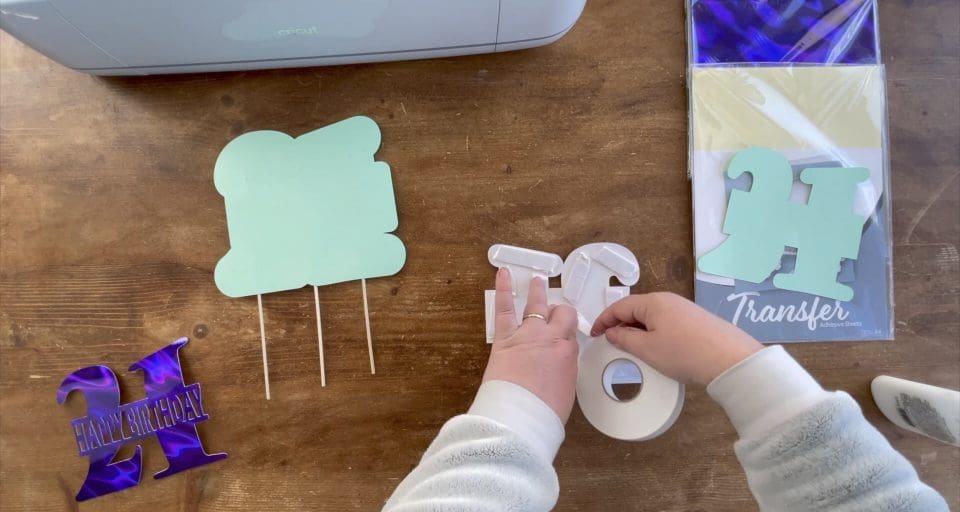
7. Using the transfer adhesive, fold it back on itself to reveal the adhesive layer underneath as shown below and place the (BACK TOP MIRRORED BIRTHDAY LAYER) card plain side, onto the sticky yellow side of the sheet. See below. You can place the white sheet back over and rub with your Squeegee, should you wish. I use small parts of the sheet at a time, so I get more use from the one sheet, so I place the card half on, and then repeat moving it along slightly for the other half and so on, see below.
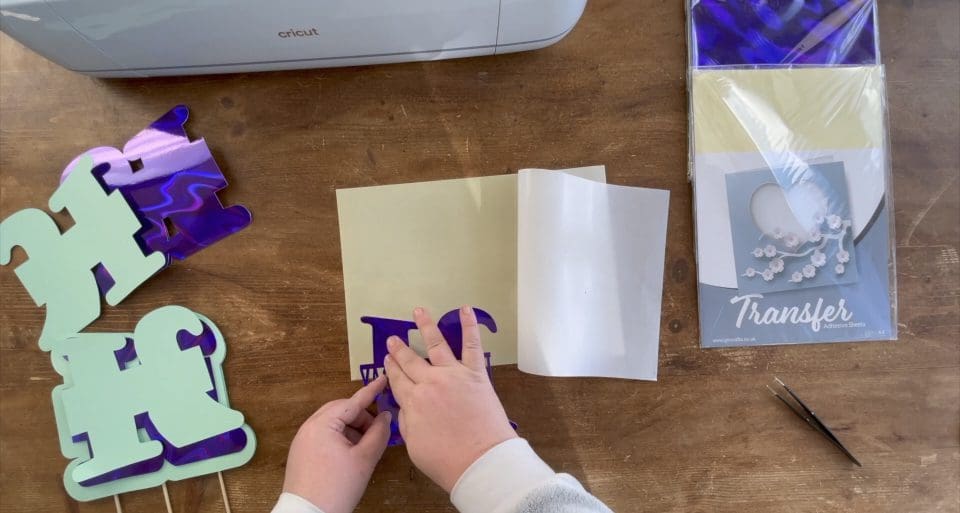
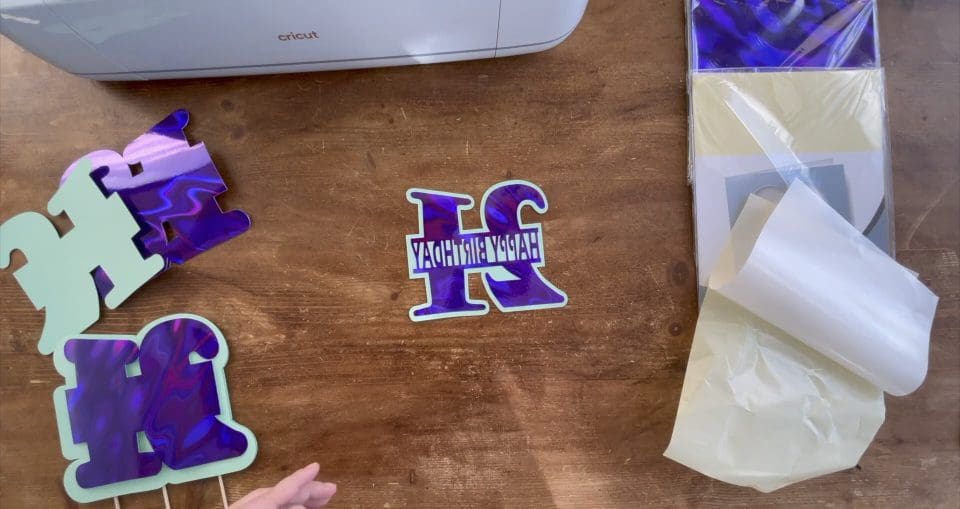
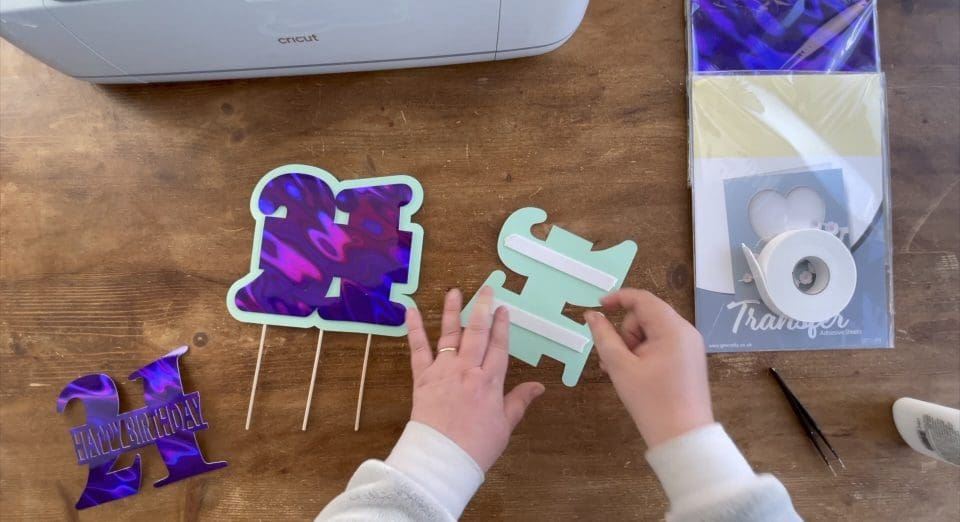
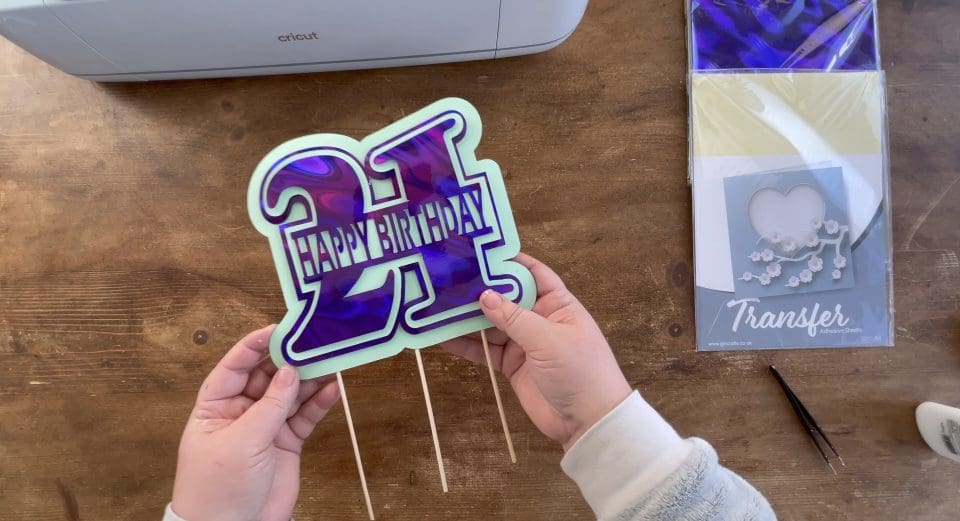
8. Apply this (back) purple layer to the next green layer behind it, repeat with this new green layer applying it to the second purple layer, before applying these to the back of the shaker cake topper.
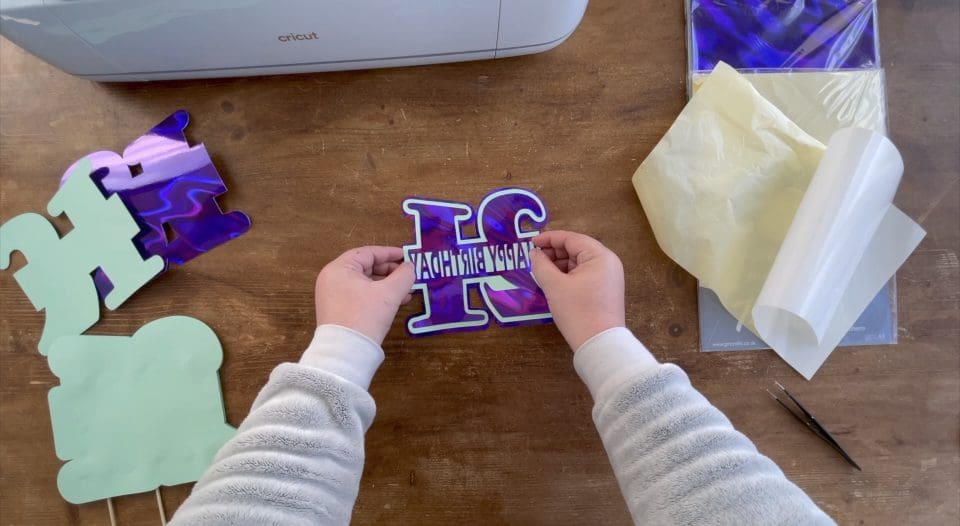
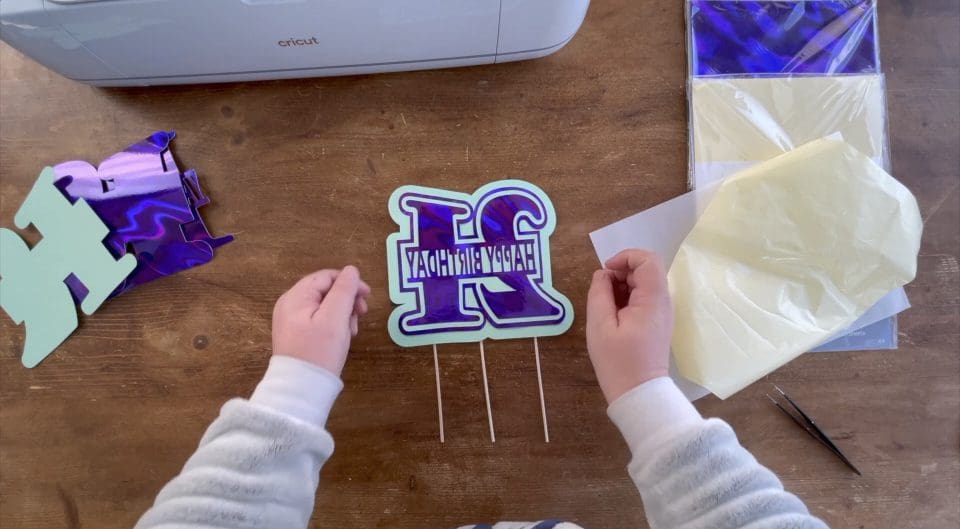
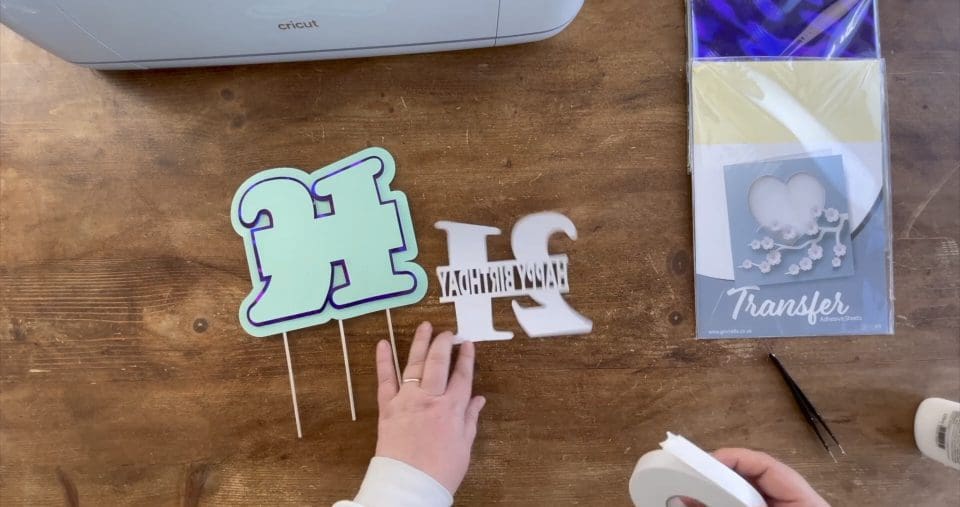
9. Next turn the topper over, again we apply 3d foam to create each layer, and use a thin line of the glue on the pads, to give you the wiggle room for a perfect line up when sticking each layer together, this time we apply each layer to the topper to ensure a perfect finish – see steps below. So apply the larger purple layer, then the green and lastly the Happy birthday top layer.


Don’t forget your finished design can be matched by using any material cut using a cutting file, card, self adhesive vinyl or even HTV. We’d love to see your makes on our social media pages! Or email them in!
Silhouette Cut File
Instructions:
Before you start, you need to download the cut file. Upload the cut file into Silhouette Studio, click the file and choose release compound path to separate each layer, and resize or regroup as necessary, (when resizing bring all layers into the design software and select all at once to get the correct offset layers and save the adjusted file, so you can cut layers individually at the correct scale you have chosen) Remember to test cut if necessary and cut settings are found here along with test cut guidelines for every machine.
Brother Cut File
To import these files into the Brother Canvas Workspace:
After downloading, please log in as usual to your design space account, open a new project mat, then left click on the SVG icon in the top left bar in canvas, this will then allow you to import your files. Once you left click this icon, a pop up box appears with you to choose where to import file from, choose to import the file from your downloads list or where you have chosen to save when unzipped.
Cut settings are found here
Just in case you need the link CanvasWorkspace (brother.com)