Tutorial/Free Cut File
GM Crafts A4 Card Tutorial Making Christmas Lanterns With Free Cut Files For All Machines
Hi! Good to see you!
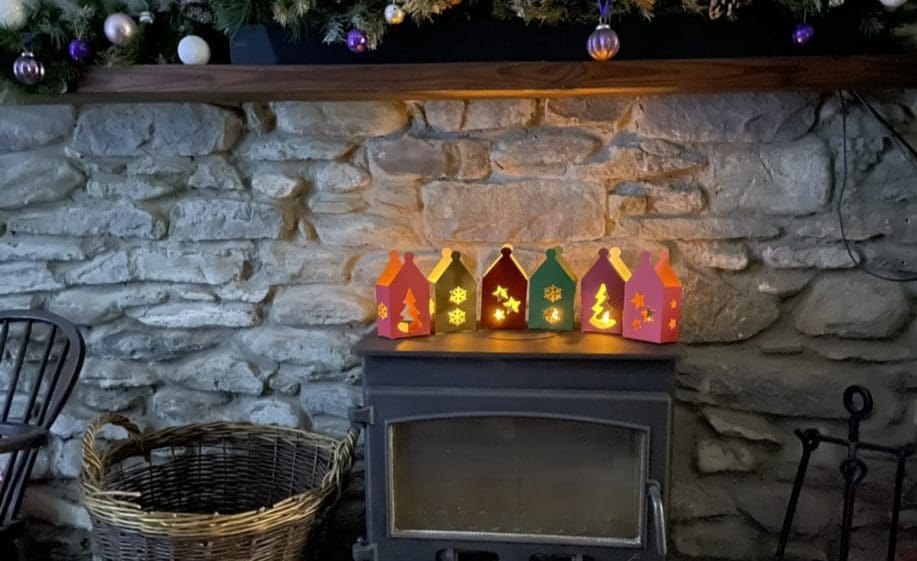
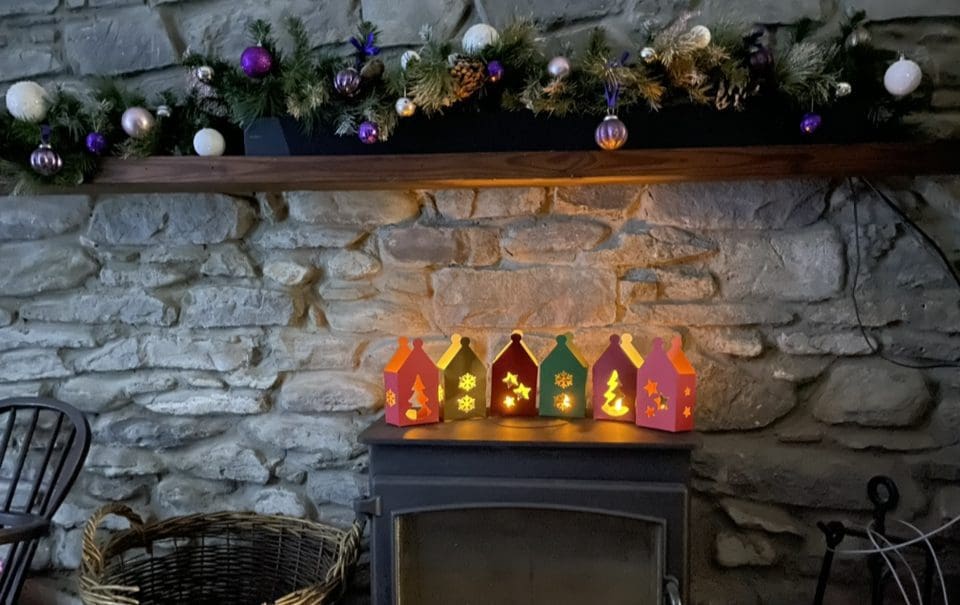
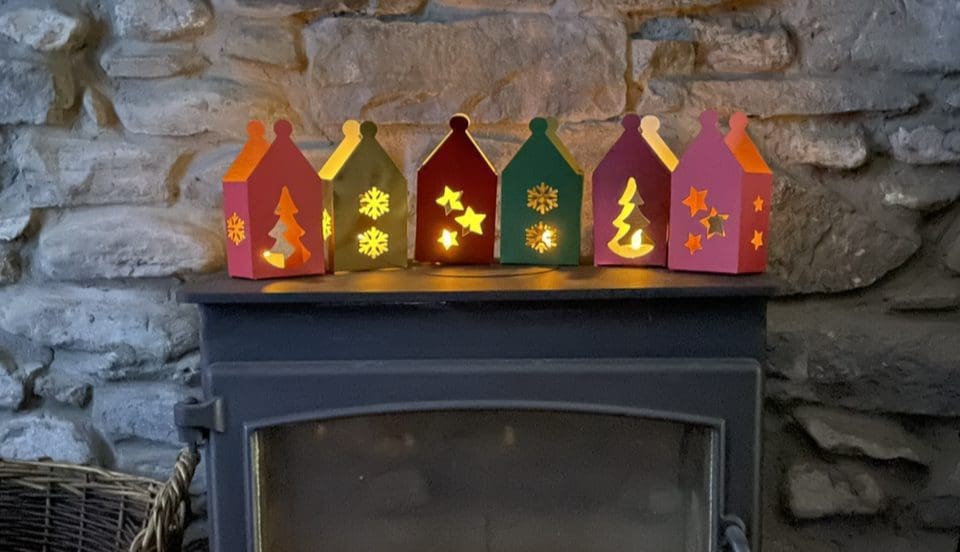
Well Christmas is almost upon us, and the school holidays, with time off with the children, we thought you may like a fun project to do with them. Fill them with LED lights, hang them on string, or sit them on shelves.
If you like this file, we have a non specific one for any season CLICK HERE
We would love to see what you make! Have you found our You Tube channel yet? The video showing this and all of our other tutorials are available on there, as well as exclusive demos, inspiration and more! Join us on Facebook , Instagram or Tiktok or send us an email to sales@gmcrafts.co.uk we would love to hear from you
***To watch this being made on YouTube click here***
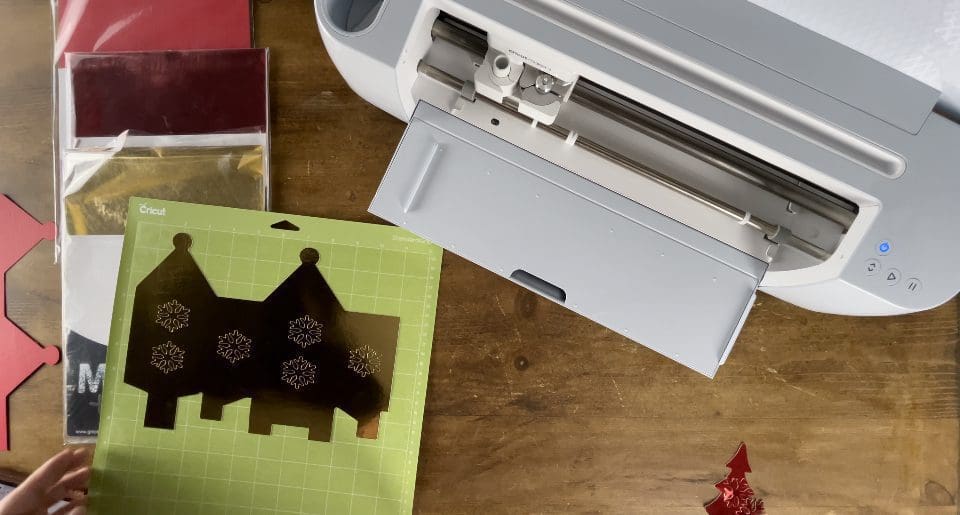
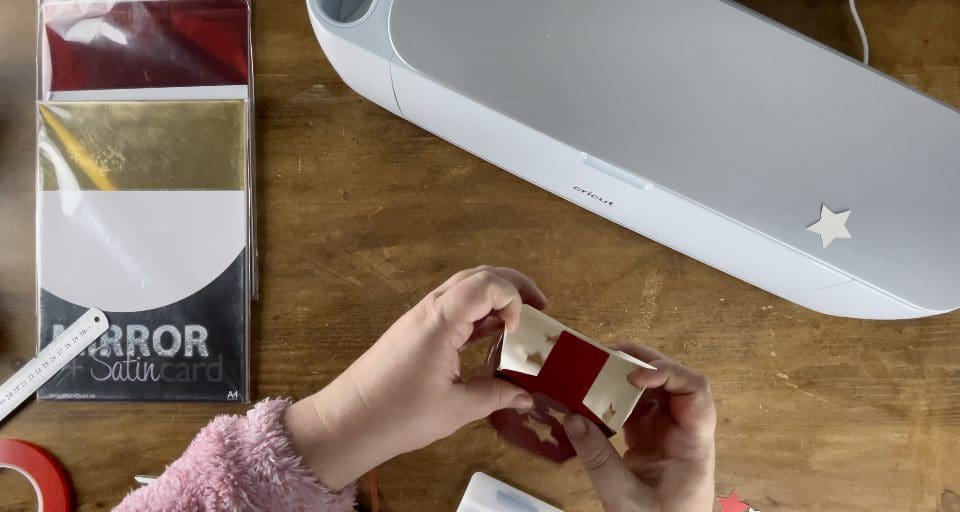
What you’ll need:
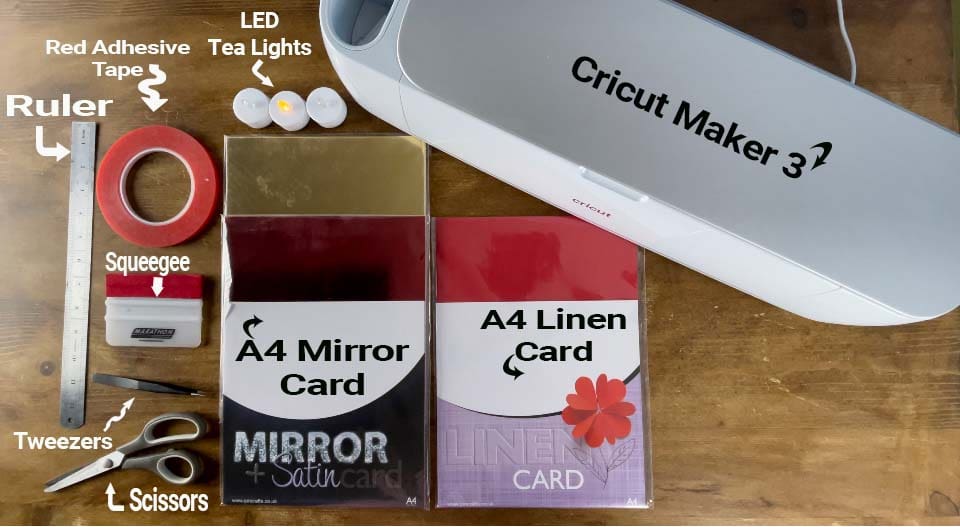
- Cricut Maker with included blade and a cutting mat. Available here
- Or a Silhouette Cameo 4 with included blade and cutting mat. Available here (see separate instructions below)
- A4 Mirror card. Available here
- A4 Linen card pack. Available here
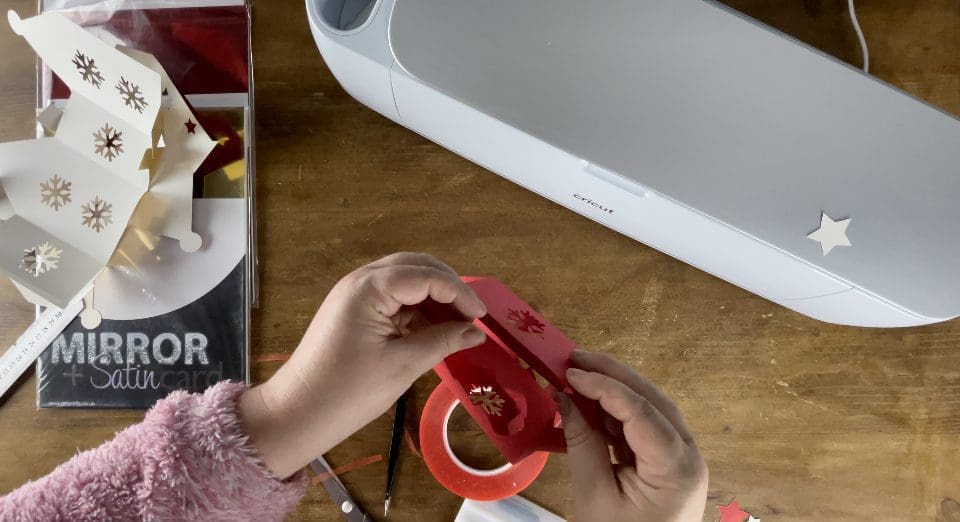
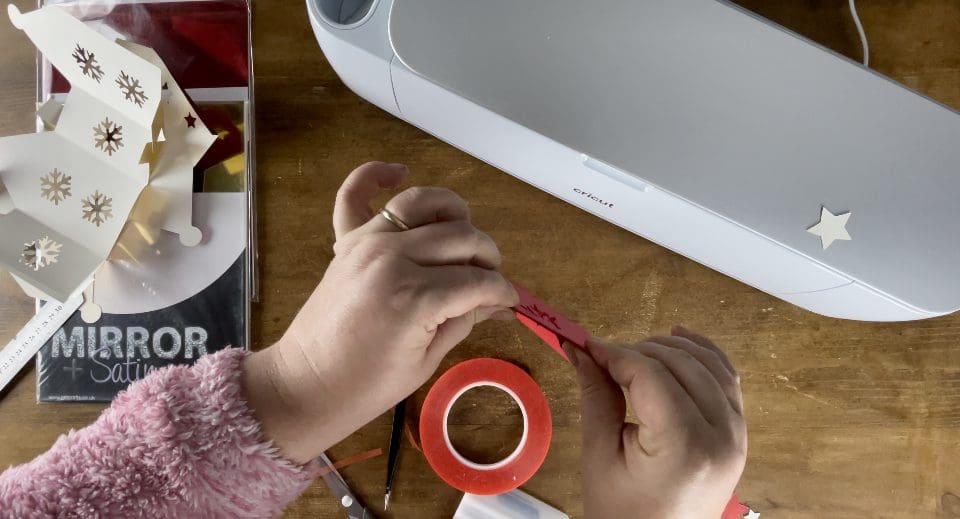
- Self adhesive red Application tape here
- Squeegee. Available here
- Weeding tweezers . Available here
- Scissors, Ruler and Lights of your choice
- Cut files, which are free below!
Christmas card lanterns cut files Click here to download for all machines.
Instructions:
1. Before you start, you need to download the cut files above.
2. Upload each PNG into the design space.
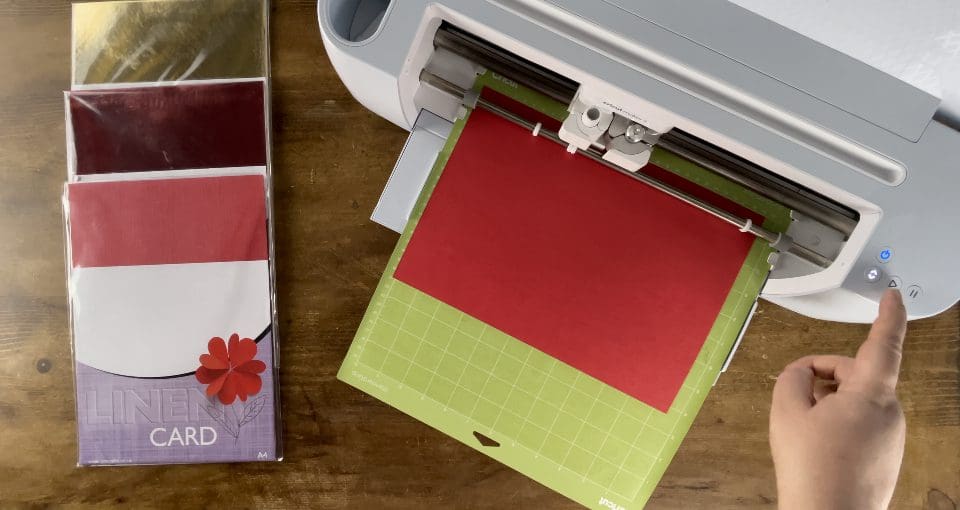
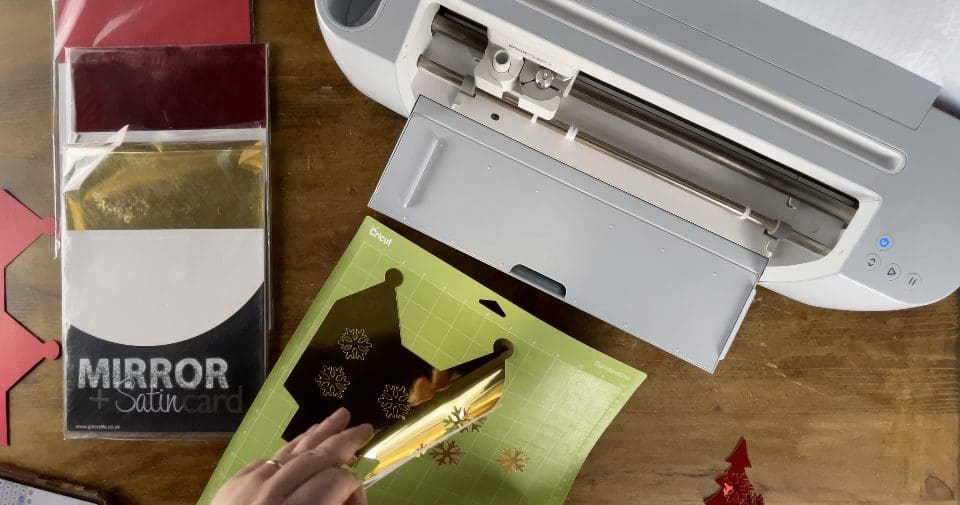
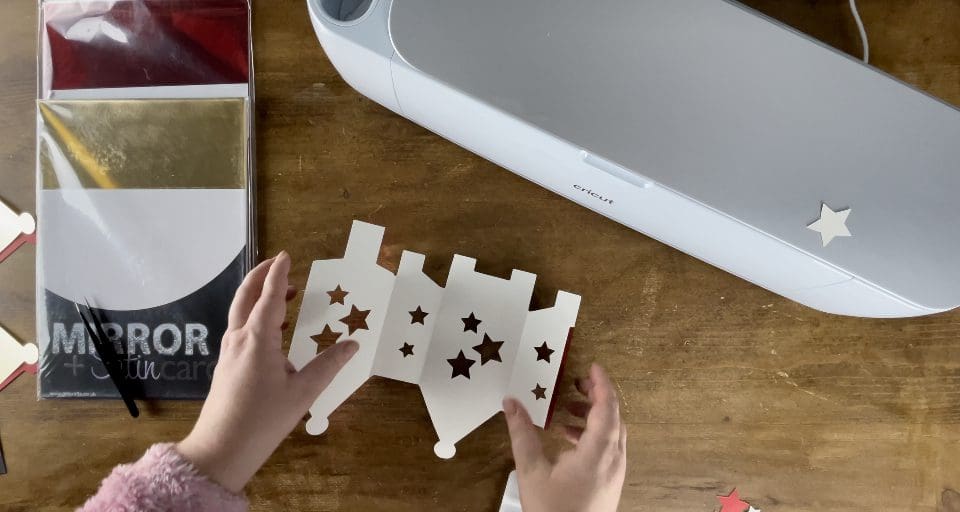
3. Insert all the images onto the canvas and resize to suit your project. Save the resized file back to the design space so you can choose each layer in the proportion you have chosen for that project, I colour each one separately so I can cut all 3 in 1 go, as shown below. When you are happy with the size, Click make it and go onto the next screen. Here you will need to choose to cut with a mat if using a Maker 3, Then click continue on the next screen.

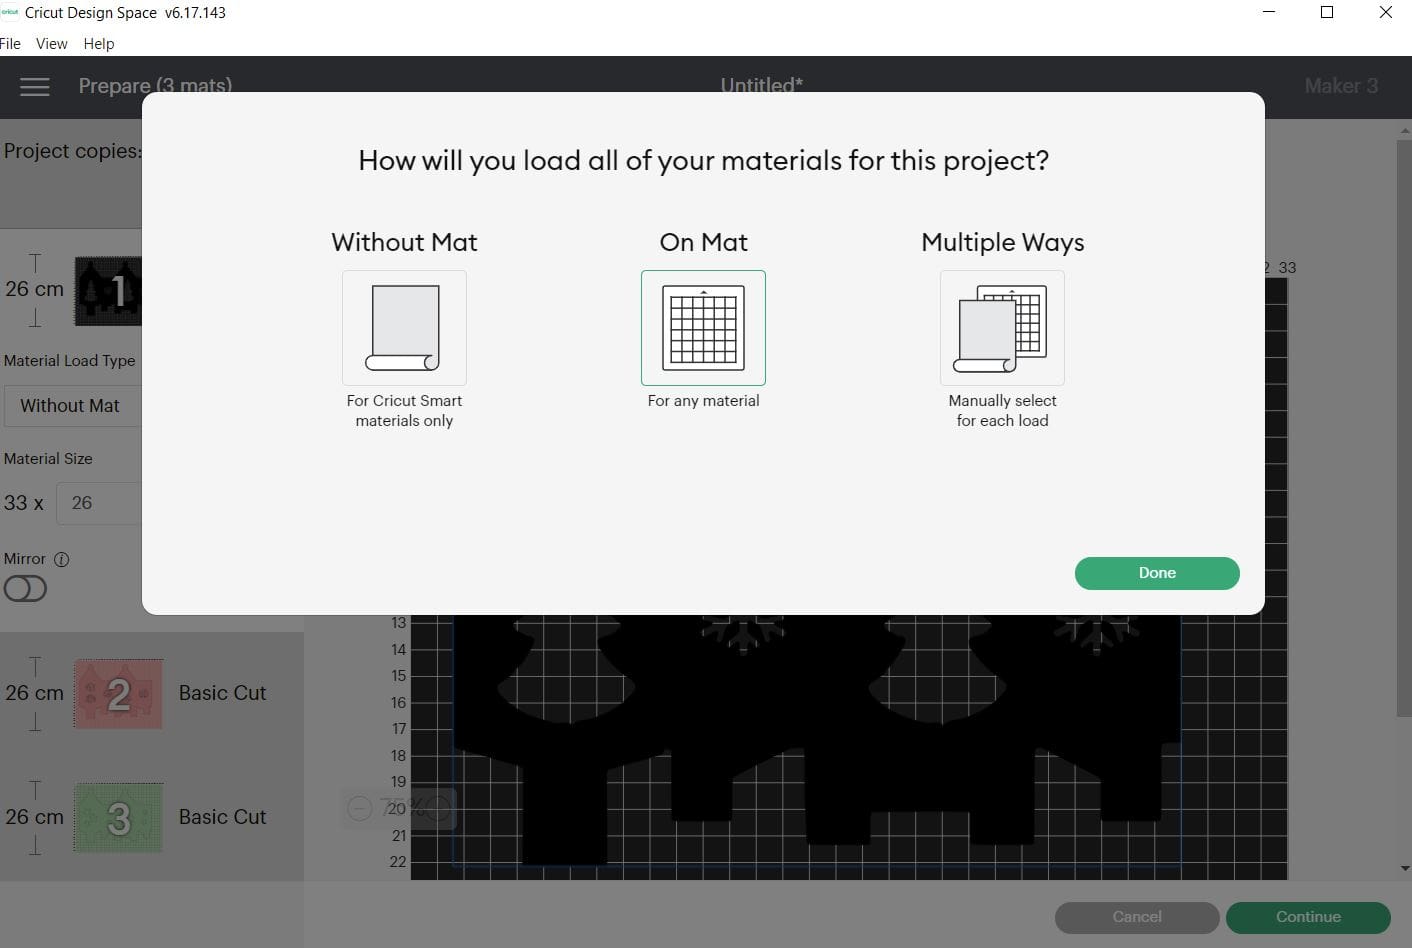
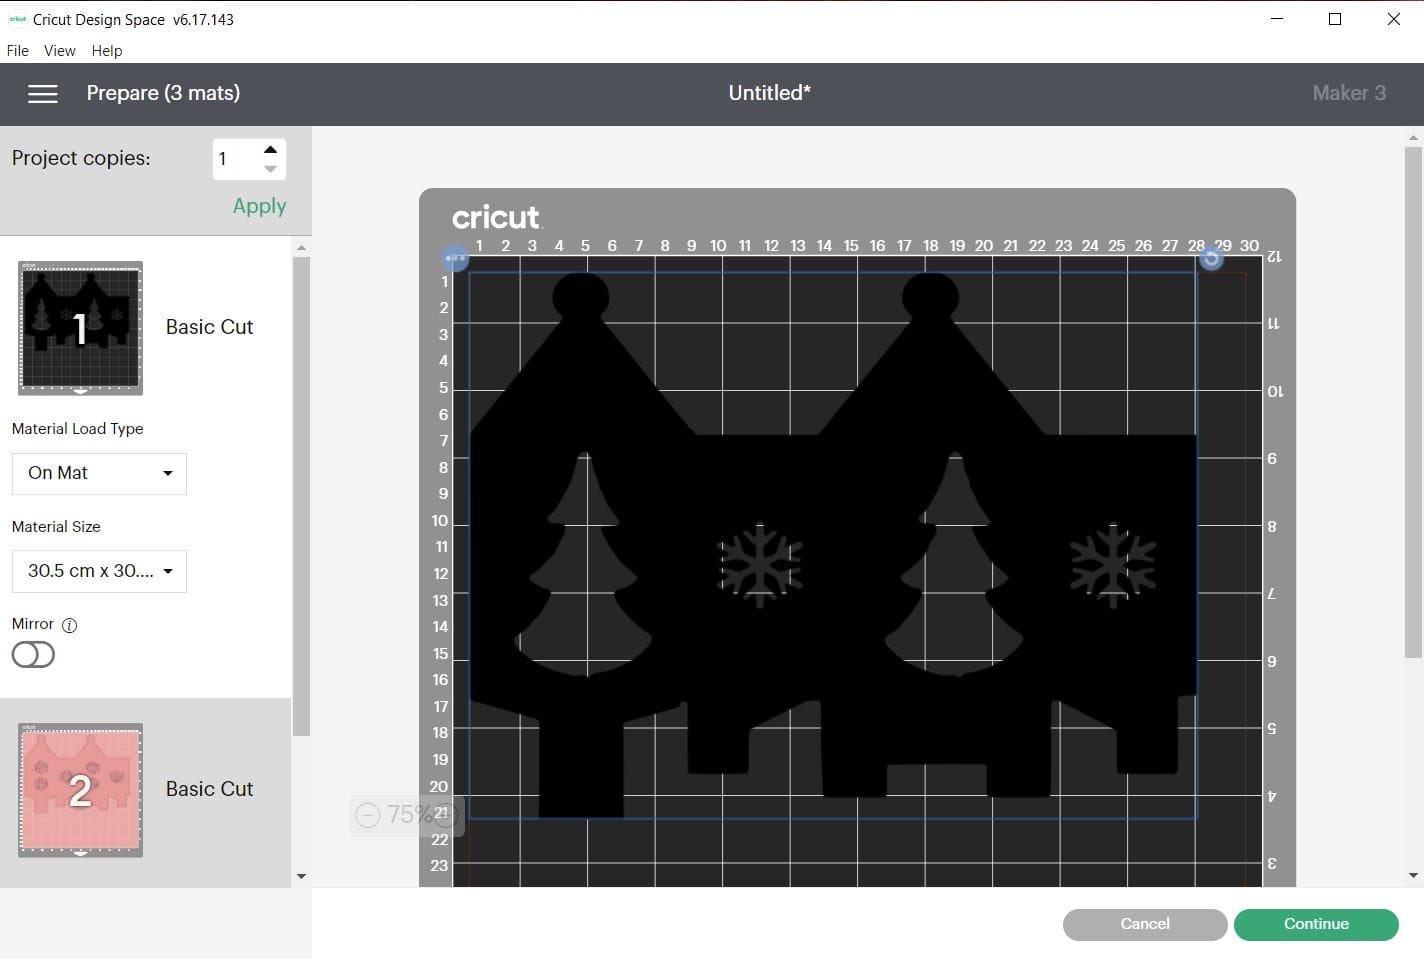
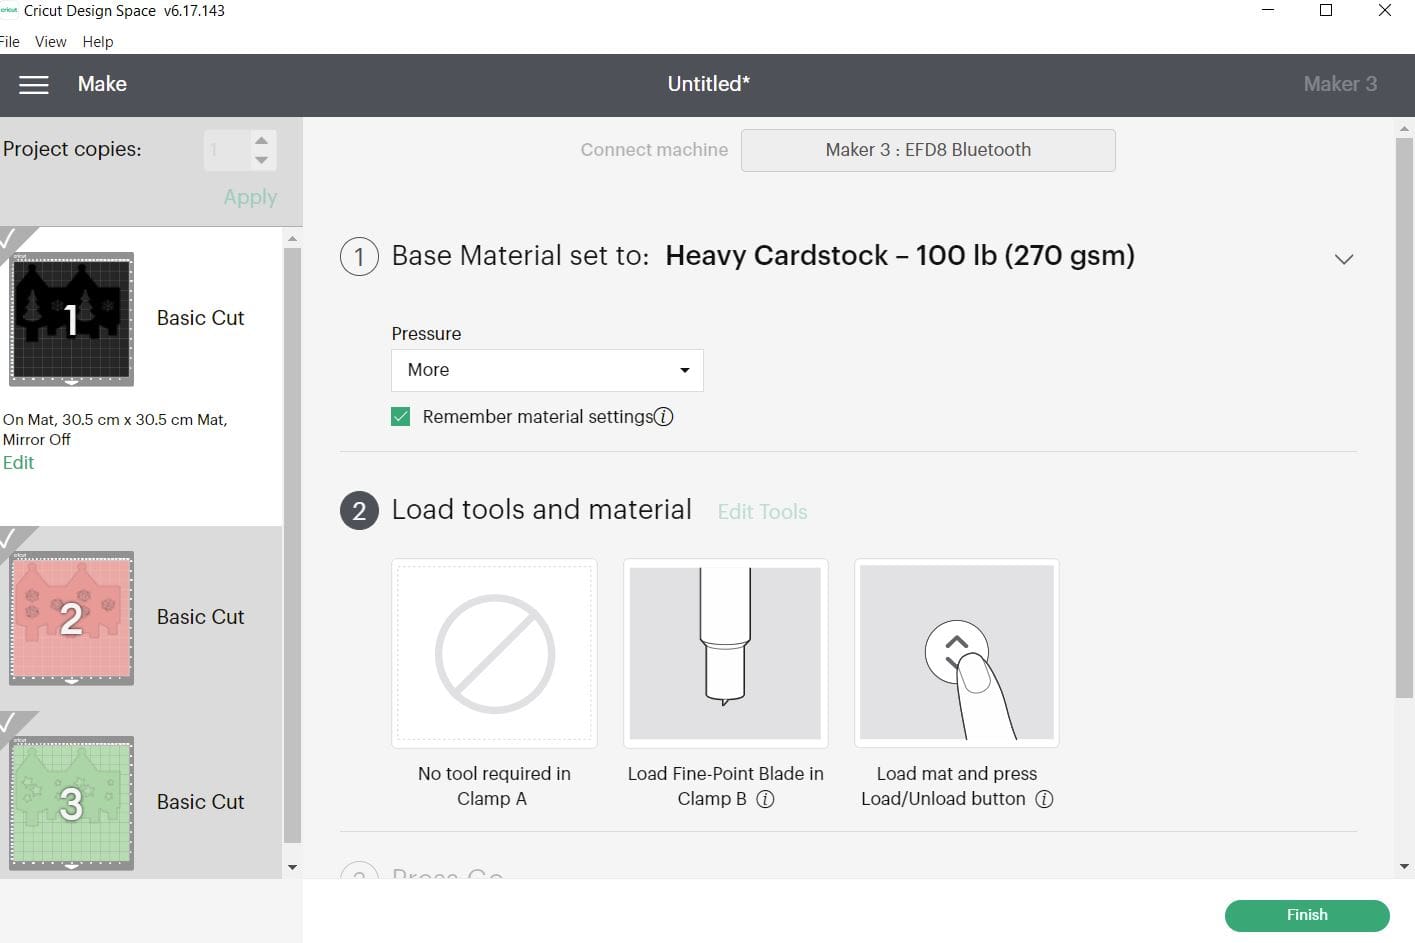
4. In the next window make sure your settings are all set to the successful settings from your test cut and ensure your machine is linked before proceeding to cut.,. Cut settings: (**please test cut) to cut all 3 types of card we used the “Heavy Cardstock” setting with More pressure. Press the flashing Cricut symbol on your maker to cut, after Loading the sheet into the machine.
**A reminder that these settings, including the blade setting, are specific to the materials and machine we’re using, adjustments may be necessary if using different materials and machine**
We always recommend before proceeding, you test cut your materials when first using so if you have not recently cut our Glitter or Mirror A4 cardstock please test cut for your chosen machine found on our Application guide, and also Blog.
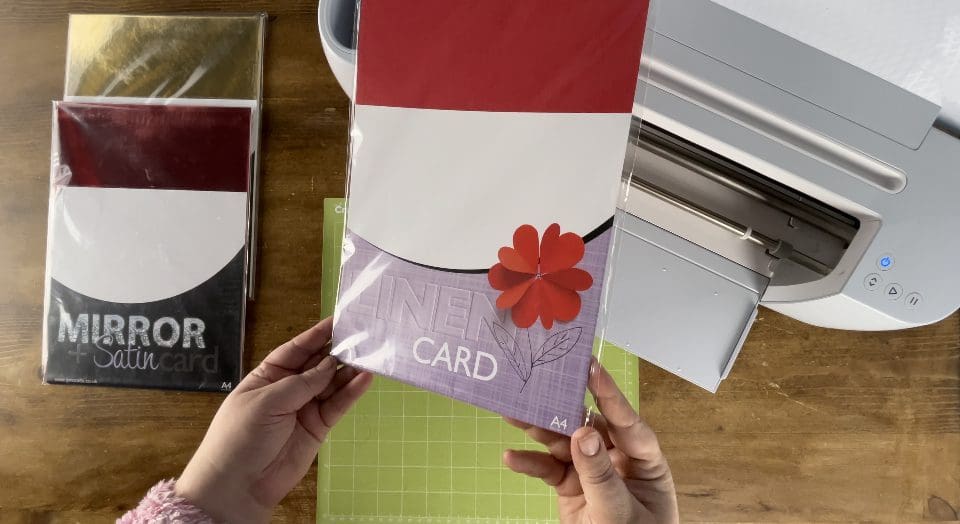
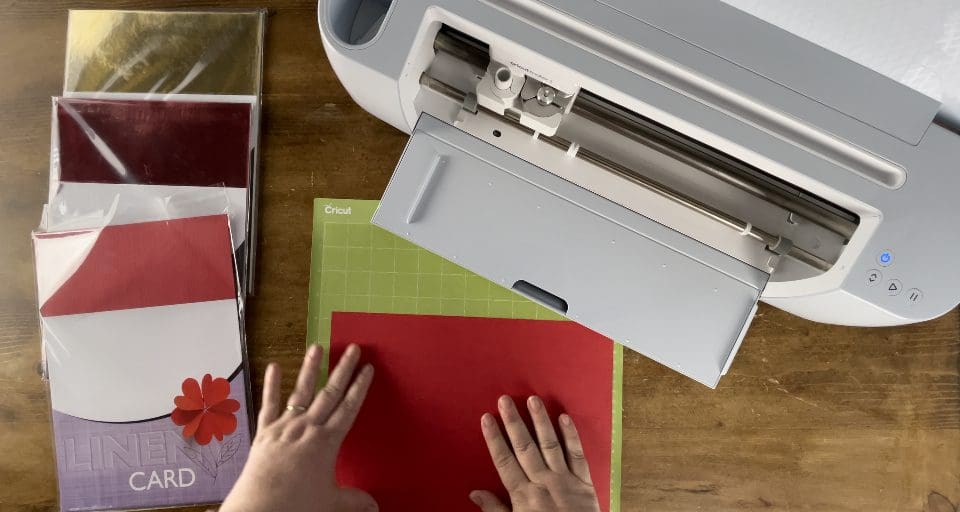
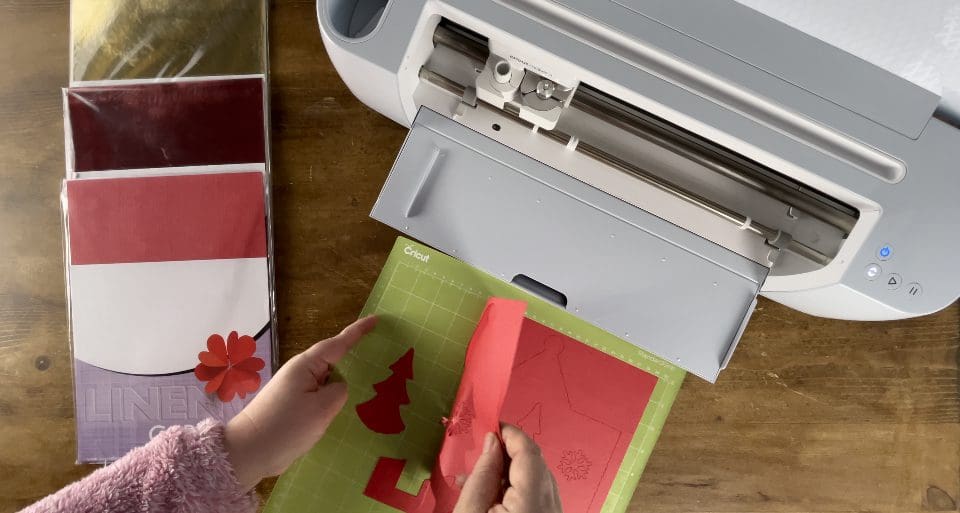
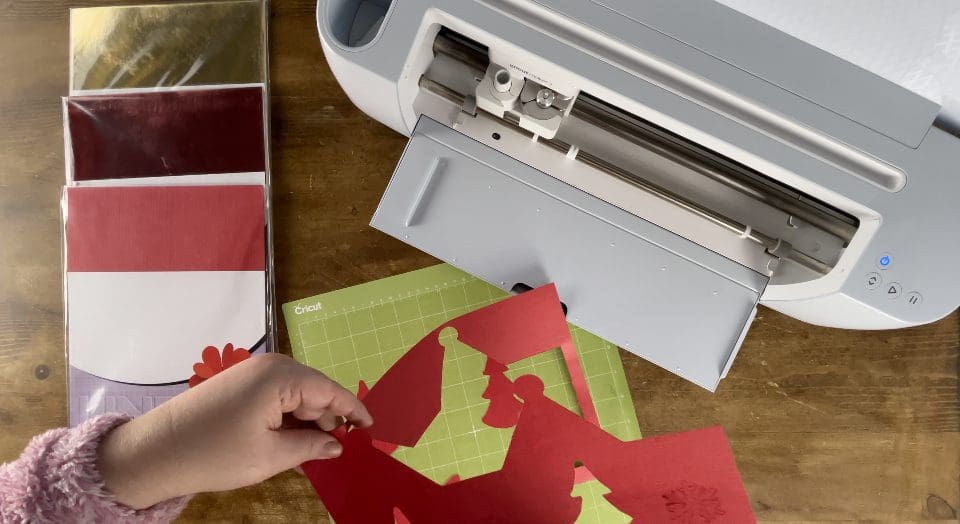
5. When cut, unload the mat by pressing the machine’s down arrow, peel the card off the mat, flex the mat away from underneath at the same time to reduce the risk of damaging the delicate cuts in the A4 card. Then, remove any excess material and scrape the mat clean with your squeegee. Once cut, proceed to repeat for the remaining lanterns you are choosing to use for your design repeating steps 4 and 5.
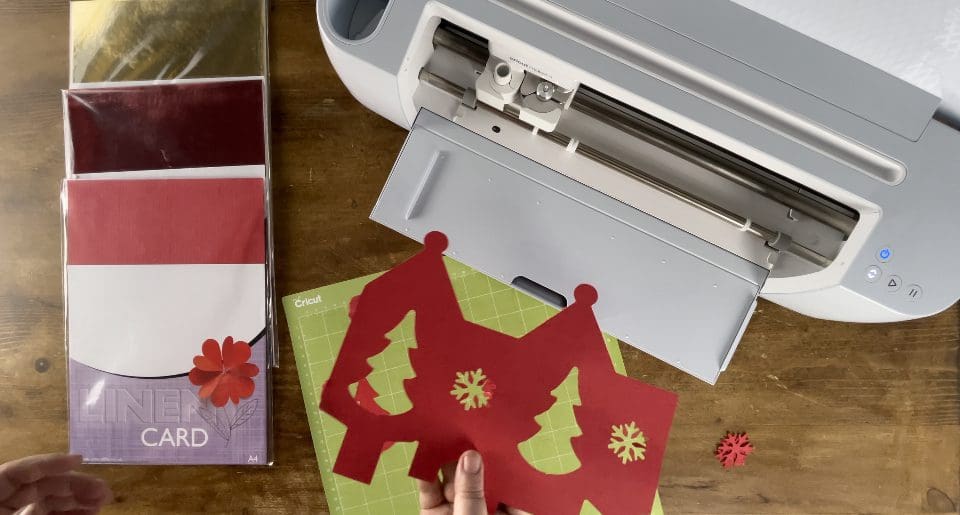

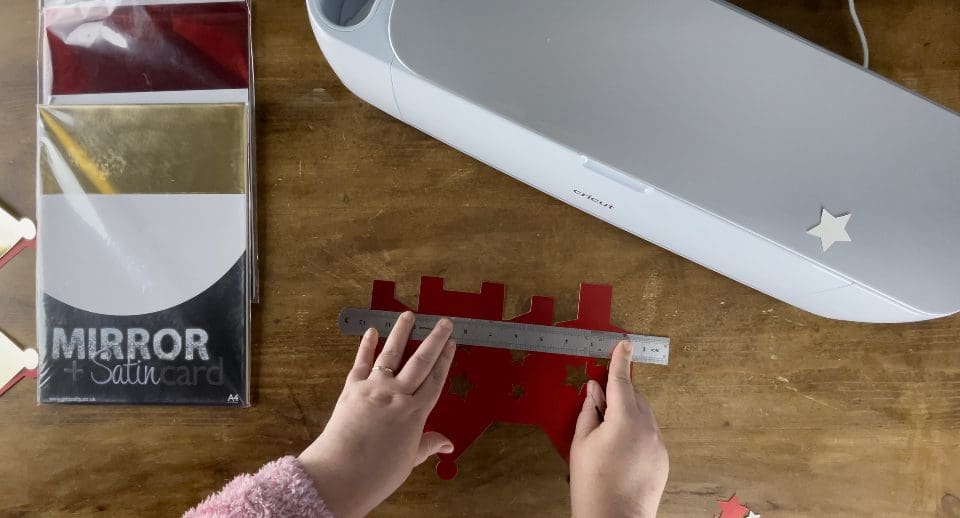
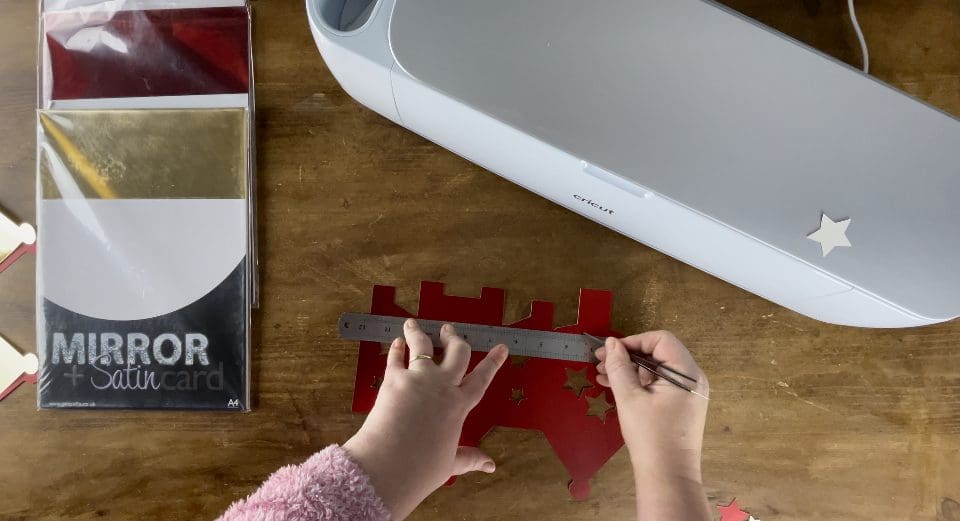
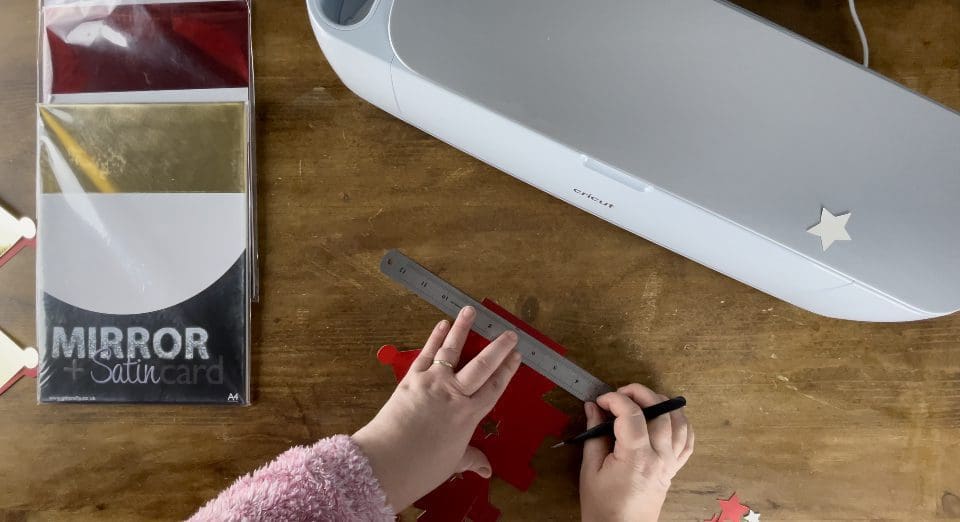
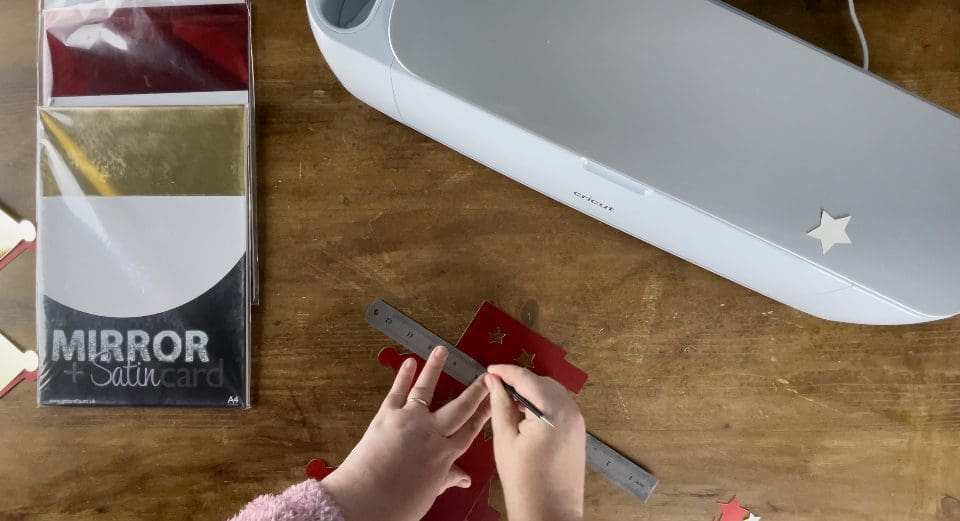
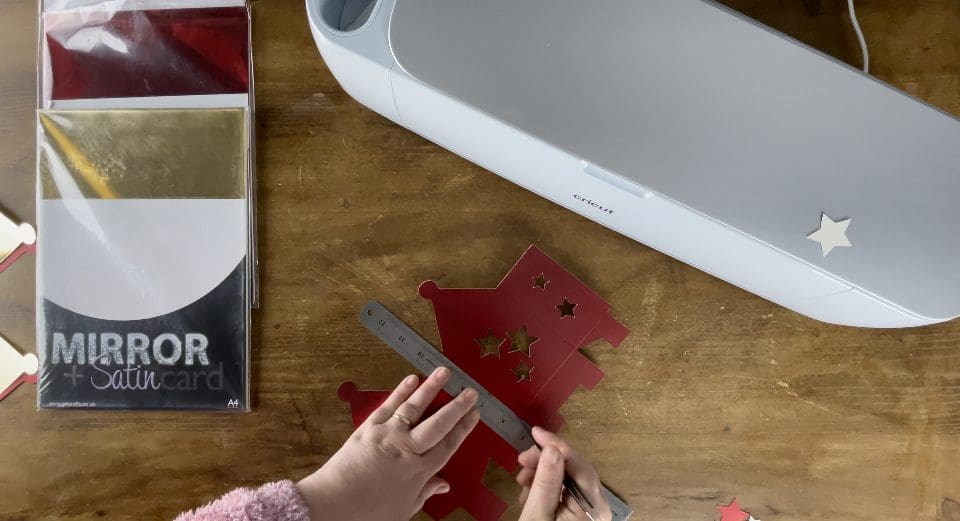
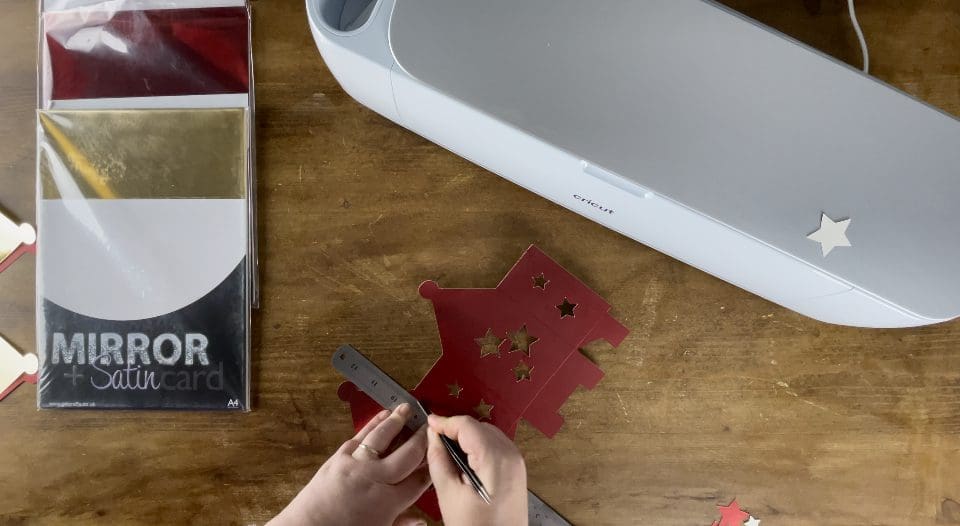
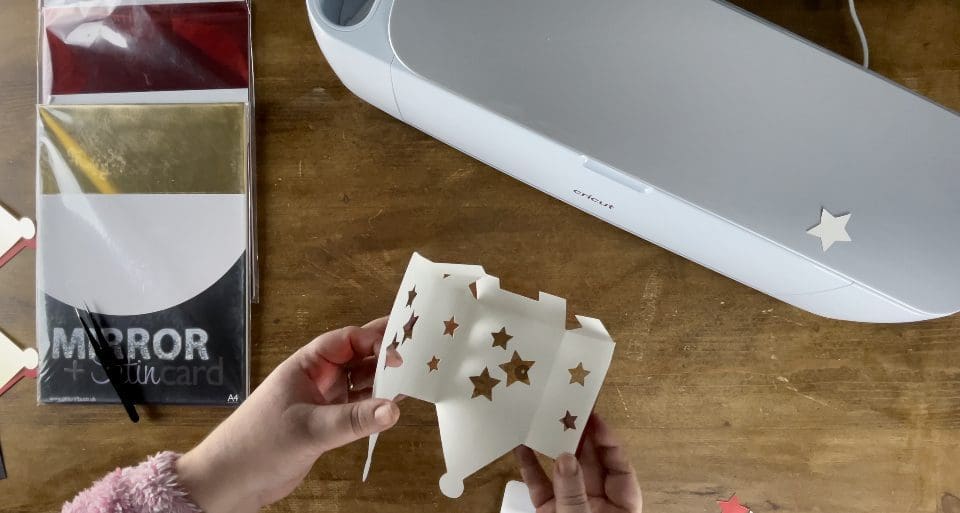
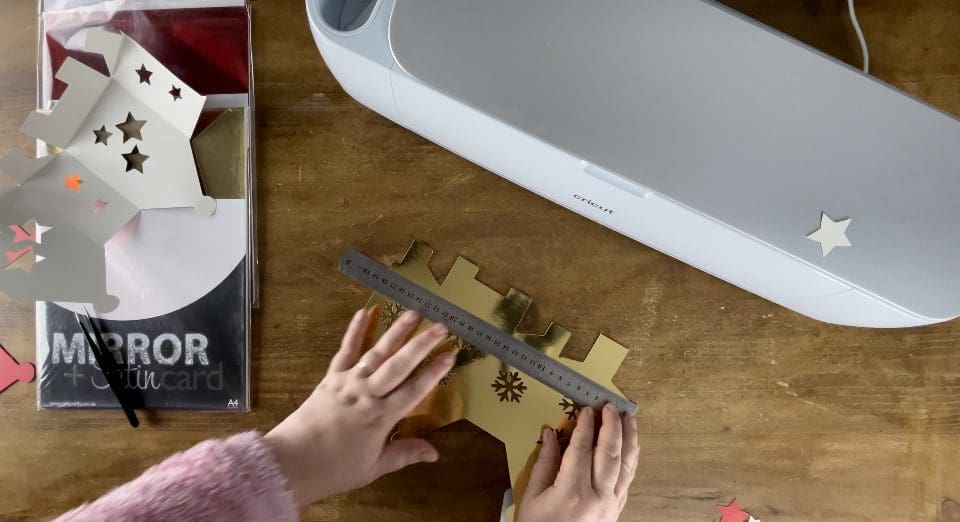
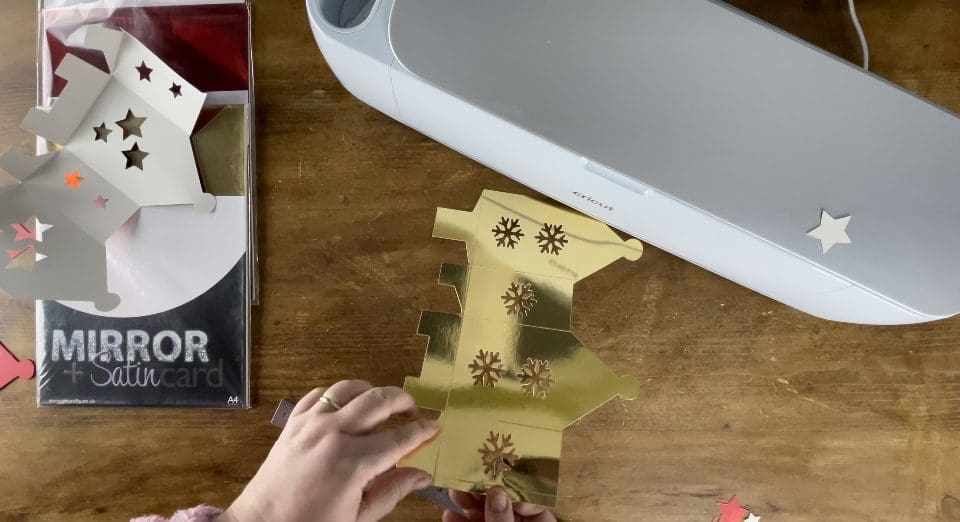
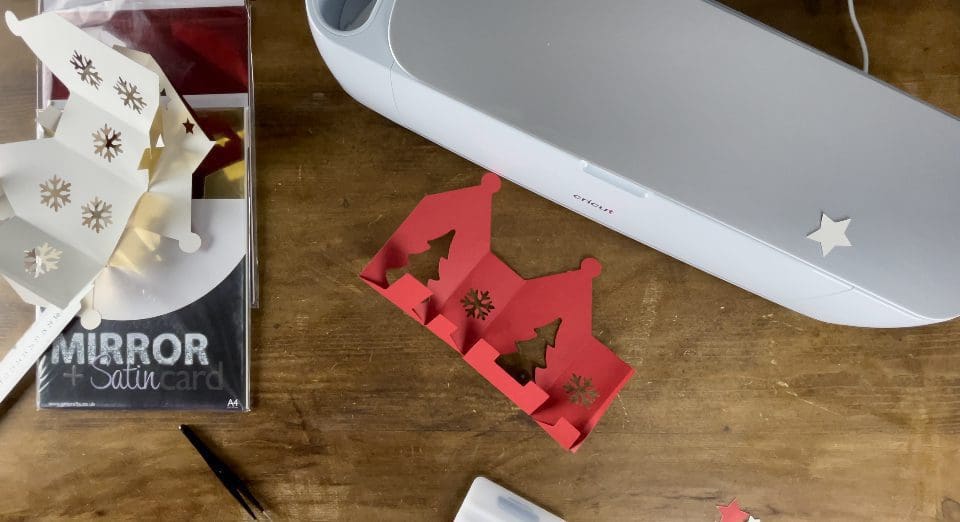
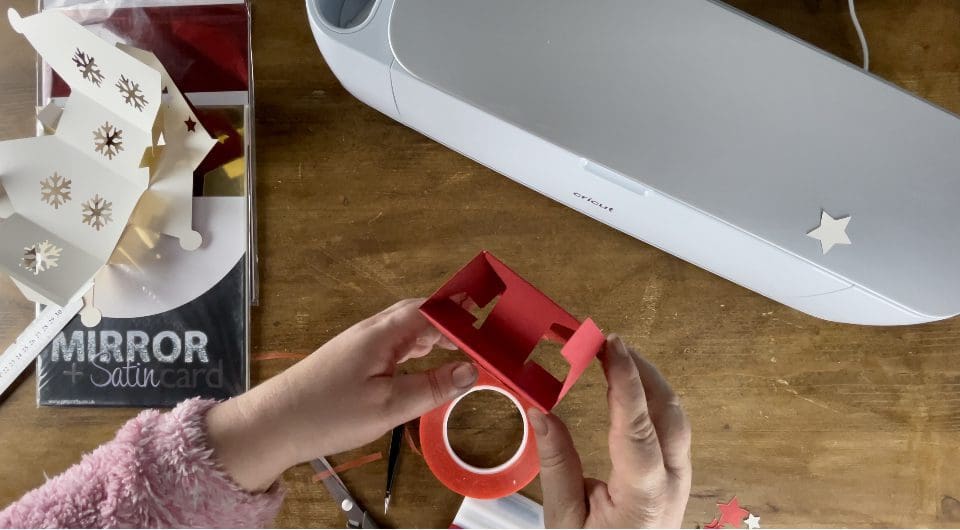
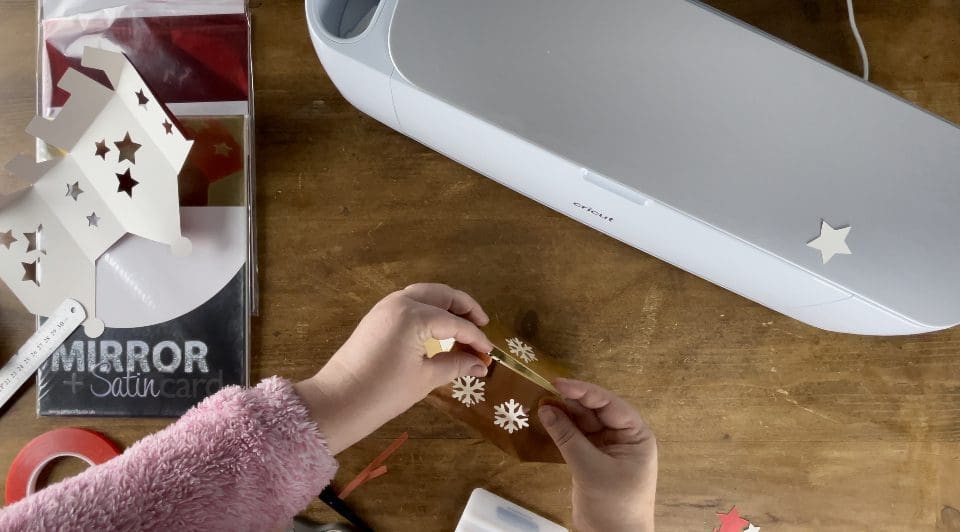
6. When your design is cut and weeded, turn the card over so the inside is facing you, take the weeding tweezers, using the non tweezer end, and Ruler and score along the bottom, flap and each corner of the boxes, to enable you to fold them neatly. You can add a score line, or dash cut lines, but we prefer this method as it gave the nicest finish when lit inside.
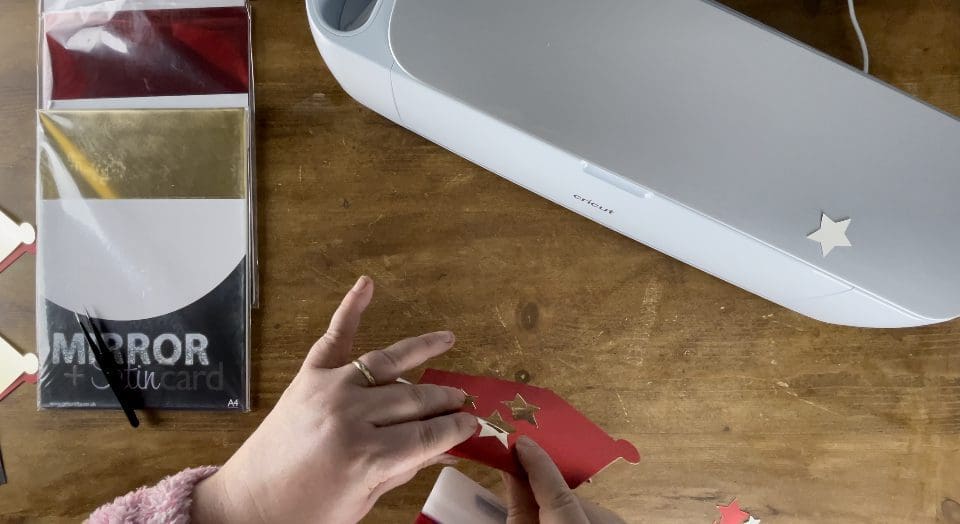
7. Take your squeegee and use it to burnish the folded score lines to create a neat finish.
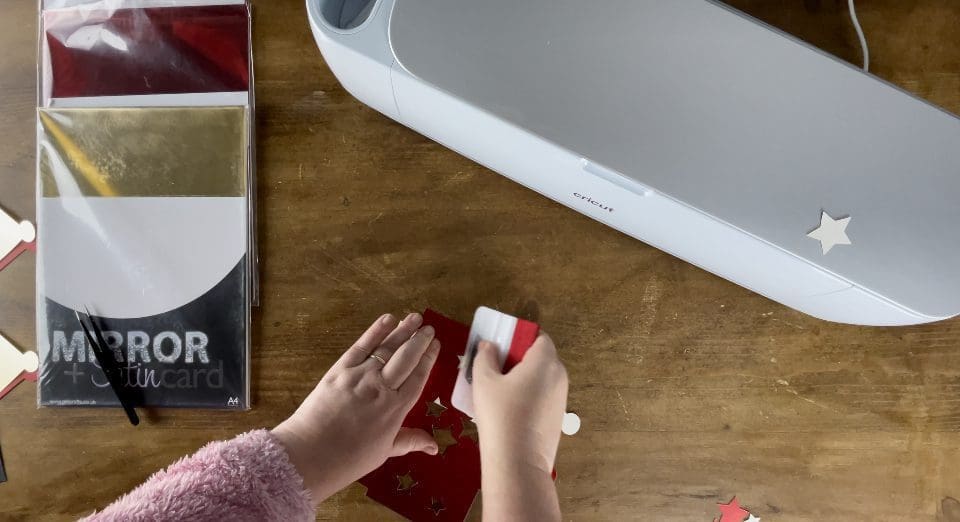
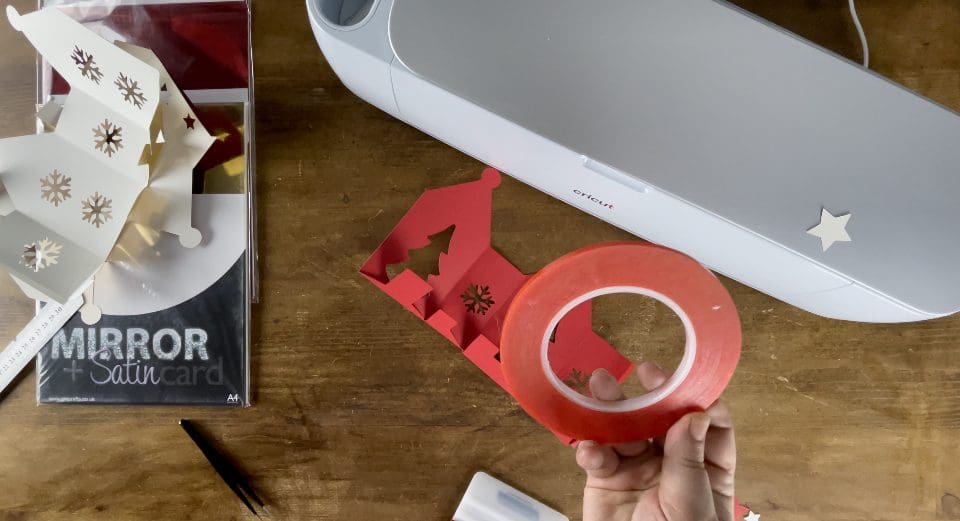
8. Take your red double sided tape and add it to the small inside flap, before bringing the outside corner edges, pinch the edge together.
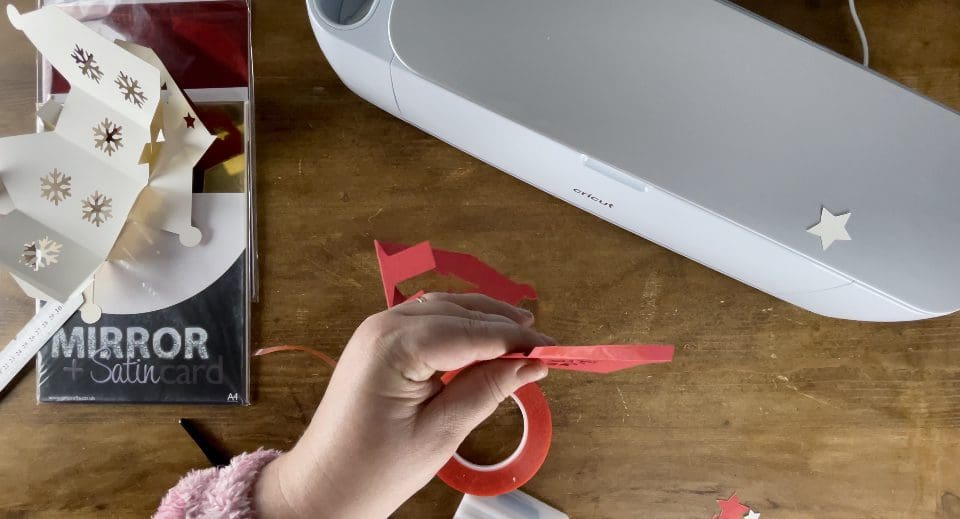

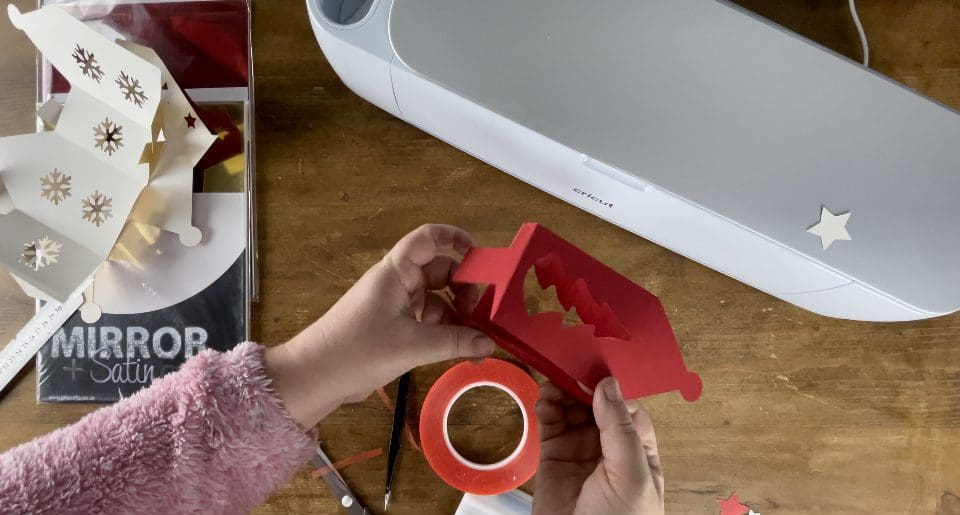
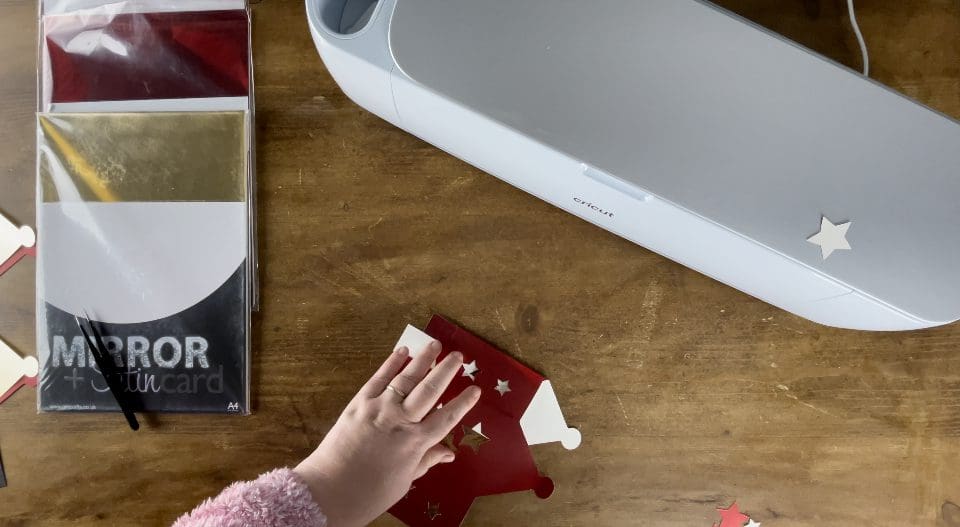
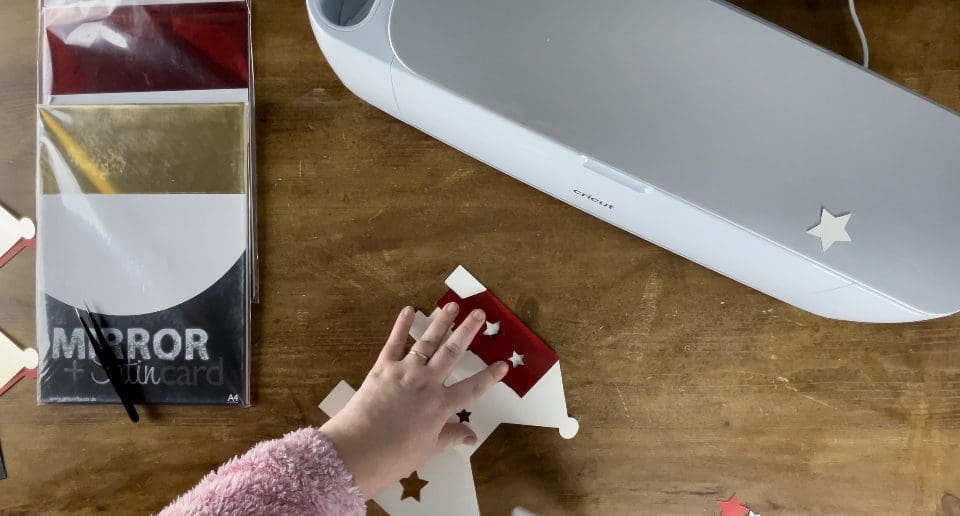
9. Fold the bottom flaps inwards, using the wider flap to tuck the 2 small side flaps in to then lock in place with the longer thin tab flap.
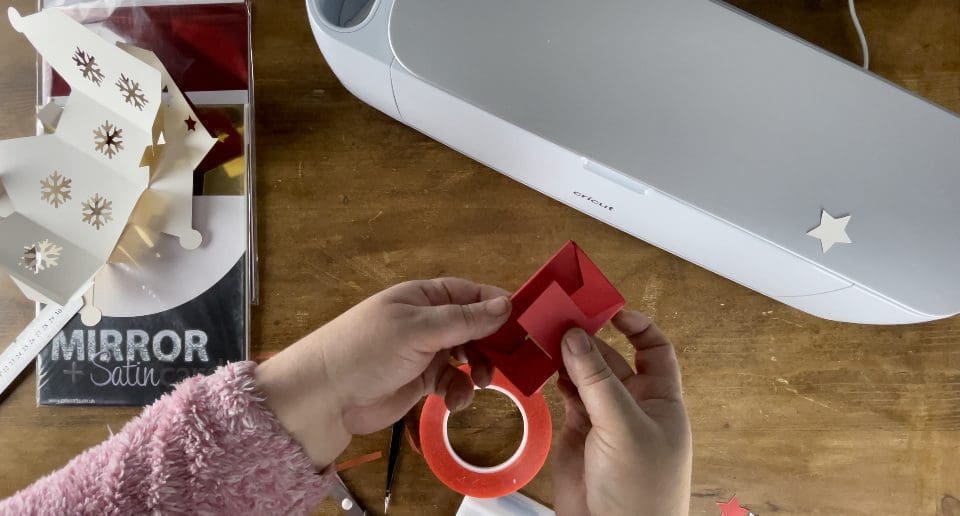
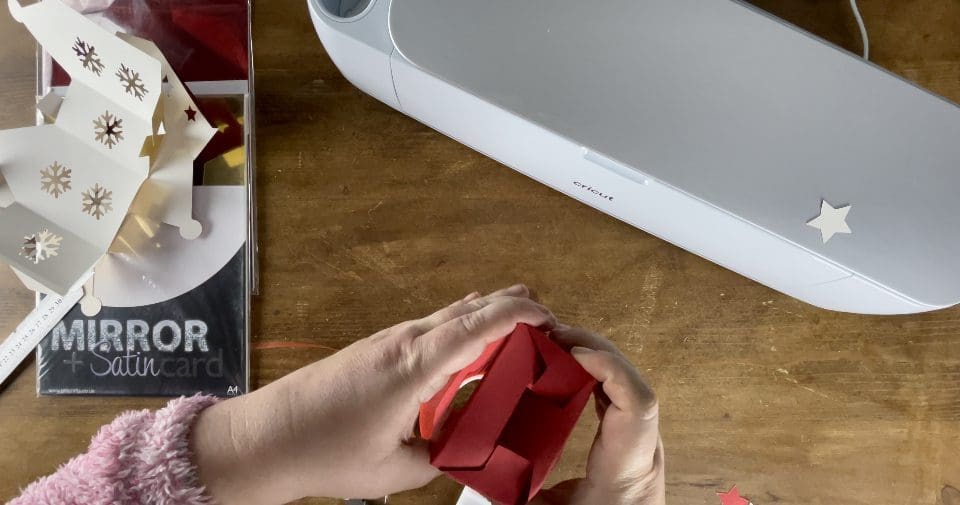
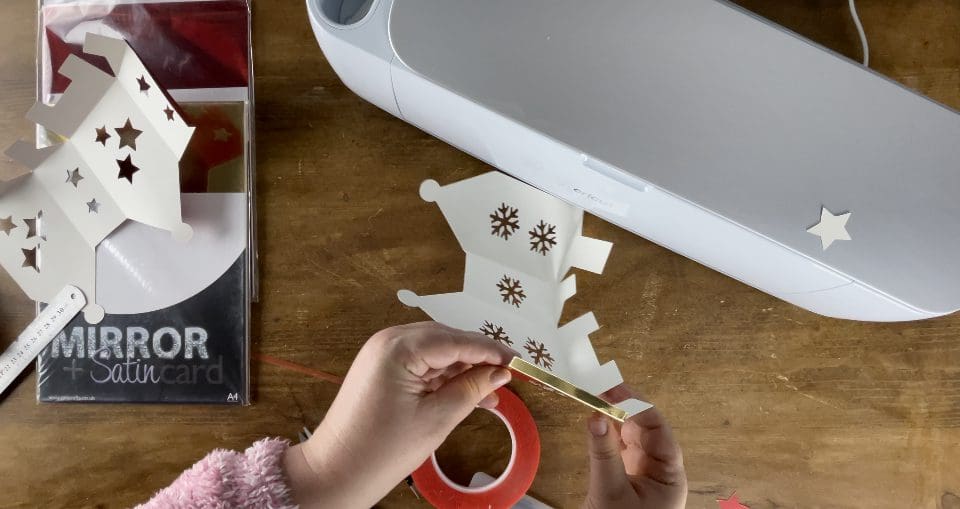
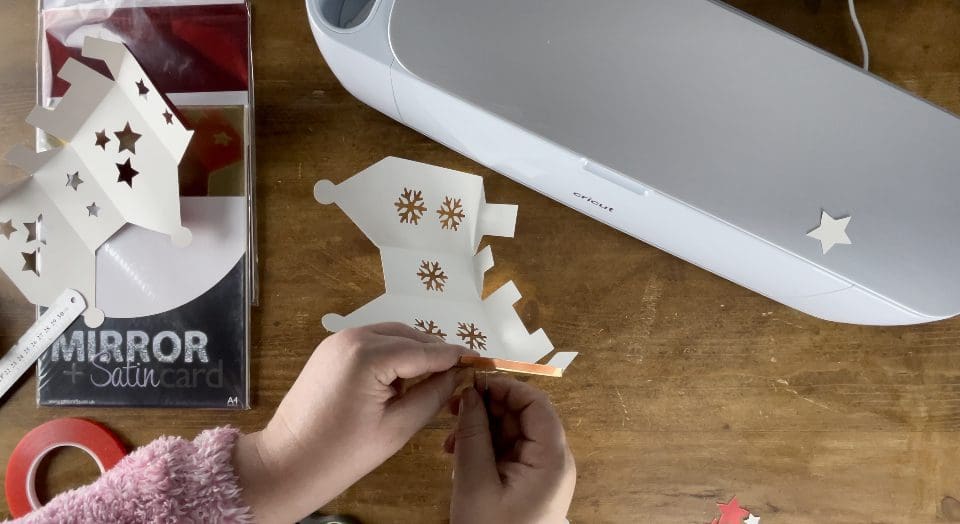

10. Pinch the corners and edges if needed, to make sure it is straight and stands square, before securing the inside flap with red tape.

11. Insert the lights of your choice, we chose battery LED tealights. You could string them up by sticking the rounded top edge together with red tape, if you wish too. Don’t forget We’d love to see your makes on our social media pages! Or email them in!
Silhouette Cut File
Instructions:
Before you start, you need to download the cut file, Upload the cut file into Silhouette Studio and resize as necessary, (when resizing bring all layers into the design software and select all at once to get the correct offset layers and save the adjusted file, so you can cut layers individually at that correct scale you have chosen) Remember to test cut if necessary and cut settings are found here along with test cut guidelines for every machine.
Brother Cut File
To import these files into the Brother Canvas Workspace:
After downloading, please log in as usual to your design space account, open a new project mat, then left click on the SVG icon in the top left bar in canvas, this will then allow you to import your files. Once you left click this icon, a pop up box appears with you to choose where to import file from, choose to import the file from your downloads list or where you have chosen to save when unzipped.
Cut settings are found here
Just incase you need the link CanvasWorkspace (brother.com)