
Tutorial/Free Cut File
Machine Free Tutorial Using Transfer Doodles And Iron On Transfers- Making Lasting Memories
Hello!
With half term almost upon us, we thought we would give you some different ideas to do this week, and something you can do on the go with your kids, by your self and even involve the whole family should you wish. This week you don’t need a cutting machine, just a pen, a pair of scissors, the sheets shown below, and either a domestic iron, or heat press if you have one. You could even do this in a hotel room, a fantastic rainy day project, or something to do when visiting relatives even- why not get everyone involved and create something truly memorable, that you can keep forever!
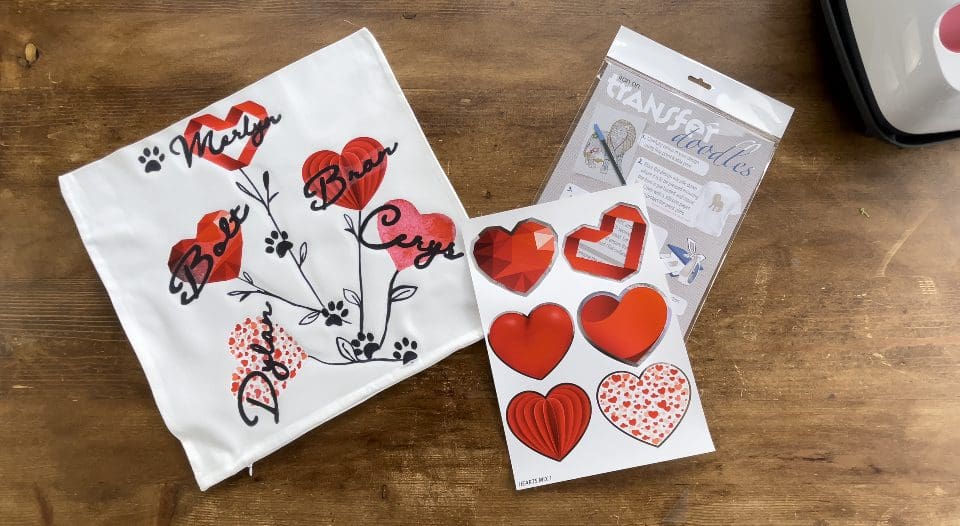
We have used one of our staff’s pet names on this project, but you could use peoples names, pet’s names, you could even use it to put quotes on, inspire someone, put words to motivate them, and of course, with the clear transfer doodle sheets you can use it to draw absolutely anything on, kids foot prints, nanny’s handwriting saying I Love You, literally anything you want, making creating memories easy for everyone, and what a keepsake it would make!!!
We would love to see what you make! Have you found our You Tube channel yet? The video showing this and all of our other tutorials are available on there, as well as exclusive demos, inspiration and more! Join us on Facebook , Instagram or Tiktok or send us an email to sales@gmcrafts.co.uk we would love to hear from you!
***Click here to watch in full screen on YouTube***
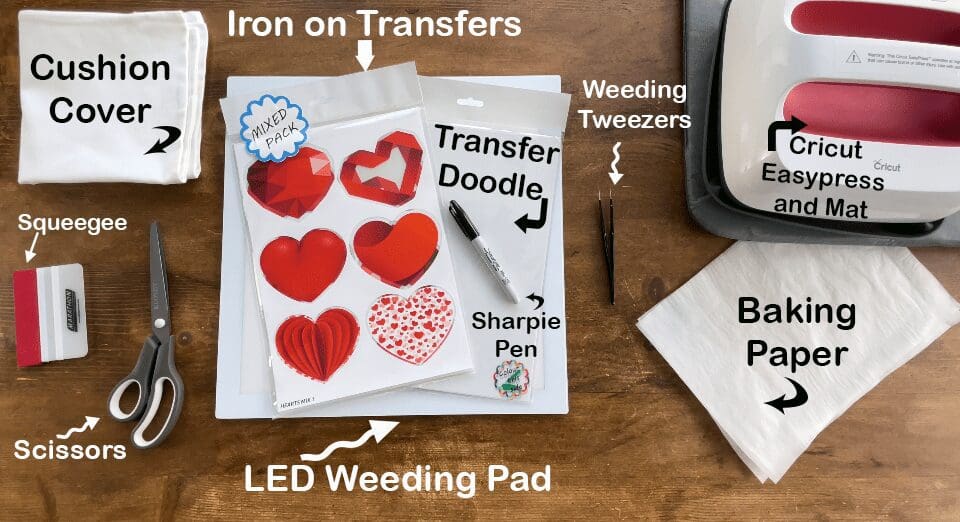
What you’ll need:
- Transfer Doodles Clear sheet pack Available Here
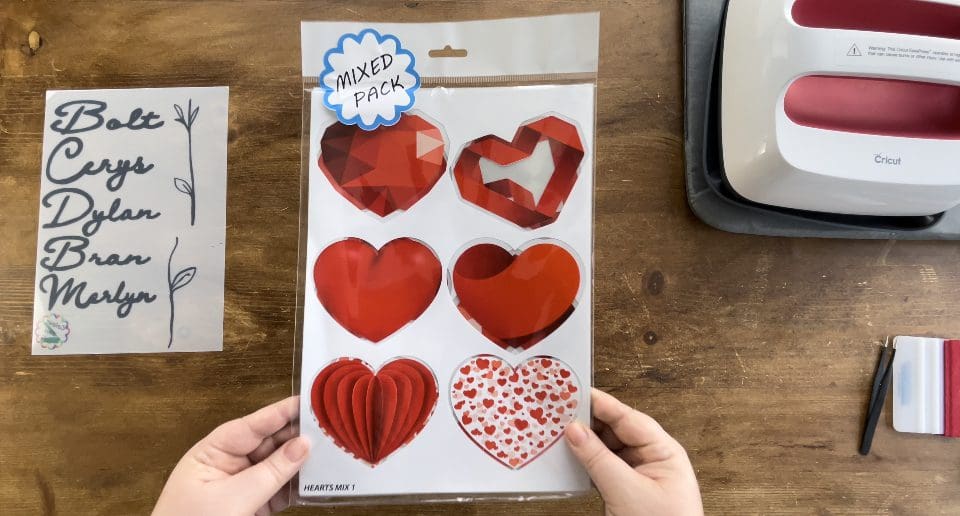
- Iron on transfers Available Here
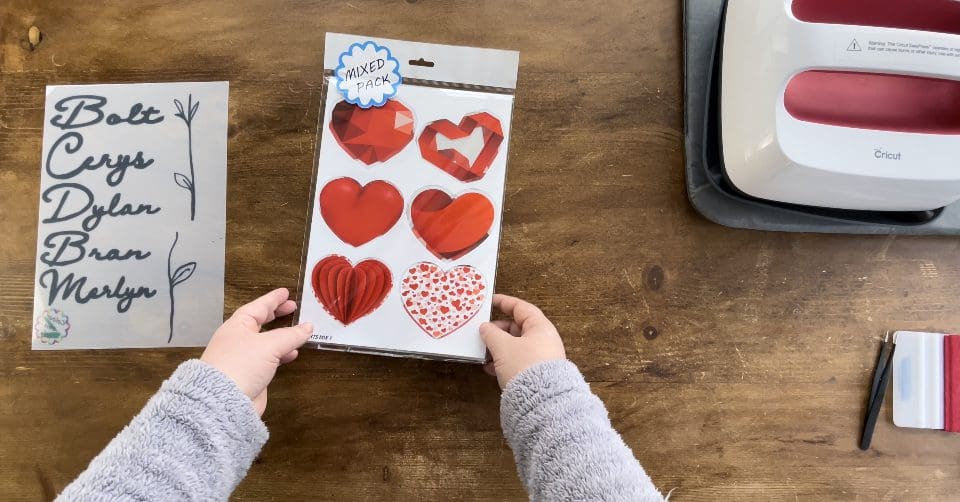
- We chose the love ones found Here
- Squeegee. Available Here
- GMCrafts LED light (weeding) panel. Available here
- Weeding tweezers . Available Here
- Cricut Easypress and Easypress Mat Here or a domestic iron if needed
- Scissors and Sharpie or permanent marker pen from your own stash
- Cushion cover, tea towel, T-shirt or maybe a blanket of your choice to apply your design to.
- Silicone Paper, this is like the baking paper you can buy in the supermarket on a roll for the kitchen- DO NOT USE TEFLON
- A print out of the below Skeleton drawing files, which are free below!
- And if you wish to do something personalised some paper to draw your own design onto first.
Click here to download and print image to trace draw stems, paws and hearts
Instructions;
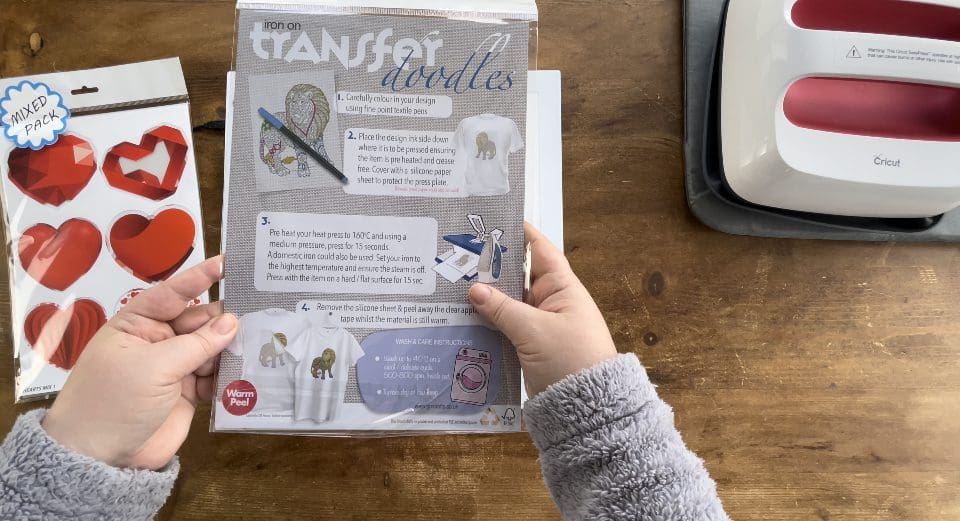
1. Before you start you will need to download the printable file above, to enable you to print this to copy and trace later on. Unzip the file to use it by right clicking it in your downloads. Below is a screen grab of what you’ll get, which bits you use is up to you.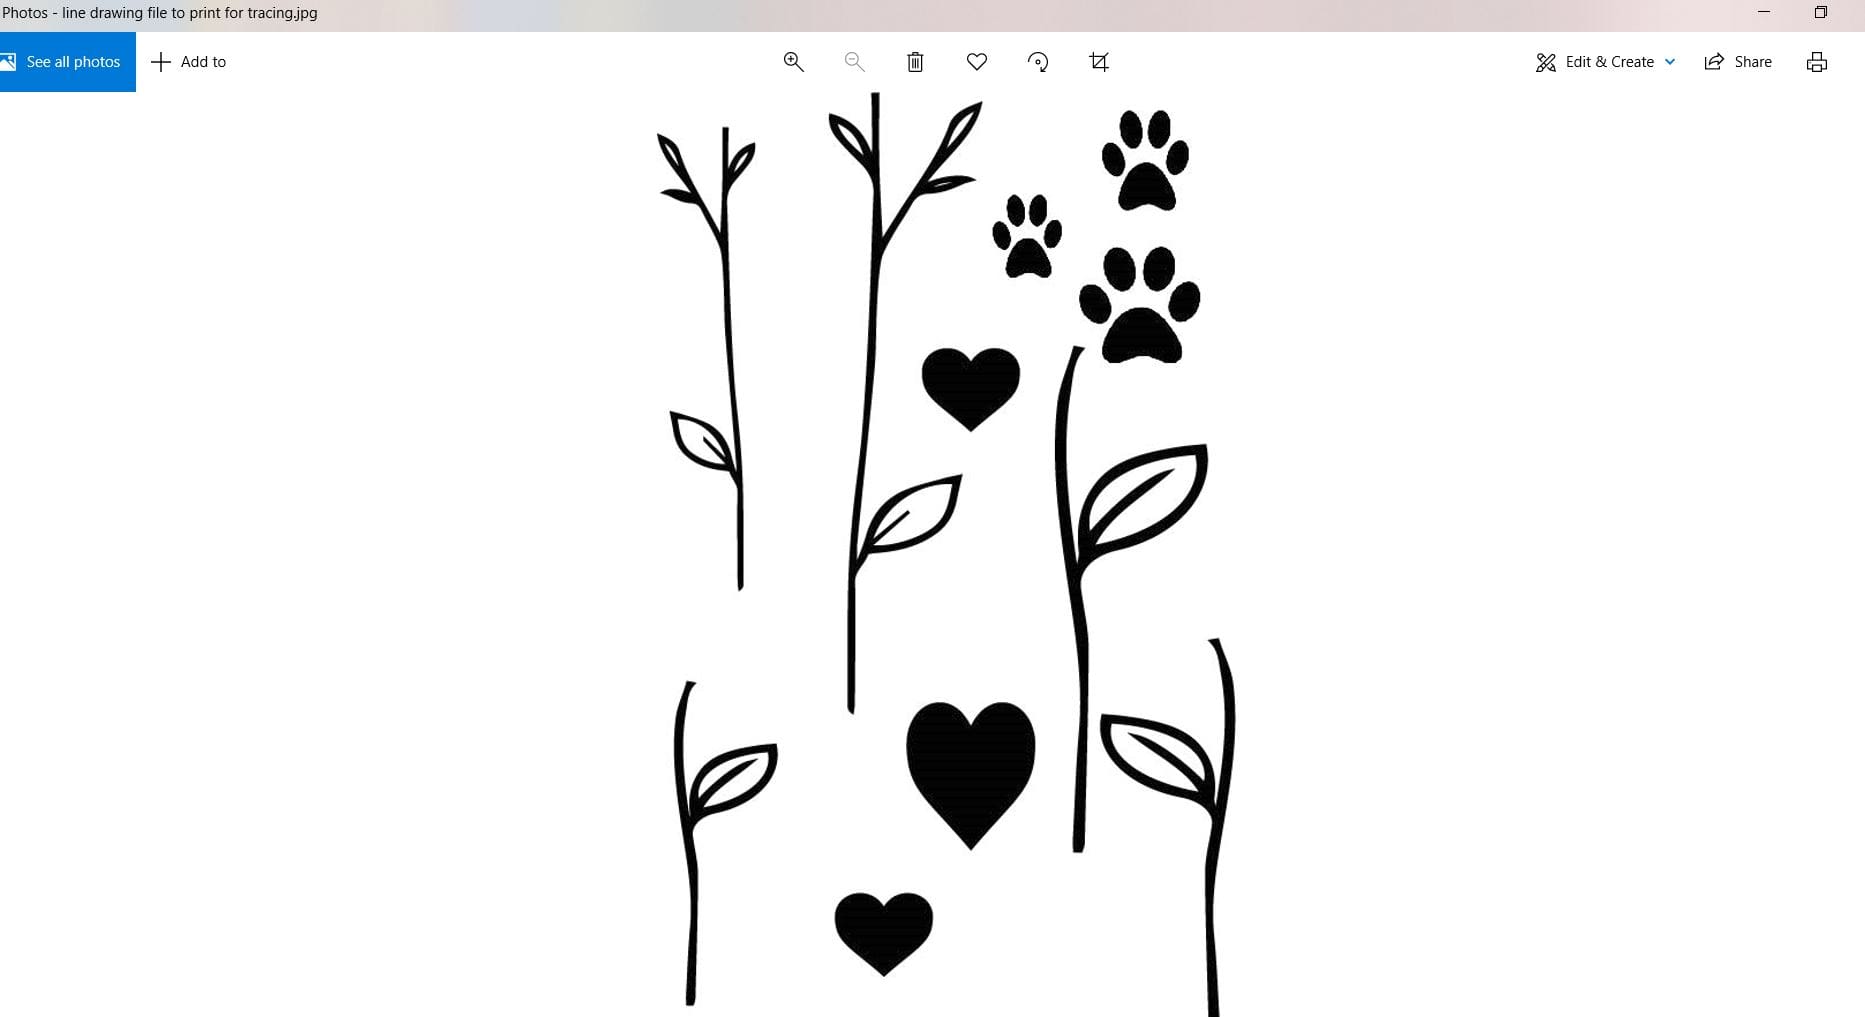
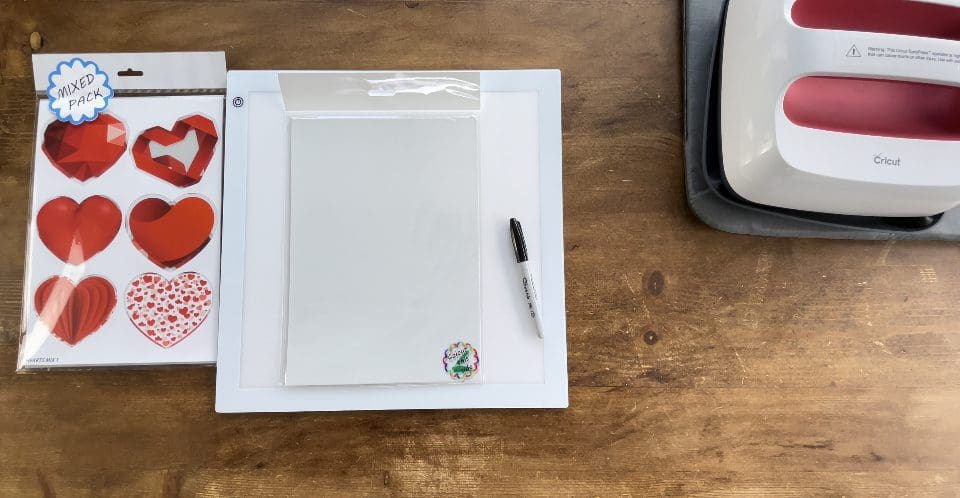
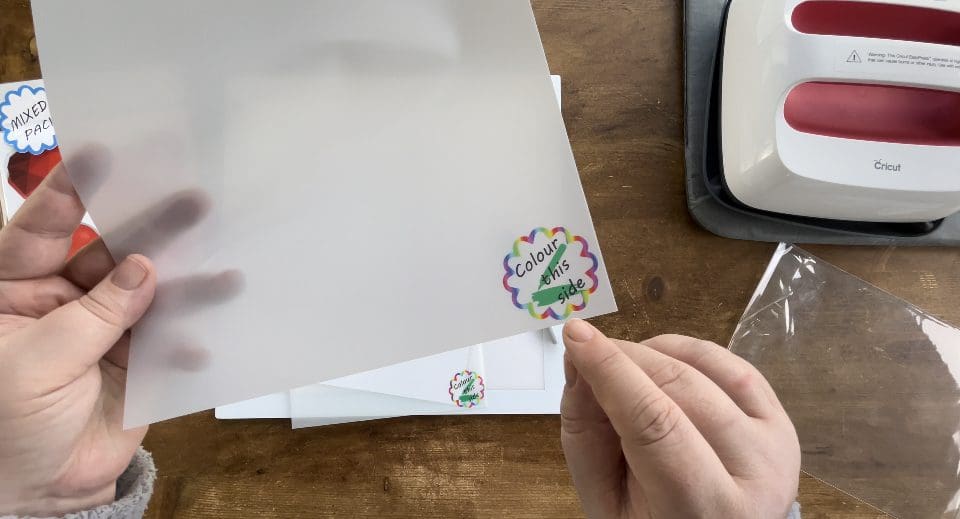
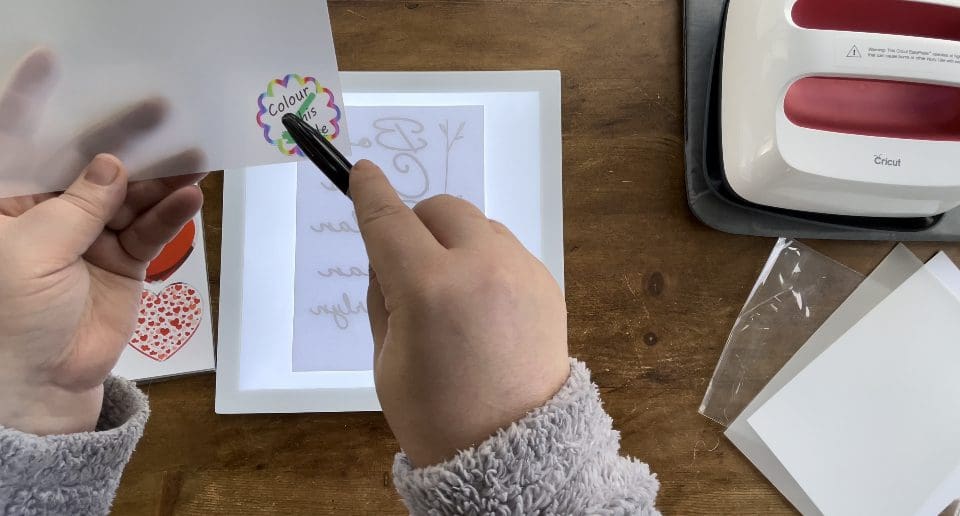
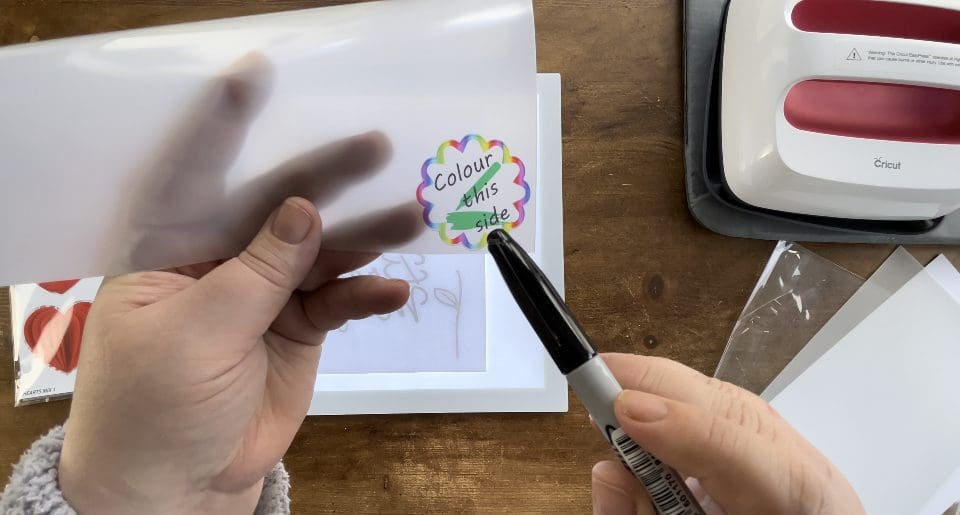
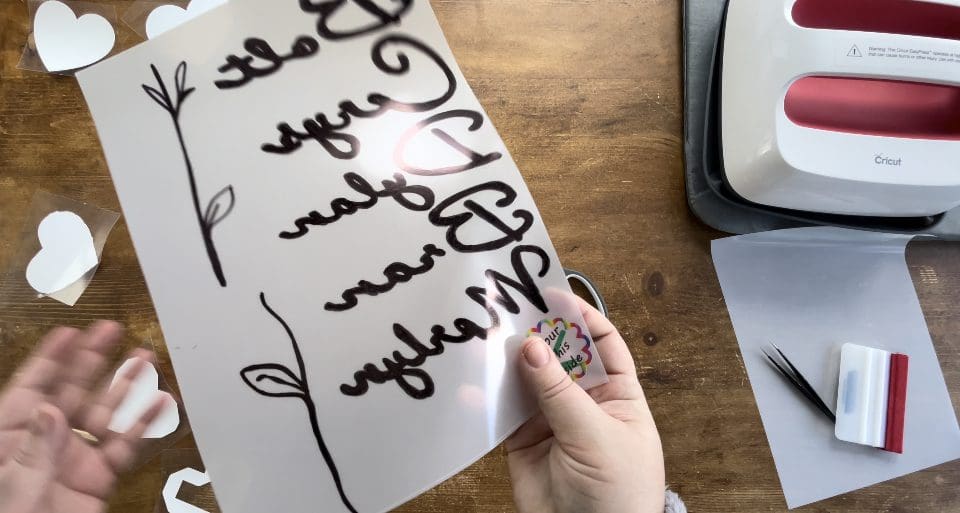
2. Now take your Transfer Doodle pack, and open it, You will see it contains a card instructions, and 2 sheets of doodles. One side will clearly tell you which side to colour- PLEASE NOTE ANY DRAWING WILL NEED TO BE MIRRORED SEE BELOW STEPS.
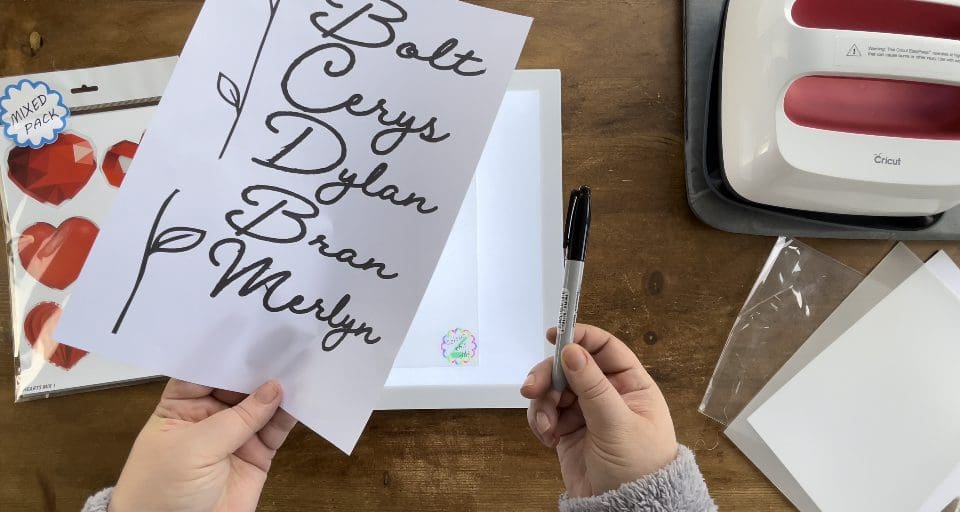
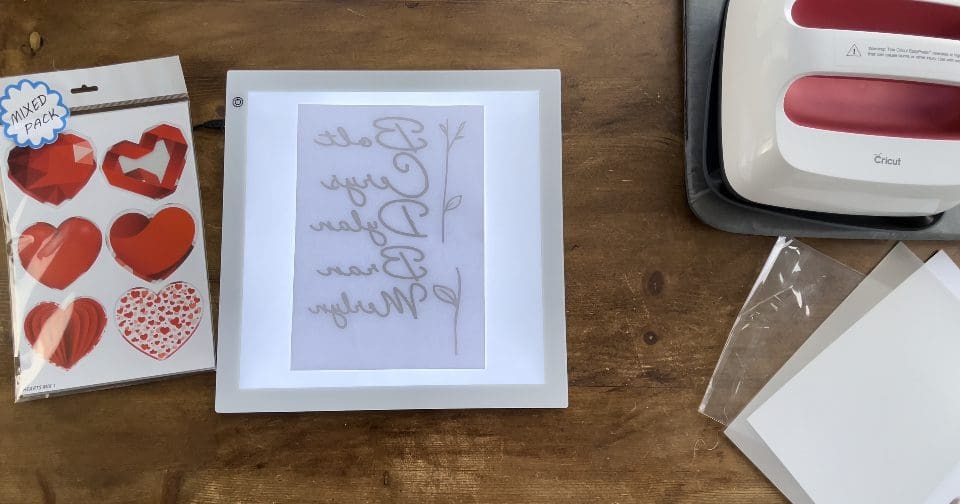
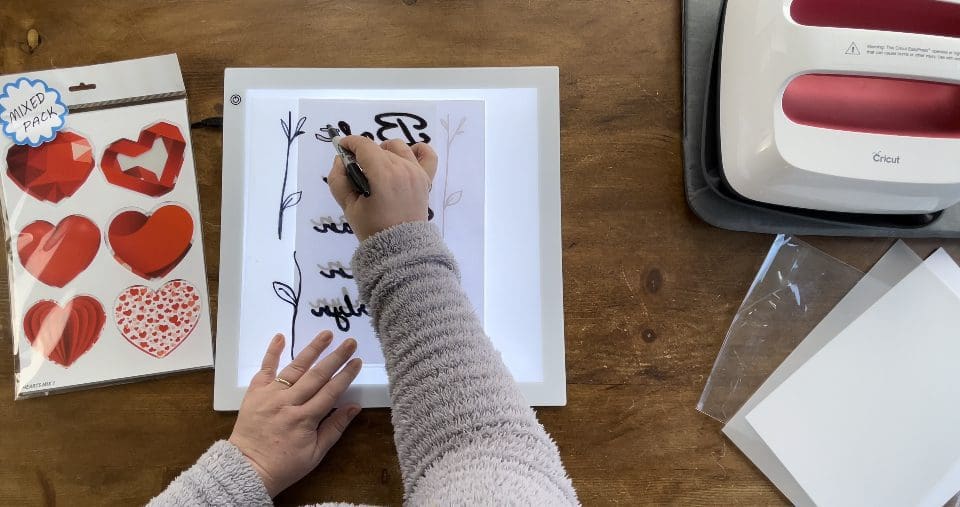
3. Take your printed sheet, as shown below and any that you have hand written or drawn on, and turn them over so that you can draw on your transfer doodle design in reverse, we have used our LED light pad, if you don’t have one, use a window and tape it with Masking tape or hold it very steady whilst tracing.
To clarify- if you want for example to write someone’s name either print it on the computer in reverse, or print as normal like below, turn it over as shown below, or hand write the design you wish to use on a piece of paper, and trace it in reverse as explained using a led light pad or window with light behind it to help you.
If you prefer you could import the file above, and your own design into your machine and use the Pen draw function to draw it on the machine, again be sure to draw in reverse on the correct side of the transfer doodle.
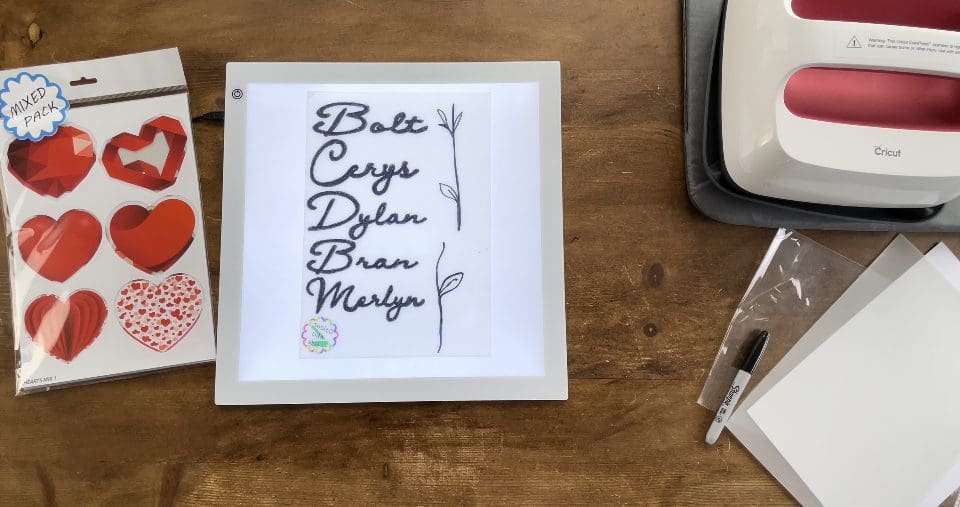
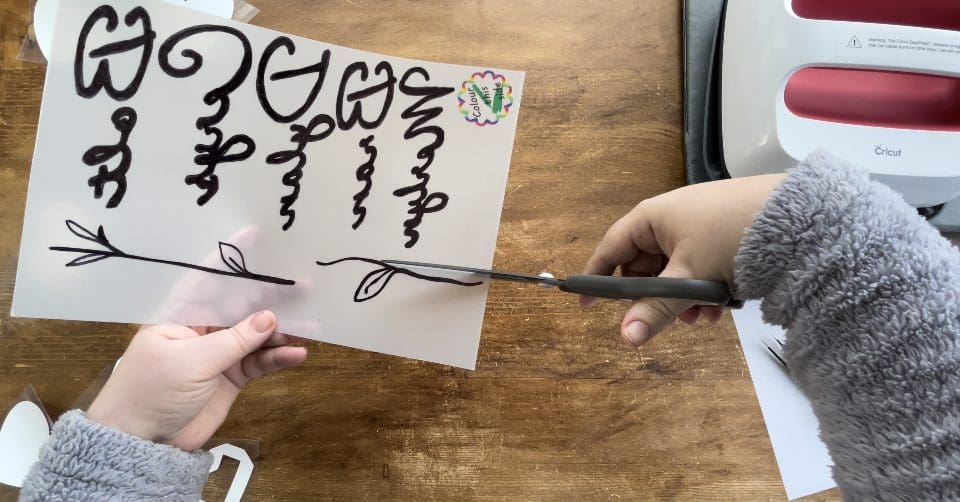
4. Make sure you have turned your design upside down as you are colouring what will become the reverse of your design, and check you are using the right side of the sheet before you start to draw or colour it. We have used a black sharpie- sharpies ( and other equivalent) work best as they transfer as vibrant colours when sealed in the HTV afterwards, however you can try other pens if you wish. Remember this is permanent and you can not wash it off and re colour after application.
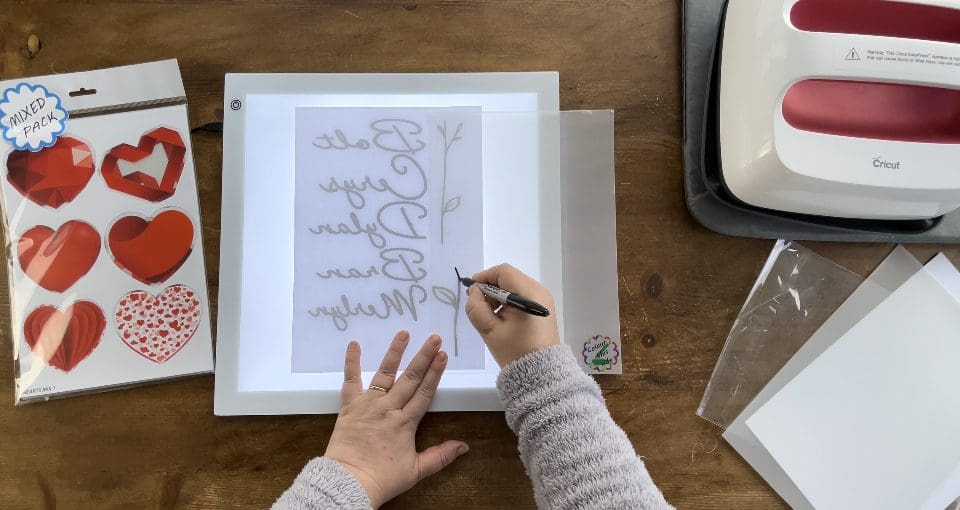
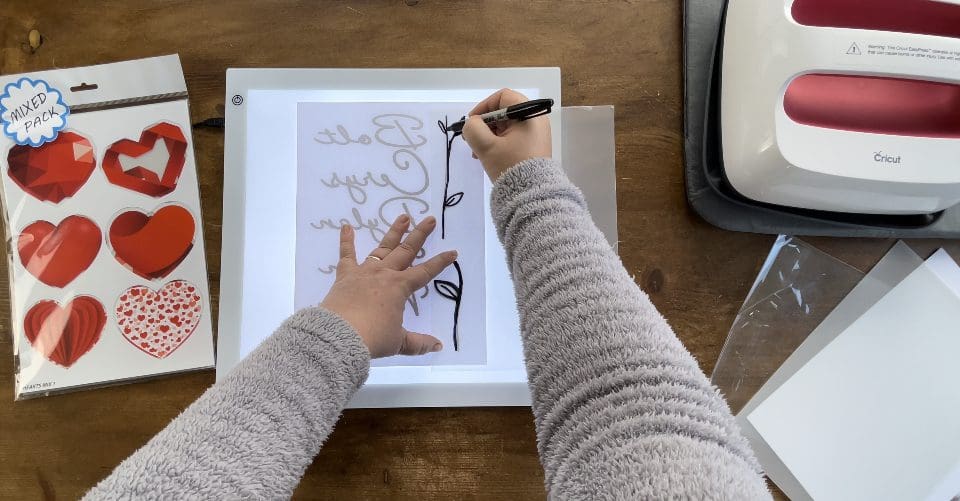
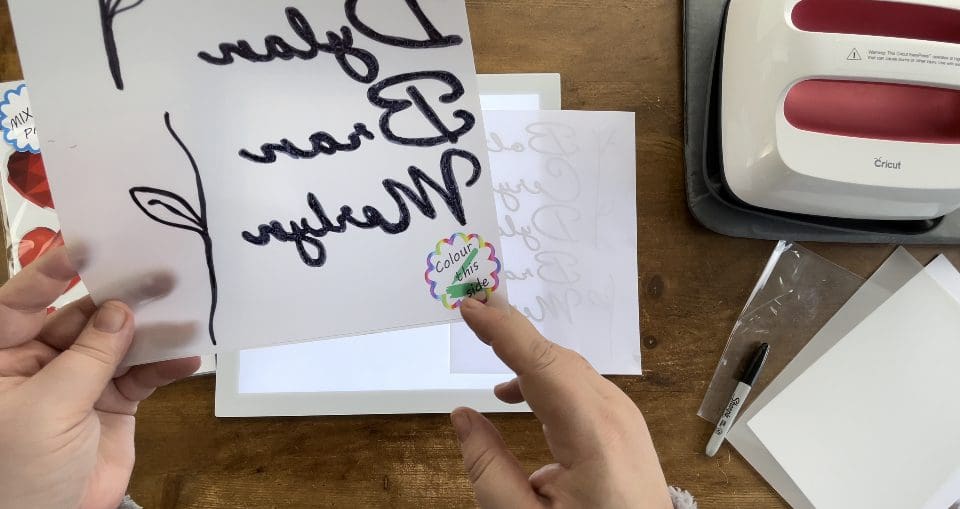
5. You can make as many designs on your sheets as you want, just ensure you leave room to cut around them later with a few mm spare.
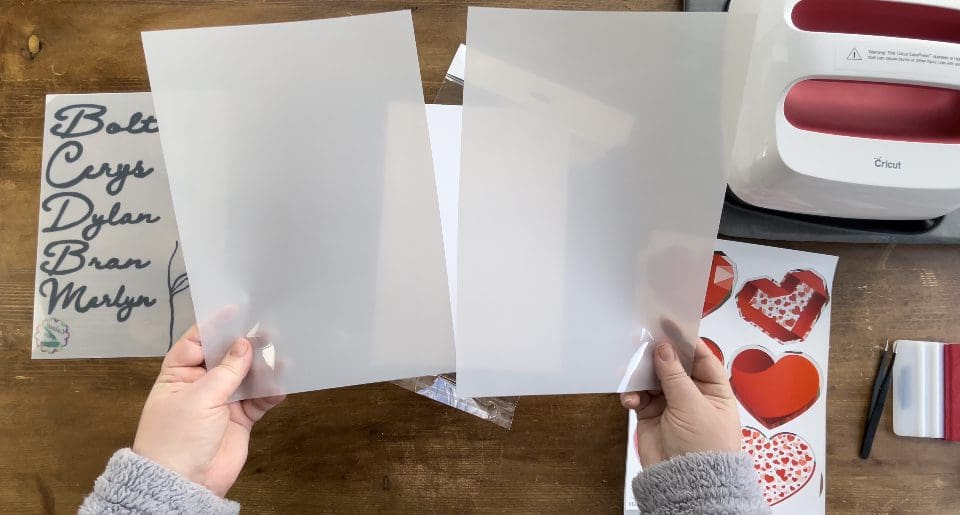
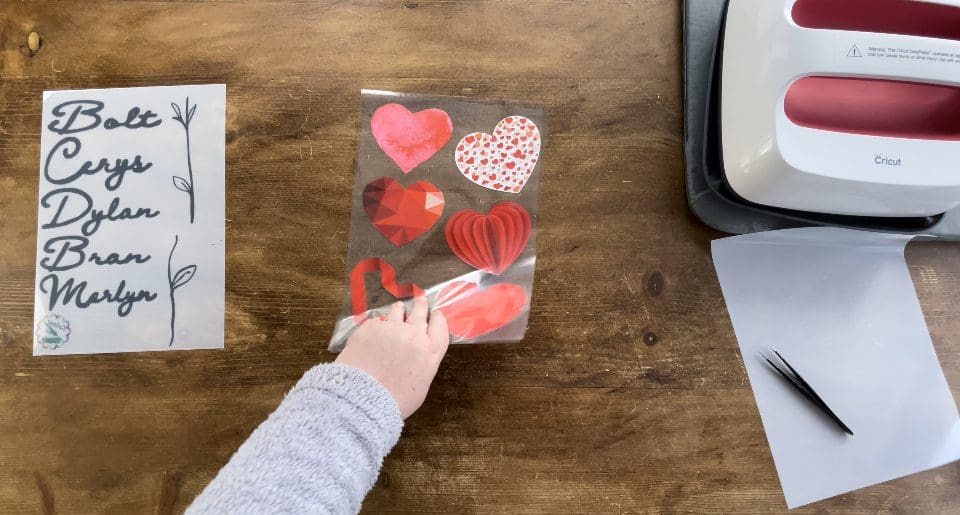
6. Now take your ready weeded Iron on Transfers, open the packet and you will find, the transfer sheet or sheets if you have a mixed pack like these, and the application sheets to apply them as shown below.
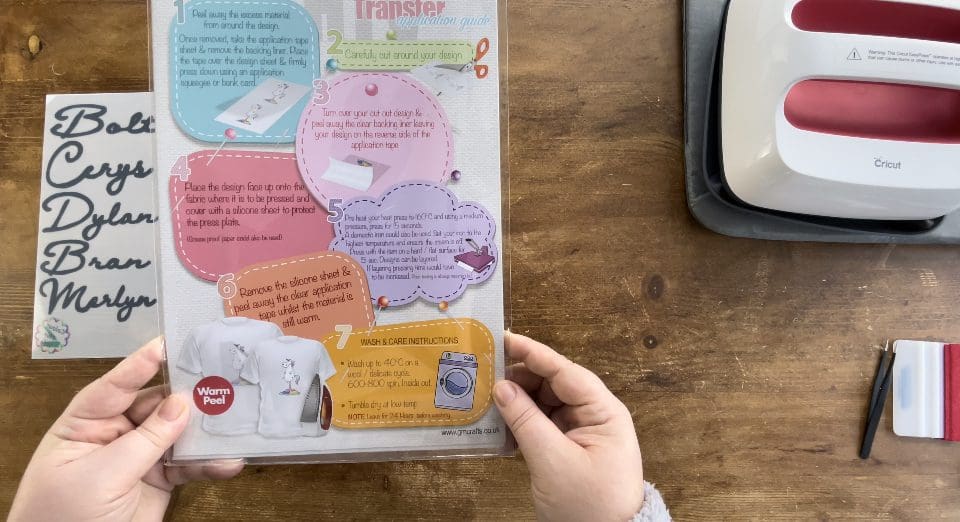
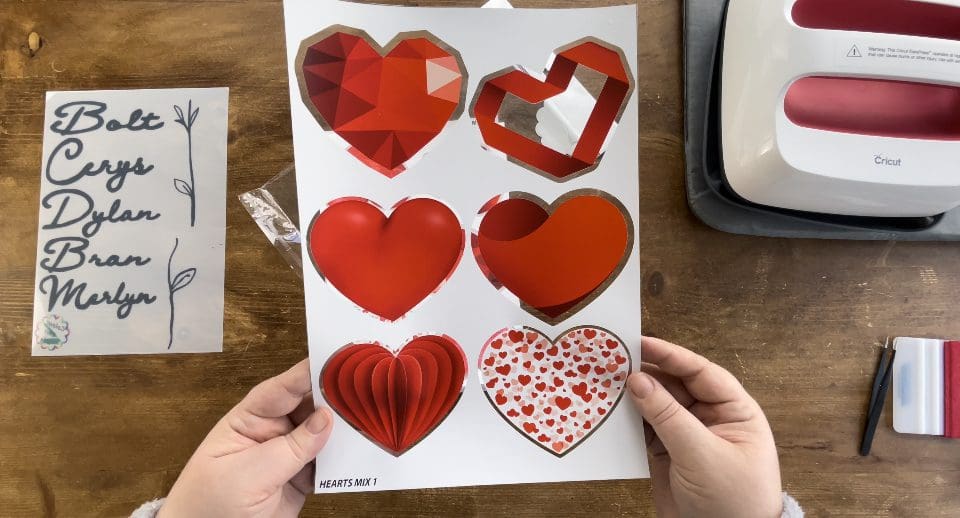
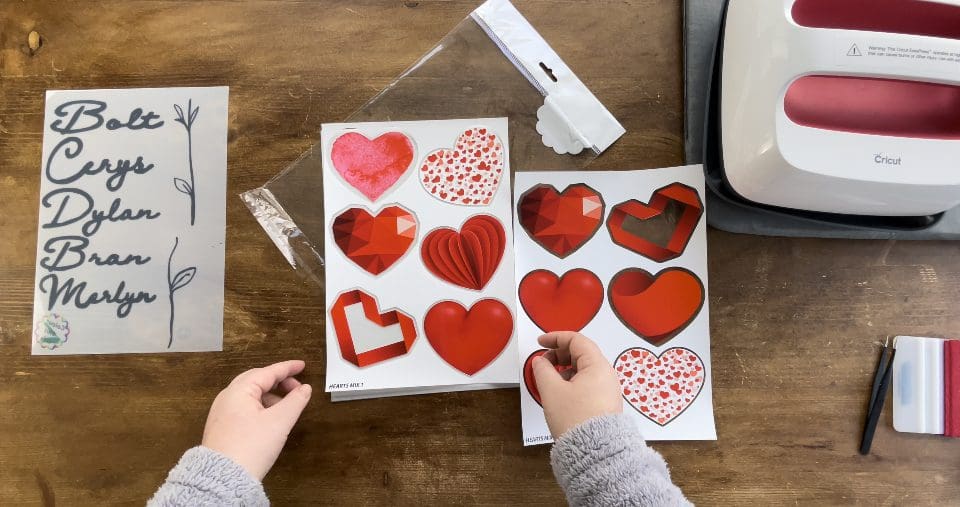
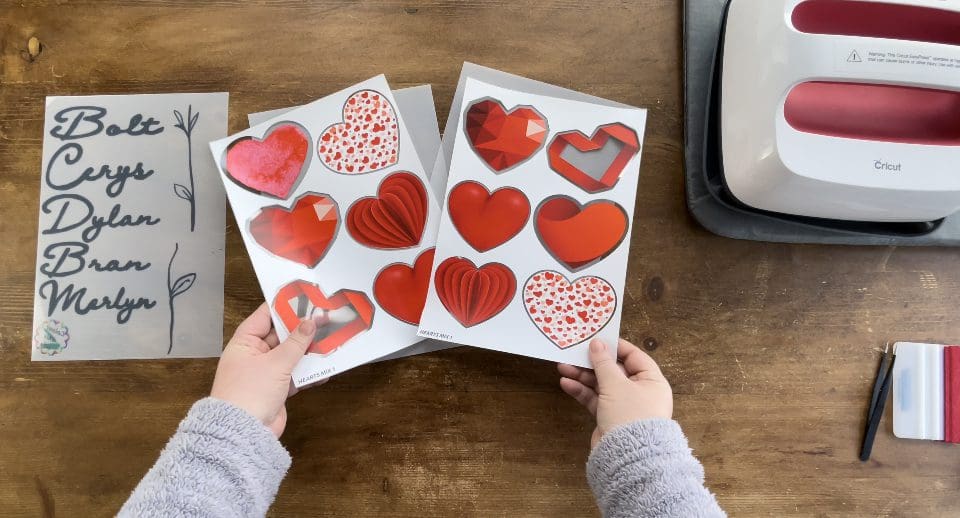
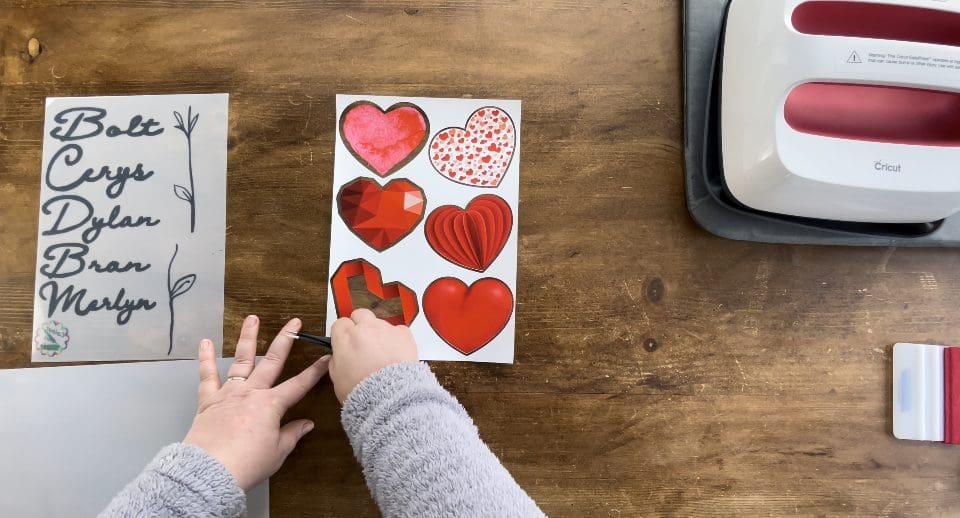
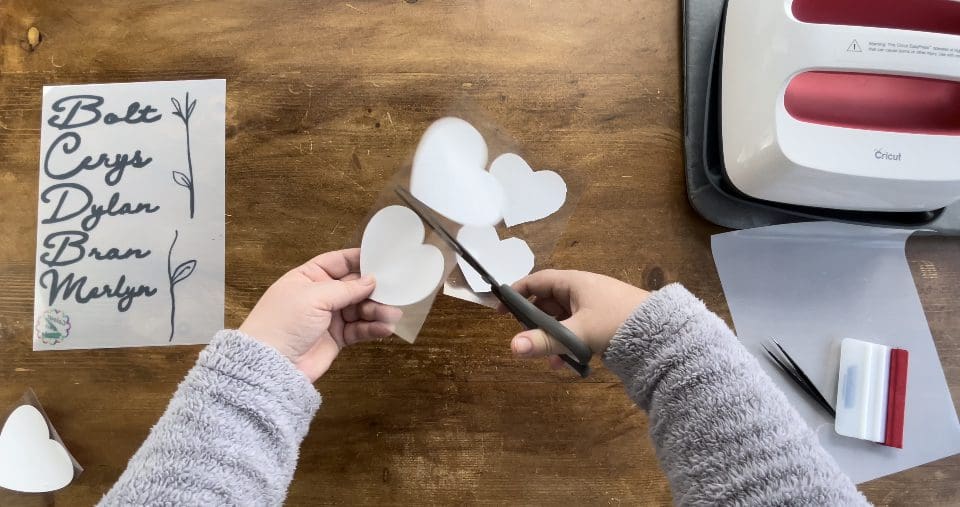
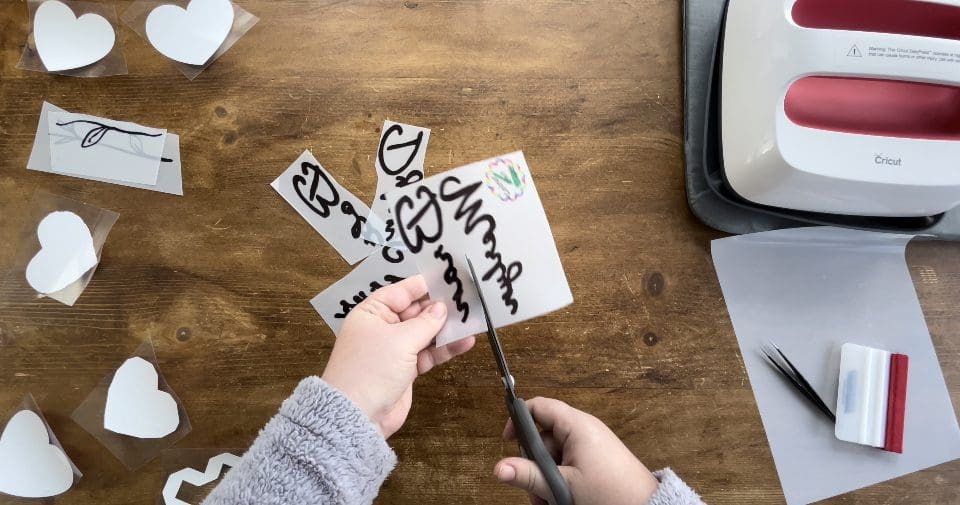
7. Take your chosen transfers design and using tweezers remove the outer white edge.
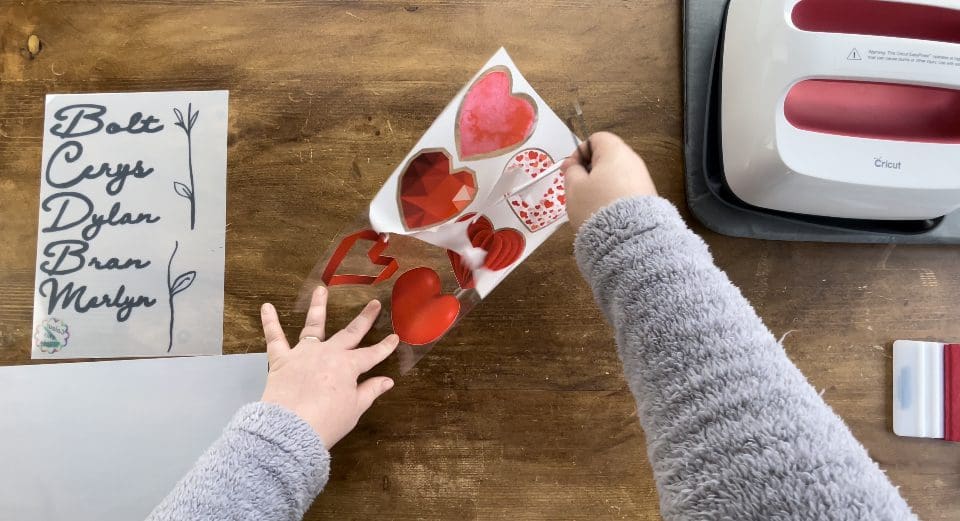
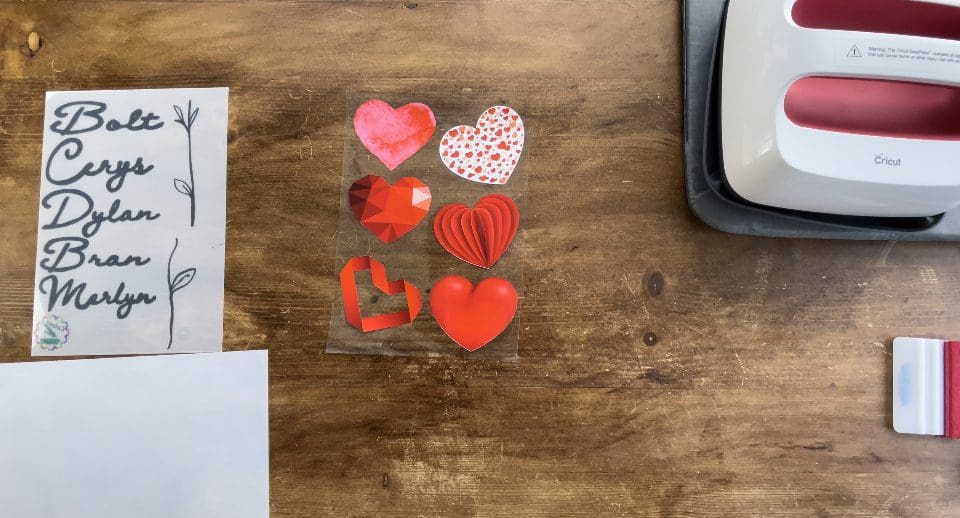
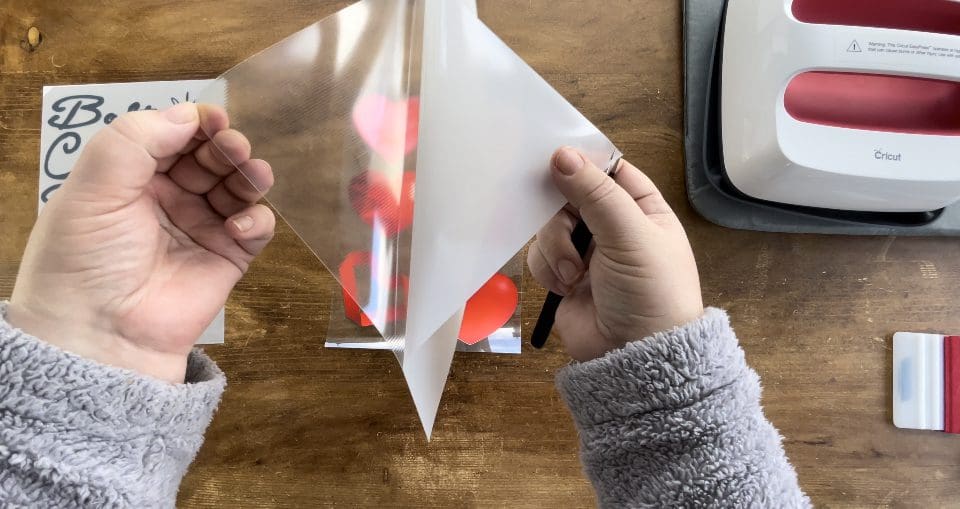
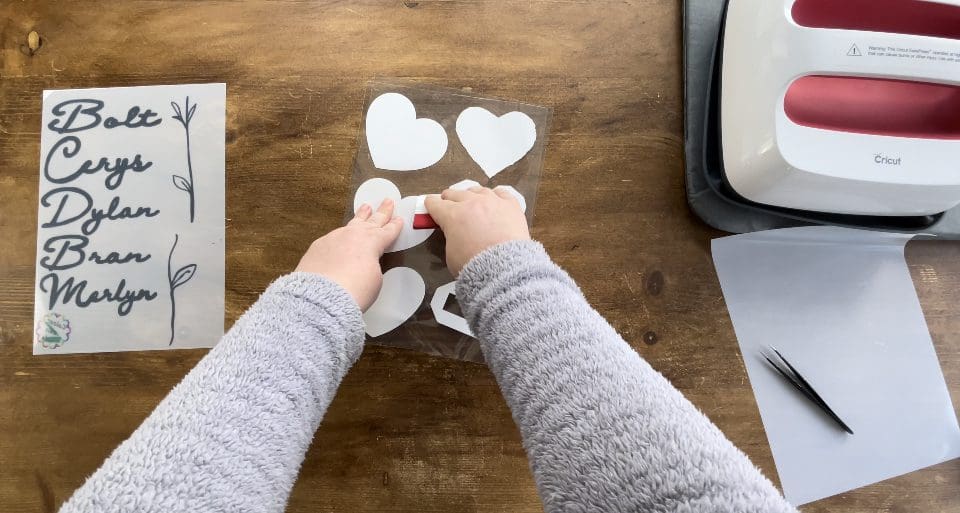
8. Take the application sheet as shown below, and remove the protective milky sheet from it, place the sticky sheet side onto the front of your transfers, and smooth out any air, before turning over and rubbing your squeegee on the back to transfer the designs, lastly unpeel the backing to leave them attached to the sheet as shown below, before cutting the sheet so they are now 6 separate designs ready to apply.
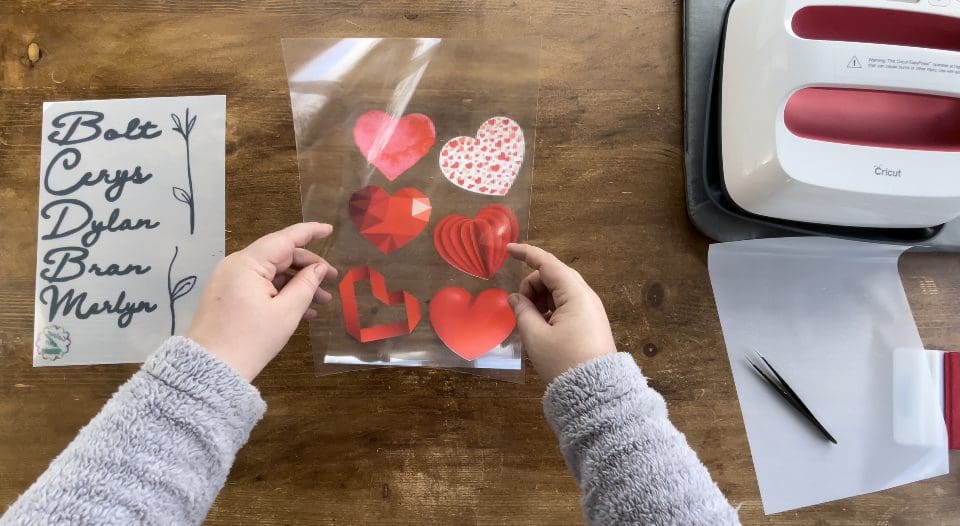

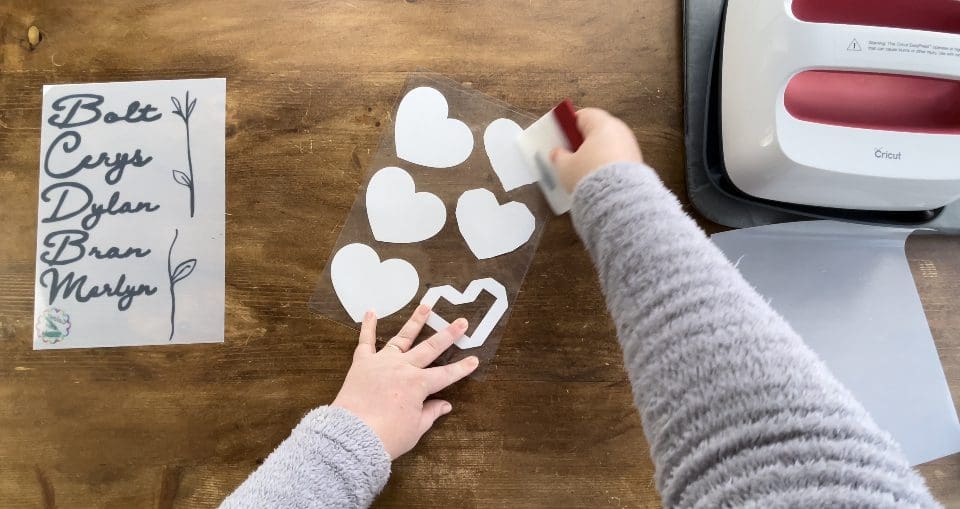
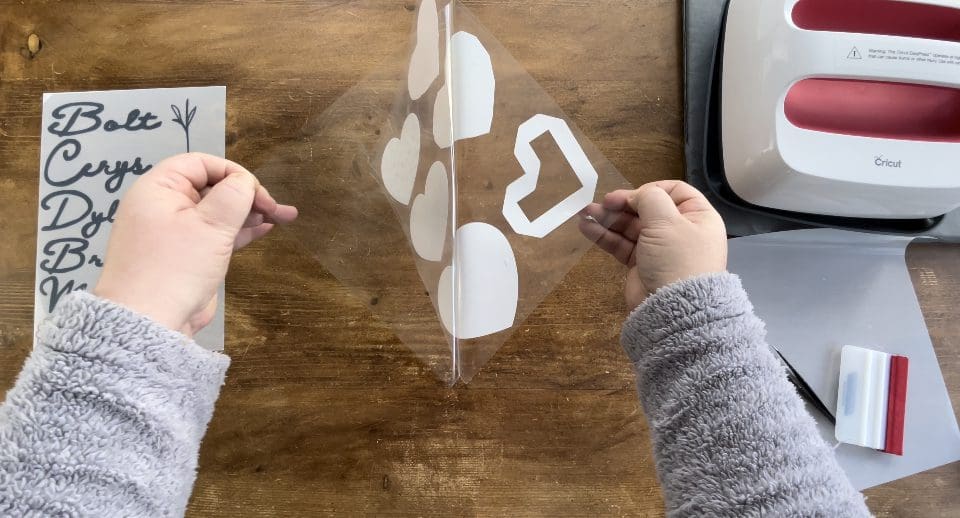

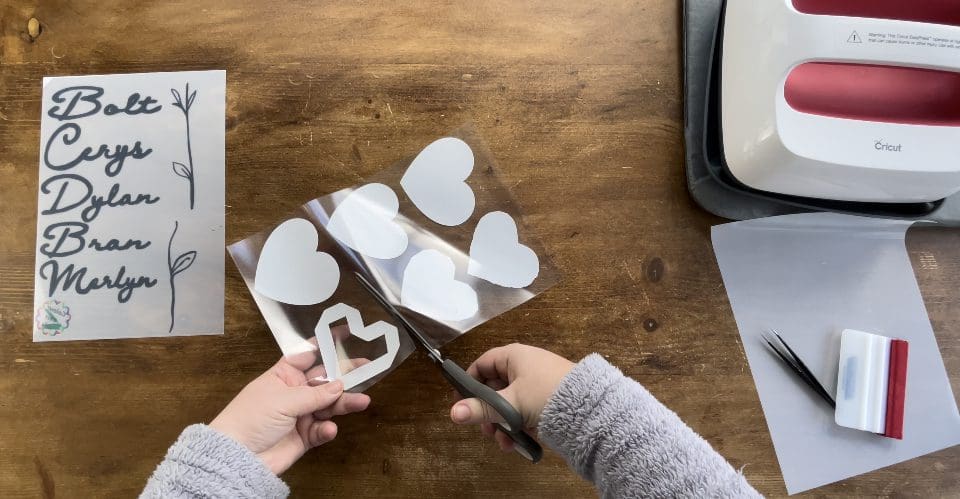
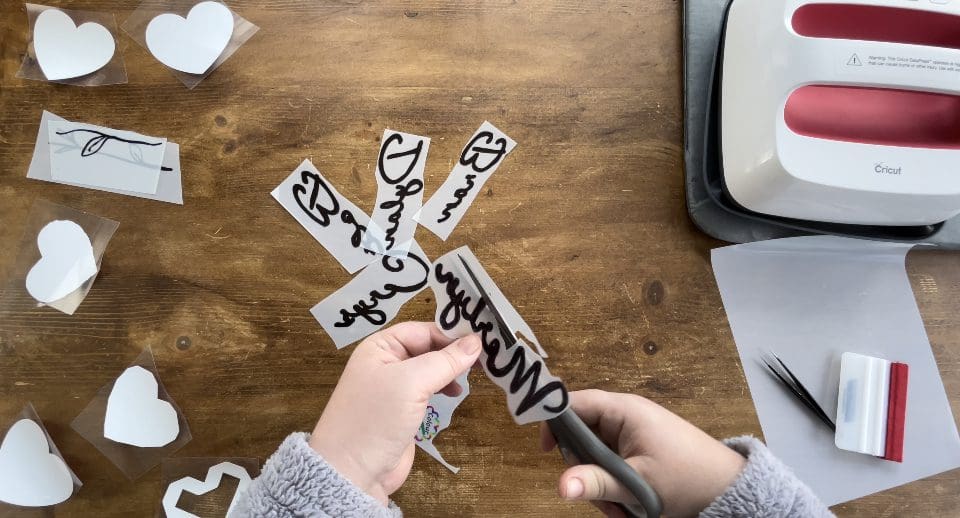
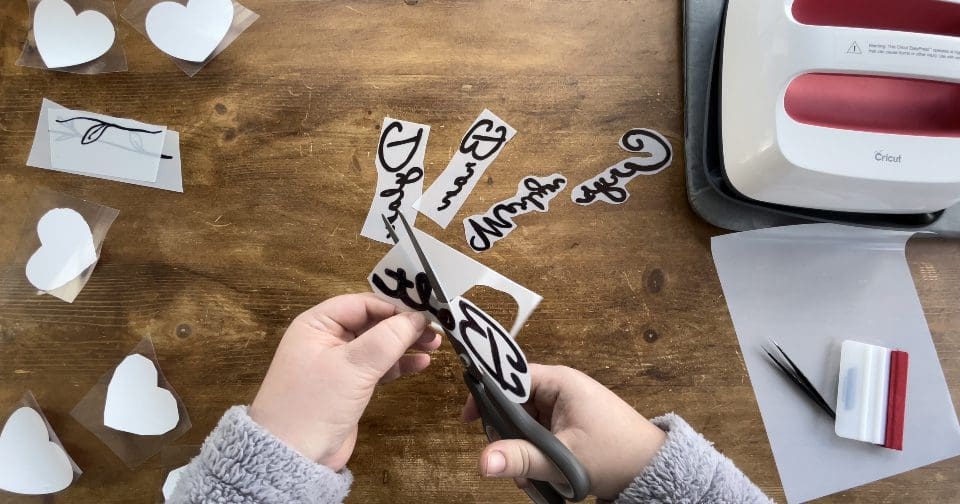
9. Now take your Transfer doodle designs and trim them to enable you to apply accordingly as individual designs or one big design depending on what you have decided to make, when trimming, leave a few mm around the pen marks to fully seal them once applied to your finished item.
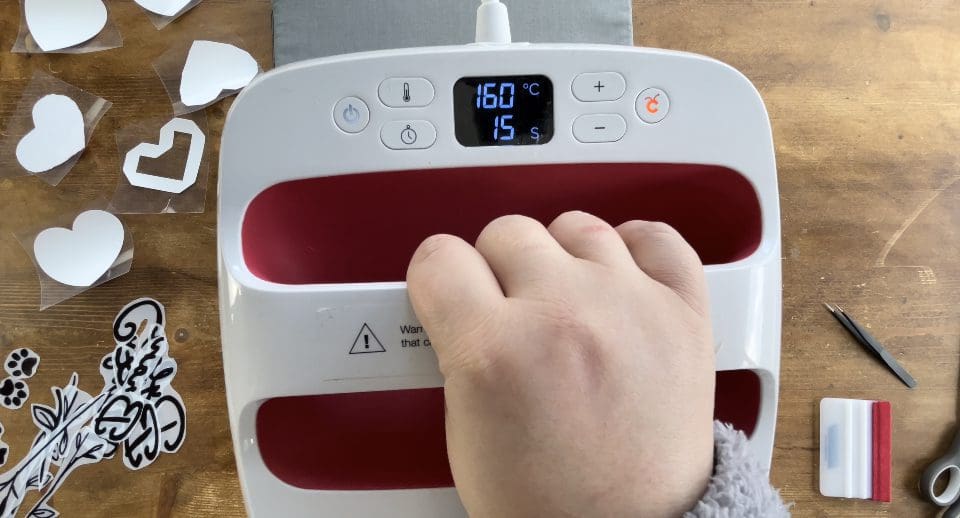
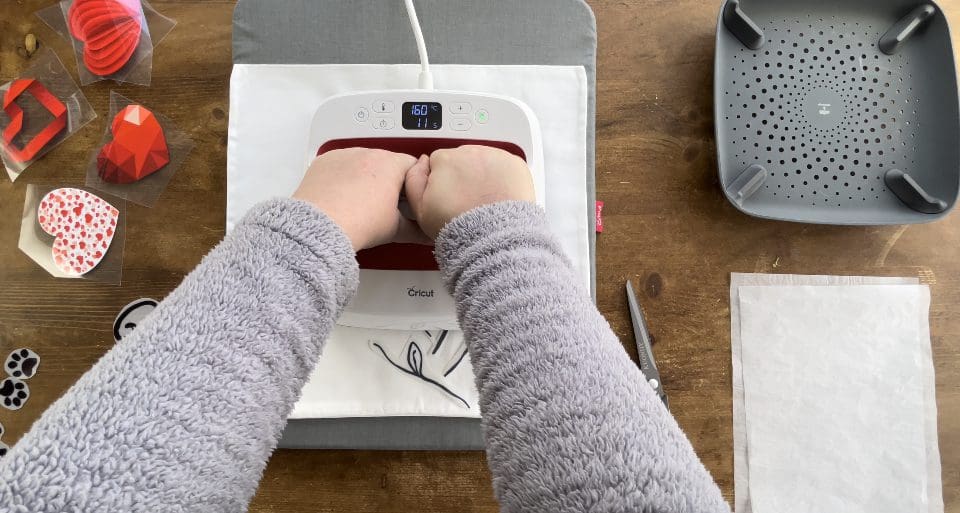
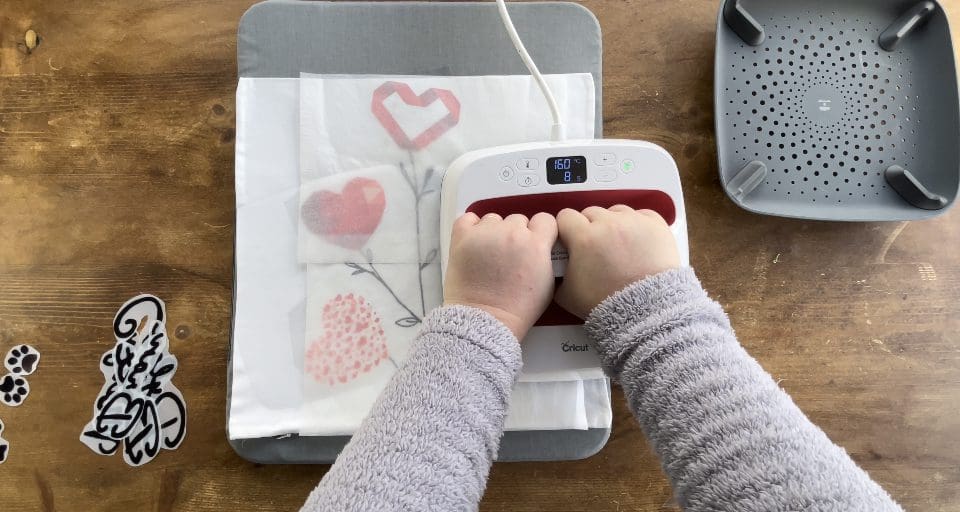
10. Switch your Easy press on, and set the temperature to 160’c and the timer to 15 seconds, please refer to our Application guide, Preheat the cushion cover, t-shirt or other garment you have chosen, once the press is ready for 10 seconds to remove any moisture.
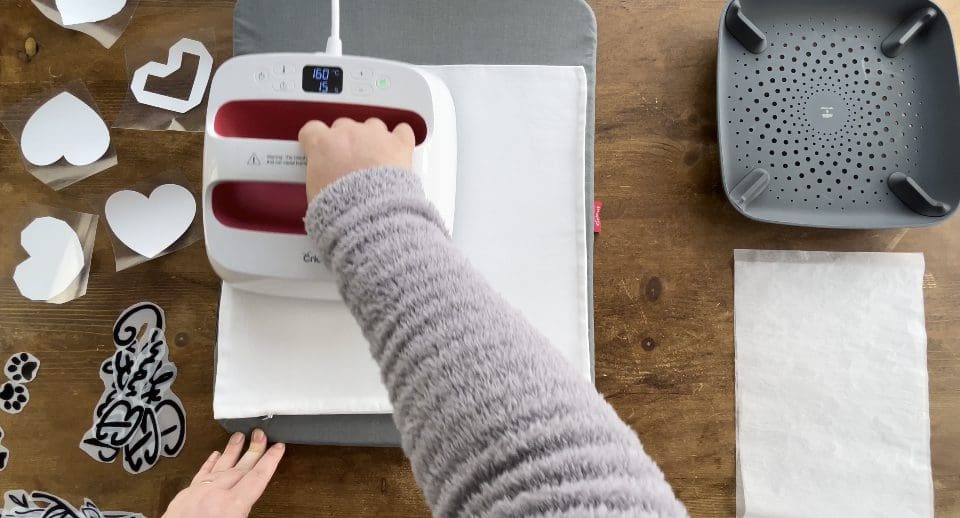
11. Lay the design already on the transfer tape in the correct place on your chosen item, facing up, and ensure it is on a hard surface, or Cricut Easy press matt and on a hard surface, check our guide here for more information on applying and using HTV successfully.
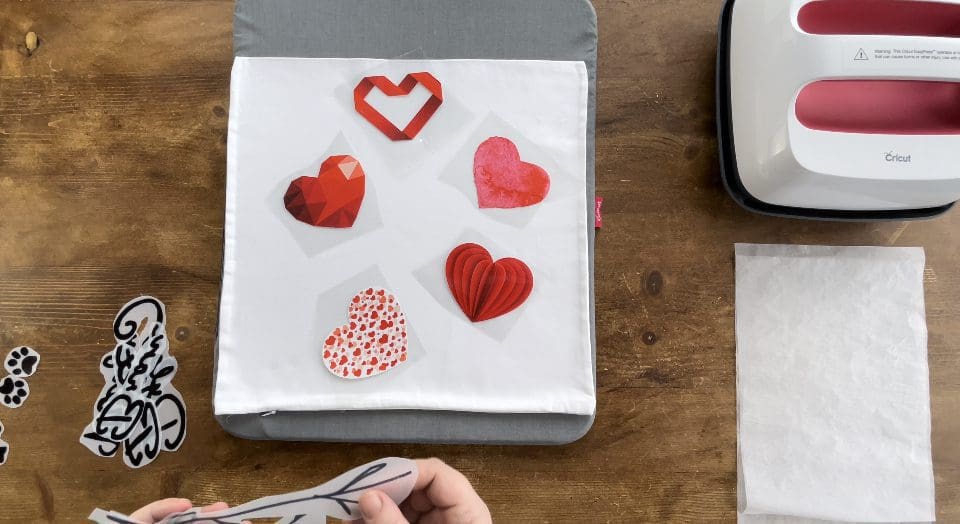
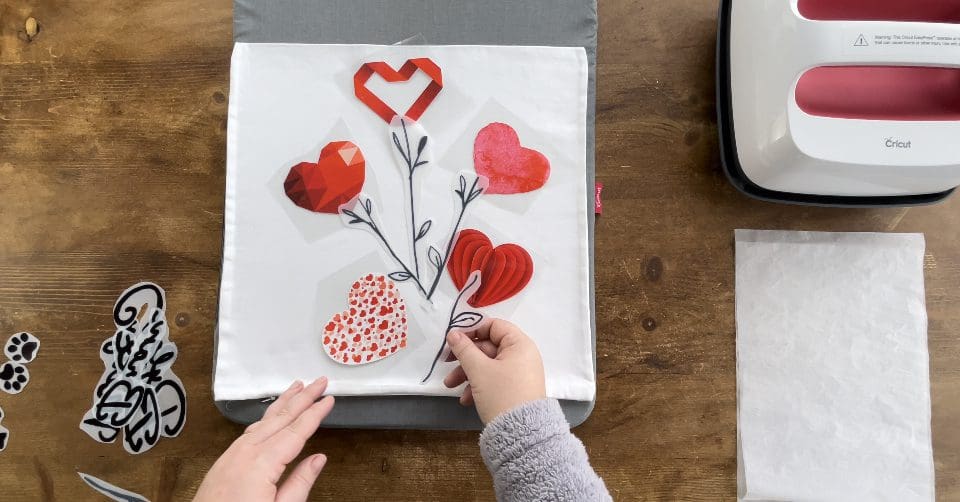
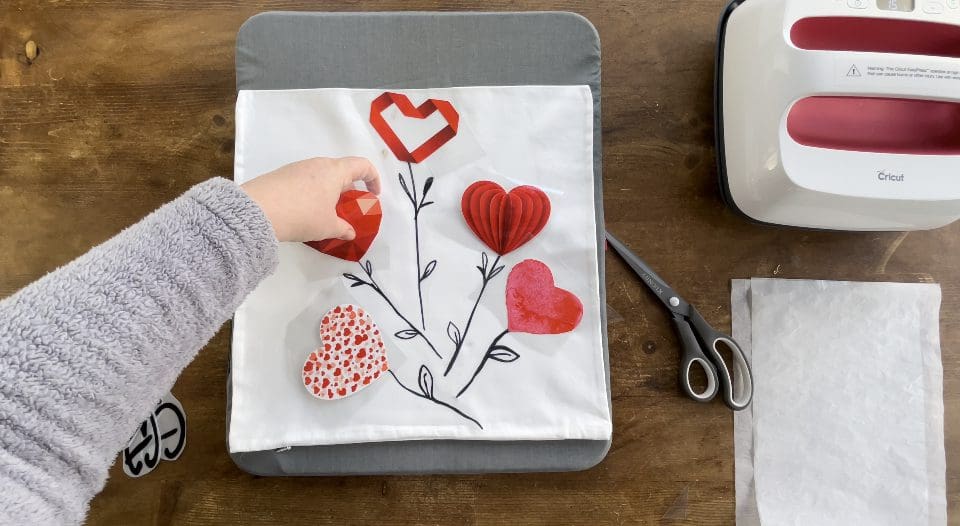
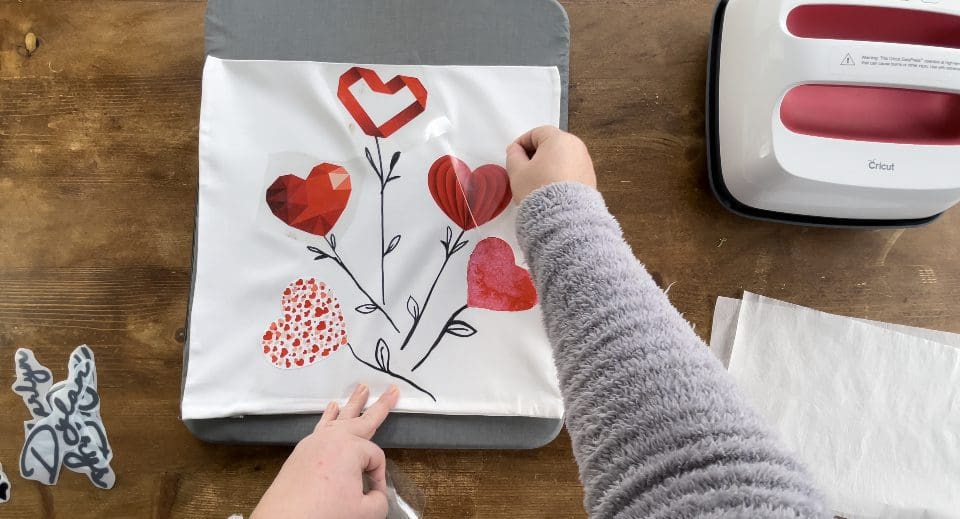
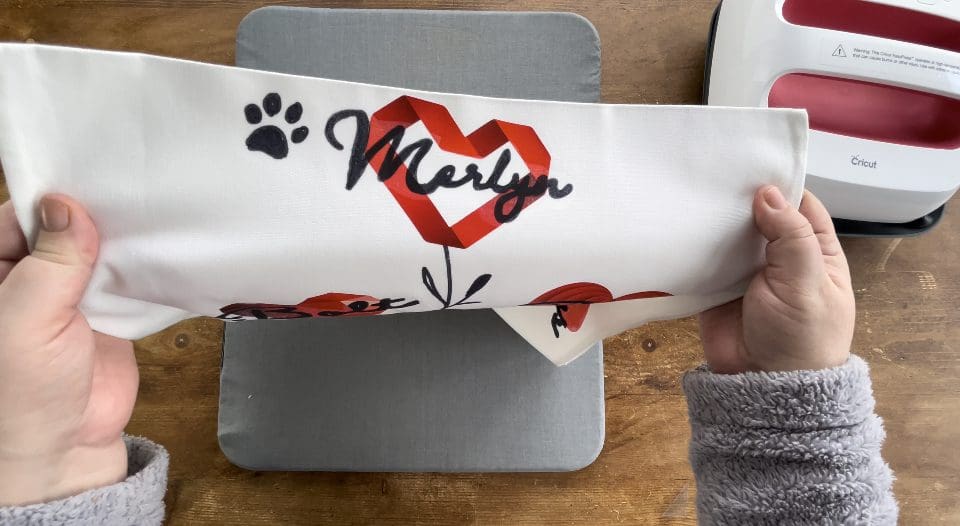
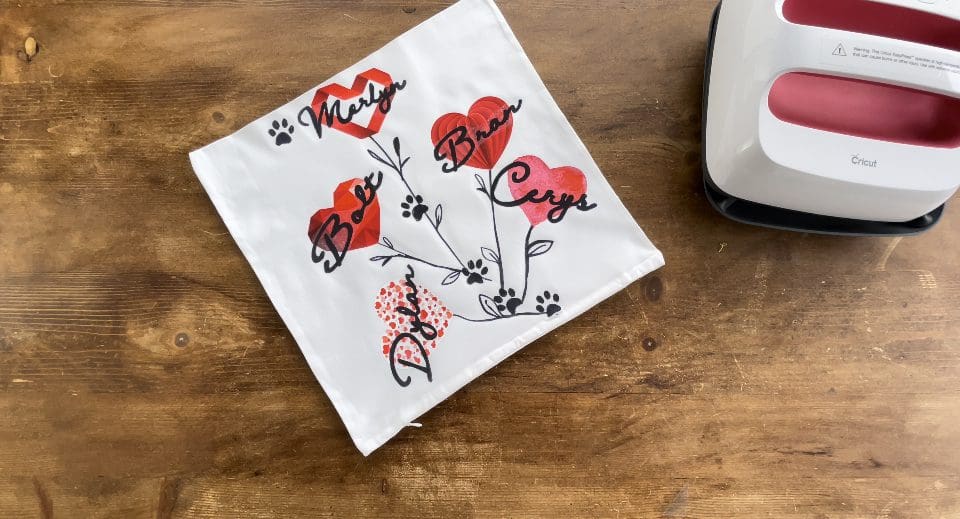
We placed the hearts first, then the stems and leaves to create a bouquet effect, once we were happy with the placement we removed the hearts, and made sure no areas of the transfer doodle cut sheets were touching on the stems, so they all applied correctly, if in doubt trim where needed to fit them without over lapping,

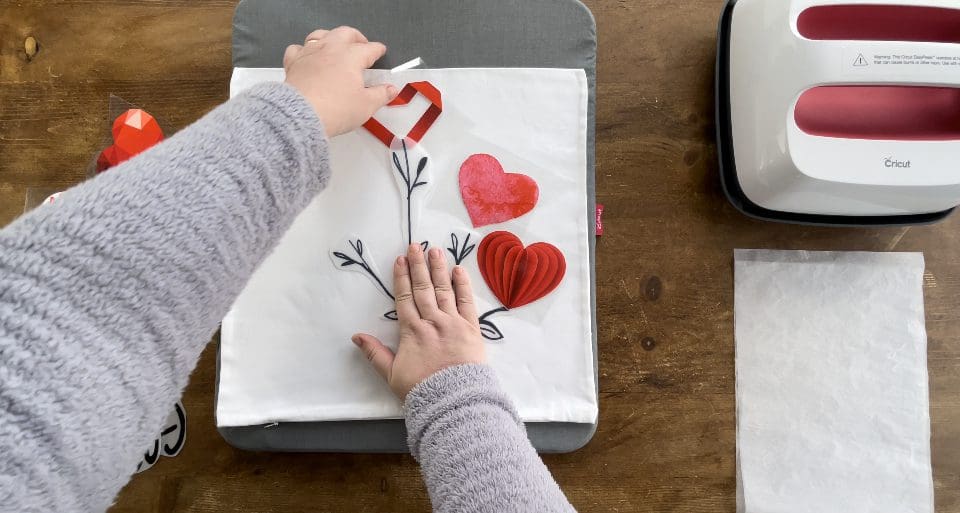

12. Applying firm pressure so that your arms are locked and pressing hard into the garment, apply the press to the design ( Usually for 15 seconds if pressing one layer only) covering each area once only to not over heat the vinyl. Because we are layering, we have reduced the press time for this step to 10 seconds and let it cool before the next layer.
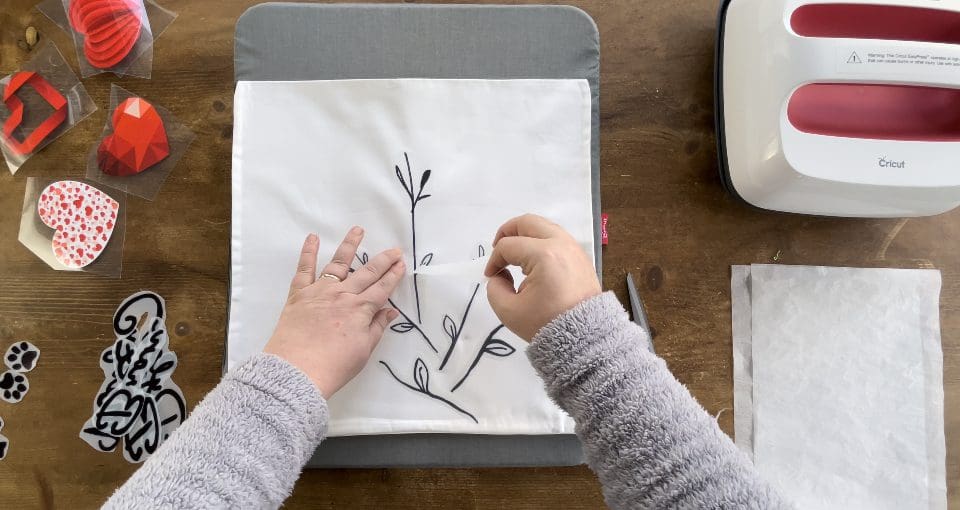
13. Once all areas have been pressed firmly, wait a few seconds to peel the carrier sheet away from the garment, if any areas have not stuck quickly repress firmly for 2-3 seconds on that area only, remove the carrier sheet.
14. Place the Hearts now in their final place, before repeating steps 12 and 13 to apply them.
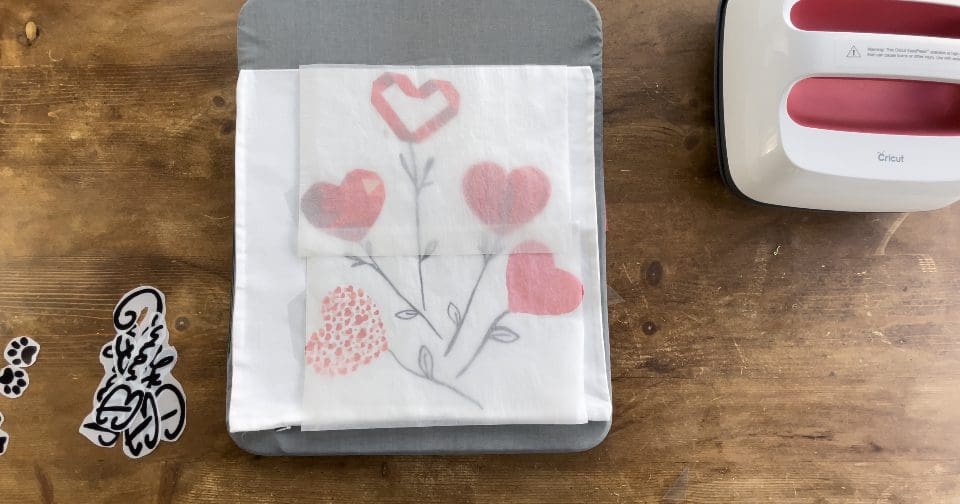
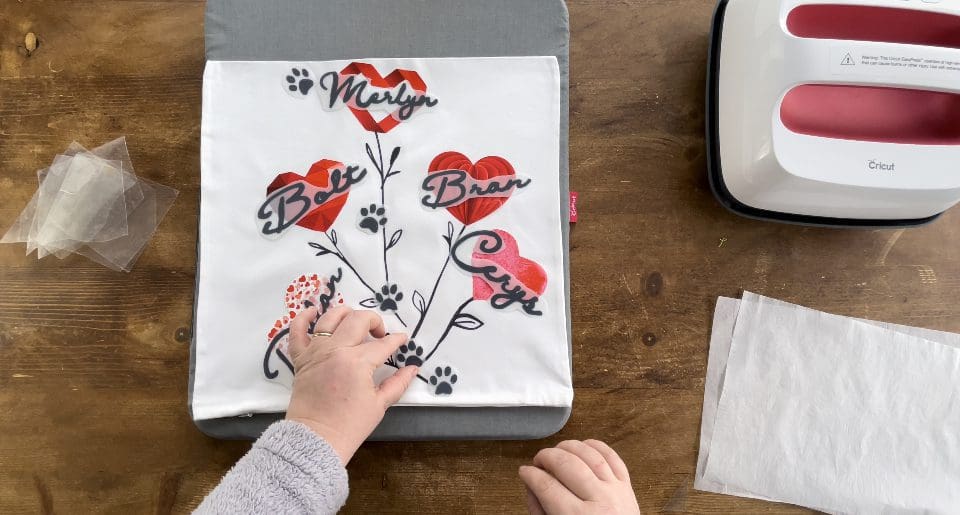
15. Lastly let the item cool and then place the names, paws and if you chose to use the black hearts, in place over the design as you’d like, this time press each area as described in steps 12 and 13, but for the full 15 seconds so that this being the top layer everything is fully applied. Again be sure to cover the design with the protective sheet.
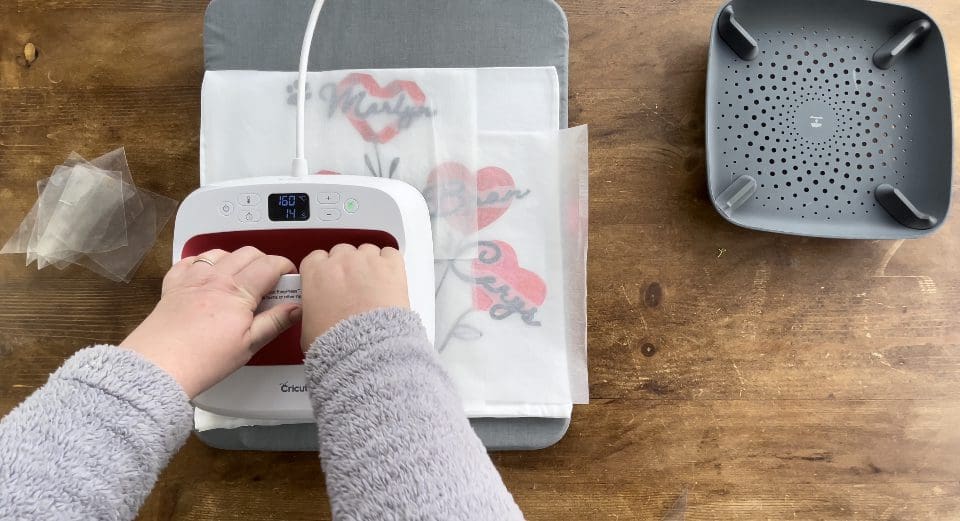
If after removing the sheet the garment or design is looking a bit untidy then recover with a sheet of baking parchment and quickly repress smoothing over it like an iron would but quickly so not to over heat.
Don’t forget your finished design can be matched by using any material cut using a cutting file, card, self adhesive vinyl or even HTV. We’d love to see your makes on our social media pages! Or email them in!