
Tutorial/Free Cut File
Line Art bag tutorial – Cricut Maker, plus free cut files
Hello!
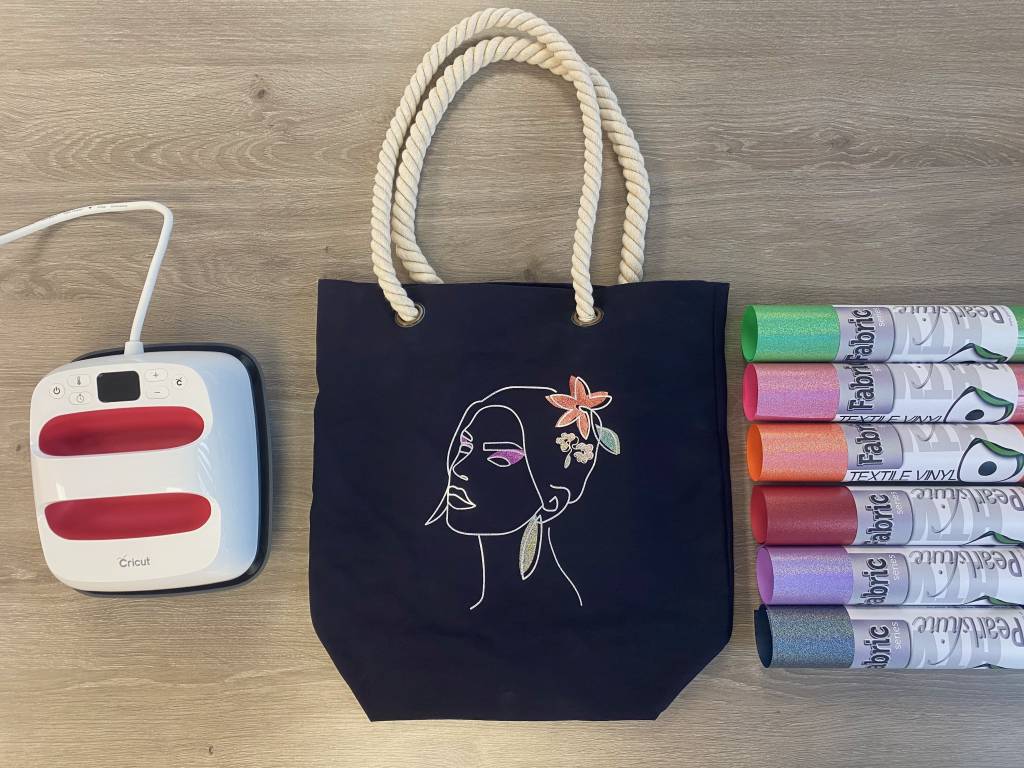
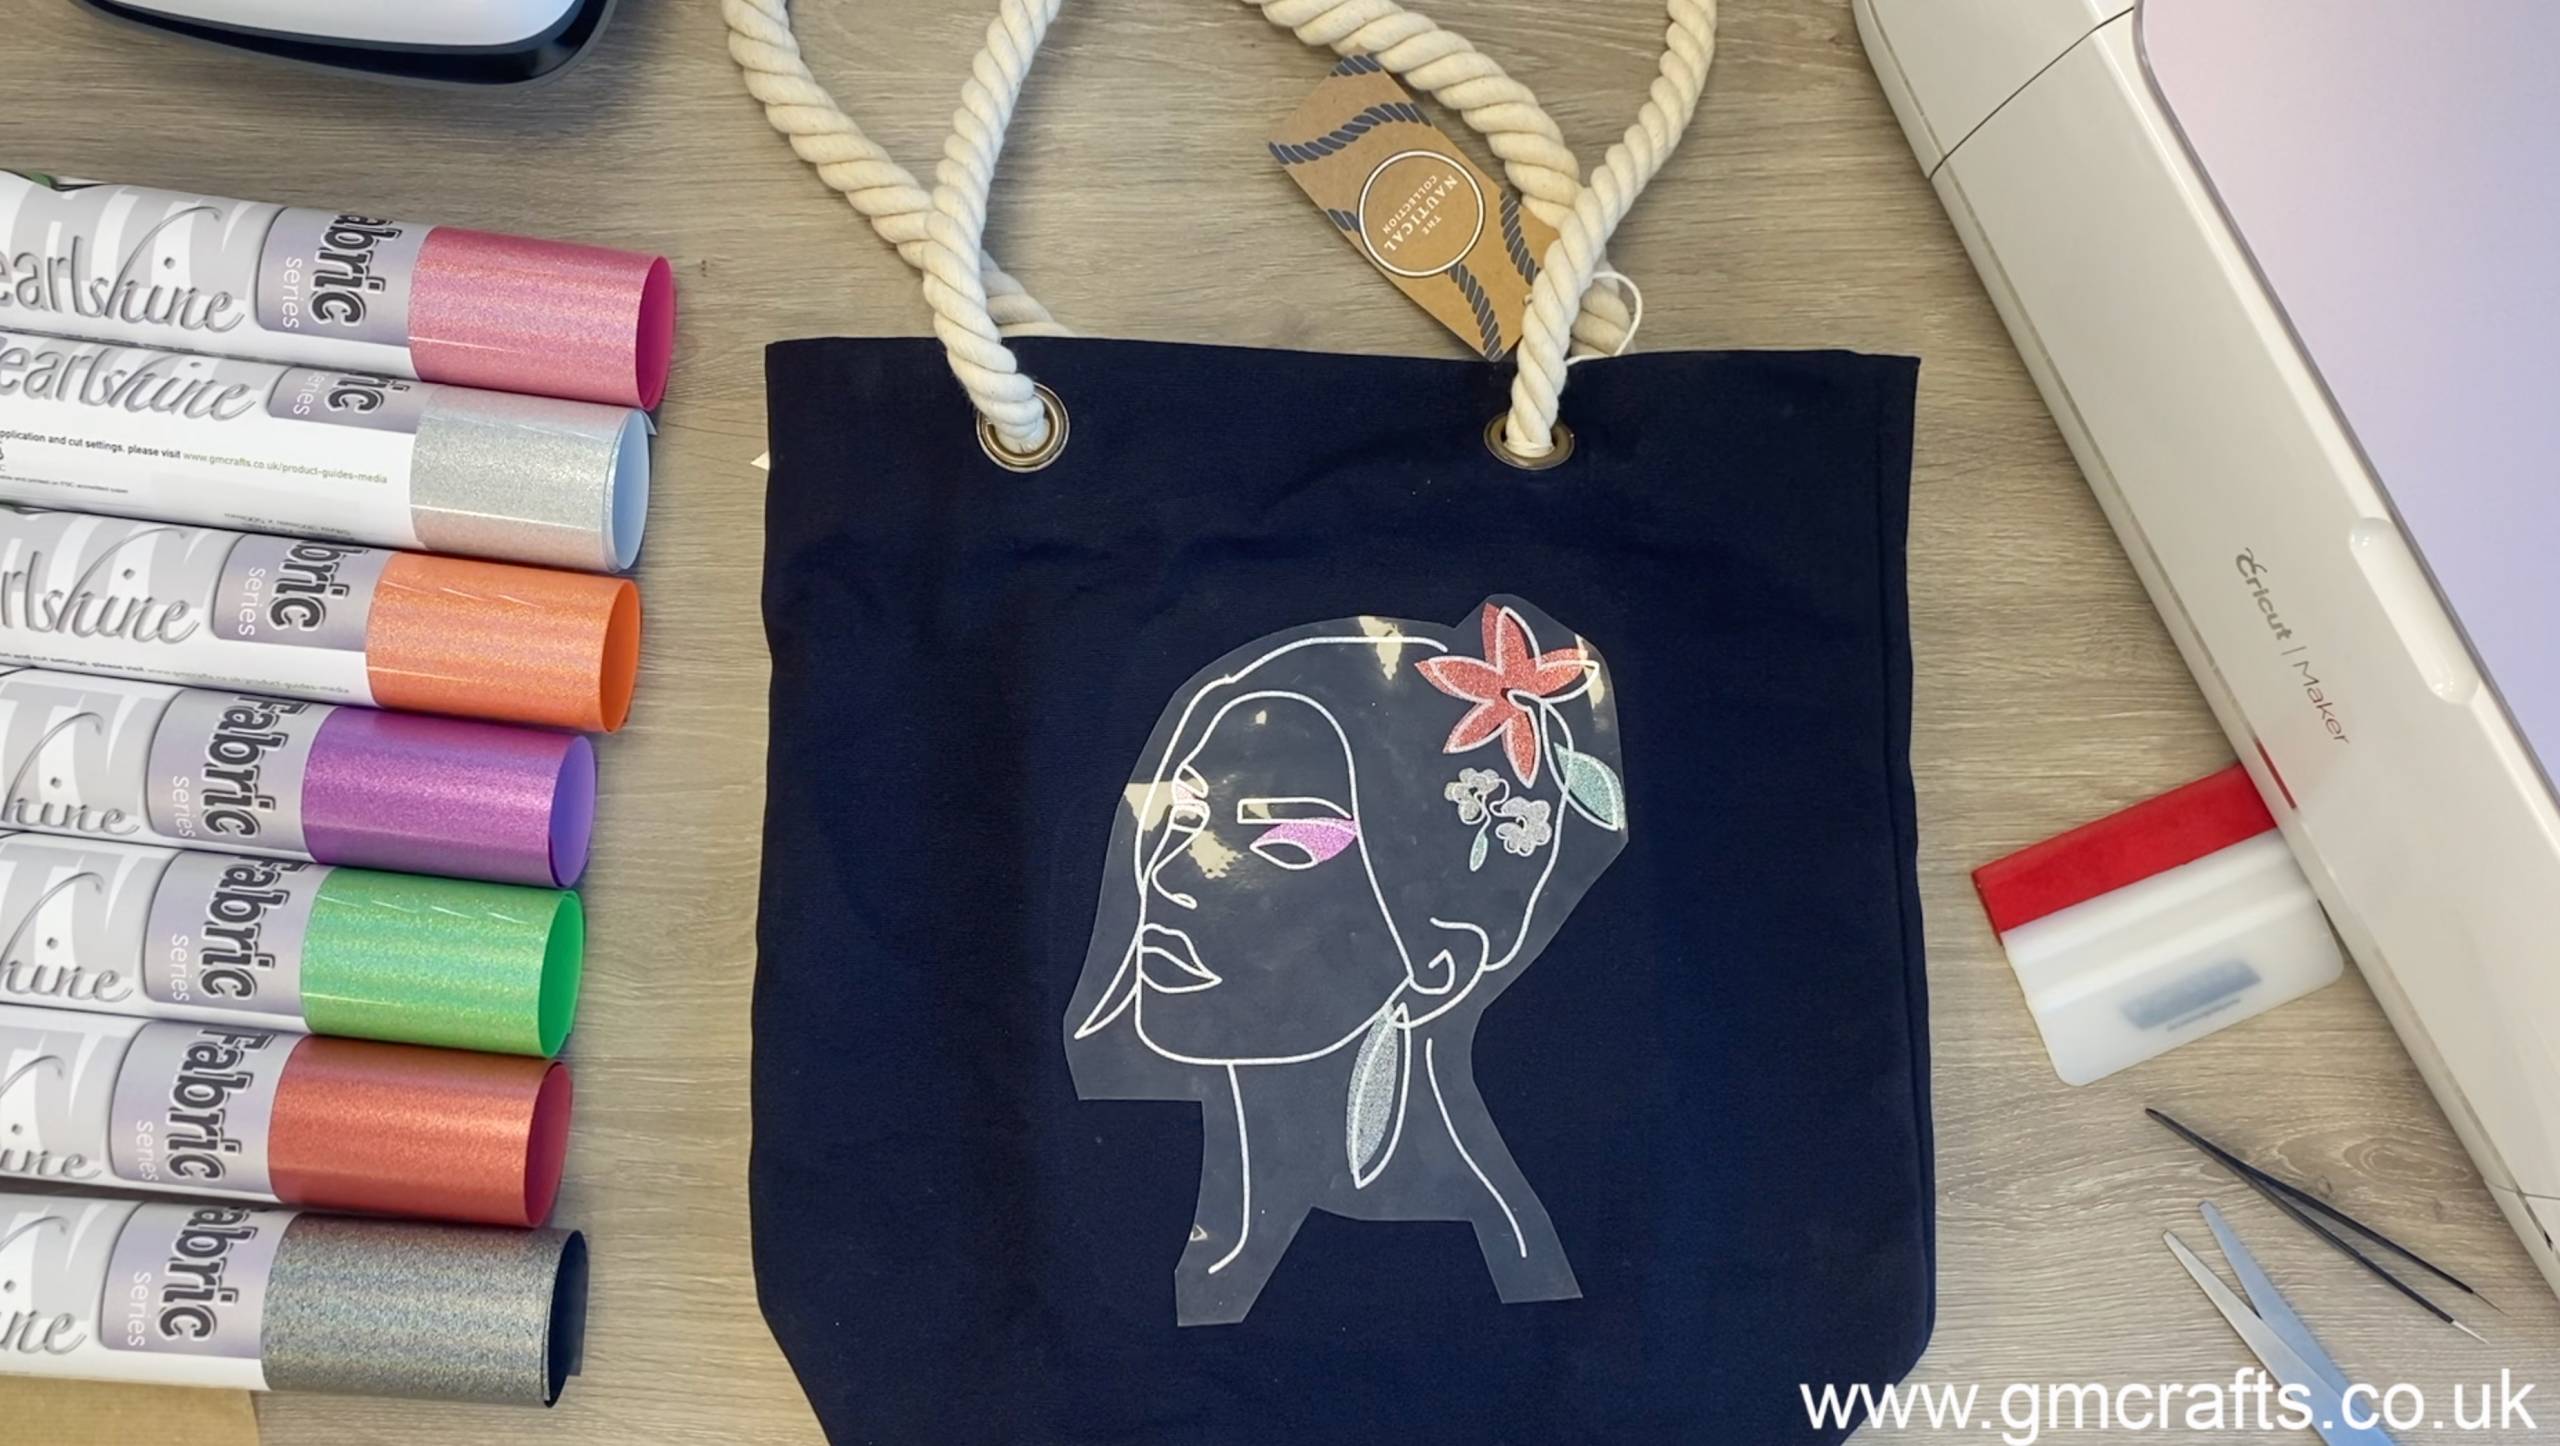
Many of you loved this line art bag we designed using our Pearlshine HTV, you asked for cut files and here they are – for Cricut, Silhouette and Brother ScanNCut machines! We’re going to be honest, this design is a bit trickier than usual, but practice makes perfect and we’re here to walk you through it. We know there are preferences with how to layer HTV, we found this way easiest for us, as you may find a way easier for you. Hope you enjoy!
We would love to see what you make! Have you found our You Tube channel yet? The video showing this and all of our other tutorials are available on there, as well as exclusive demos, inspiration and more! Join us on Facebook , Instagram or Tiktok or send us an email to sales@gmcrafts.co.uk we would love to hear from you!
***watch this being made here***
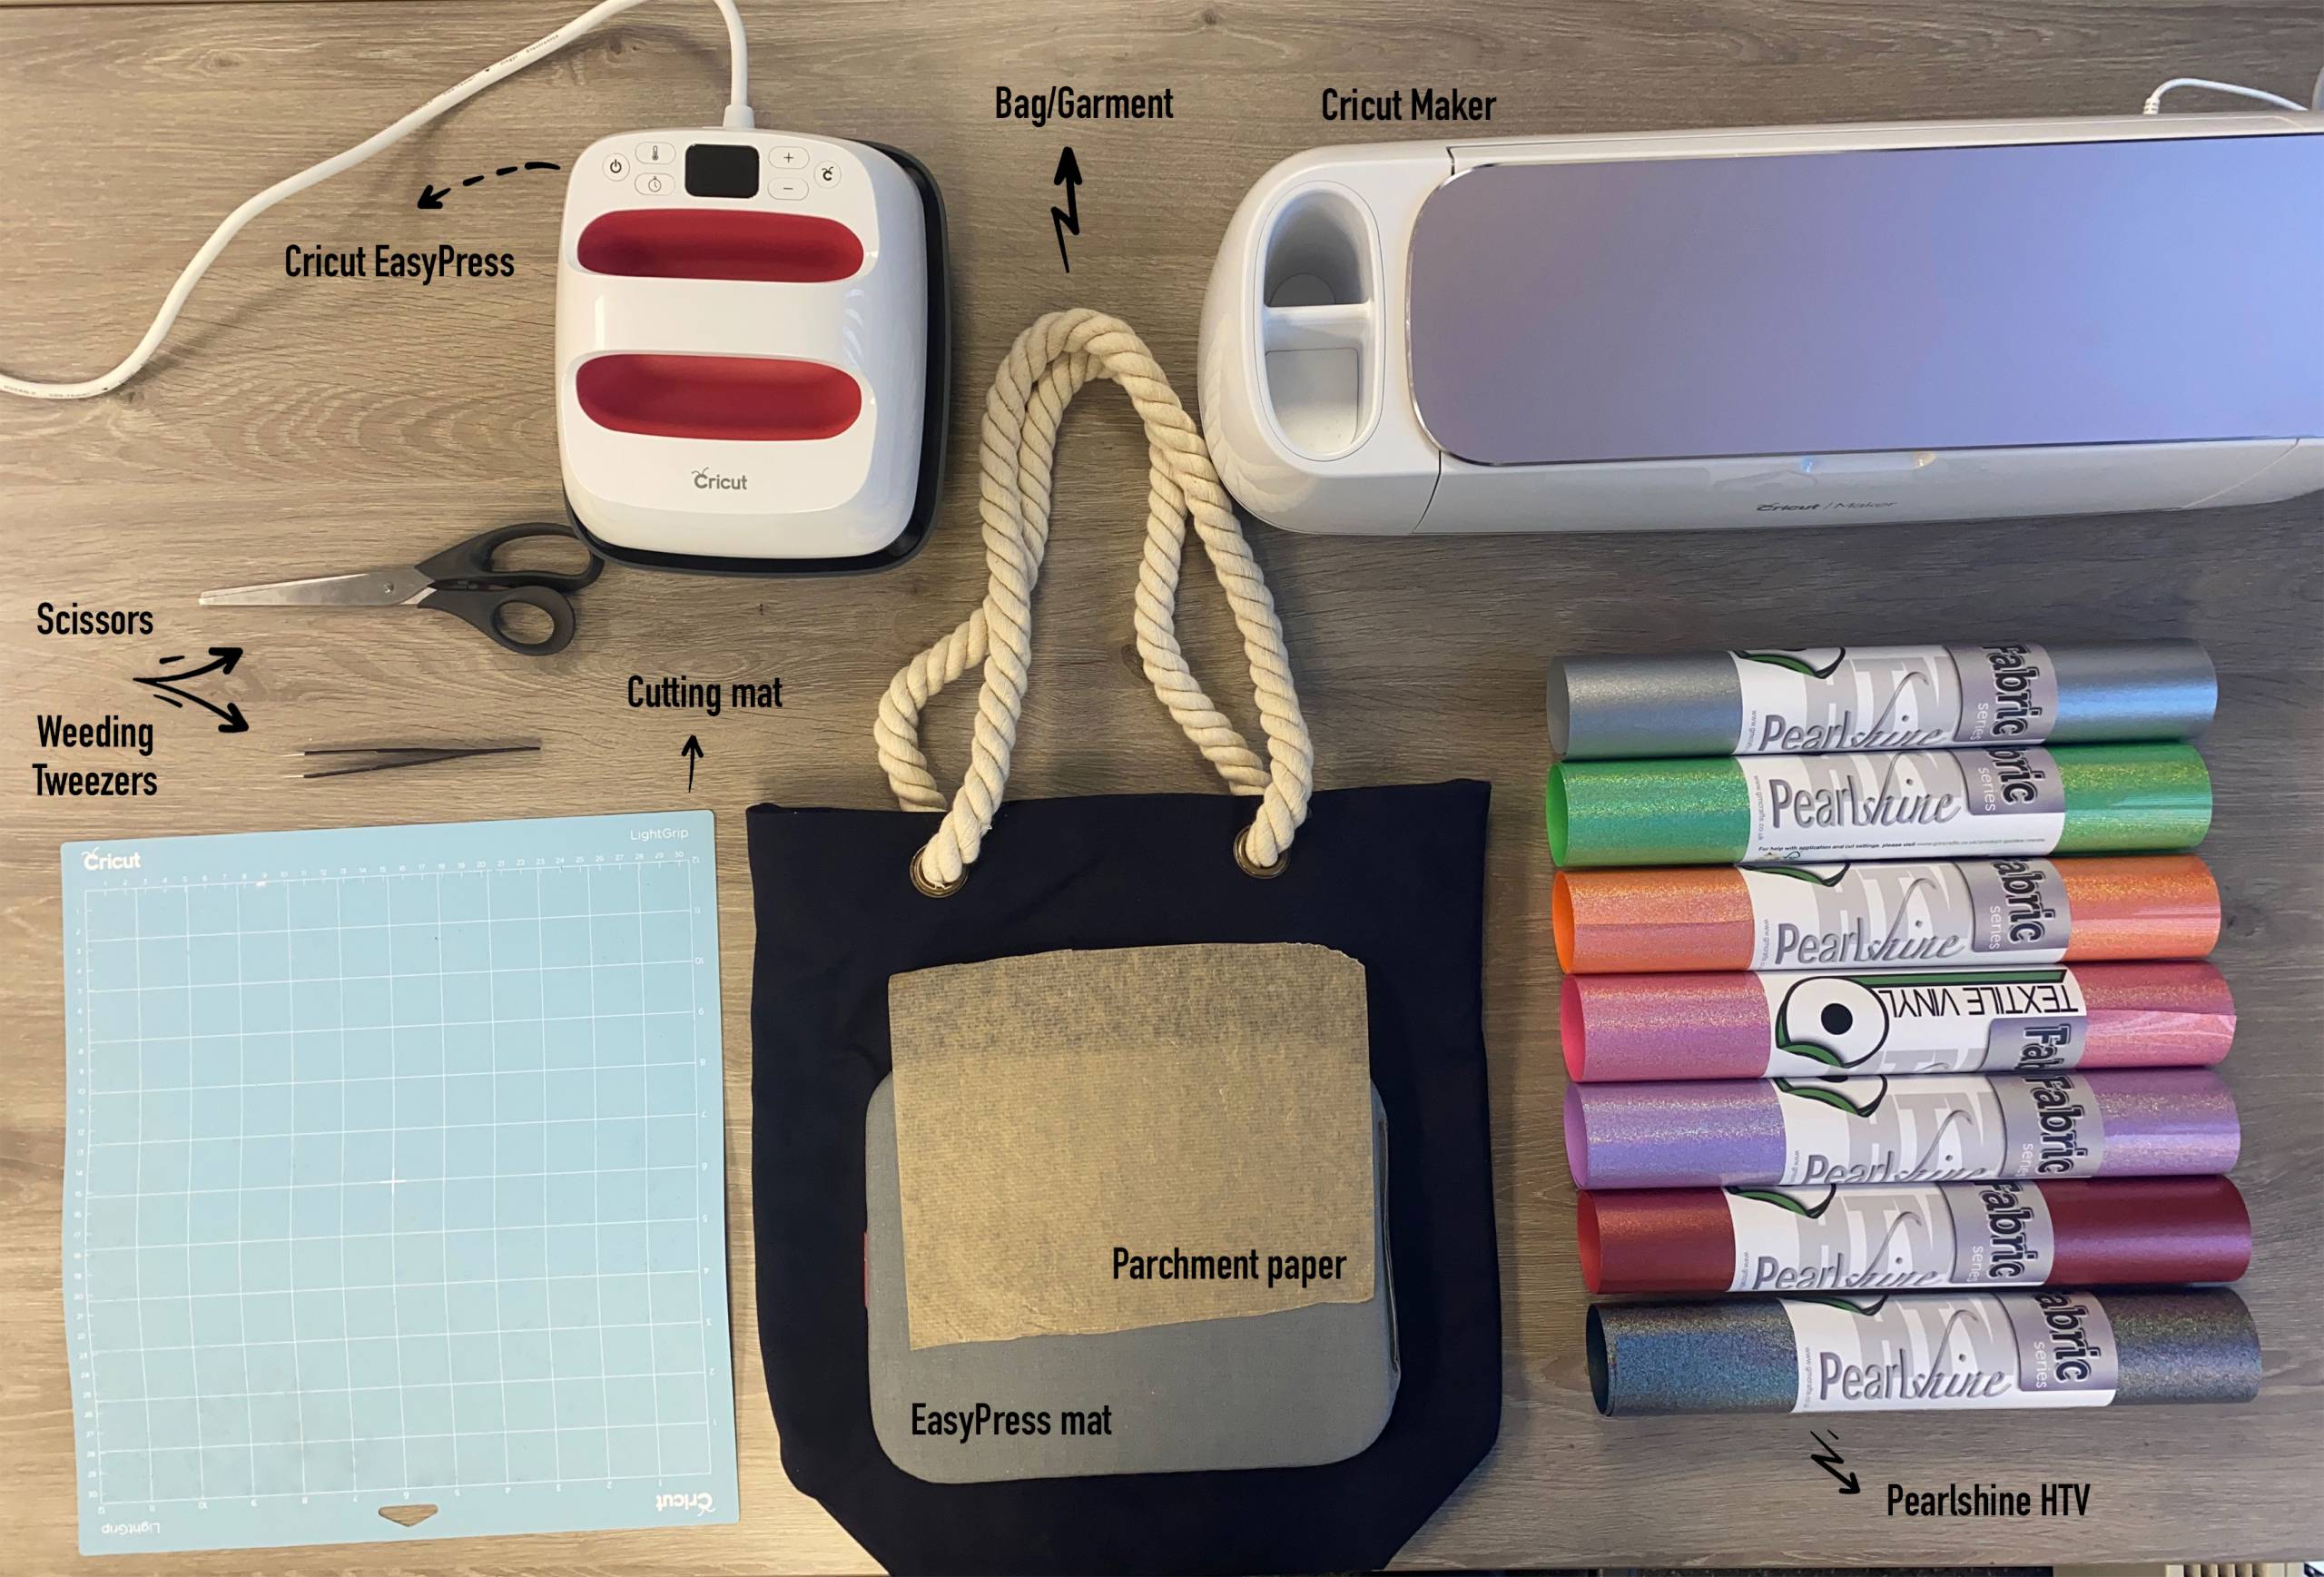
What you’ll need:
- Cricut Maker. Available here
- Cutting mat. Available here
- Cricut EasyPress. Available here
- EasyPress heat mat. Available here
- Weeding tool. Available here
- GM LED Wedding Pad. Available here
- Pearlshine HTV Silver. Available here
- Pearlshine HTV Holo Black. Available here
- Pearlshine HTV Red. Available here
- Pearlshine HTV Neon Rainbow Purple. Available here
- Pearlshine HTV Neon Rainbow Pink. Available here
- Pearlshine HTV Neon Rainbow Orange. Available here
- Pearlshine HTV Neon Rainbow Green. Available here
- Scissors
- Parchment paper. Always use parchment paper when layering HTV!
- Your bag/garment. The one we used will be on site in the near future but in the meantime, this design will work on any cotton/polycotton garment.
Instructions:
1.Download the cut files for Cricut machines.
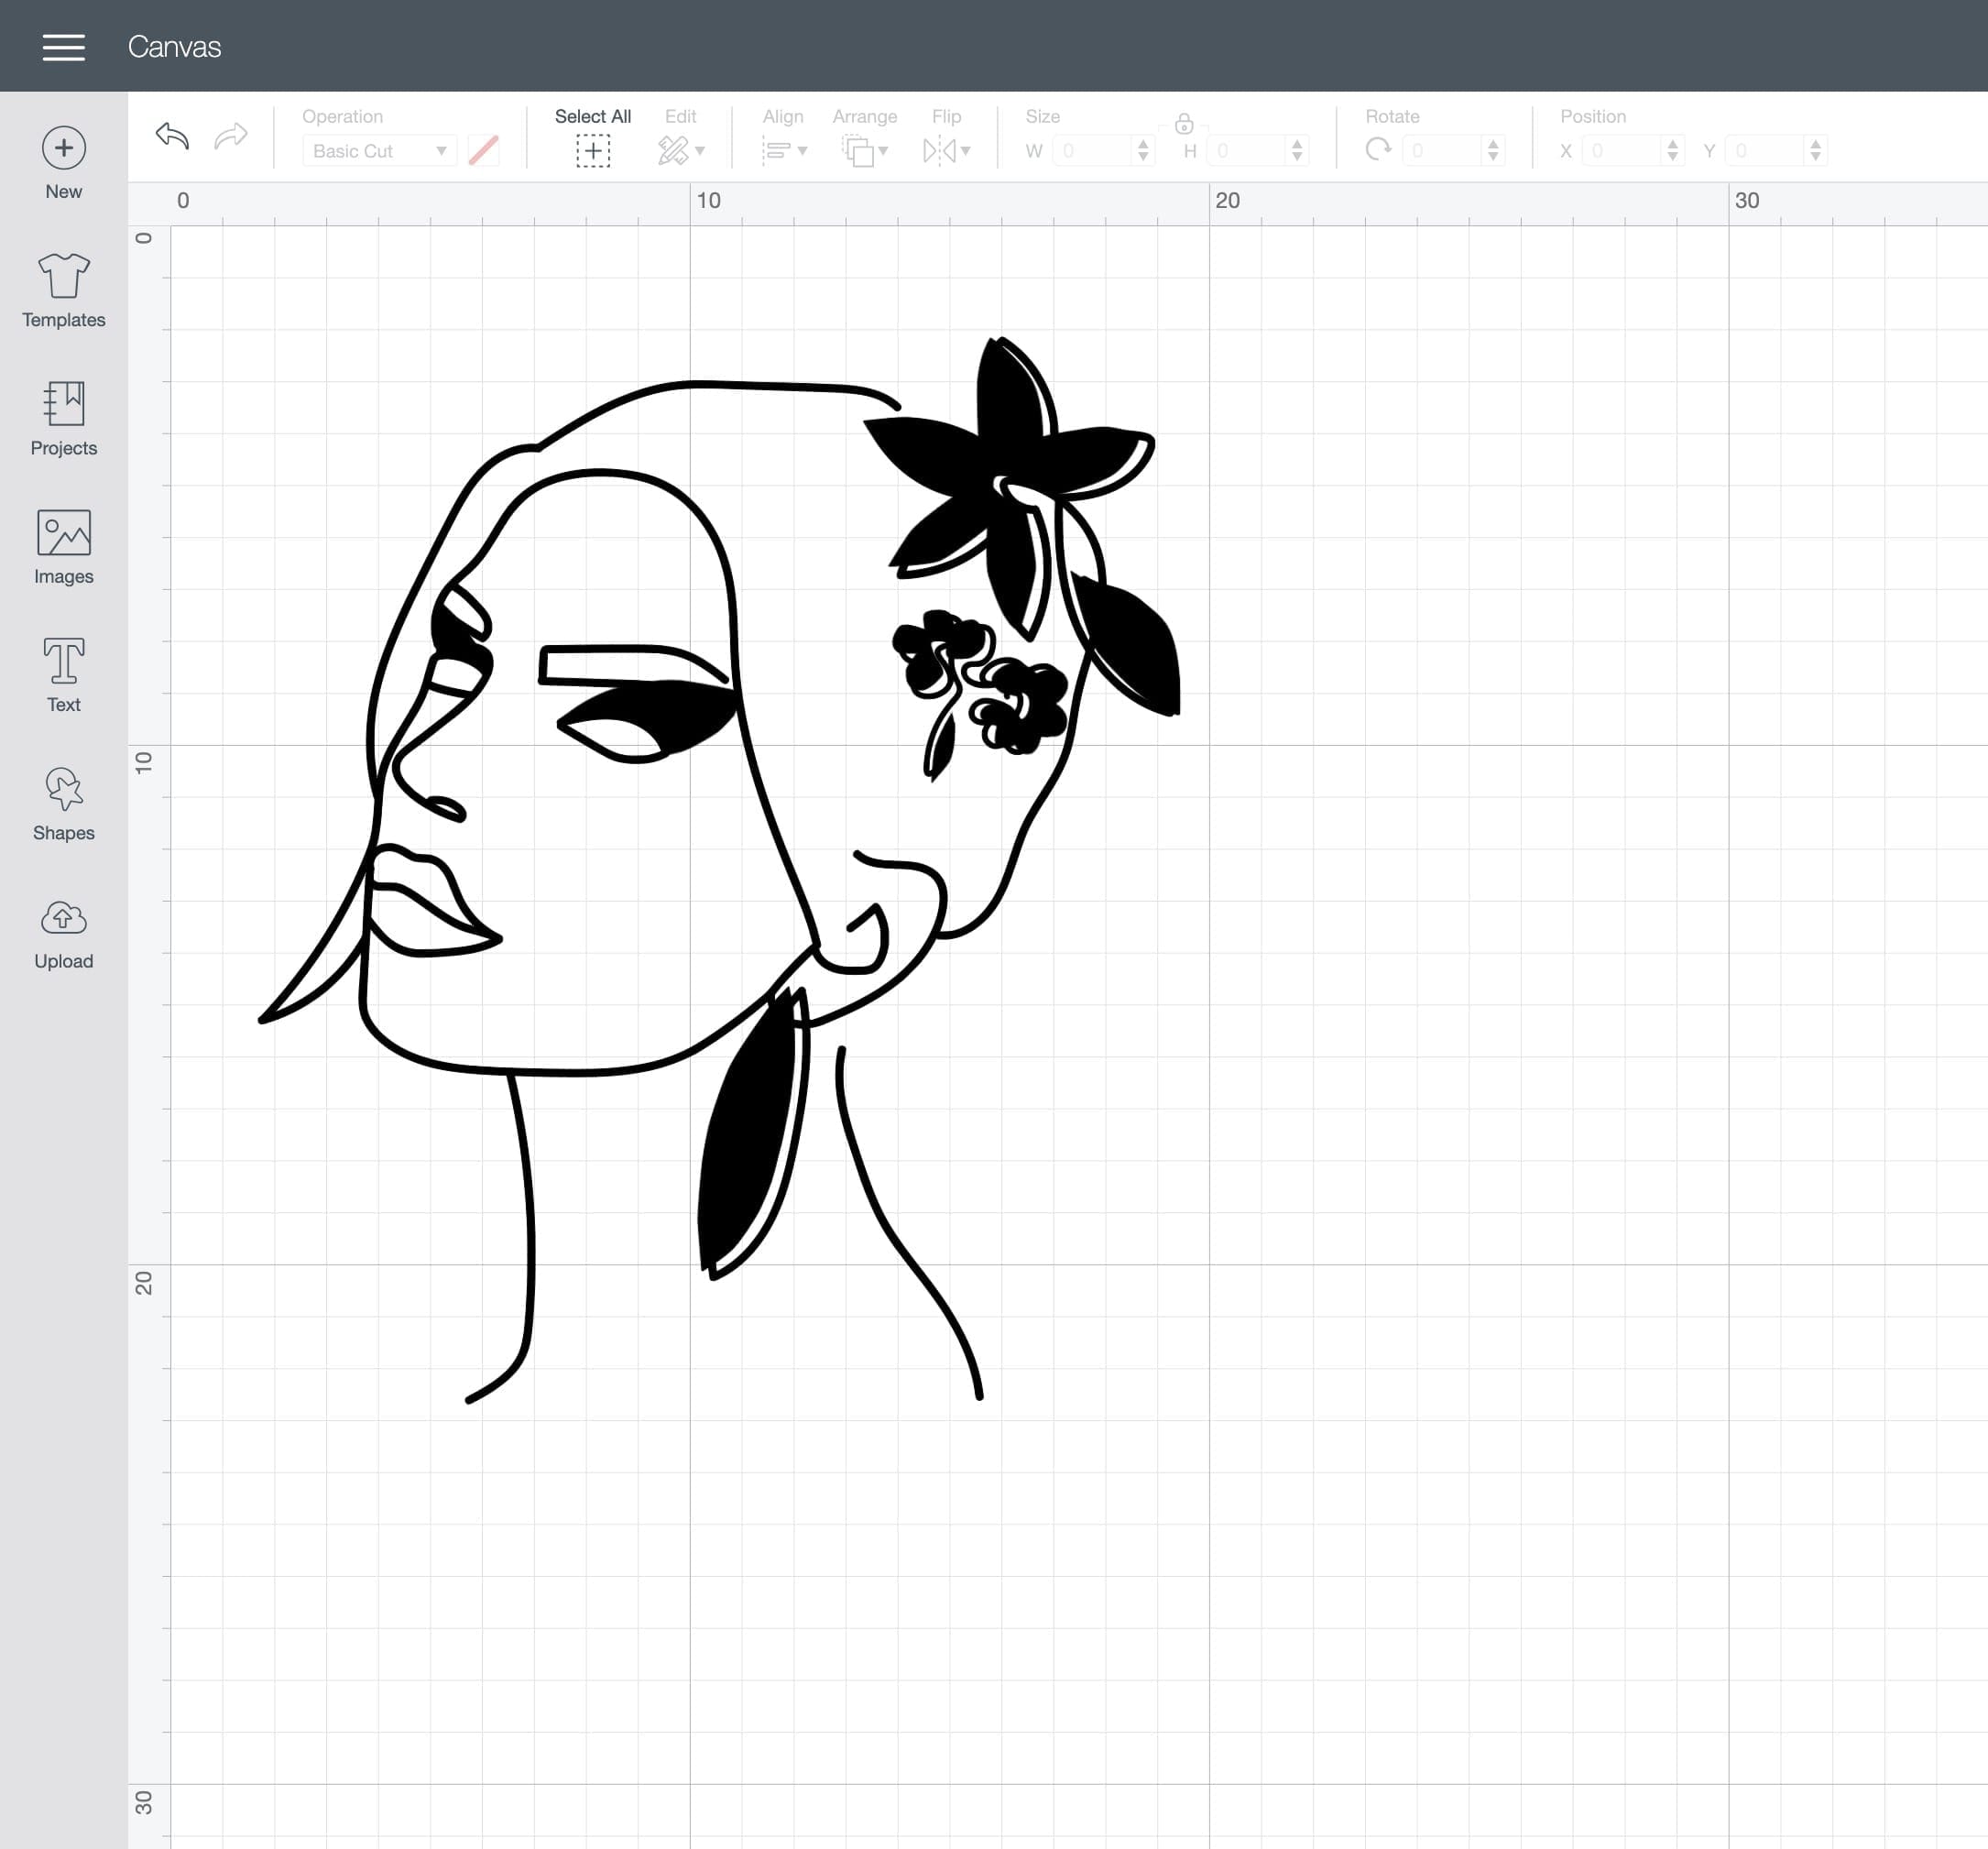
2. Upload each PNG into the design space as shown below.

3. Insert all the images onto the canvas and resize to suit your project. Position the flowers, leaves, eyeshadow and earrings against the face so that they are the right size for when you cut. Resize them when first inserted onto the canvas as they will still be grouped and will resize in the correct proportion to the face.
4. When resized, reposition each layer to be cut.
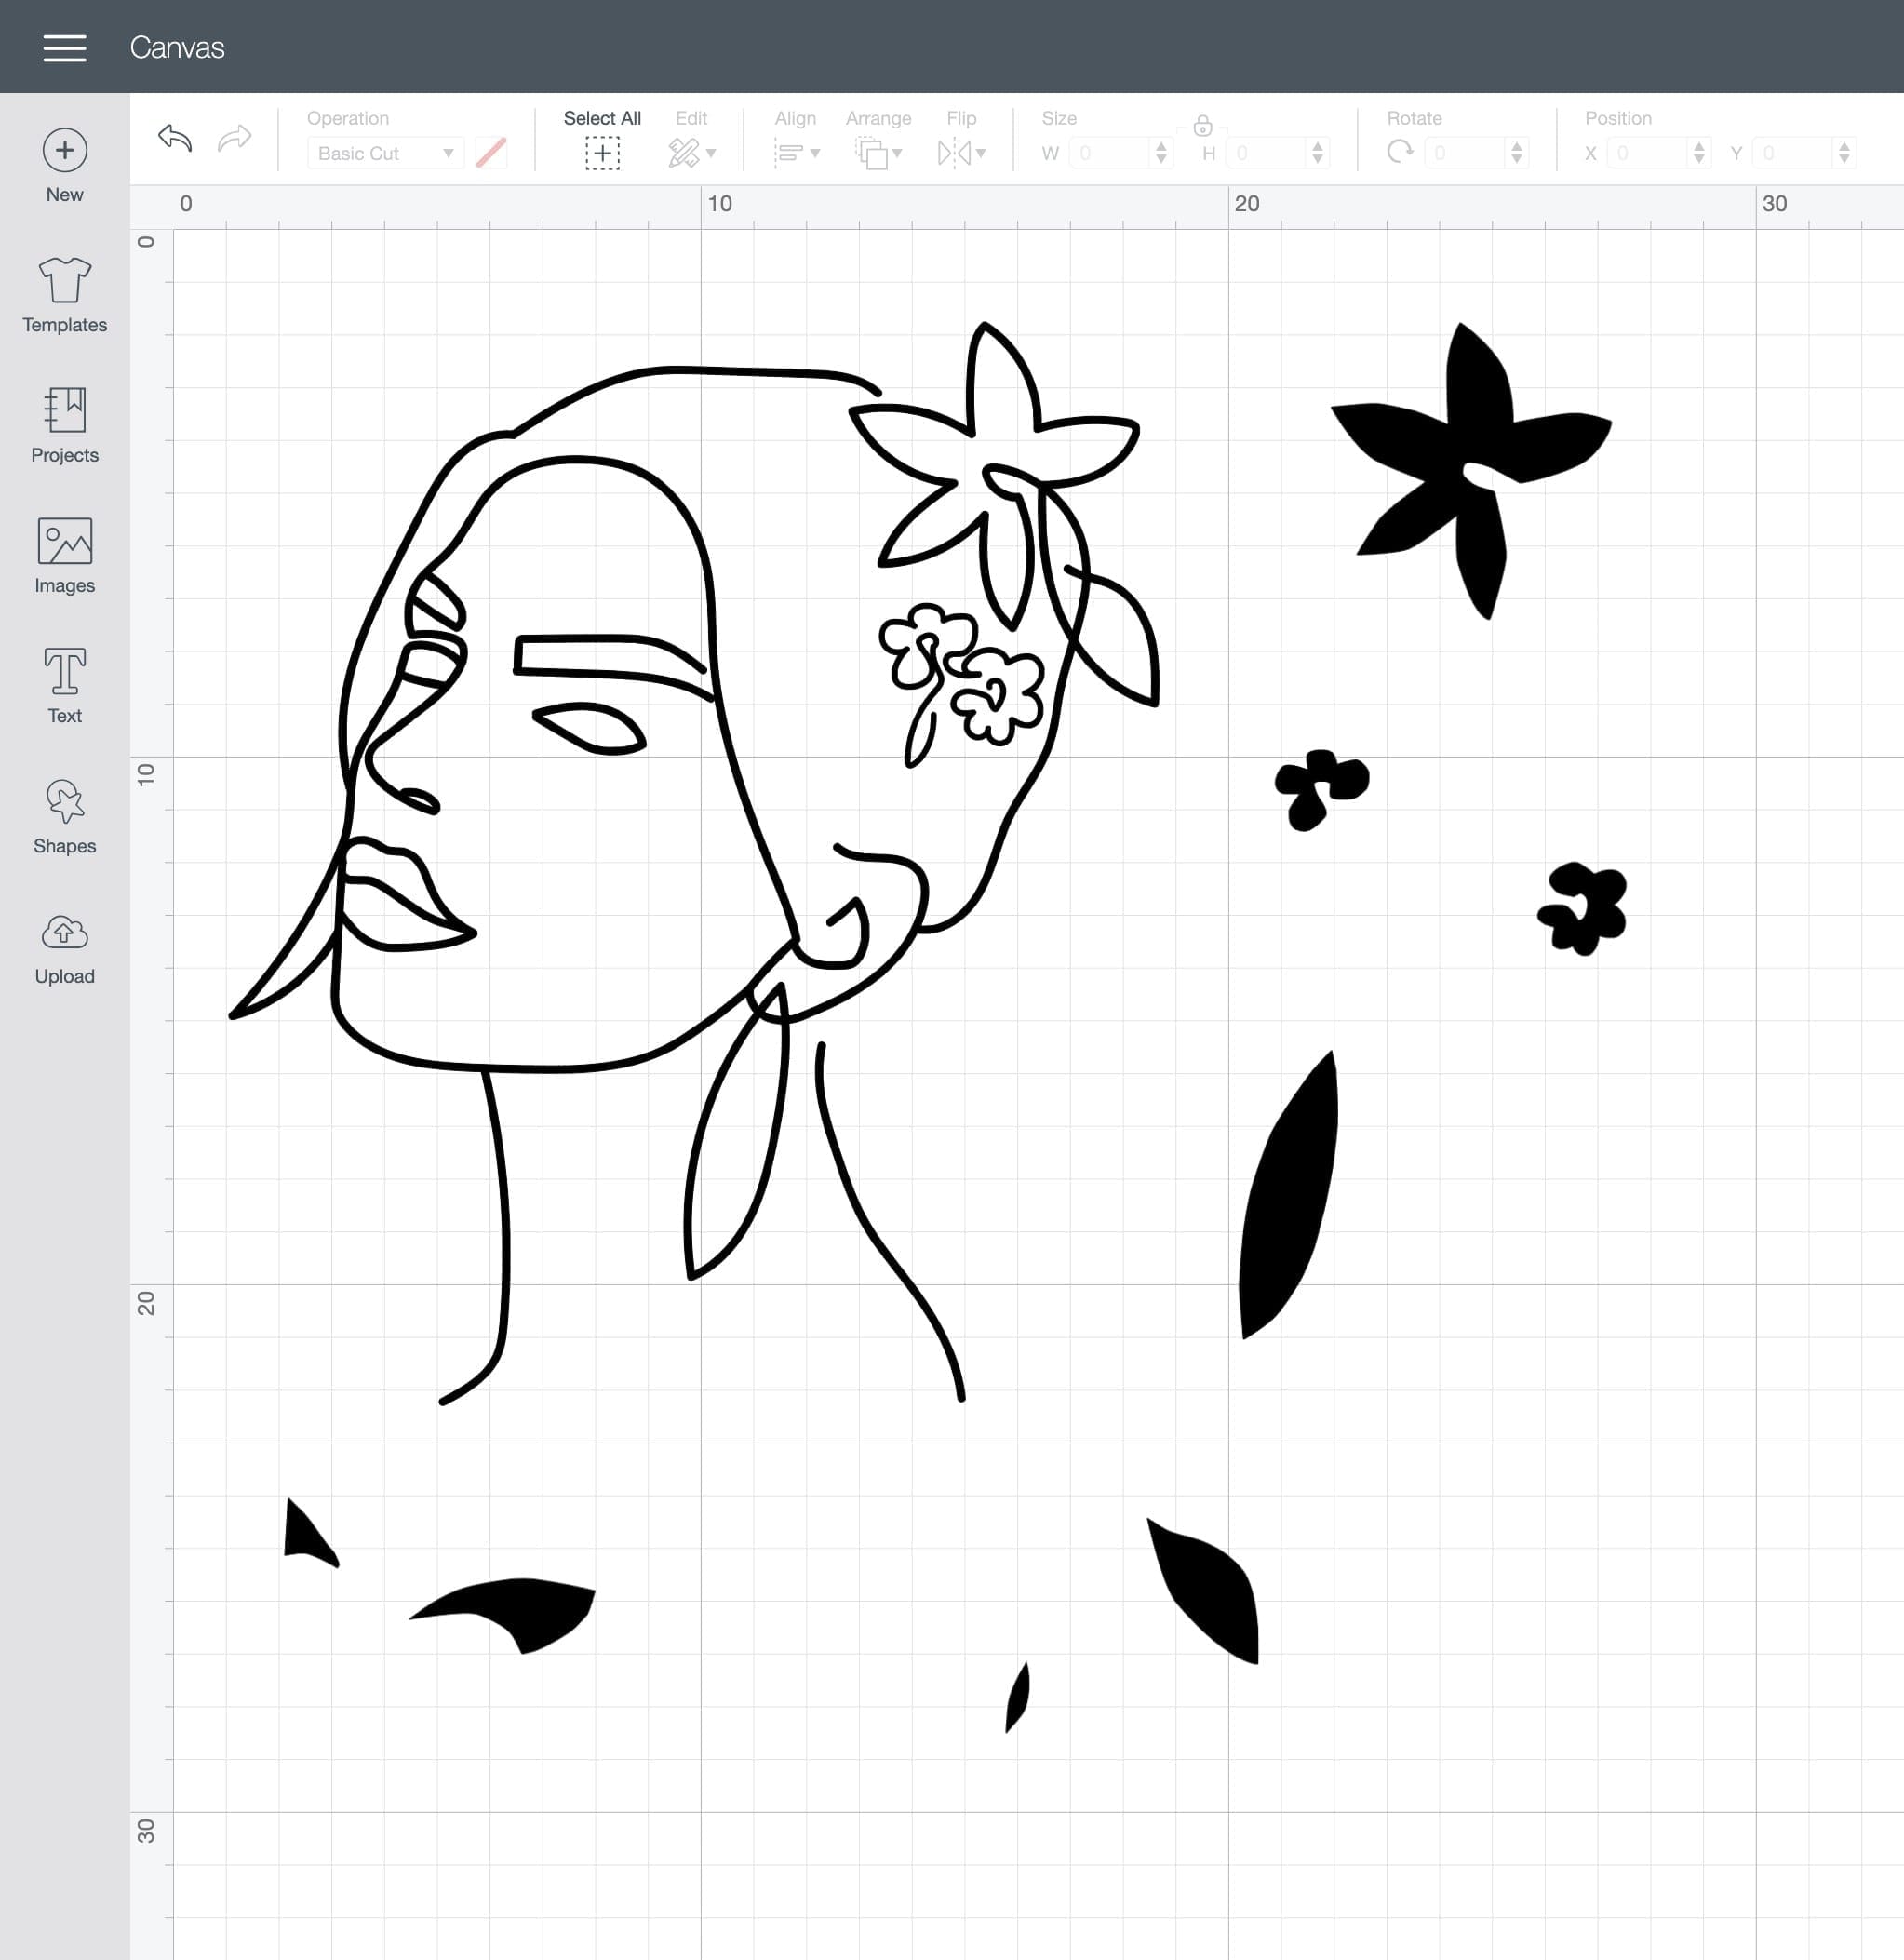
5. Press ‘Make It’ and make sure you select ‘Mirror’ so that your images are reversed on the cutting mat. Pearlshine HTV is always cut in reverse. We cut all the images on one mat by making a note of where each image was on the mat and putting the corresponding vinyl colours in the same place on the actual mat. This takes some patience and time but will get easier the more you get used to it. However if you’d rather cut the images separately on different mats, that is fine too.
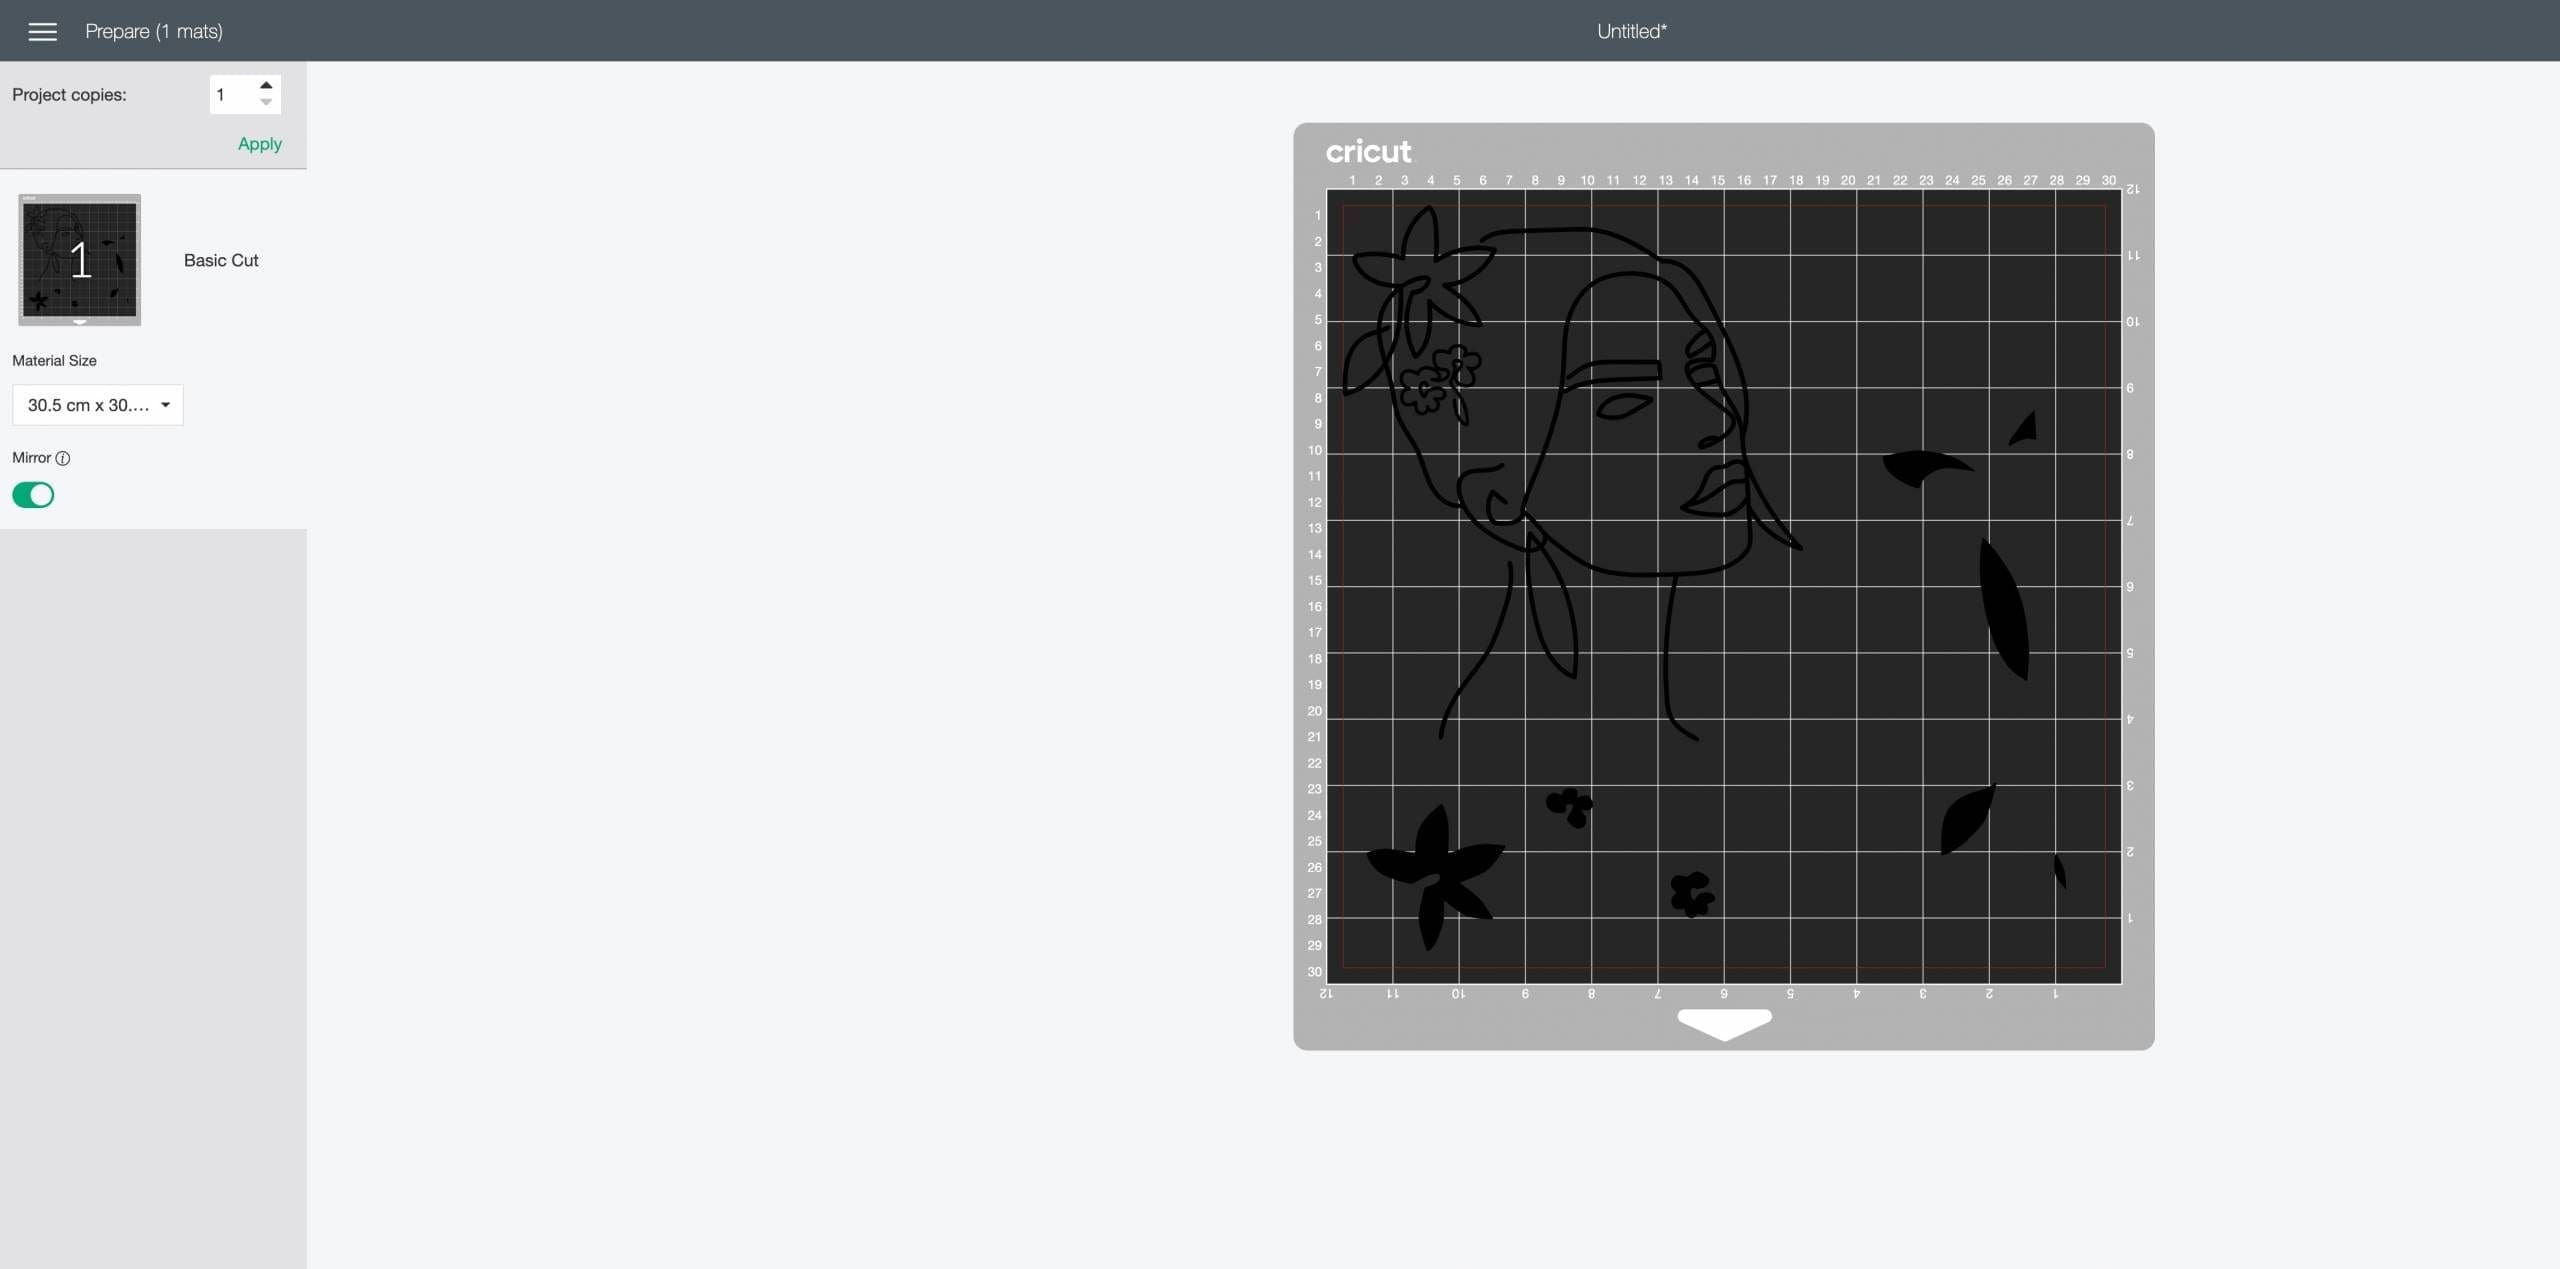
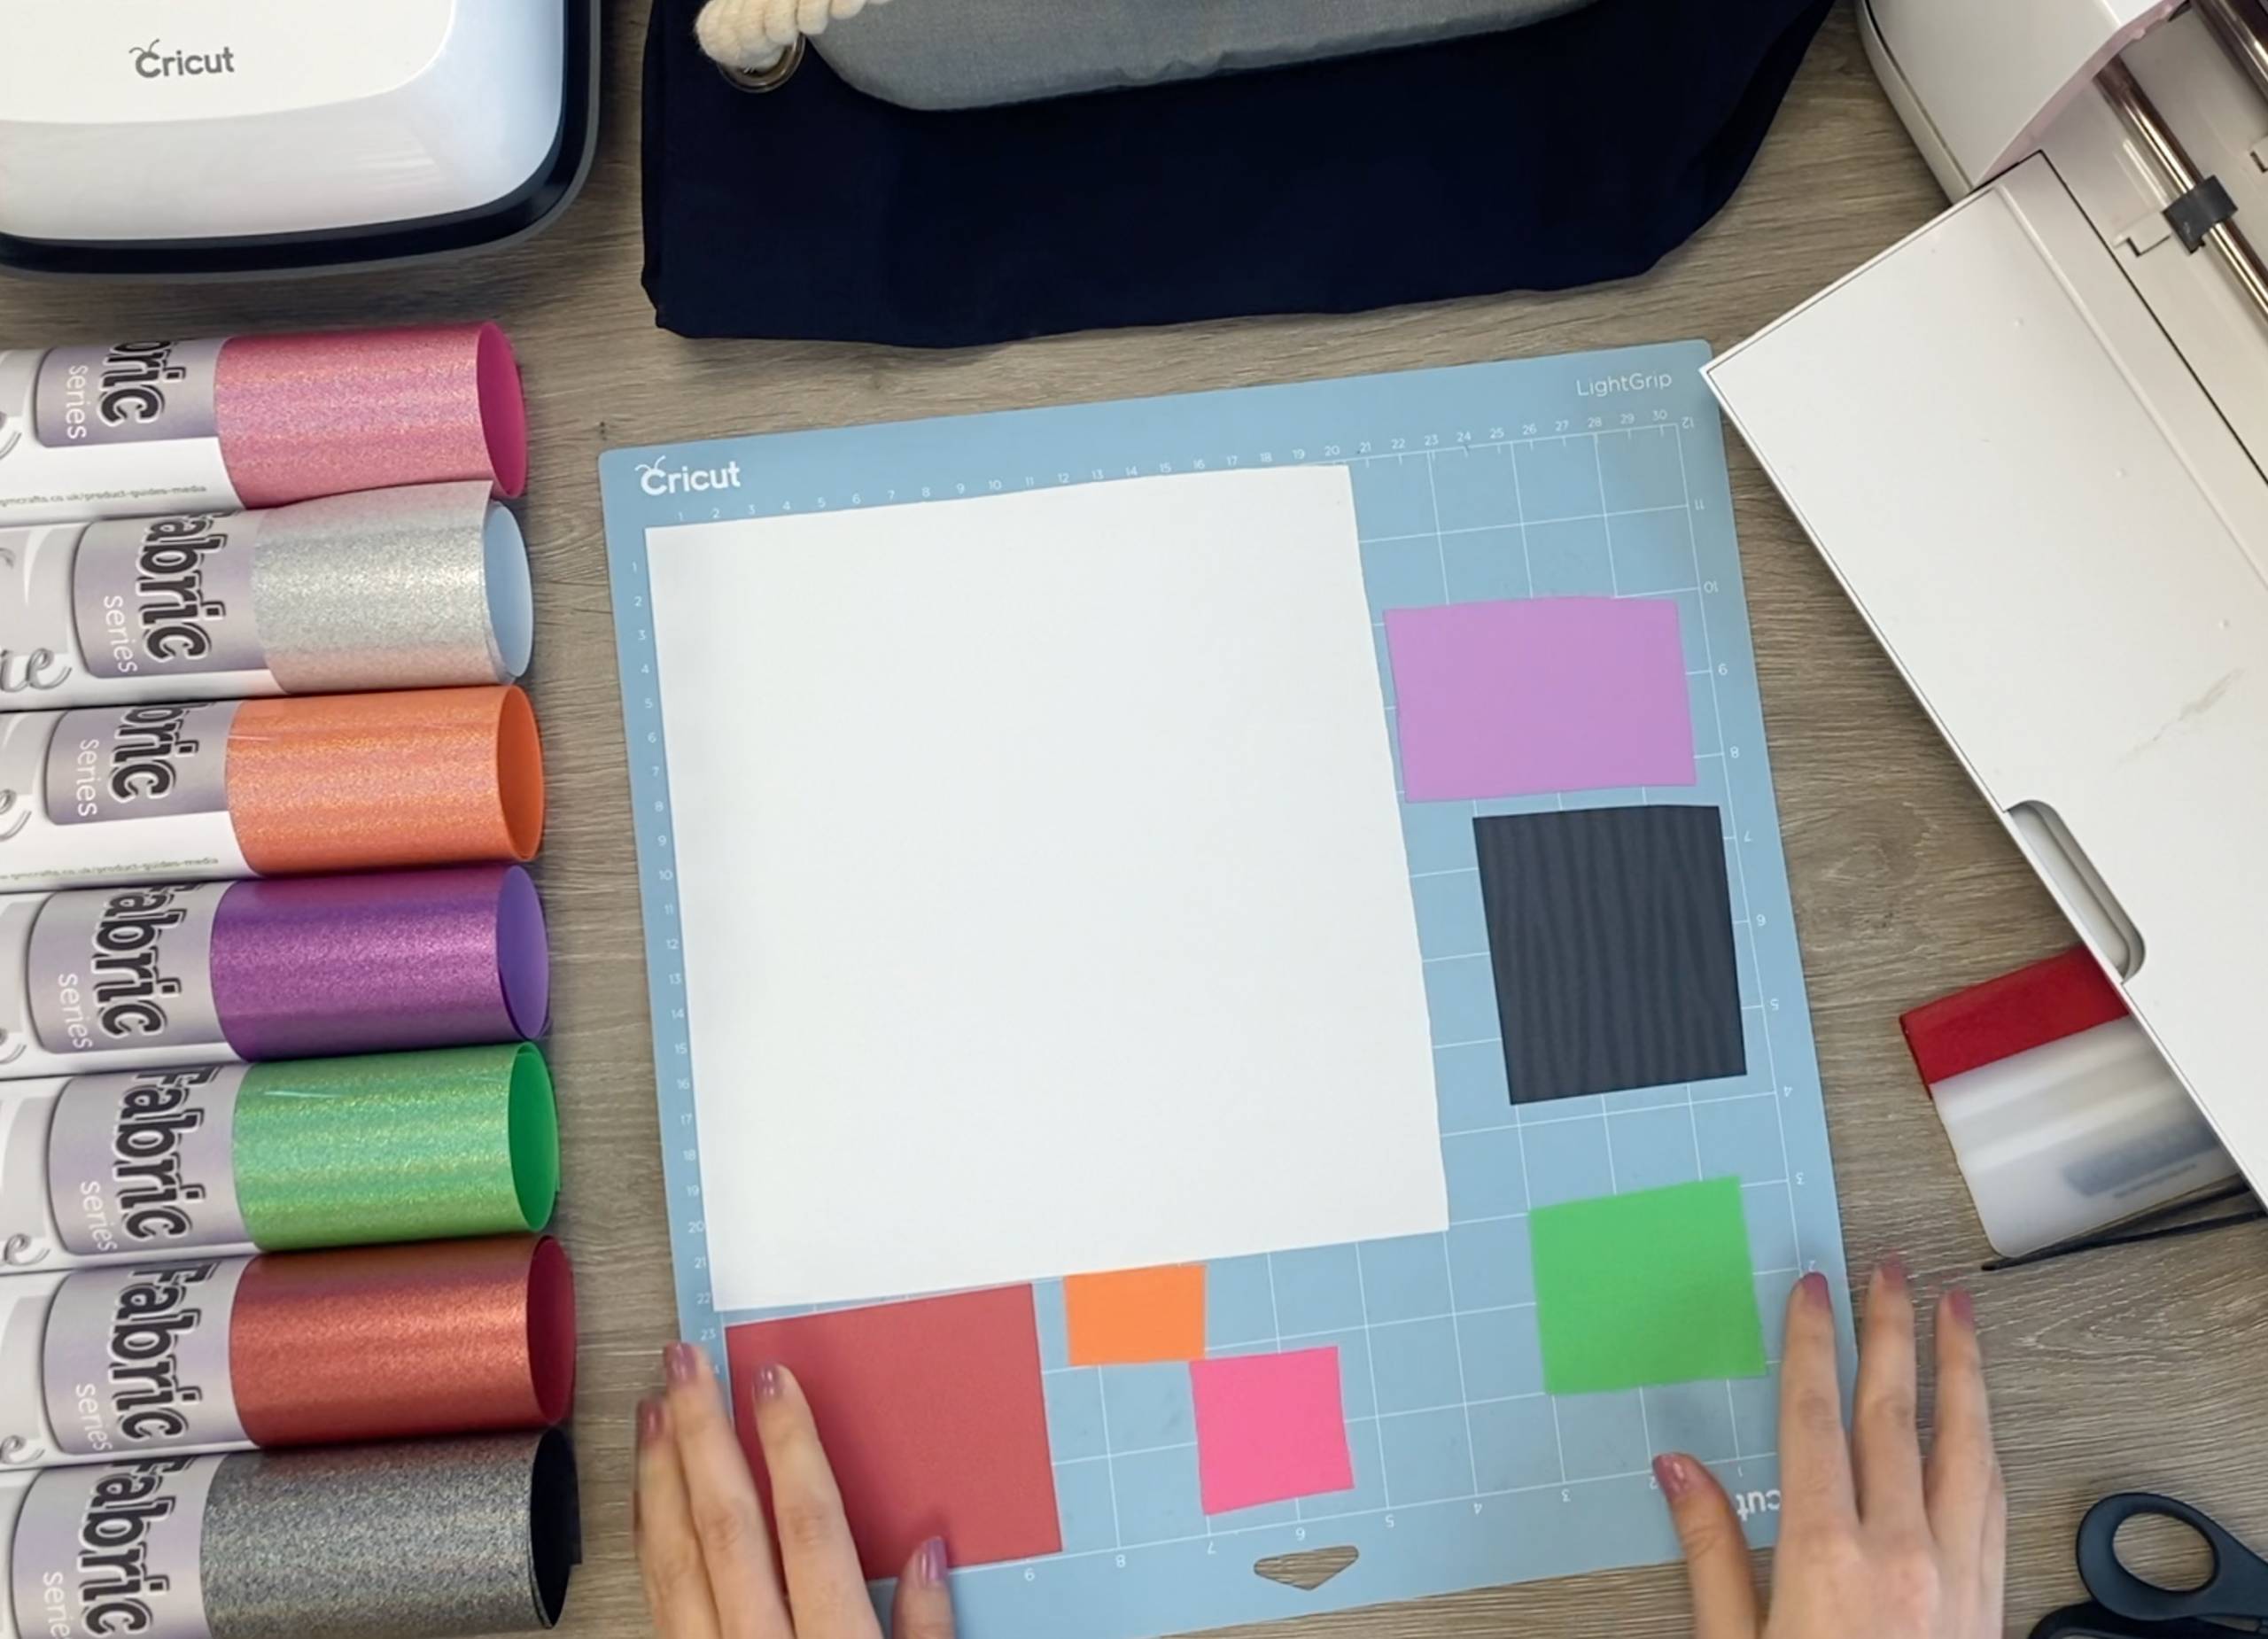
6. Press ‘continue’ and select ‘Holographic Heat Transfer’ as your material and the pressure to ‘More’. We used a Fine-Point blade. Load your mat into your Cricut machine and send the images to cut.
7. When cut, weed the vinyl so that just the design is left on the clear carrier sheet.
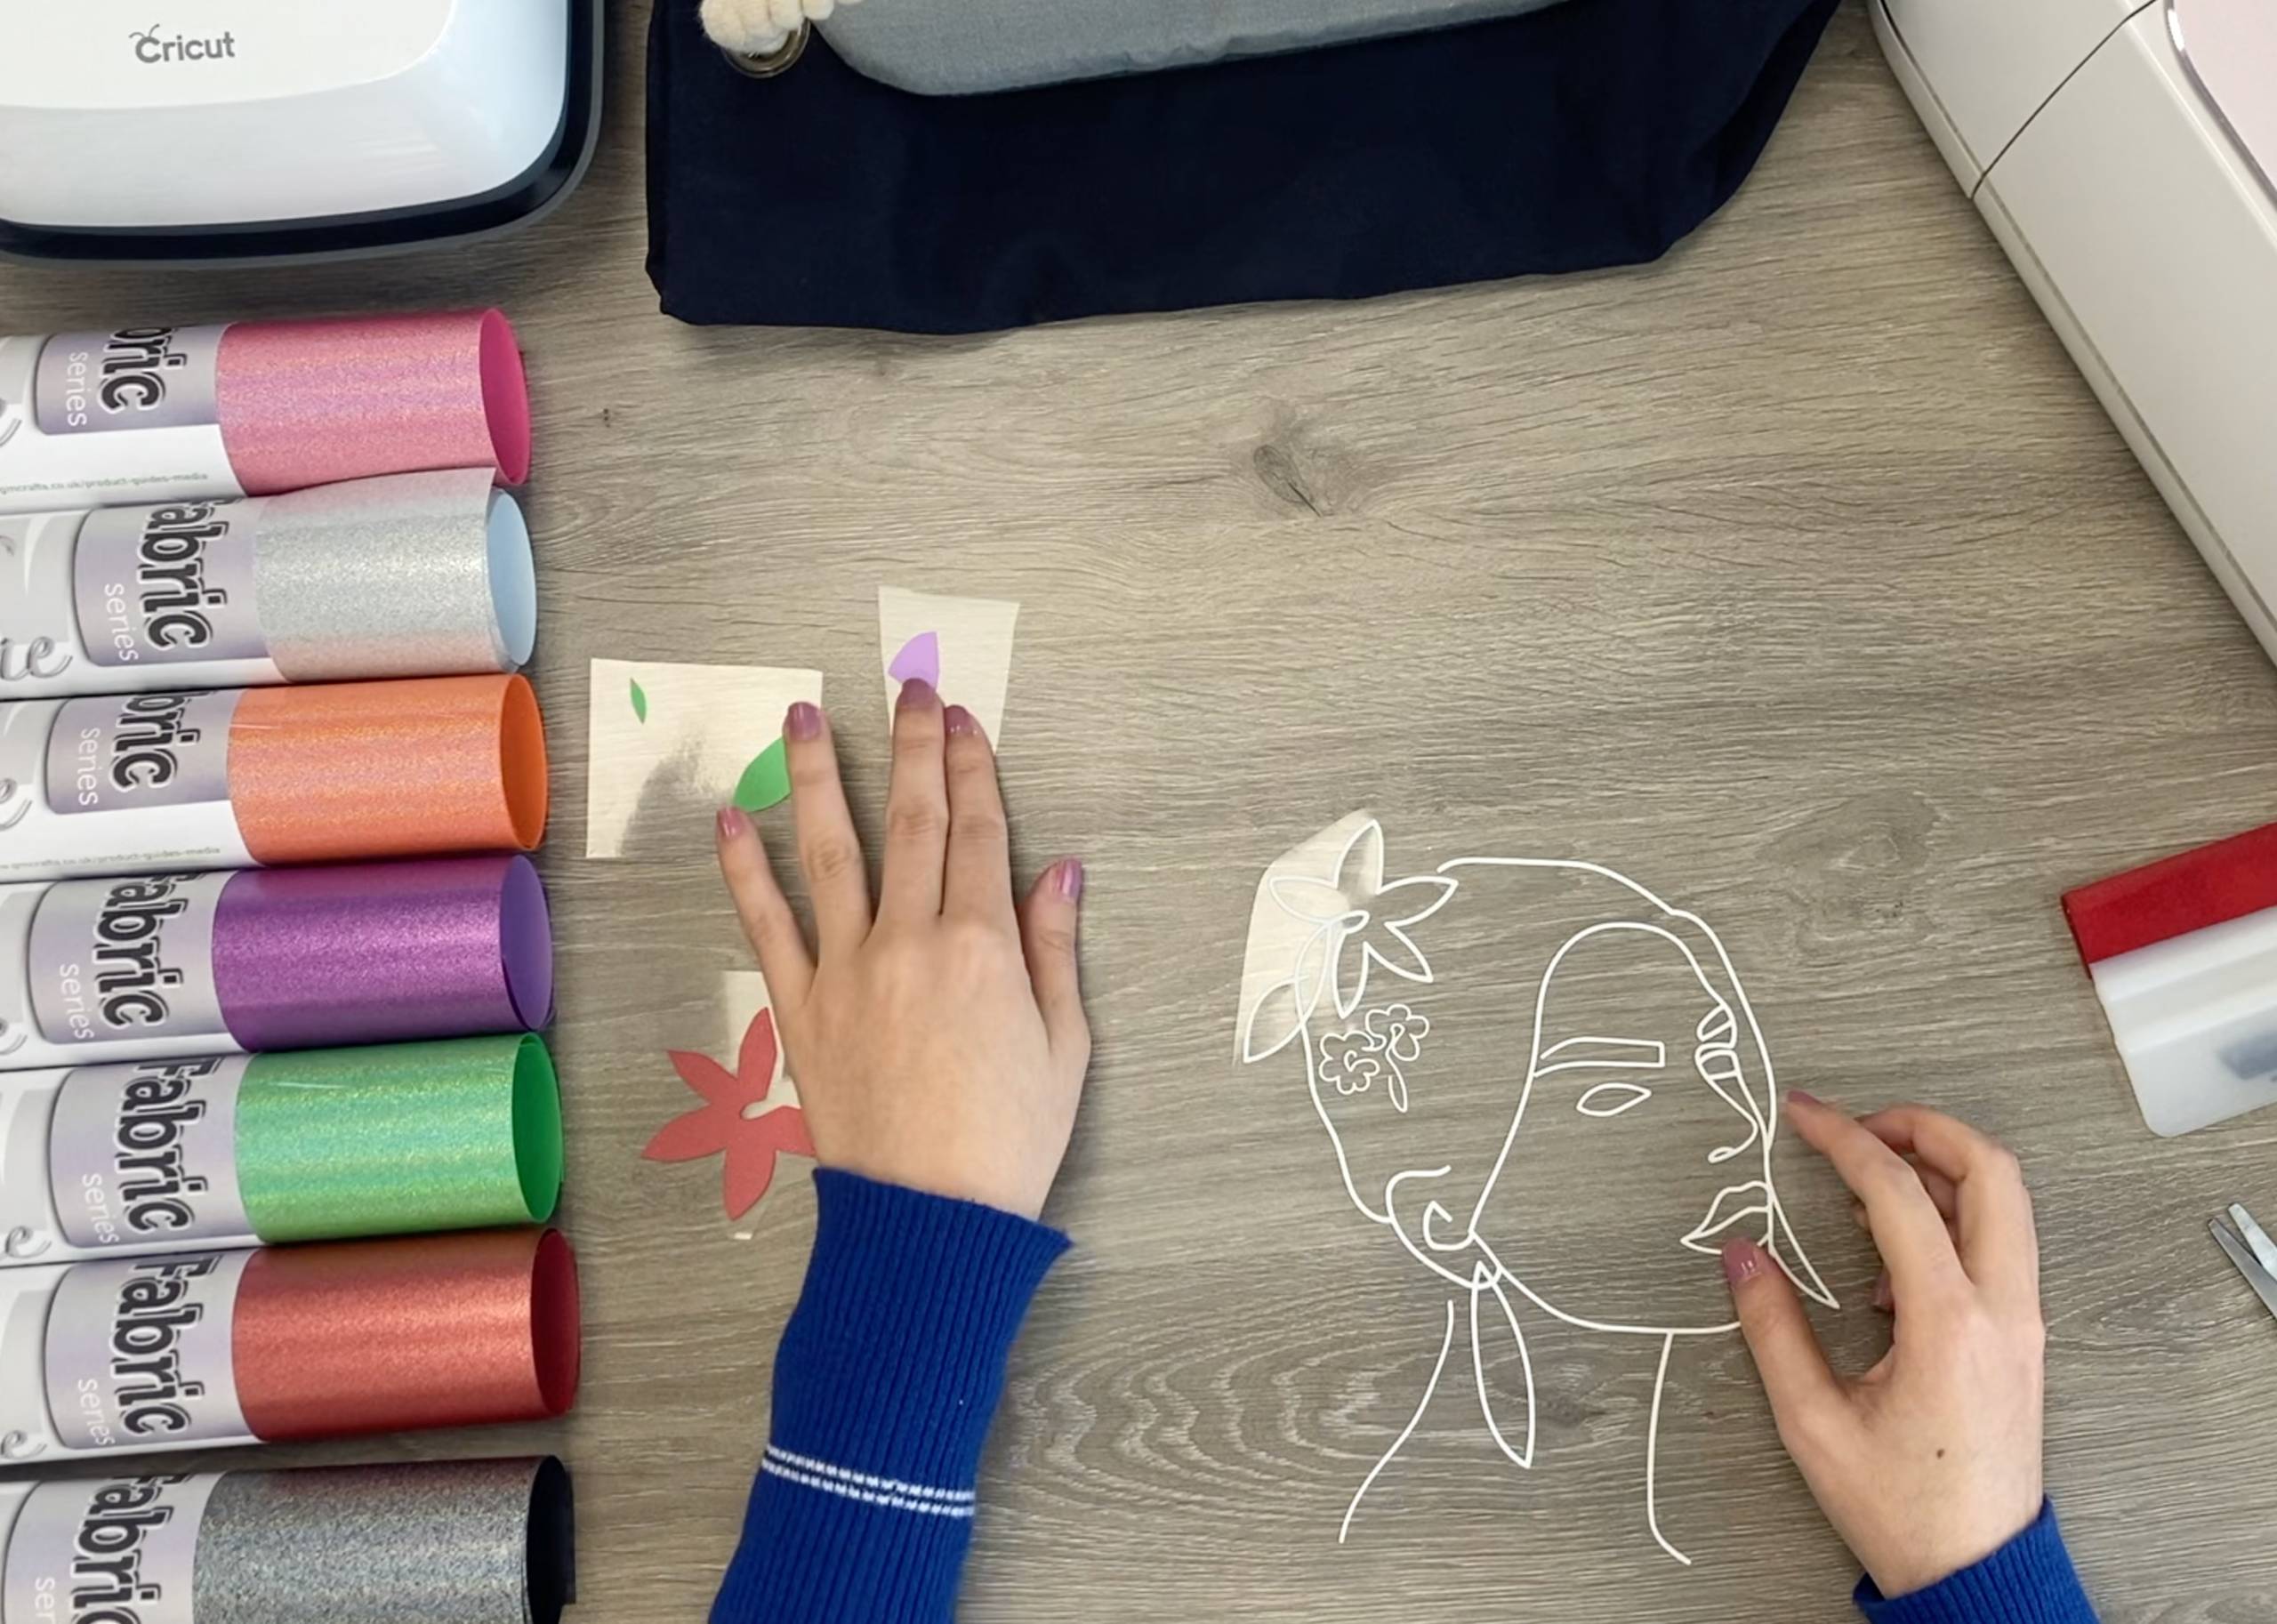
8. Position the flowers, leaves, eyeshadow and earring images on top of the face where you’d like them to be on the design. Press the layers in groups, not all together. Position the large flower and small flowers first. then the eyeshadow, leaves and earring.
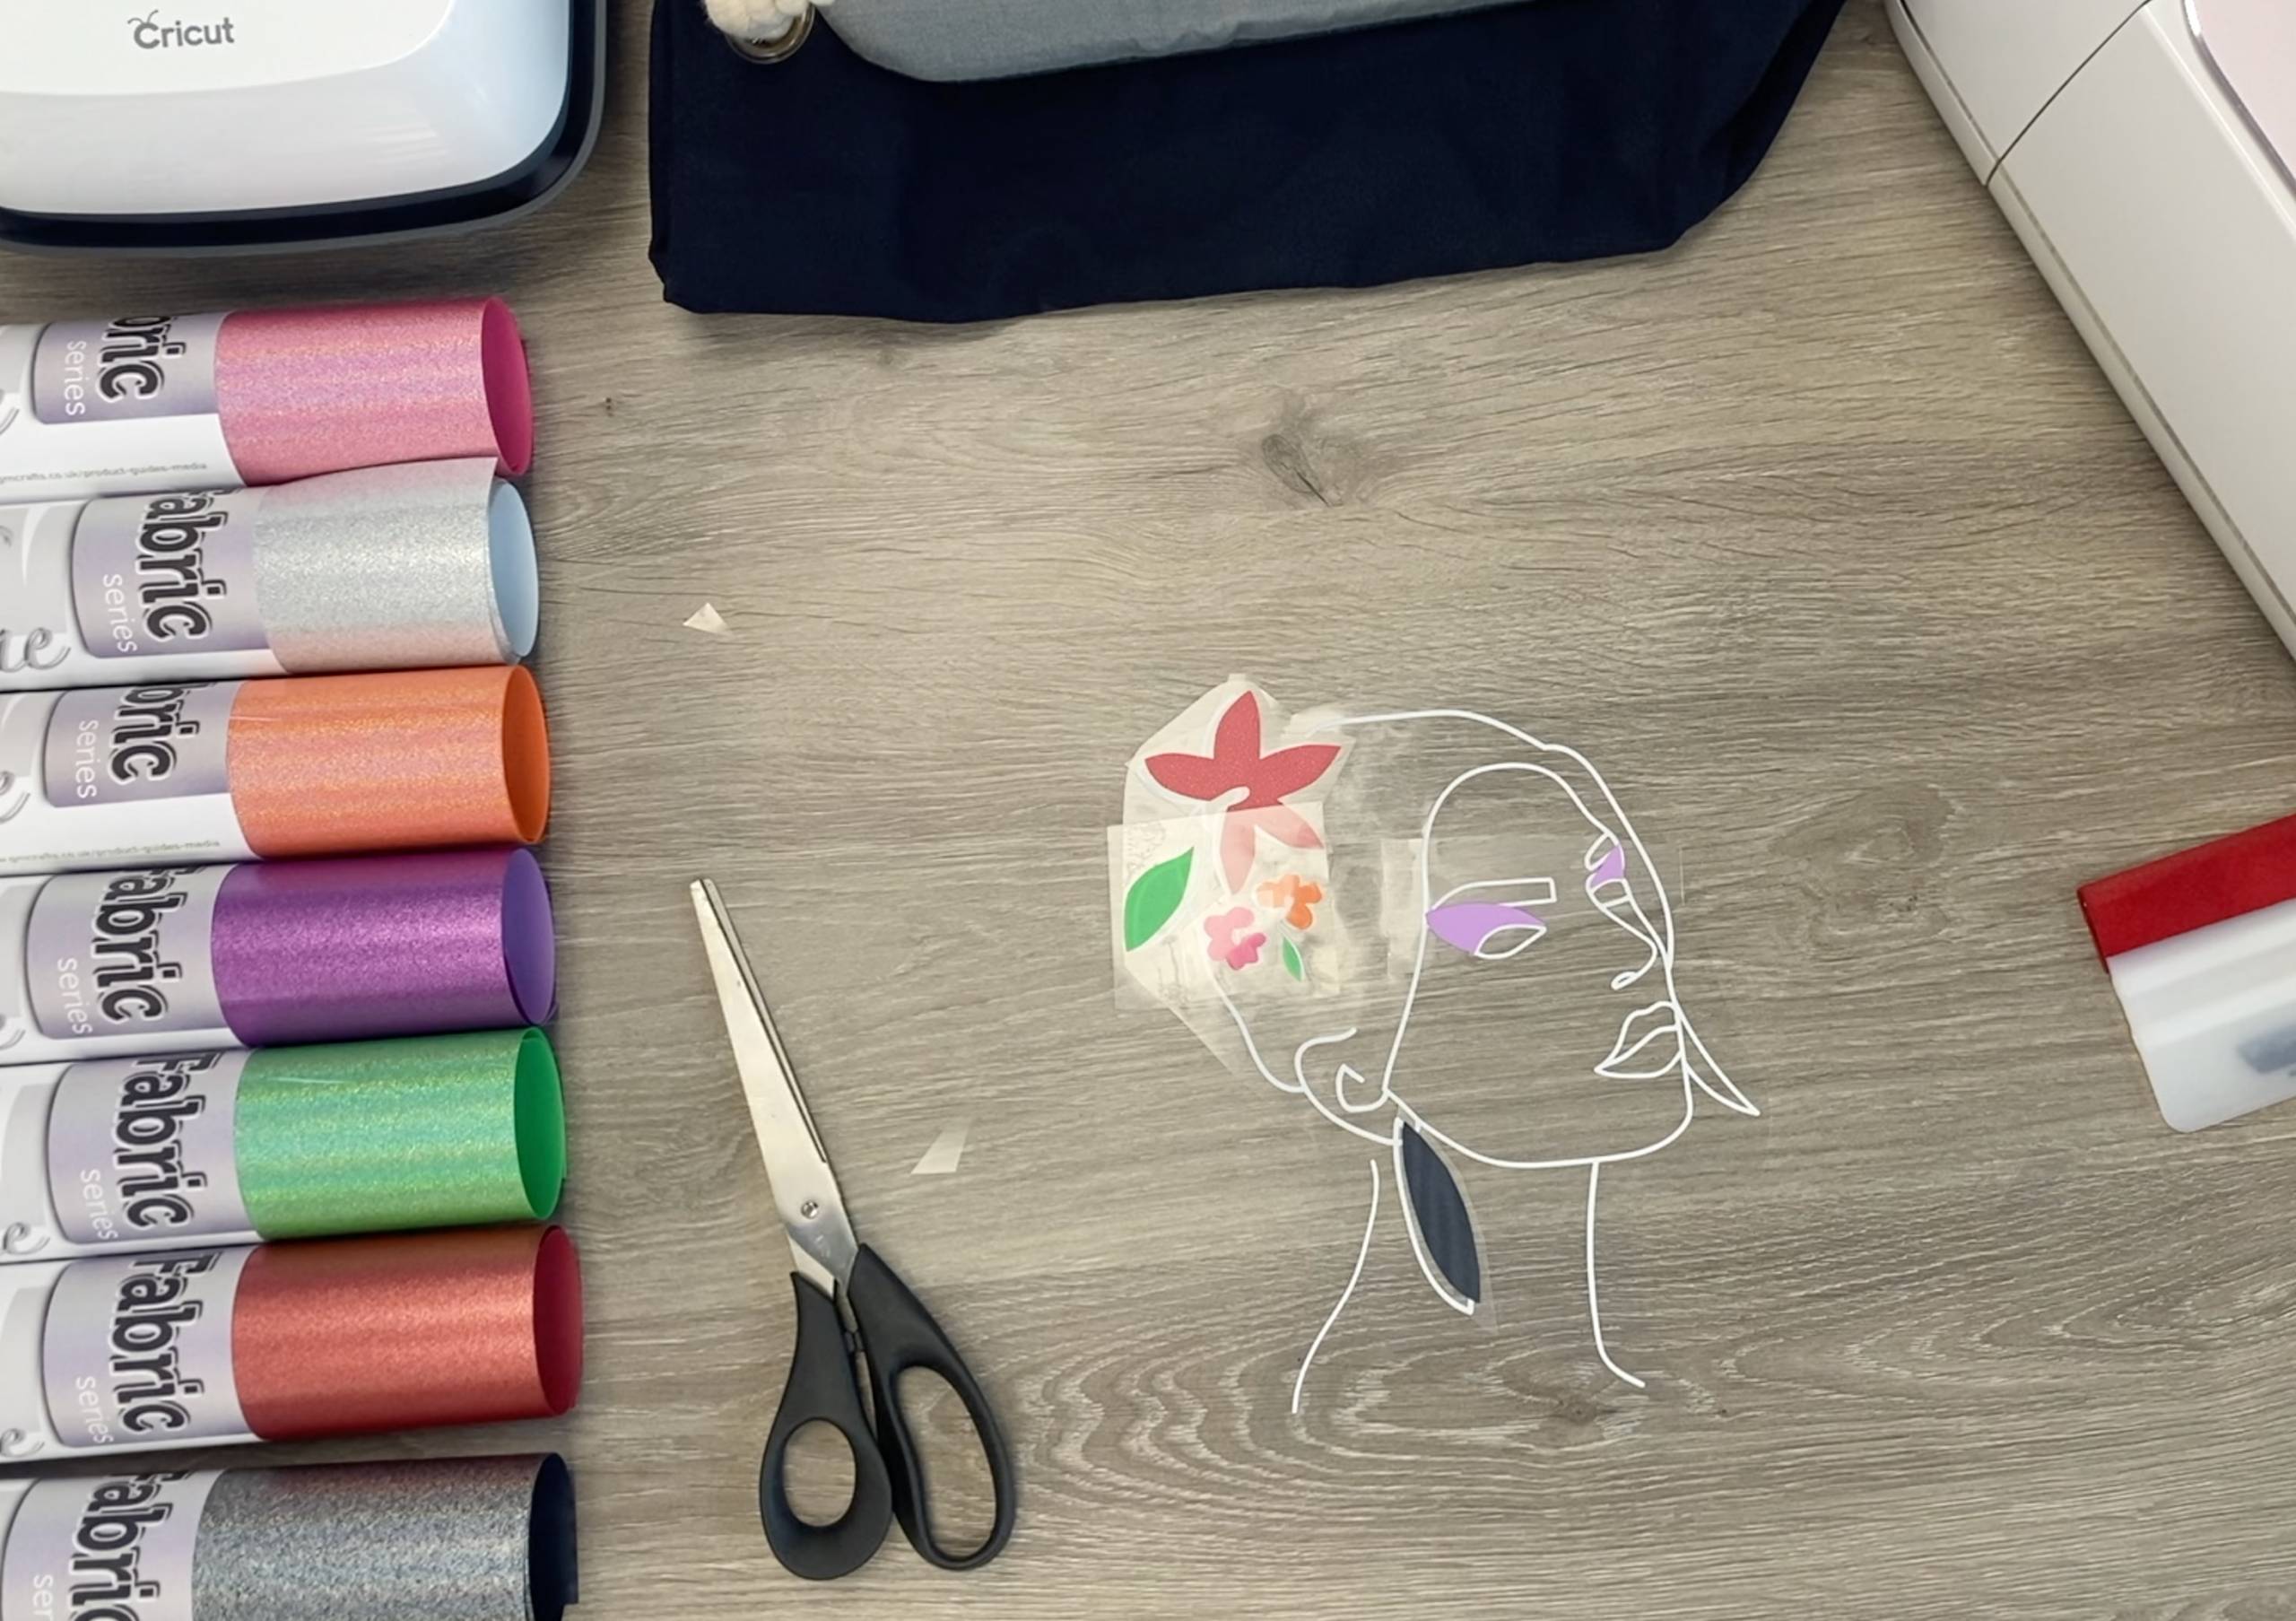
9. Preheat the area of application for 5 seconds before positioning the design on your garment. You should be able to carry the whole design now as it will be stuck together by the carrier sheets. The design should be face up how you’d expect to see it on the garment, the face layer should be on the top.
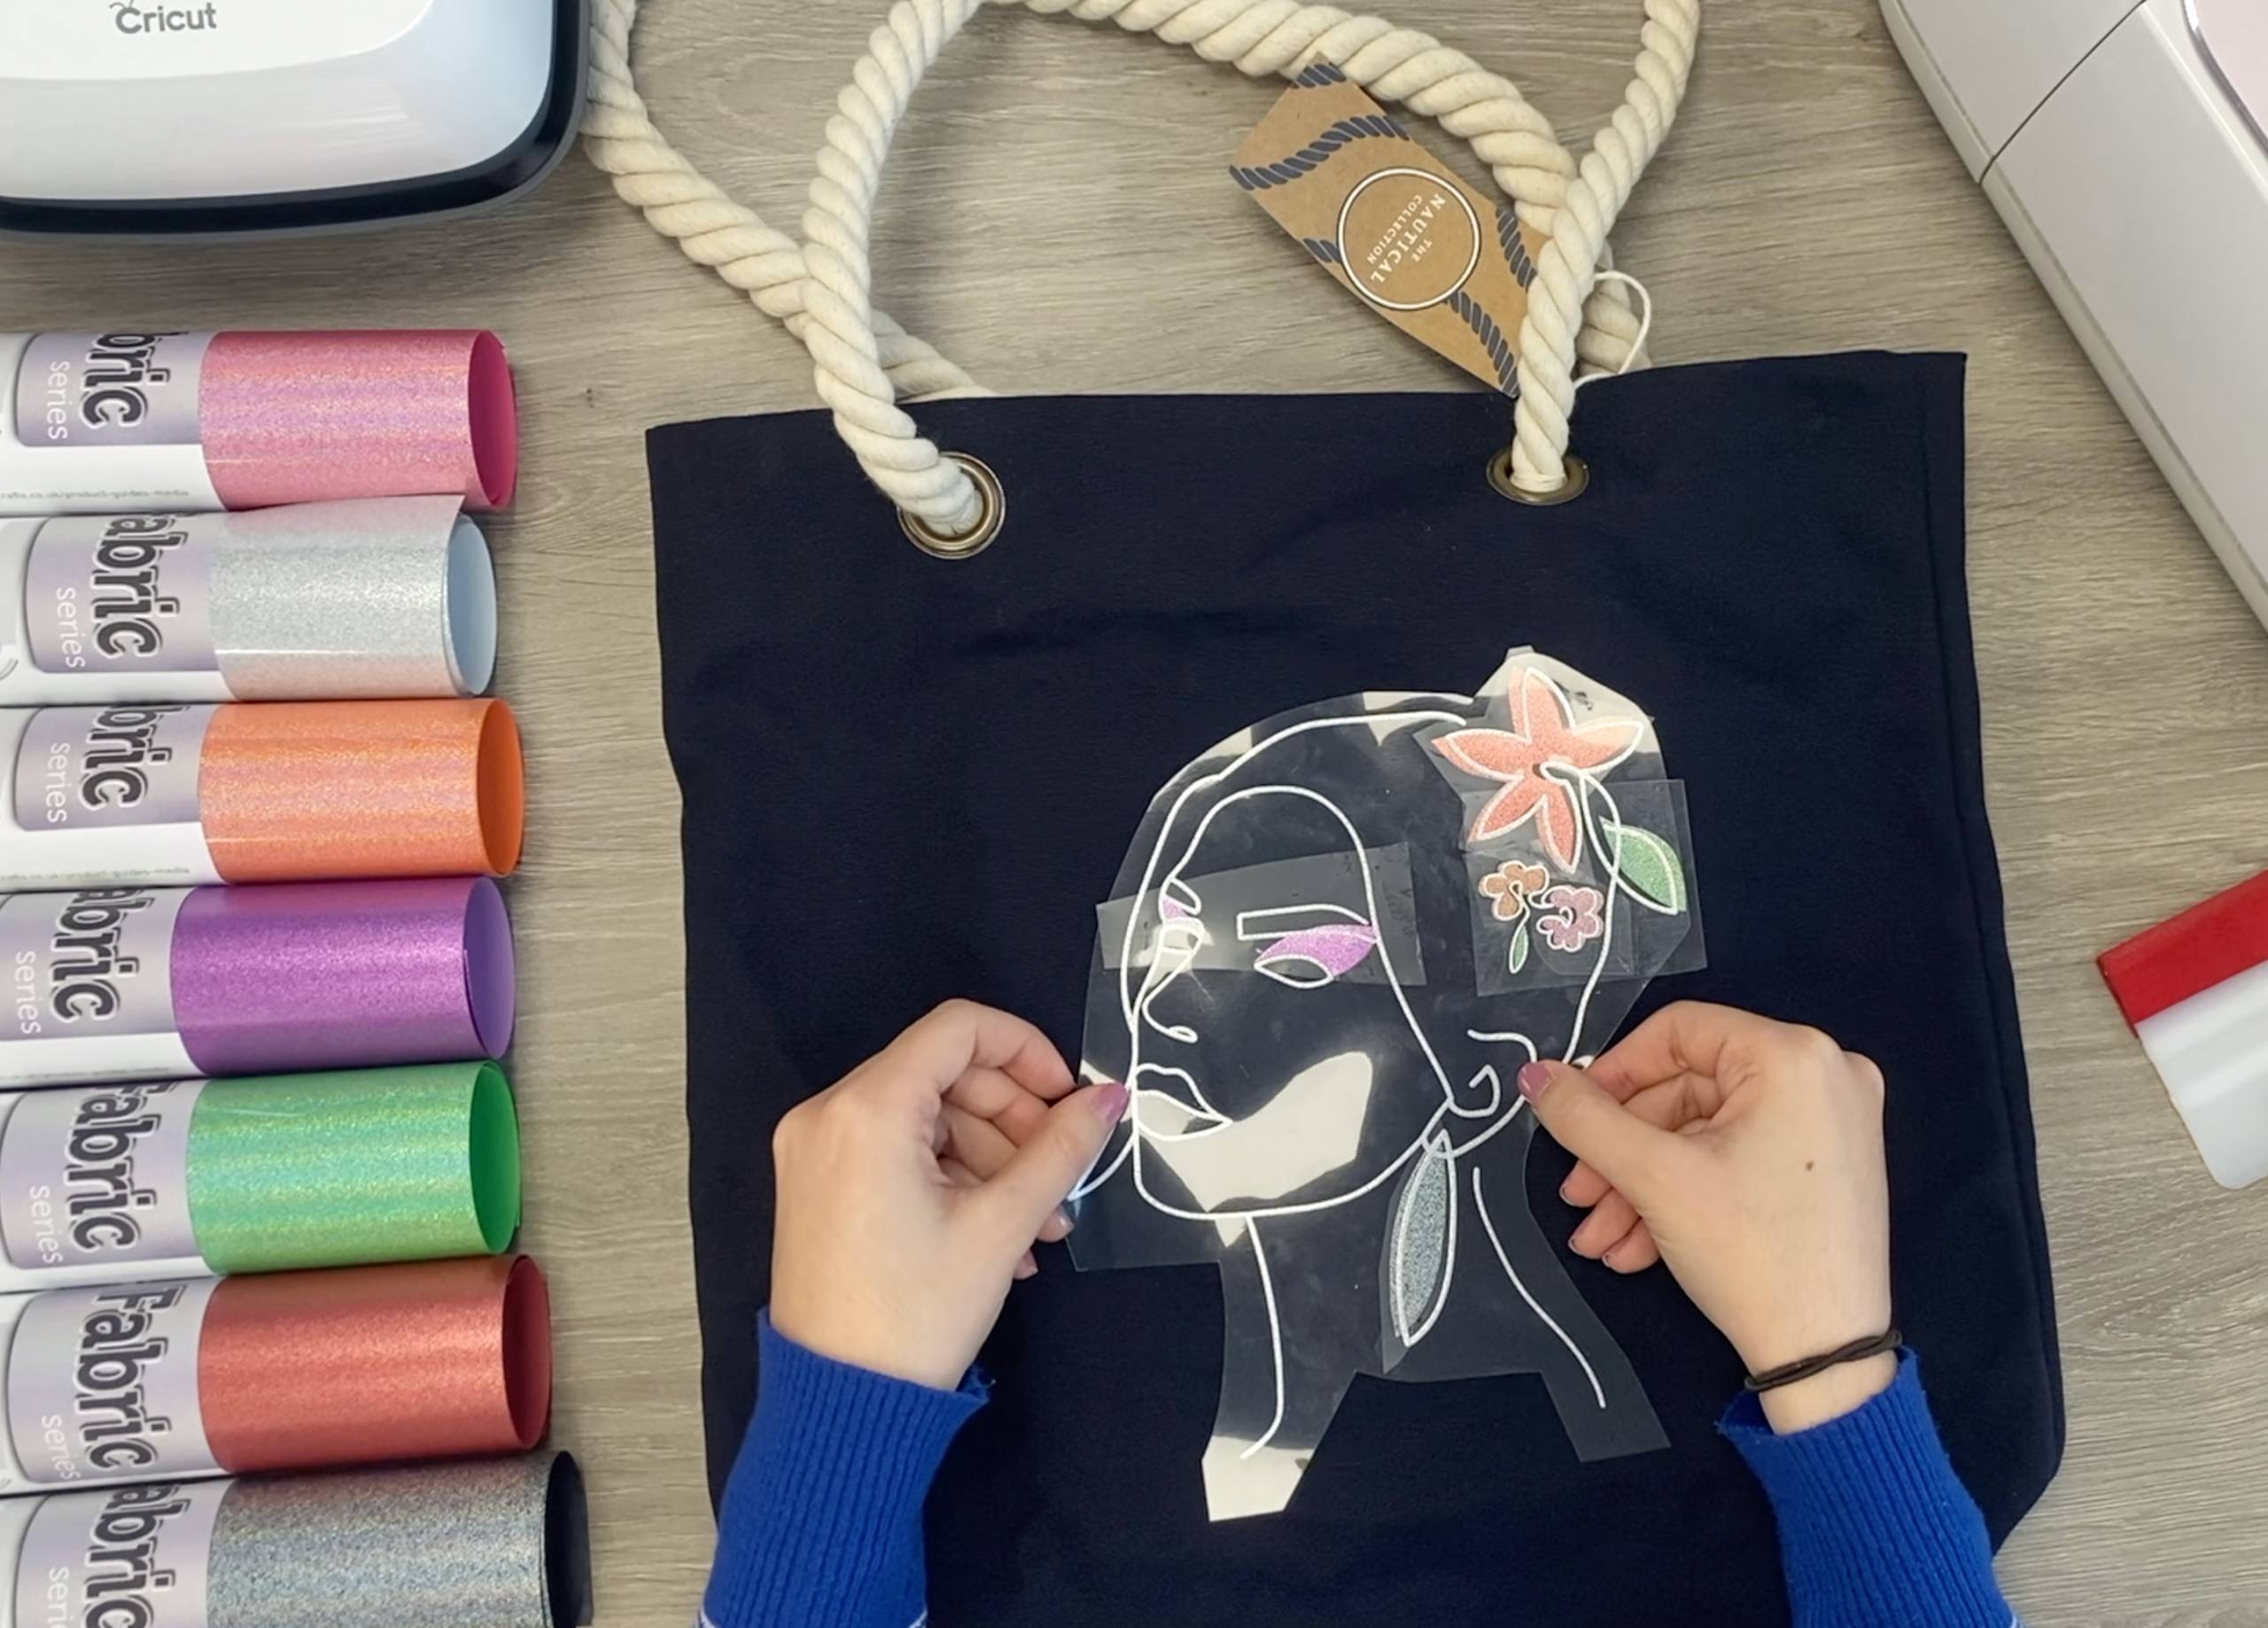
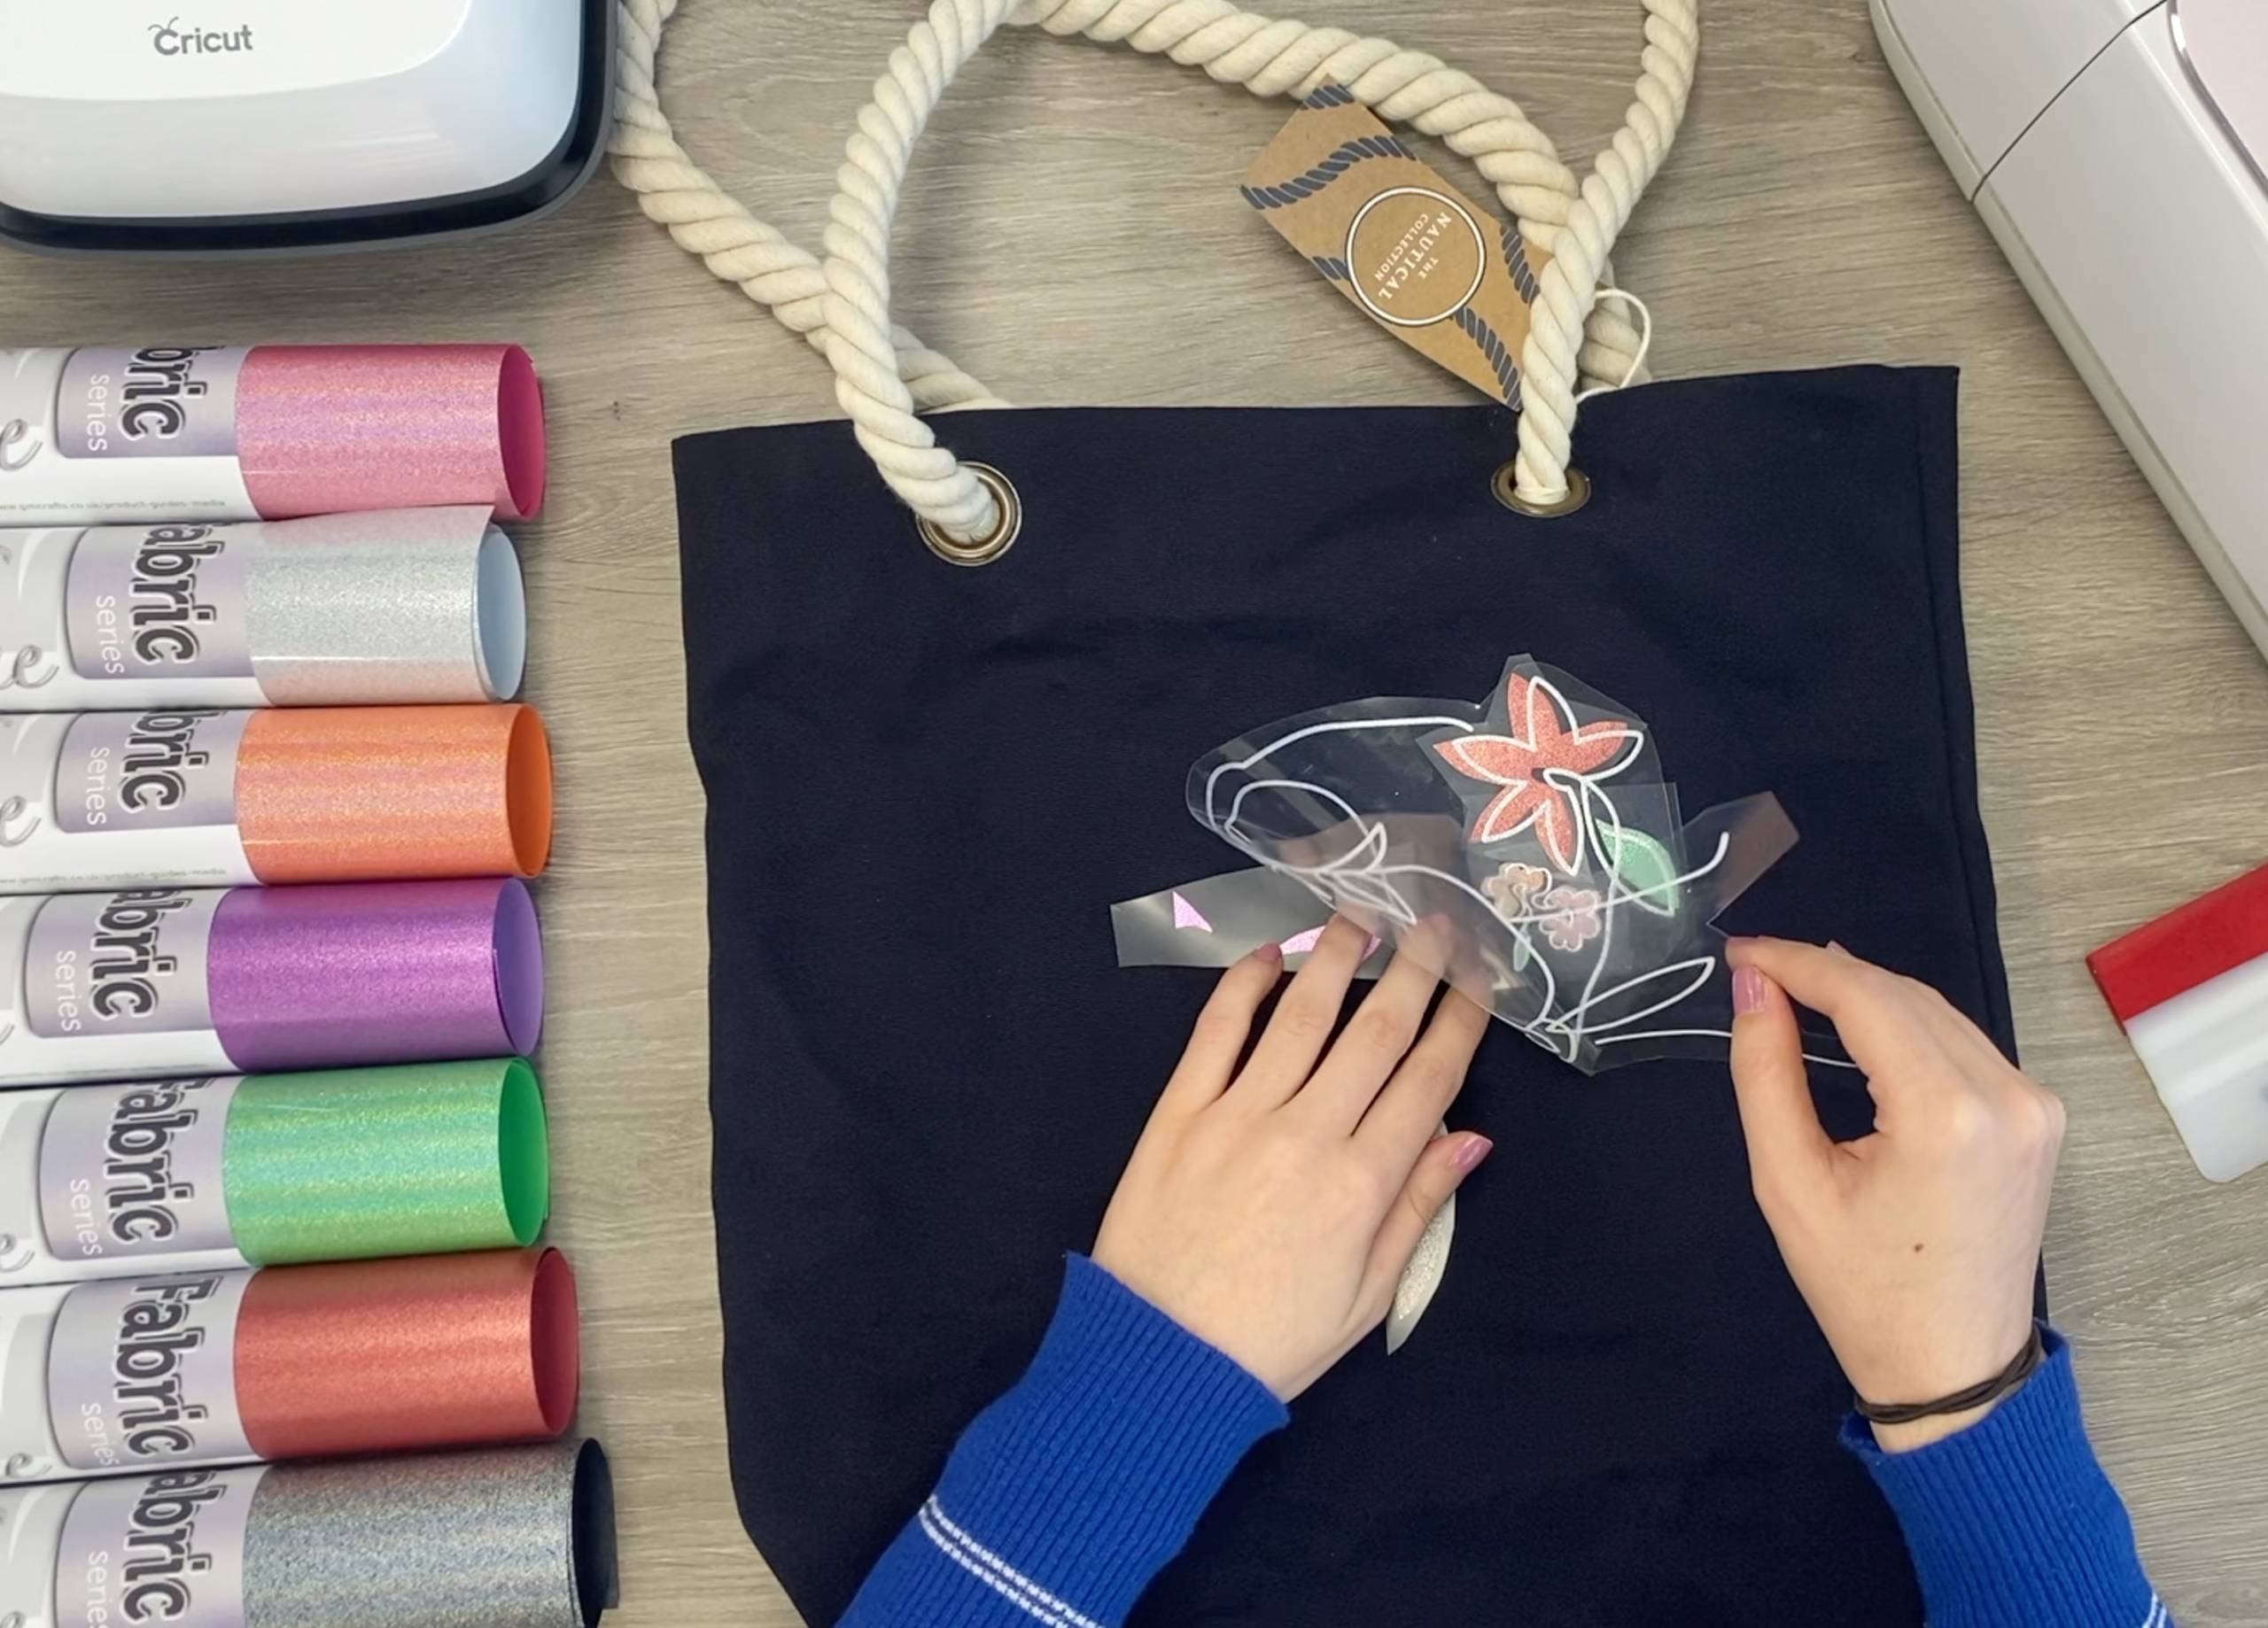
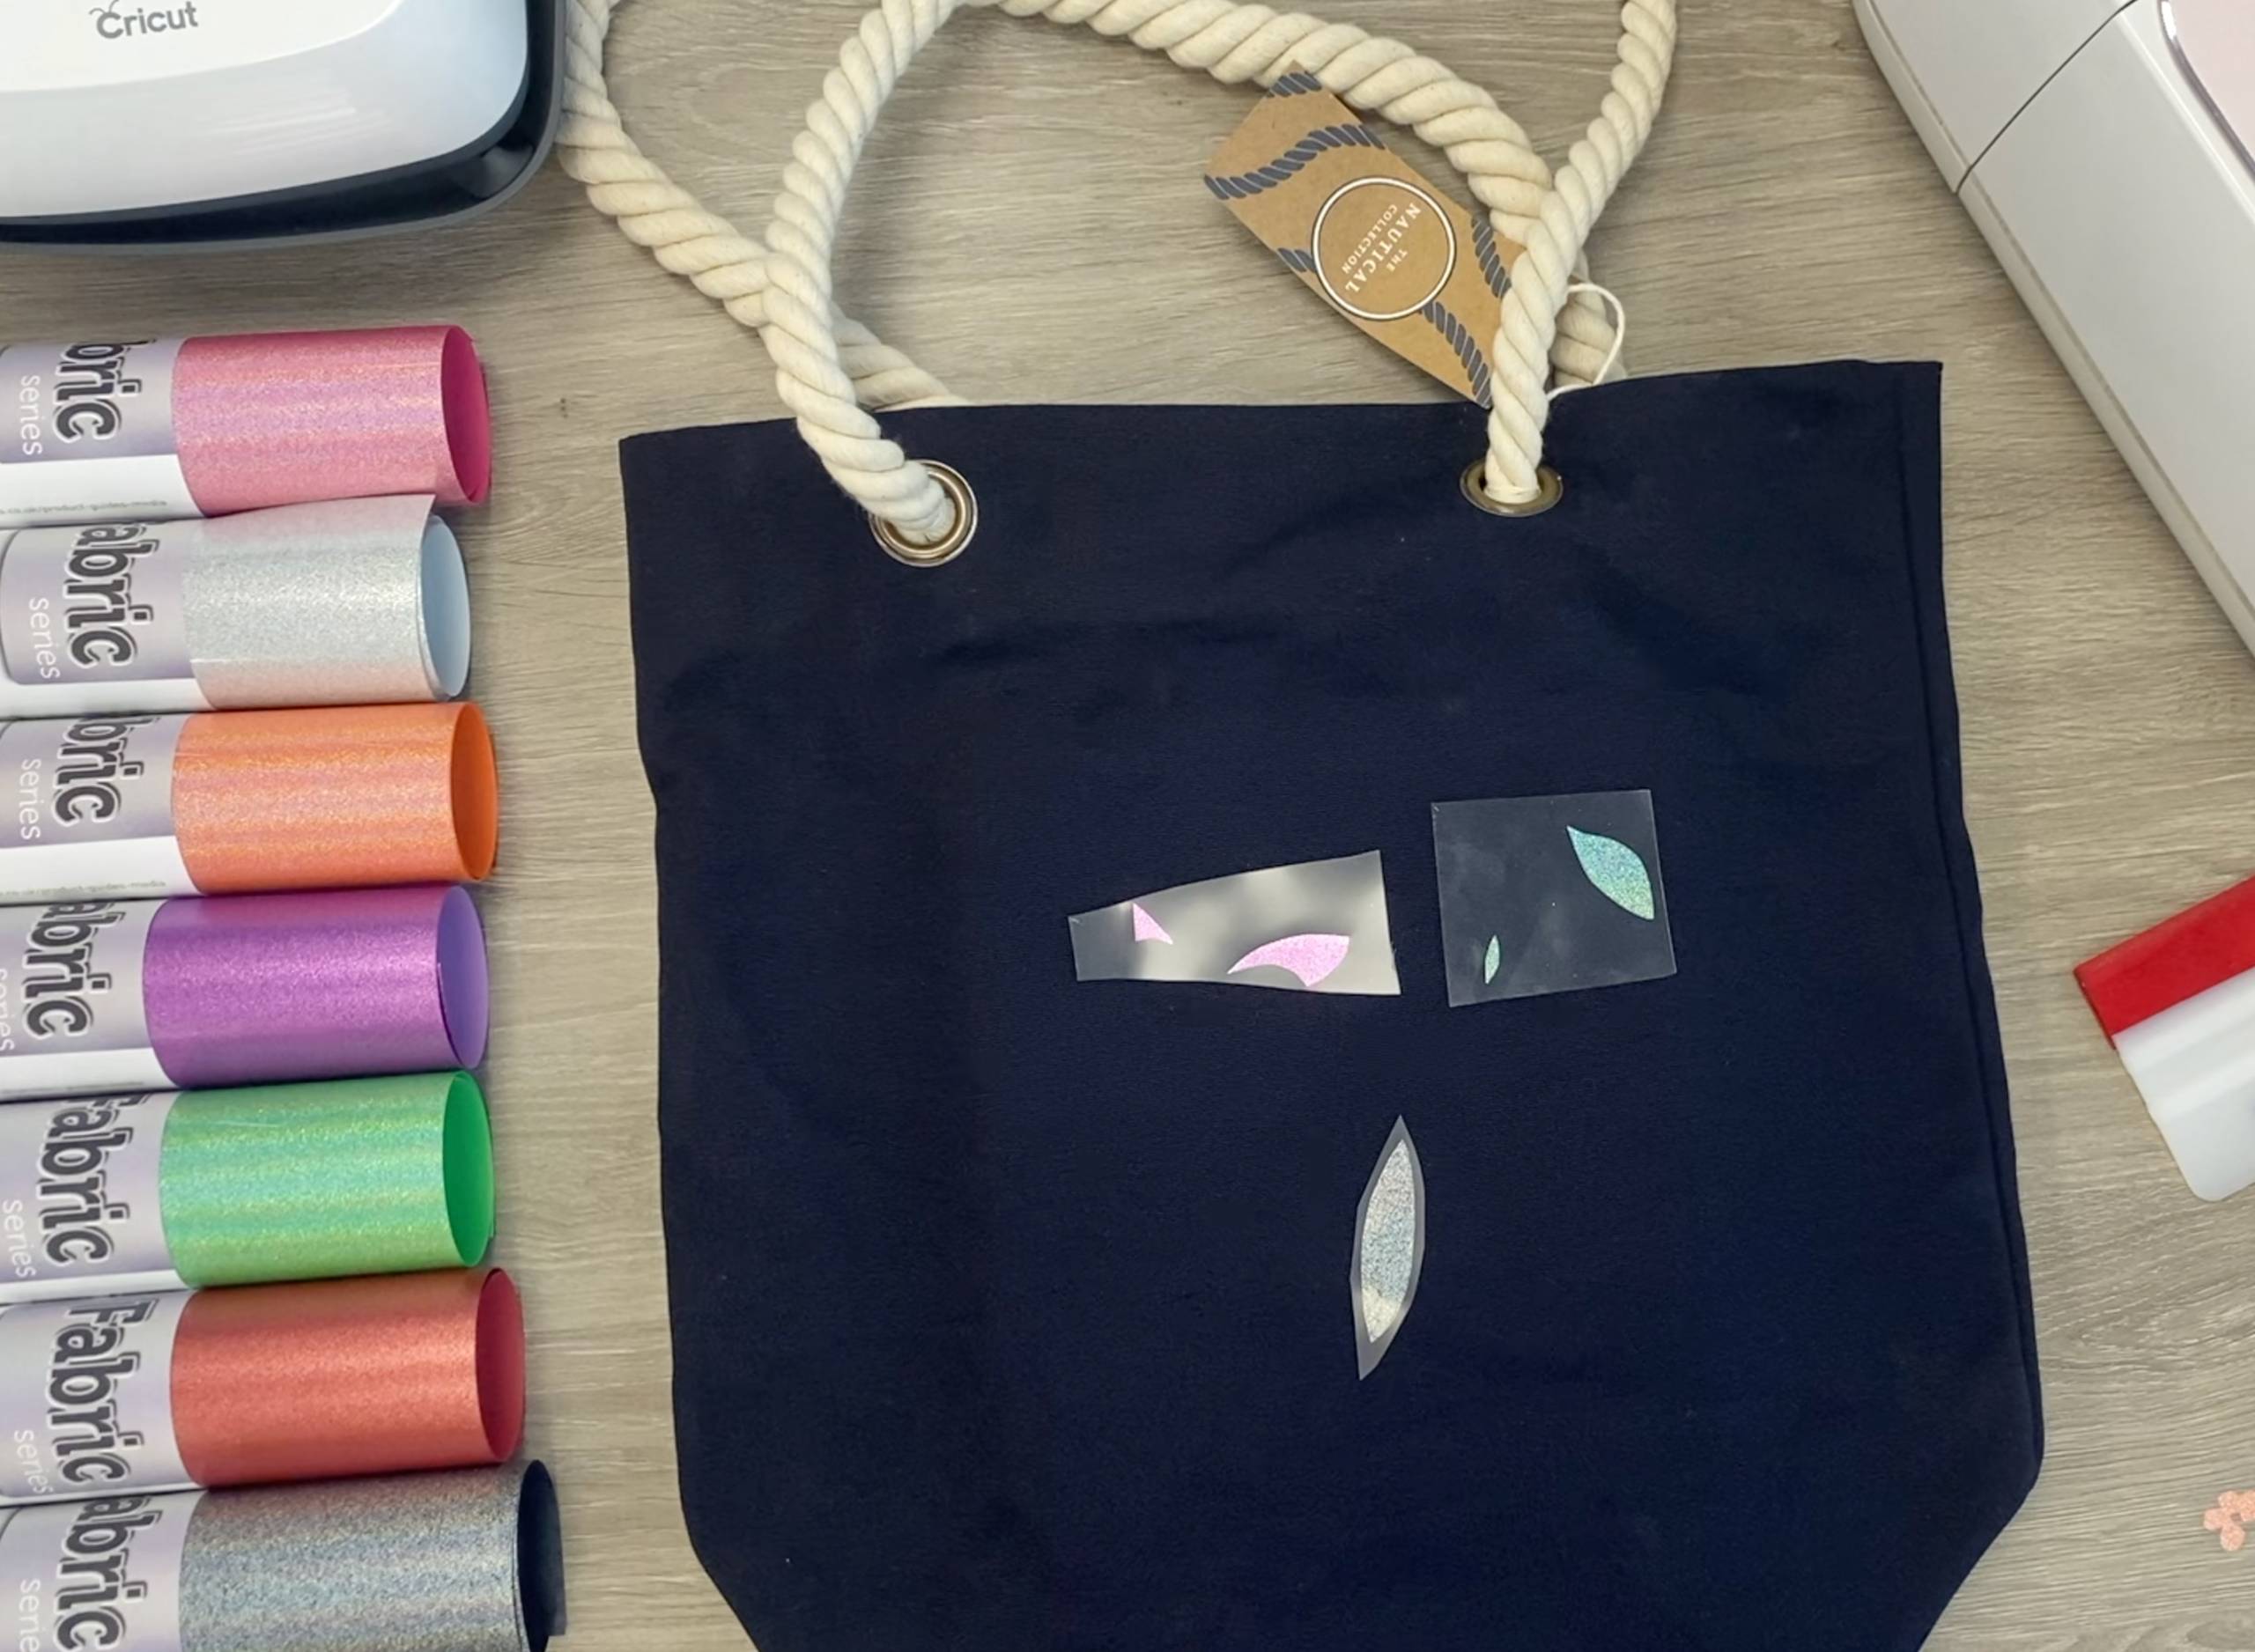
10. Carefully peel back the top face layer, the large flower and small flowers leaving the earring, eyeshadow and leaves on the garment. You may have to hold these layers down as you peel off the rest to keep them in position.
11. Place parchment paper over the design before you press it. Set your EasyPress to 160°C with a 15 second timer, when ready press the design using strong pressure.
12. When finished remove the EasyPress from the garment. Wait until the carrier sheet is warm before gently peeling it back. If you find parts of the vinyl have not stuck repress for 2 seconds at a time until it sticks.
13. Reposition the remaining design and peel of leaving the big flower in place. Repeat steps 11 and 12 to press the big flower.
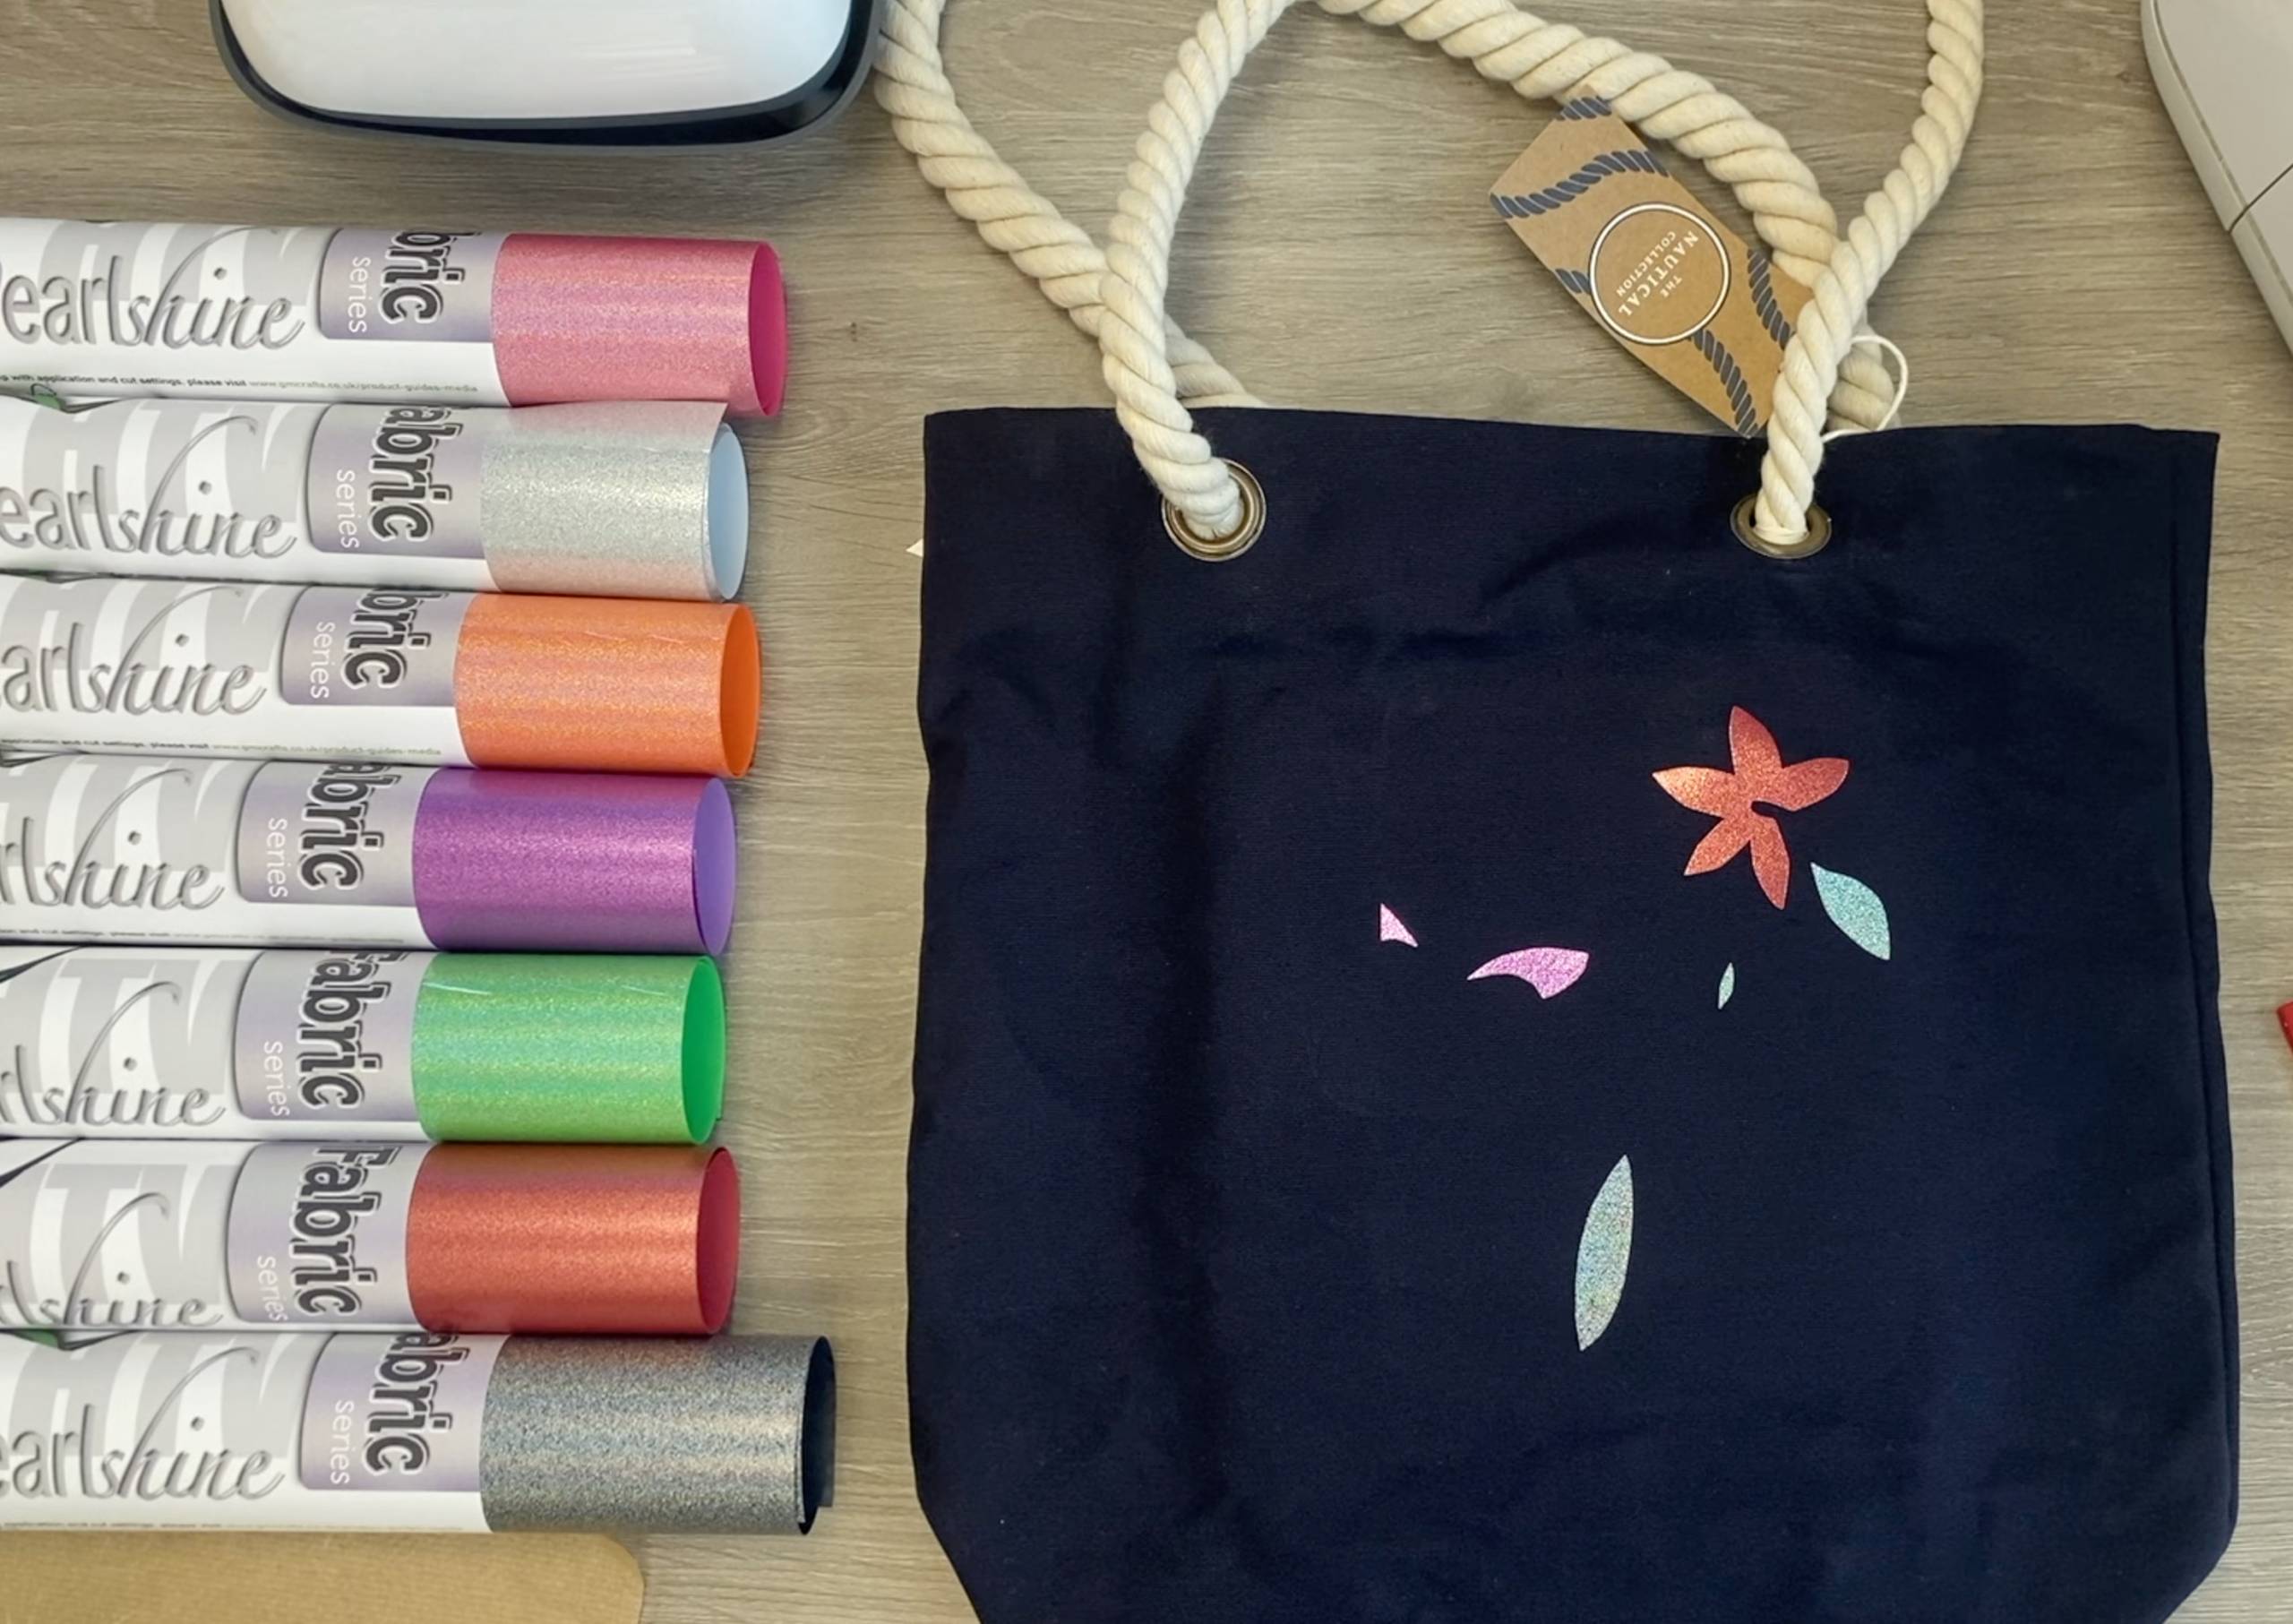
14. Reposition the design and peel back leaving just the small flowers and repeat steps 11 and 12. Make sure the carrier sheets do not overlap over the actual vinyl as this will ruin the vinyl when you press it.
15. Position the last ‘face’ layer on the design and repeat steps 11 and 12. Don’t forget the parchment paper every time you layer!
Silhouette Cut files
Open your studio 3 cut file and resize in Silhouette Studio. Make sure your design is mirrored by selecting Object>Mirror>Flip horizontally.
Cut settings:
Material: Heat Transfer Glow in the Dark
Ratchet blade: 2
Speed: 6
Force: 6
Passes: 1
Brother Cut Files
To import these files into the Brother Canvas Workspace:
After downloading, please log in as usual to your design space account, open a new project mat, then left click on the SVG icon in the top left bar in canvas, this will then allow you to import your files. Once you left click this icon, a pop up box appears with you to choose where to import file from, choose to import the file from your downloads list or where you have chosen to save when unzipped.
Just incase you need the link CanvasWorkspace (brother.com)