
Tutorial/Free Cut File
‘I’m just here for the milk’, baby grow tutorial – Cricut Maker
Hello everyone!
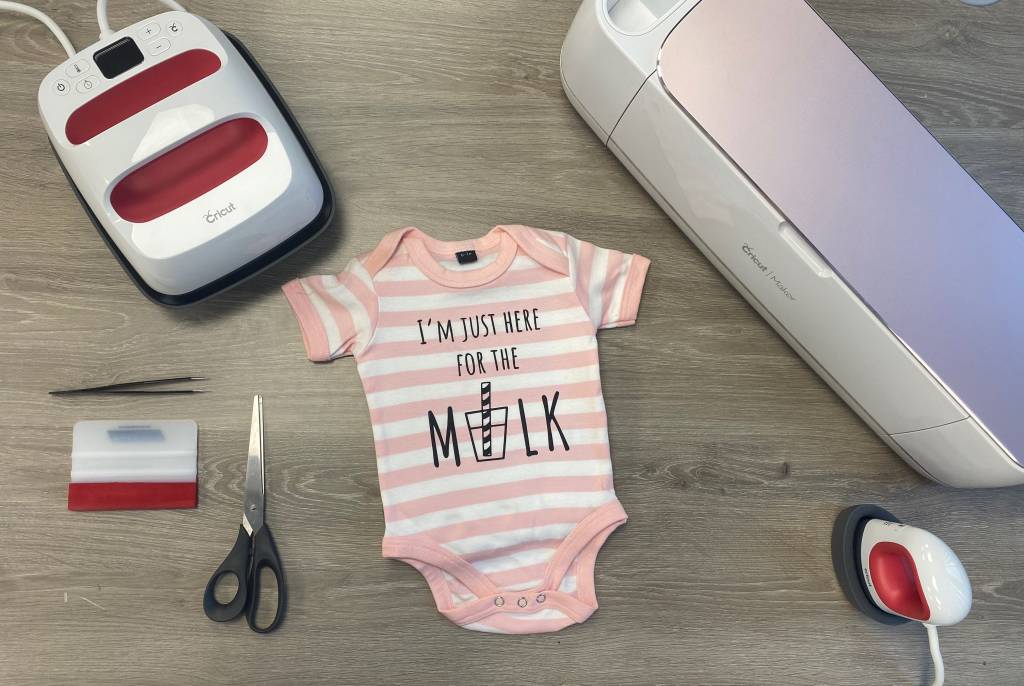
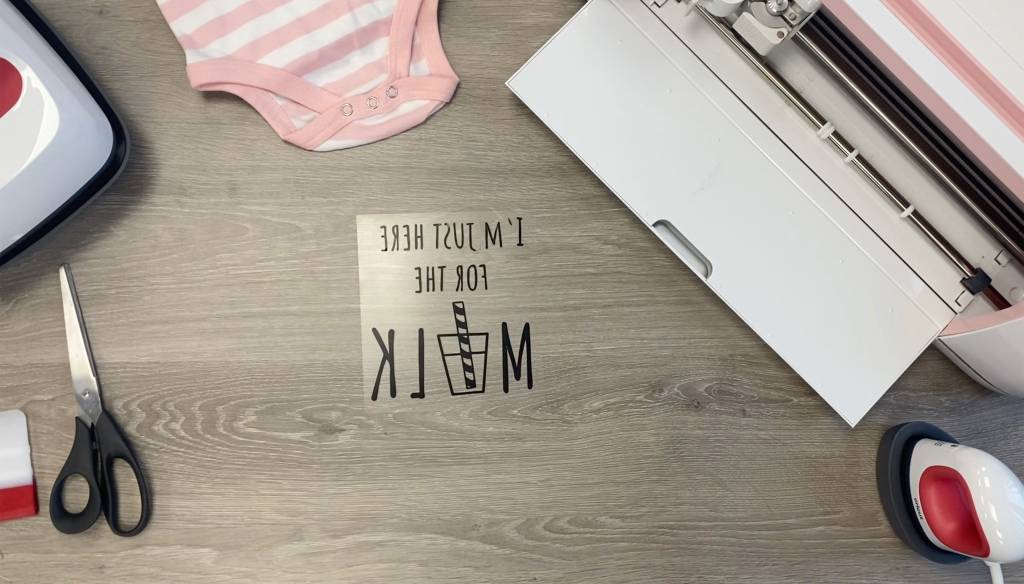
Here’s a quick and easy Cricut Maker and EasyPress tutorial for the ‘I’m just here for the milk’ baby grow. Of course, this design isn’t limited to baby grows and would work on any form of baby clothes, as long as you stick to the basic instructions. Get crafting this fun design for expecting friends, family and beyond.
We would love to see what you make! Have you found our You Tube channel yet? The video showing this and all of our other tutorials are available on there, as well as exclusive demos, inspiration and more! Join us on Facebook , Instagram or Tiktok or send us an email to sales@gmcrafts.co.uk we would love to hear from you!
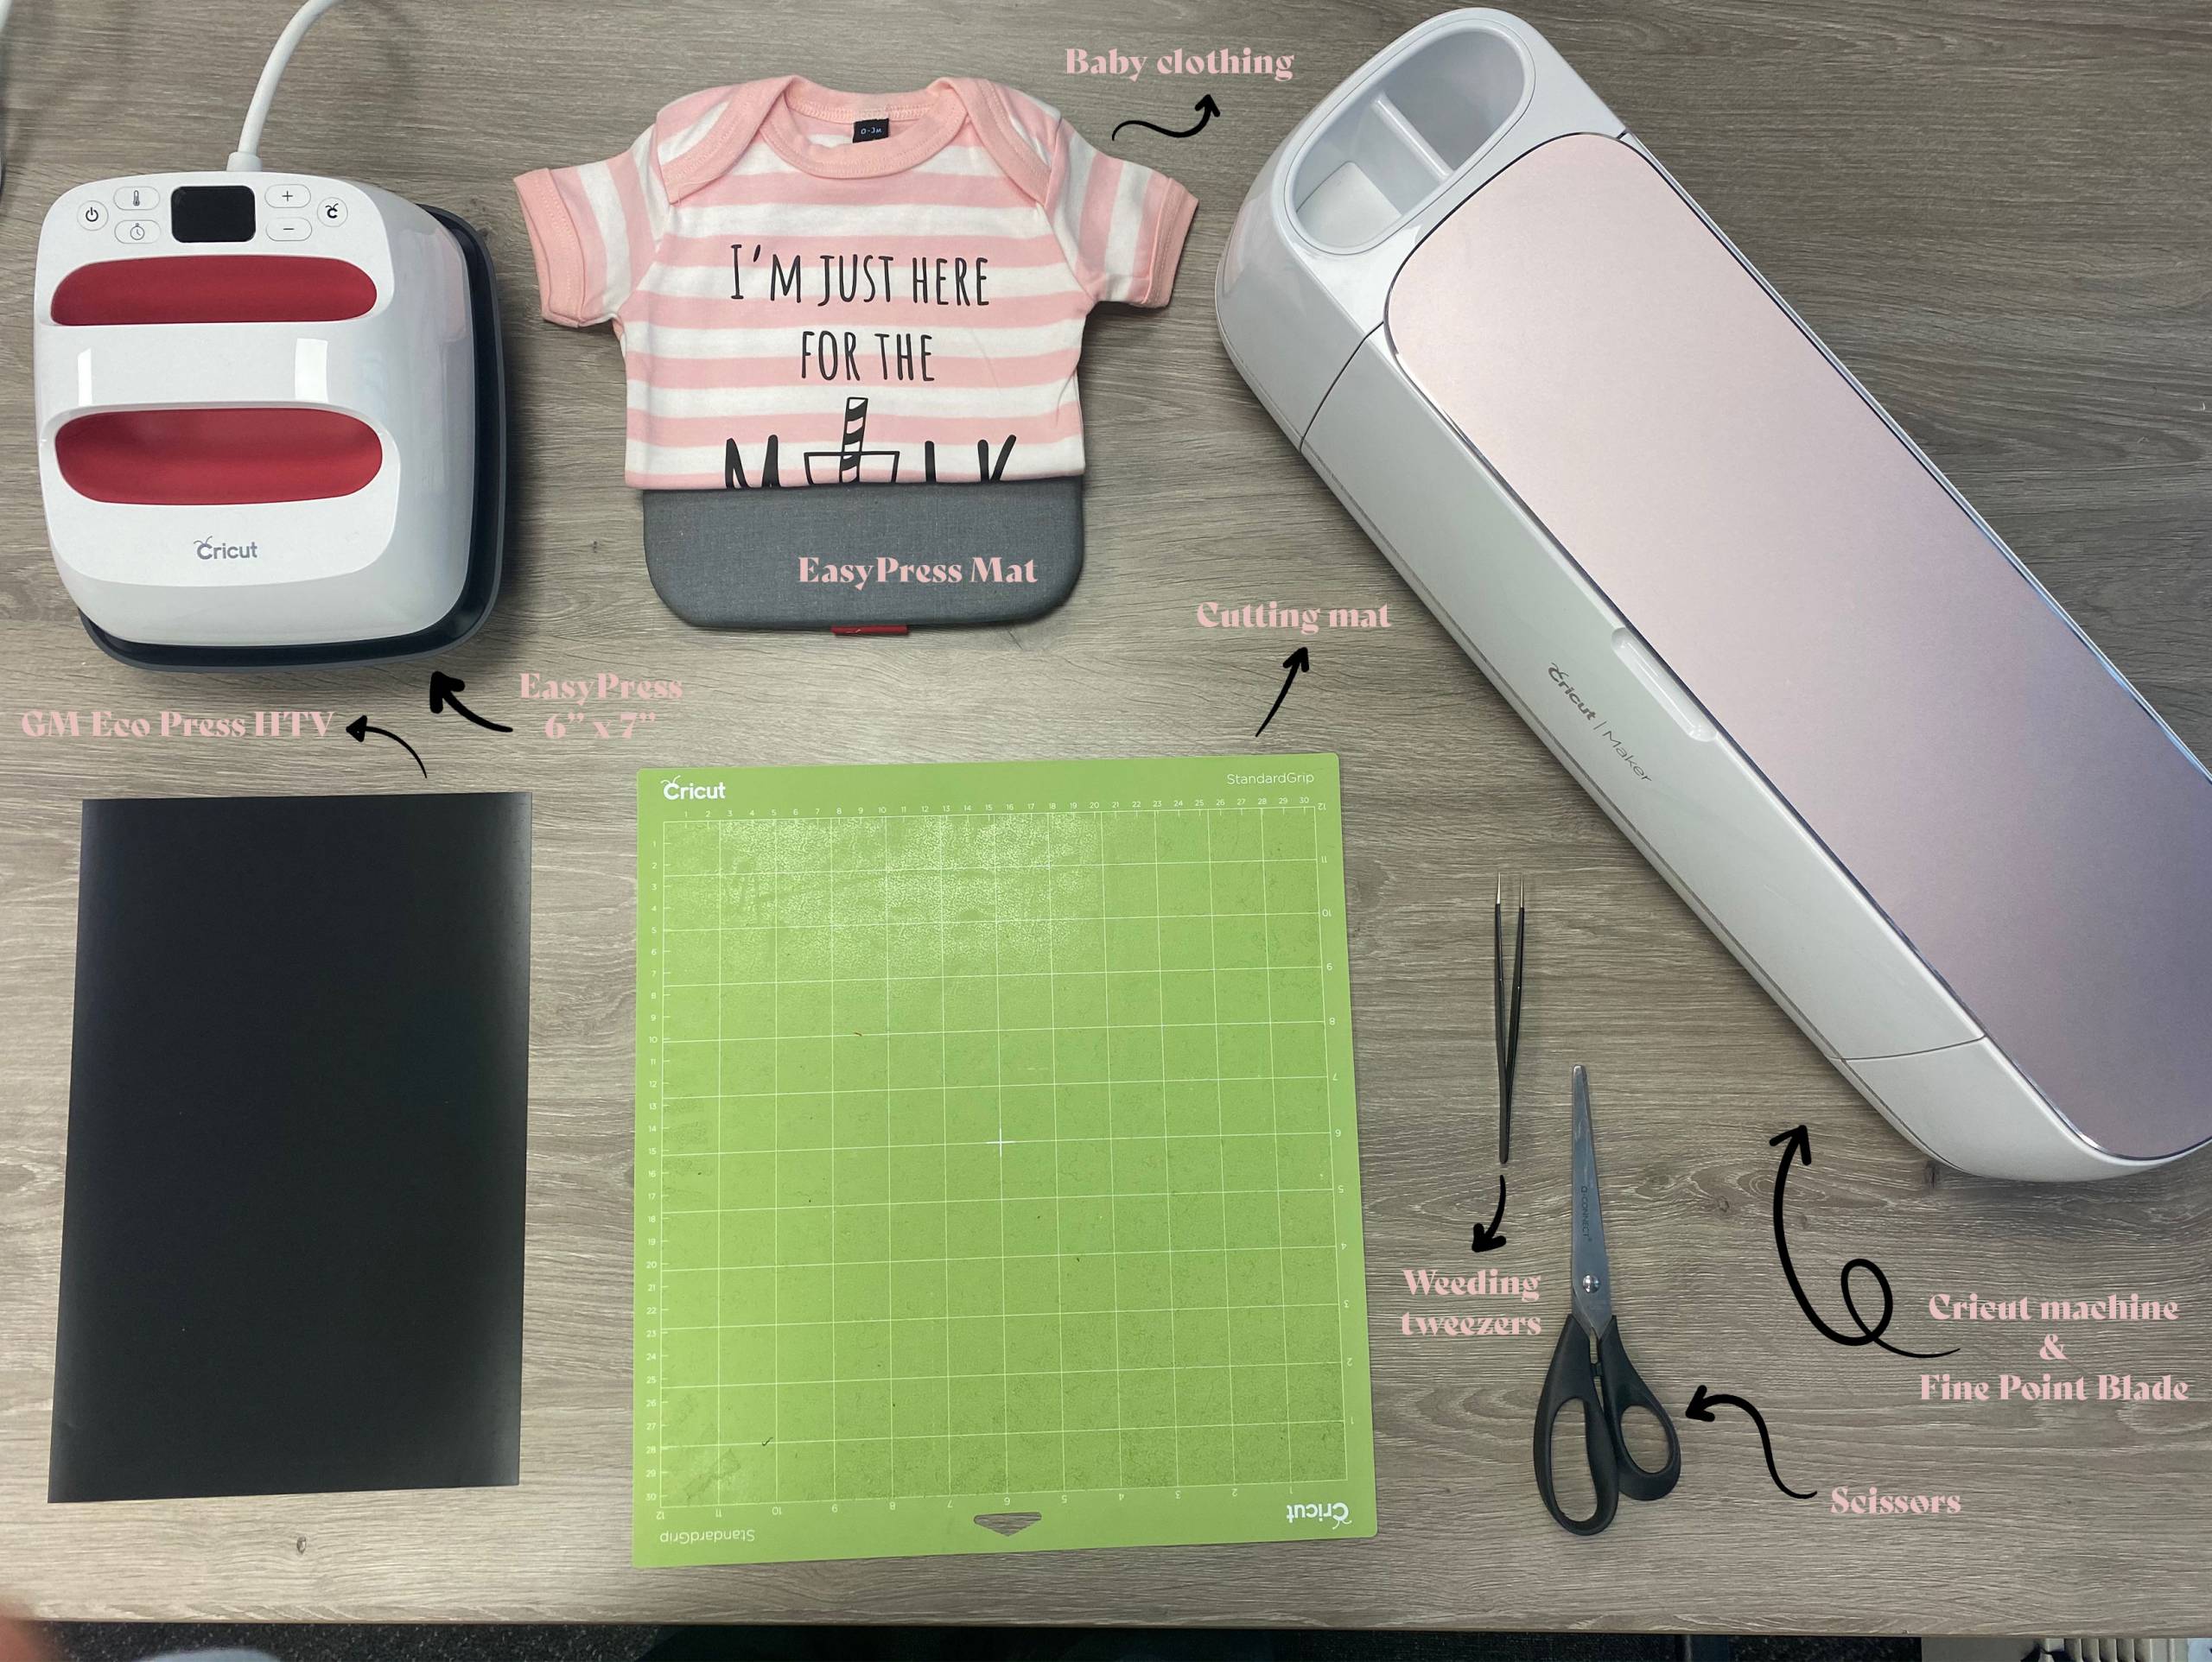
What you’ll need:
- Cricut Maker. Available here
- Cricut cutting mat. Available here
- Cricut EasyPress 6″ x 7″. Available here
- EasyPress Mat. Available here
- GM Eco Press HTV sheet. Available here
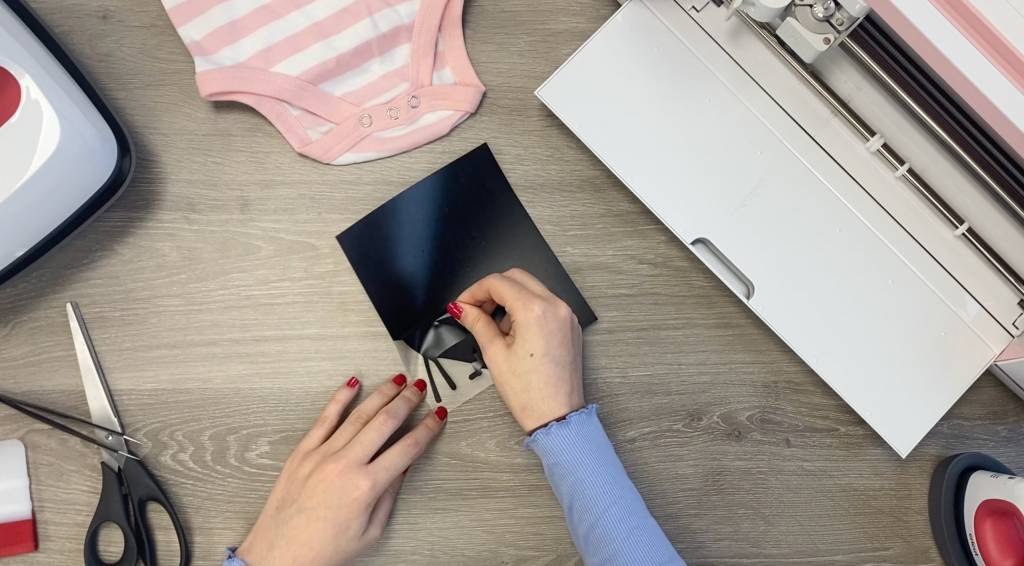
- Weeding tweezers. Available here
- Scissors
- Your choice of garment
- Cut files, which are free below! Including, Cricut, Silhouette and Brother cut files.
Instructions:
Before you start, you need to download the cut file below.
1. Upload the cut file onto Cricut Design Space and resize as necessary. We resized ours so that it had a 15cm width.
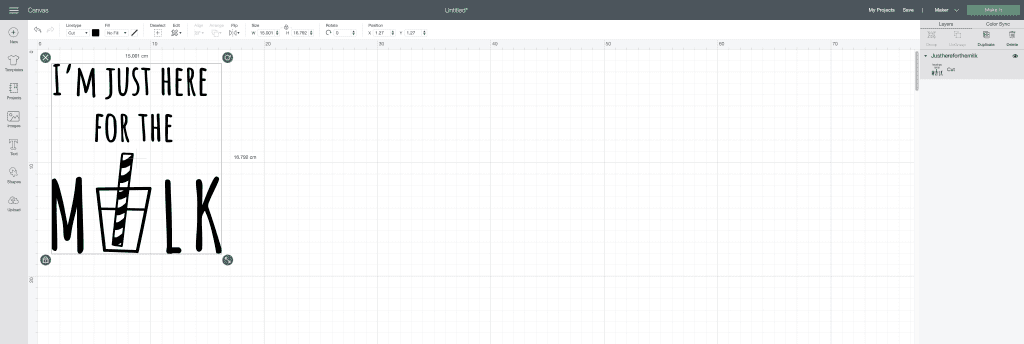
2. When happy with the size of the design, select ‘Make it’ in the top right corner of your screen. In the next ‘prepare’ window make sure ‘mirror’ is selected. Eco Press HTV is always cut in reverse.

3. Select ‘continue’ in the bottom right of the screen and make sure your machine is connected.
4. Position the GM Eco Press HTV on the cutting mat and apply pressure to it to make sure it is secure. The vinyl should be face up with the clear carrier sheet face down on the mat, you are only cutting the vinyl, not the clear carrier sheet. You can peel a corner of the Eco Press HTV to know which side is the clear carrier sheet.
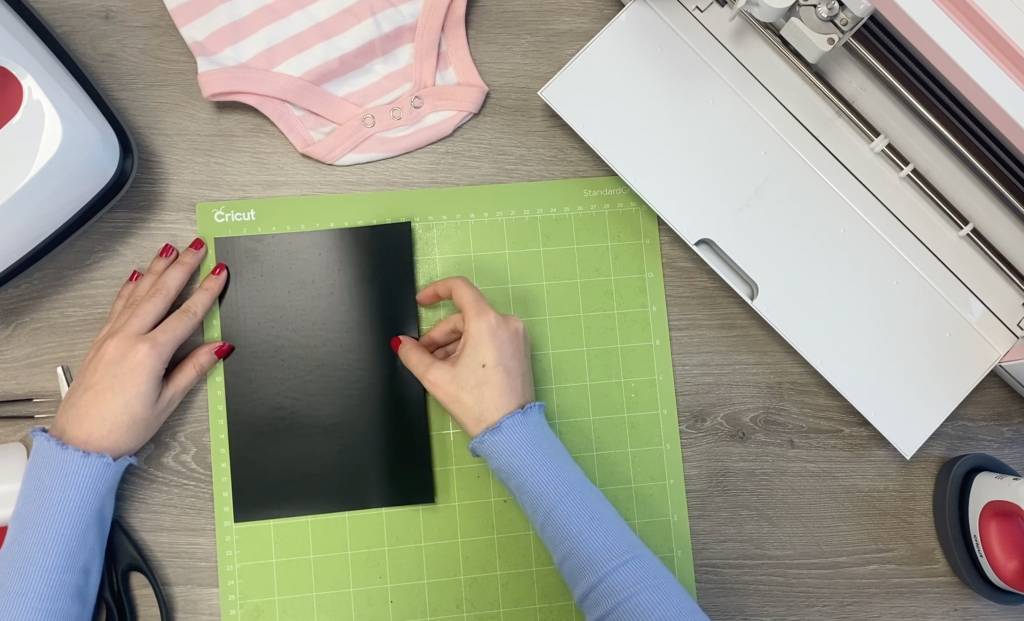
5. Load the mat onto the cutting machine and press the Cricut symbol when ready to cut.
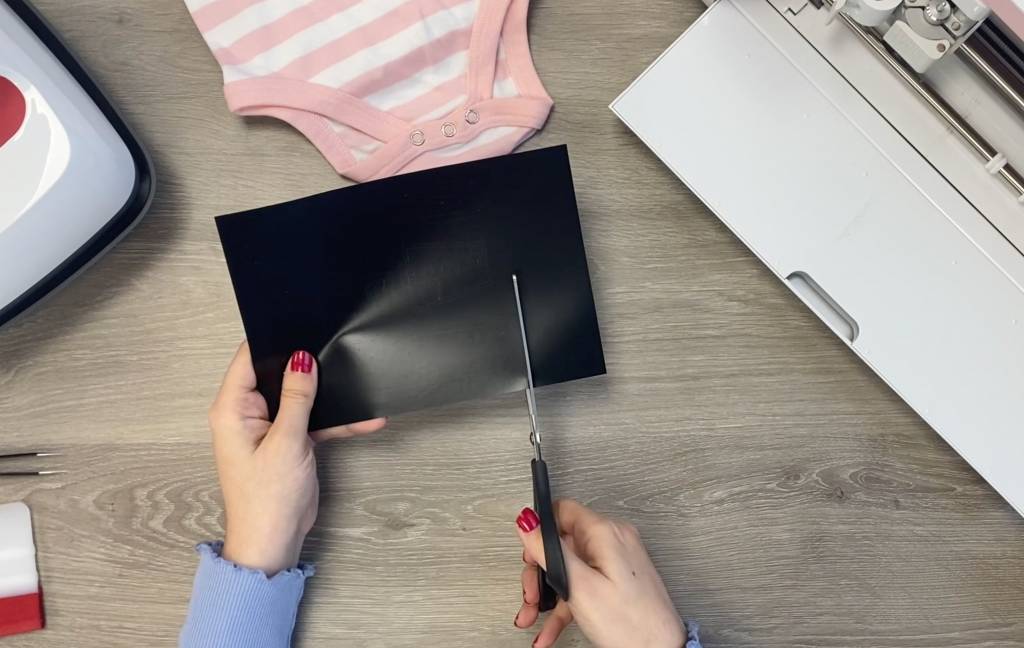
6. When cut, peel the vinyl off the mat and cut to size. Then, weed any excess material so that just the design is left on the clear carrier sheet.
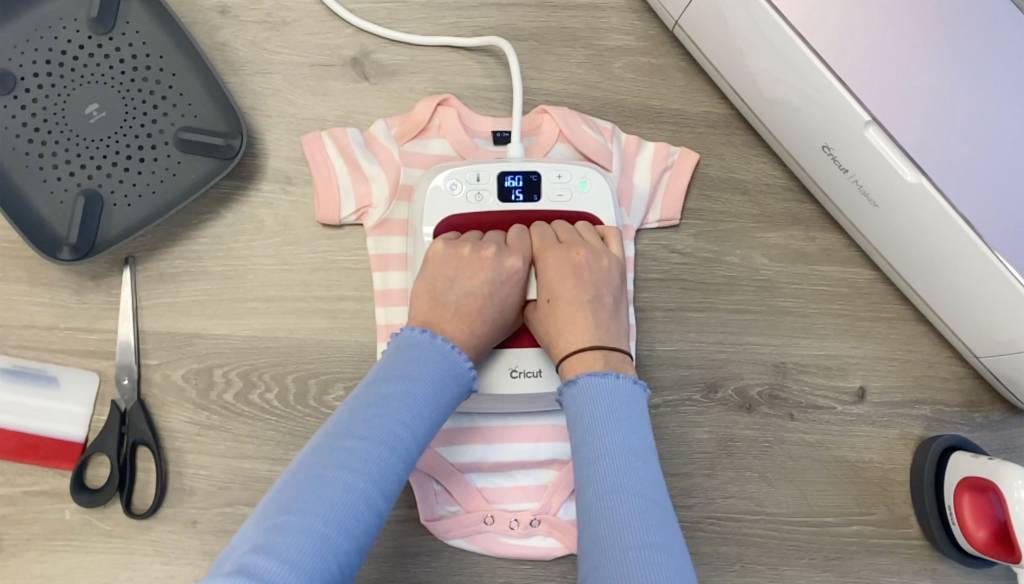
7. Make sure you use a Cricut EasyPress Mat, or a fluffy folded bath towel, under your garment. Preheat the area of application on your garment for 5 seconds at 160°c, using medium pressure. This is to get rid of any creases and/or moisture.
8. Position the vinyl design clear carrier sheet face up so the design is as you’d expect to look at it.

9. Set the EasyPress temperature to 160°c and the timer to 15 seconds. When the Cricut symbol becomes green, the machine is ready to use. If you wish you can use parchment paper as a cover sheet for extra protection, but this is optional.
10. Position the EasyPress on the area of application and press the Cricut symbol to start the timer. Apply strong pressure, your knuckles should be white and shaking a little!
11. When finished remove the EasyPress from the garment. Wait until the carrier sheet is warm before gently peeling it back. If you find parts of the vinyl have not stuck repress for 2 seconds at a time until it sticks.
**Leave for 24 hours before washing or using. Machine washable 40°c. Low tumble dry. Do not dry clean. GM Eco Press is not recommended for use on Nylon fabrics**
Silhouette Cut File
Open your studio 3 cut file and resize in Silhouette Studio. Make sure your design is mirrored by selecting Object>Mirror>Flip horizontally.
Cut settings:
Material: Matte Vinyl
Ratchet blade: 2
Speed: 5
Force: 10
Passes: 1
Brother Cut File
To import these files into the Brother Canvas Workspace:
After downloading, please log in as usual to your design space account, open a new project mat, then left click on the SVG icon in the top left bar in canvas, this will then allow you to import your files. Once you left click this icon, a pop up box appears with you to choose where to import file from, choose to import the file from your downloads list or where you have chosen to save when unzipped.
Just incase you need the link CanvasWorkspace (brother.com)
Hope you’ve enjoyed this blog post, see you next week for another tutorial! 🙂