
Guides
APPLYING AND REMOVING SELF ADHESIVE VINYL
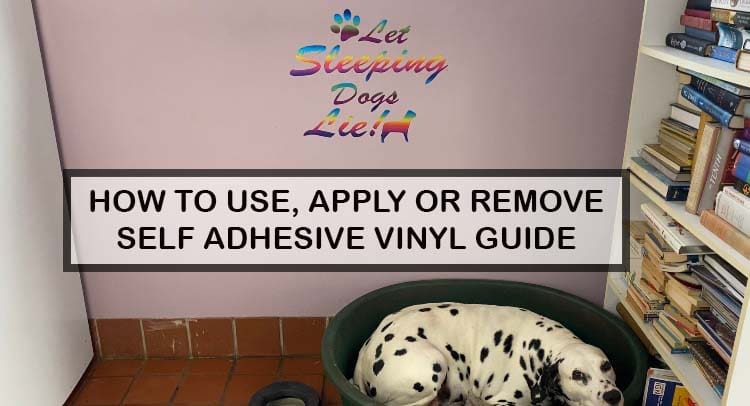
APPLYING AND REMOVING SELF ADHESIVE VINYL
Many customers first questions are how do I apply self adhesive Vinyl, how do I remove it, and is it permanent?
Our range of self adhesive vinyls come in a variety of finishes and ranges suited for different purposes, and we will cover below how to use them, and how to remove them too, as well as common questions we get asked.
Firstly are they permanent?, all our vinyl in the self adhesive category gives you it’s ability for use outside, or indoors and it’s expected lifespan is on the product description page. It is classed as permanent unless it is the temporary wall art Oracal 638 , the sandblasting or paint mask stencil vinyl’s, which are for stencils only.
Can it be used in the dishwasher? – No, vinyl should not be placed in the dishwasher due to the unpredictable and variable heats, steam, salts and chemicals, it is not advised. Please hand wash only.
Is it food safe vinyl?- Vinyl can be used on the outside of glass, cups etc but should not be used on areas that come into direct contact with food… for example on the eating surface of a plate or inside of a cup. There is no industry Vinyl safety tests specifically available for food safety and for example a fork or knife could scratch the vinyl on a plate making it potentially go into the food, so we advise to use on areas not in direct contact with the food or drink for best practice.
Removing self adhesive vinyl
To aid the removal of self adhesive vinyl, you can very gently heat the vinyl with a low heat setting on your hair dryer to soften the adhesive. Our self adhesive vinyl can be used on windows and removed in this way too.
Any glue residue will clean off with WD40, stickystuff remover, surgical spirit, baby wipes, acetone etc
How do I cut it?
Self adhesive vinyl, is cut with the vinyl facing up and the paper liner on the cutting mat, or fed into the machine with the paper backing at the bottom with the vinyl facing you. The first step in crafting with vinyl is to prepare your cut file in the cutting machine software you are using. (If you do not have an electronic cutting machine like a Silhouette or Cricut, you can cut vinyl by hand, but it is just more difficult to get intricate designs) You can also use metal cutting dies for this.
It is possible to cut vinyl directly from the roll without a mat using your Silhouette roll feeder. You can get Silhouette Cameo cutting mats in 12″x12″ and 12″x24″ (or wider if using the plus 15″or pro 24″) The Cricut cutting mats are available in 12″x12″ and 12″x24″ too.
Whatever mat and machine you are using, put your adhesive vinyl paper backing side down onto your mat so the coloured vinyl side is facing up towards you.
ADJUST CUT SETTINGS AND CUT
Finally, you will need to adjust the cut settings in your software or on your machine to work with the material you are using. This process will be a little bit different for every cutting machine, but just make sure to choose the settings for the particular type of vinyl you are using (Metallic vinyl may require different settings than regular glossy vinyl, for instance). We advise test cutting first when using a new material and when changing the blade, or if you have not used the machine for a while as calibration can change with the seasons. Test cut info, and settings for all the machines we use are found here. Please choose your machine from the menu; www.gmcrafts.co.uk/blog/
I recommend doing a small test cut, especially when you are working with a new material to make sure the cut settings will work well with the material you are using before attempting to cut the entire design. You want the blade to cut through the vinyl cleanly without cutting through the backing. This is called a “kiss cut,” and it will make it much easier to weed and apply your decal in the next steps. If your test cut has gone through the paper backing, you may need to decrease your thickness/depth, pressure or blade setting, or if the test cut didn’t go all the way through the vinyl, you may need to increase the thickness/depth pressure or blade setting. When you are happy with your cut settings, load your cutting mat with the vinyl paper backing down into your machine, and cut your chosen design.
WEED OUT EXCESS VINYL
The next step is called “weeding.” Basically, weeding just means removing any excess vinyl from around your design that you do not want to be transferred to your final product.
HOW TO AVOID WASTING VINYL WHEN WEEDING
If your cut design is considerably smaller than the piece of vinyl you cut it from, then I recommend first trimming off the extra vinyl before weeding. You can just use a pair of scissors and trim around your design. This allows you to use the rest of your vinyl piece for another project.
TIPS FOR WEEDING ADHESIVE VINYL
To weed off the excess vinyl, you will need some kind of tool. We use a weeding hook found here www.gmcrafts.co.uk/product-category/craft-tools/weeding-tools/ You can also use a silhouete hook, cricut hook, tweezers, a craft knife, or even a straight pin. You prod the weeding tool into the excess vinyl carefully lifting to remove all the unwanted areas of waste from your design. Your weeding is finished when your chosen design only is left behind.
HOW DO YOU USE TRANSFER TAPE?
First, you will need to cut your design from adhesive vinyl and weed out the excess vinyl. To get the best application, you really need to get a nice “kiss cut,” which means that the blade of your cutting machine just goes through the vinyl without cutting into or through the paper backing. If the blade has cut into the paper backing, it may be a bit more difficult to remove the decal from the backing, or it may have popped the vinyl off already making applying transfer tape harder. If this is an issue see test cutting advice above.
When your design is cut and weeded, you just need to cut a piece off a piece of transfer tape to fit your project and smooth it down on top of the design. Once smoothed down, please turn it over and rub the back of the vinyl so it adheres to the transfer tape from behind the vinyl, using a squeegee ; https://www.gmcrafts.co.uk/product-category/craft-tools/squeegees-scrapers/ (or a credit card in a emergency) If it has not transferred fully to the tape keep rubbing with more force with the transfer tape on the table and the back of the vinyl paper facing you so you push it onto the transfer tape,( not back onto the backing paper). You can then peel the transfer tape up, bringing the decal with it and off of the backing. Your decal has now moved to the transfer paper and is ready to be carried to your project surface.
PREPARING YOUR SURFACE FOR THE VINYL.
Any surface to which vinyl is to be applied must be clean and free of surface treatments to ensure a good bond. Newly painted surfaces should be left to cure before graphics are applied please check with the paint manufacturer for their advice on timescale as some can be very lengthy. Avoid greasy, rough or porous surfaces, Surfaces prone to out-gassing may produce bubbles under the vinyl and can eventually lead to total failure of the adhesive bond. For example polycarbonates, some acrylics, as well as surfaces treated with silicone, wax, sealants or varnish.
Particular care must be taken when applying vinyl to other vinyl surfaces such as flexible truck sides, banners and stretched sign-faces. Children’s ride on toys for example contain plasticisers, which can migrate to the applied face-film and break down the adhesive or prevent it from taking.
It is best to prepare the surface by spraying or using hot washing up water before drying completely, Follow this by wiping entire surface with rubbing alcohol with a clean lint free cloth, not wipes as they have emulsifiers to keep the wipe moist and can leave a hidden layer behind, leave to completely air dry and proceed to the application process..
Painted Surfaces (Automotive* or Household)
Vinyl can be applied to automotive painted surfaces by first using rubbing alcohol or other
mild solvent cleaner to remove wax and other road debris. Spray surface cleaner over surface and wipe clean.
Interior painted walls and surfaces must be cleaned with a mild soapy solution or paint manufacturer recommended cleaner.
DO NOT USE solvent based products to clean interior paint surfaces. Interior paints are usually water-based.
Using a harsh cleaner can damage your painted surface. Wipe clean with lint free cloth or towel and proceed to application process paying particular attention to paint manufacturer advice on degassing.
APPLY VINYL DECAL
After first washing your hands to remove any risk of surface contamination, carefully position your decal over your surface. Gently place one end down on the surface and smooth it out with your fingers. Then use your application squeegee (link above) or scraper tool to burnish the decal onto your surface. Remember, the vinyl’s adhesive is activated through pressure, so give it a good rub to get it to stick well. Take care to repeat with more pressure over delicate cut areas as needed. Finally, peel off your transfer tape, and you are all done! Please leave in a room temperature area for 48 hours preferably out of direct sun and moisture for the adhesive to reach it’s maximum adhesion.
Applying large decals – how to remove bubbles- you can if applying a large decal to a surface use a very fine misting spray of water over the surface you are applying to, prior to application and use the squeegee to remove air bubbles and moisture from the centre of the decal to the edges much like you would when applying a screen protector in a sweeping motion from the middle outwards in each direction, leave this then to dry and evaporate. (please only use a fine mist) for 72 hours.
*please note applying car decals outside in the rain, in direct sunlight and extreme heat or cold is not advised, or when these conditions, or bad weather is expected for 48 hours after application. As a rule of thumb, do not apply vinyl when the air temperature is under 10’c or over 30’c during the application process, or just after.
We would love to see what you make! Have you found our You Tube channel yet? The video showing this and all of our other tutorials are available on there, as well as exclusive demos, inspiration and more! Join us on Facebook , Instagram or Tiktok or send us an email to sales@gmcrafts.co.uk we would love to hear from you!