
Tutorial/Free Cut File
Animal Creme egg holders – Instructions and Cut Files
Hi everyone,
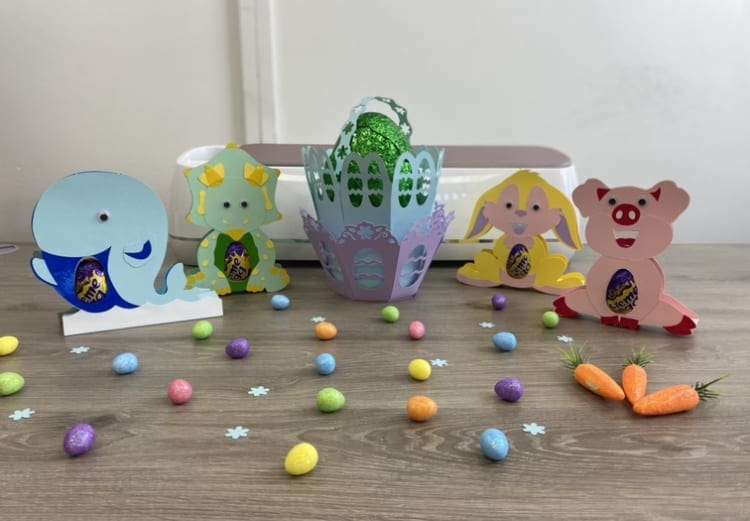
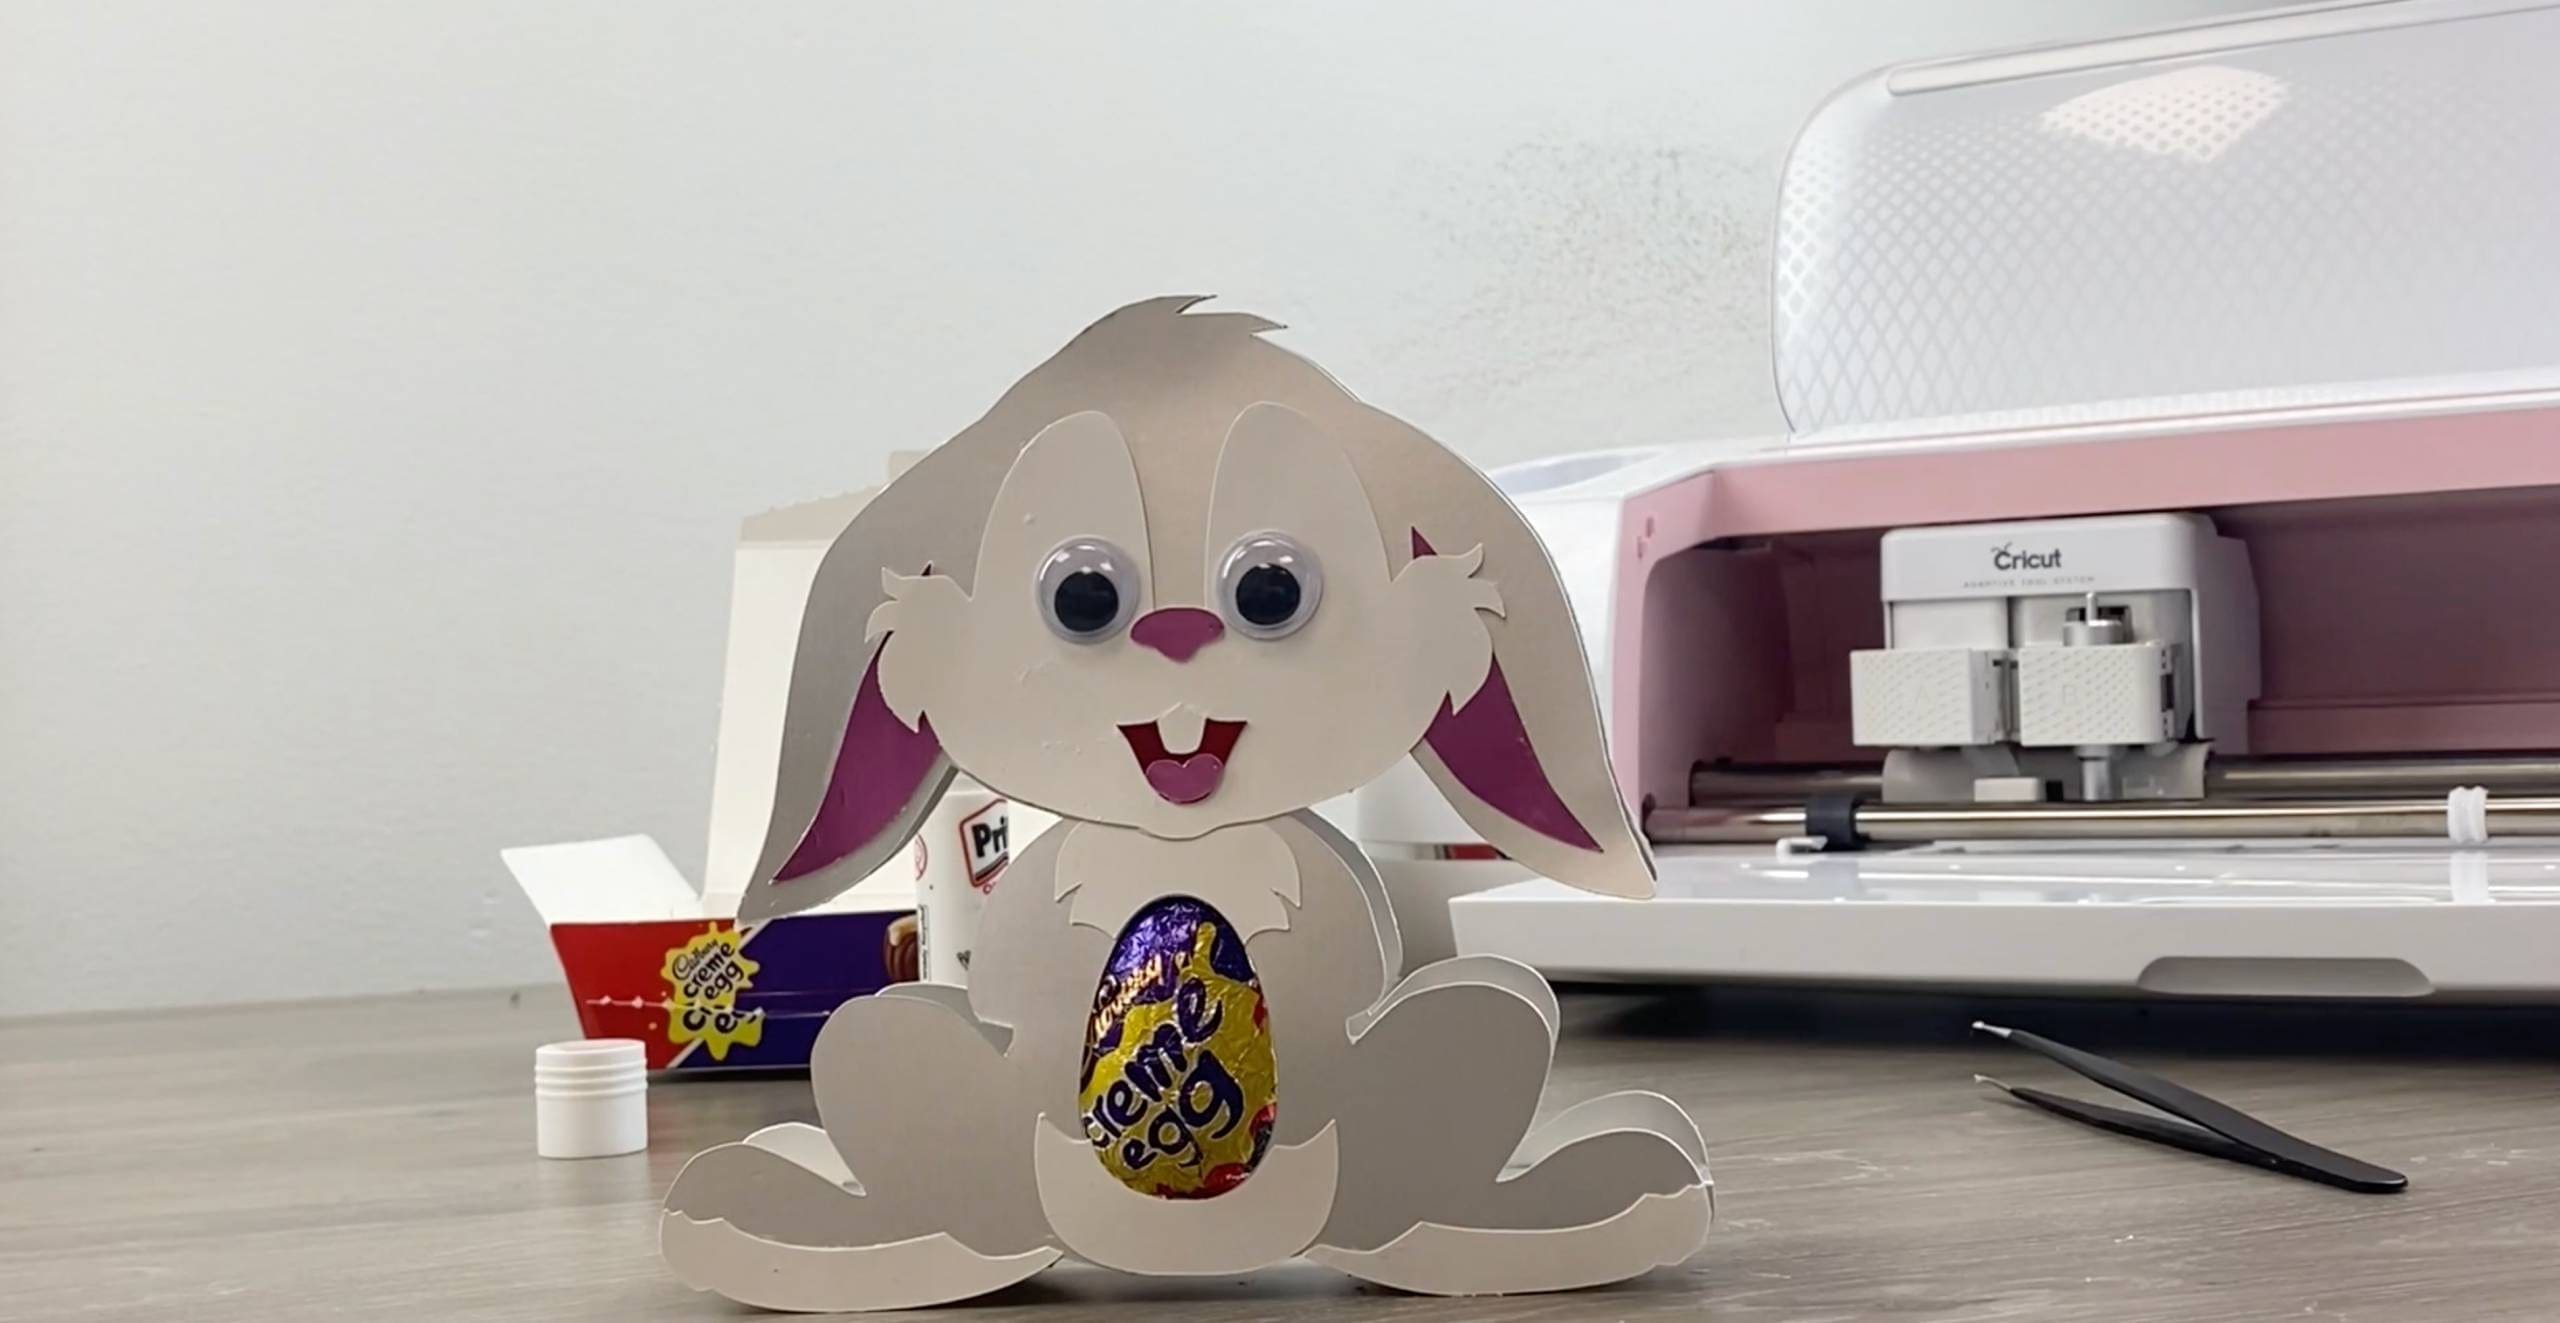
We posted a video a couple of weeks ago of these fun creme egg animal holders promising that cut files were on the way, well, here they are. These are a cute way to gift small treats like Creme eggs, Cadbury eggs or Kinder eggs, they’re a fun way to hide the eggs in an Easter egg hunt too! We used our new Mirror and Satin Card, which is available in 13 gorgeous colours, we used a lot of the satin card but you can choose between satin or mirror depending on if you want a classic smooth finish or glam shimmer finish.
Below are the cut files and instructions for a Rabbit, Pig, Dinosaur, Whale and Chick. The photo below displays all the different colours of card we used to make all of the animals, but the card used for each individual animal will be listed under their own heading. Enjoy!
We would love to see what you make! Have you found our You Tube channel yet? The video showing this and all of our other tutorials are available on there, as well as exclusive demos, inspiration and more! Join us on Facebook , Instagram or Tiktok or send us an email to sales@gmcrafts.co.uk we would love to hear from you!
***watch this being made here***
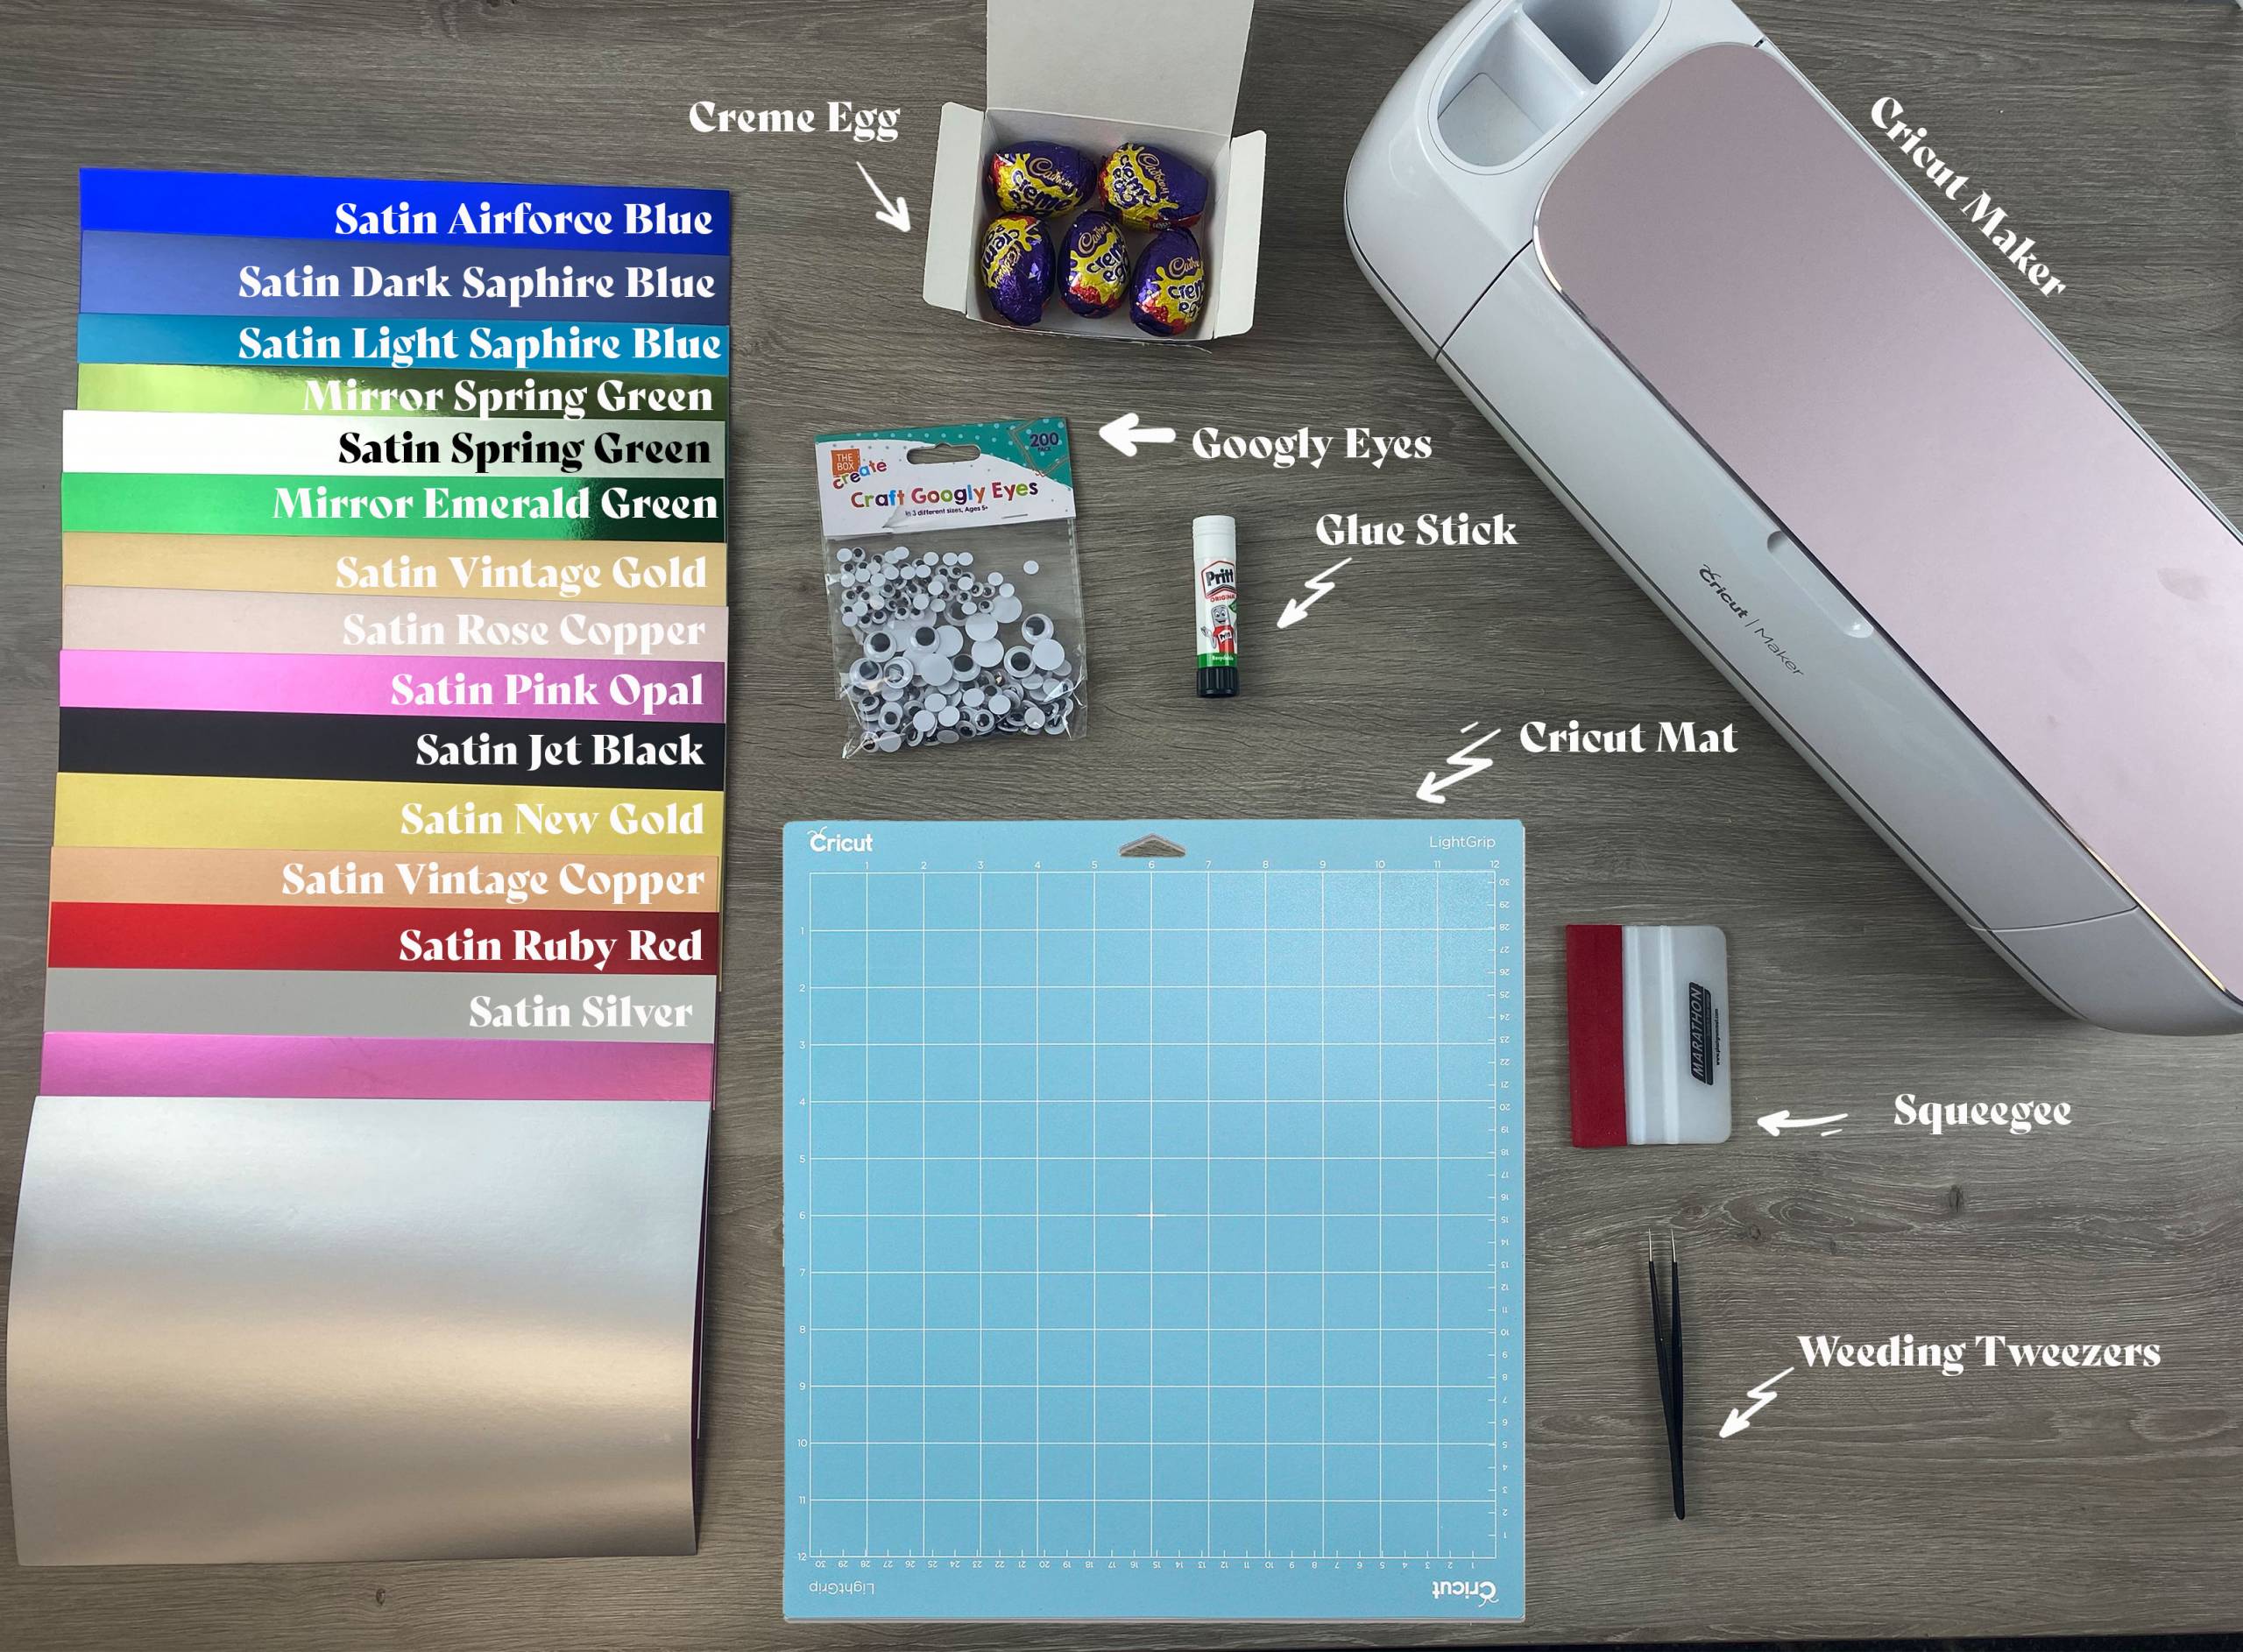
What you’ll need:
Rabbit
What you’ll need:
- Cricut Maker. Available here
- Silver satin card. Available here
- Pink Opal satin card. Available here
- Ruby Red satin card. Available here
- White craft card. Available here
- Weeding tweezers (optional but help to avoid finger marks on the card) Available here
- Squeegee (optional but an easier way of securing the card onto your cutting mat) Available here
- Googly eyes. Available here
- Glue stick. Available here
Instructions:
1. Download the Rabbit cut files and unzip them by double clicking on the file, which should open the file up. This zip file will have all the animal cut files in for you to select the ones you’d like to use.
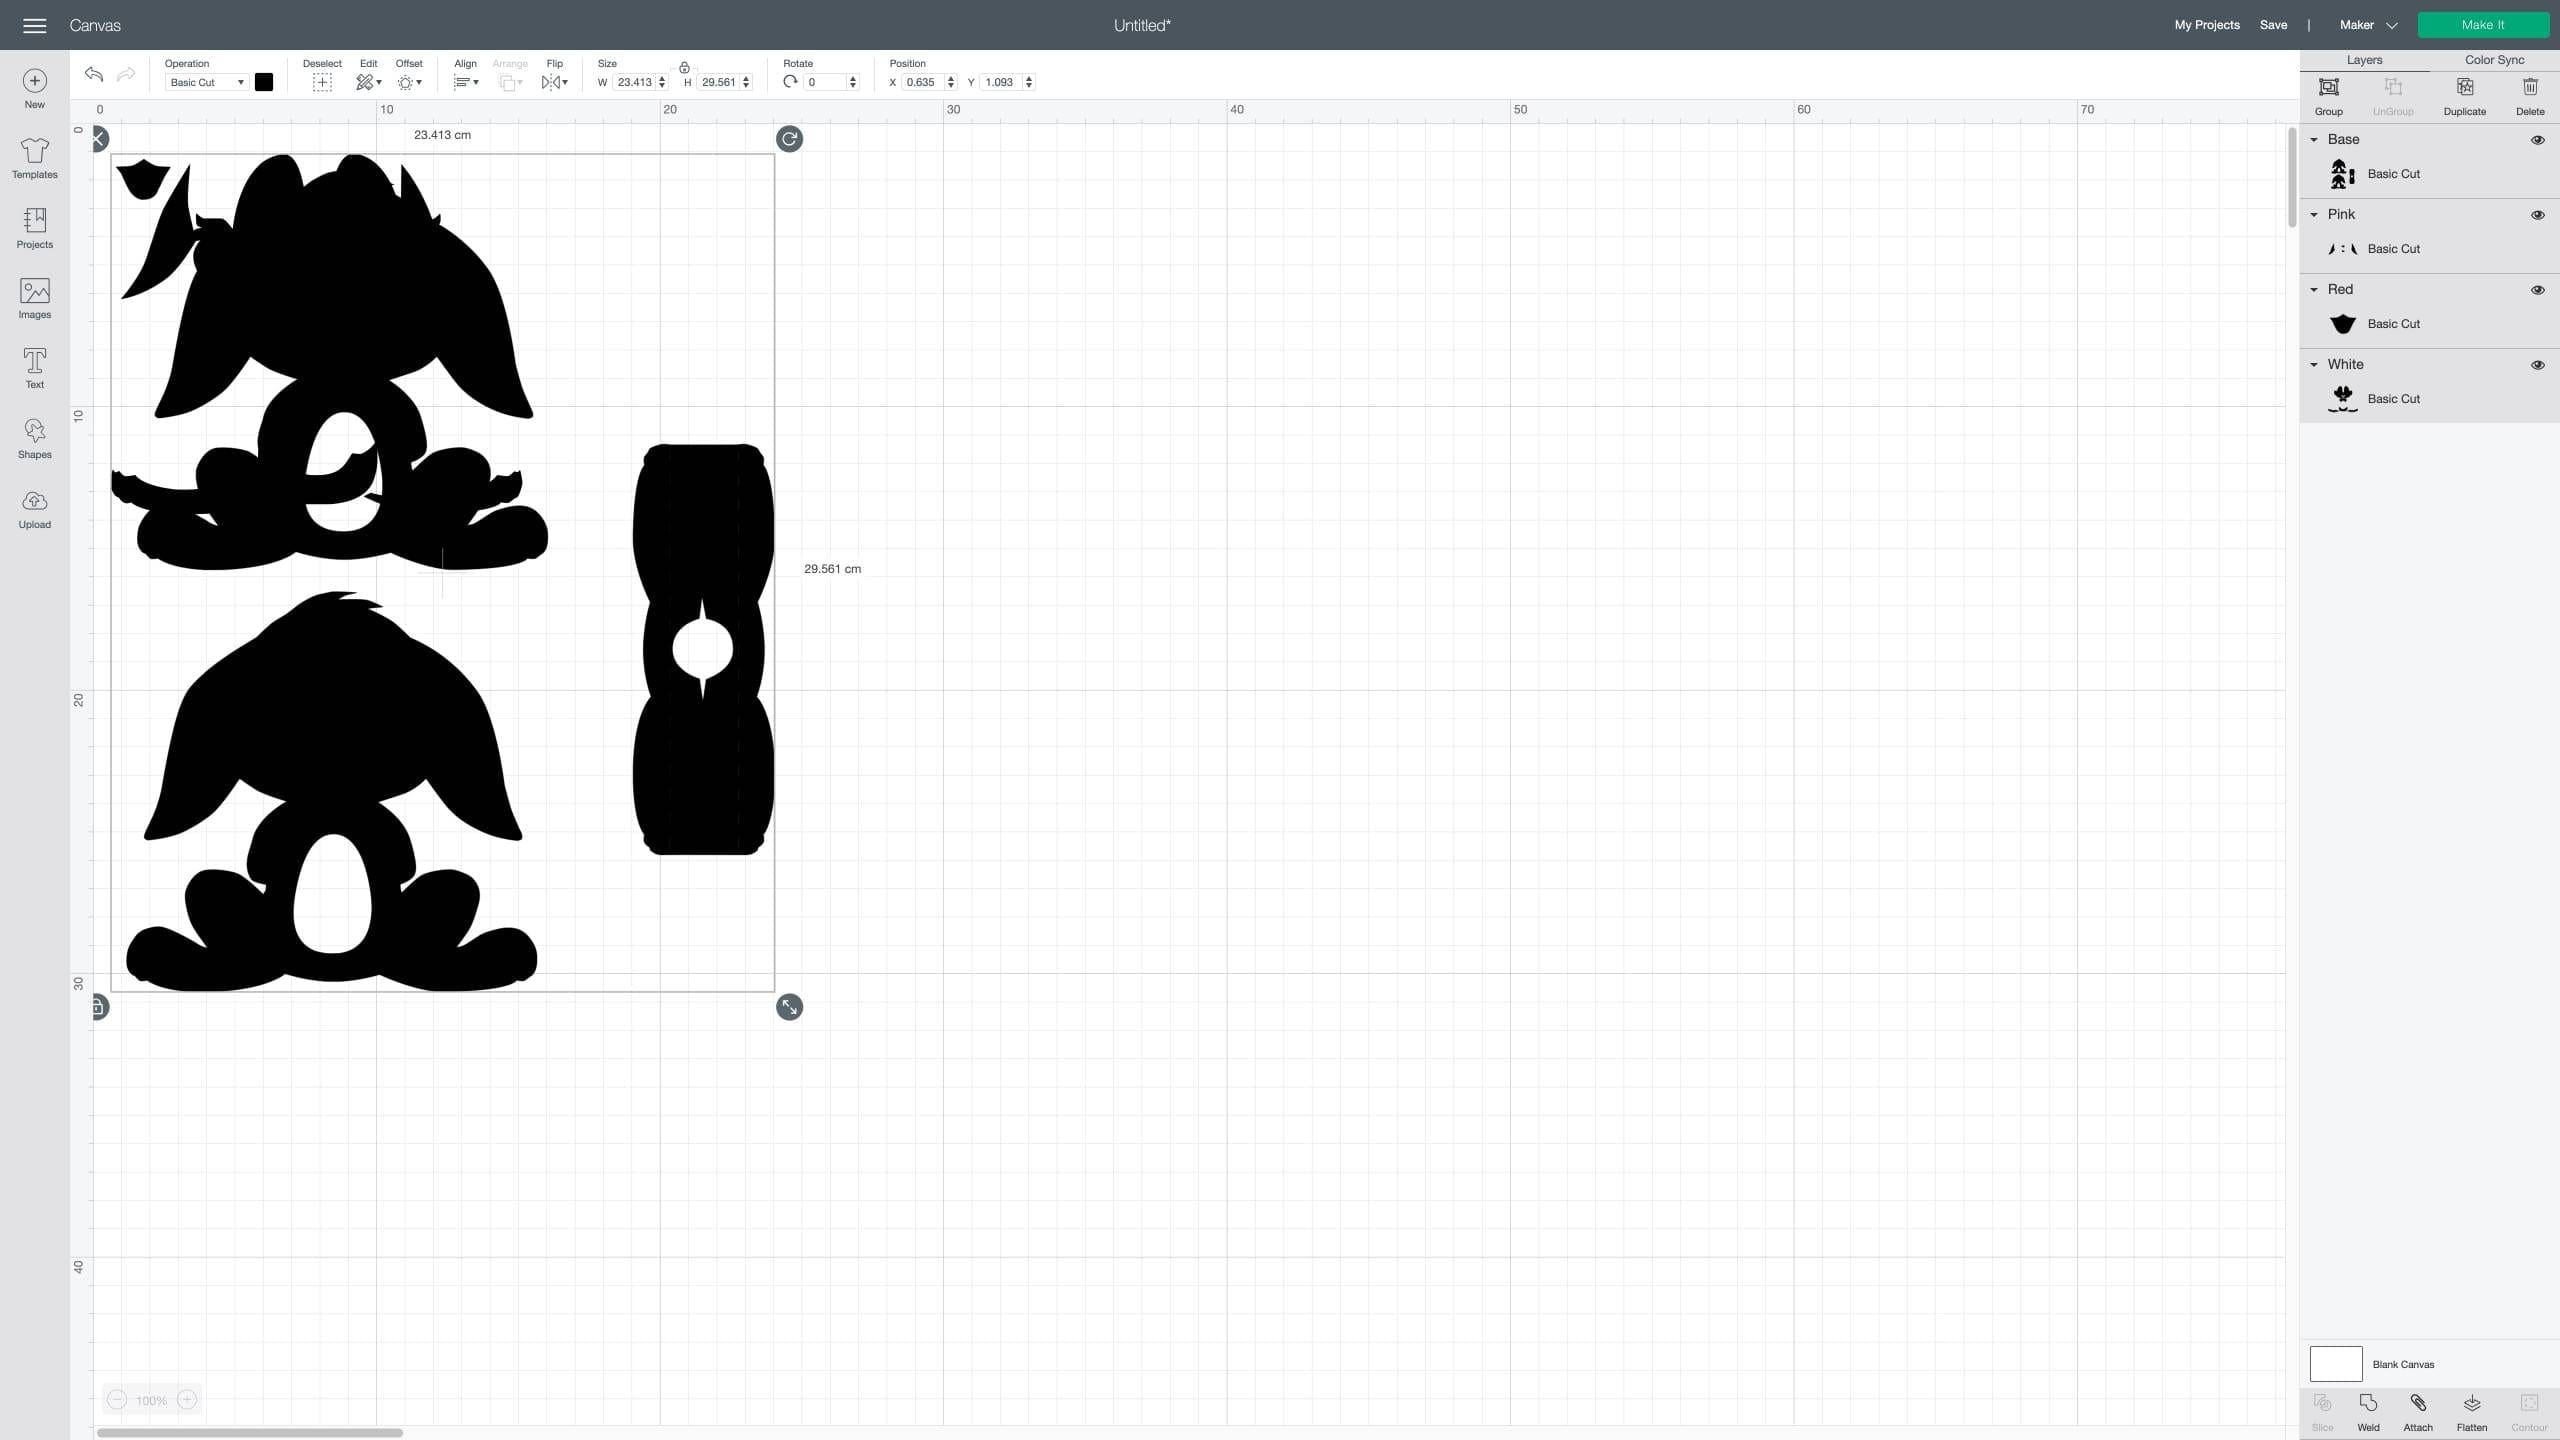
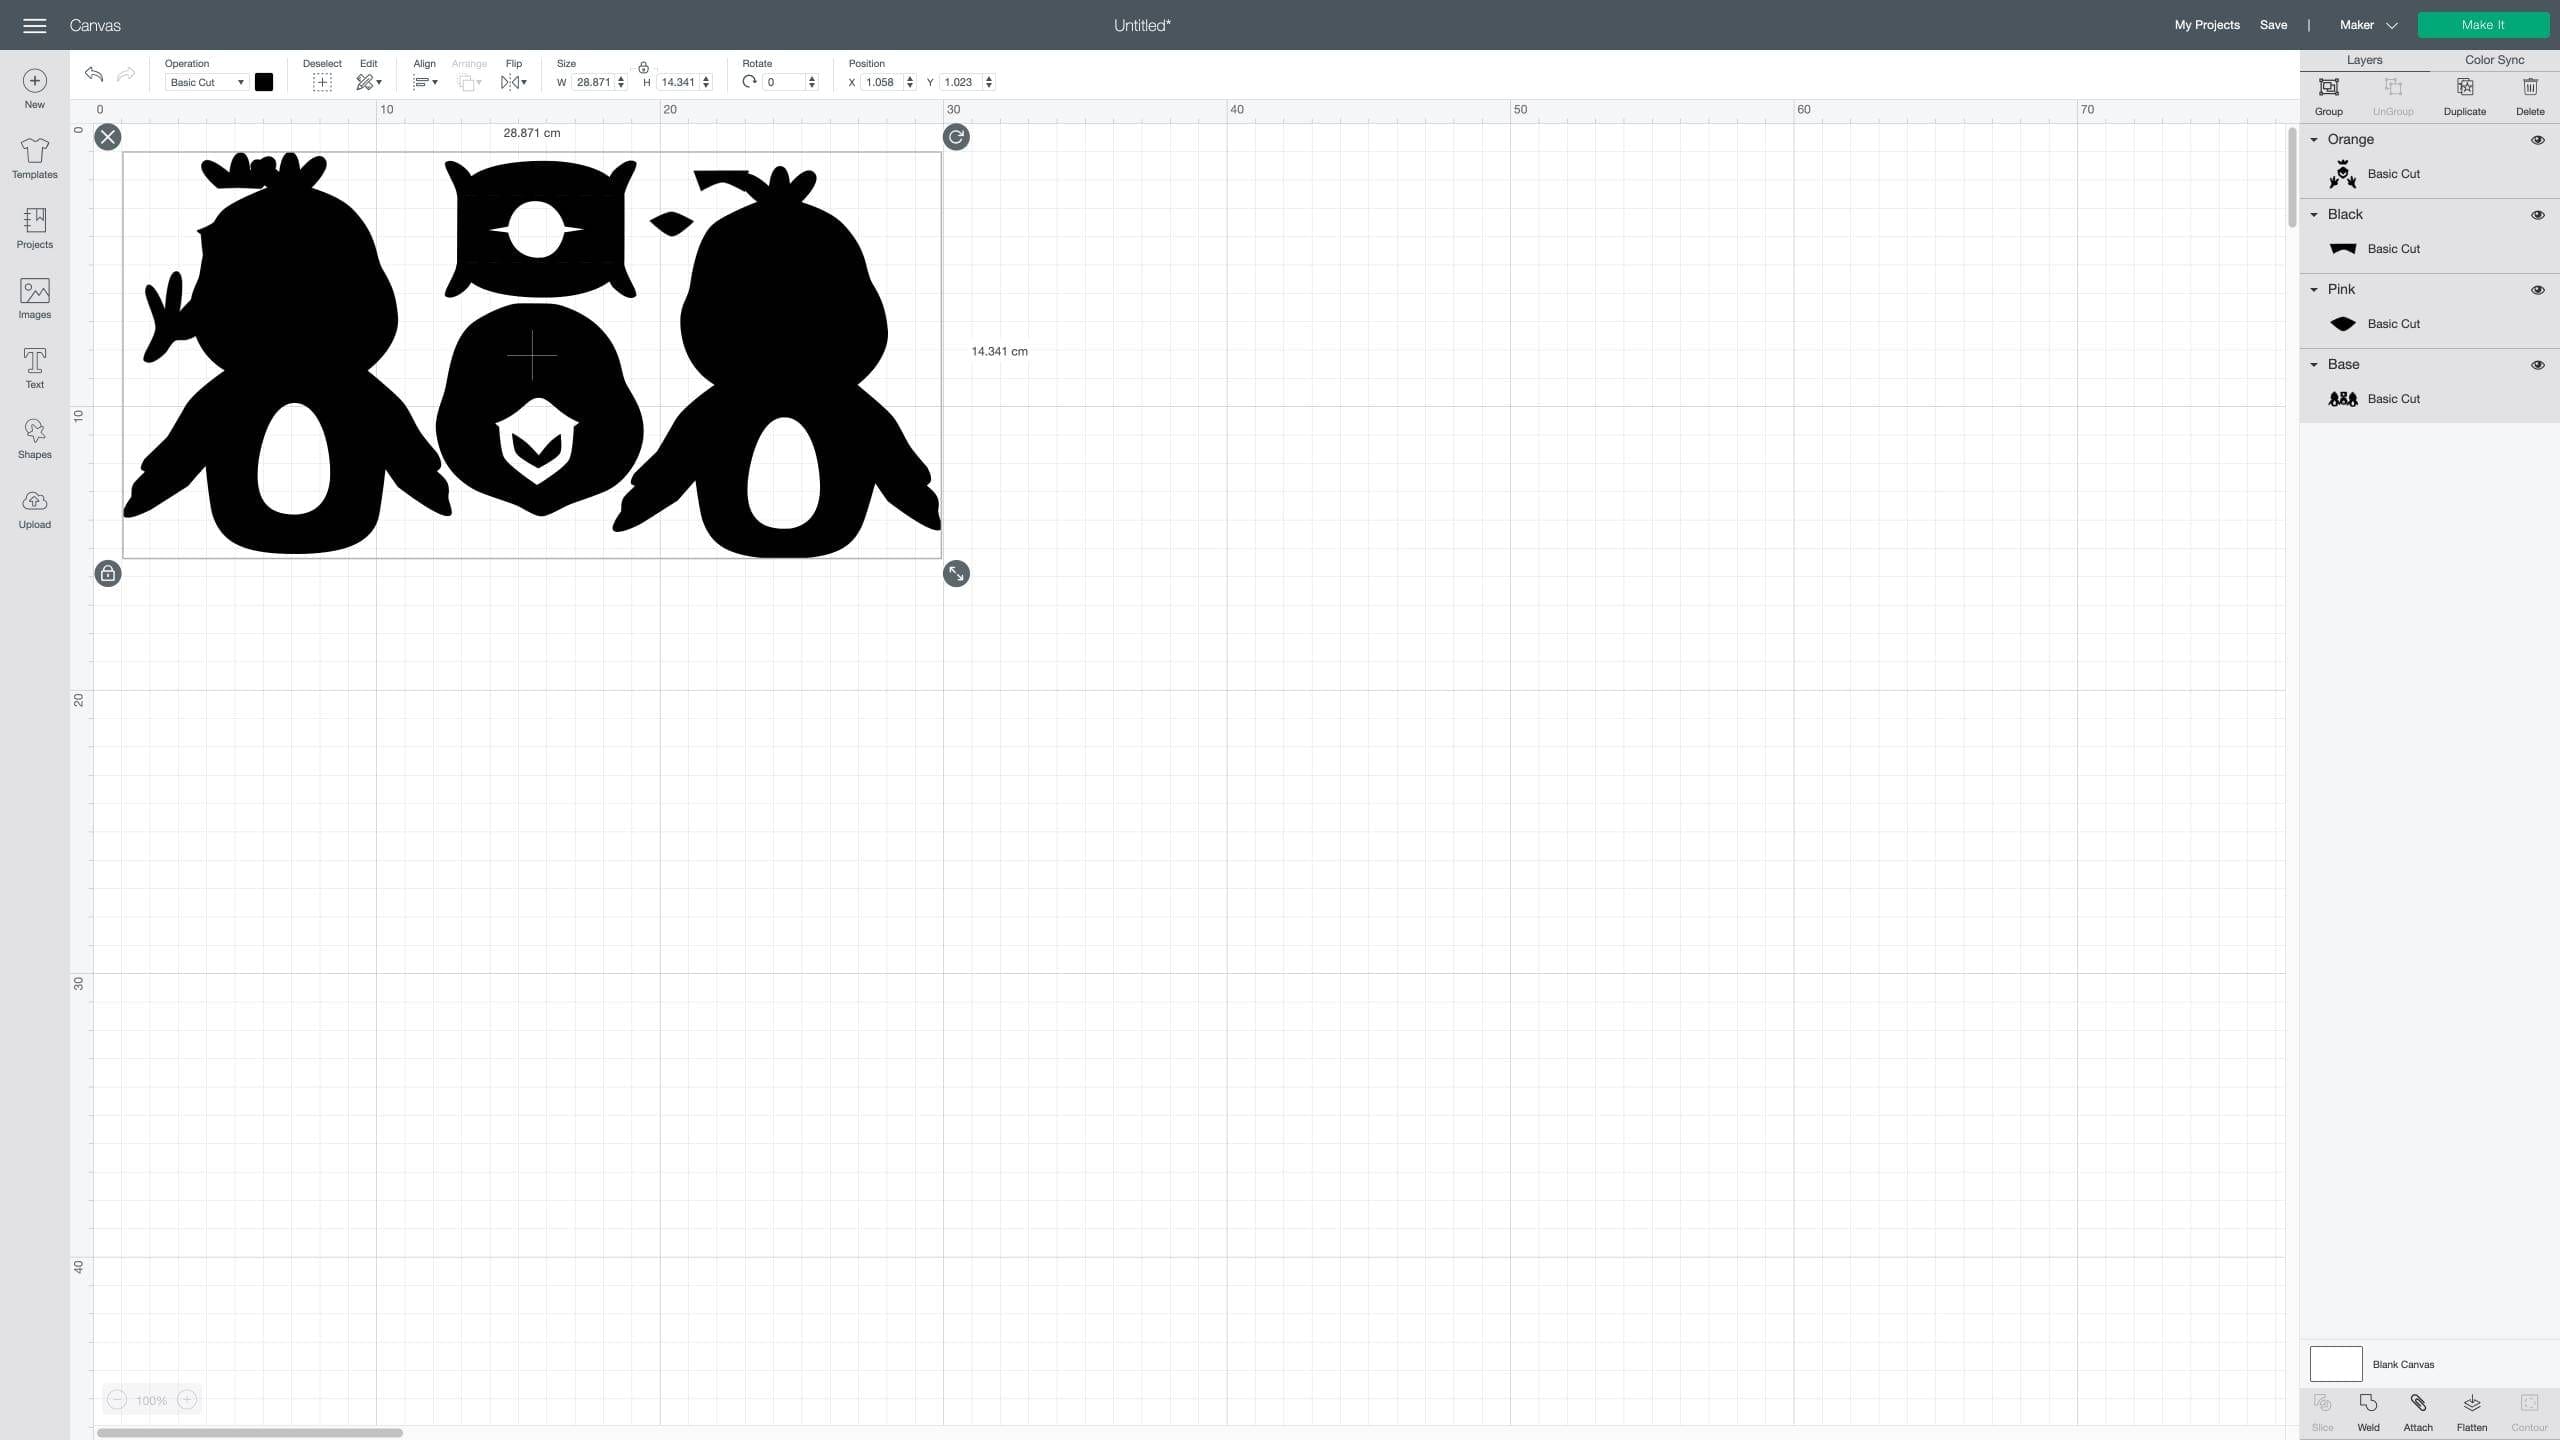
2. Upload each rabbit PNG into the Cricut Design Space and then insert them onto the canvas.
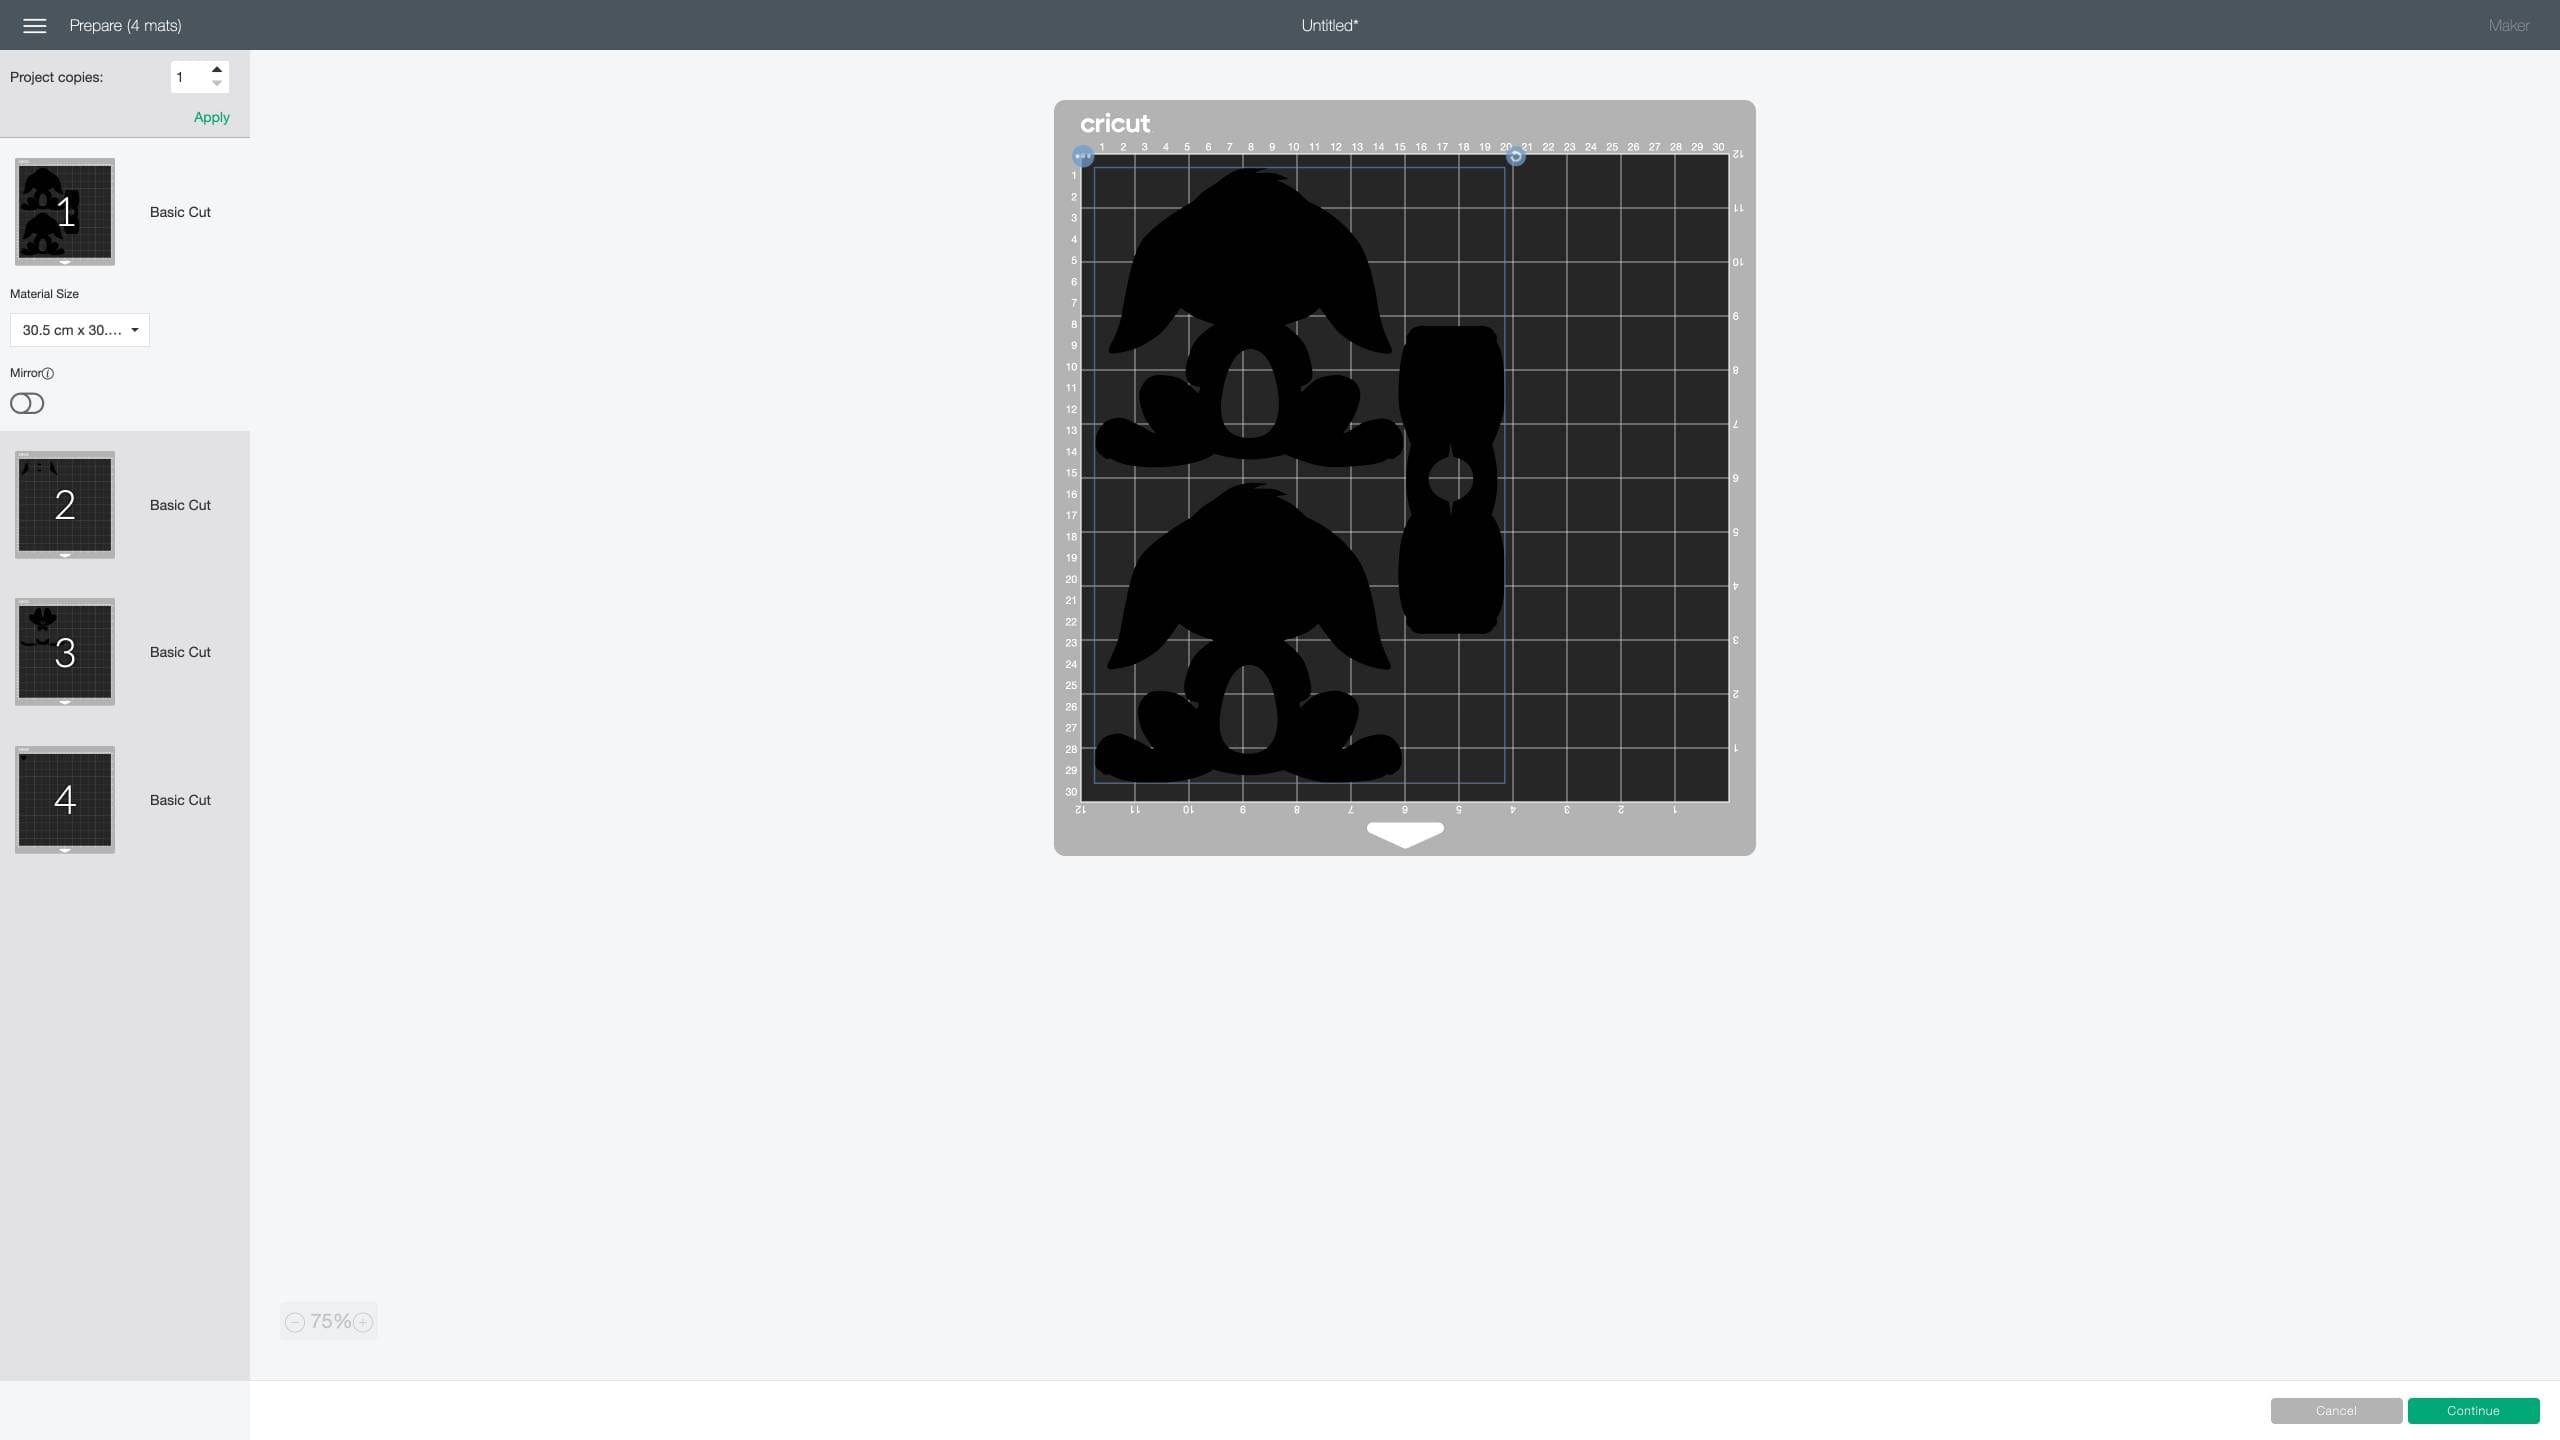
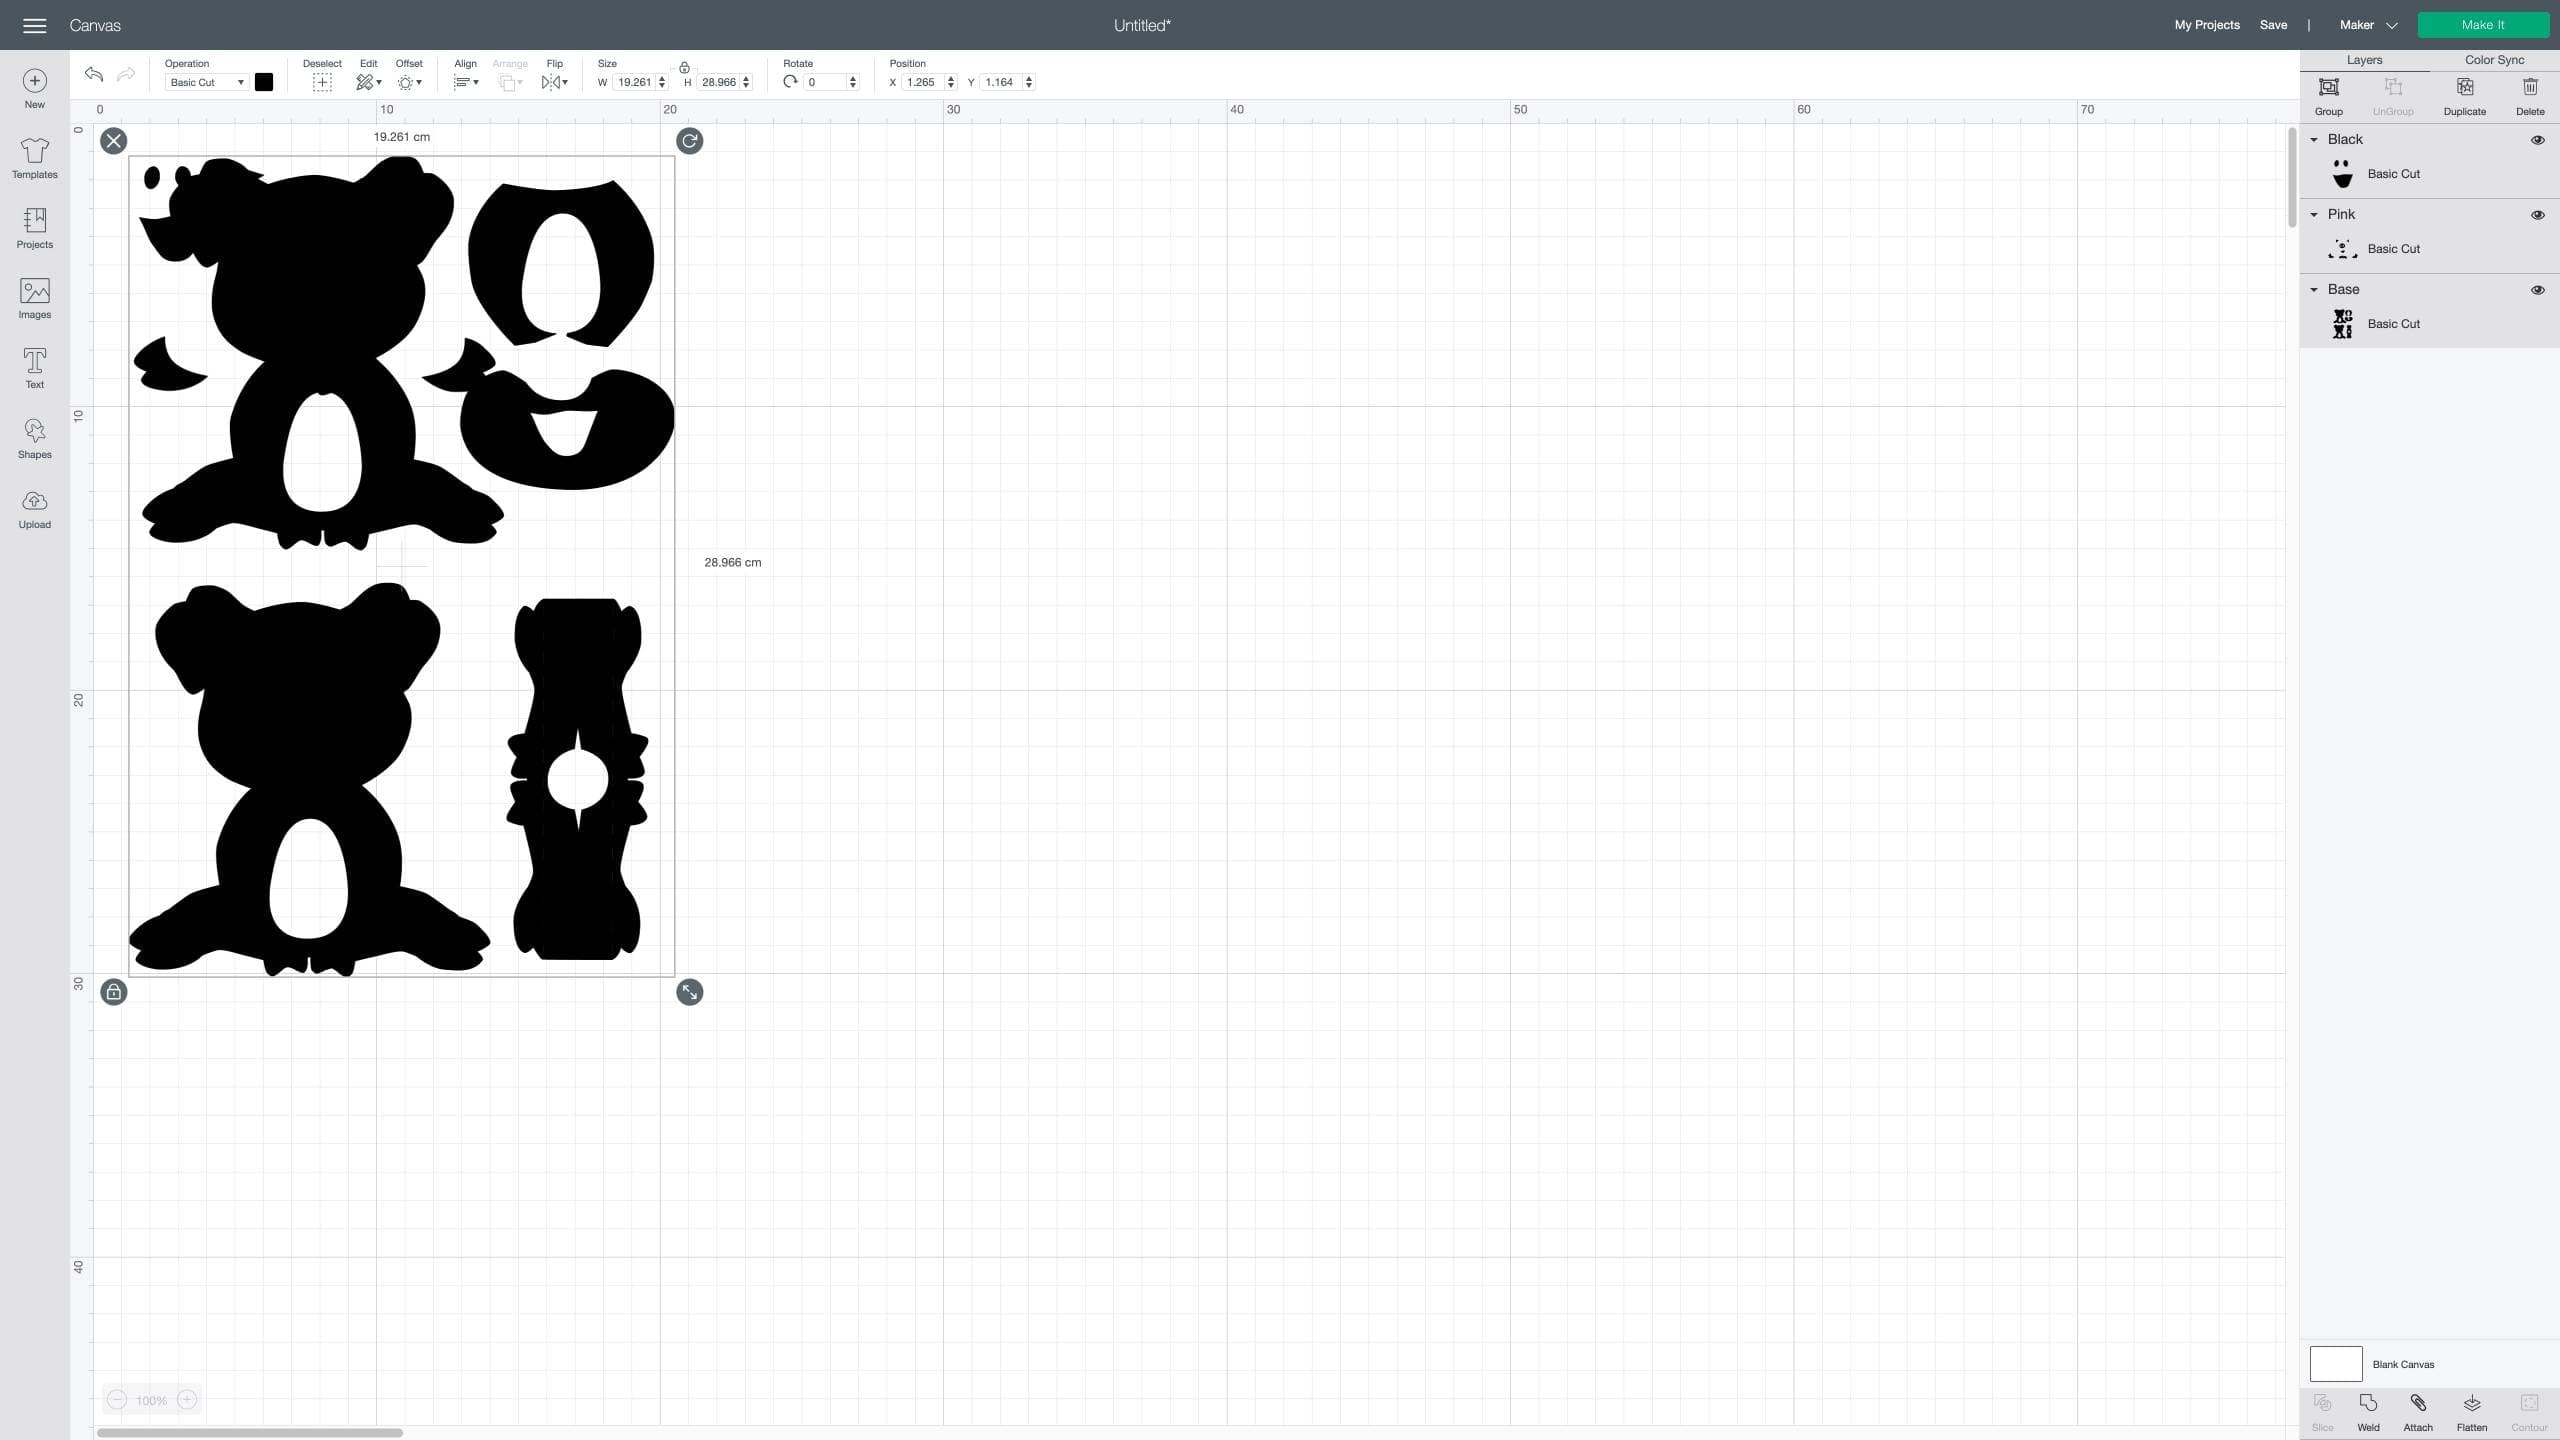
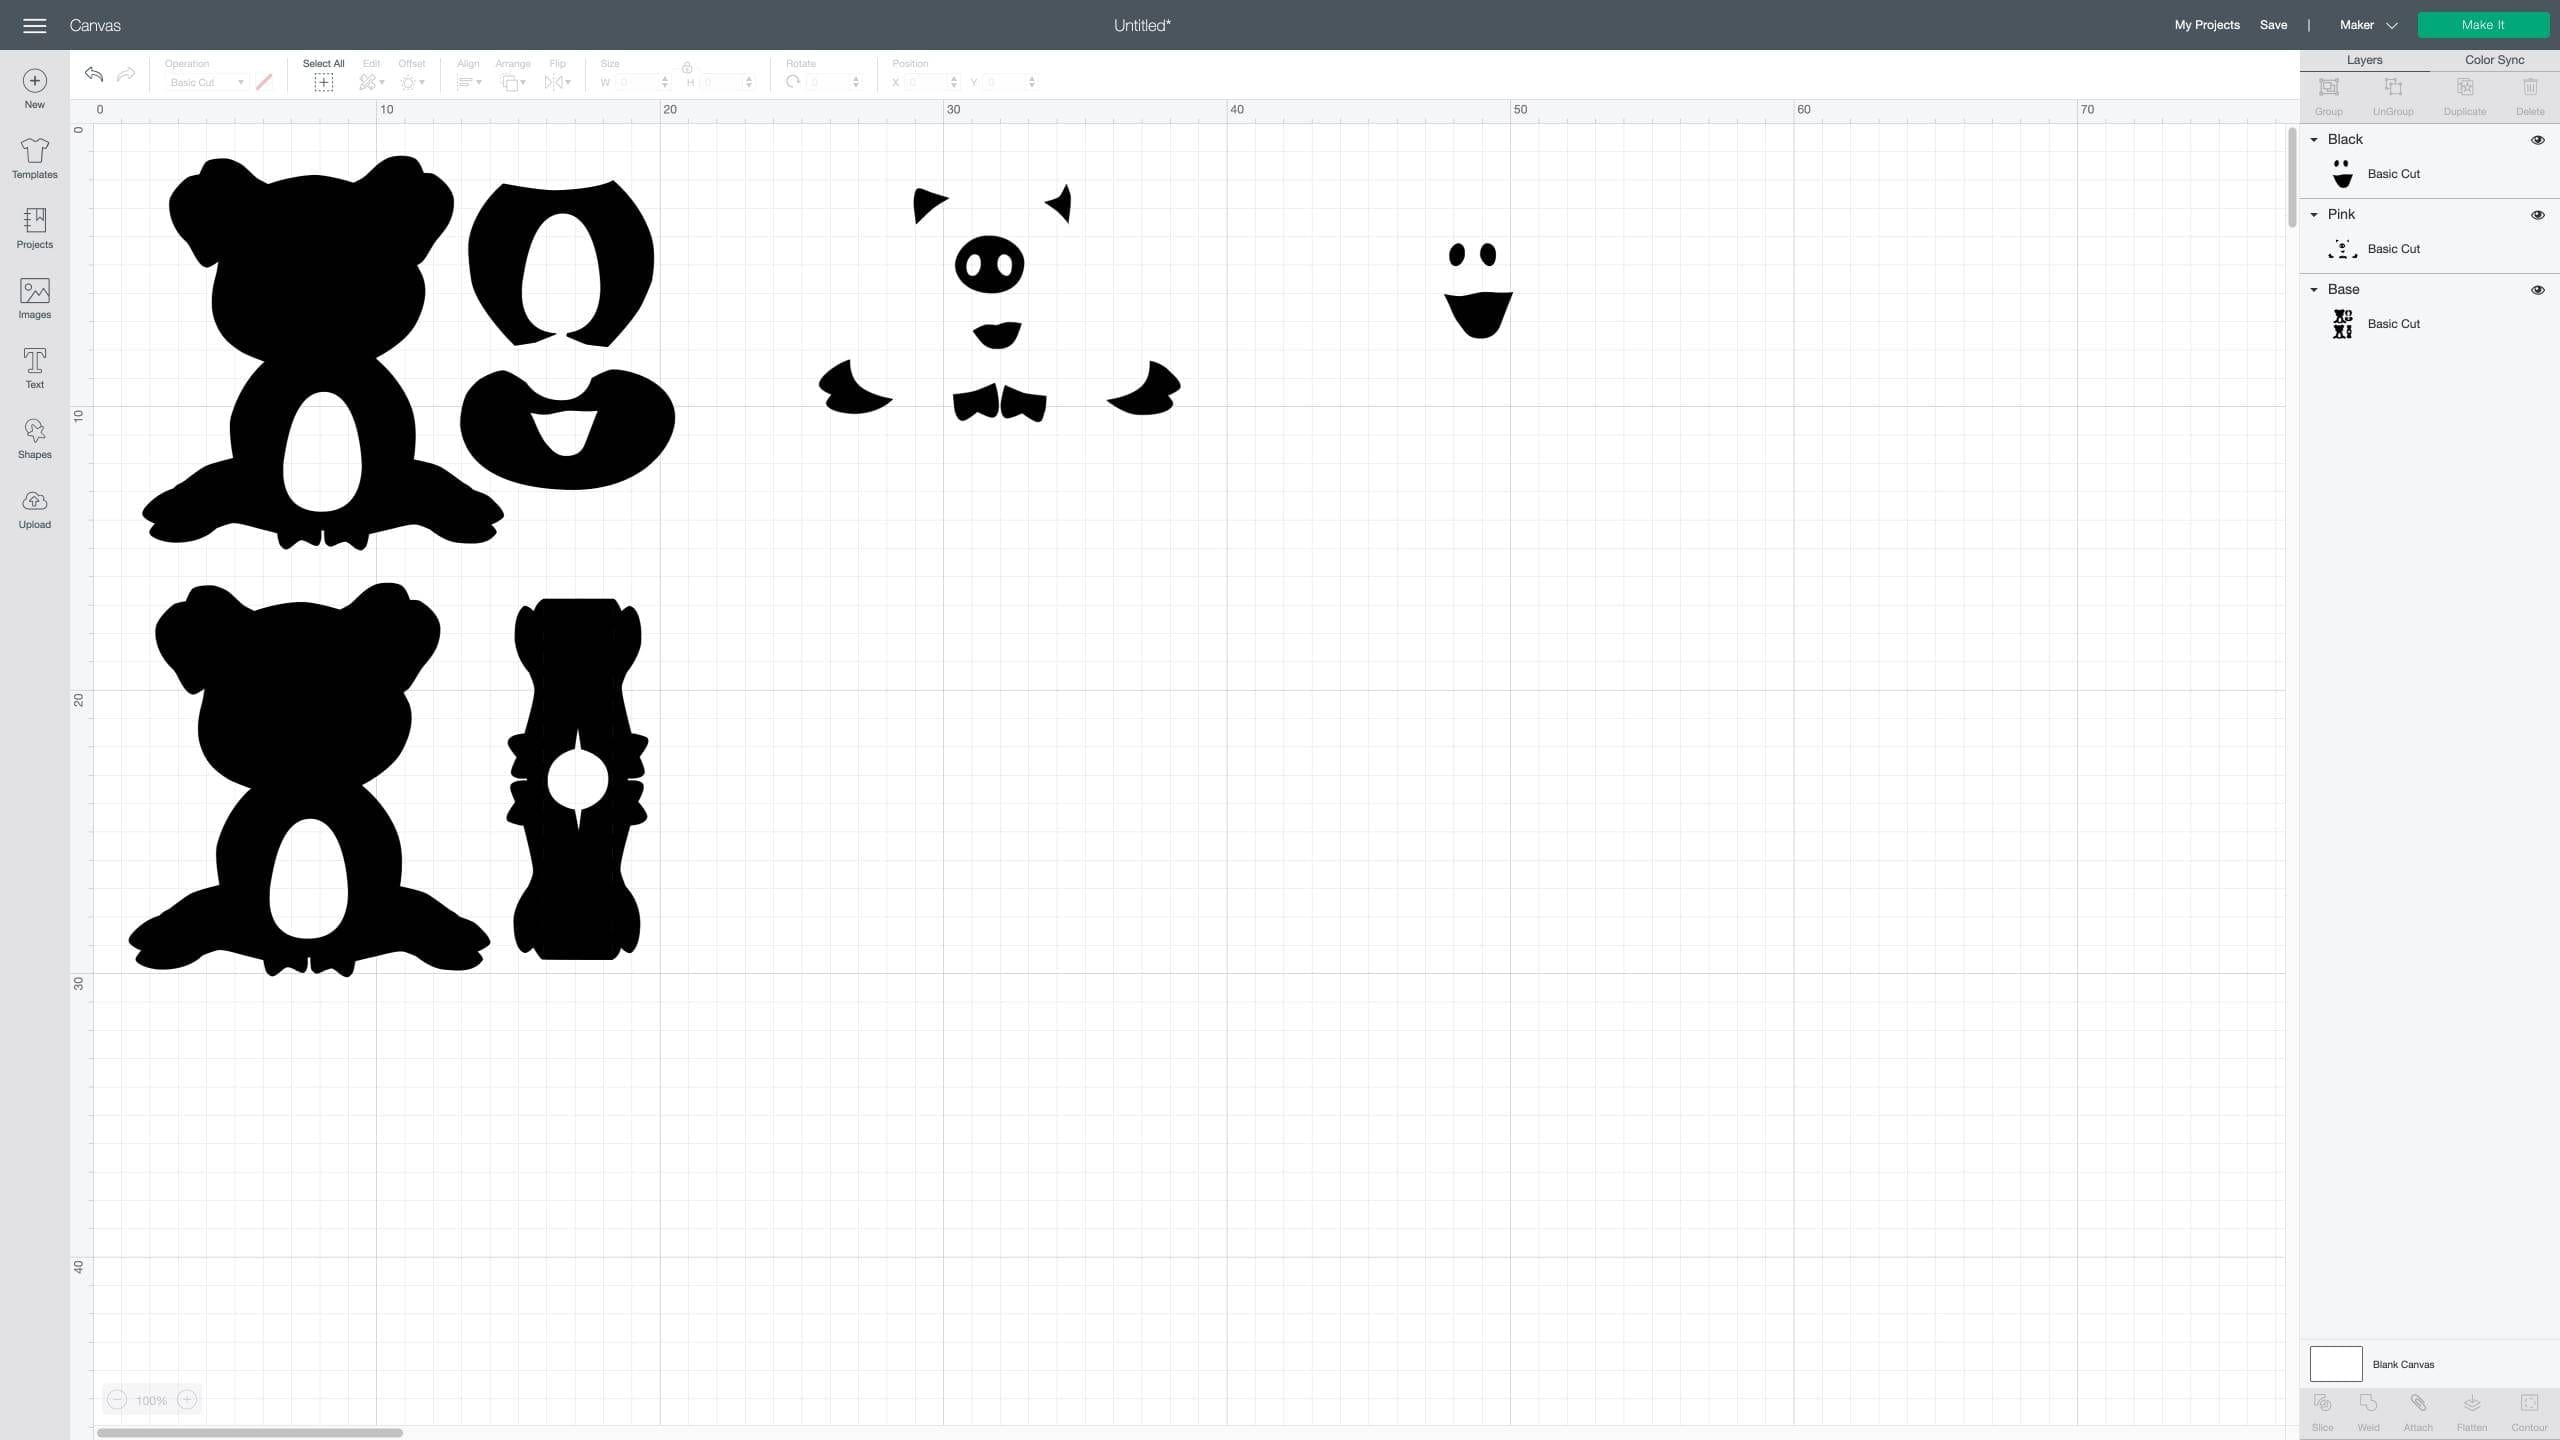
3. Resize them as soon as you have inserted them onto the canvas as they will all still be grouped. We re-sized them to the measurement shown below.
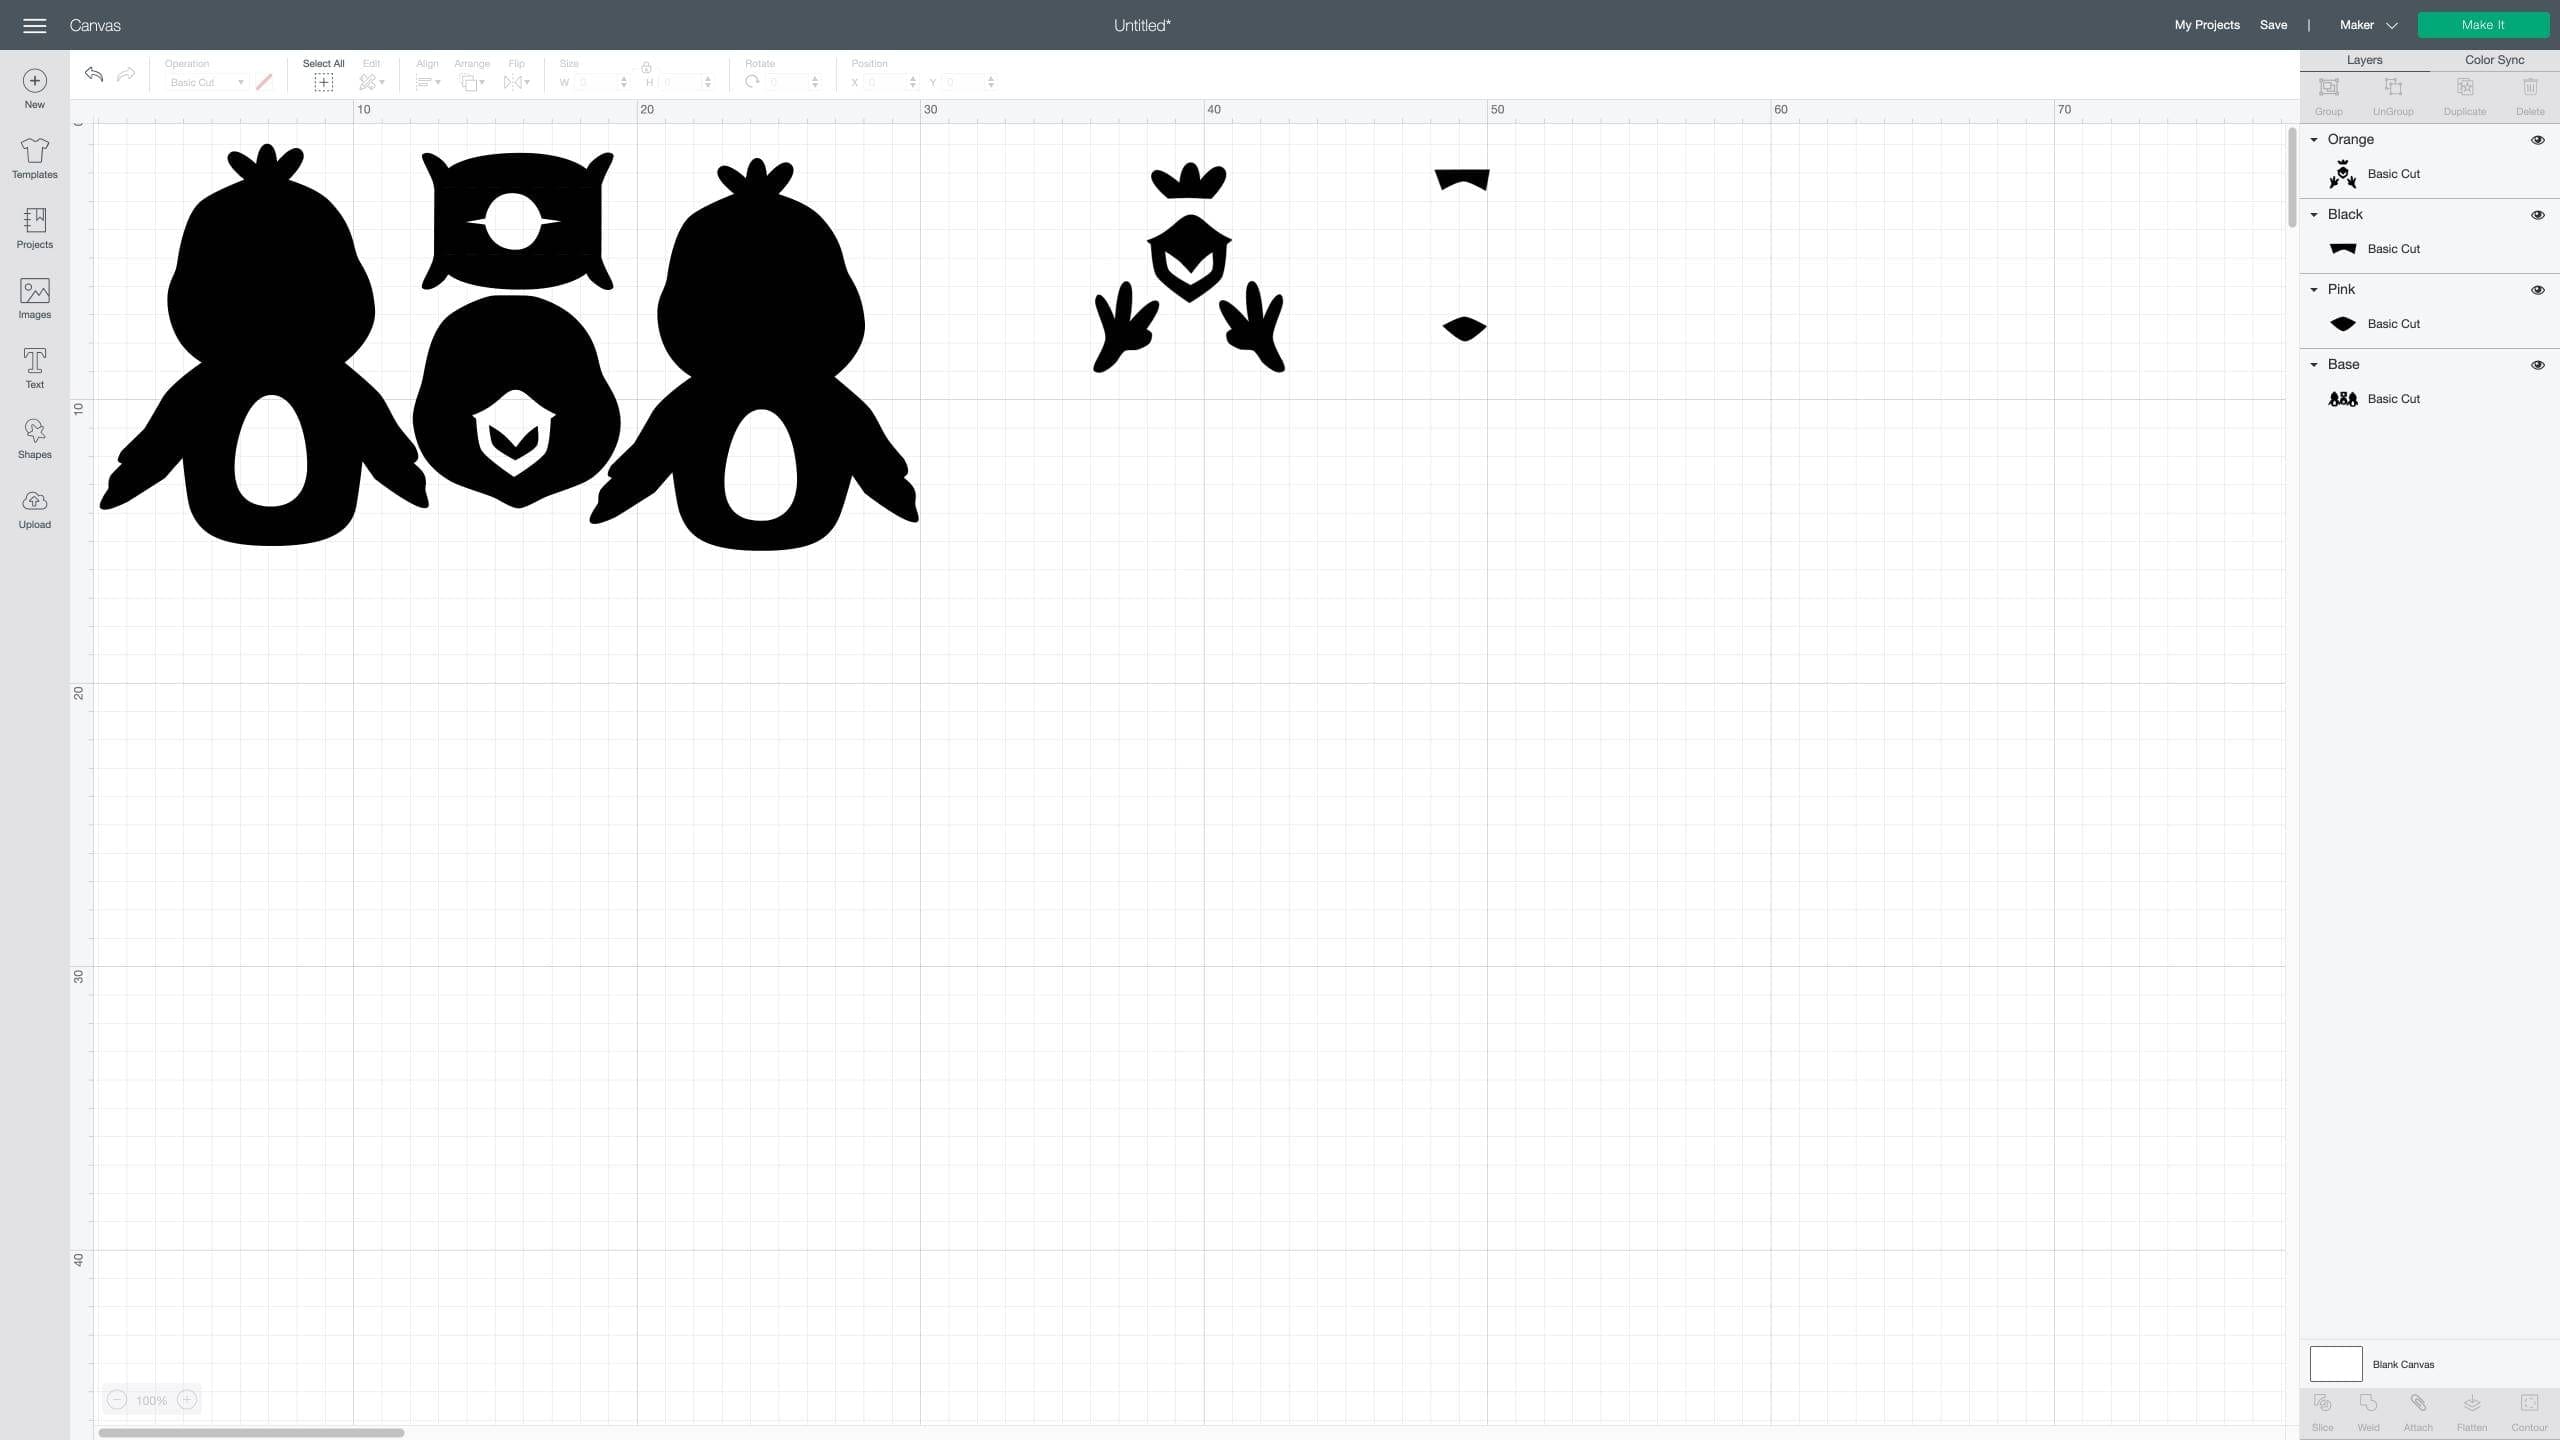
4. Position them so that all the layers are separated and select ‘Make it’ in the top right.
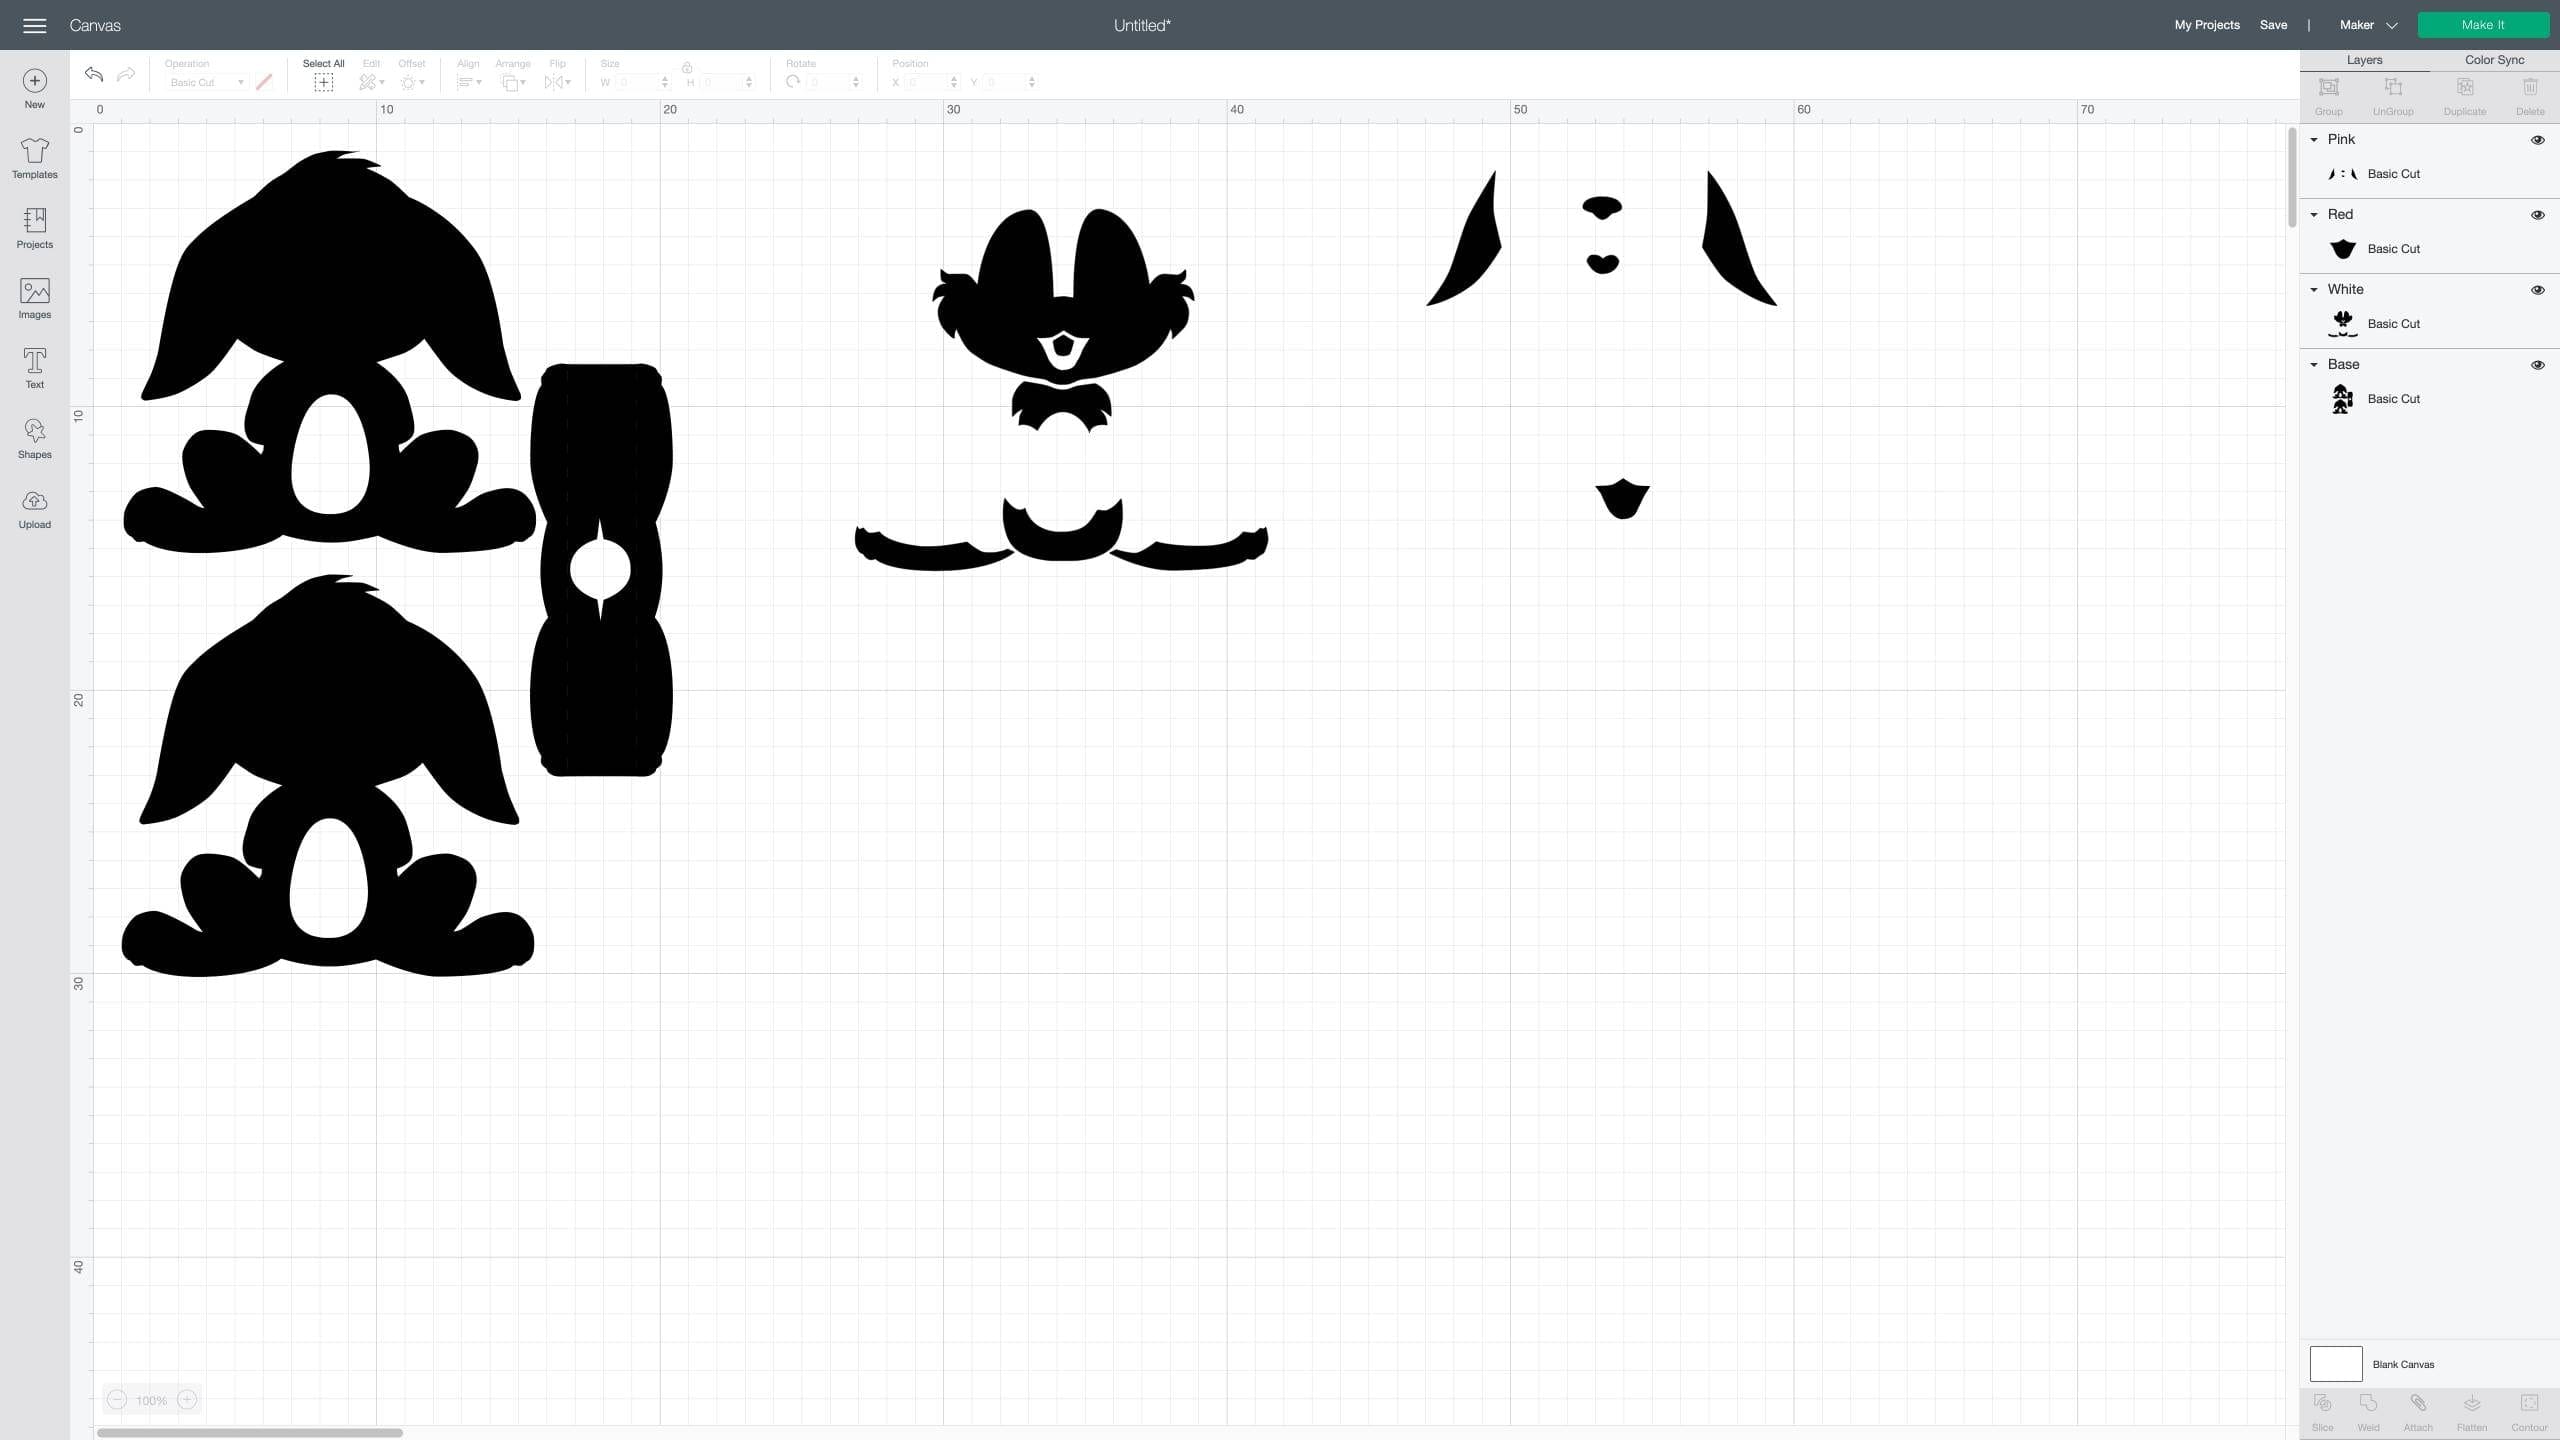
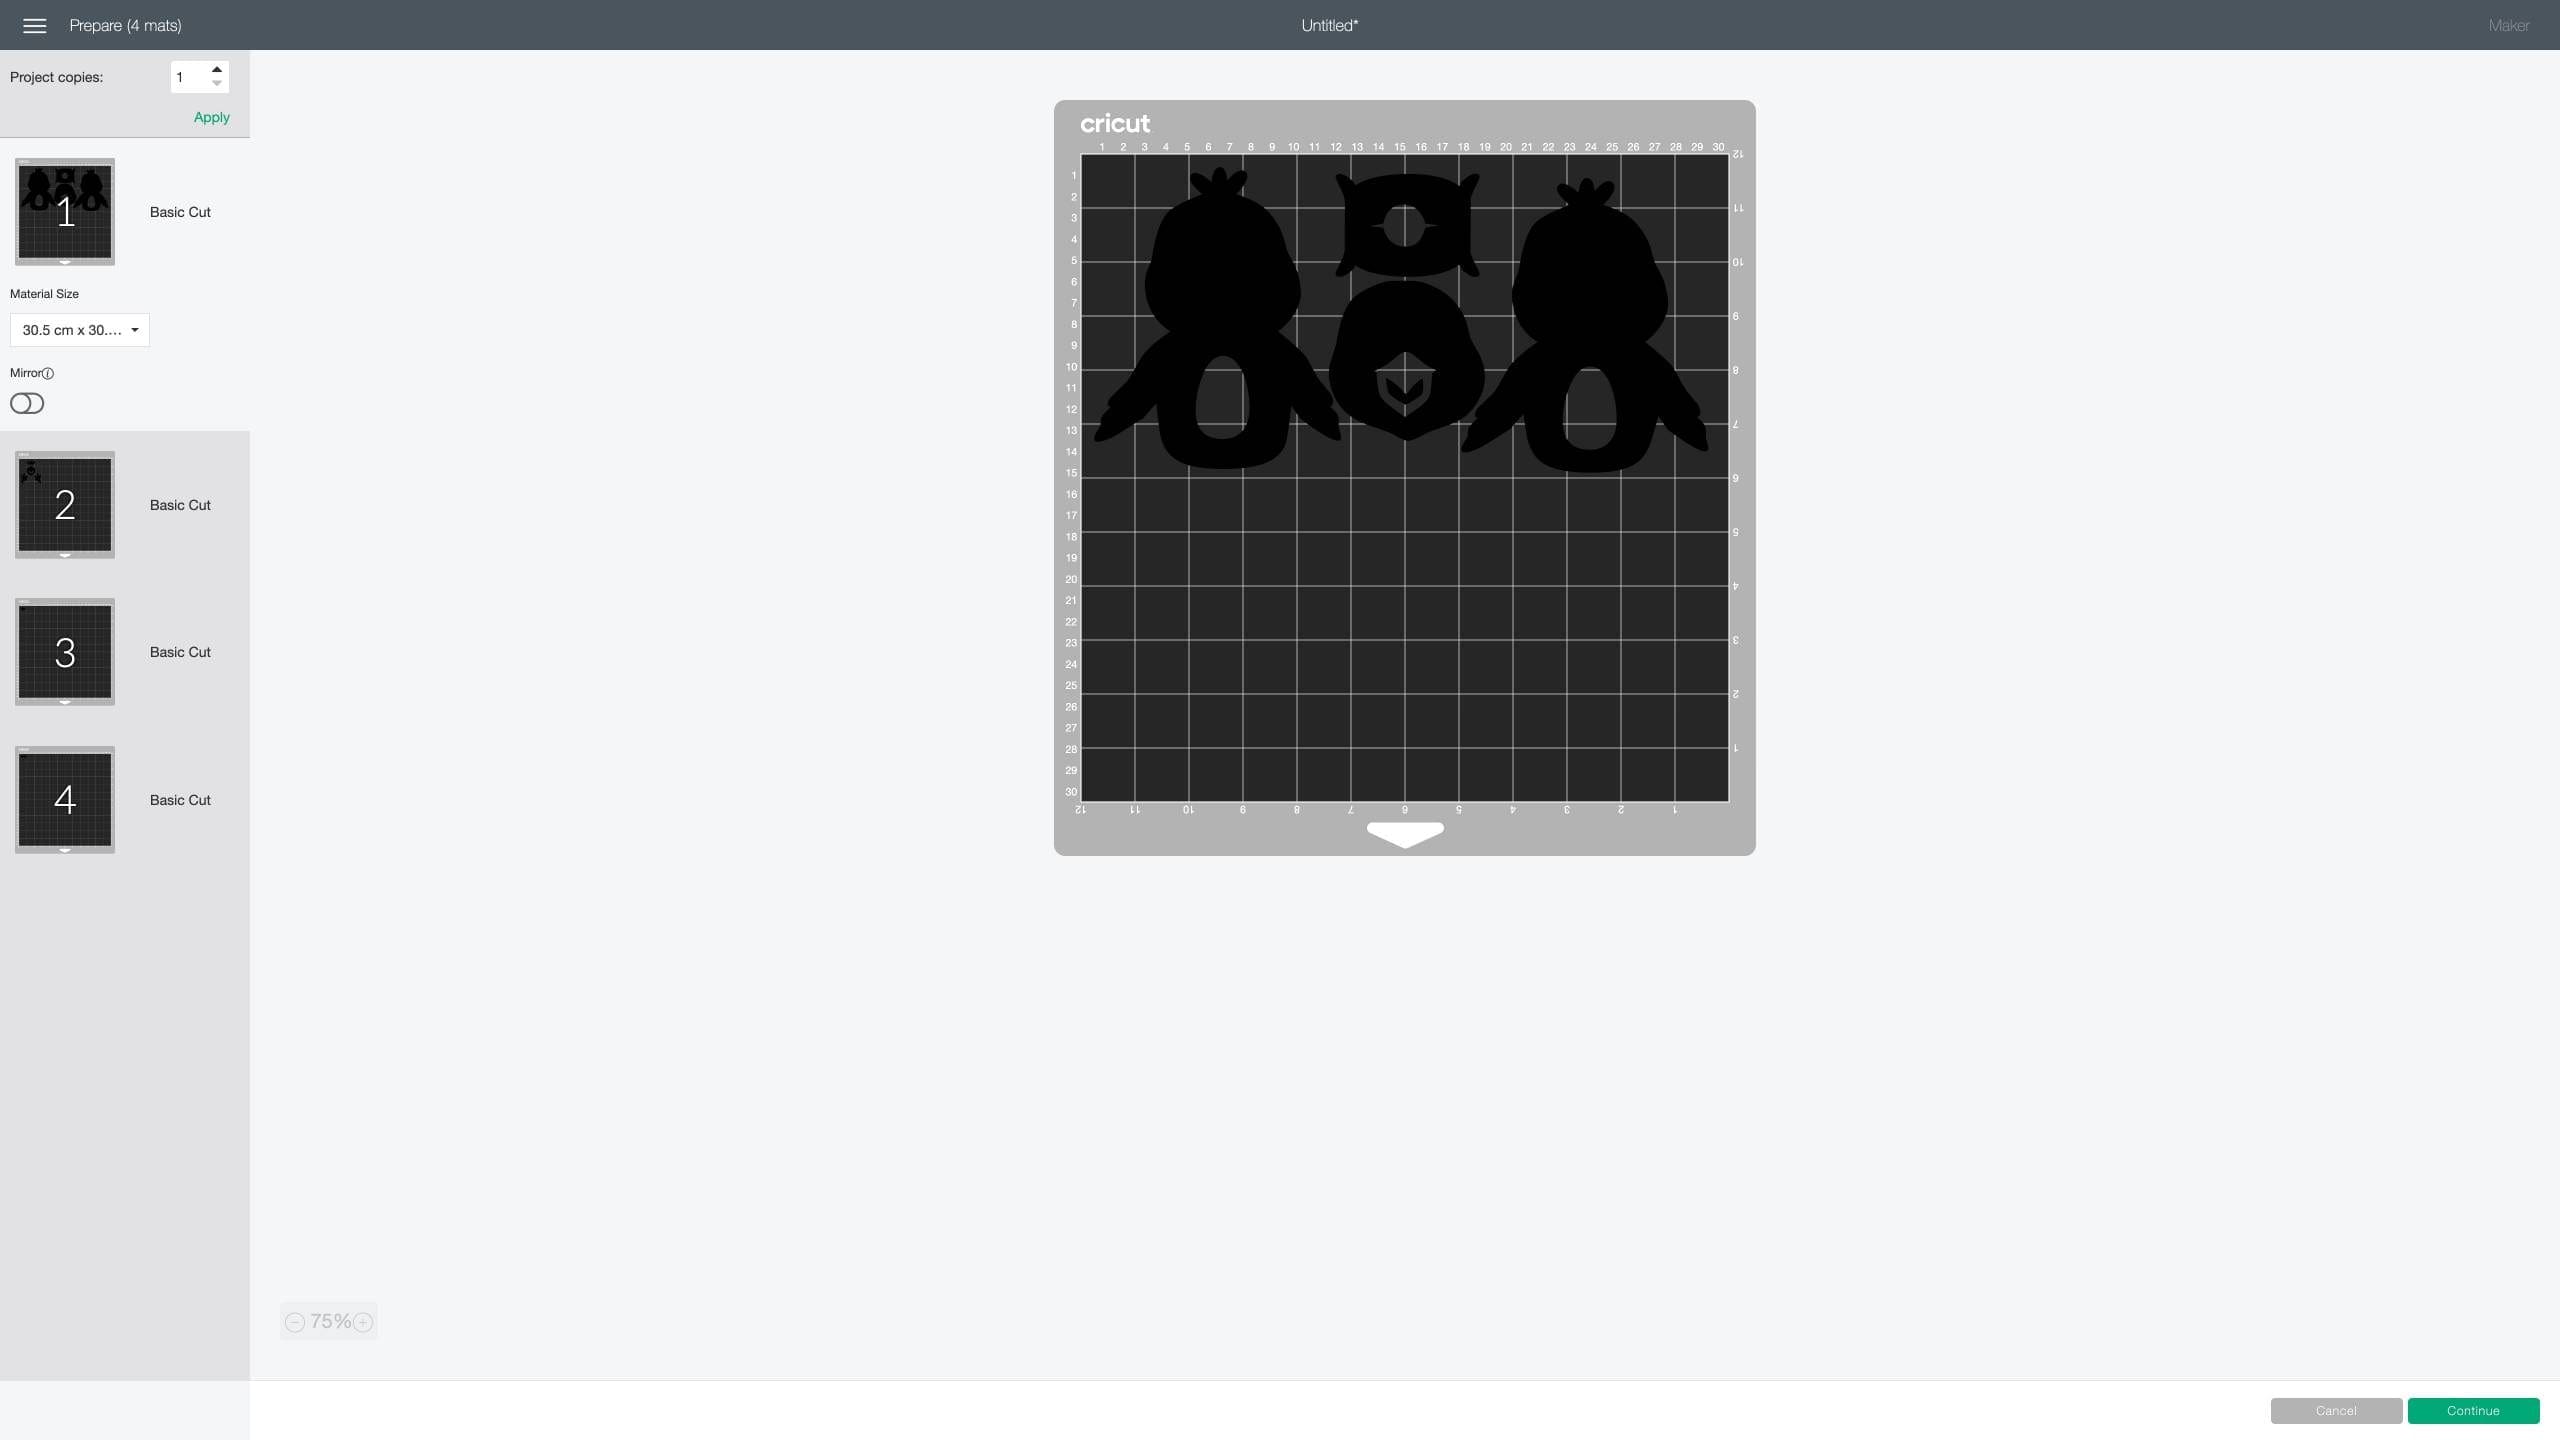
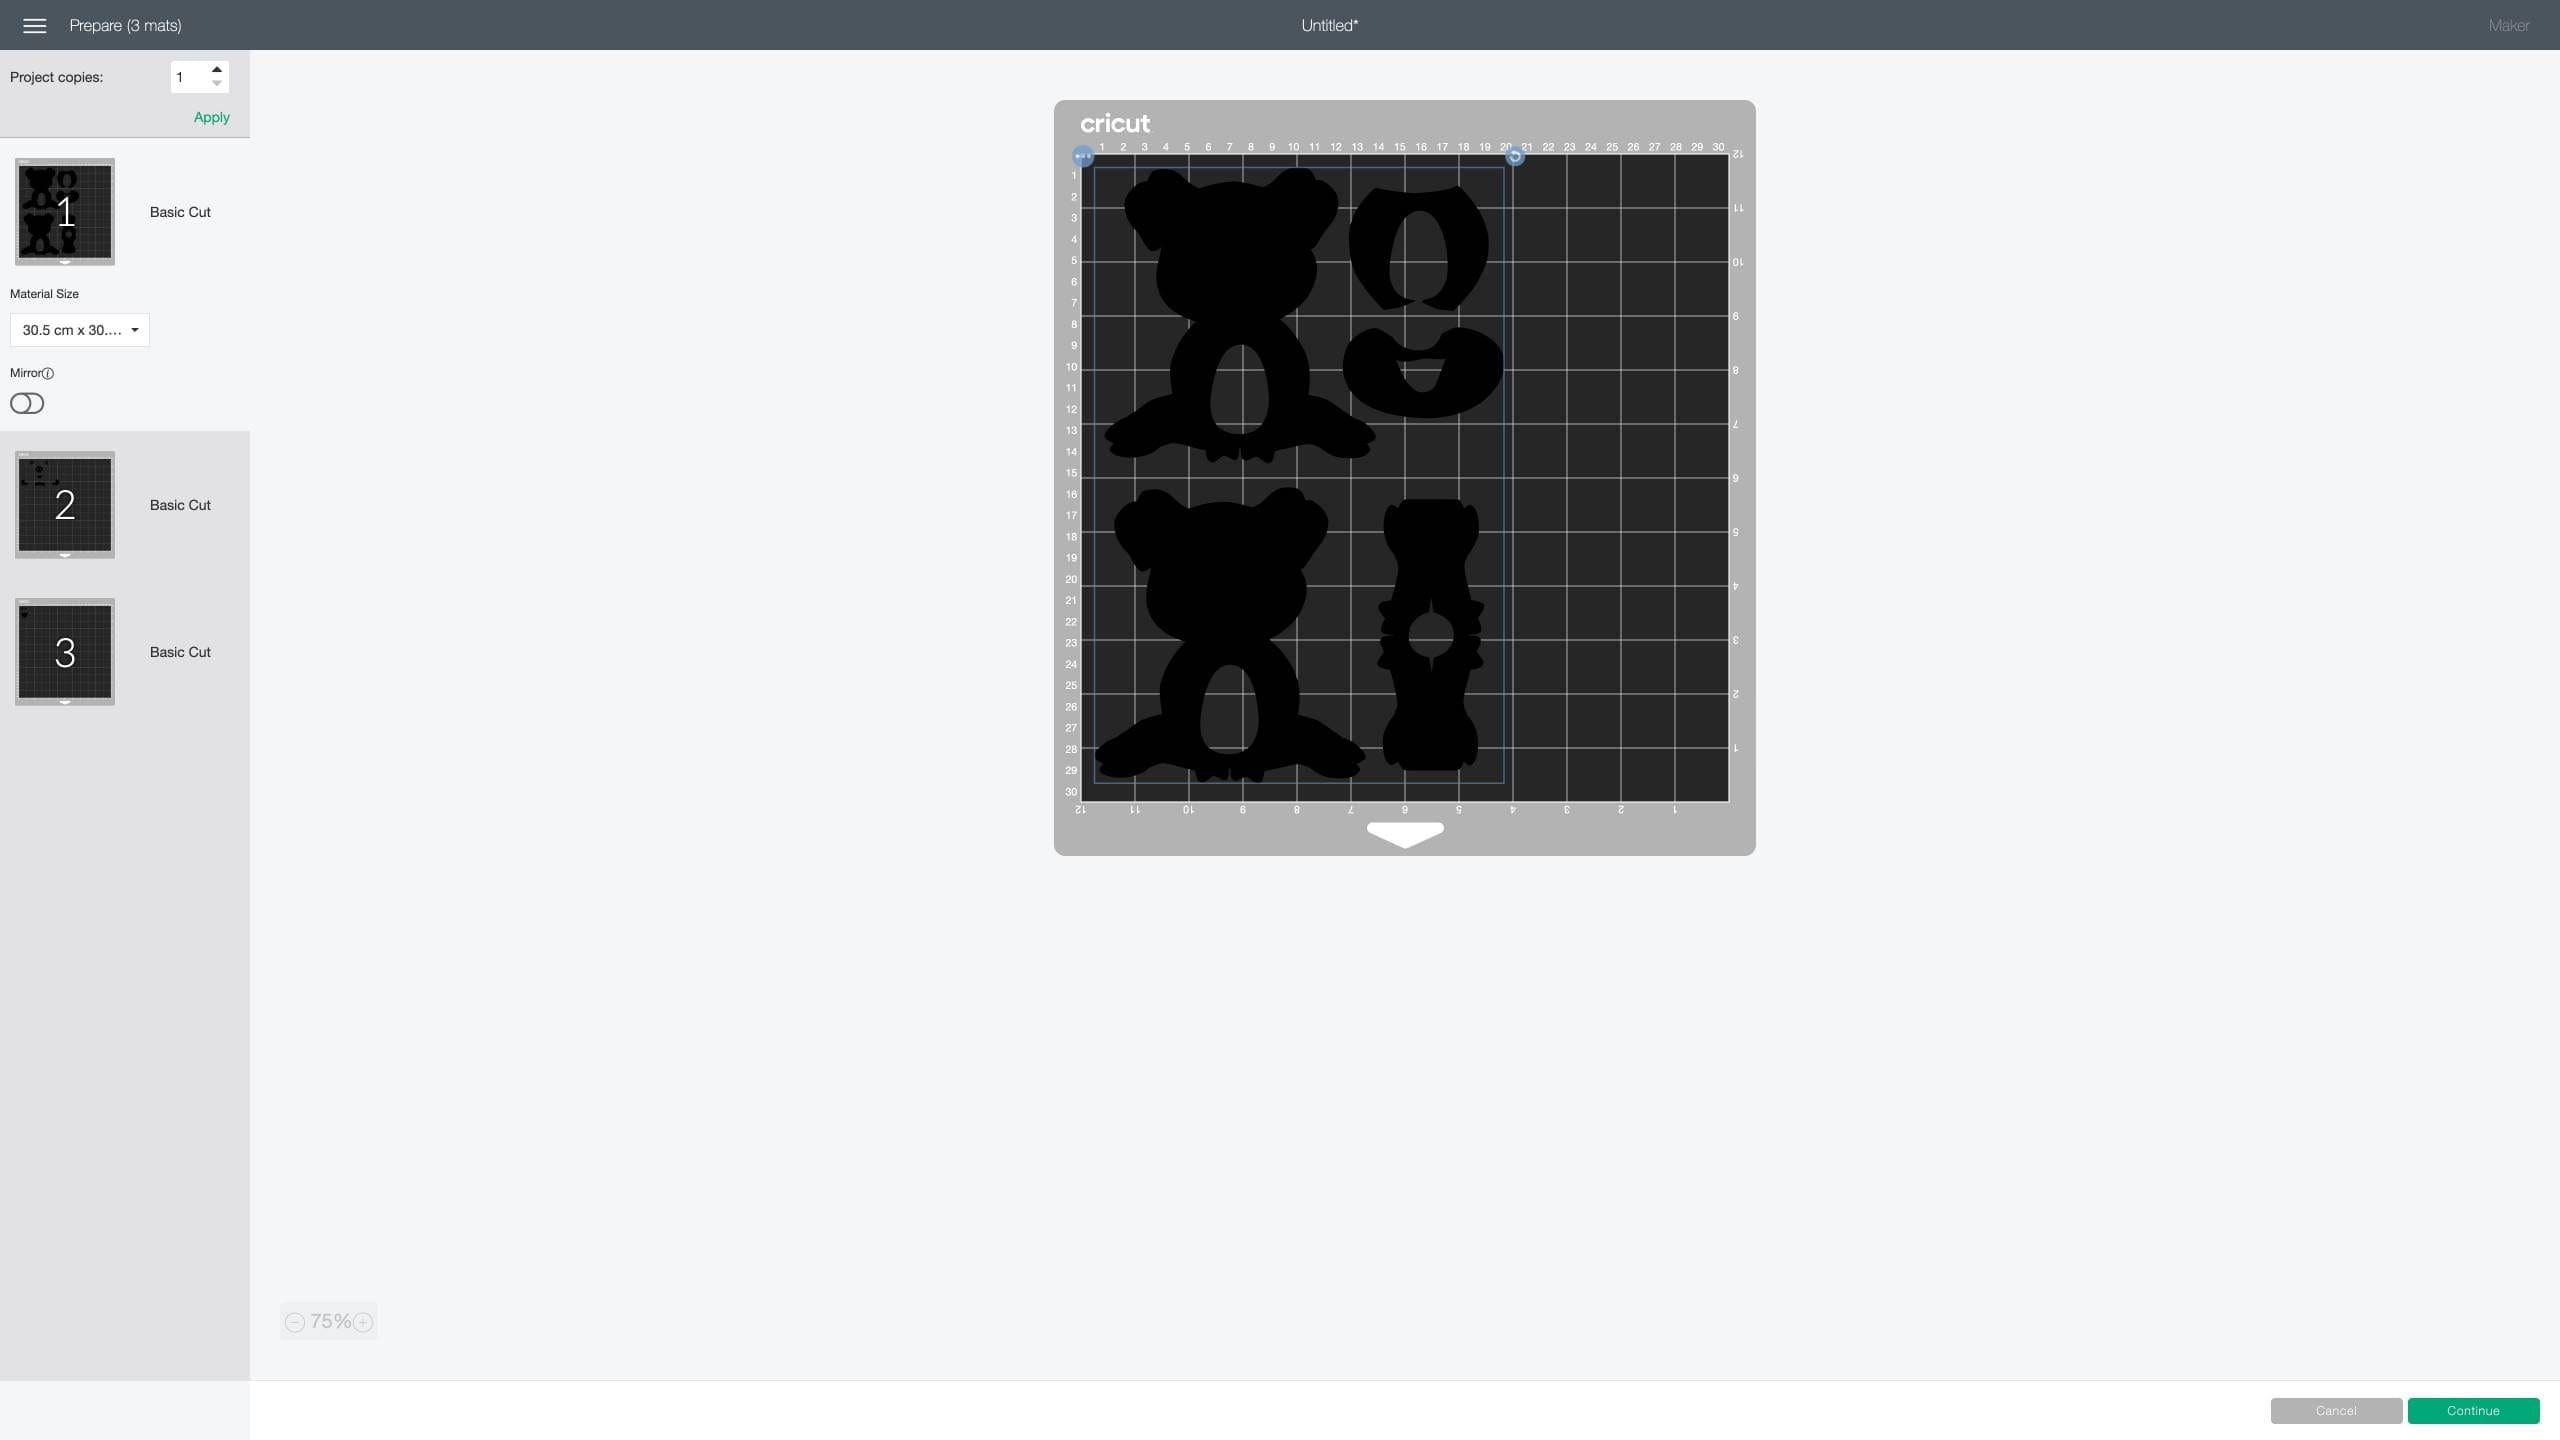
5. Move each layer so that each one is on a different cutting mat, as shown below. To make these instructions easier order them like this: 1. Base, 2. Ears, nose and tongue, 3. White fur, 4. Red part of the mouth. Press ‘Continue’ in the bottom right of the screen.
6. Select your Cricut device and set the base material to Heavy cardstock and Default pressure setting. Now you’re ready to cut.
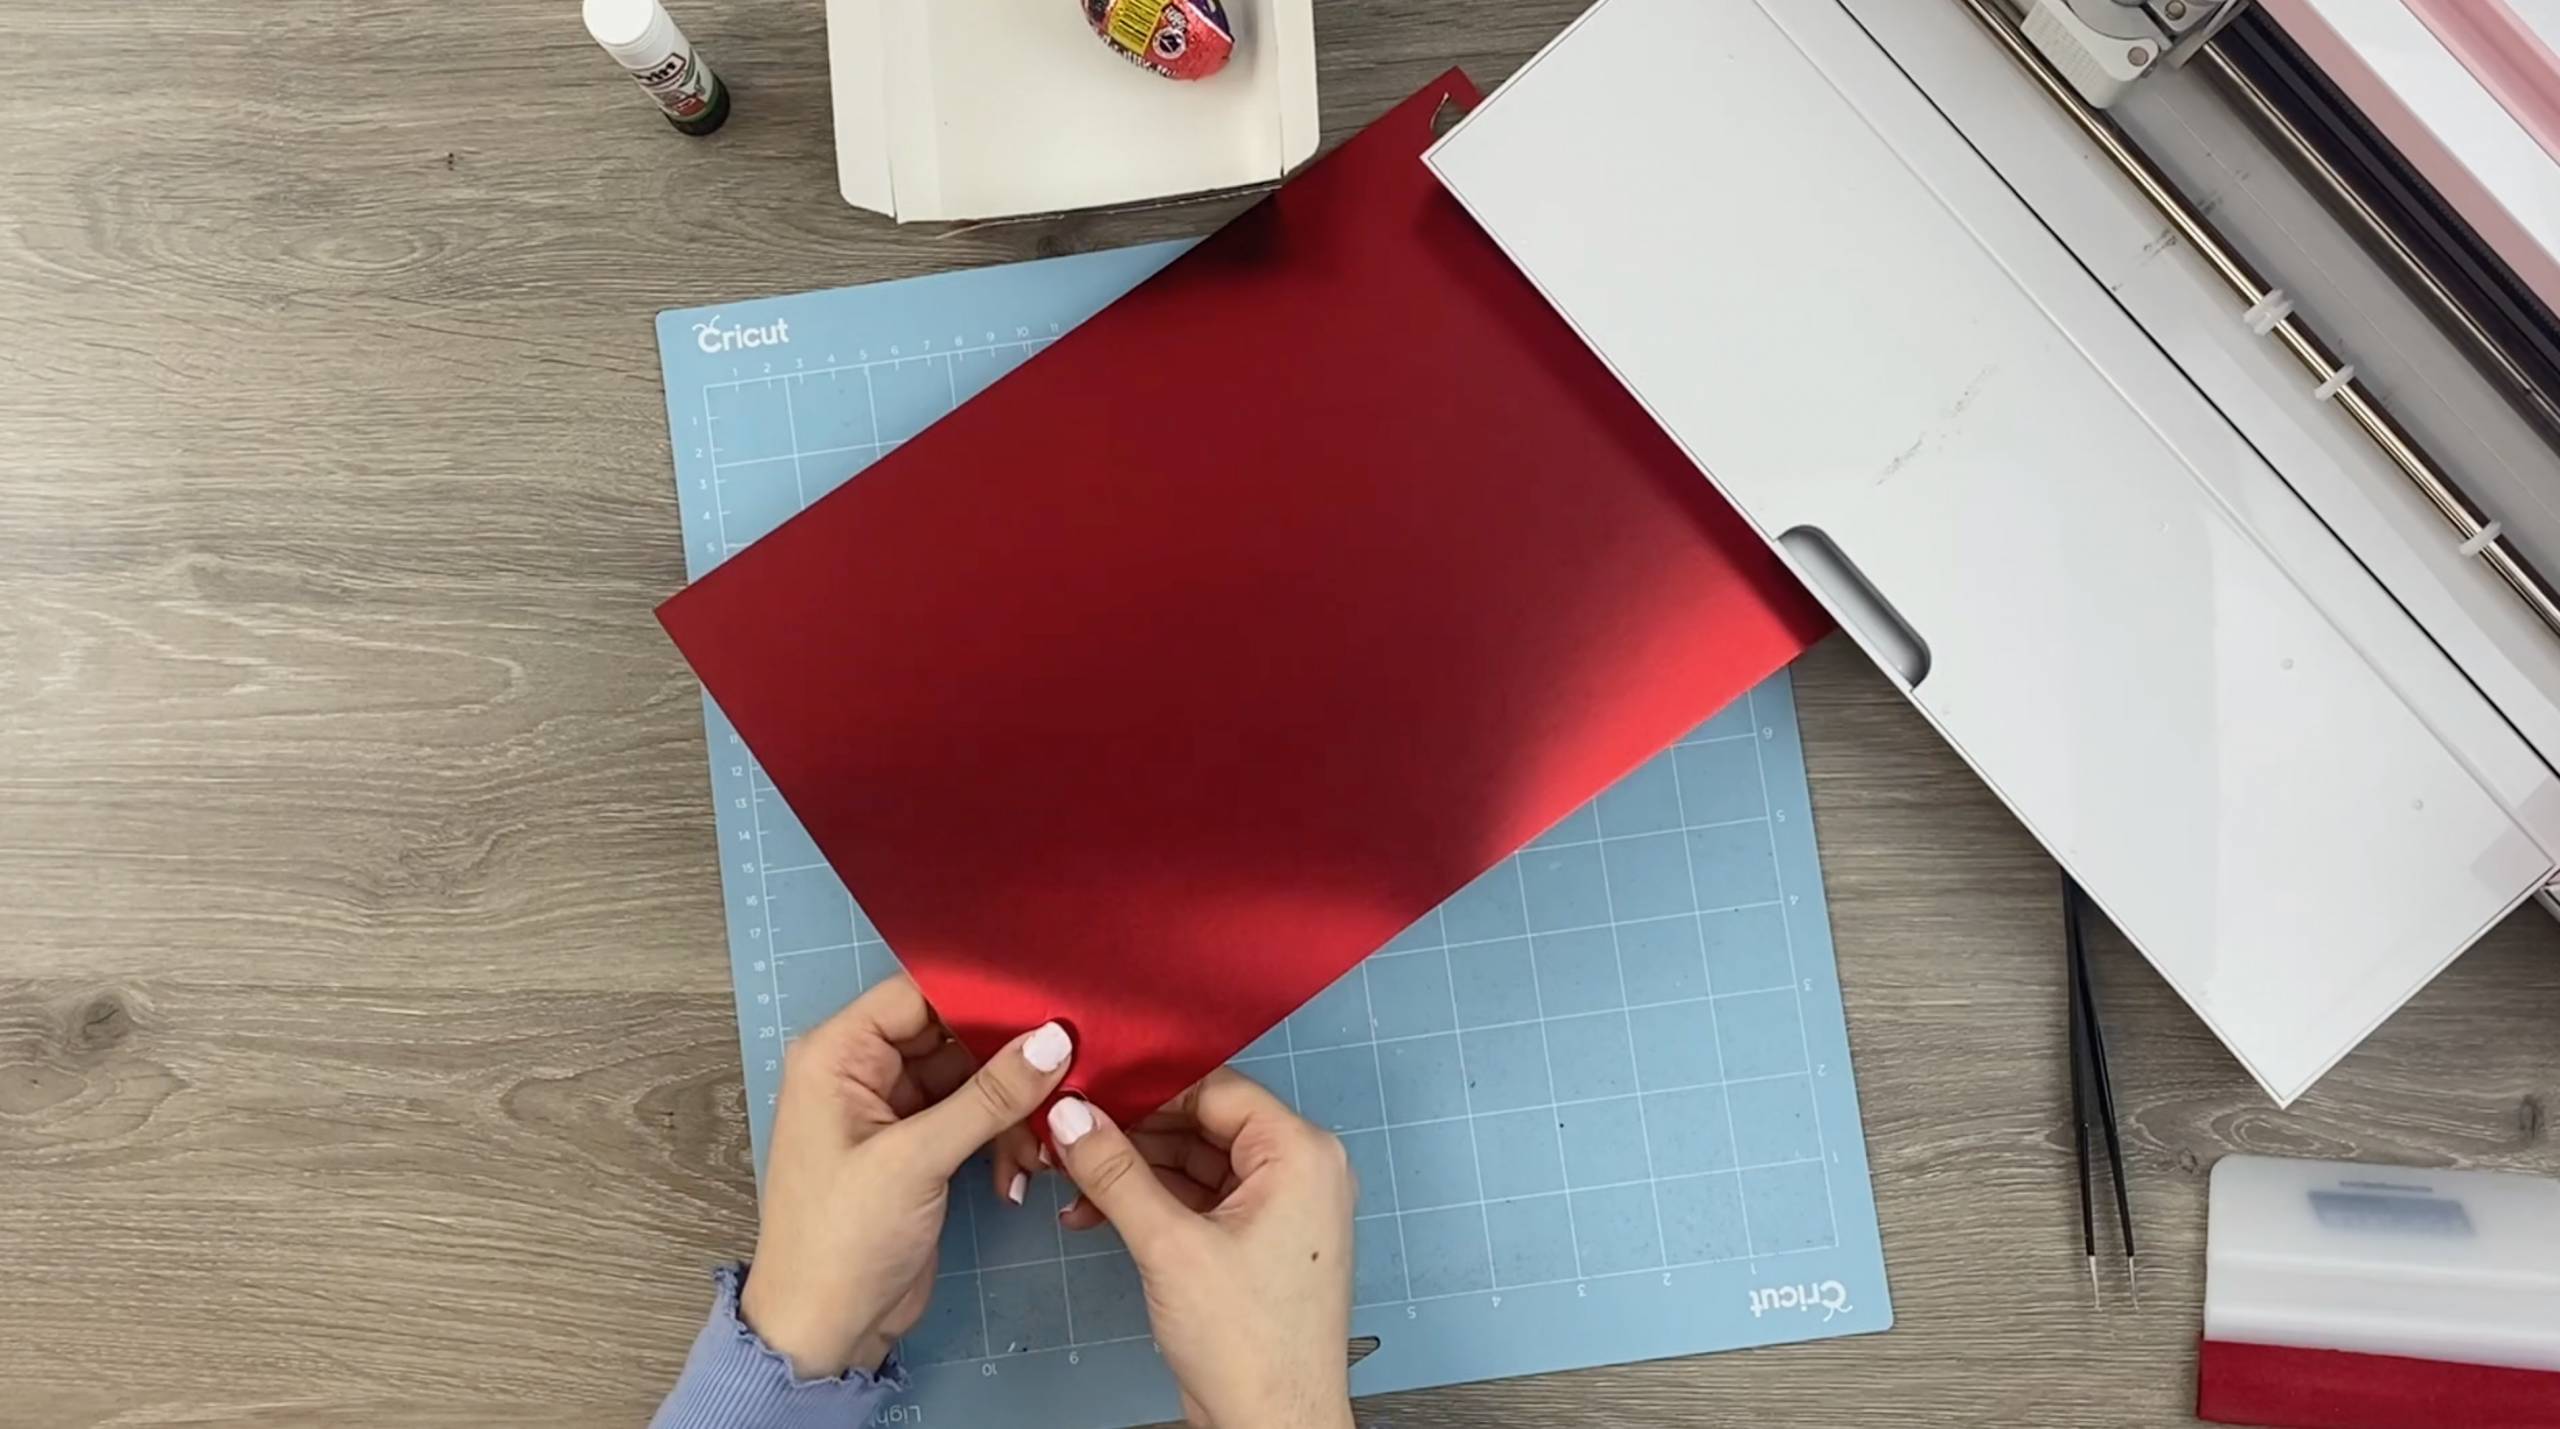
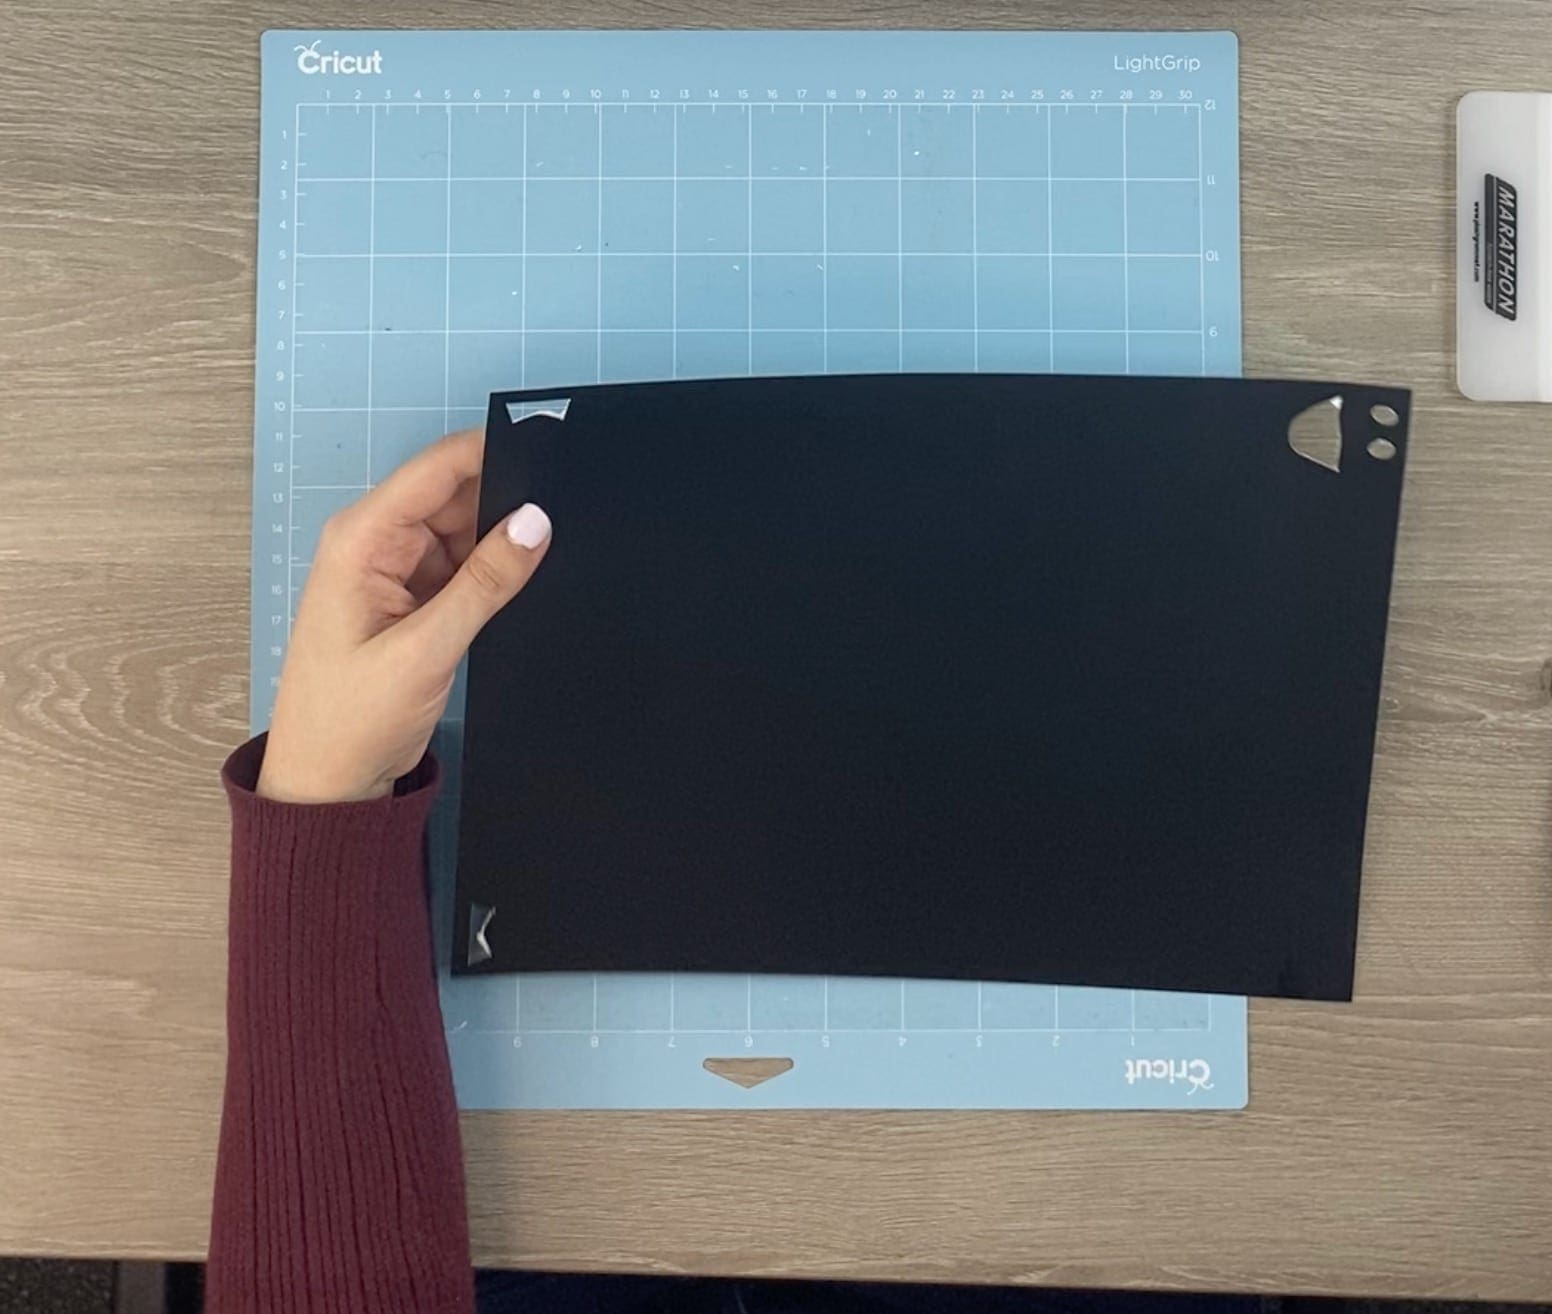
7. Place the Silver satin card onto the cutting mat, rub gently to secure. Load onto the machine and press the cricut symbol to start the cut.
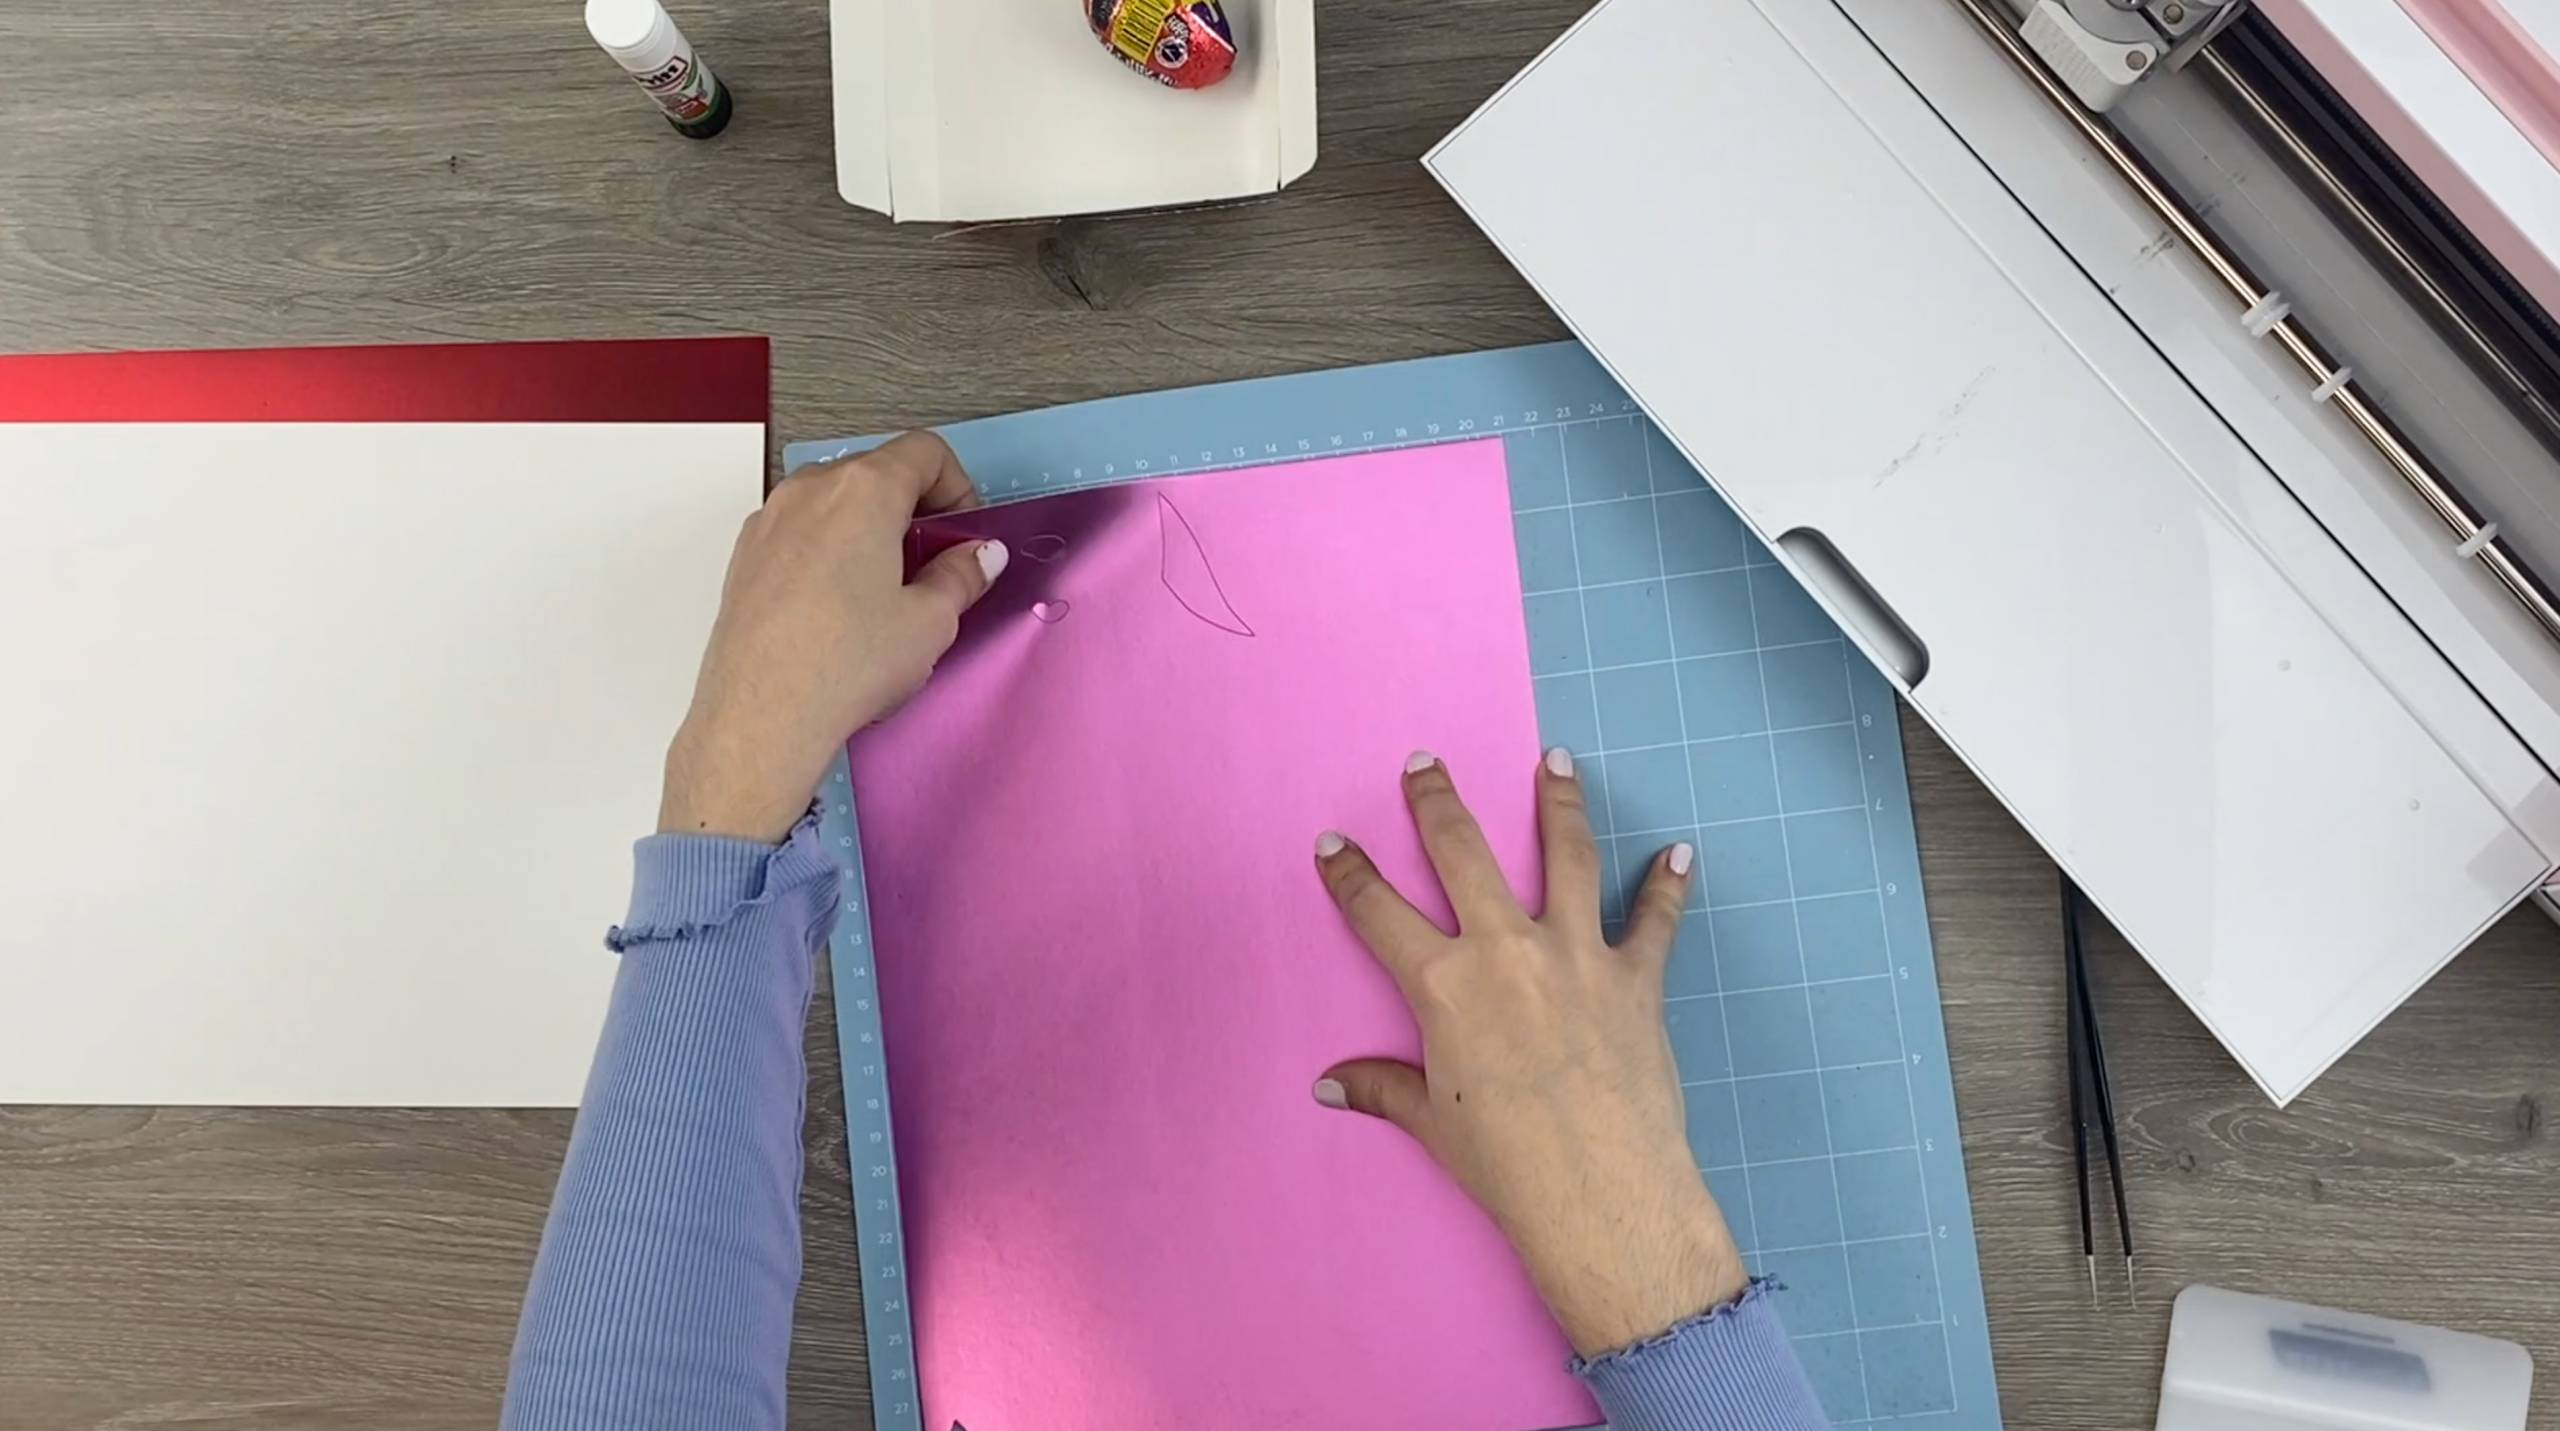
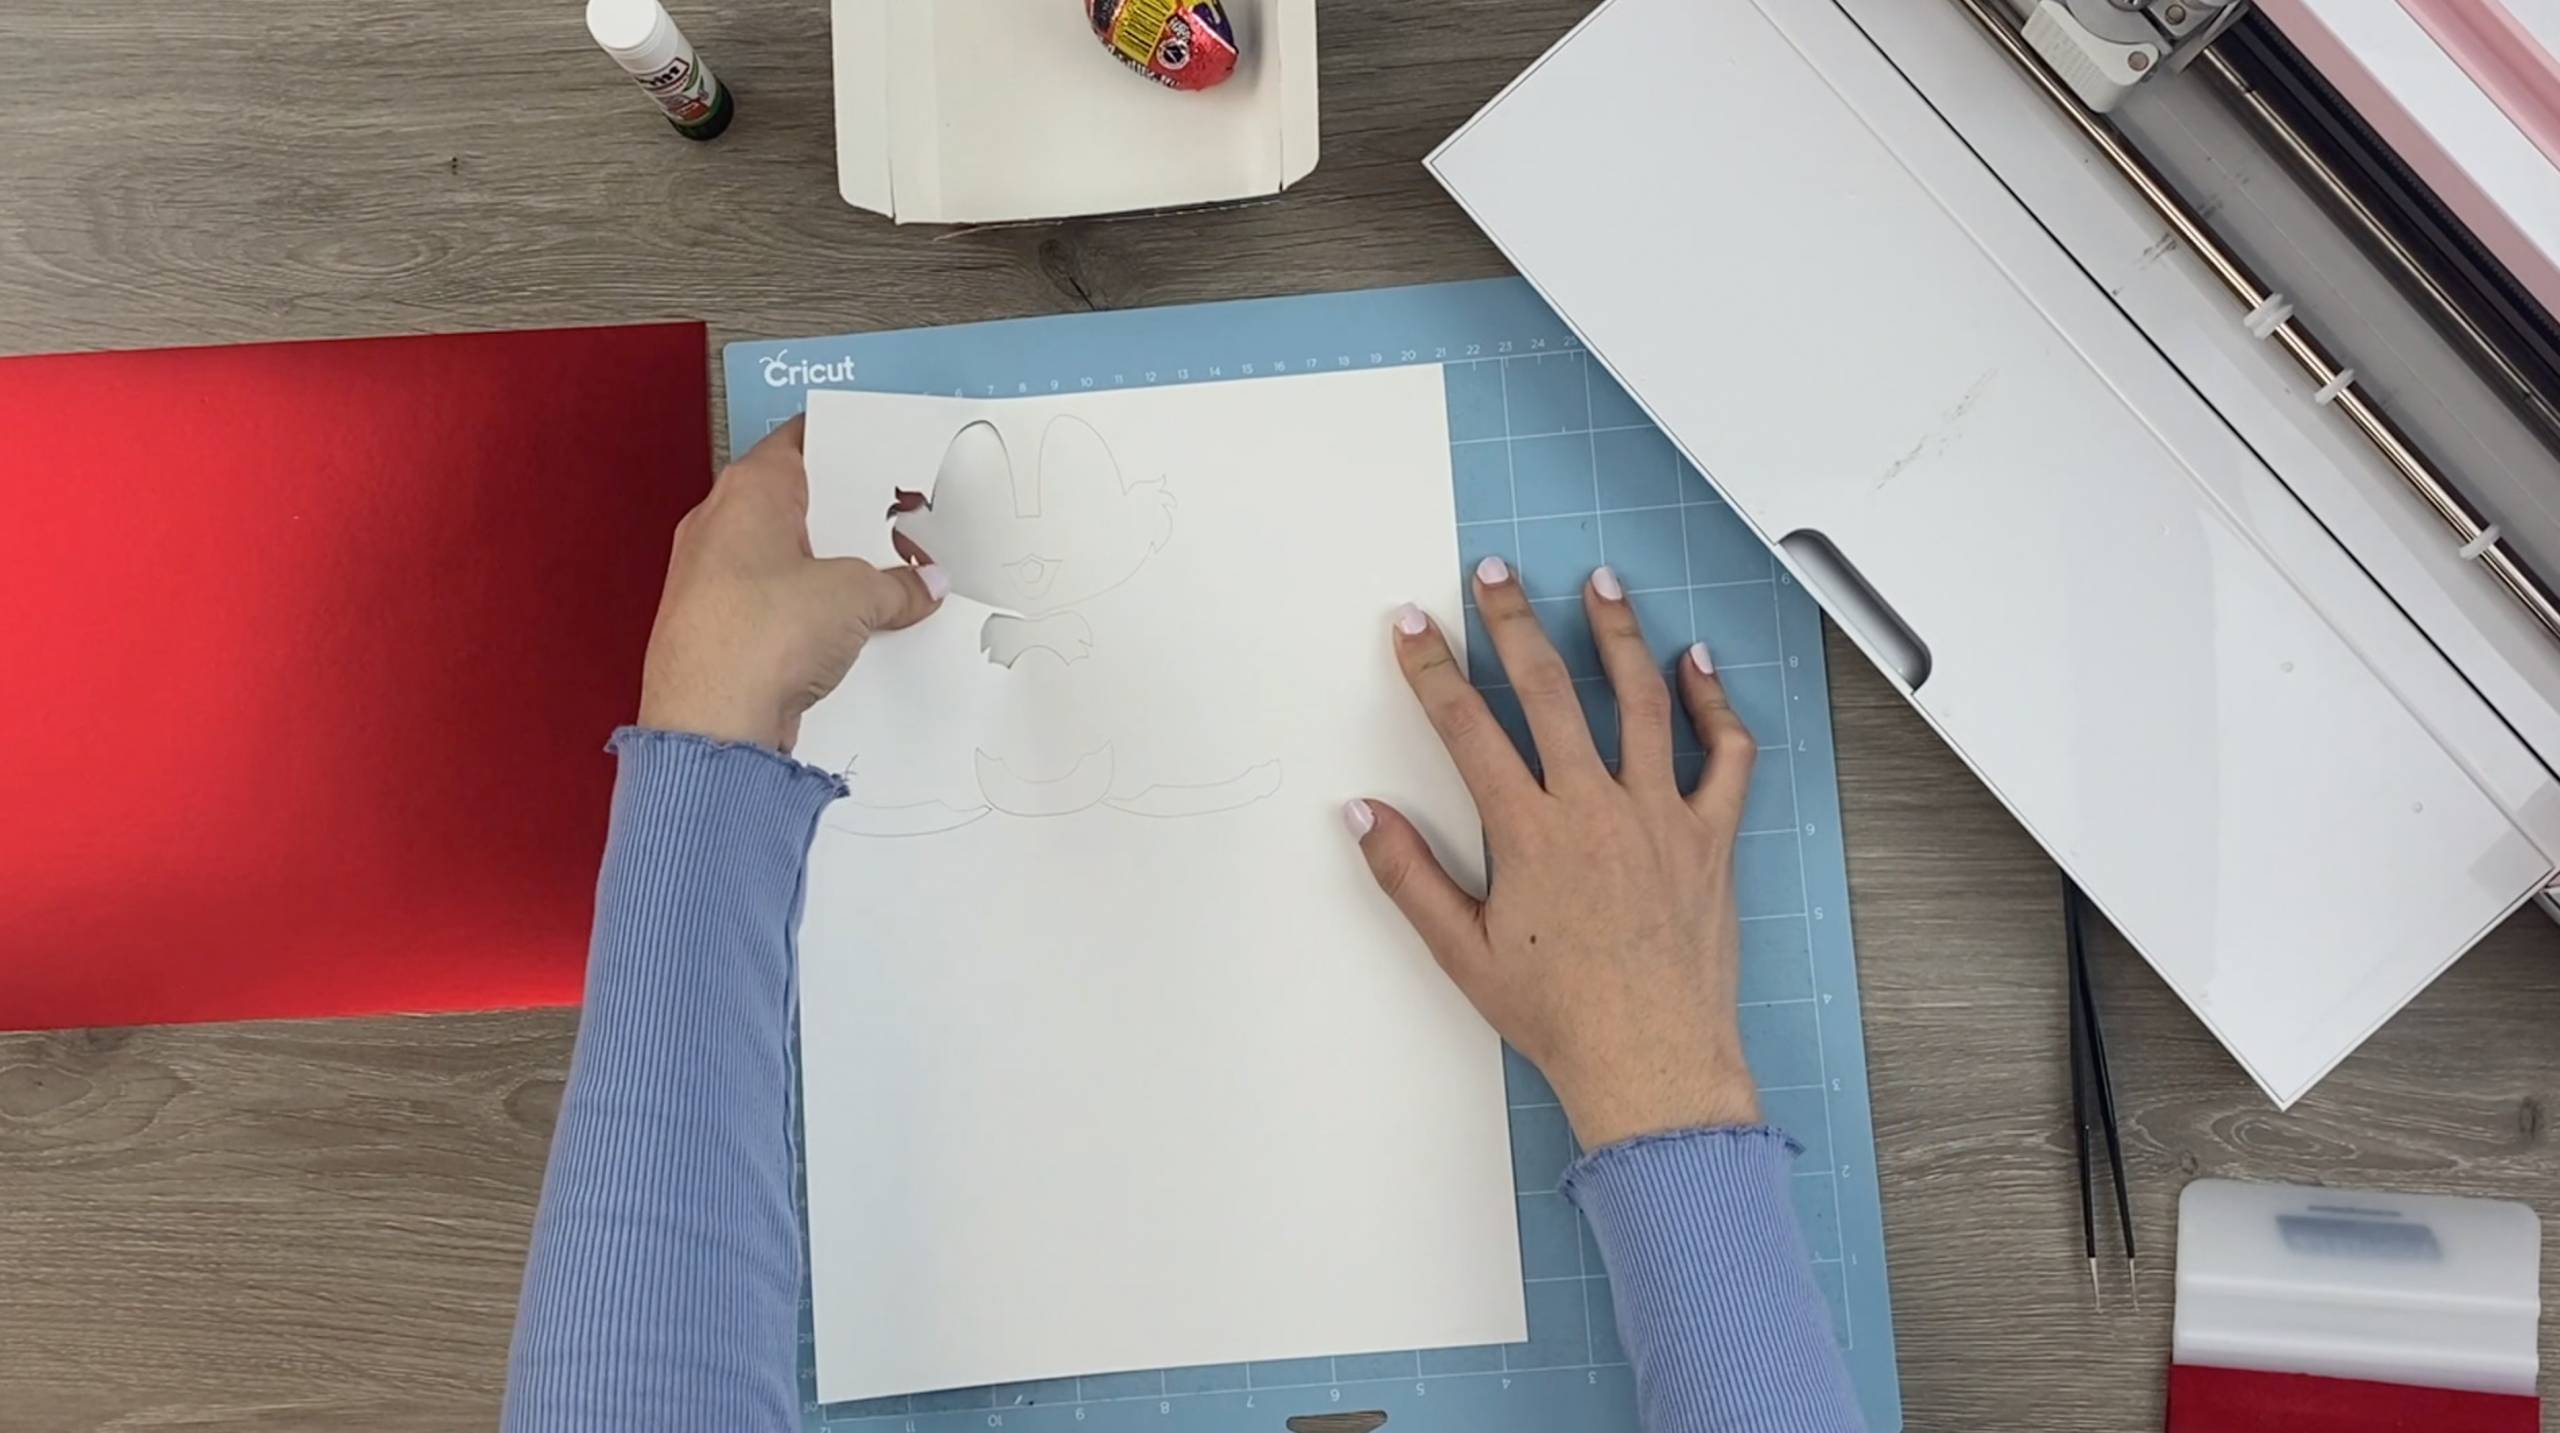
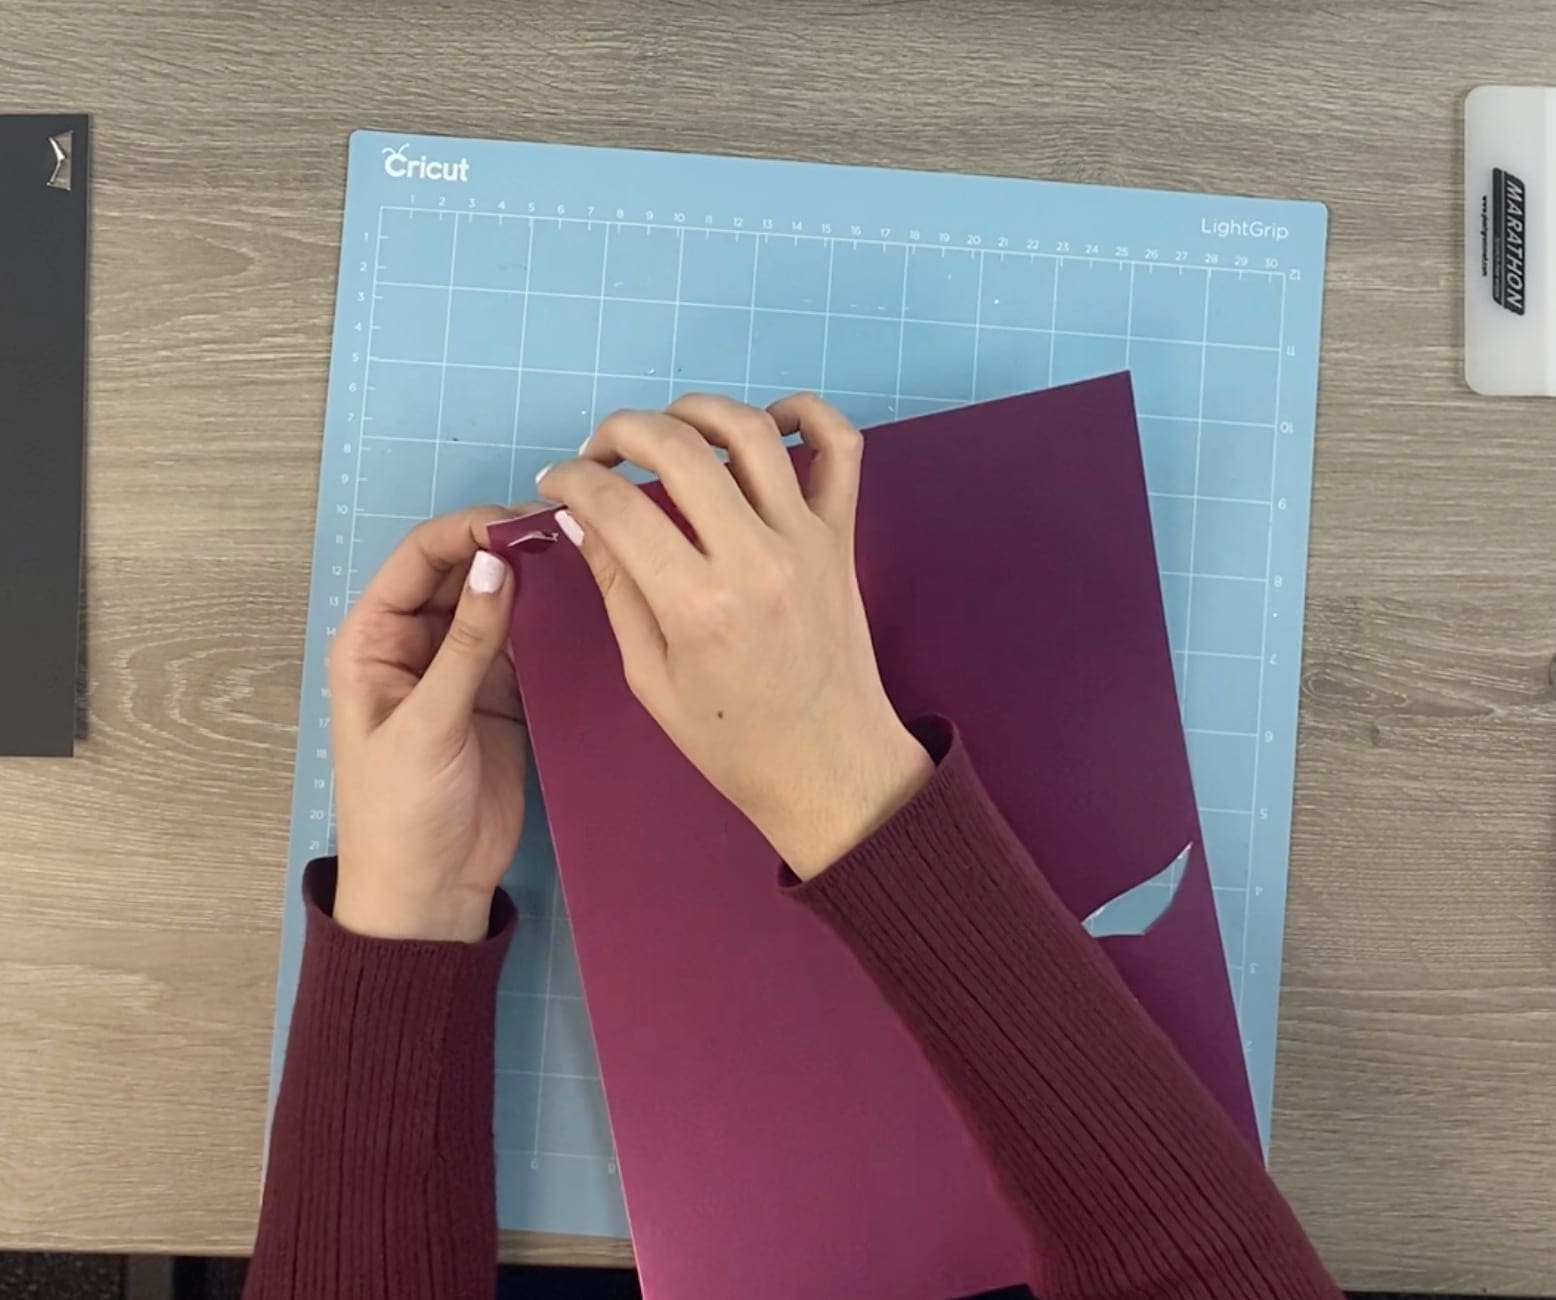
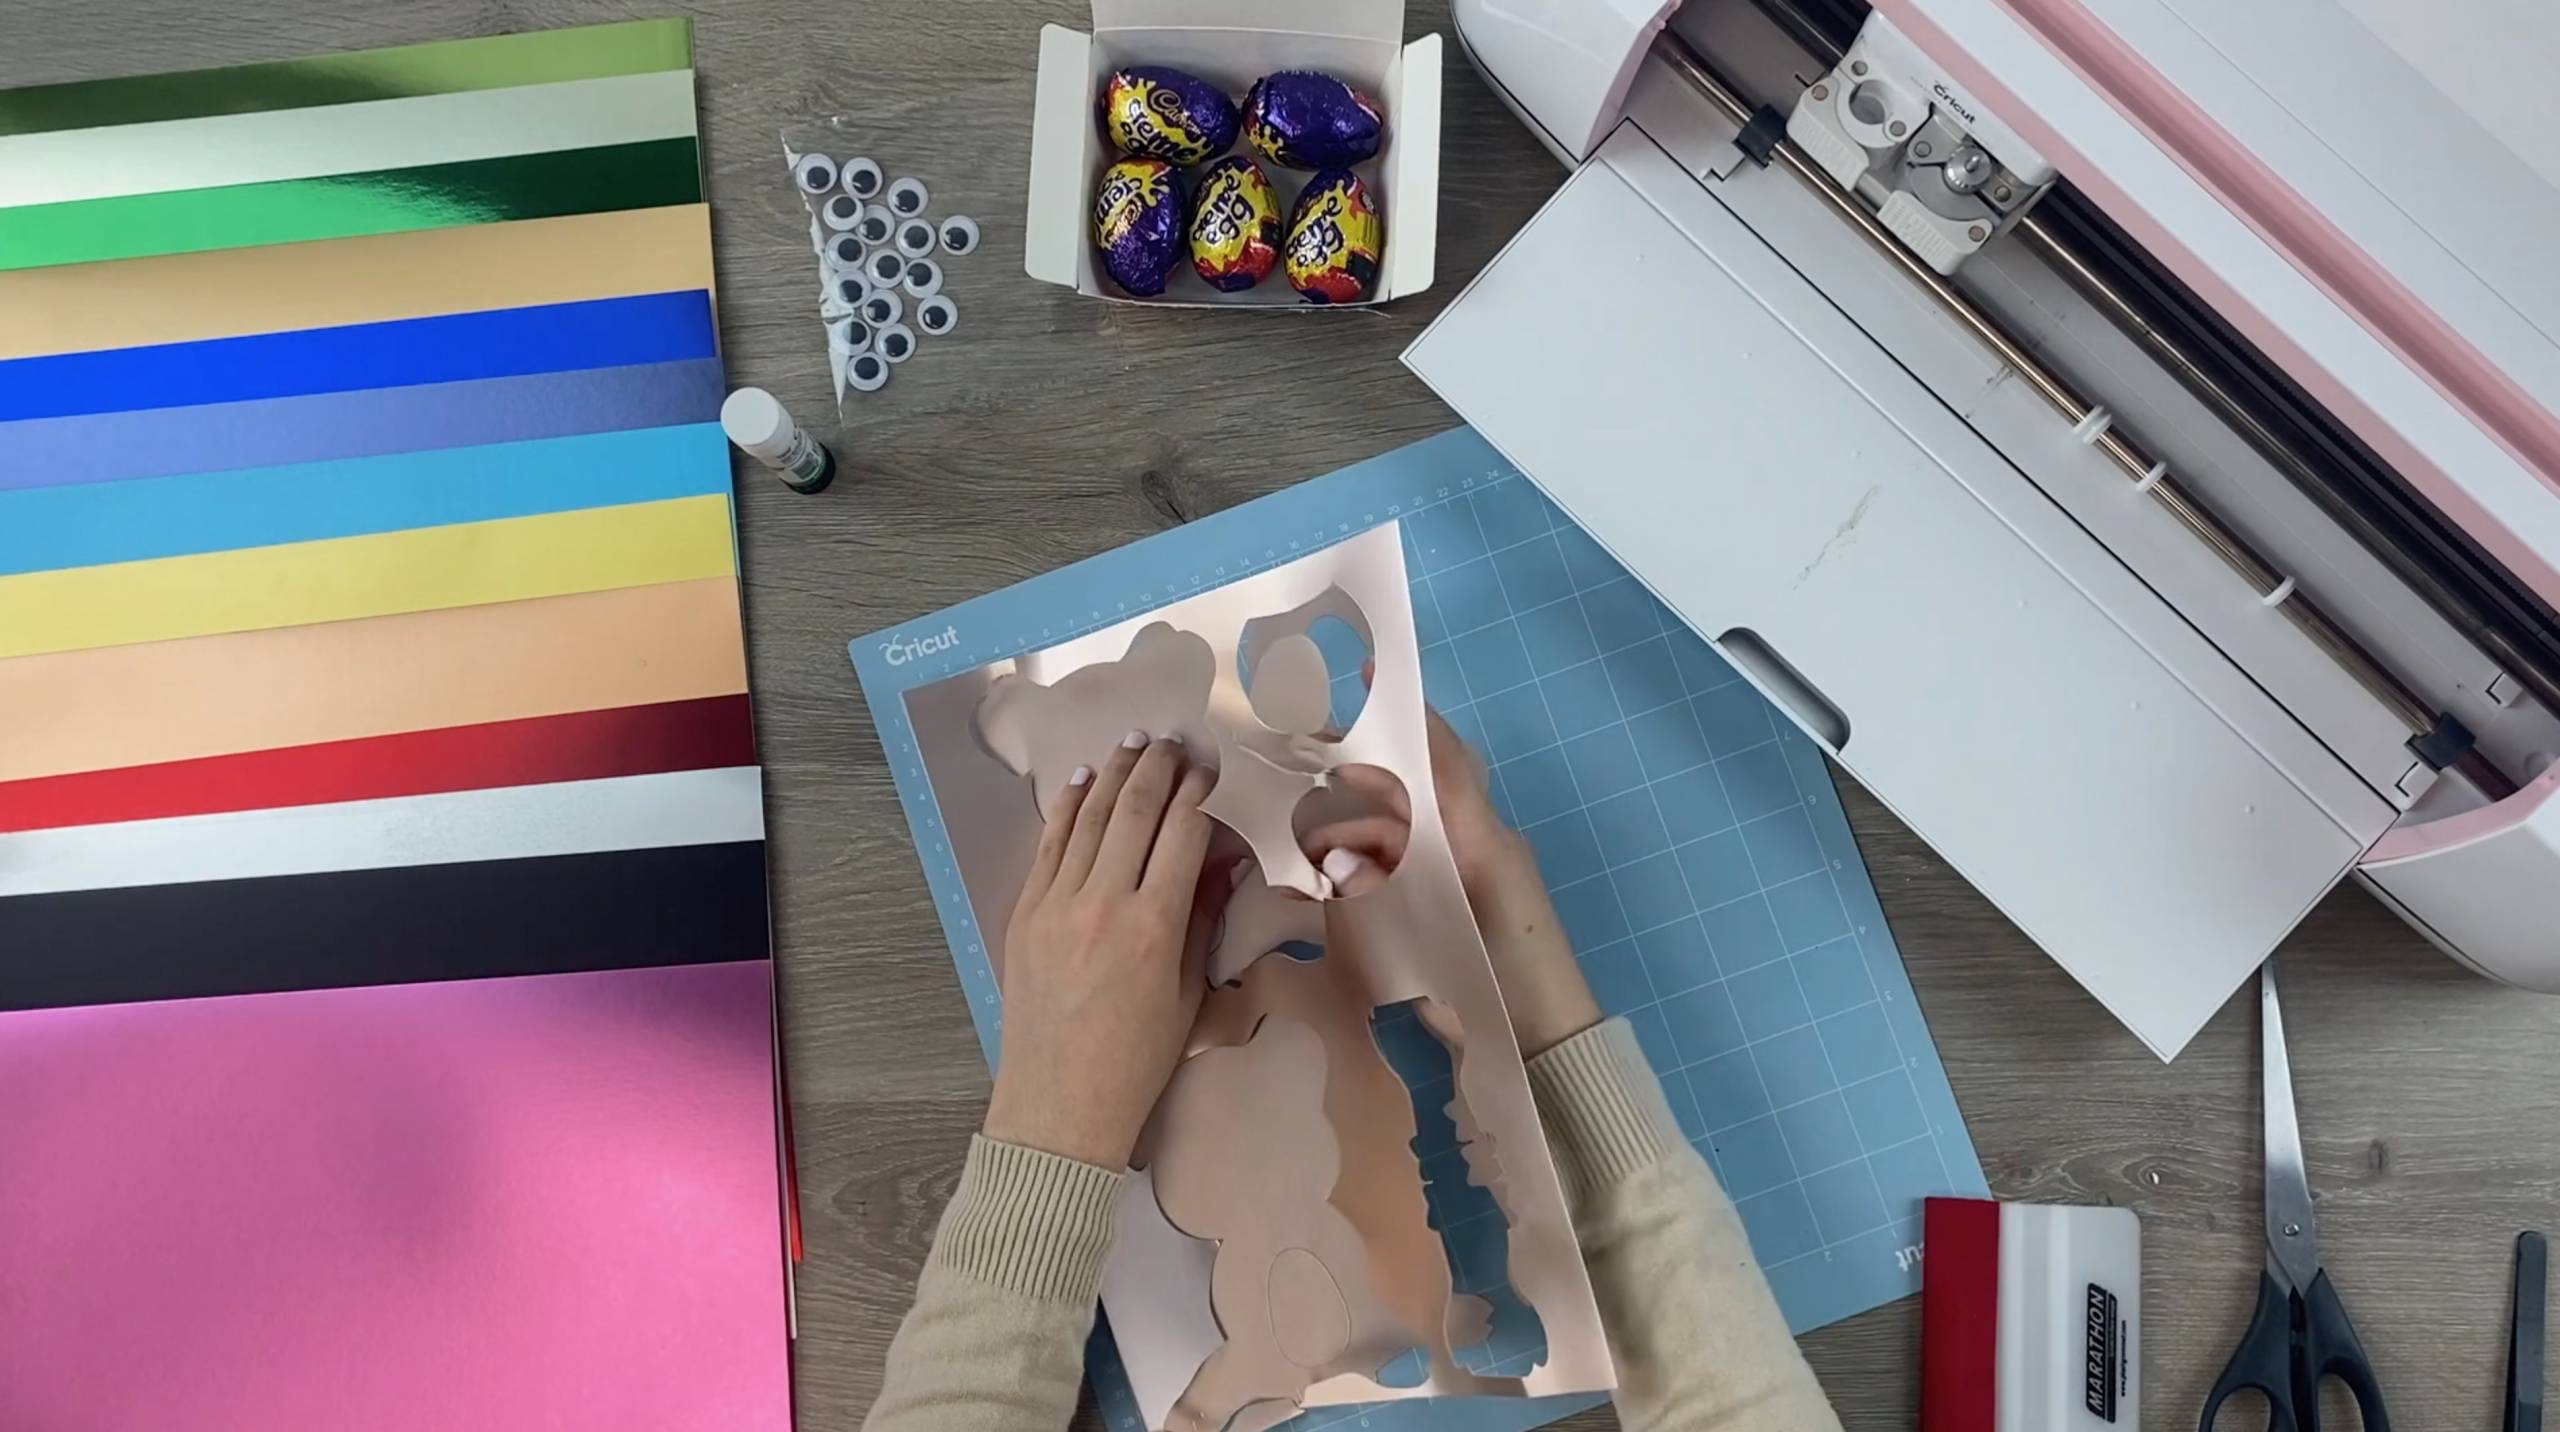
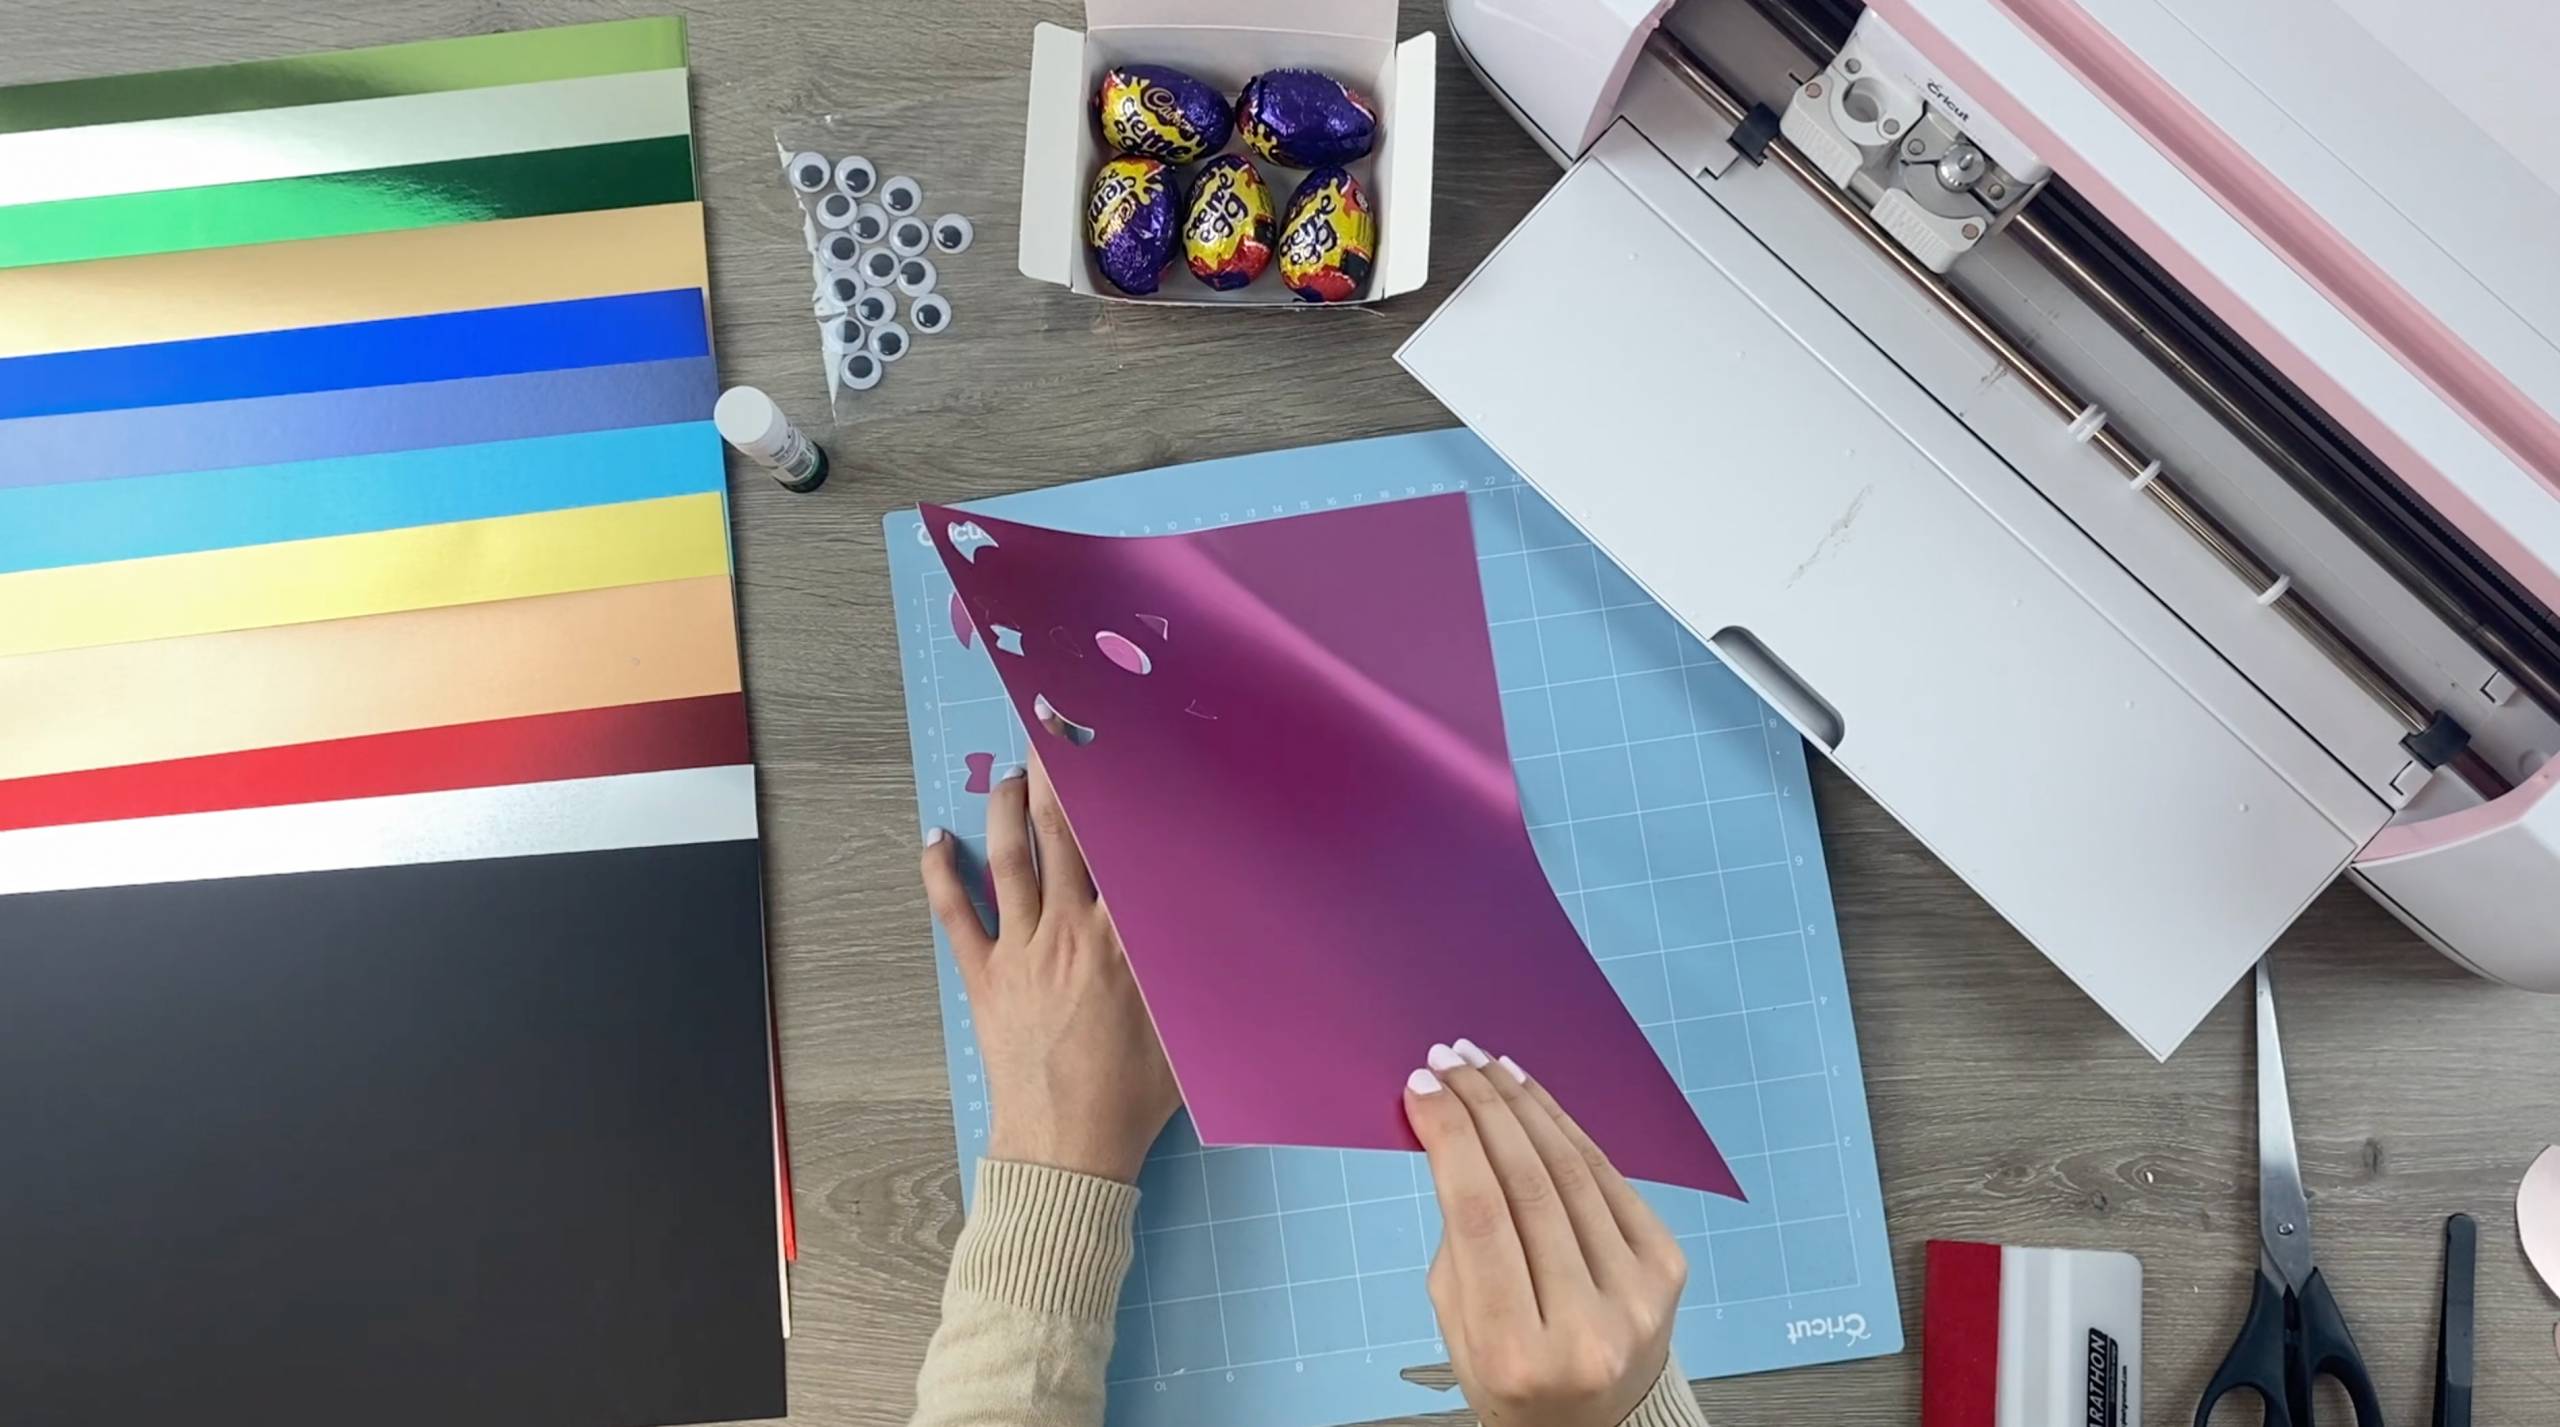
8. When done, unload the mat and gently peel back the card. Some of the shapes will probably need to be popped out of the card. When all shapes are separated, place them to one side.
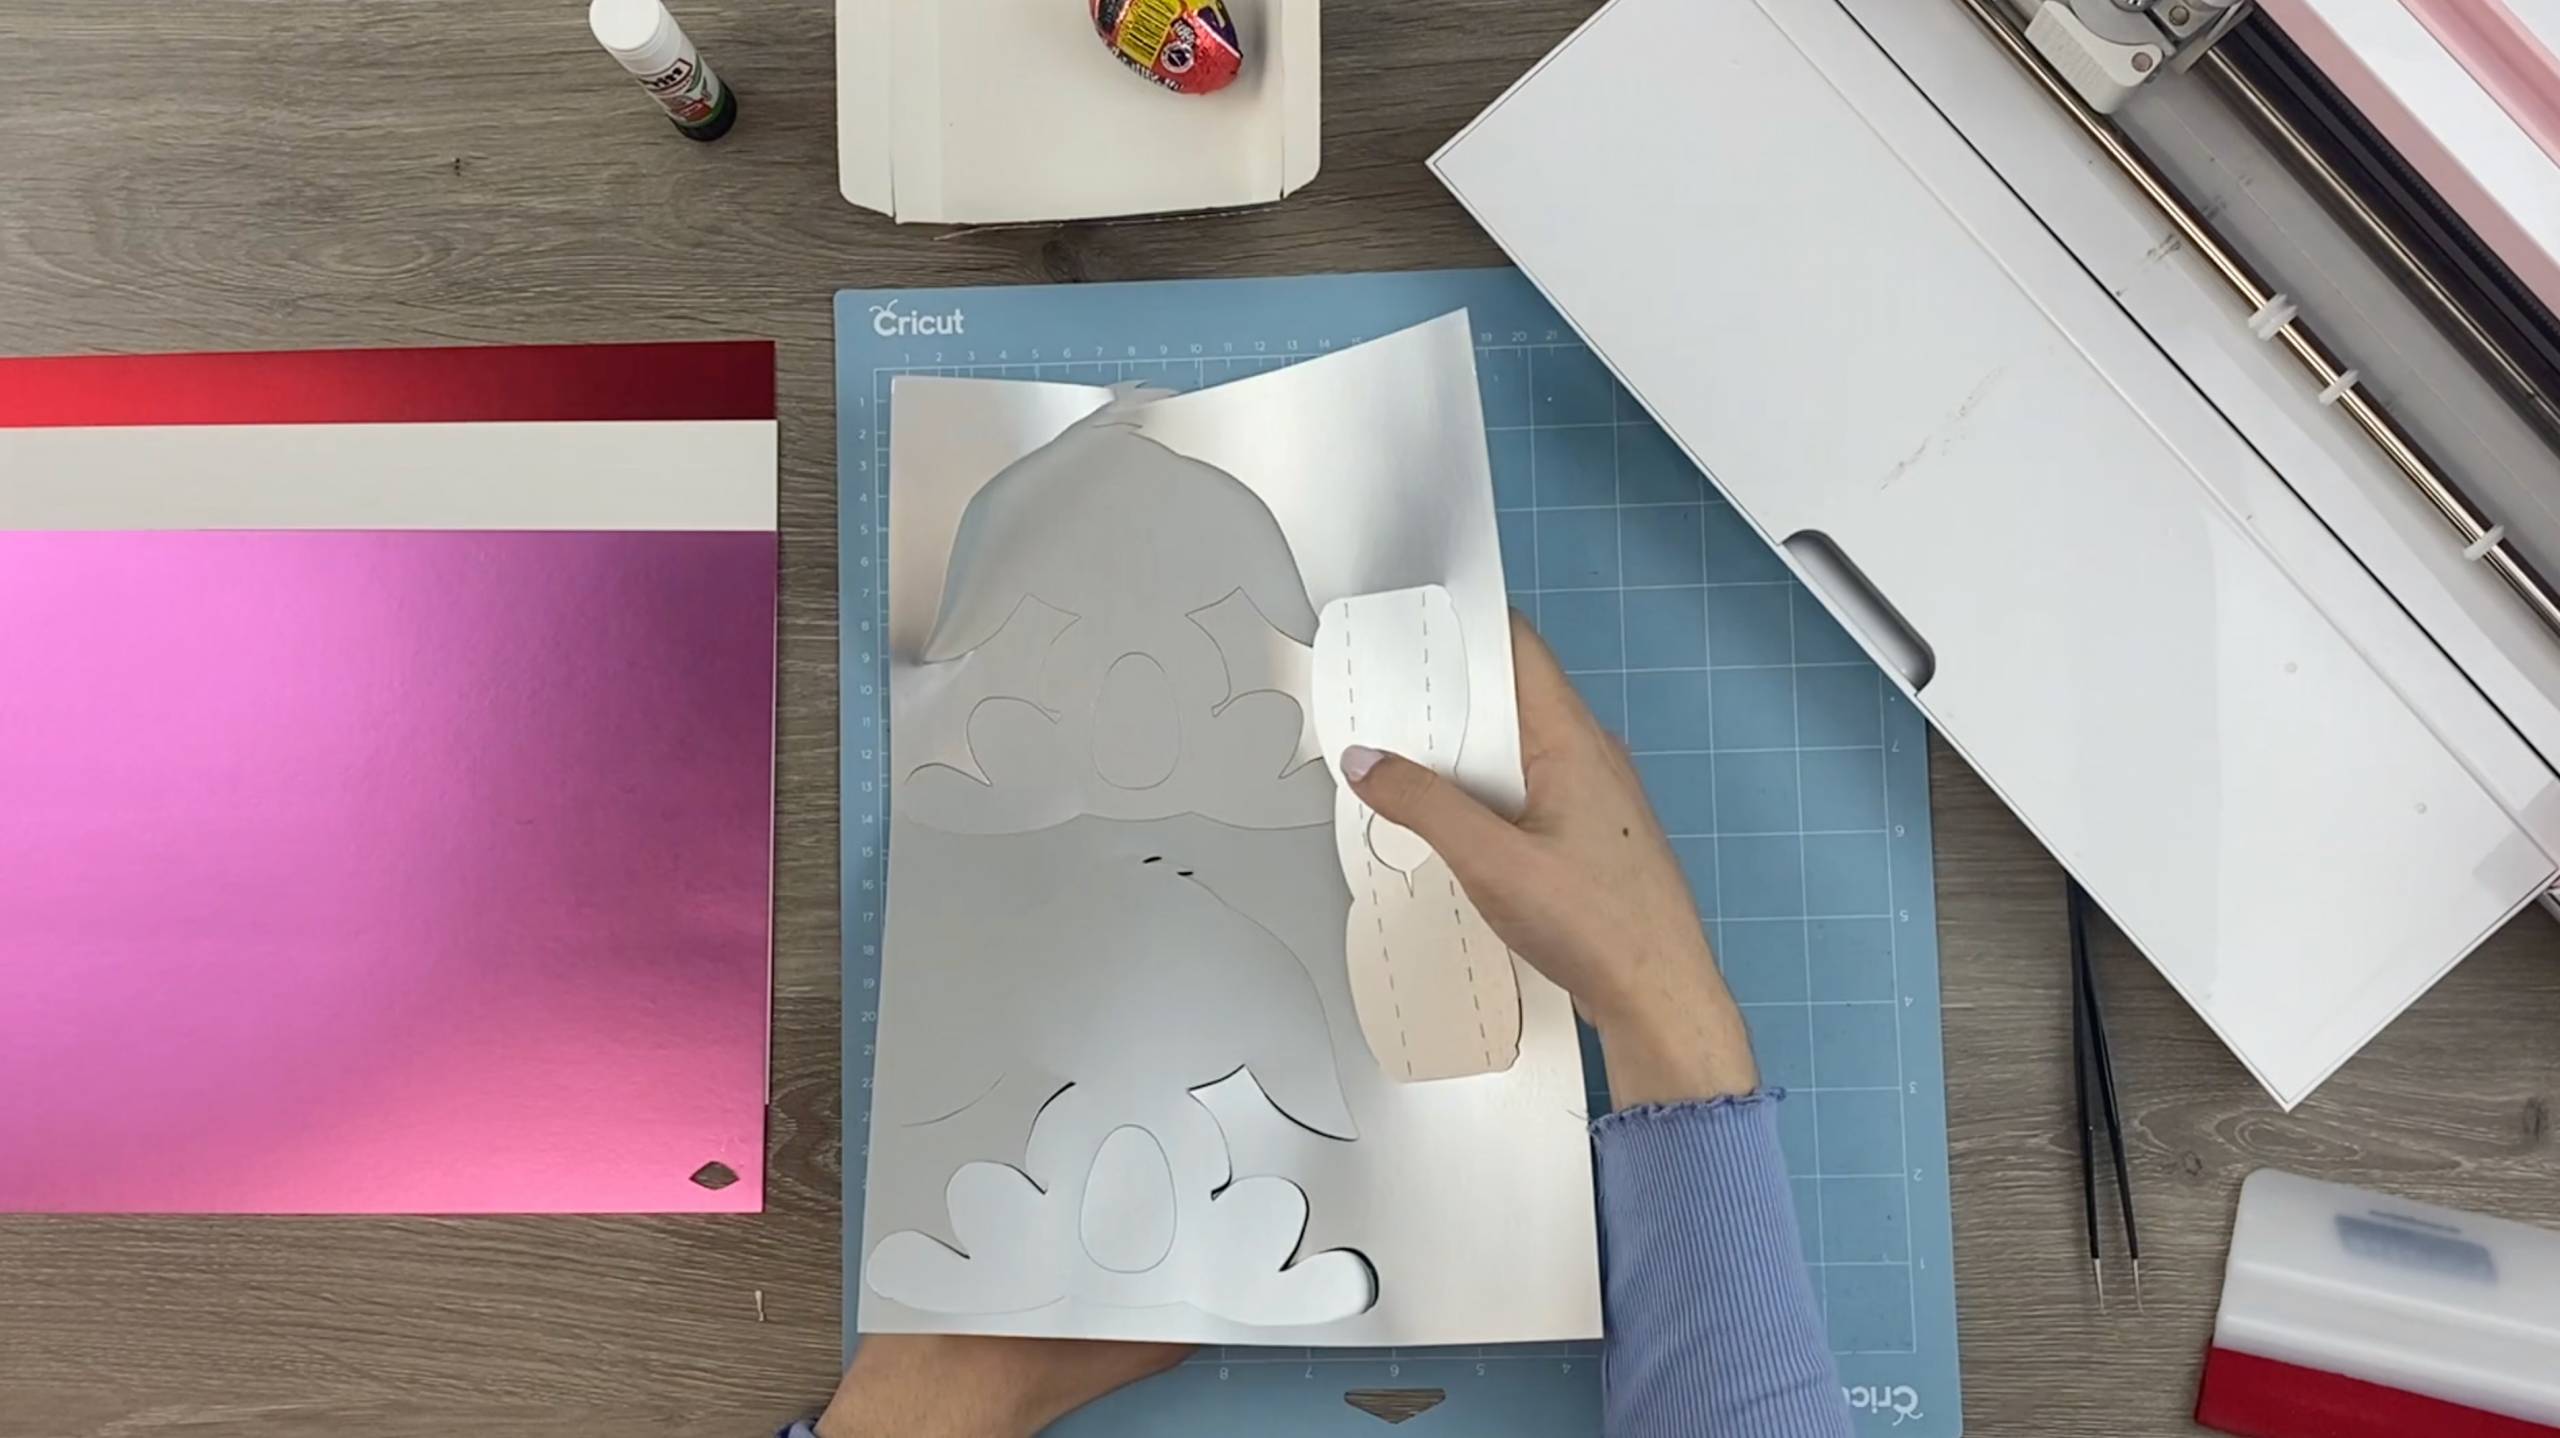
9. Repeat steps 7 and 8 with the remaining coloured card, in this order: Pink Opal satin card for the ears, nose and tongue, White craft card for the white fur and teeth and Ruby Red satin card for the mouth.
10. Firstly stick the ears onto the base as shown below. Next, stick the white feet and belly fur down. Thirdly, stick the white face fur down, then the ruby red mouth, tongue and teeth. Finally stick the nose on.
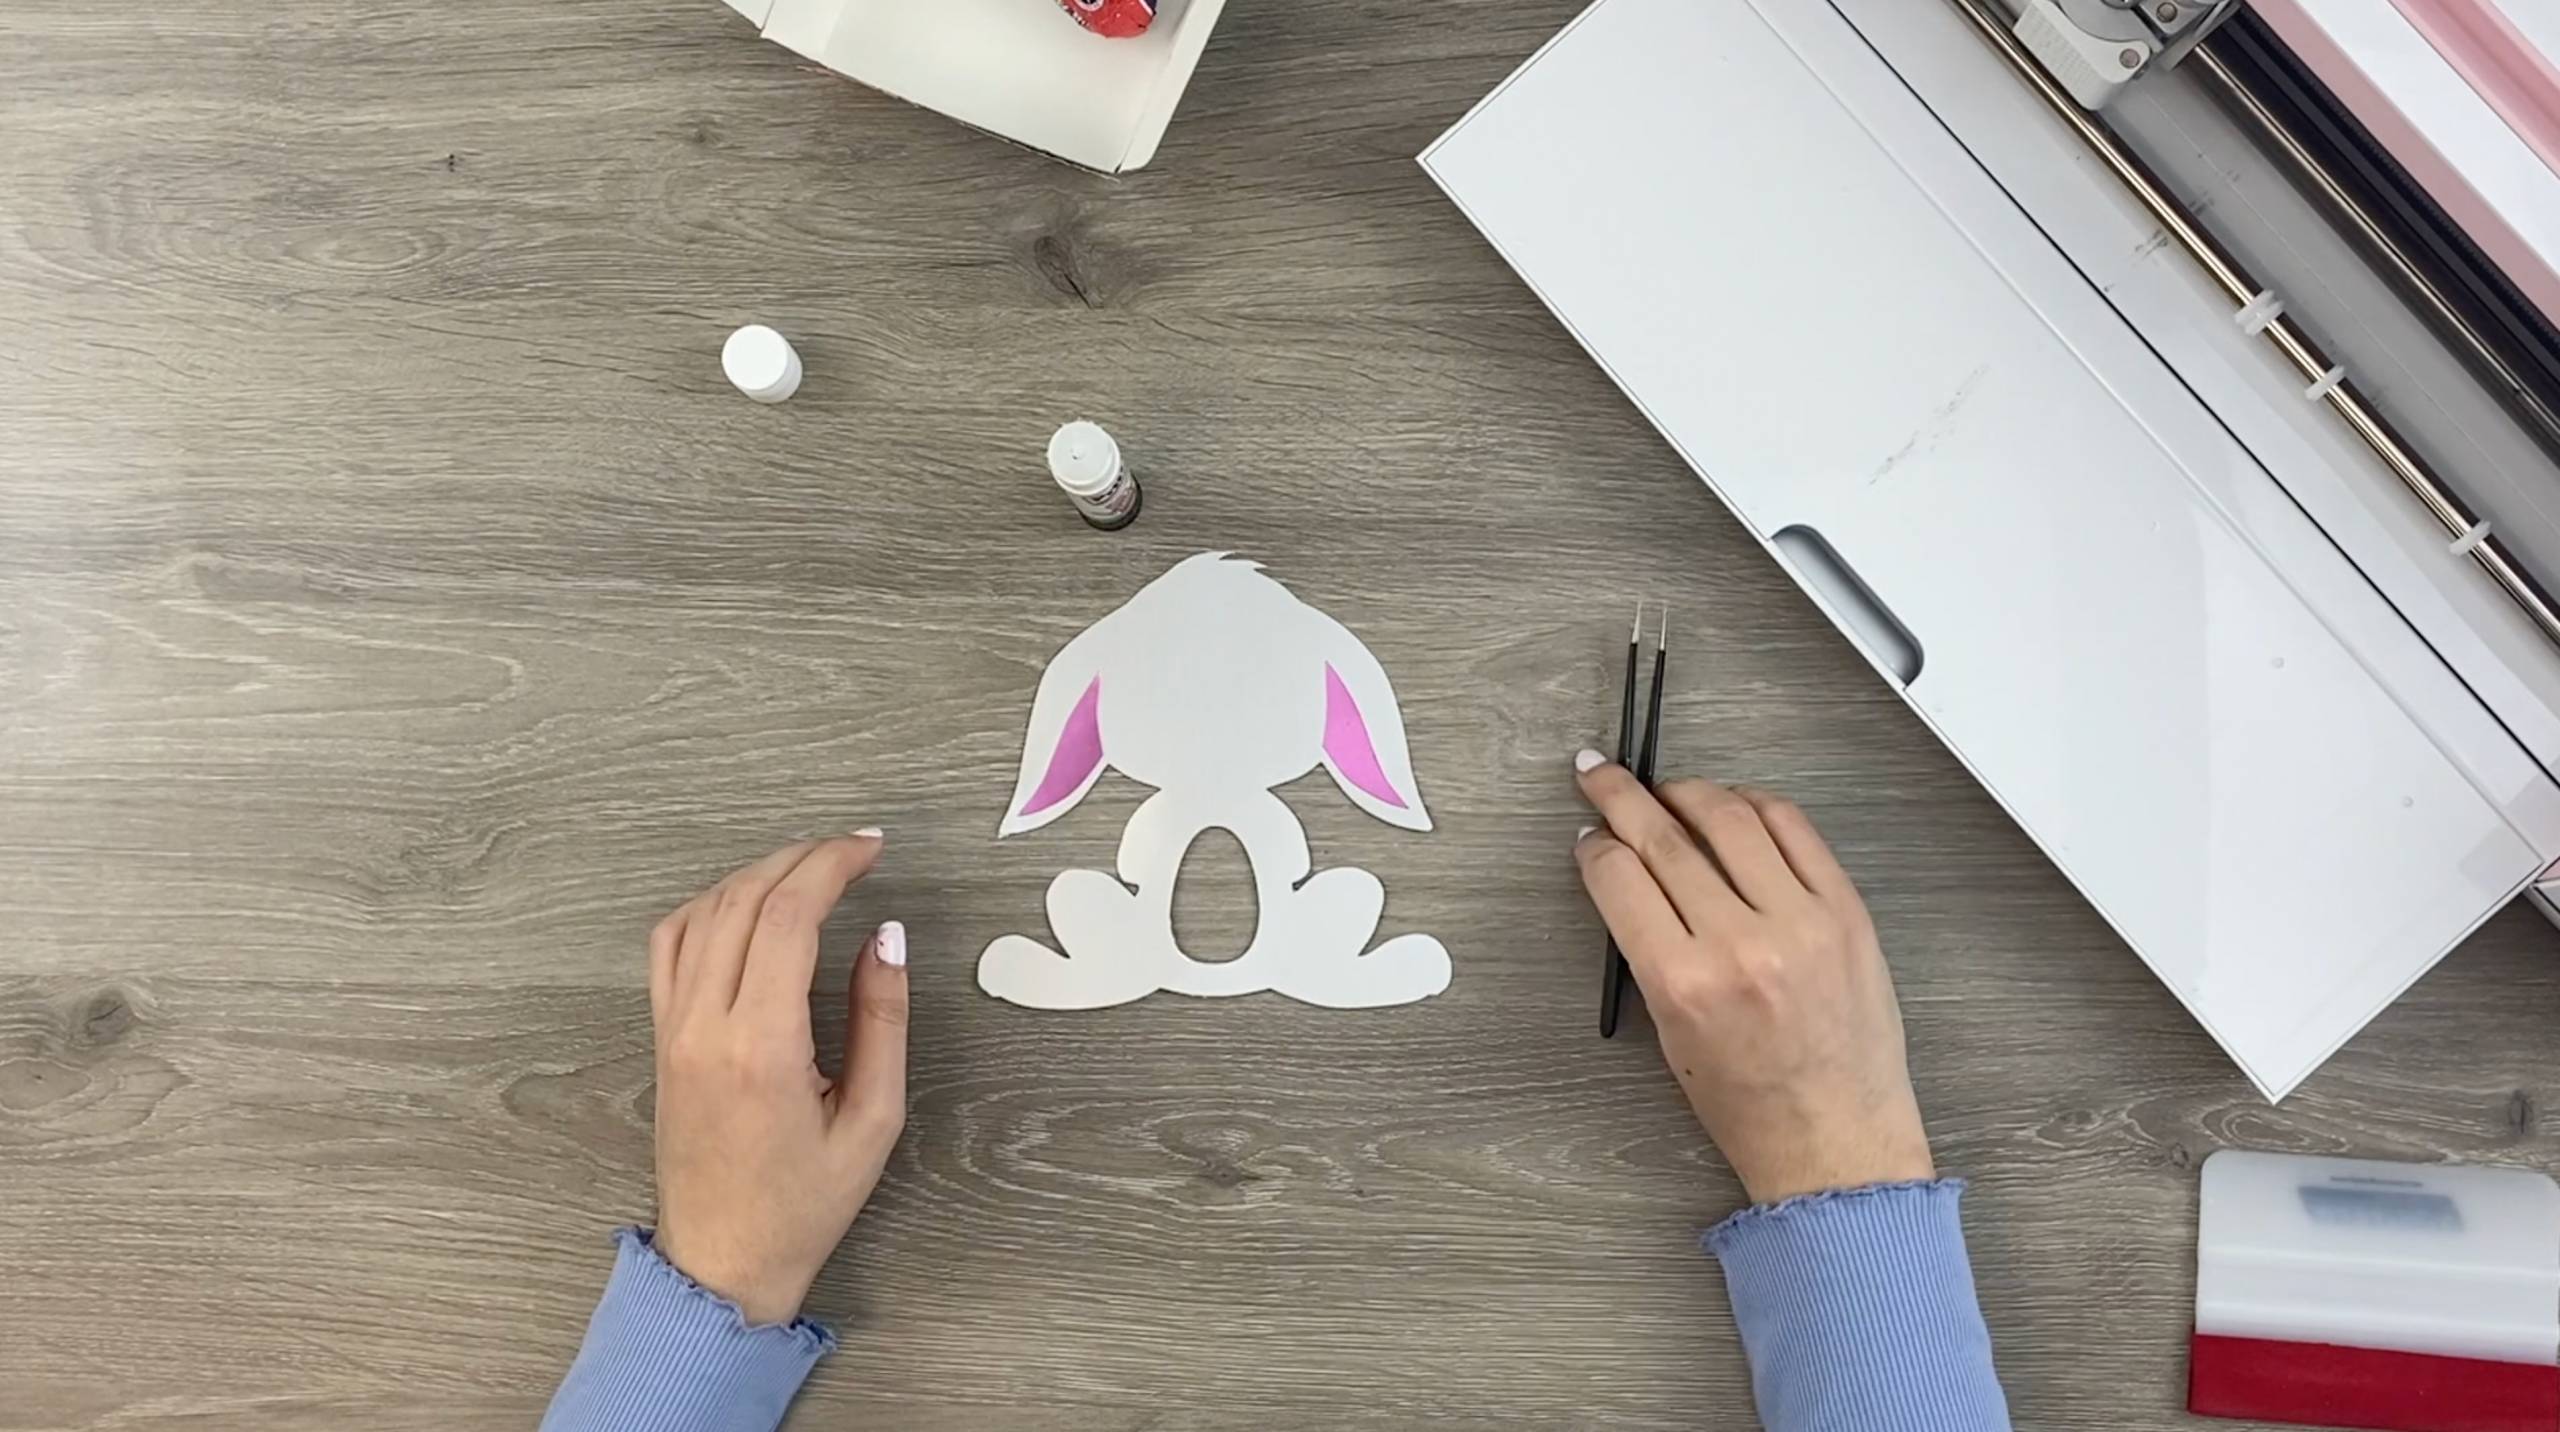
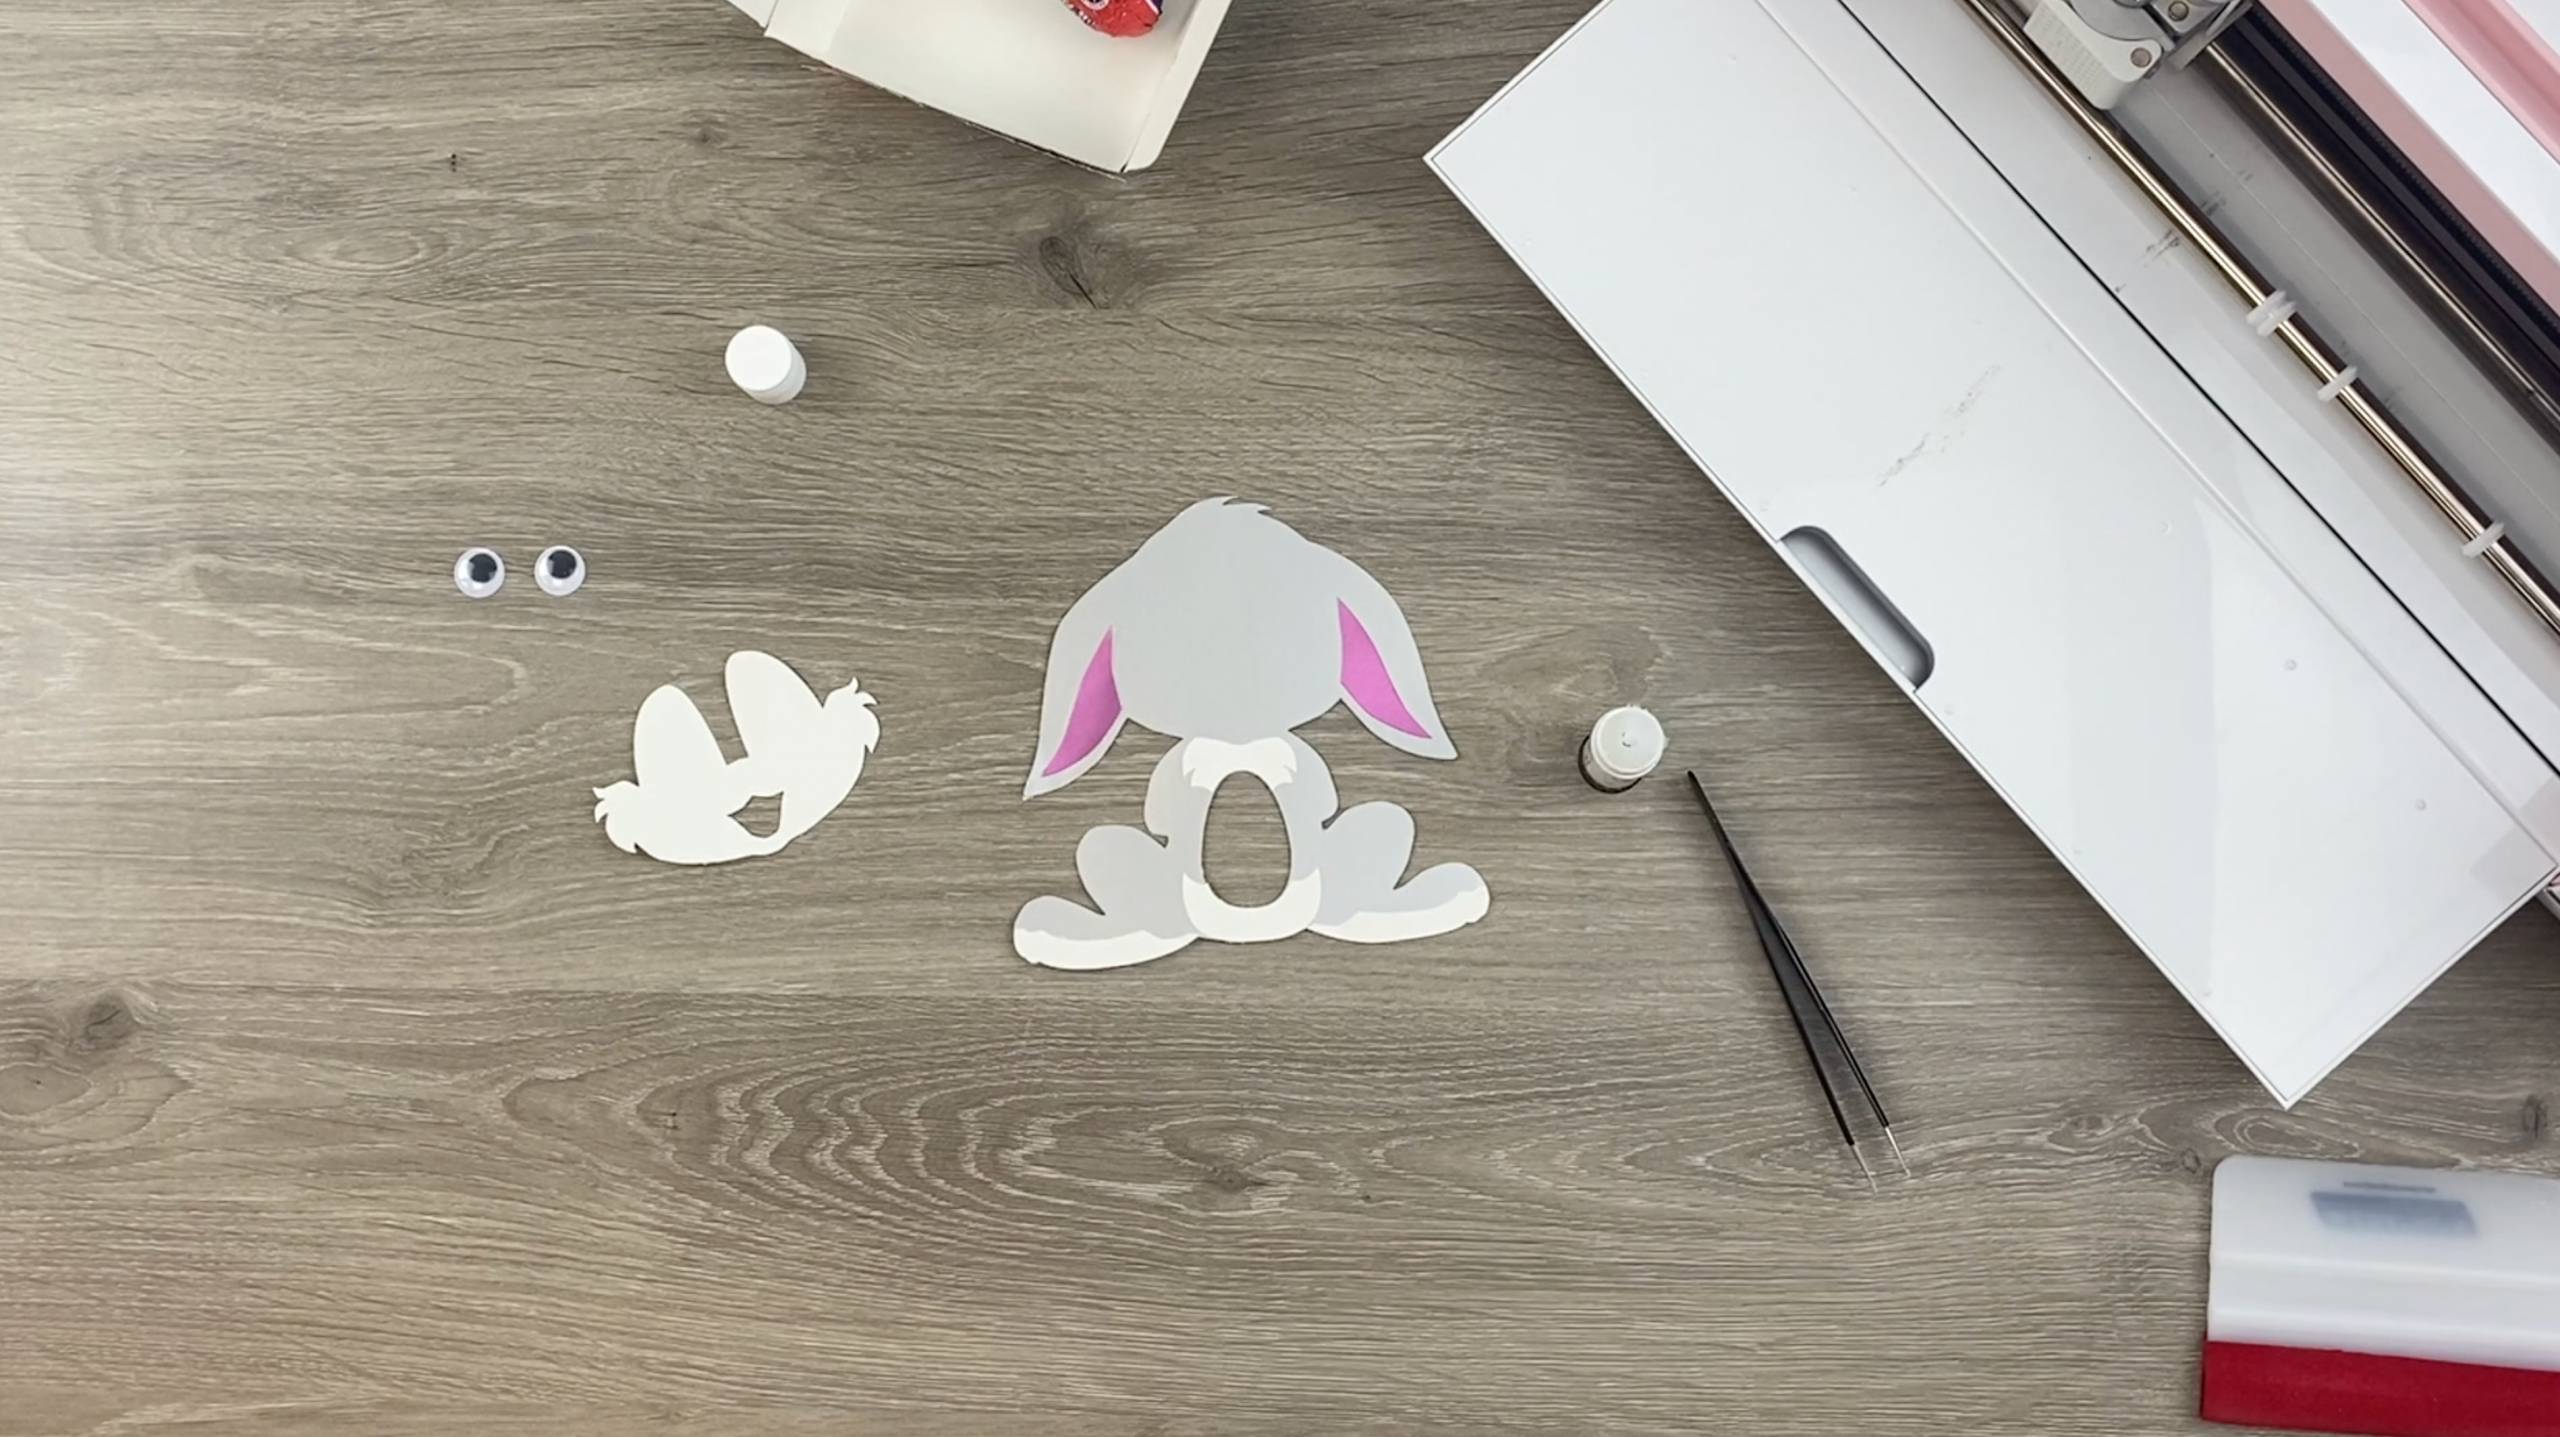
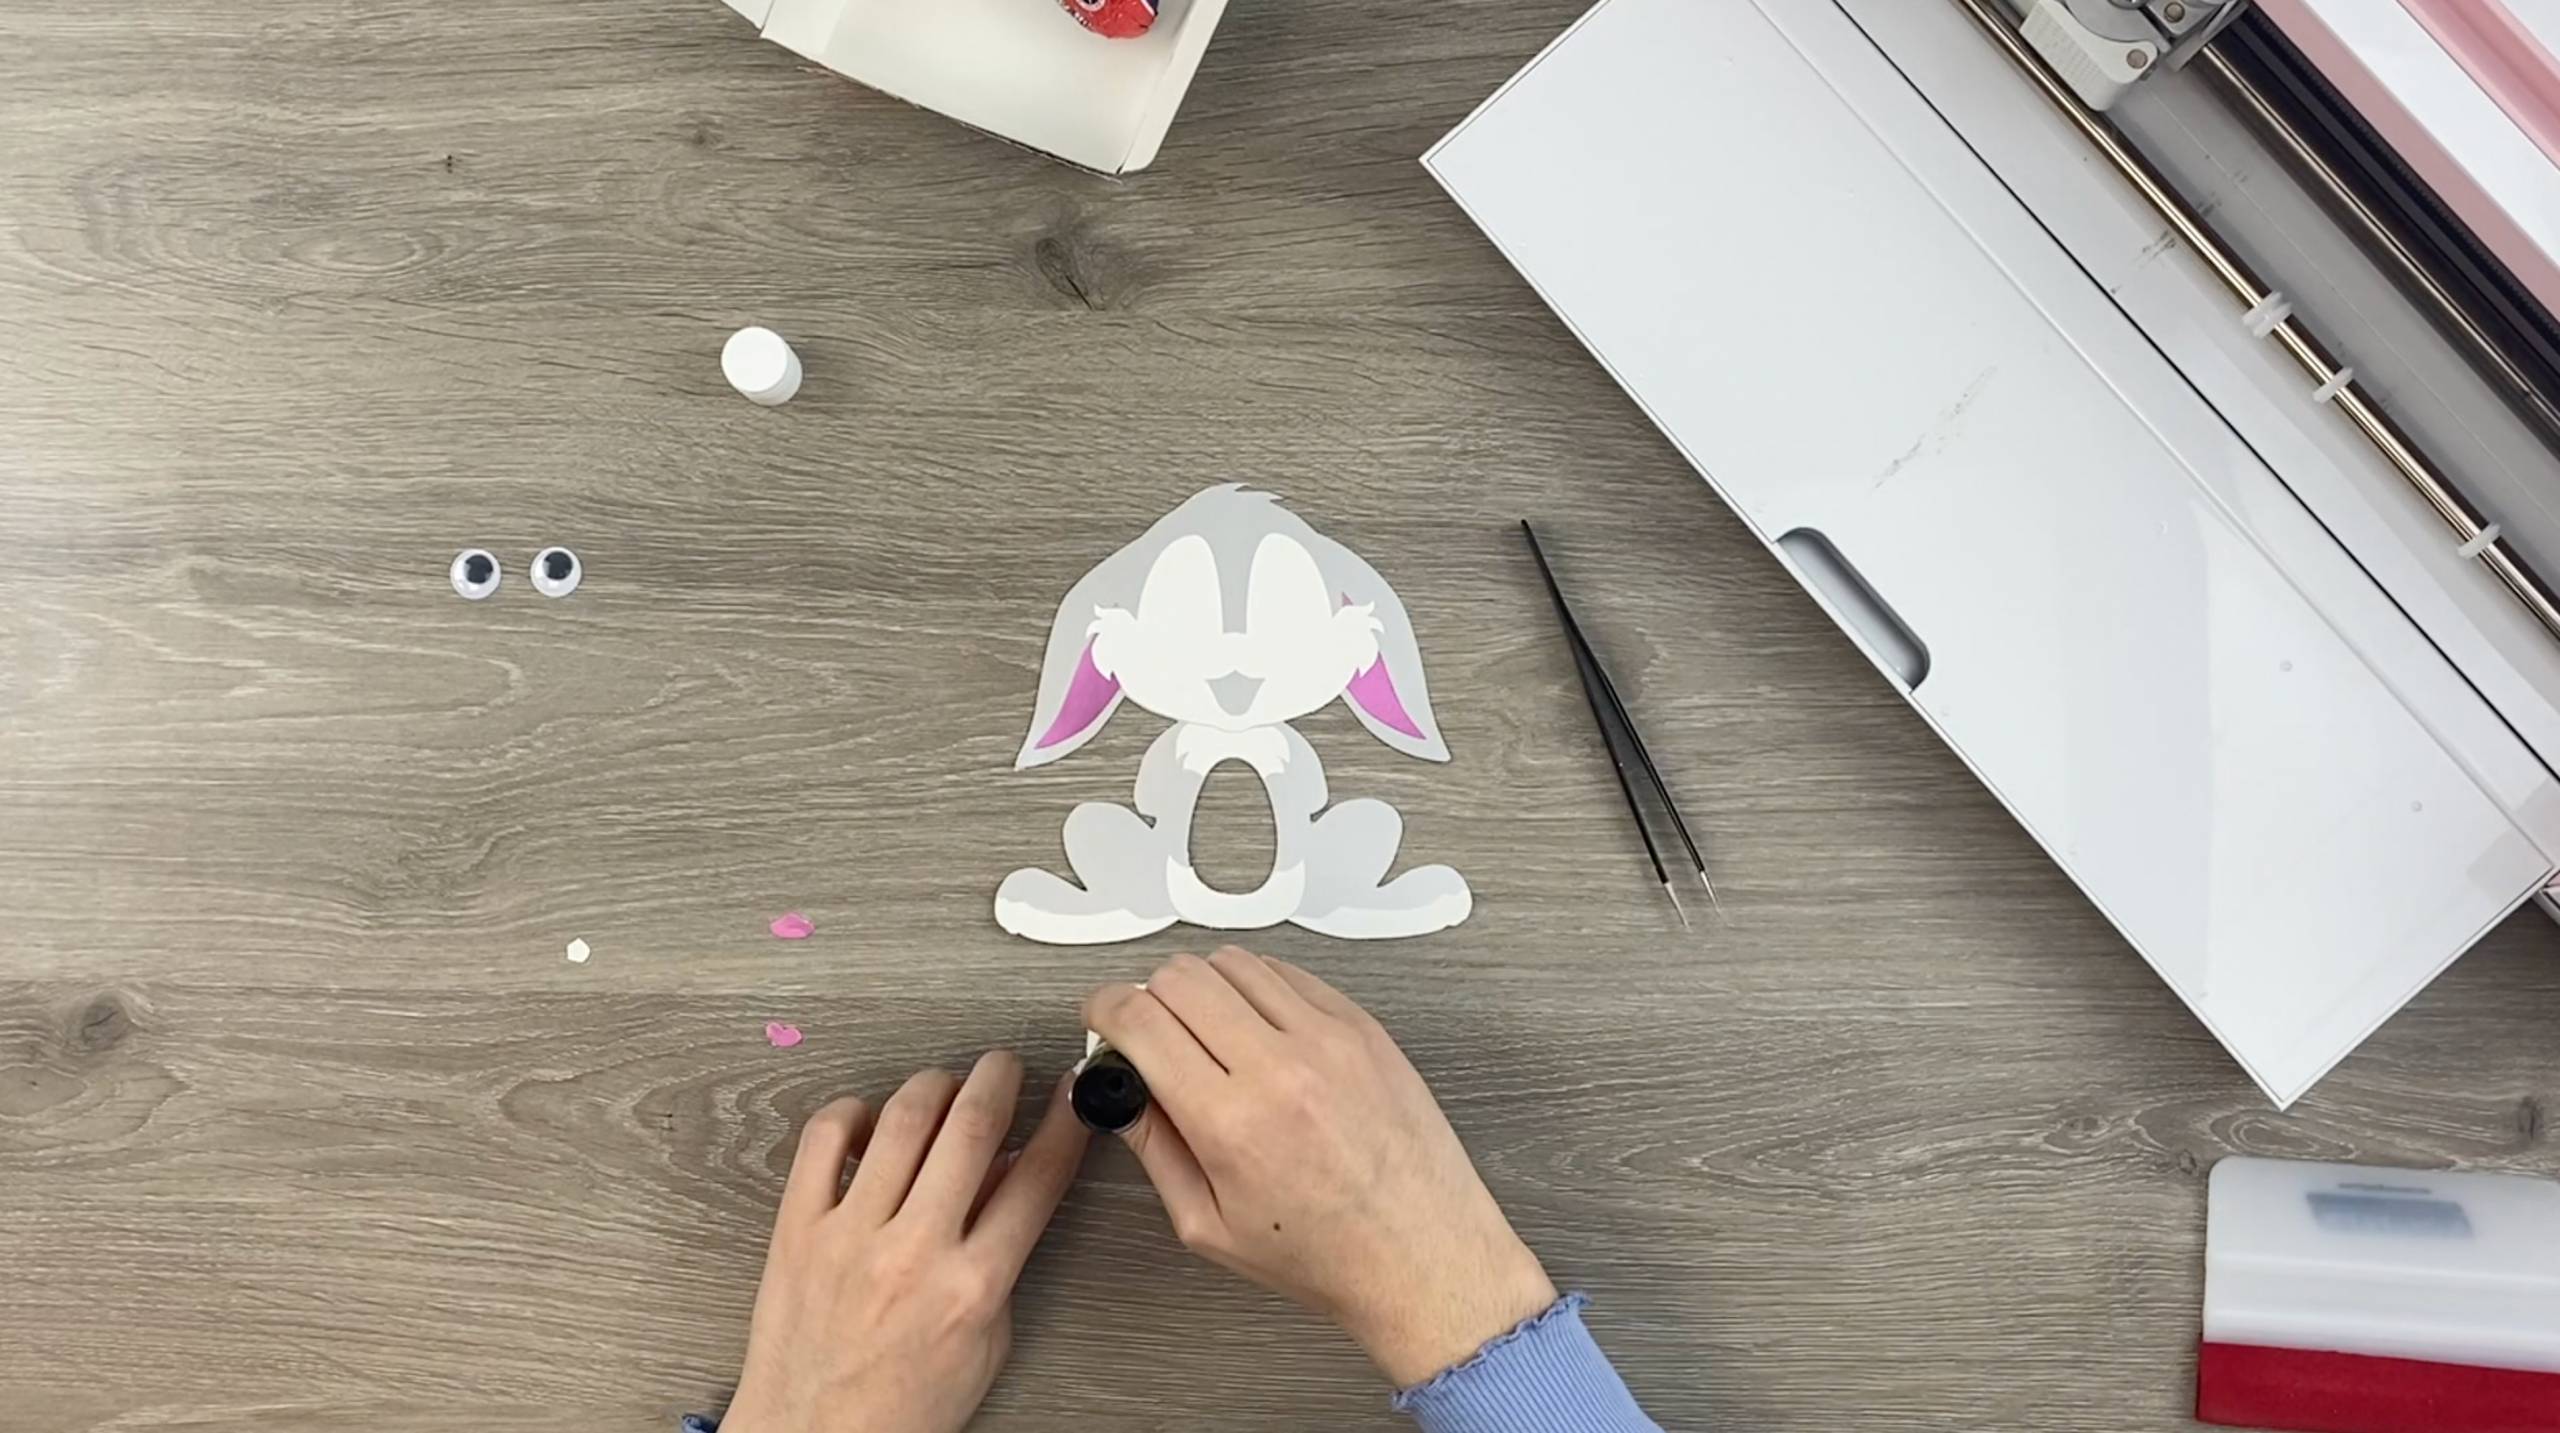
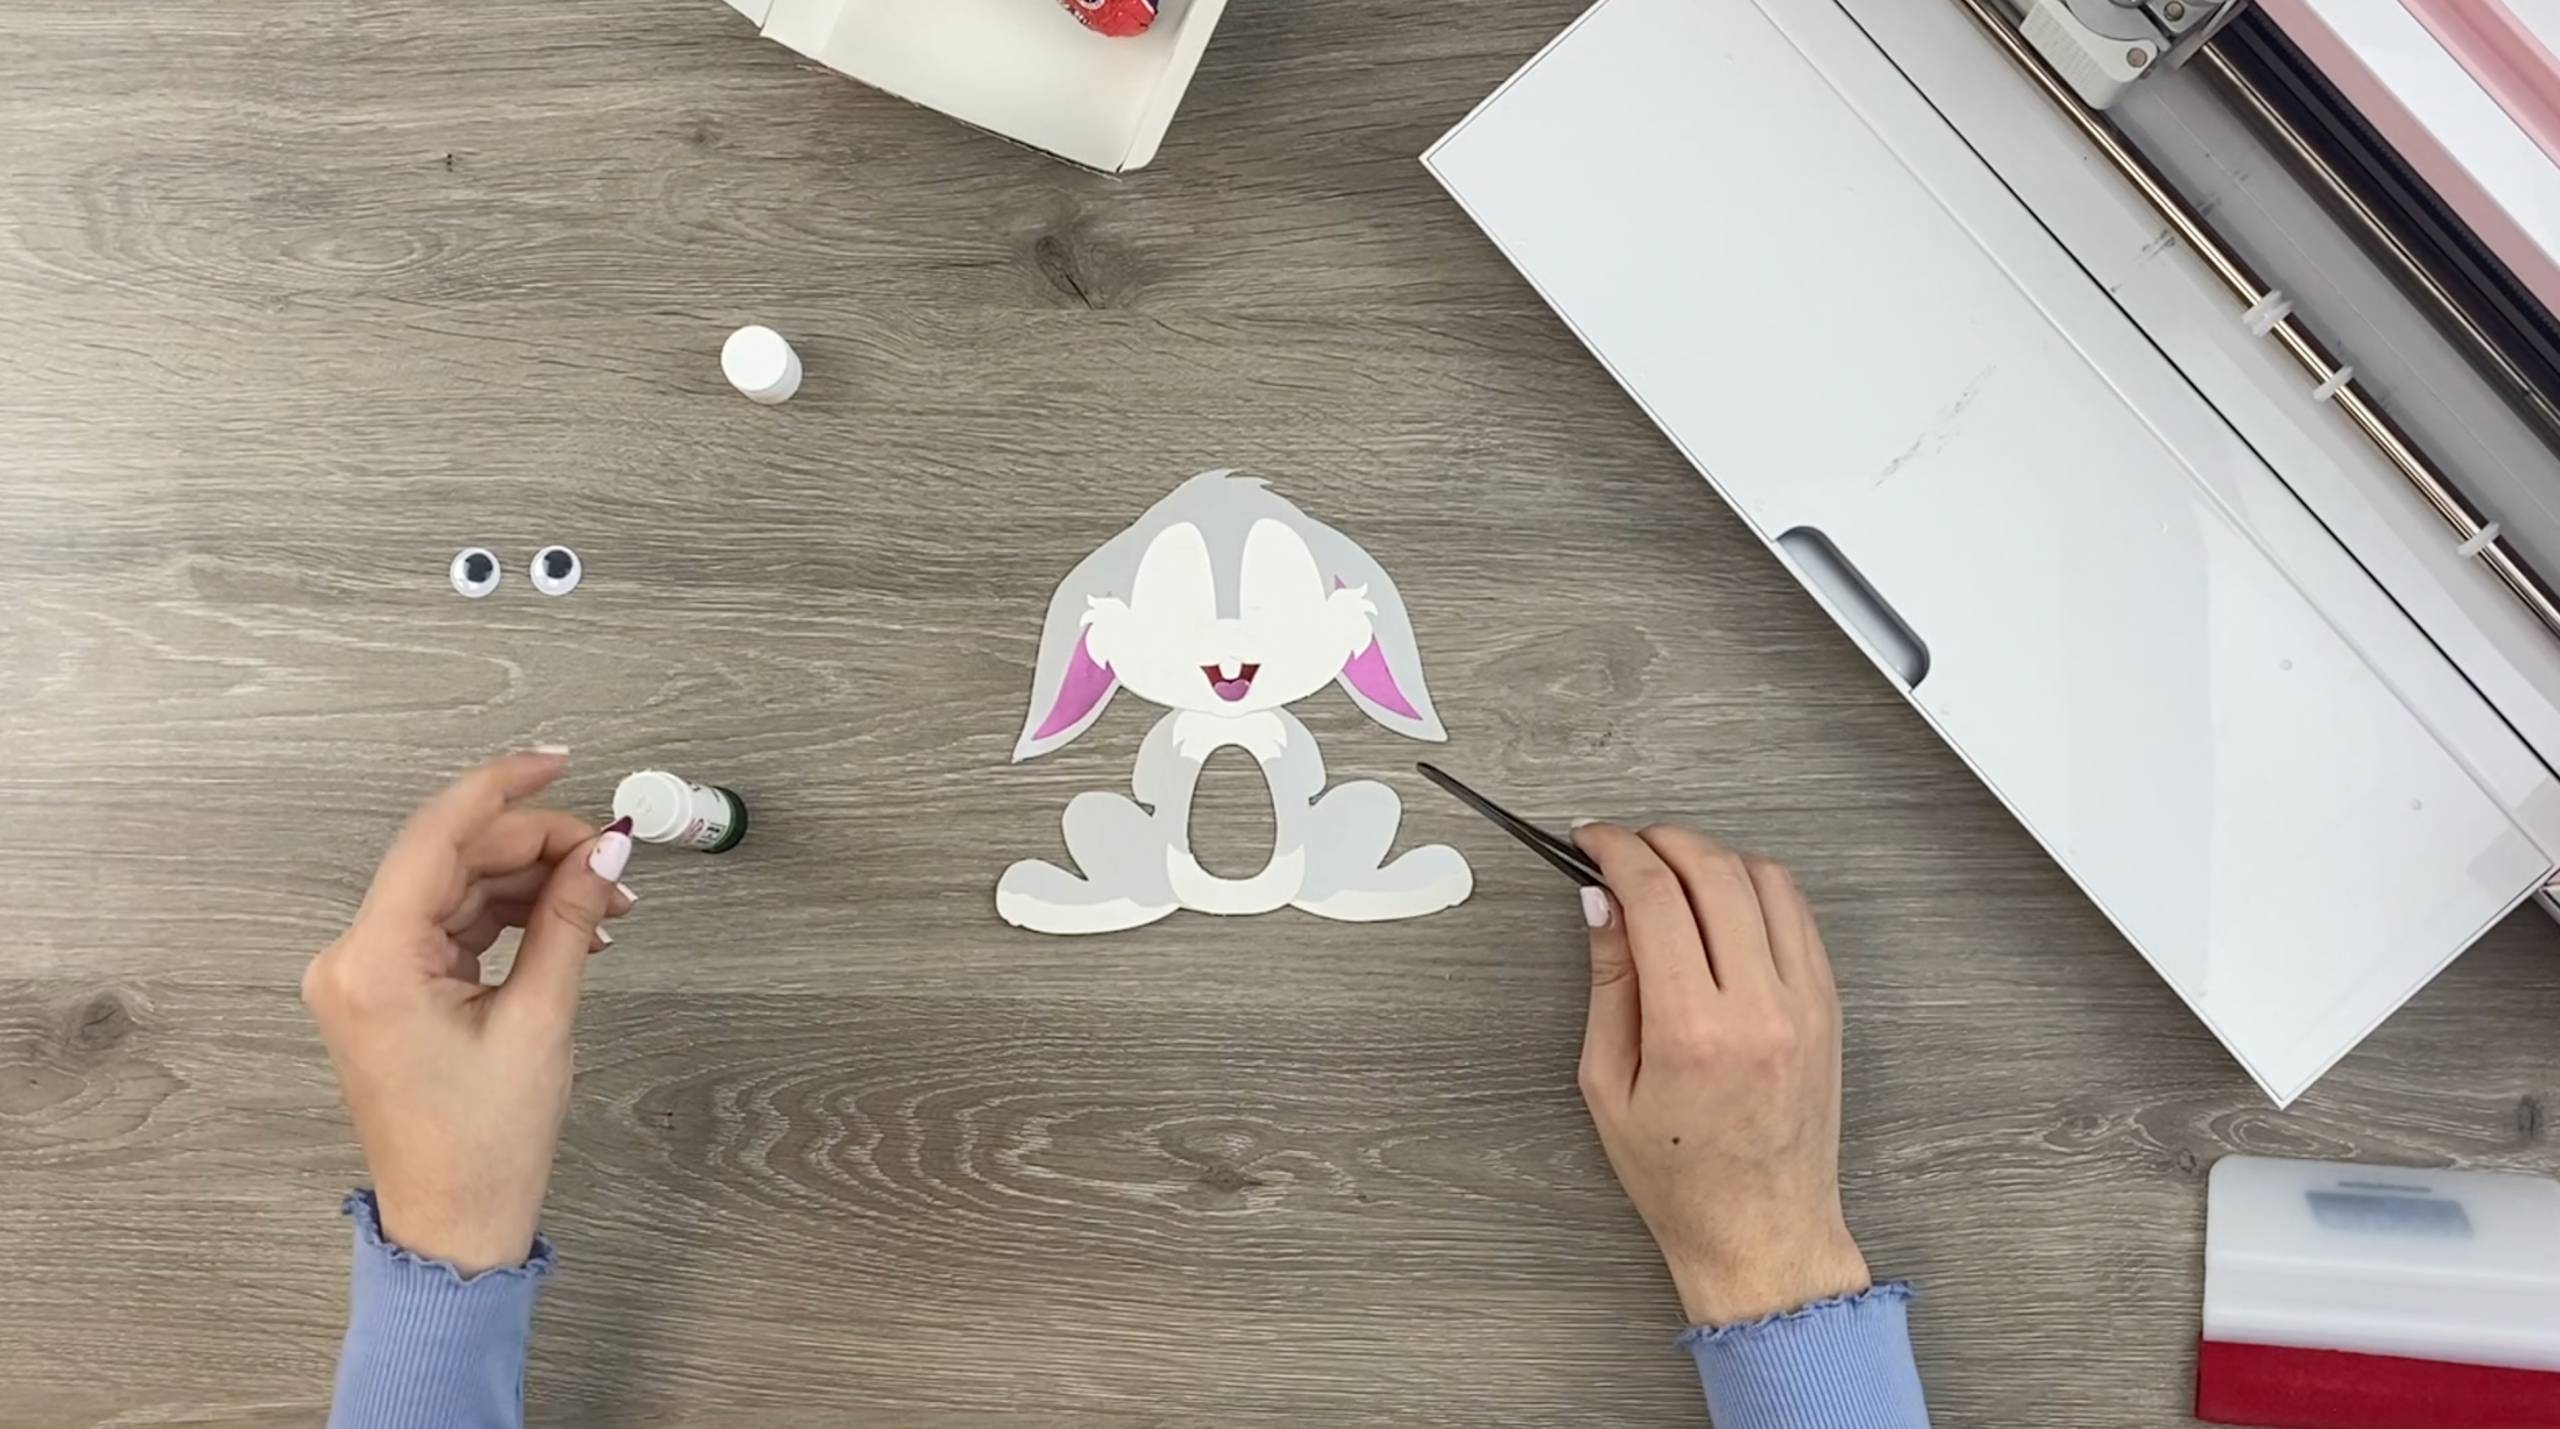

11. Apply the googly eyes!
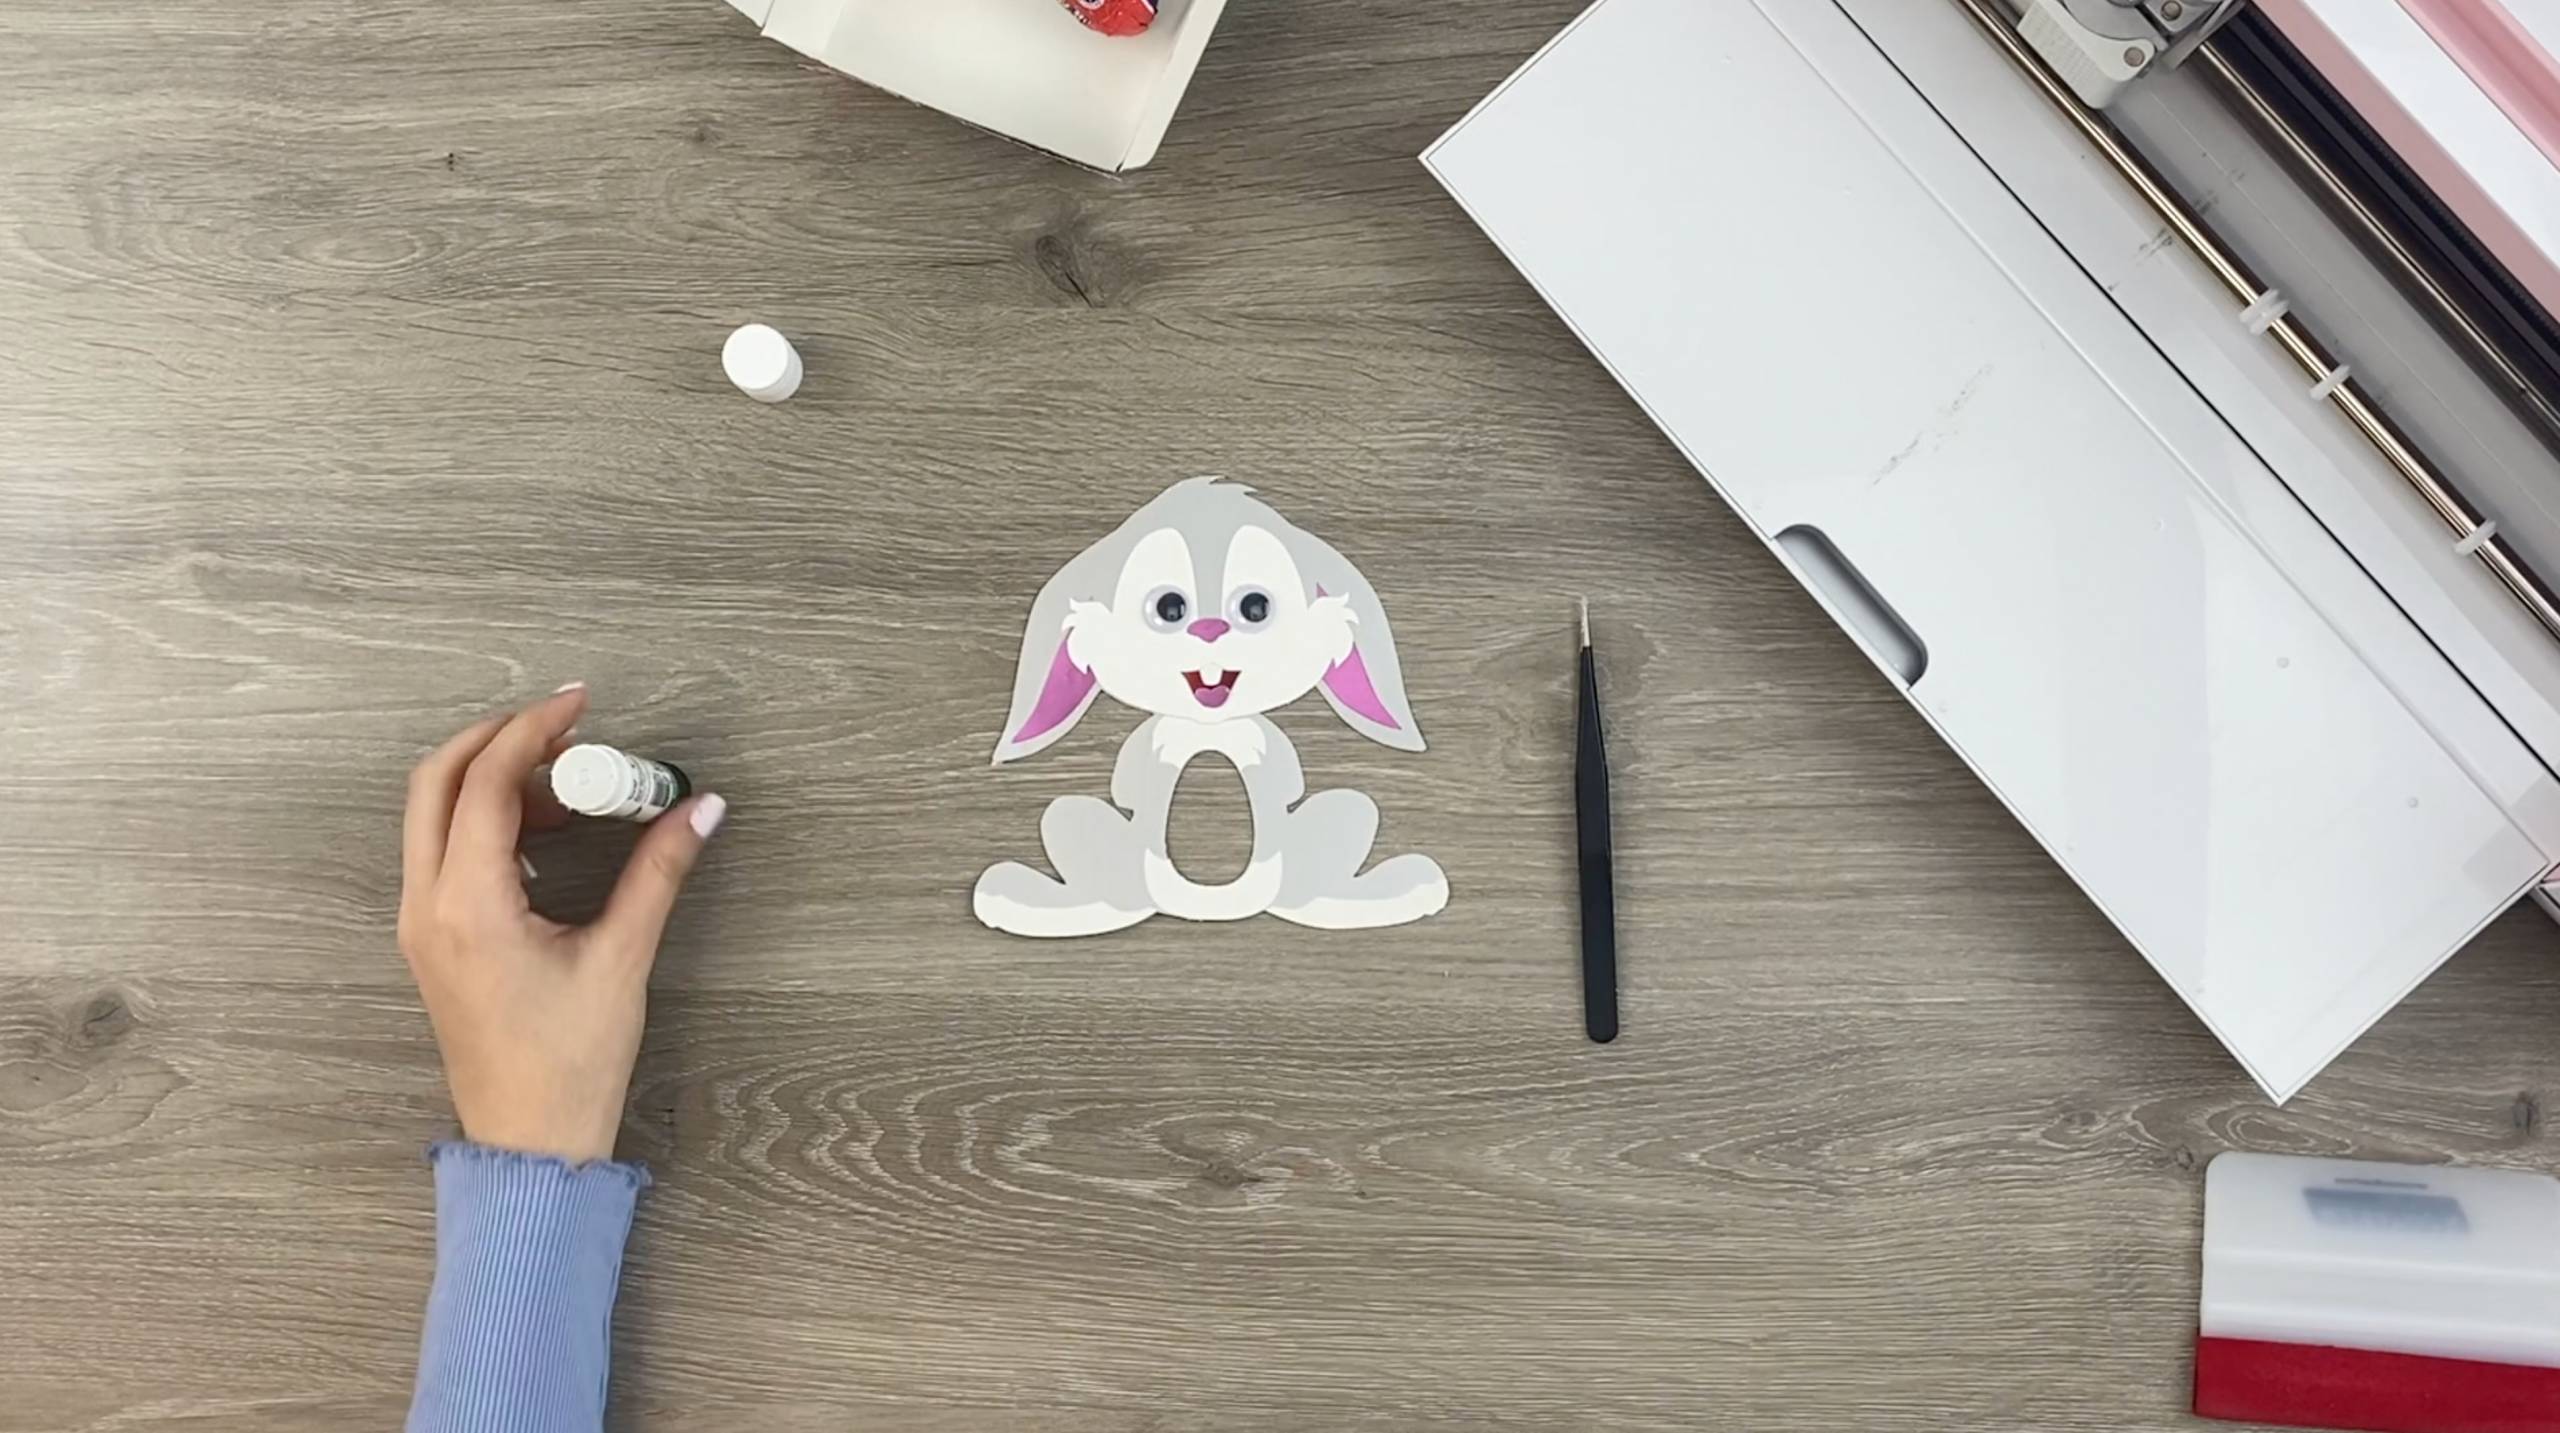
12. Fold the score lines on the bottom base card and apply glue to one edge. Stick the front of the rabbit to this edge by lining it up with the back of the rabbit’s feet.

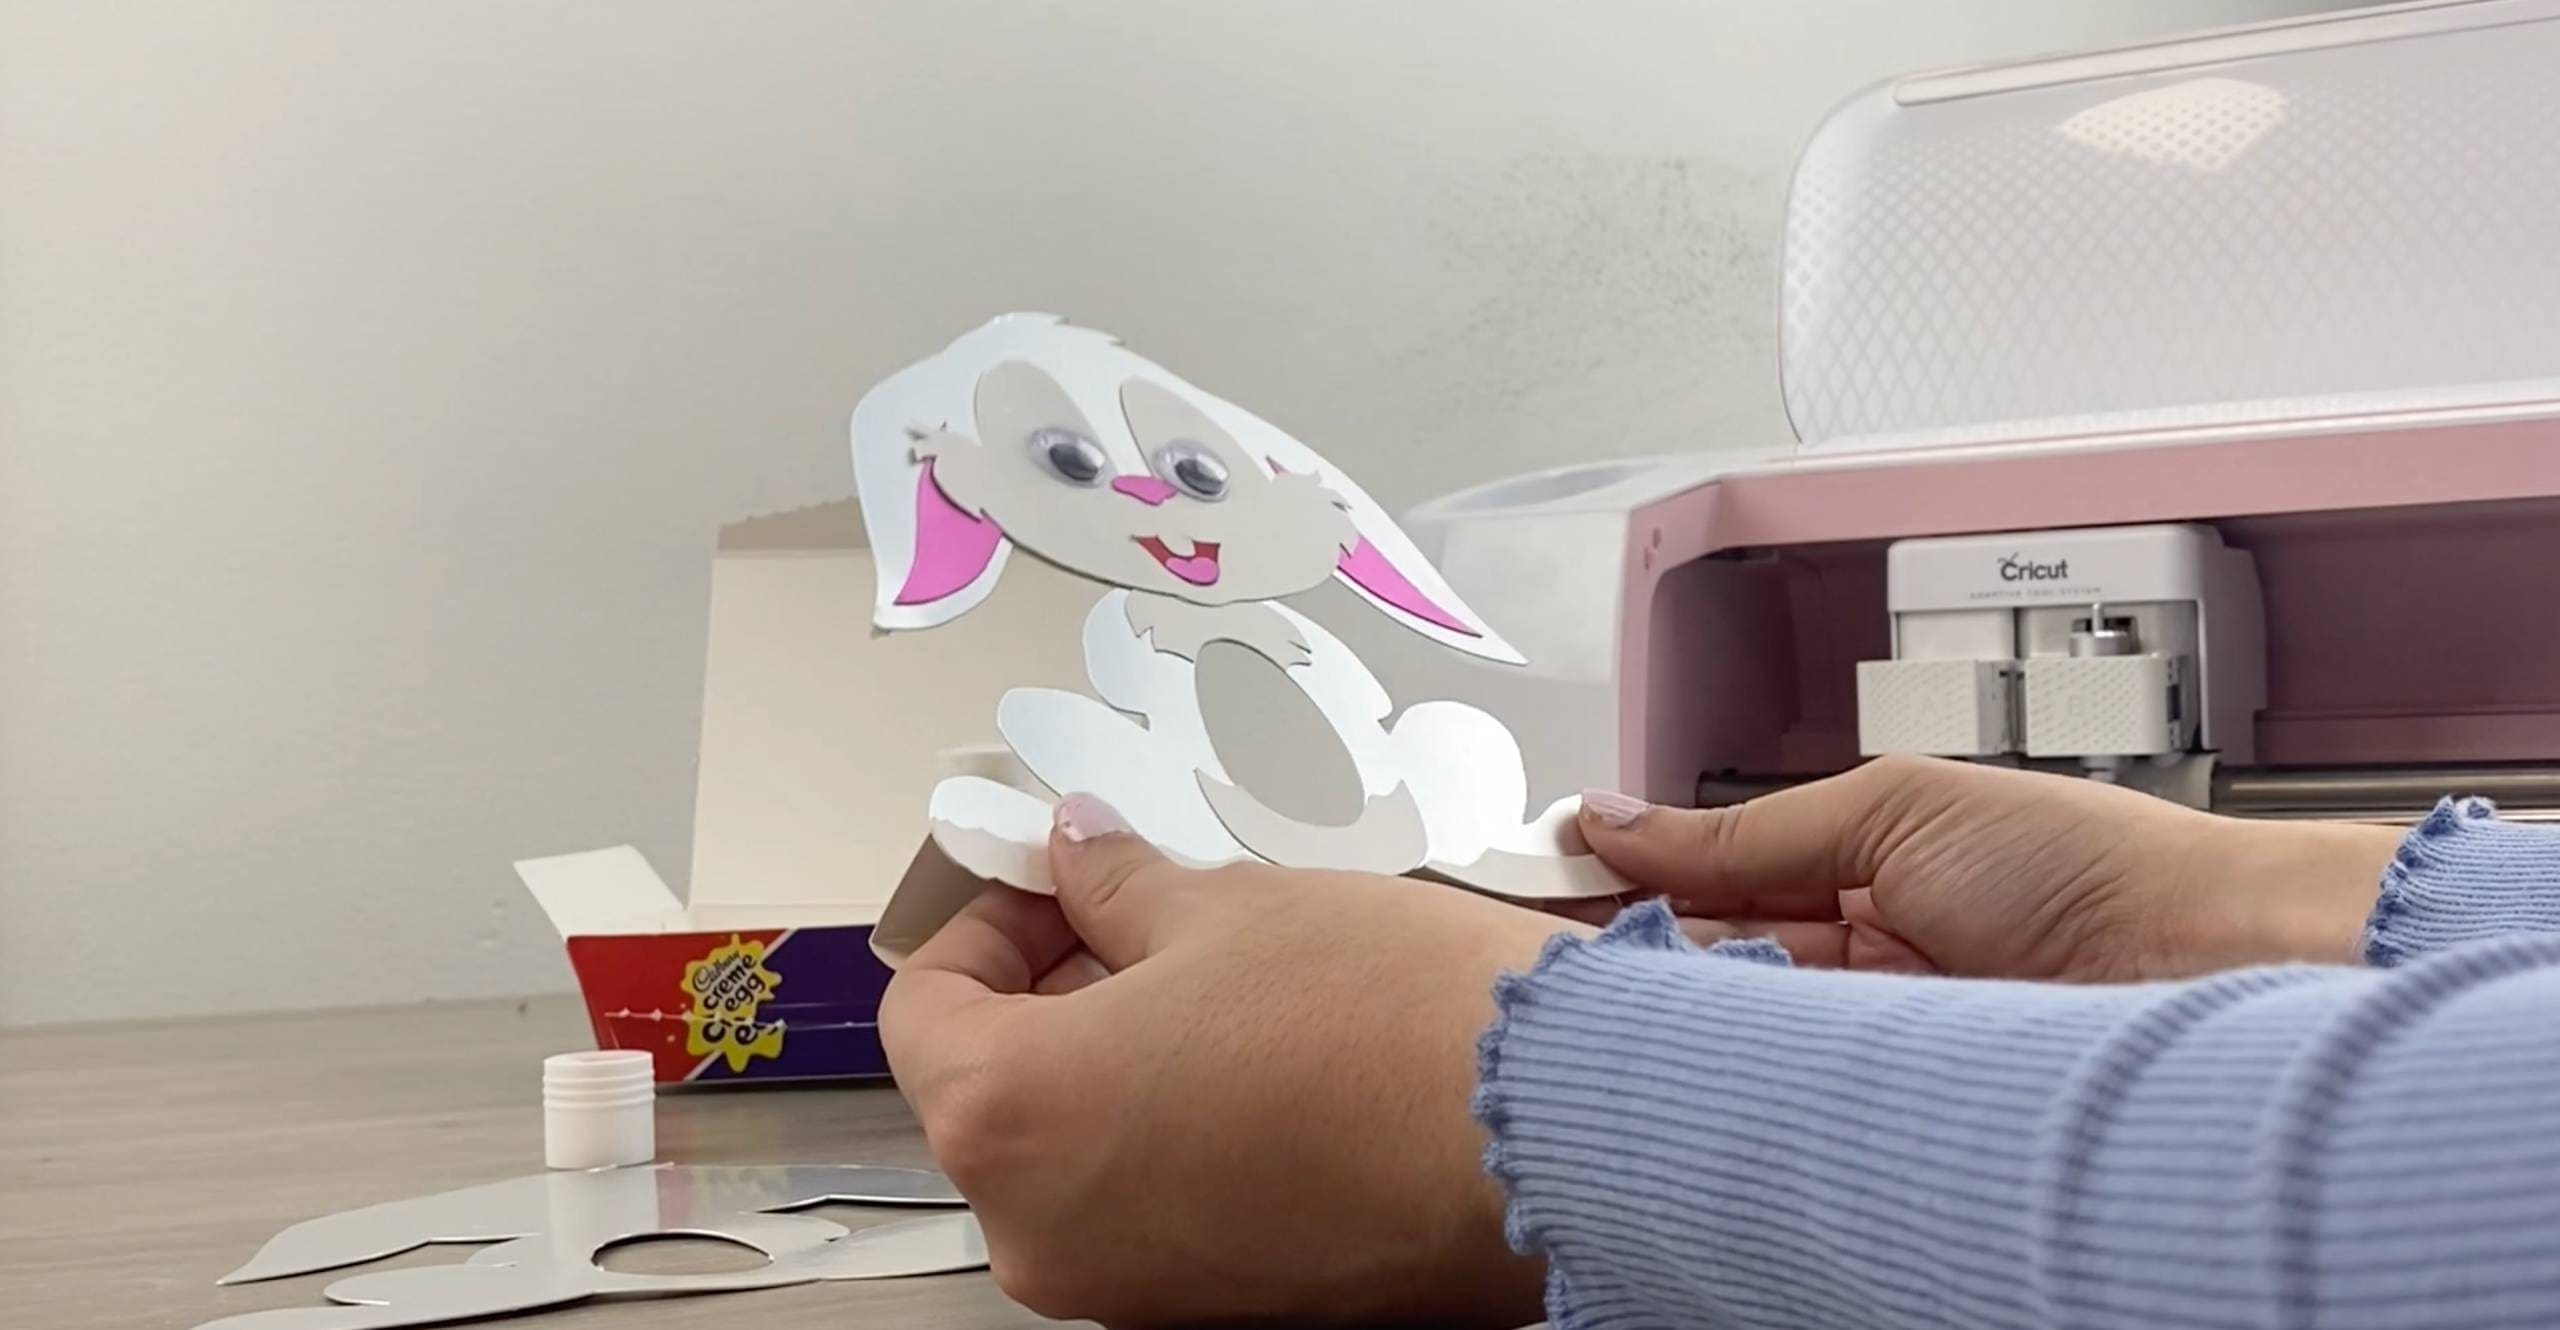
13. Apply glue to the the other edge of the bottom base card and stick the remaining plain rabbit silhouette to it, the coloured side of the card should be facing forward.
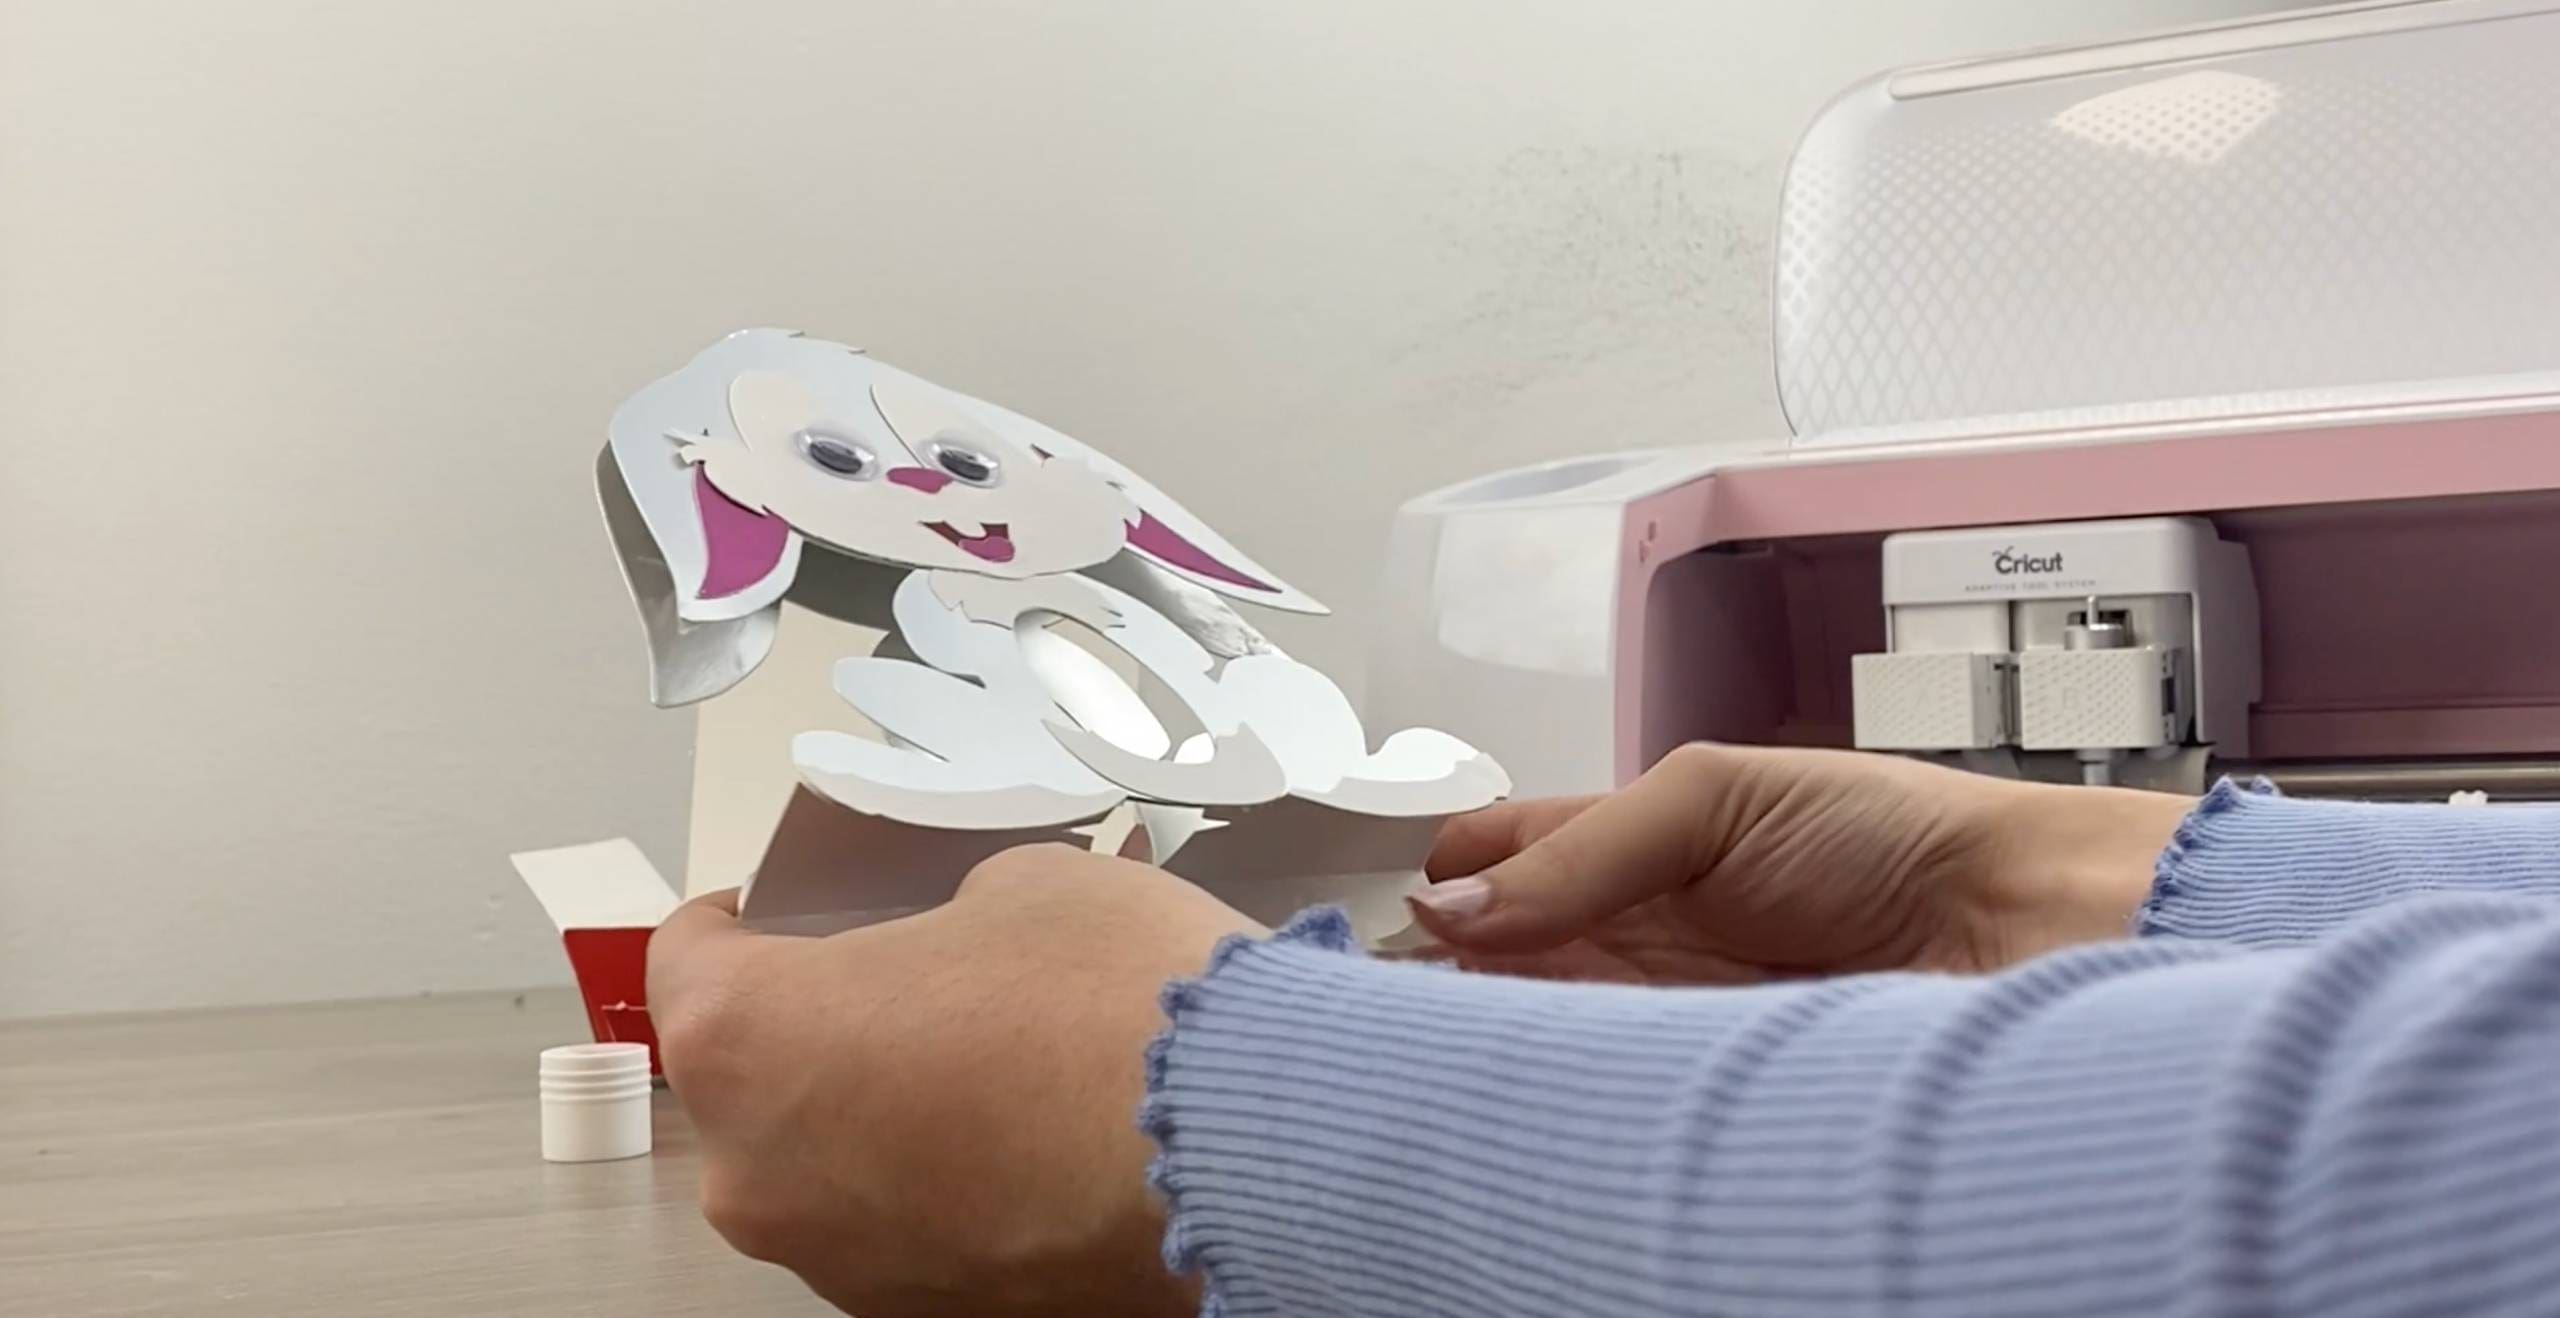
14. Apply glue to the inside of the top of the rabbit’s head and bottom of ears, then secure the two sides to each other.
15. Slide your egg through the side to sit in the egg holder.
Silhouette Cut Files
Double-click on the Zip file to open it up and then open the cut file. When it opens in Silhouette studio all of the cut files will be on one mat, depending on which Silhouette machine your using you may need to move each of the different-coloured cut files onto different mats. If using a machine with a larger mat you can cut them all on one mat, just make sure each coloured card is in the correct position on the mat in correlation to the correct cut file.
Cut Setting: Cardstock Plain
Blade: 3
Speed: 4
Force: 20
Passes: 1
Brother Cut Files
After downloading and opening the zip file, please log in as usual to your design space account, open a new project mat, then left click on the SVG icon in the top left bar in canvas, this will then allow you to import your files. Once you left click this icon, a pop up box appears with you to choose where to import file from, choose to import the file from your downloads list or where you have chosen to save when unzipped.
Cut Settings:
Card:
Blade: 3.75
Speed: 1
Pressure: 0
Passes: 1
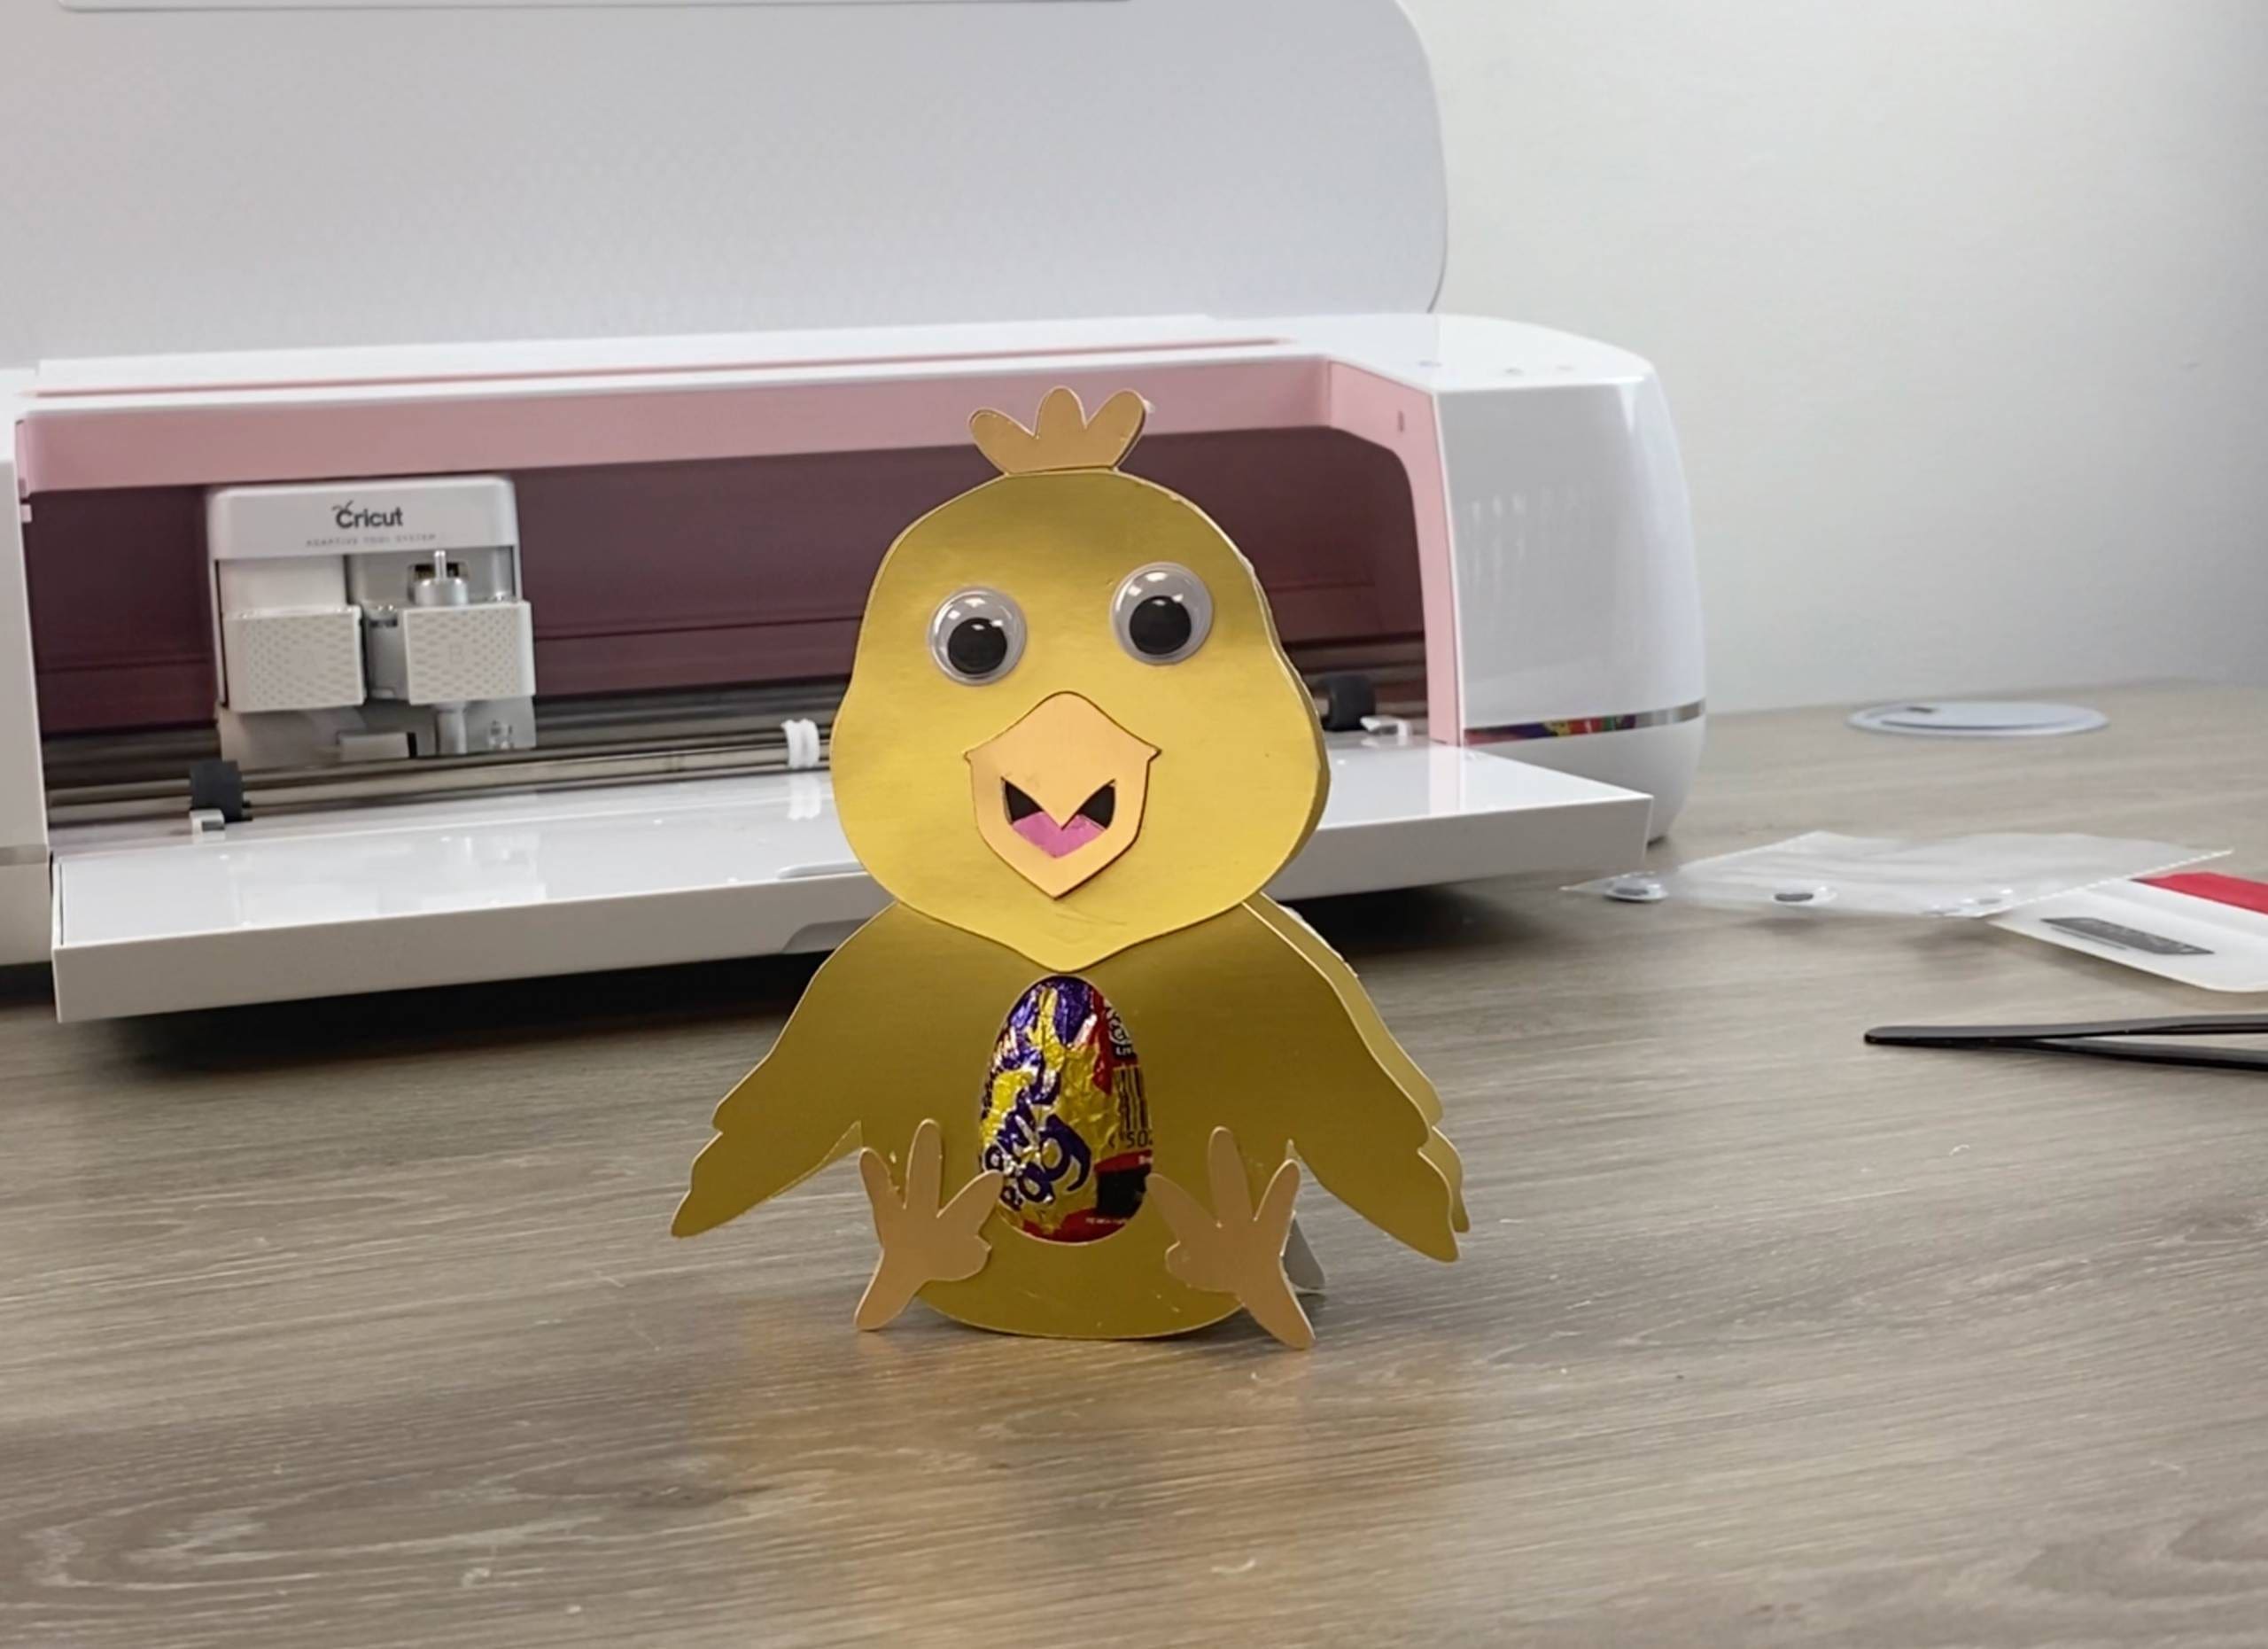
Chick
What you’ll need:
- Cricut Maker. Available here
- New Gold satin card. Available here
- Vintage Copper satin card. Available here
- Black satin card. Available here
- Pink Opal satin card. Available here
- Weeding tweezers (optional but help to avoid finger marks on the card) Available here
- Squeegee (optional but an easier way of securing the card onto your cutting mat) Available here
- Googly eyes. Available here
- Glue stick. Available here
1. Download the Chick cut files and unzip them by double clicking on the file, which should open the file up. This zip file will have all the animal cut files in for you to select the ones you’d like to use.
2. Upload each chick PNG into the Cricut Design Space and then insert them onto the canvas.
3. Resize them as soon as you have inserted them onto the canvas as they will all still be grouped. We re-sized them to the measurement shown below.
4. Position them so that all the layers are separated and select ‘Make it’ in the top right.
5. Move each layer so that each one is on a different cutting mat, as shown below. To make these instructions easier order them like this: 1. the base silhouettes, 2. Feet, beak and head feathers, 3. Tongue, 4. Black area of mouth. Press ‘continue’ in the bottom right of the screen.
6. Select your Cricut device and set the base material to Heavy cardstock and Default pressure setting. Now you’re ready to cut.
7. Place the New Gold satin card onto the cutting mat, rub gently to secure. Load onto the machine and press the cricut symbol to start the cut.
8. When done unload the mat and gently peel back the card. Some of the shapes will probably need to be popped out of the card. When all shapes are separated, place them to one side.
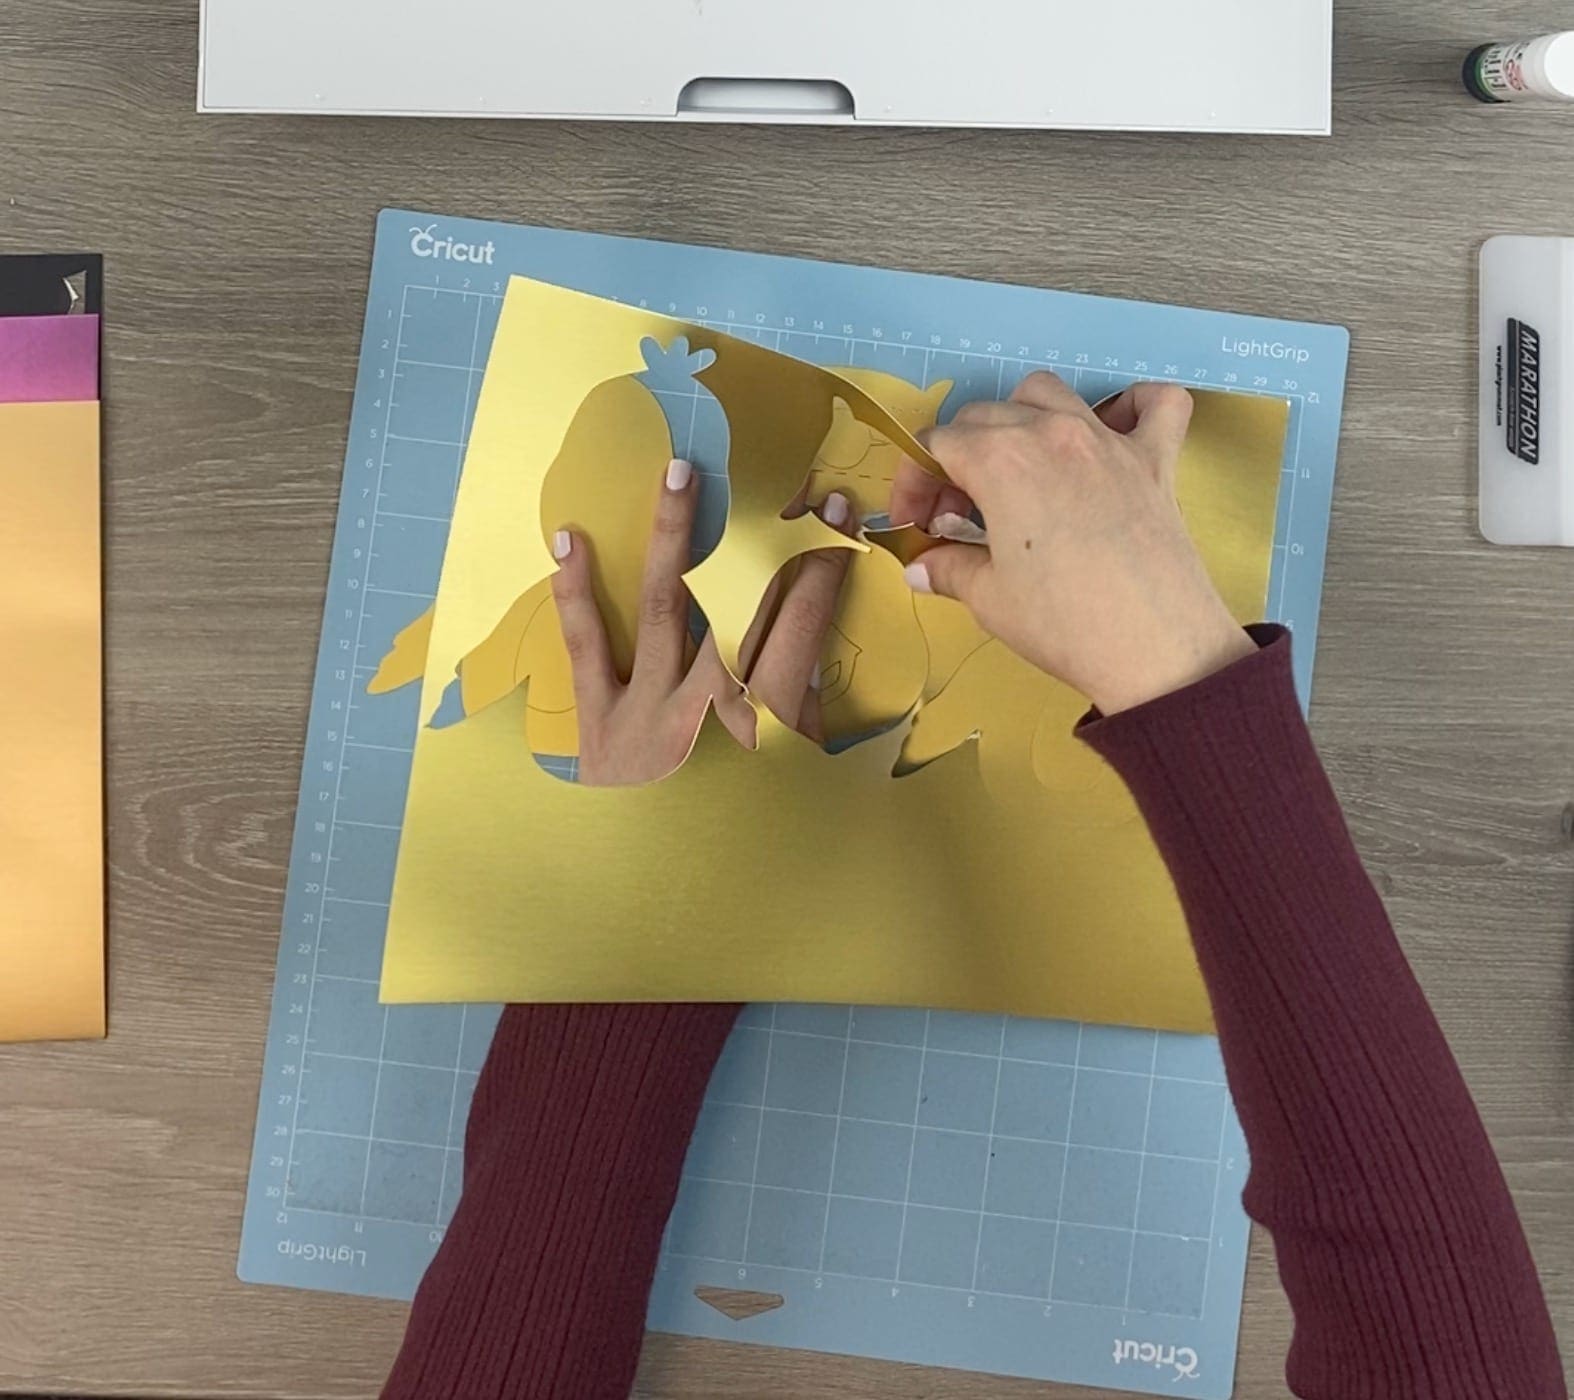
9. Repeat steps 7 and 8 with the remaining coloured card, in this order: Vintage Copper satin card for the feet, beak and head feathers, Pink Opal for the tongue Jet Black satin card for the mouth.
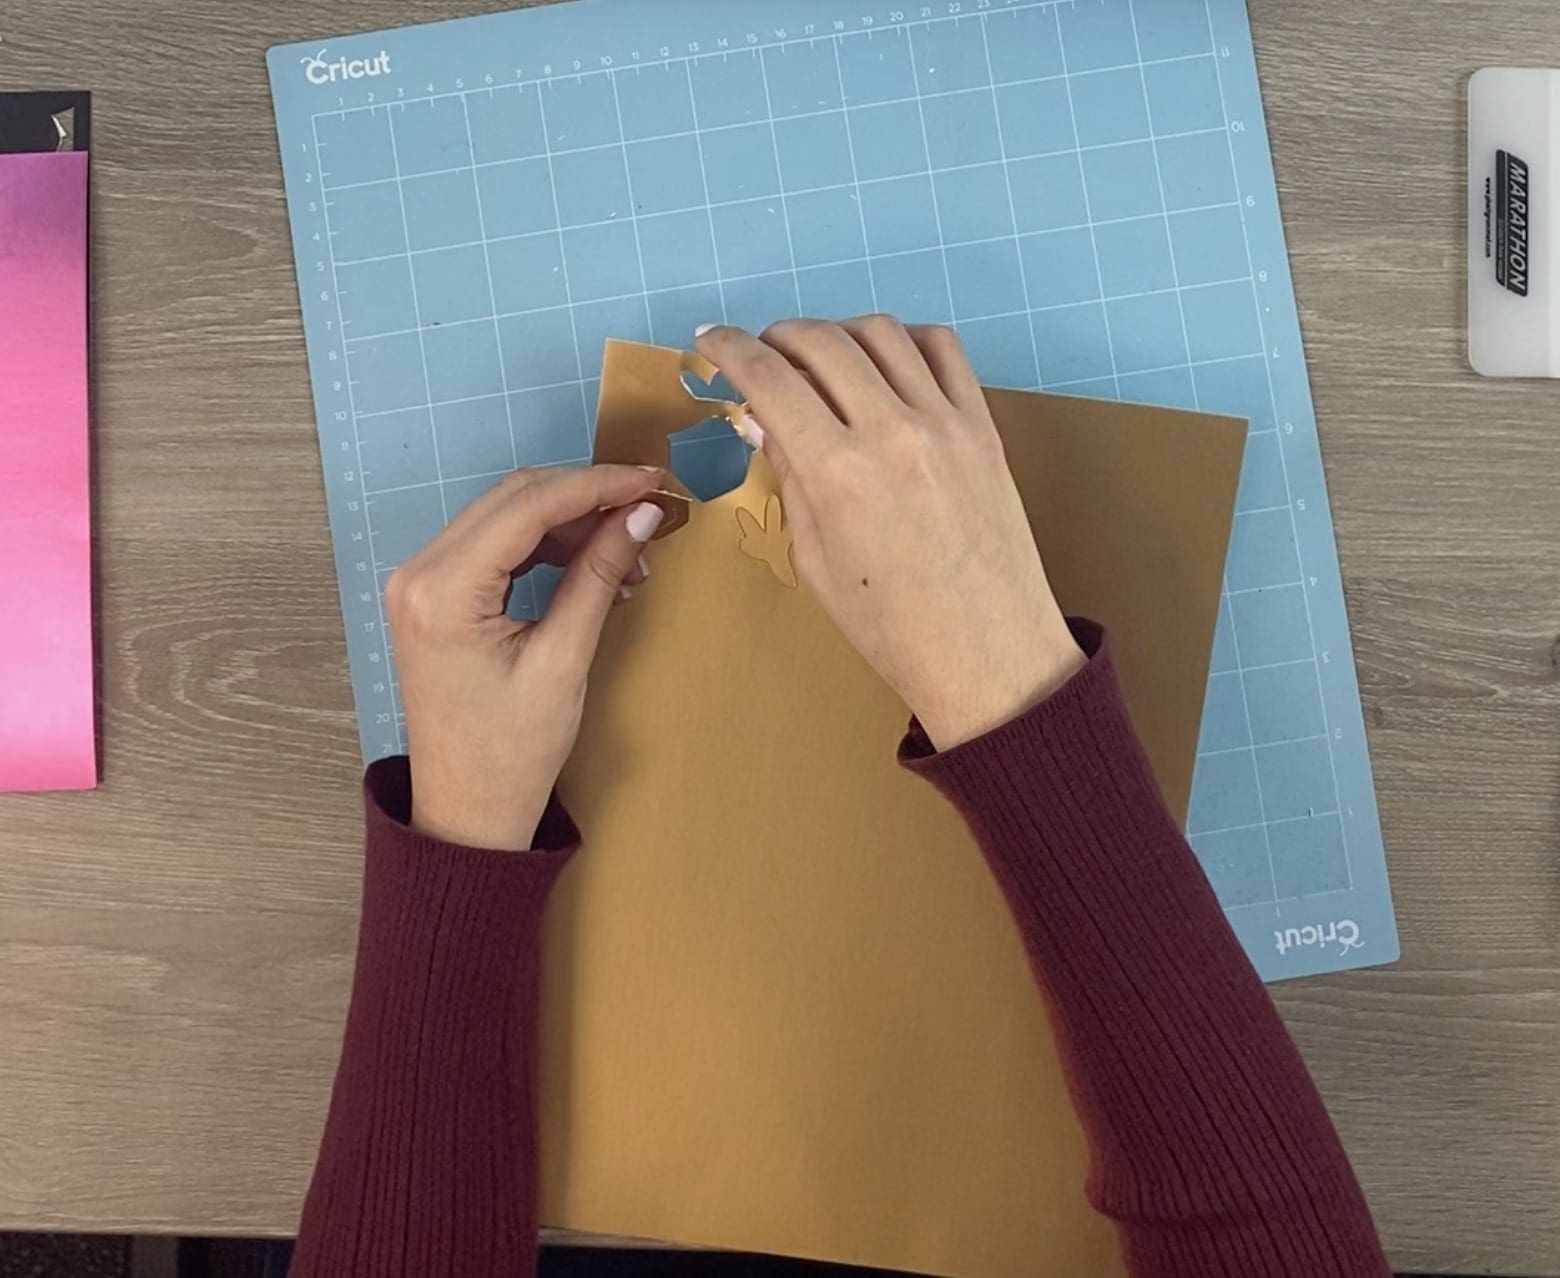
**FYI: As we have used card that has previously been used the photos above will have other shapes cut out of it besides the actual shapes that you you will be cutting**
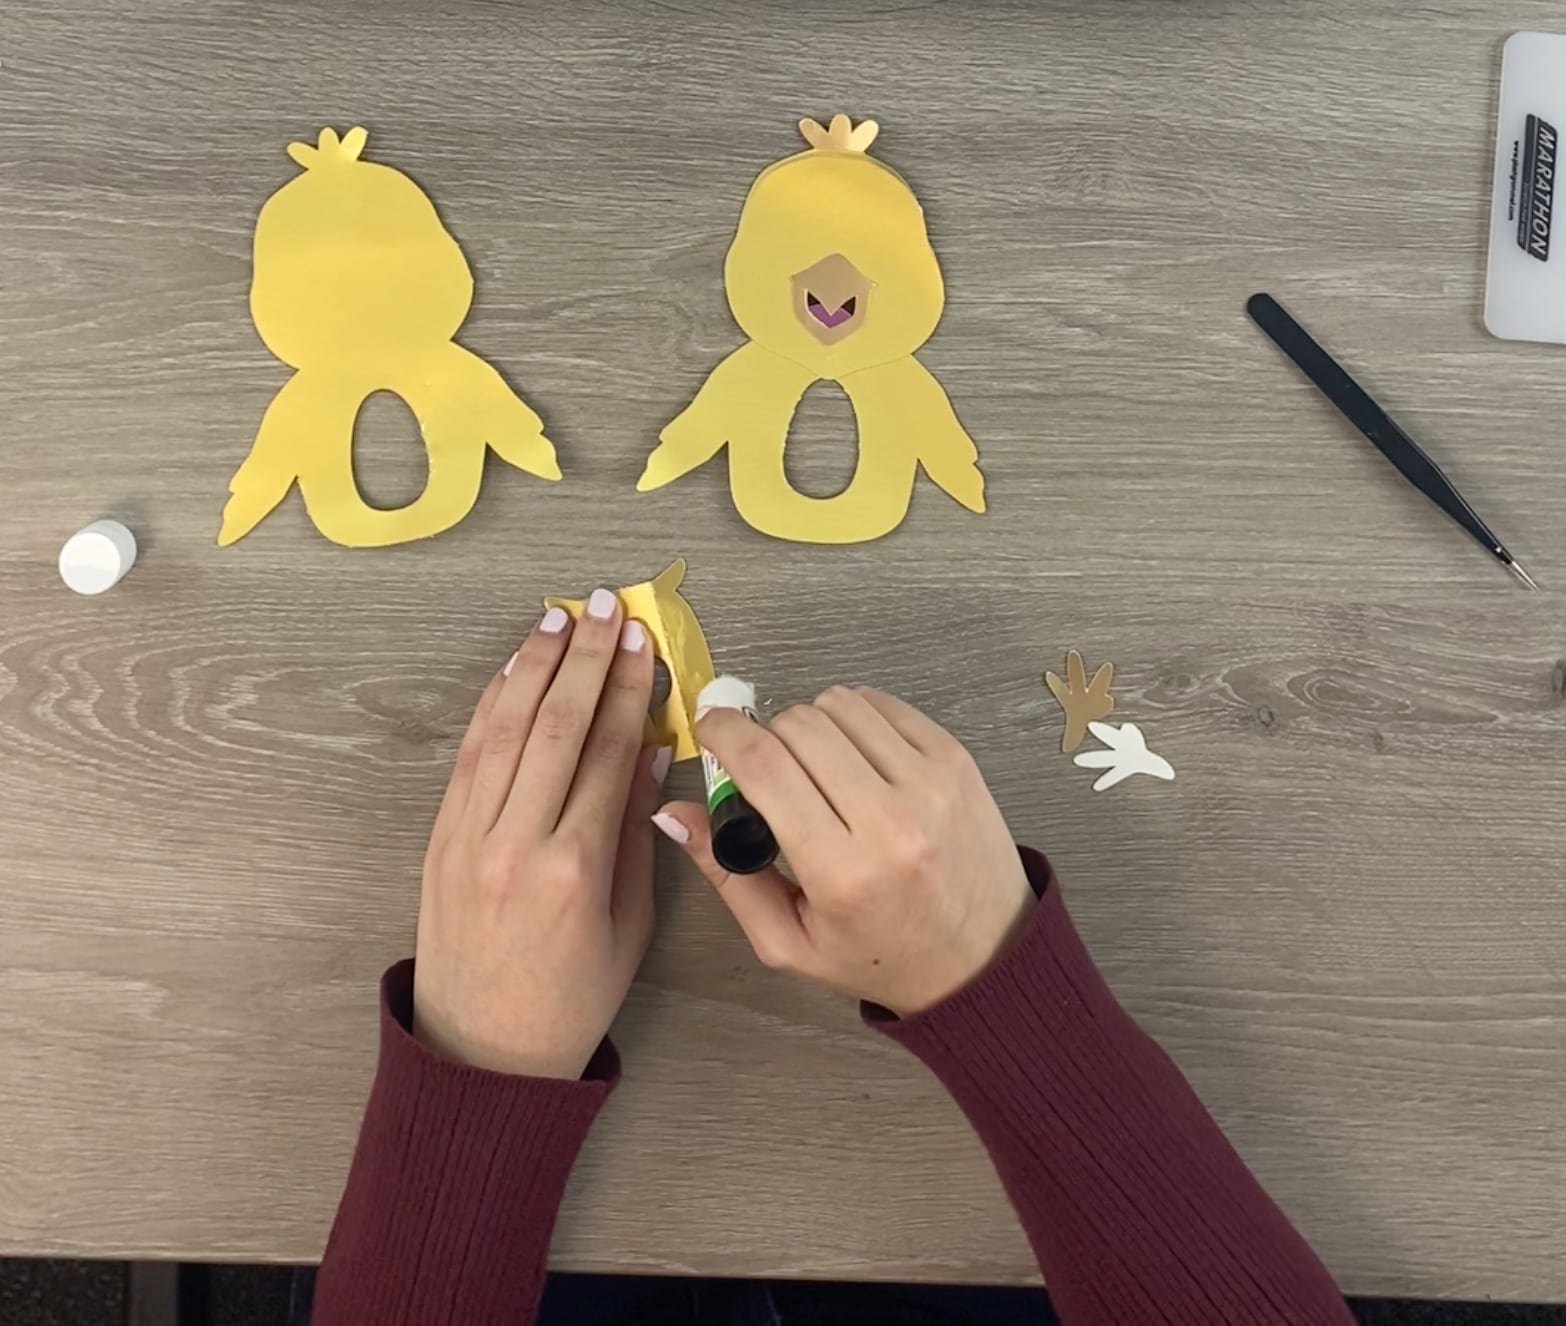
10. Firstly, apply the head feathers and then stick the head onto the the front base. Next, turn over the beak and position the tongue and black area and then glue them to the beak. You can now position stick the beak down in the area provided. Do not apply the feet yet as you do this after you assemble the egg holder.
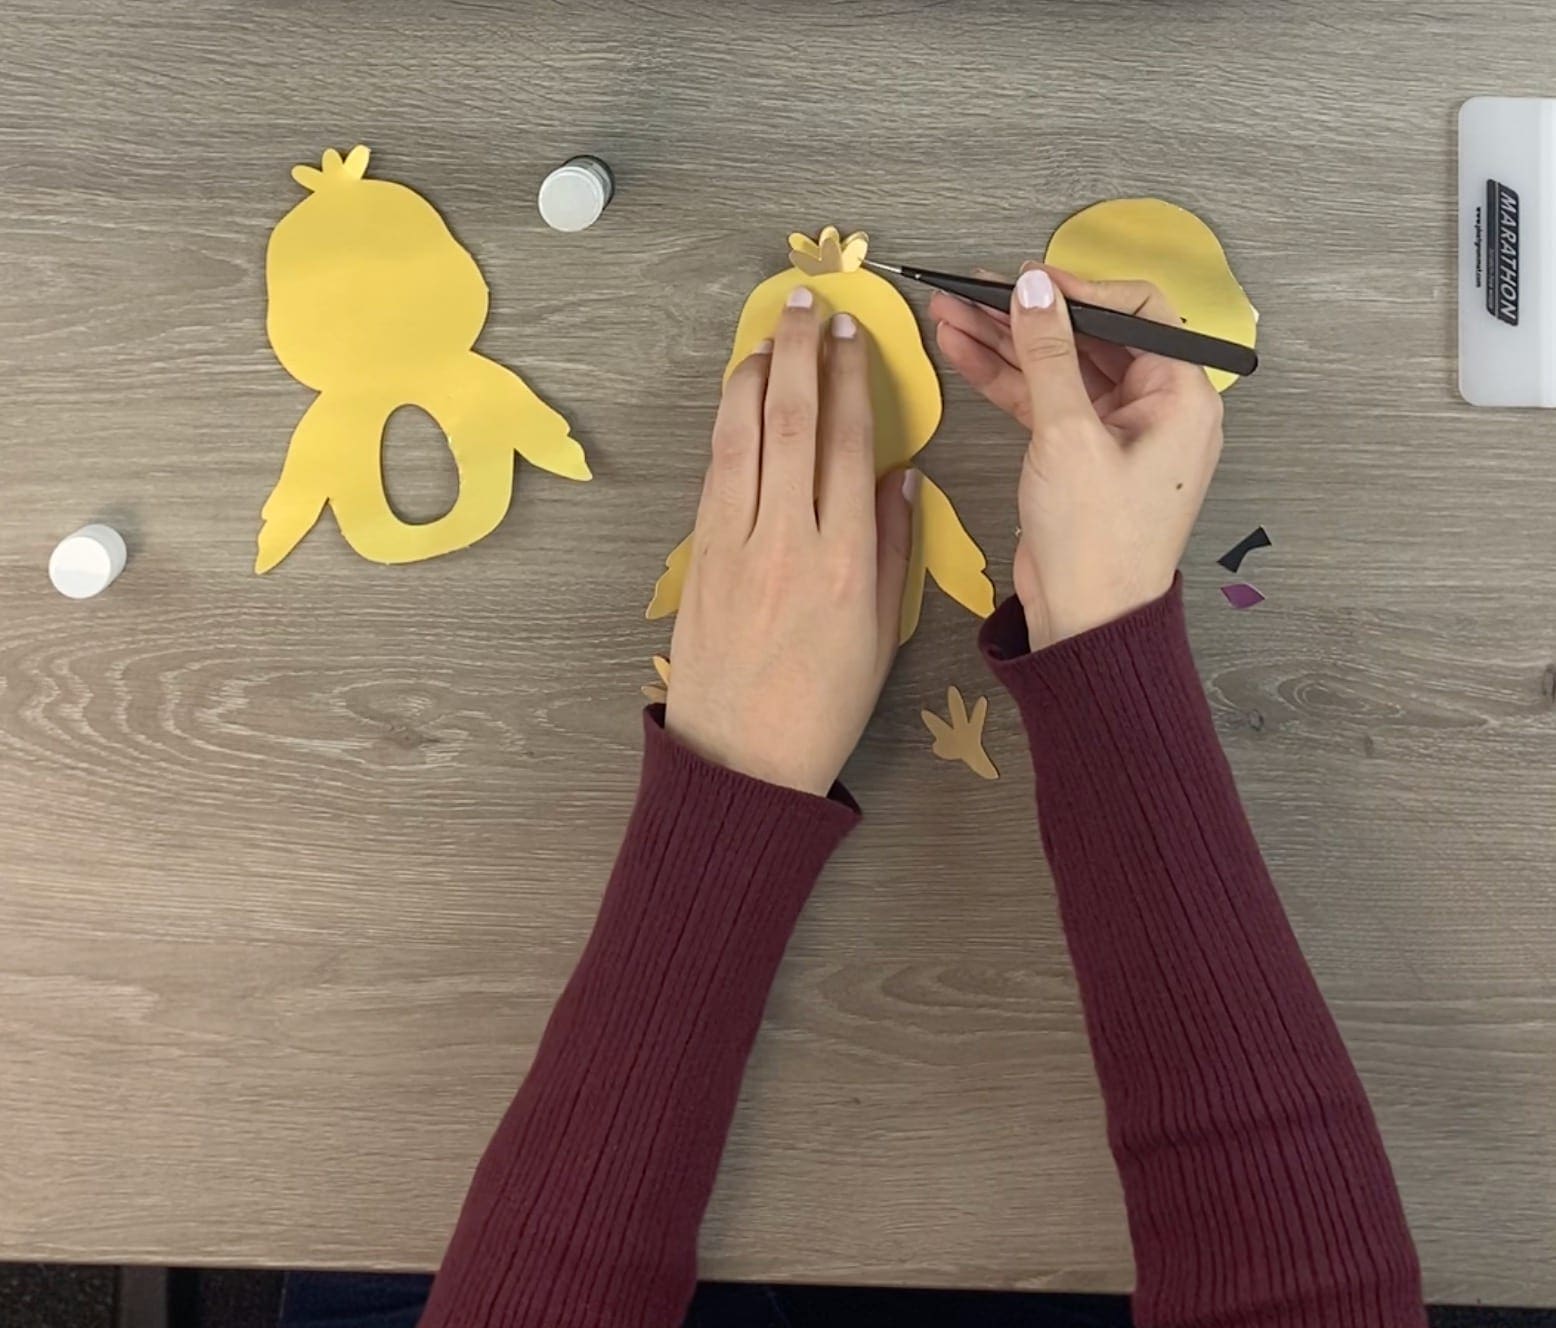
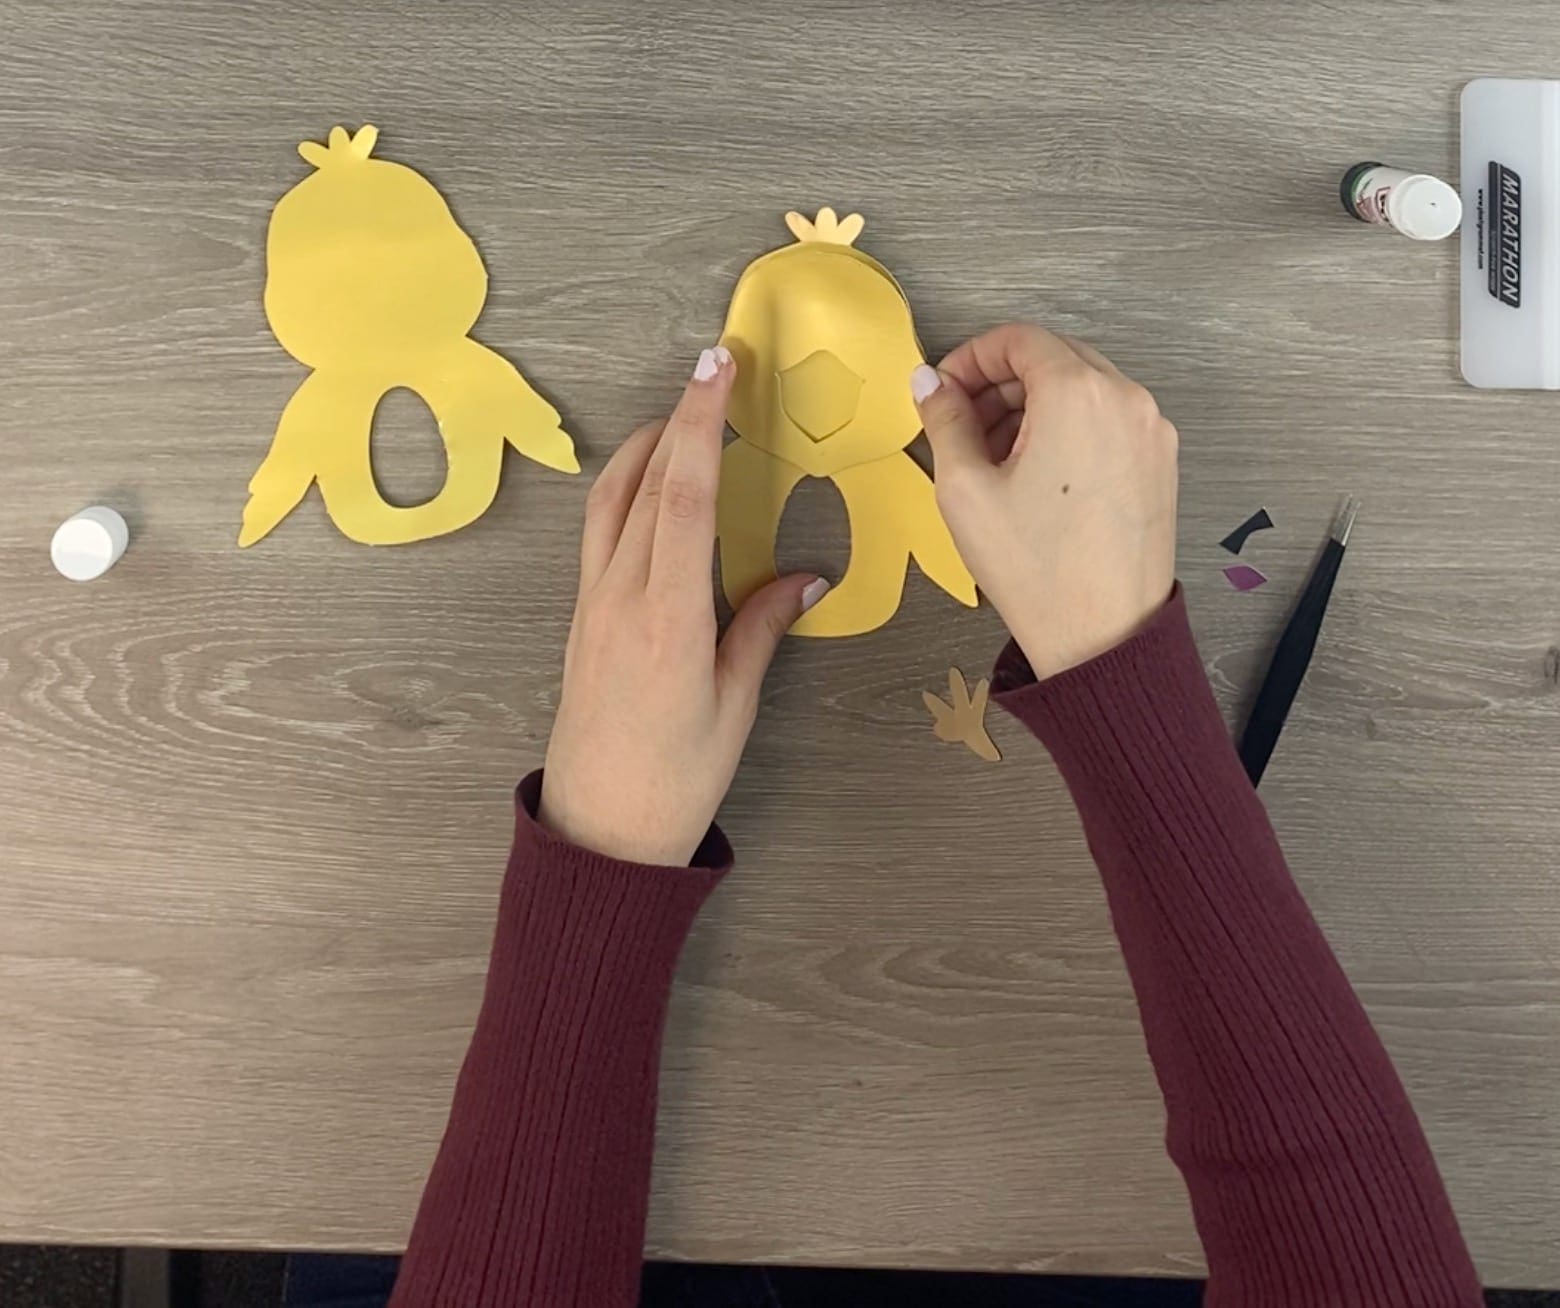
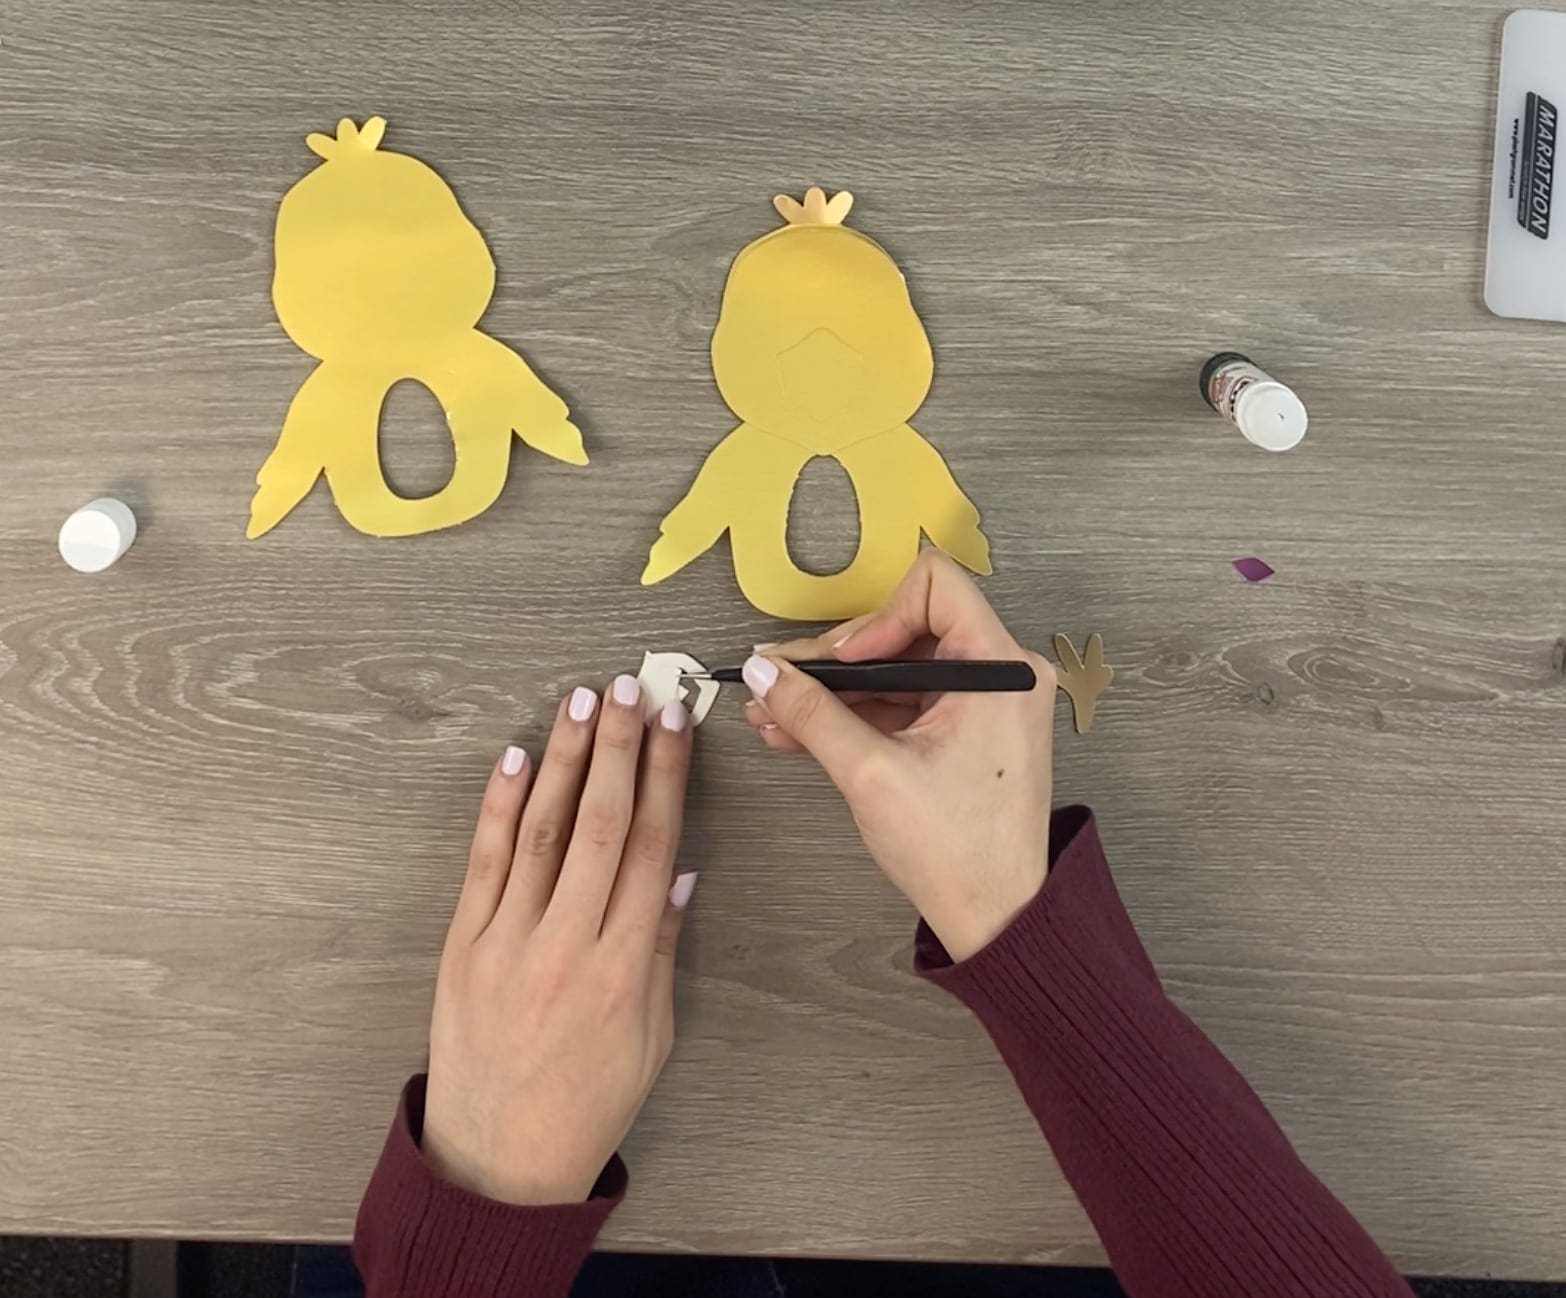
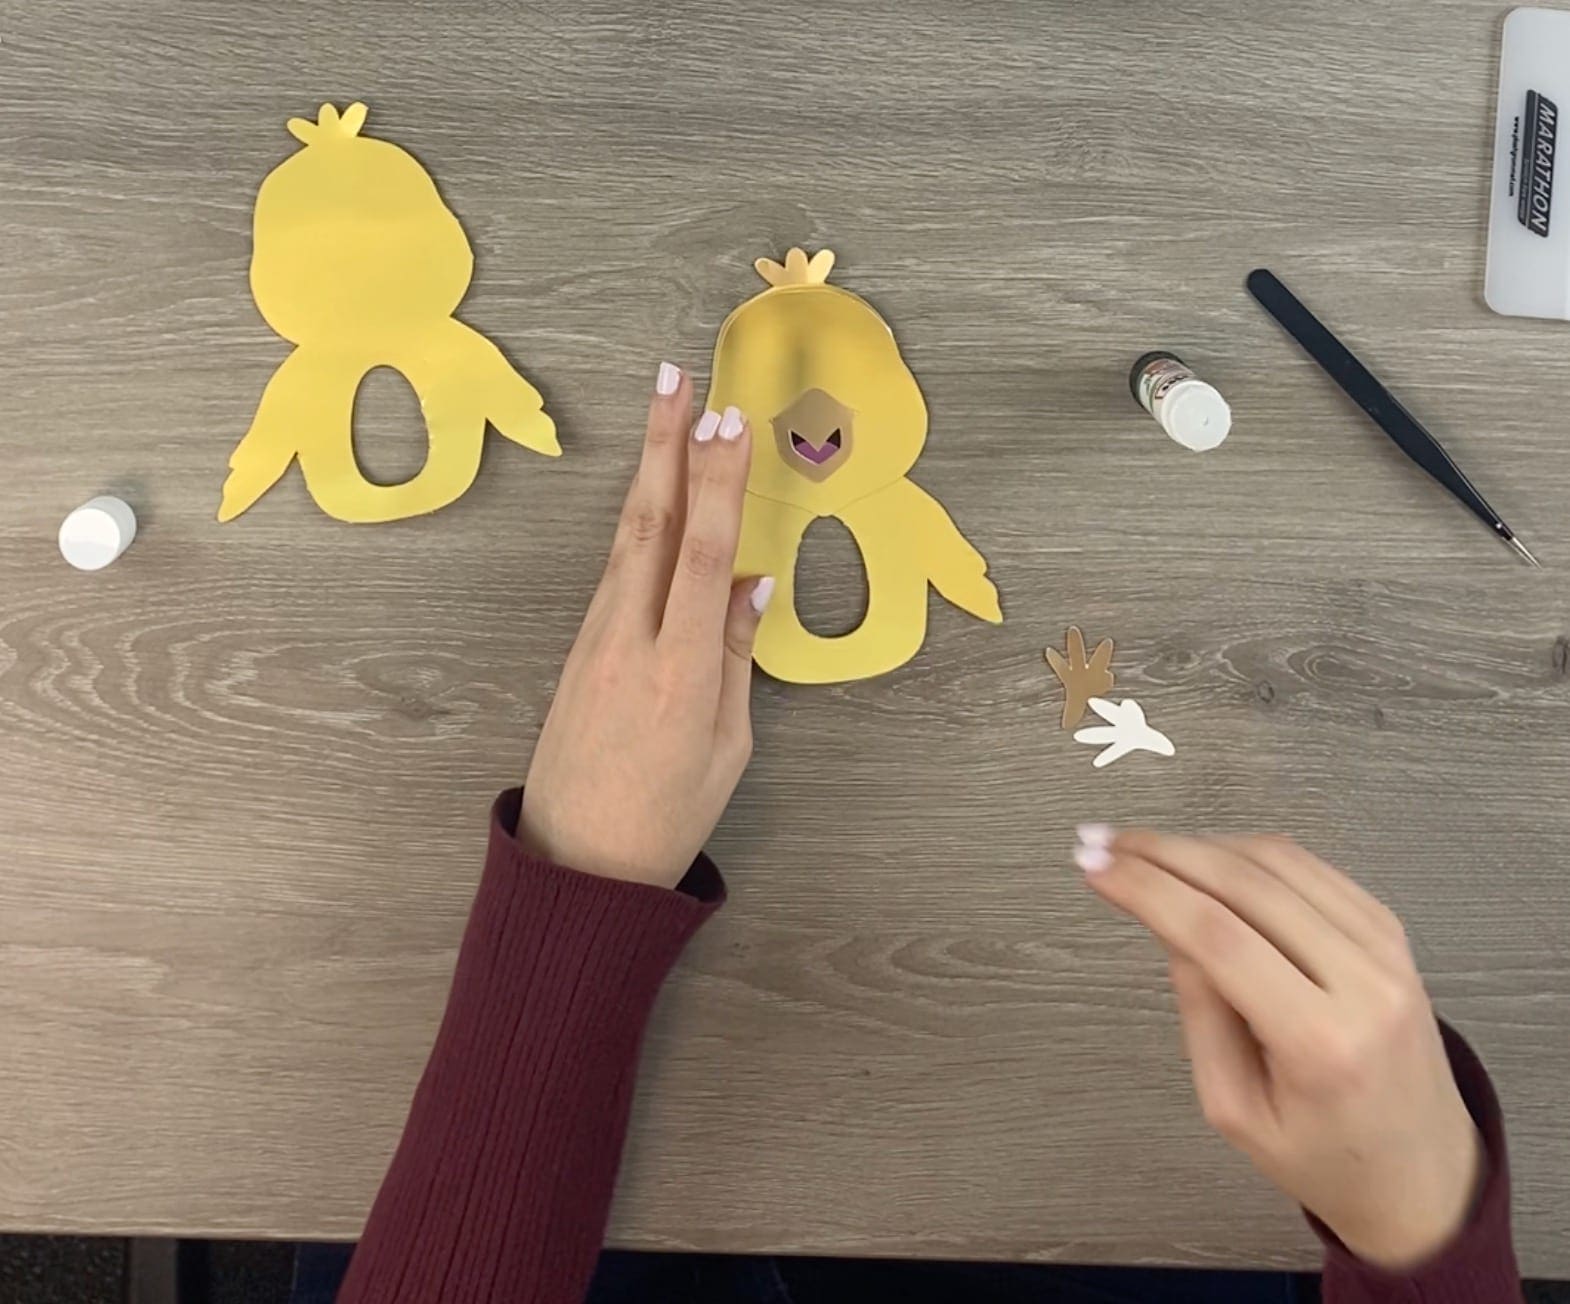
11. Apply the googly eyes!

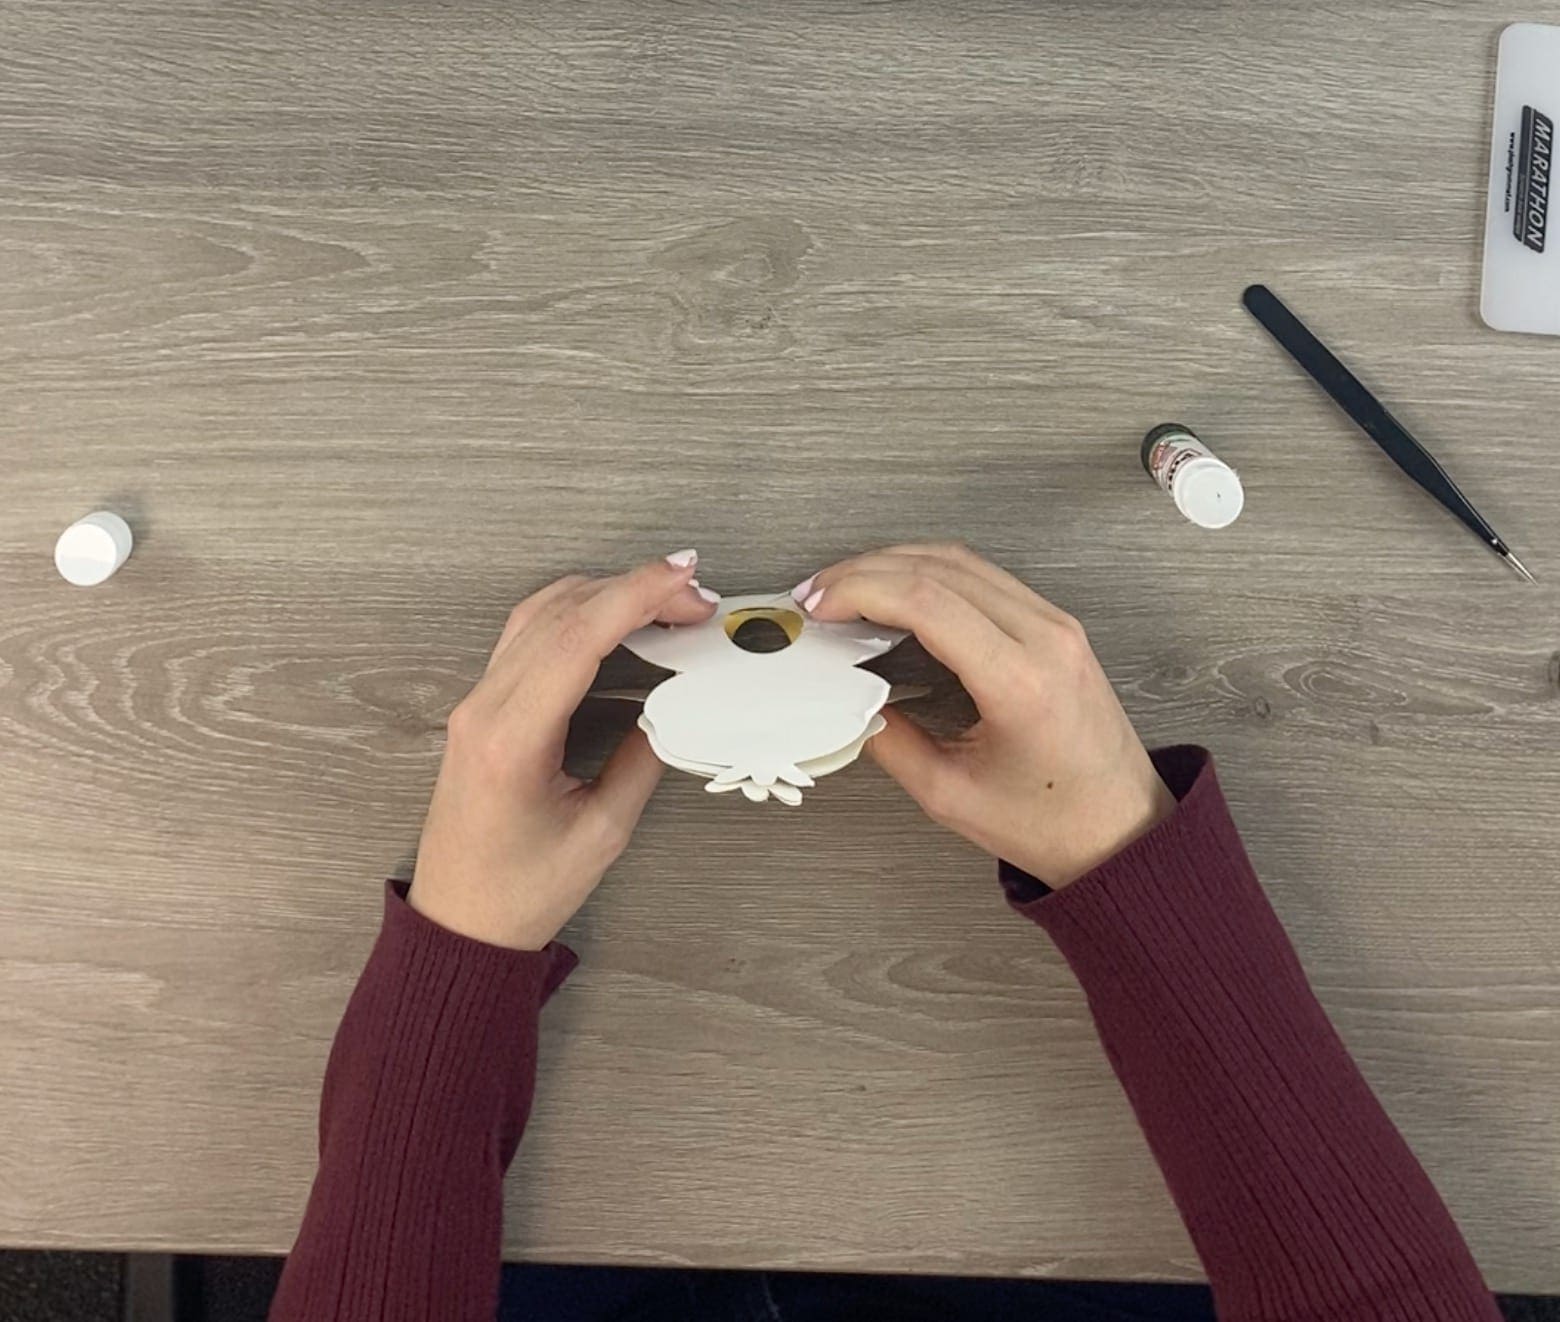
12. Fold the score lines on the bottom base card and apply glue to one edge. Stick the front of the chick to this edge by lining it up with the bottom of the chick.

13. Apply glue to the the other edge of the bottom base card and stick the remaining plain chick silhouette to it, the coloured side of the card should be facing forward.
14. You can then apply the feet in line with the bottom base.
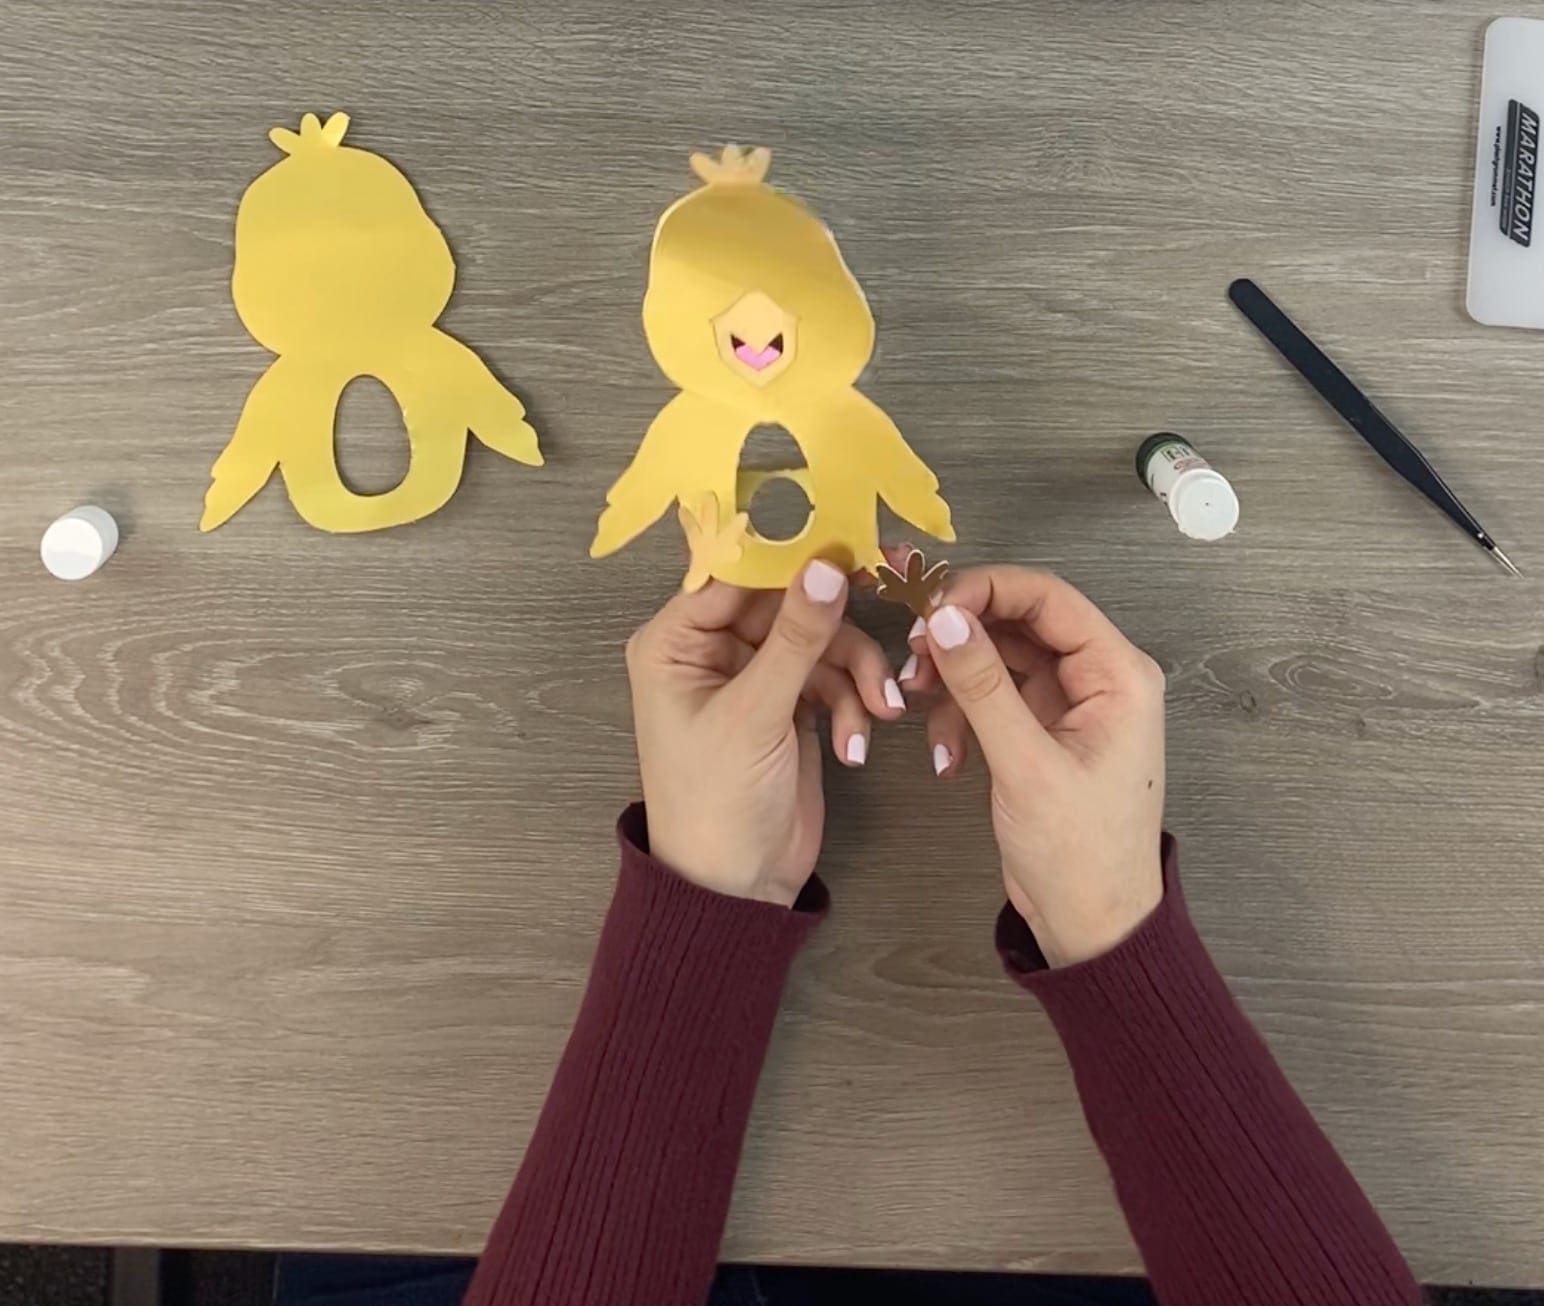
14. Apply glue to the inside of the top of the chick’s head and then secure the two sides to each other.
15. Slide your egg through the side to sit in the egg holder.
DOWNLOAD CUT FILE
Double-click on the Zip file to open it up and then open the cut file. When it opens in Silhouette studio all of the cut files will be on one mat, depending on which Silhouette machine your using you may need to move each of the different-coloured cut files onto different mats. If using a machine with a larger mat you can cut them all on one mat, just make sure each coloured card is in the correct position on the mat in correlation to the correct cut file.
Cut Setting: Cardstock Plain
Blade: 3
Speed: 4
Force: 20
Passes: 1
Brother Cut Files
To import these files into the Brother Canvas Workspace:
DOWNLOAD CUT FILE
After downloading, please log in as usual to your design space account, open a new project mat, then left click on the SVG icon in the top left bar in canvas, this will then allow you to import your files. Once you left click this icon, a pop up box appears with you to choose where to import file from, choose to import the file from your downloads list or where you have chosen to save when unzipped.
Cut Settings:
Card:
Blade: 3.75
Speed: 1
Pressure: 0
Passes: 1
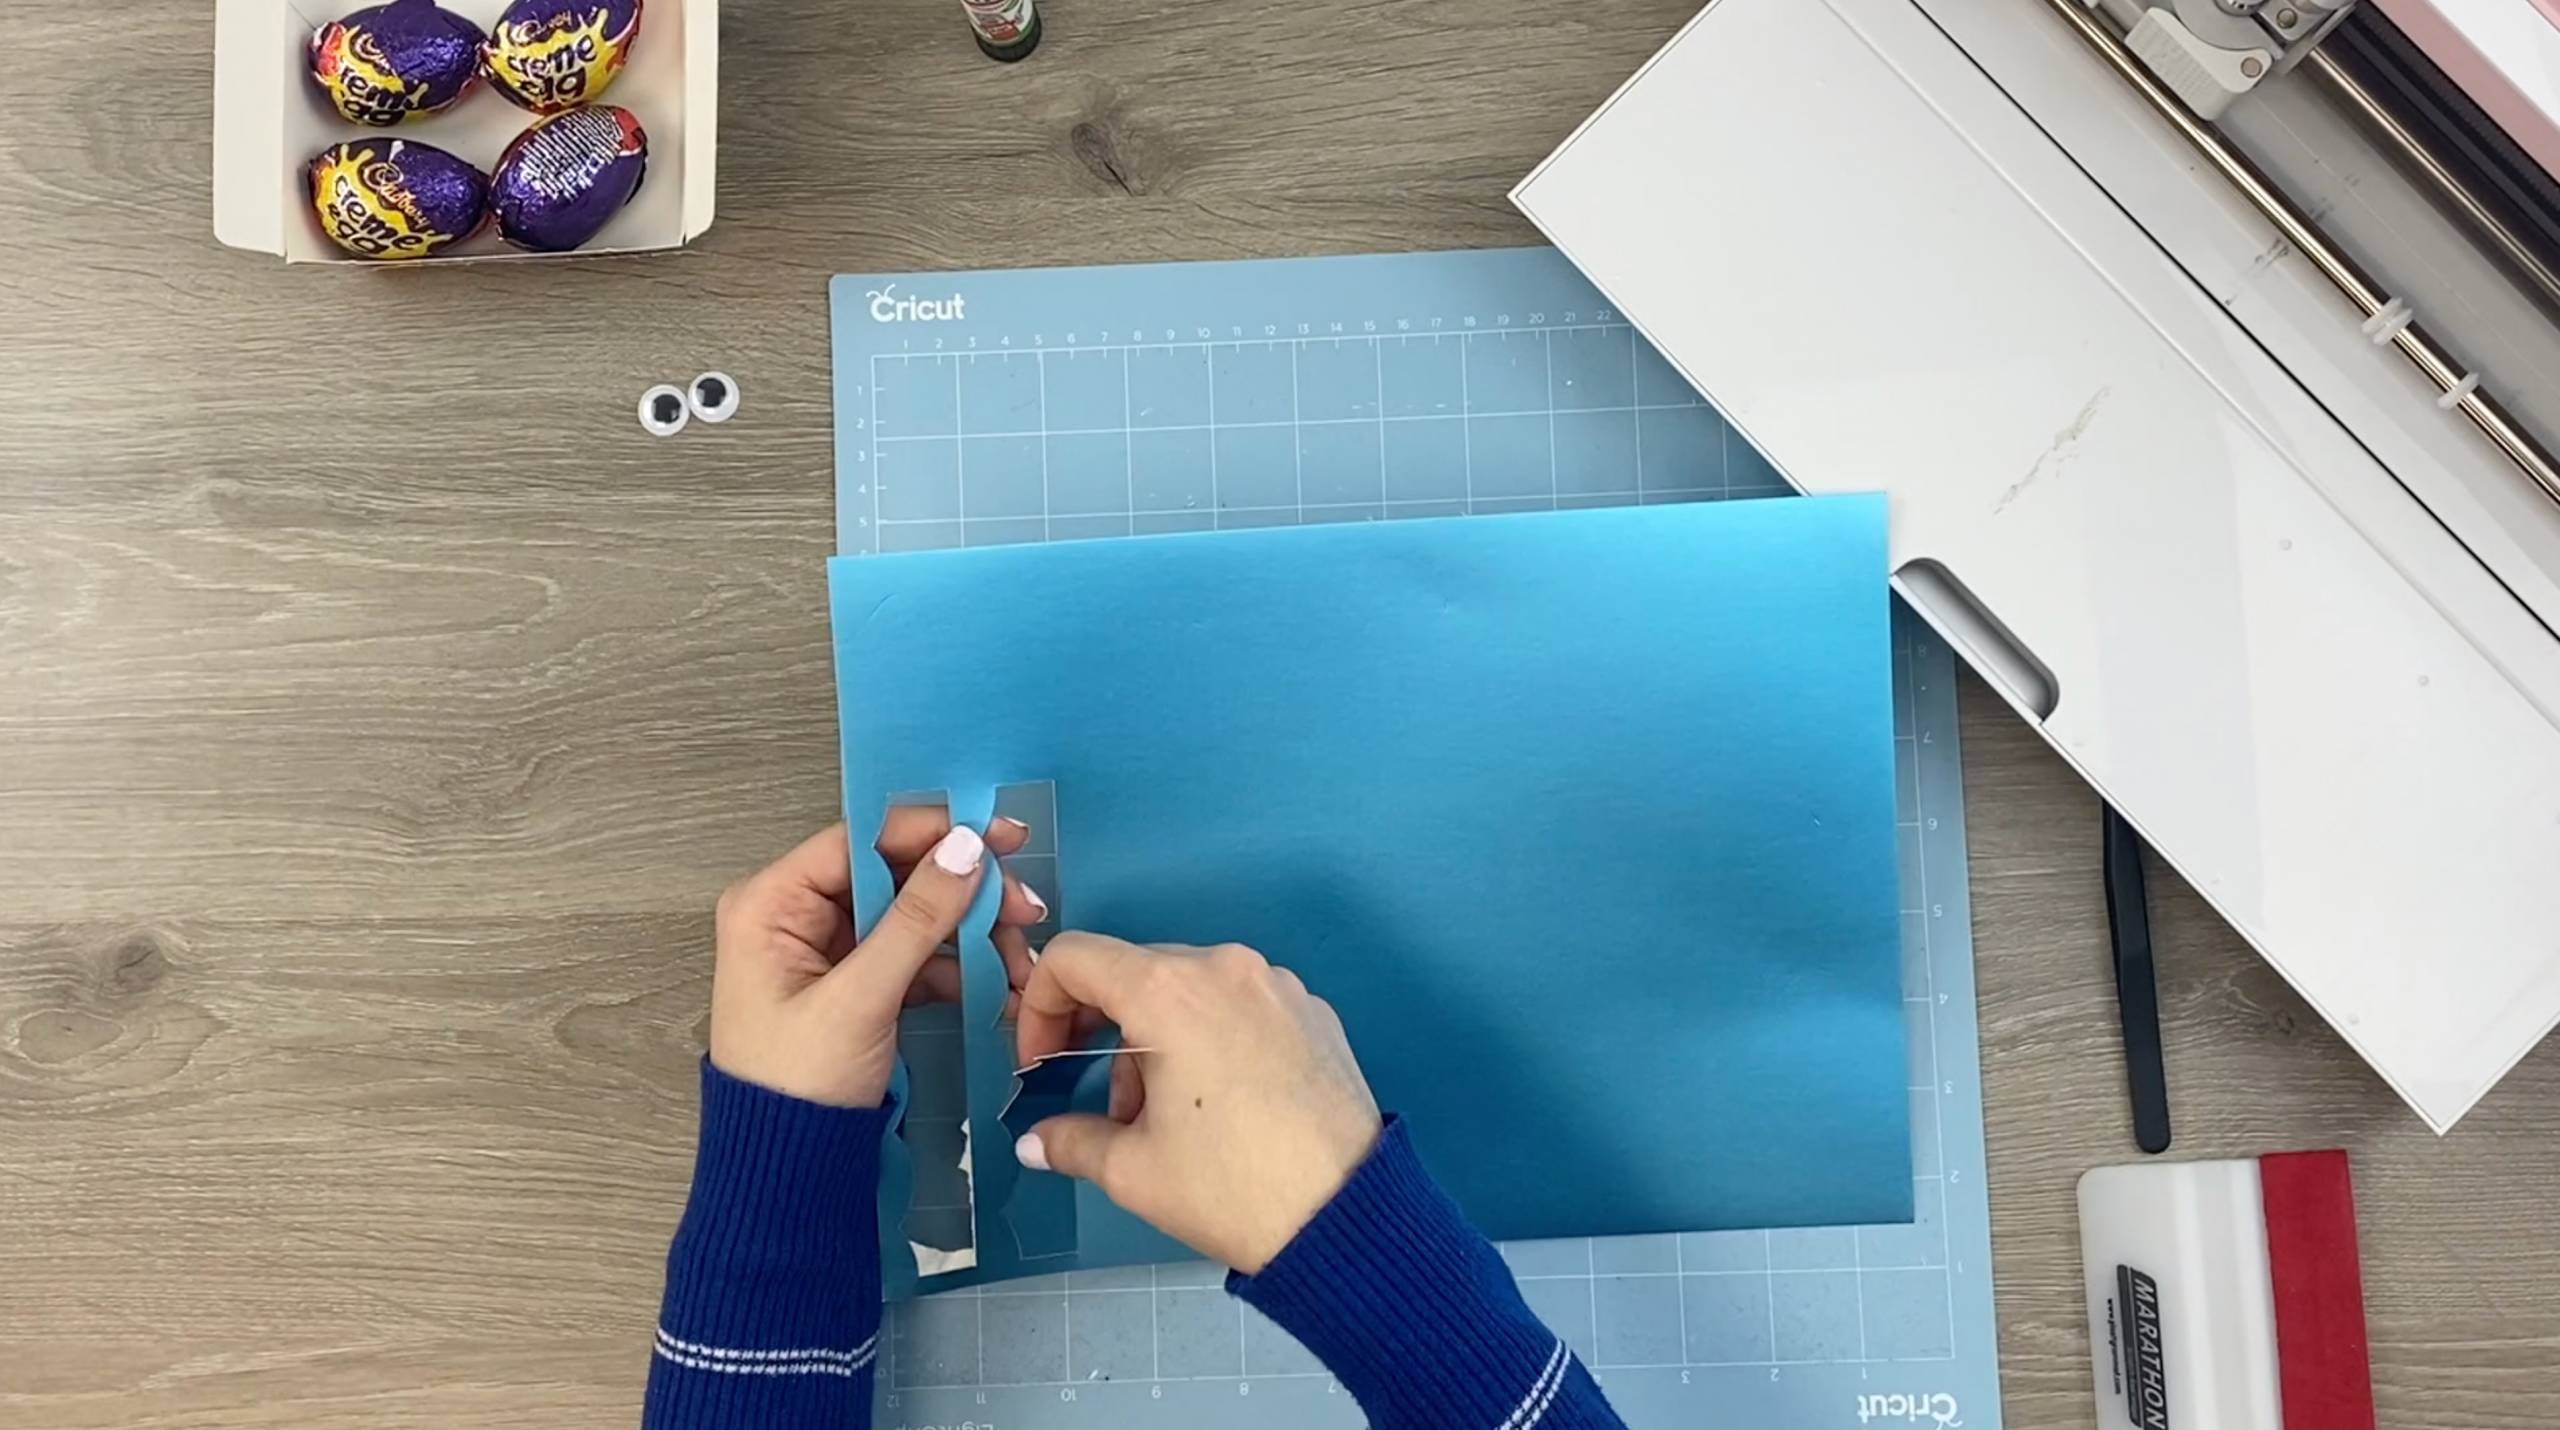
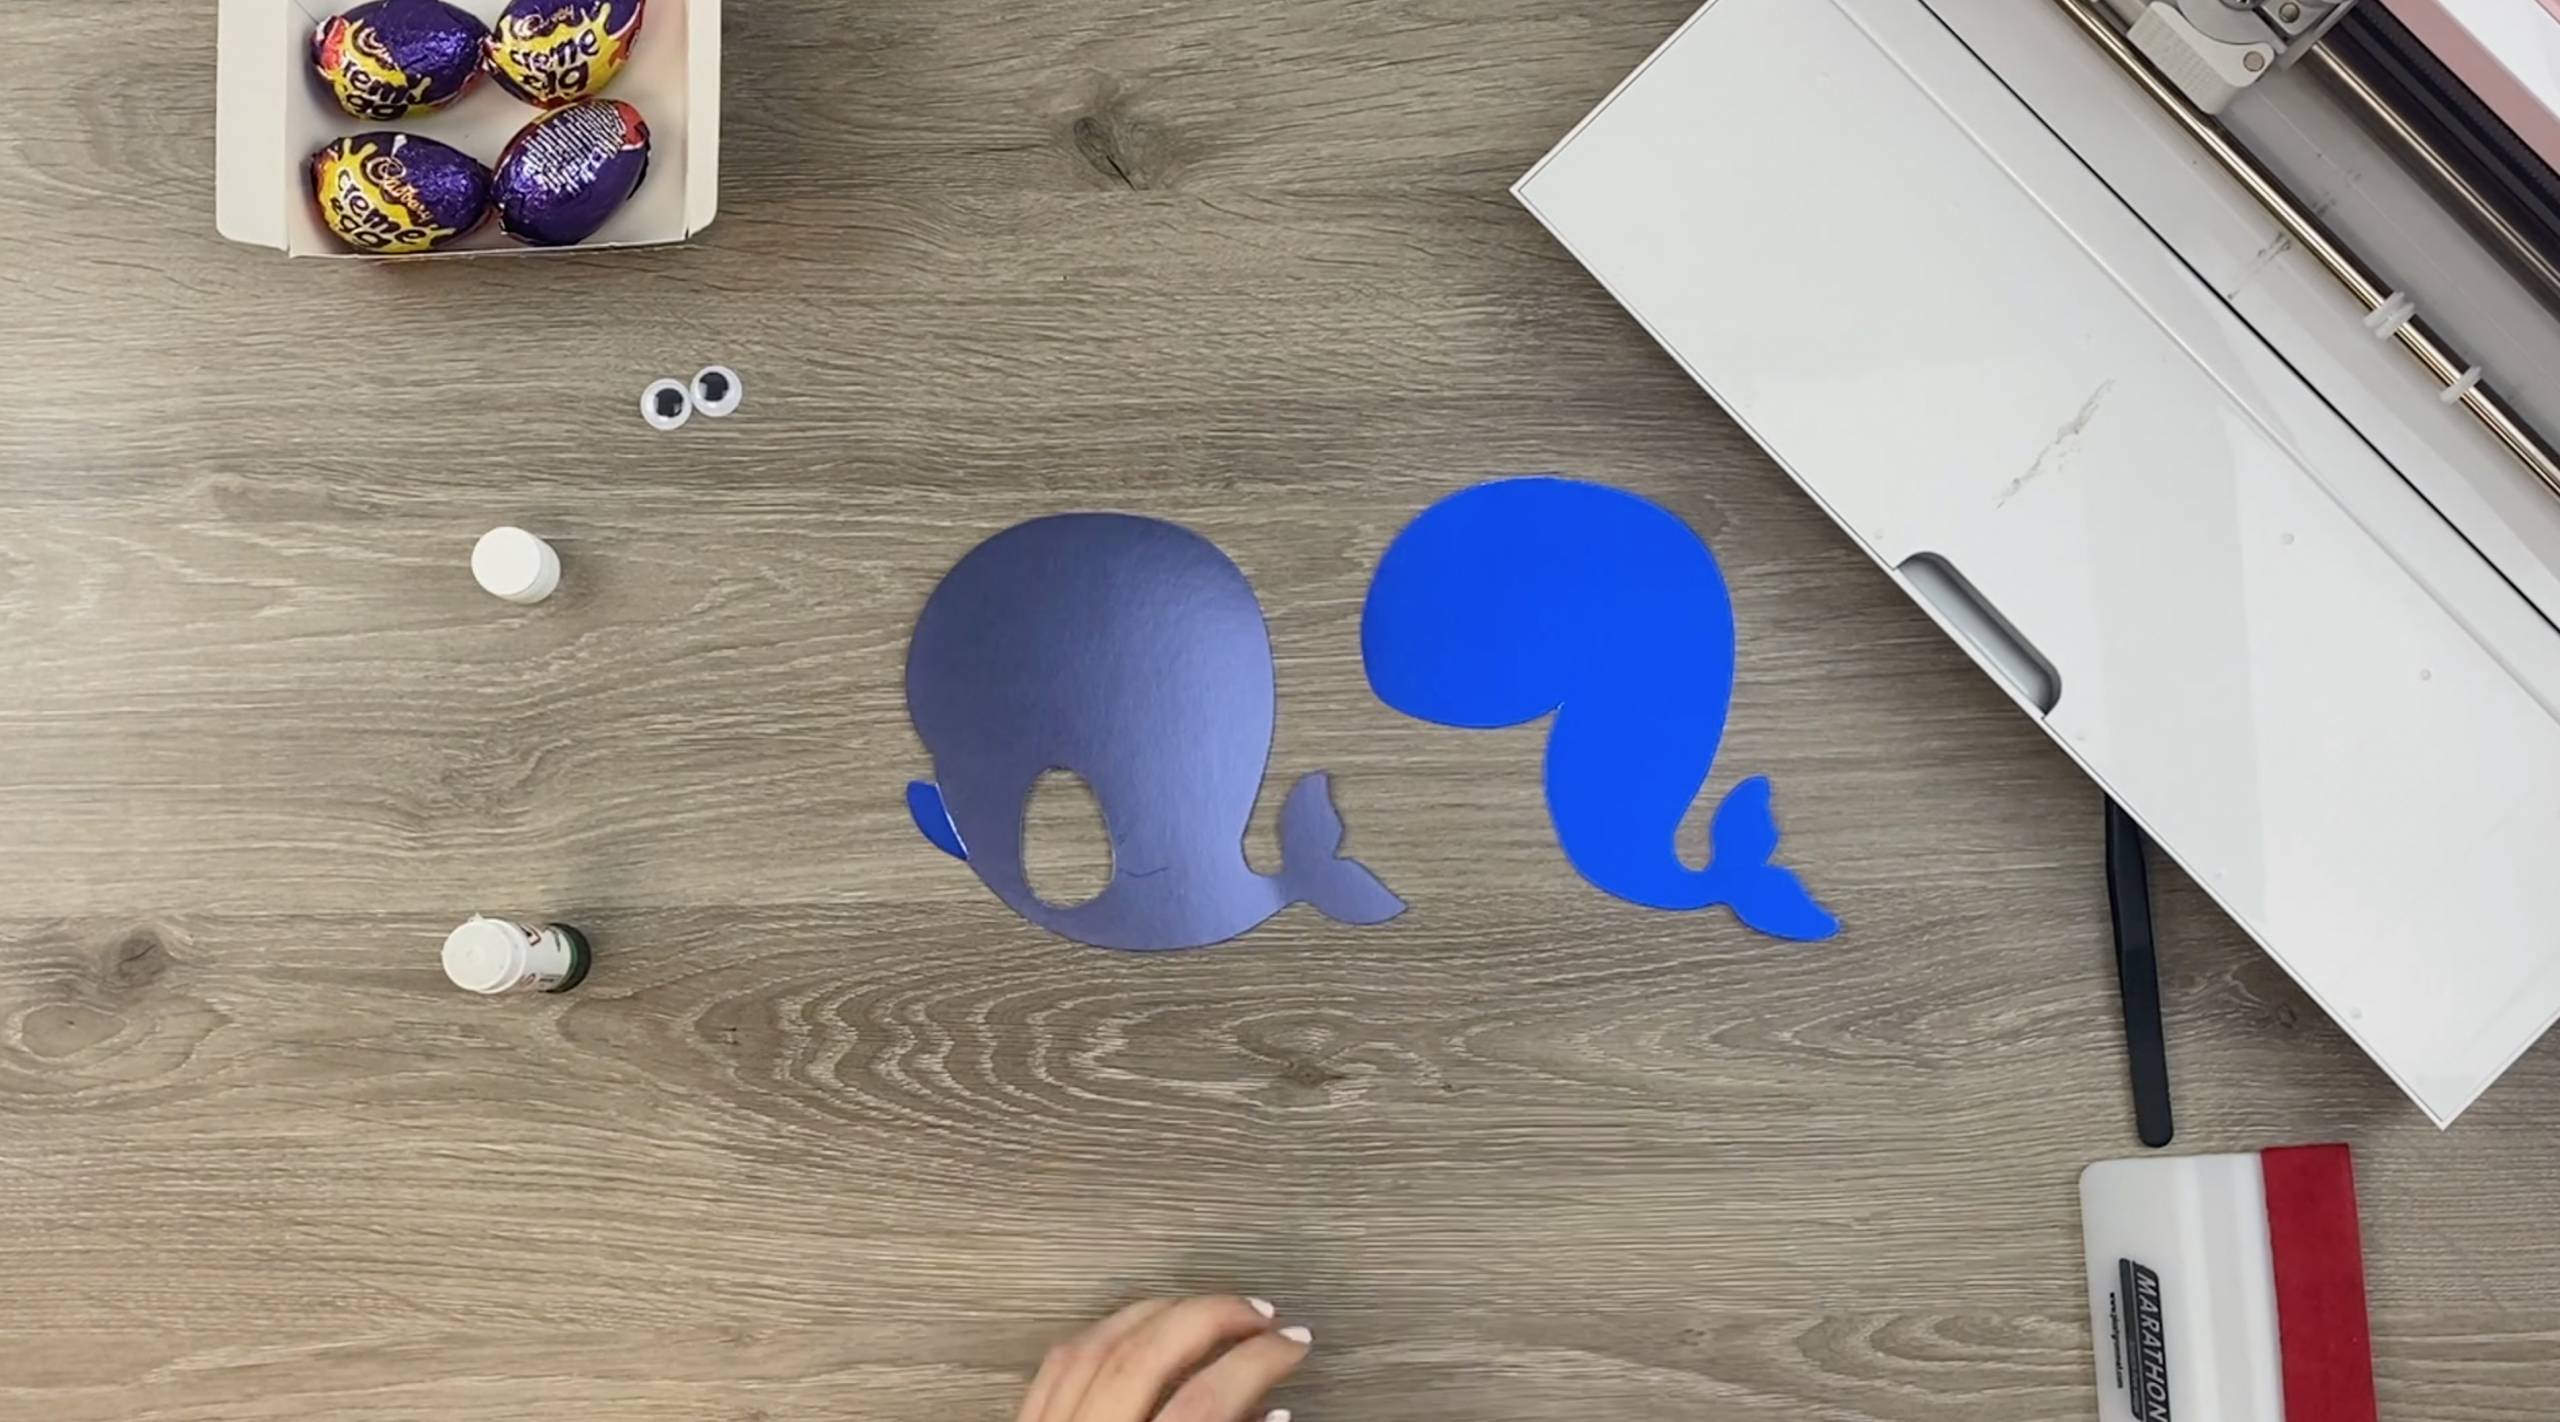
Whale
What you’ll need:
- Cricut Maker. Available here
- Airforce blue satin card. Available here
- Sapphire blue BOTH shades of satin card. Available here
- Weeding tweezers (optional but help to avoid finger marks on the card) Available here
- Squeegee (optional but an easier way of securing the card onto your cutting mat) Available here
- Googly eyes. Available here
- Glue stick. Available here
1. Download the Chick cut files and unzip them by double clicking on the file, which should open the file up. This zip file will have all the animal cut files in for you to select the ones you’d like to use.
2. Upload each whale PNG into the Cricut Design Space and then insert them onto the canvas.
3. Resize them as soon as you have inserted them onto the canvas as they will all still be grouped. We re-sized them to the measurement shown below.
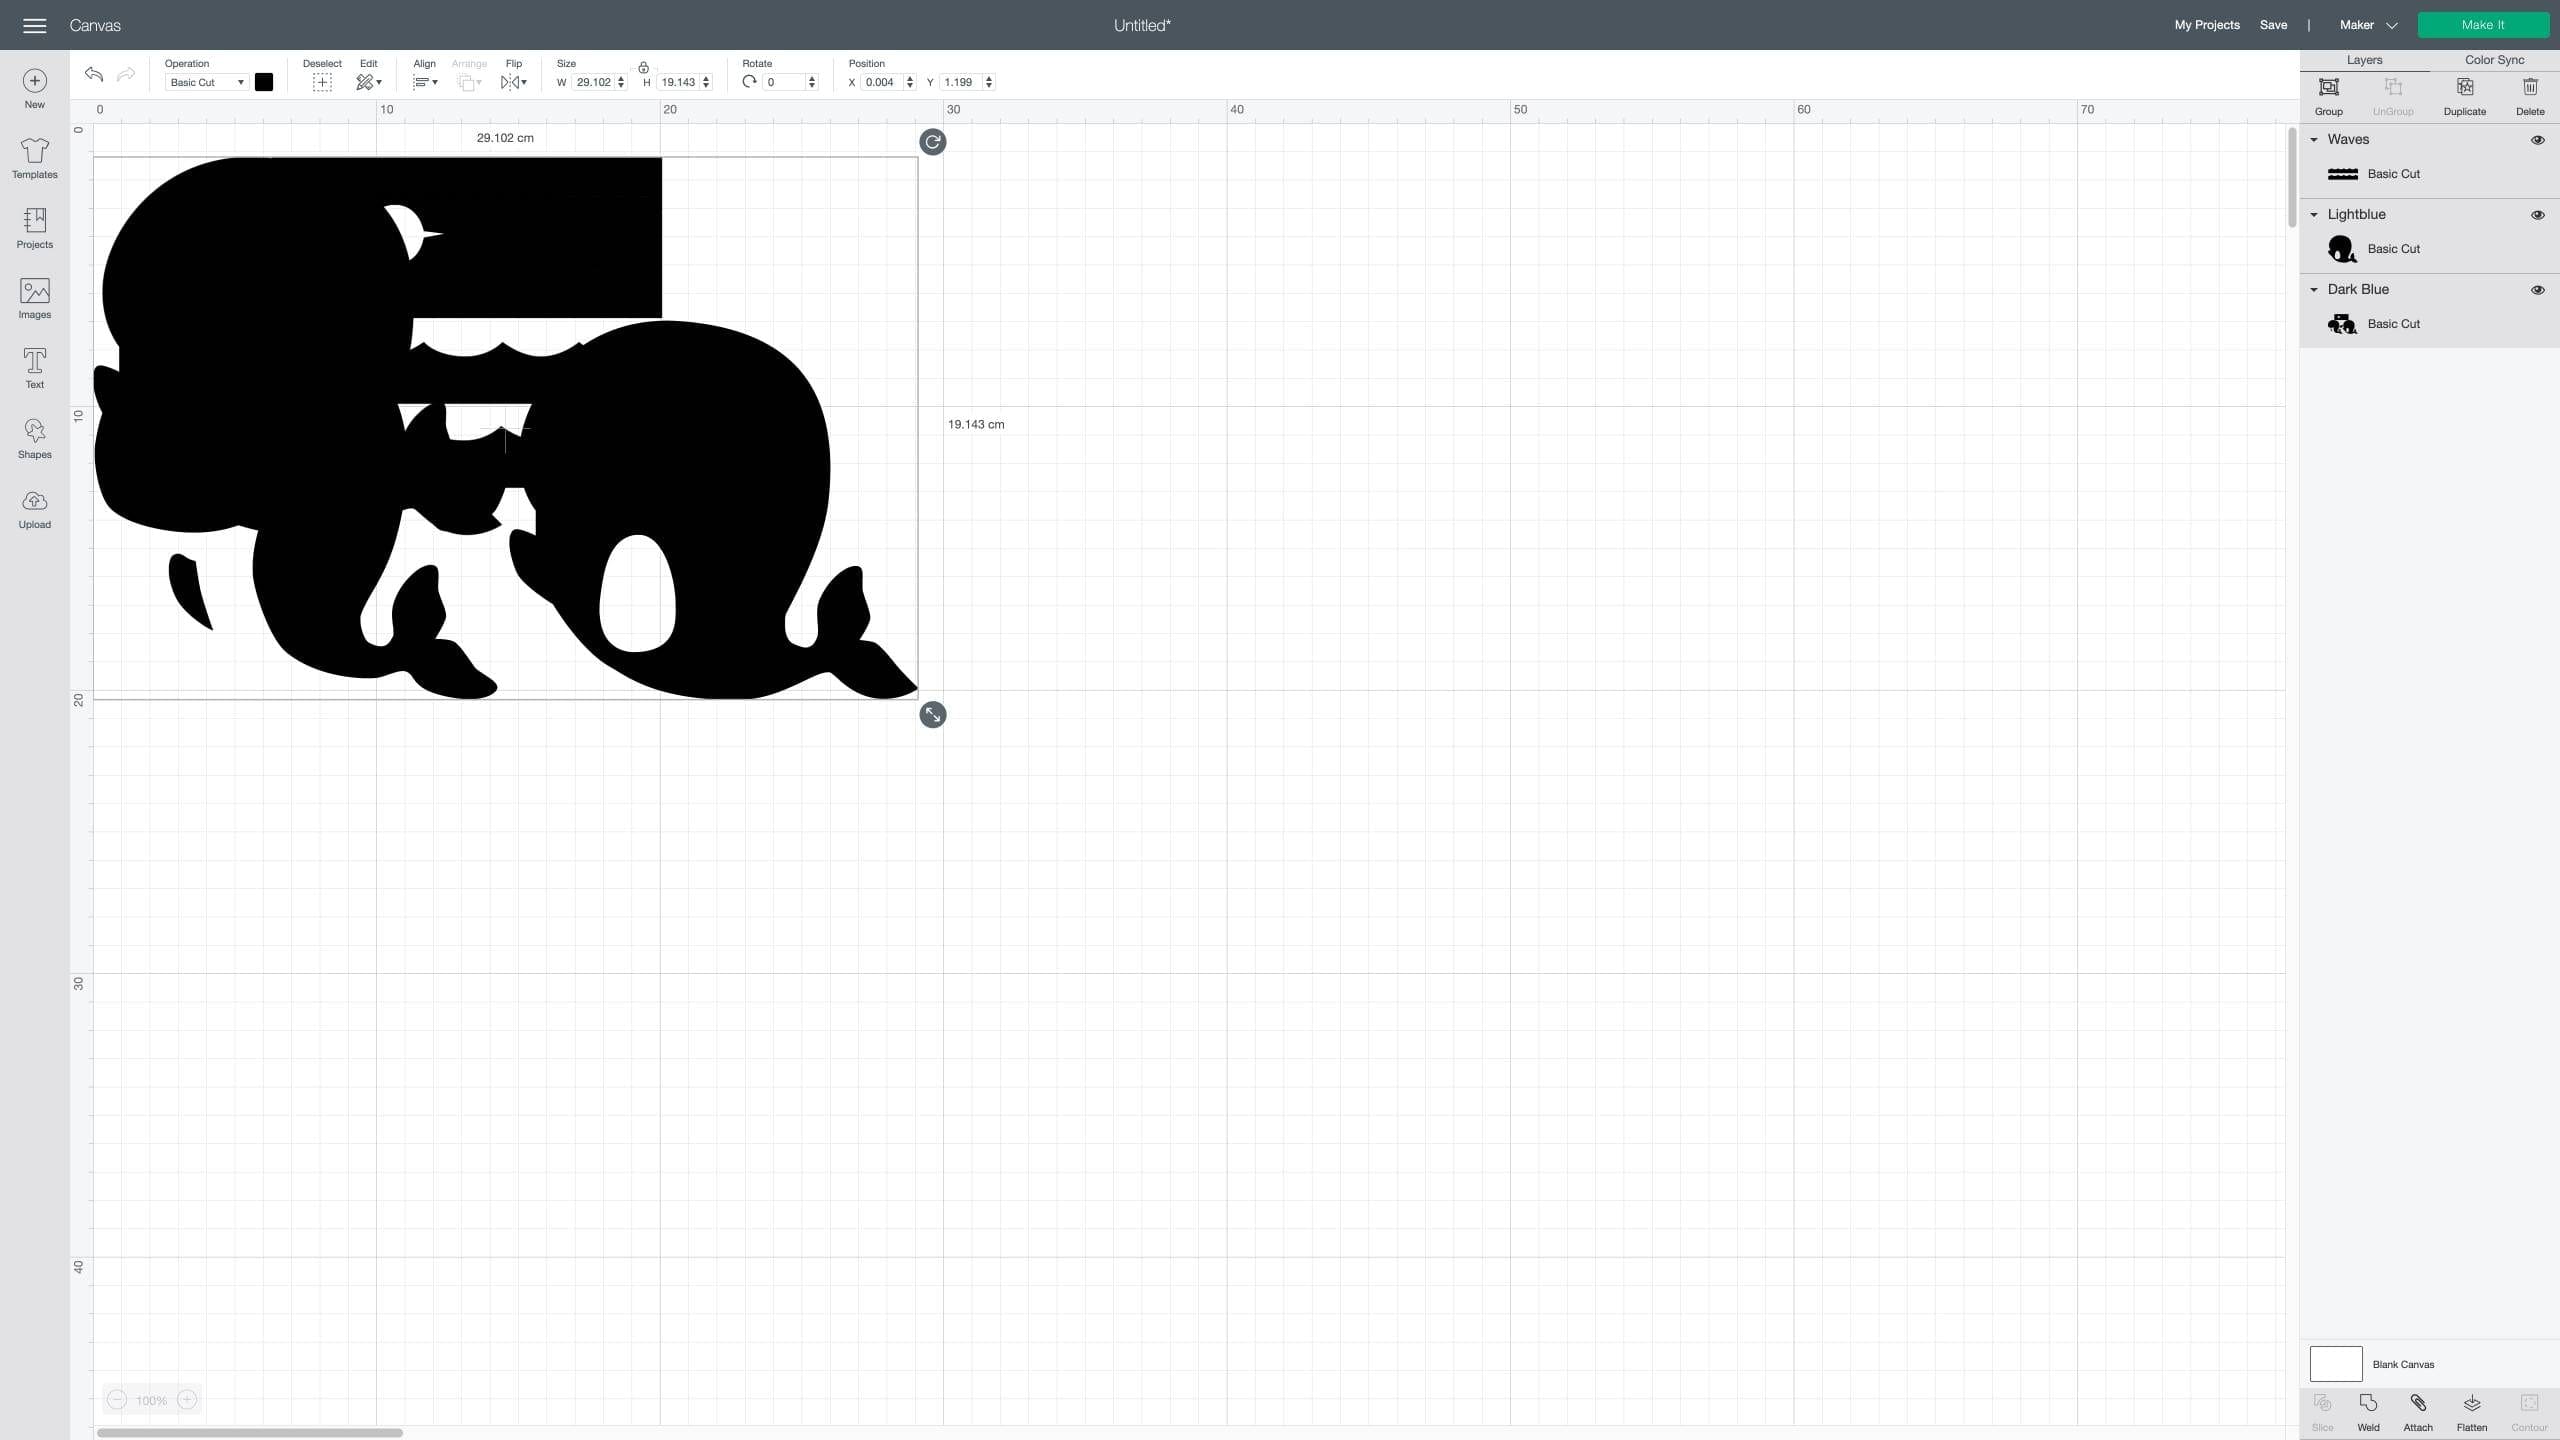
4. Position them so that all the layers are separated and select ‘Make it’ in the top right.
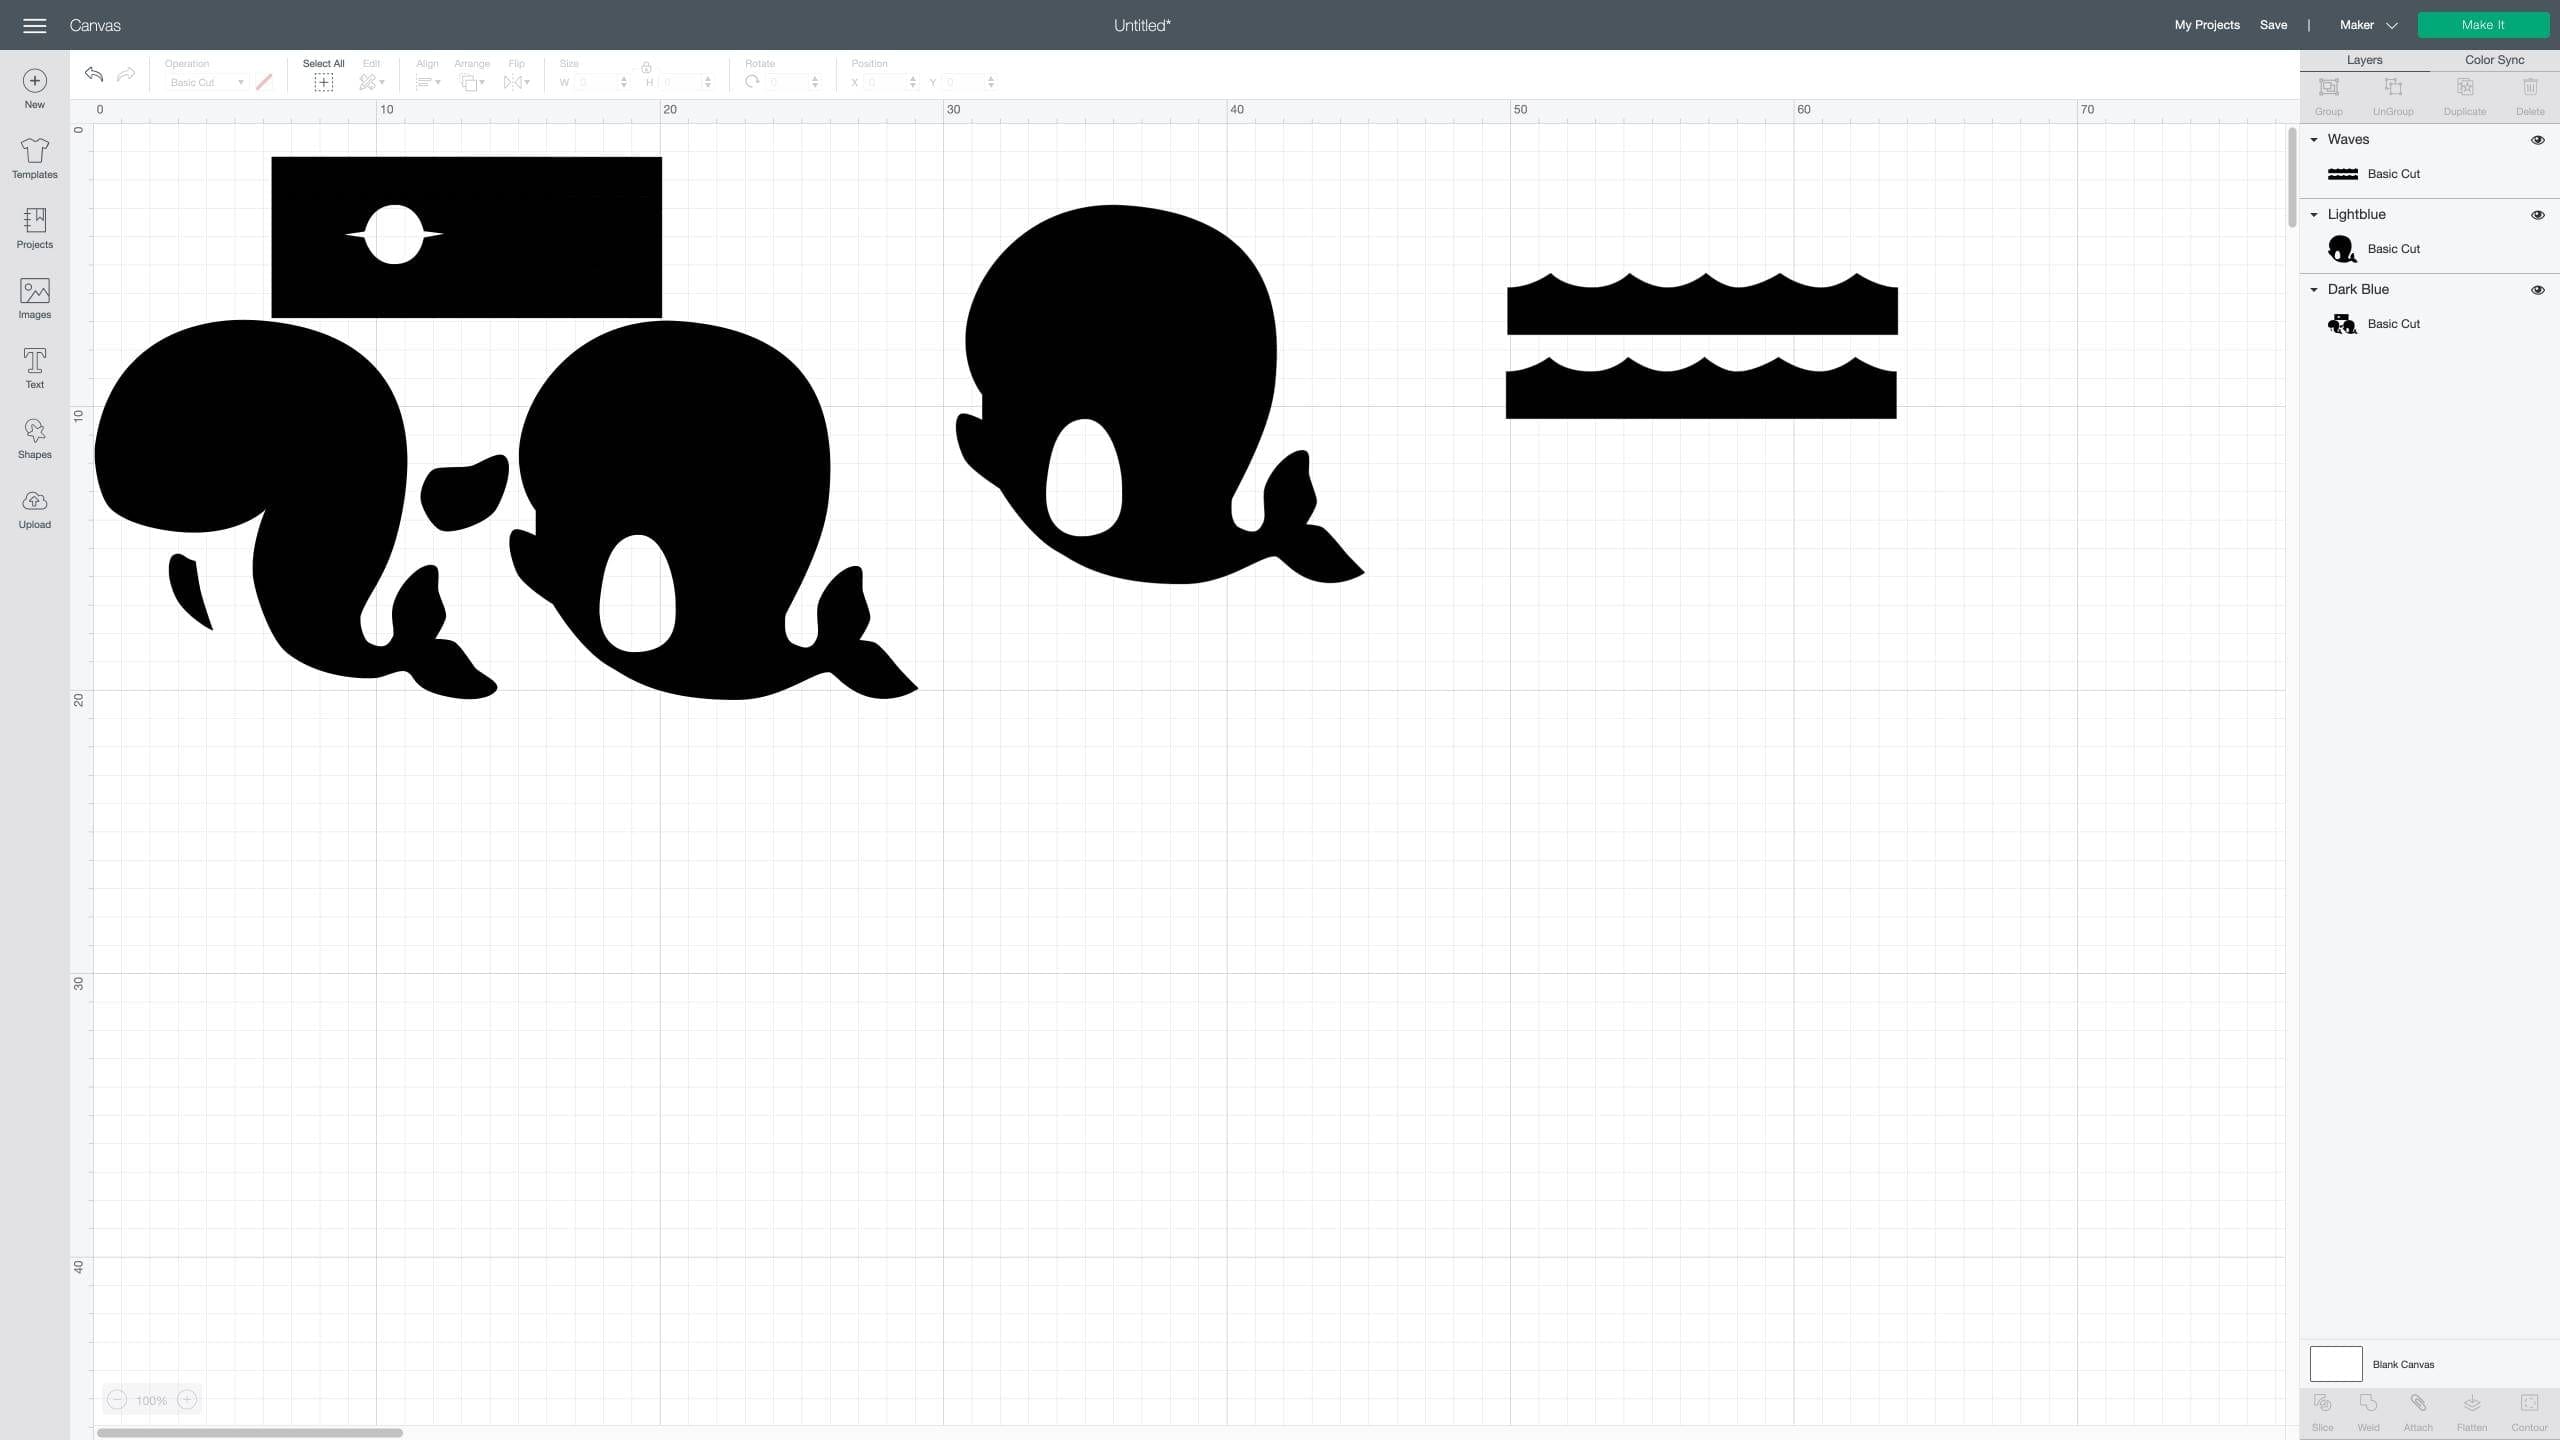
5. Move each layer so that each one is on a different cutting mat, as shown below. To make these instructions easier order them like this: 1. the base silhouettes, 2. belly 3. waves. Press ‘continue’ in the bottom right of the screen.

6. Select your Cricut device and set the base material to Heavy cardstock and Default pressure setting. Now you’re ready to cut.
7. Place the Airforce Blue satin card onto the cutting mat, rub gently to secure. Load onto the machine and press the cricut symbol to start the cut.
8. When done unload the mat and gently peel back the card. Some of the shapes will probably need to be popped out of the card. When all shapes are separated, place them to one side.
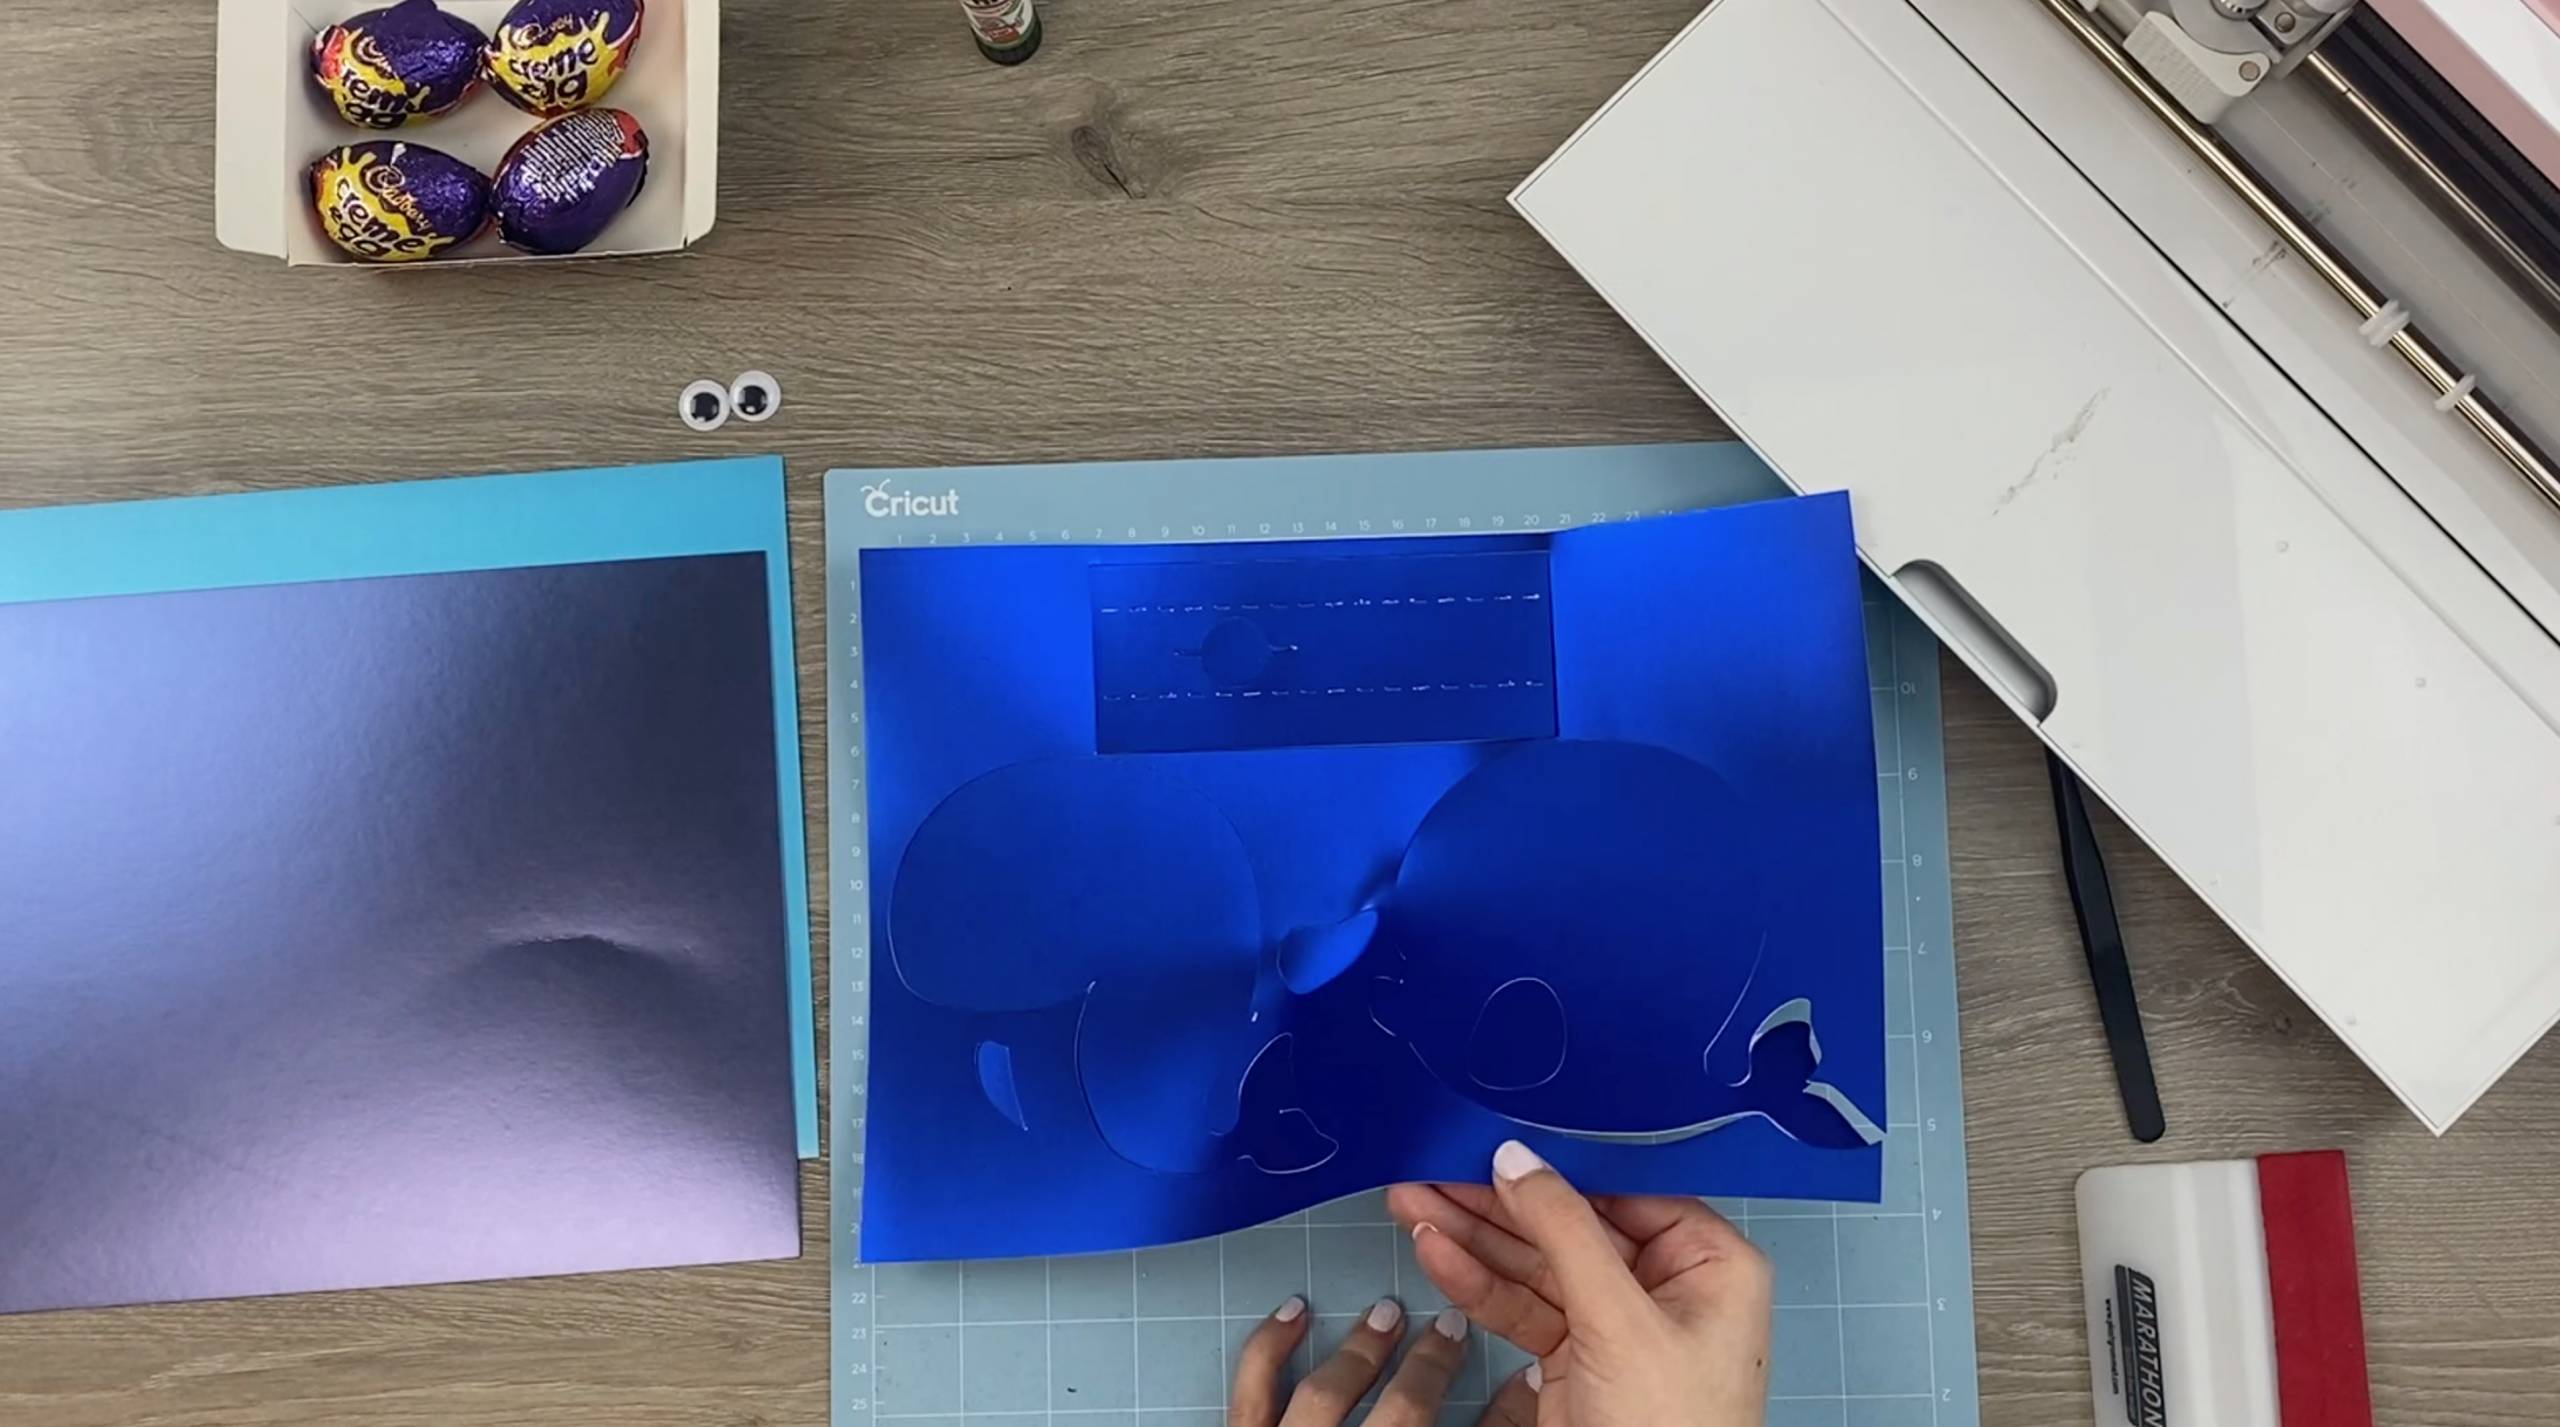
9. Repeat steps 7 and 8 with the remaining coloured card, in this order: Dark Sapphire Blue satin card for the belly, Light Sapphire Blue satin card for the waves.
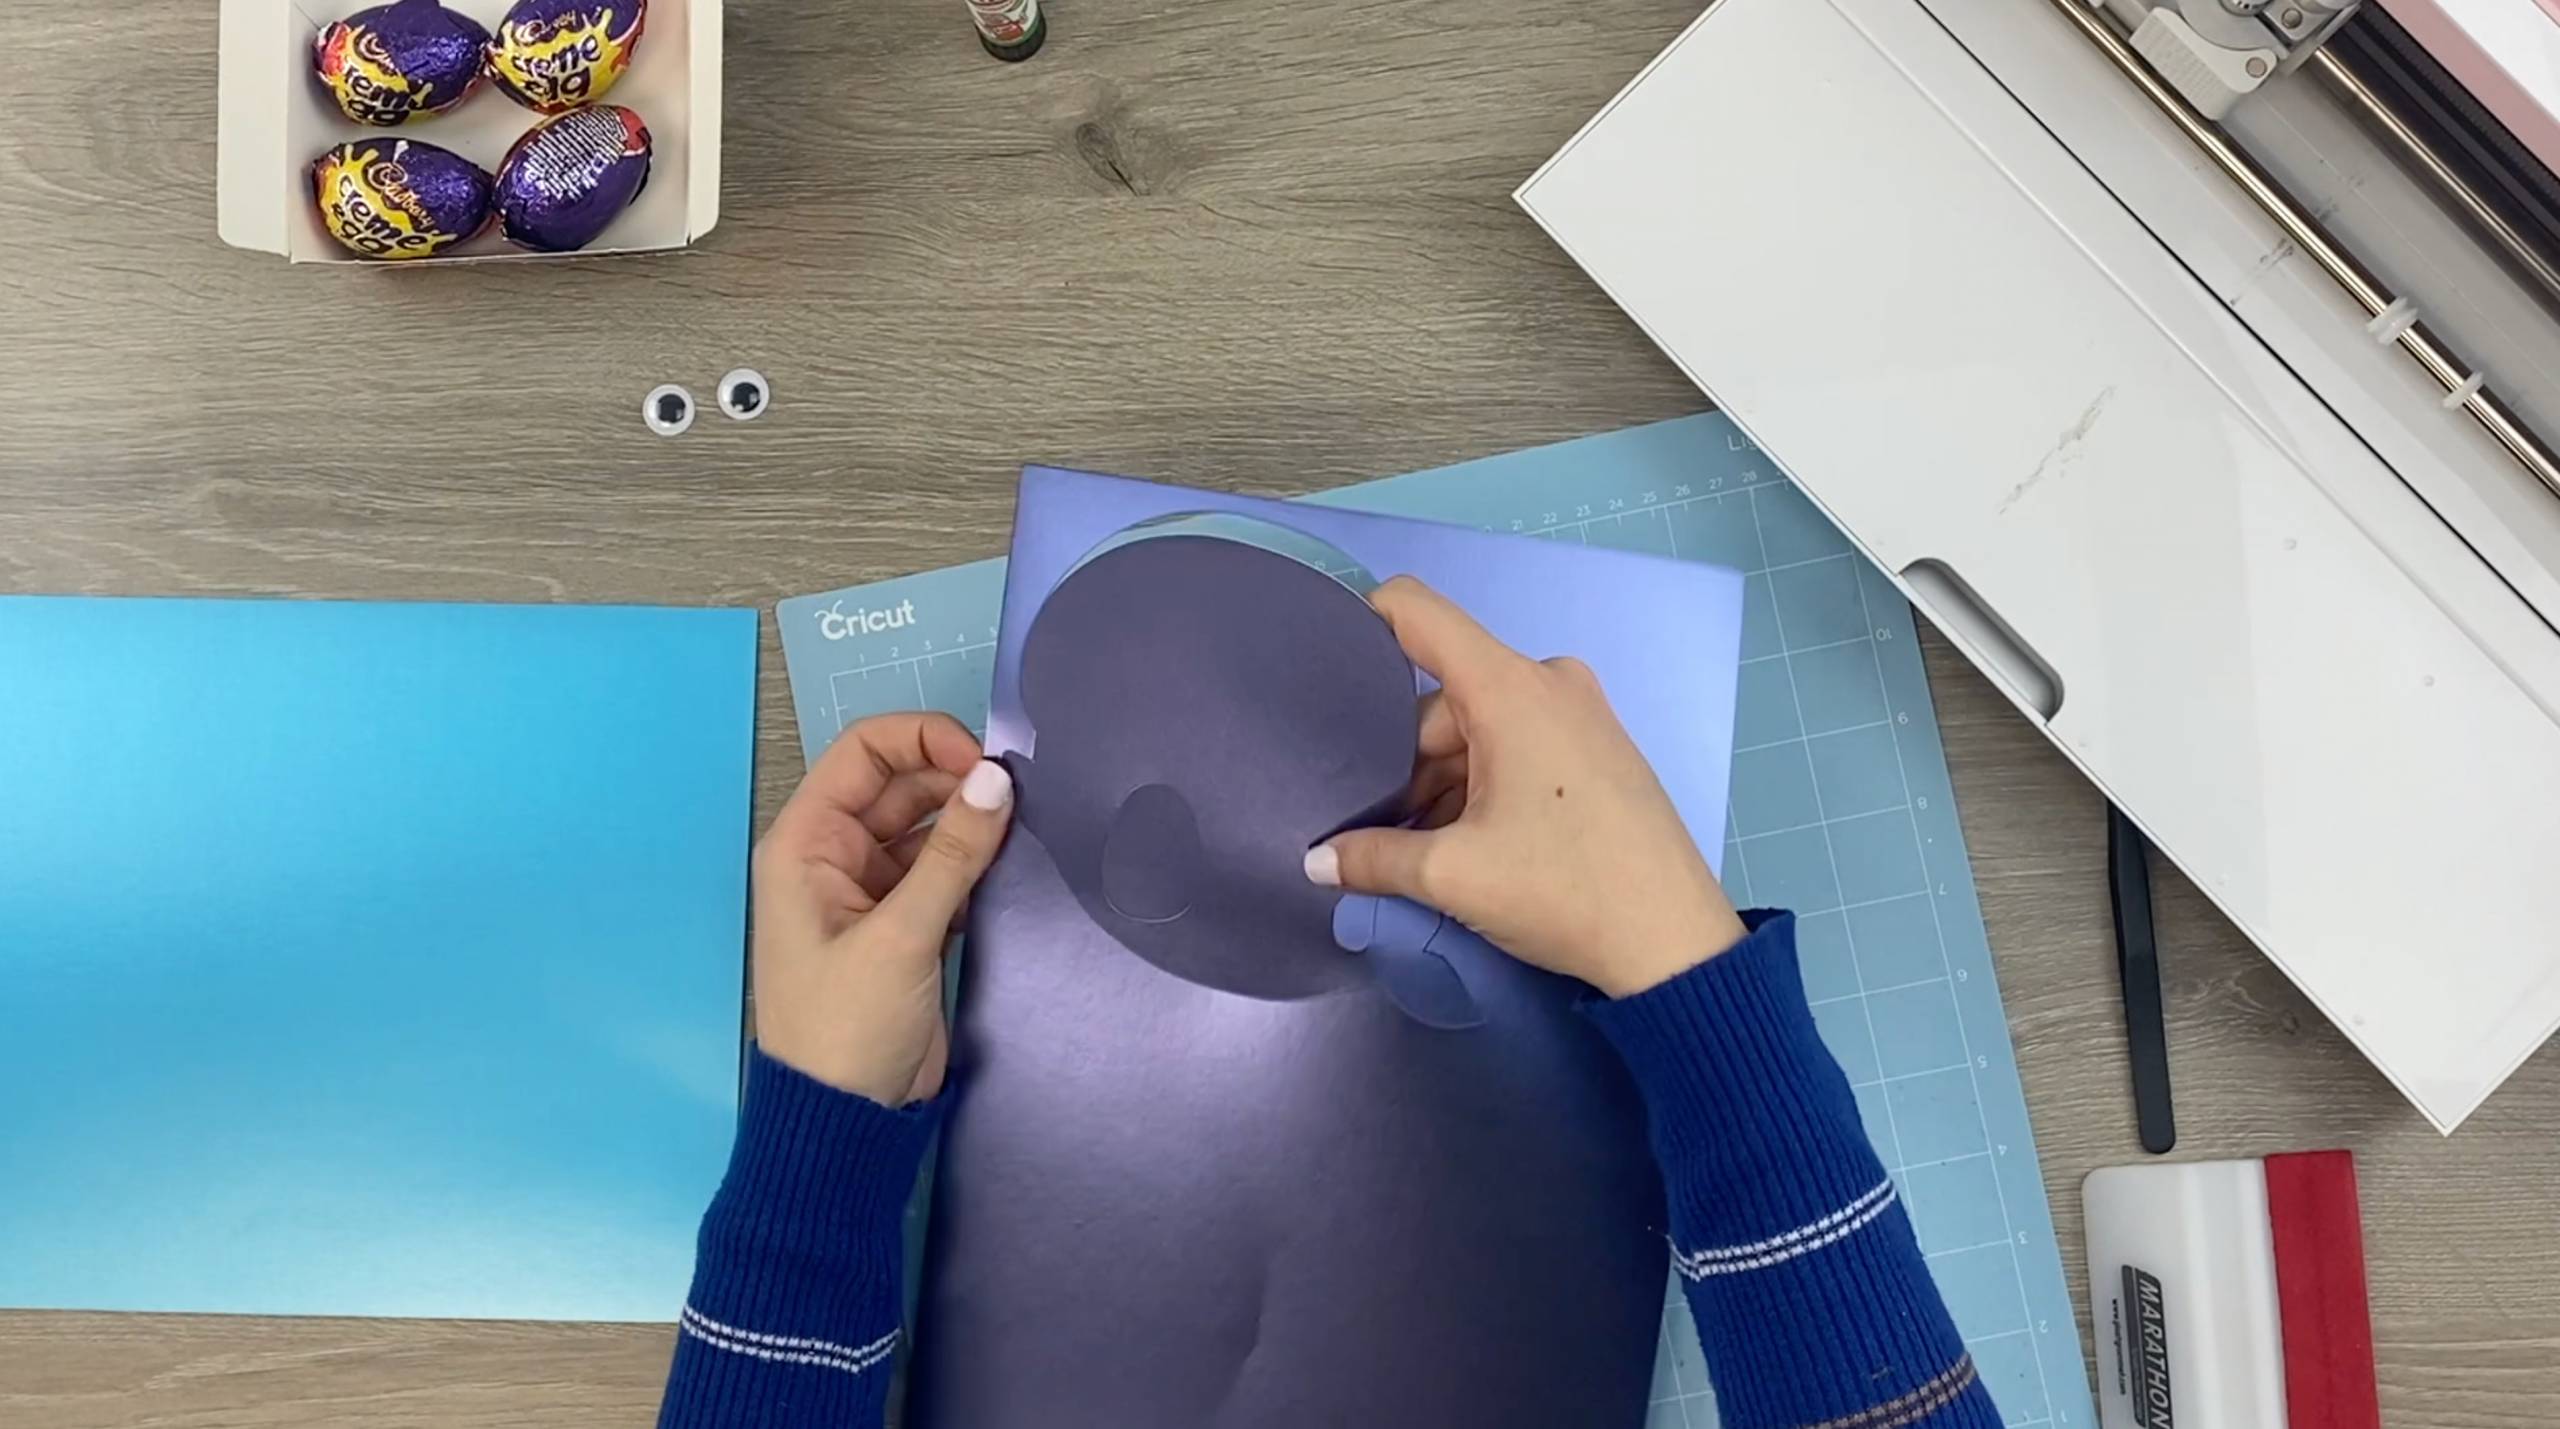
10. Firstly, position and apply the left fin, then stick one of the Airforce Blue sides on top of the dark Sapphire Blue, then apply the right fin. Apply one of the wave sides to the front of the whale, the first full ‘dip’ should fit nicely under the egg window. Apply the other wave to the remaining whale silhouette, the glue should be applied to the coloured side as the coloured side faces forward.
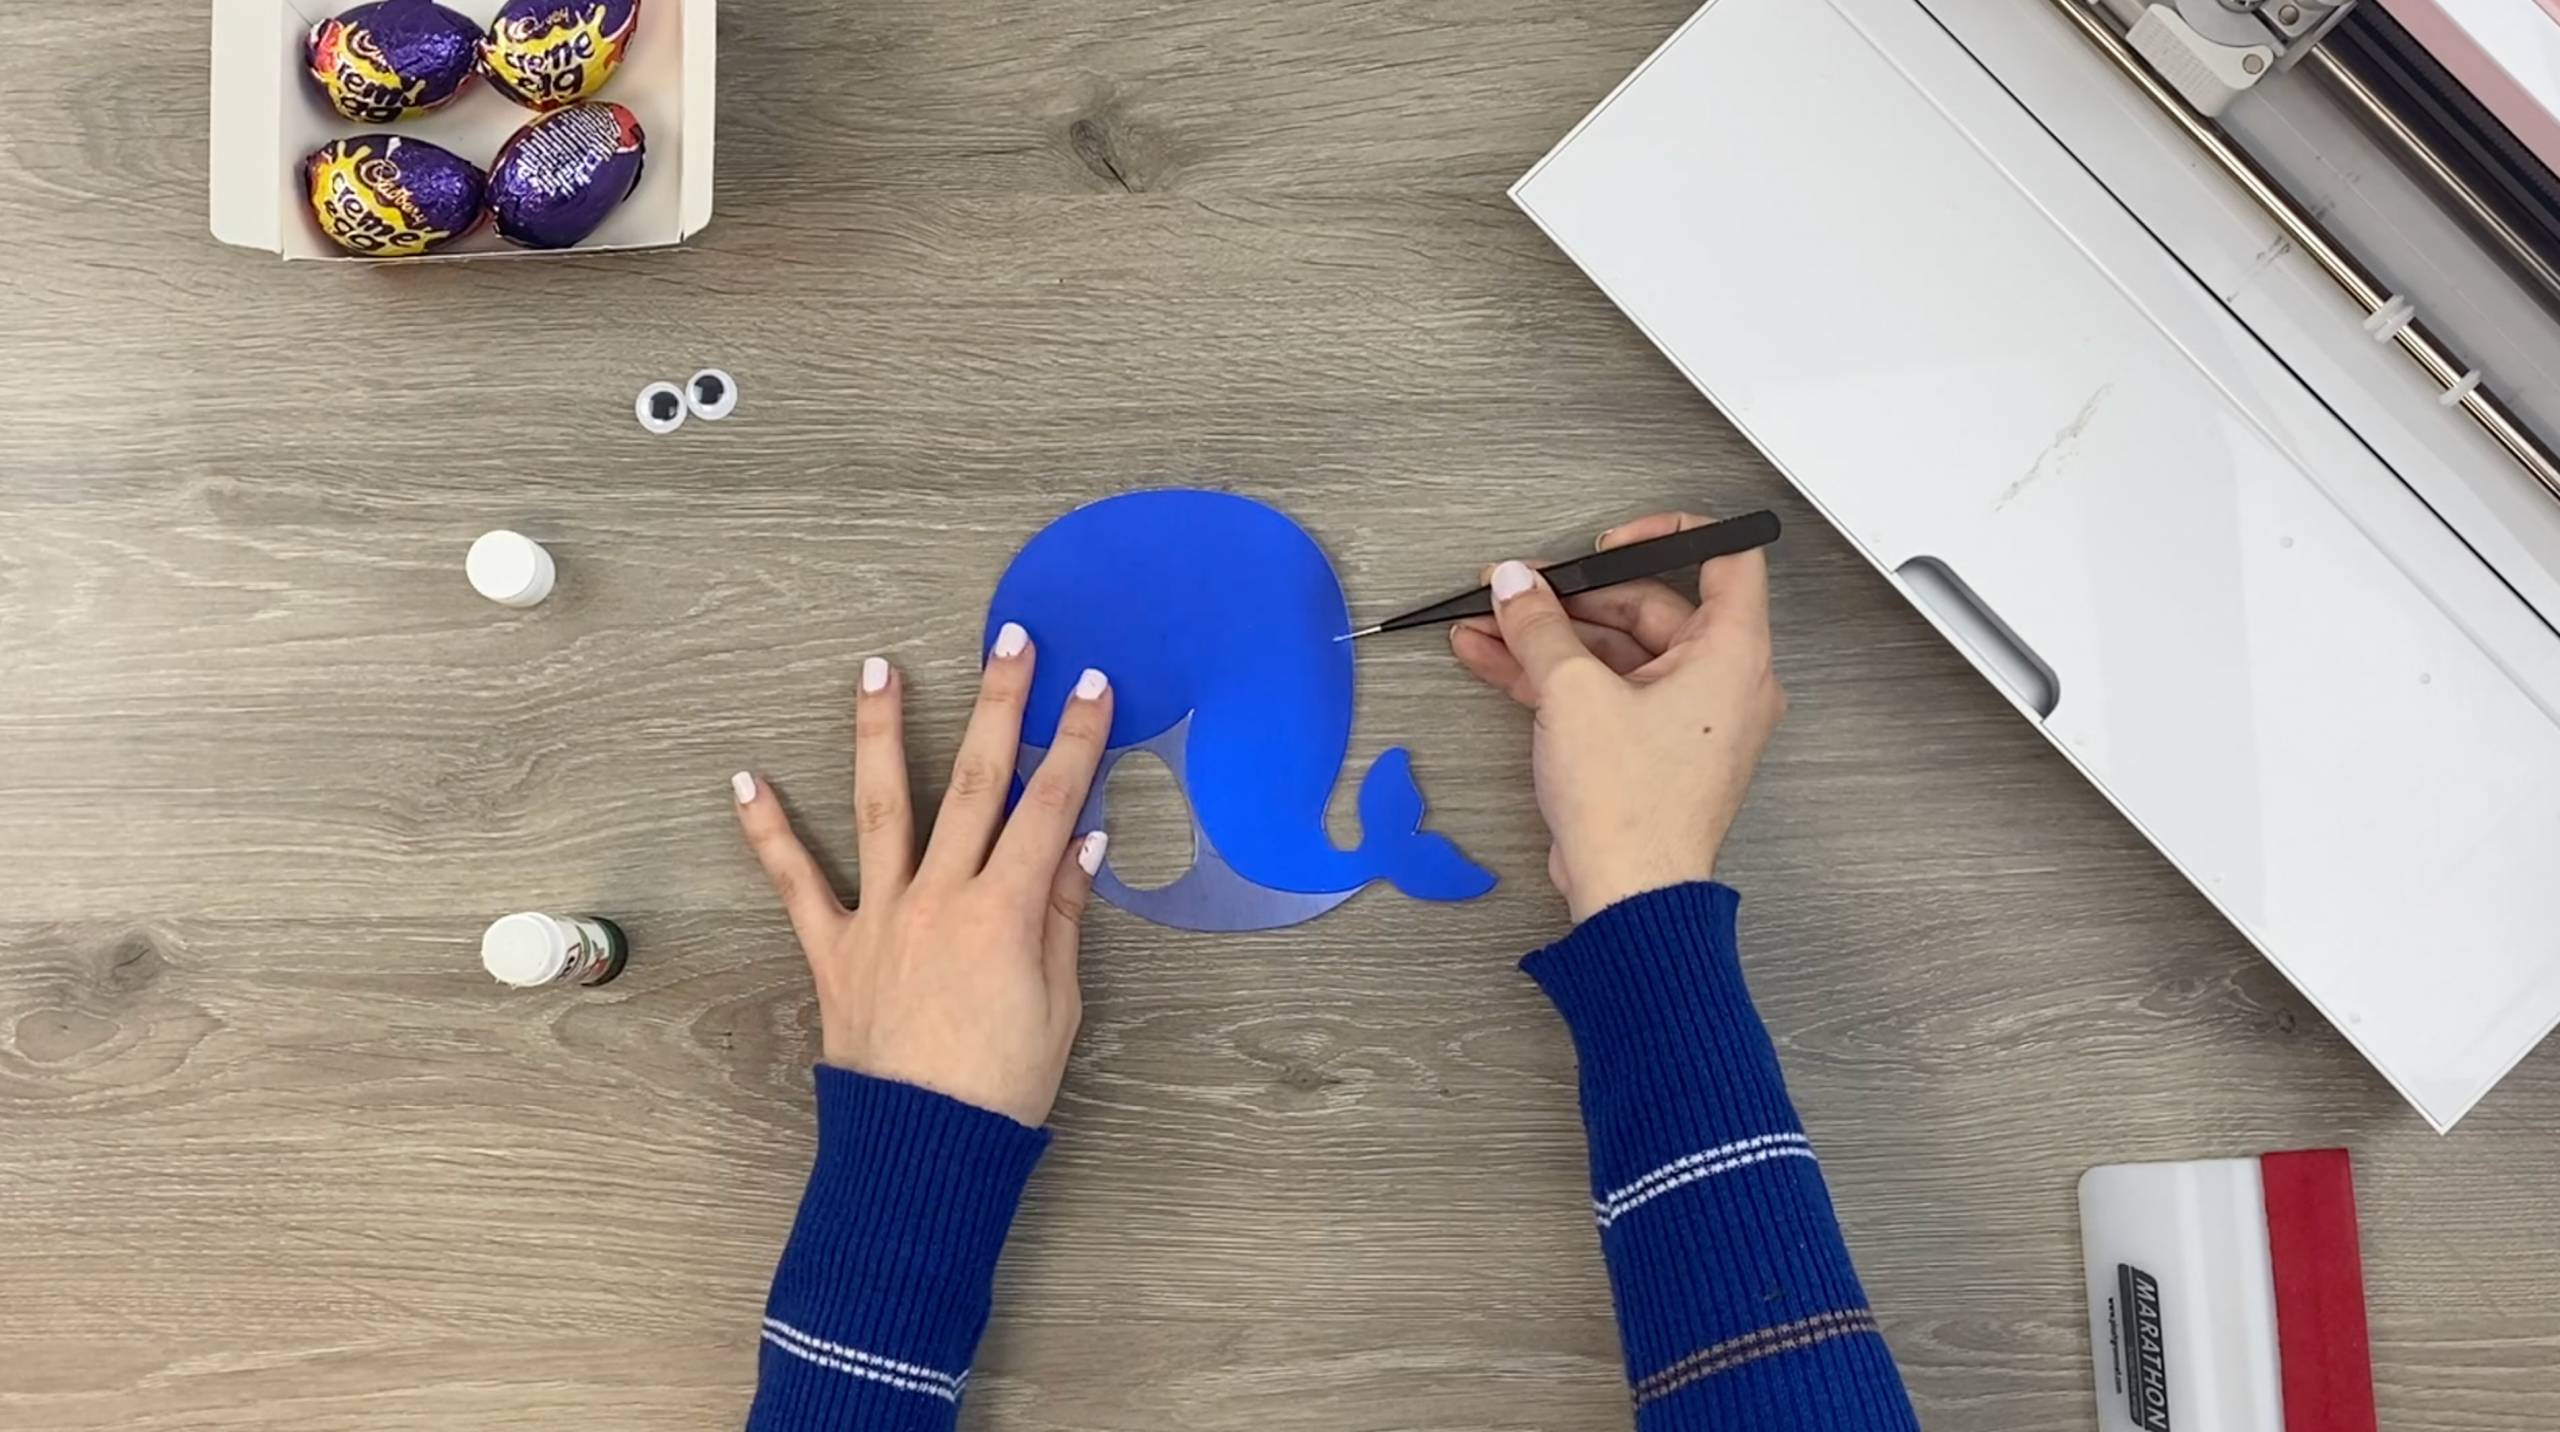
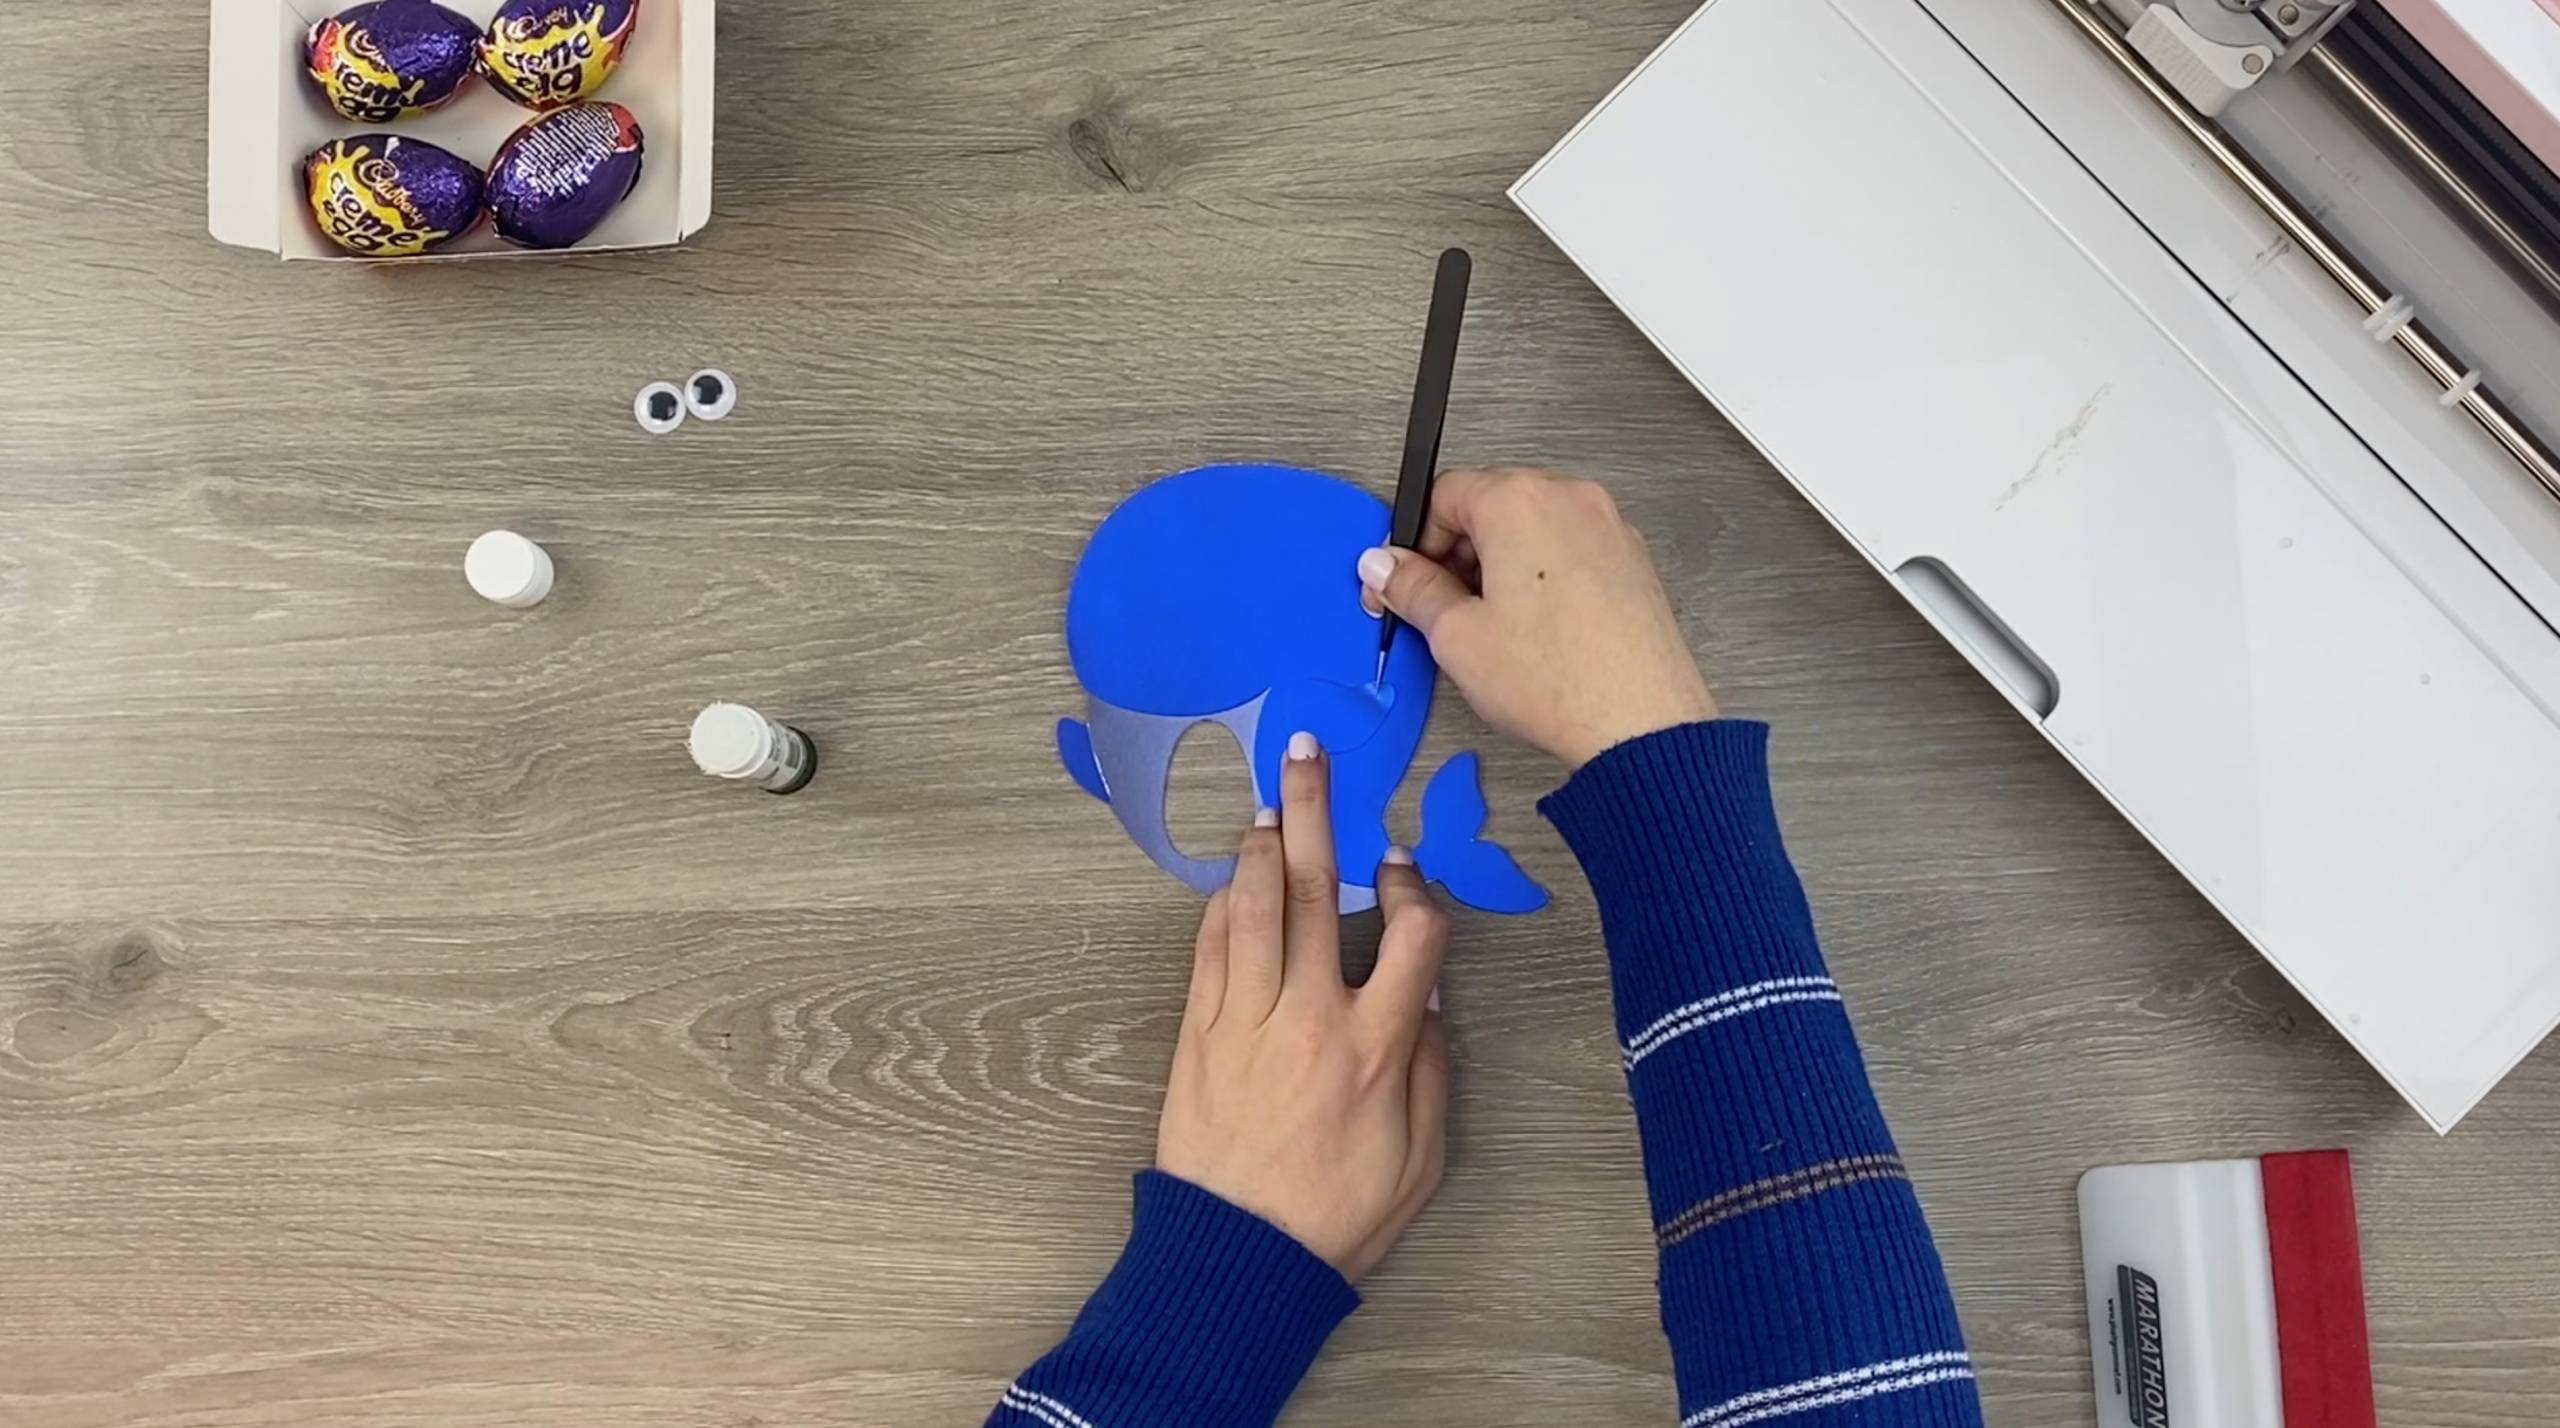
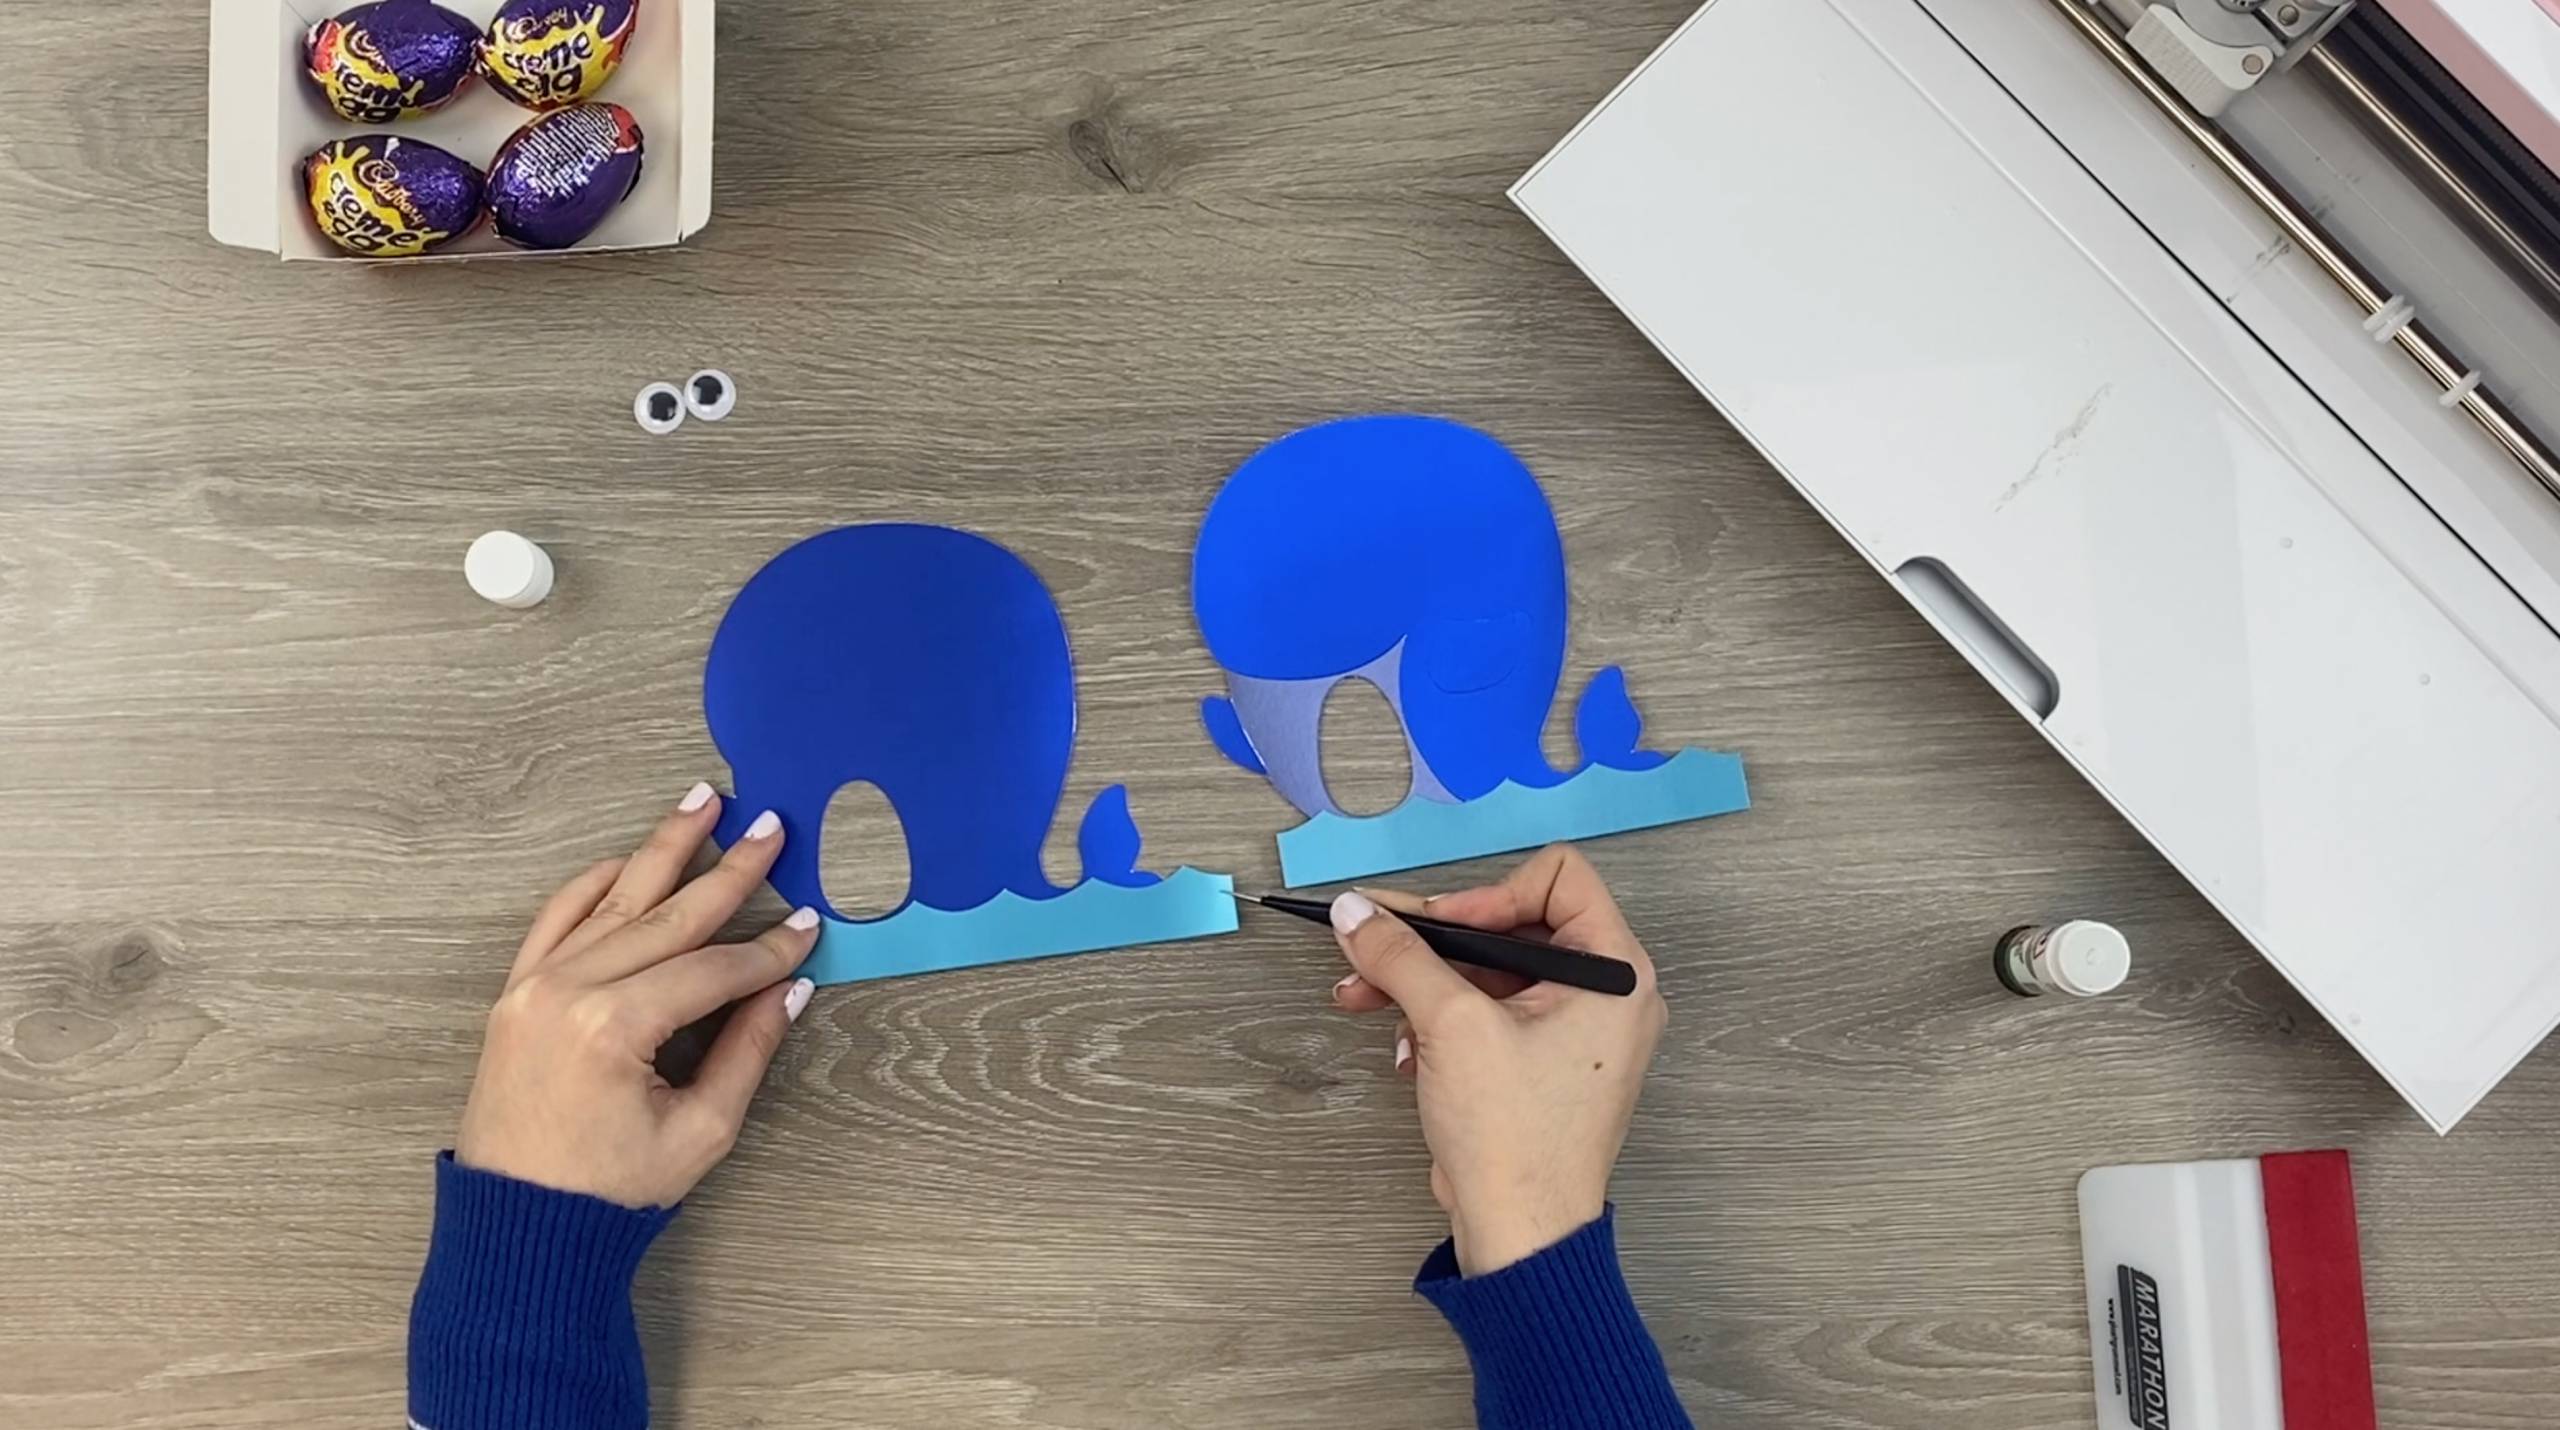
11. Apply the googly eye (only one eye needed for the whale)!
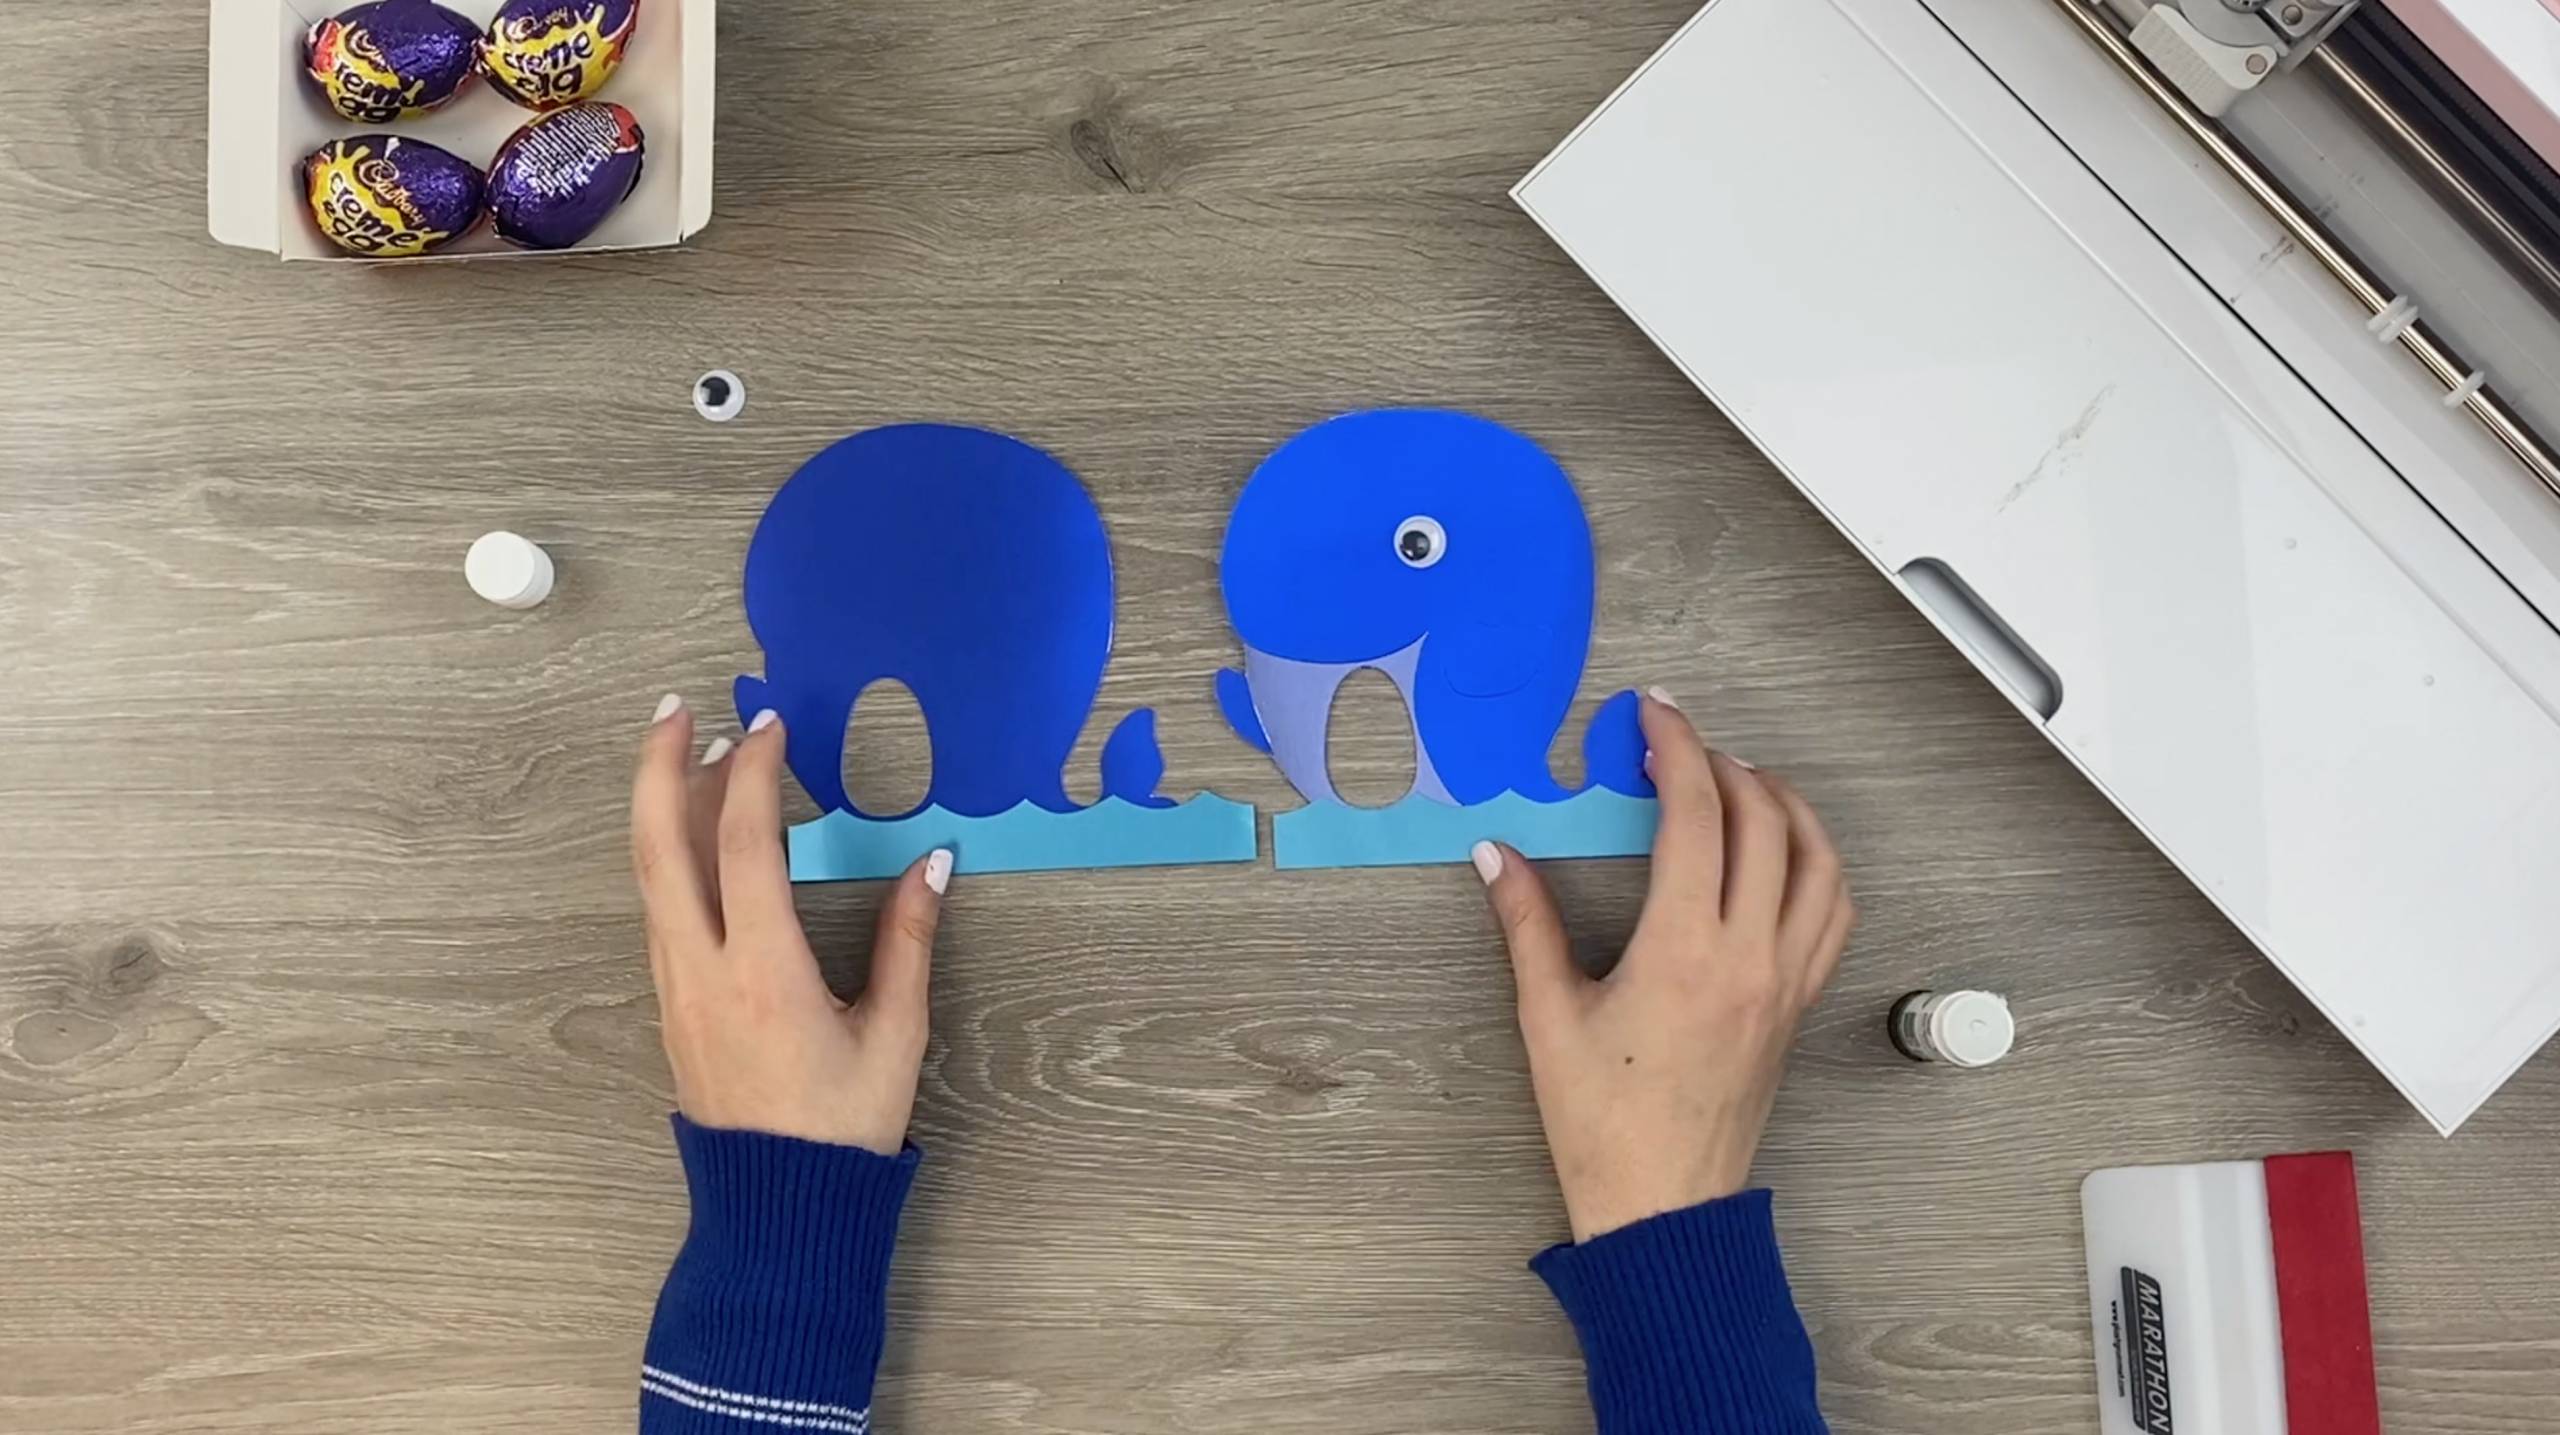
12. Fold the score lines on the bottom base card and apply glue to one edge. Stick the front of the whale to this edge by lining it up the waves.
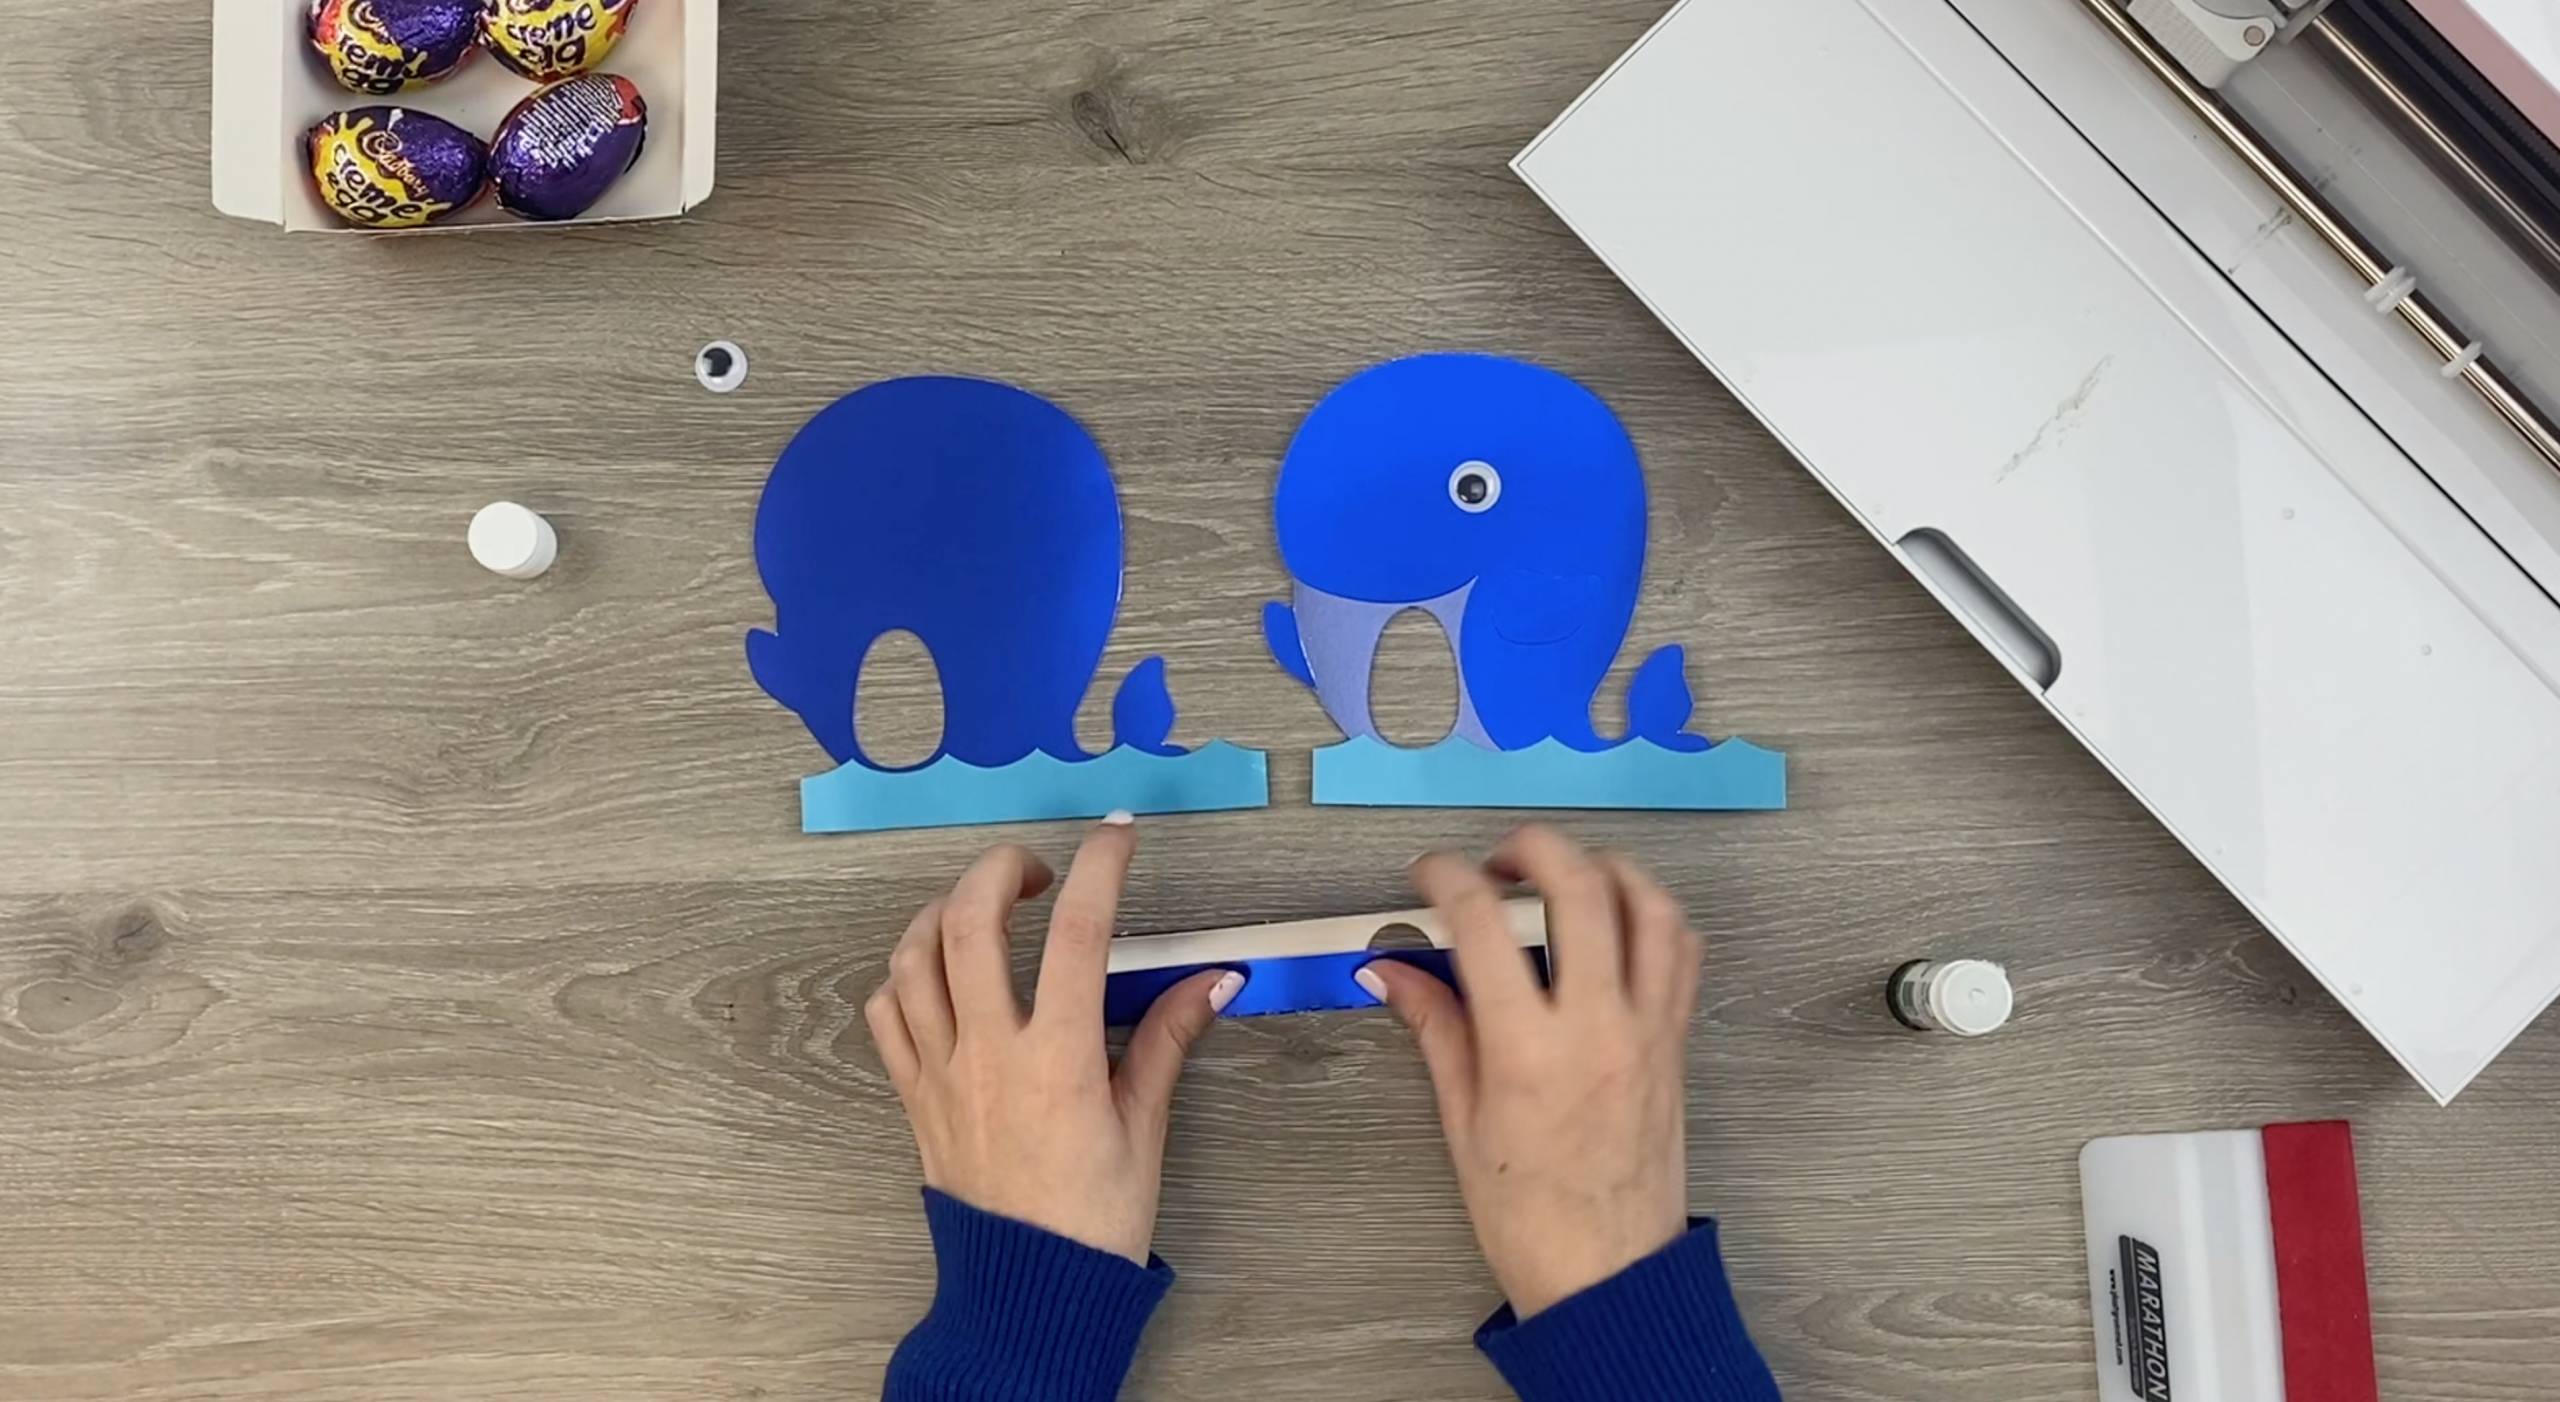

13. Apply glue to the the other edge of the bottom base card and stick the remaining plain whale silhouette to it, the coloured side of the card should be facing forward.
14. Apply glue to the inside of the top of the whale’s head and then secure the two sides to each other.
15. Slide your egg through the side to sit in the egg holder.

DOWNLOAD CUT FILE
Double-click on the Zip file to open it up and then open the cut file. When it opens in Silhouette studio all of the cut files will be on one mat, depending on which Silhouette machine your using you may need to move each of the different-coloured cut files onto different mats. If using a machine with a larger mat you can cut them all on one mat, just make sure each coloured card is in the correct position on the mat in correlation to the correct cut file.
Cut Setting: Cardstock Plain
Blade: 3
Speed: 4
Force: 20
Passes: 1
Brother Cut Files
To import these files into the Brother Canvas Workspace:
DOWNLOAD CUT FILE
After downloading, please log in as usual to your design space account, open a new project mat, then left click on the SVG icon in the top left bar in canvas, this will then allow you to import your files. Once you left click this icon, a pop up box appears with you to choose where to import file from, choose to import the file from your downloads list or where you have chosen to save when unzipped.
Cut Settings:
Card:
Blade: 3.75
Speed: 1
Pressure: 0
Passes: 1
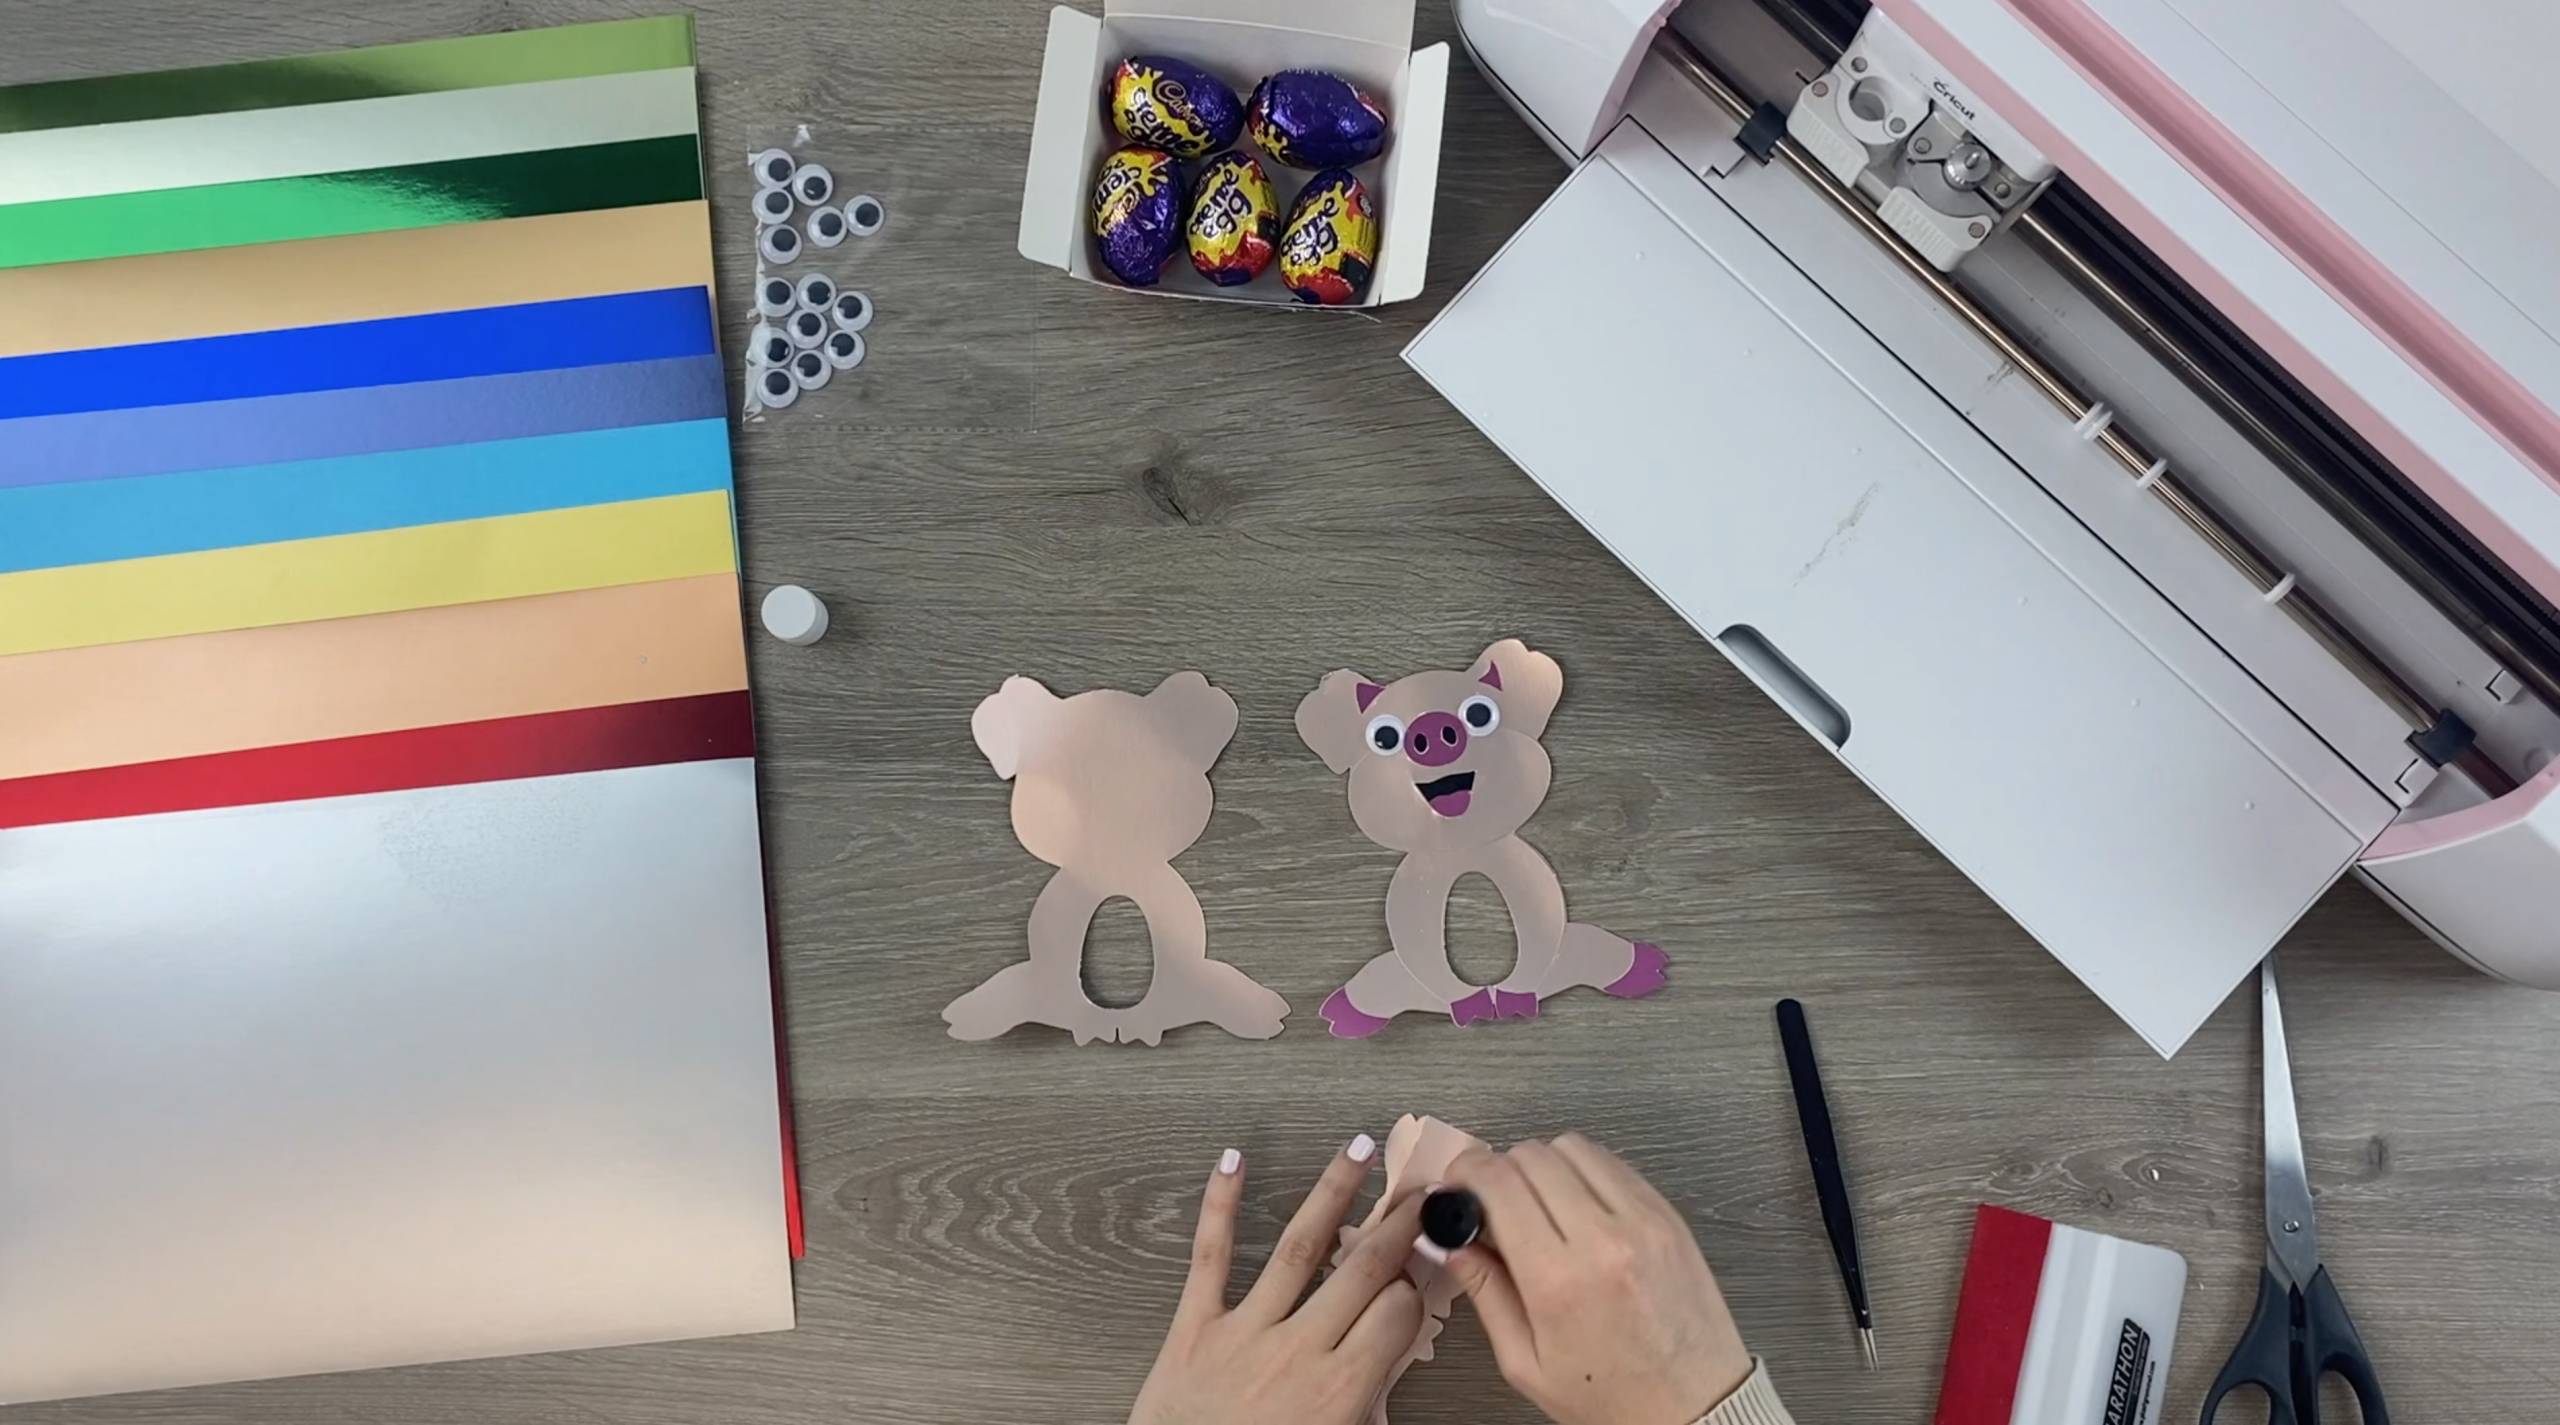
Pig
What you’ll need:
- Cricut Maker. Available here
- Rose Copper satin card. Available here
- Pink Opal satin card. Available here
- Jet Black satin card. Available here
- Weeding tweezers (optional but help to avoid finger marks on the card) Available here
- Squeegee (optional but an easier way of securing the card onto your cutting mat) Available here
- Googly eyes. Available here
- Glue stick. Available here
1. Download the Pig cut files and unzip them by double clicking on the file, which should open the file up. This zip file will have all the animal cut files in for you to select the ones you’d like to use.
2. Upload each Pig PNG into the Cricut Design Space and then insert them onto the canvas.
3. Resize them as soon as you have inserted them onto the canvas as they will all still be grouped. We re-sized them to the measurement shown below.
4. Position them so that all the layers are separated and select ‘Make it’ in the top right.
5. Move each layer so that each one is on a different cutting mat, as shown below. To make these instructions easier order them like this: 1. the base silhouettes, 2. Ears, nose, tongue and hooves, 3. Black area of mouth and nostrils. Press ‘continue’ in the bottom right of the screen.
6. Select your Cricut device and set the base material to Heavy cardstock and Default pressure setting. Now you’re ready to cut.
7. Place the Rose Copper satin card onto the cutting mat, rub gently to secure. Load onto the machine and press the cricut symbol to start the cut.
8. When done unload the mat and gently peel back the card. Some of the shapes will probably need to be popped out of the card. When all shapes are separated, place them to one side.
9. Repeat steps 7 and 8 with the remaining coloured card, in this order: Pink Opal satin card for the ears, nose, tongue and hooves and Jet Black satin card for the mouth and nostrils.

10. Firstly, stick on the hooves and ears. Secondly apply the cheeks and front legs. Next, stick the black area of the mouth down before applying the tongue, and then lastly, apply the nose and nostrils.
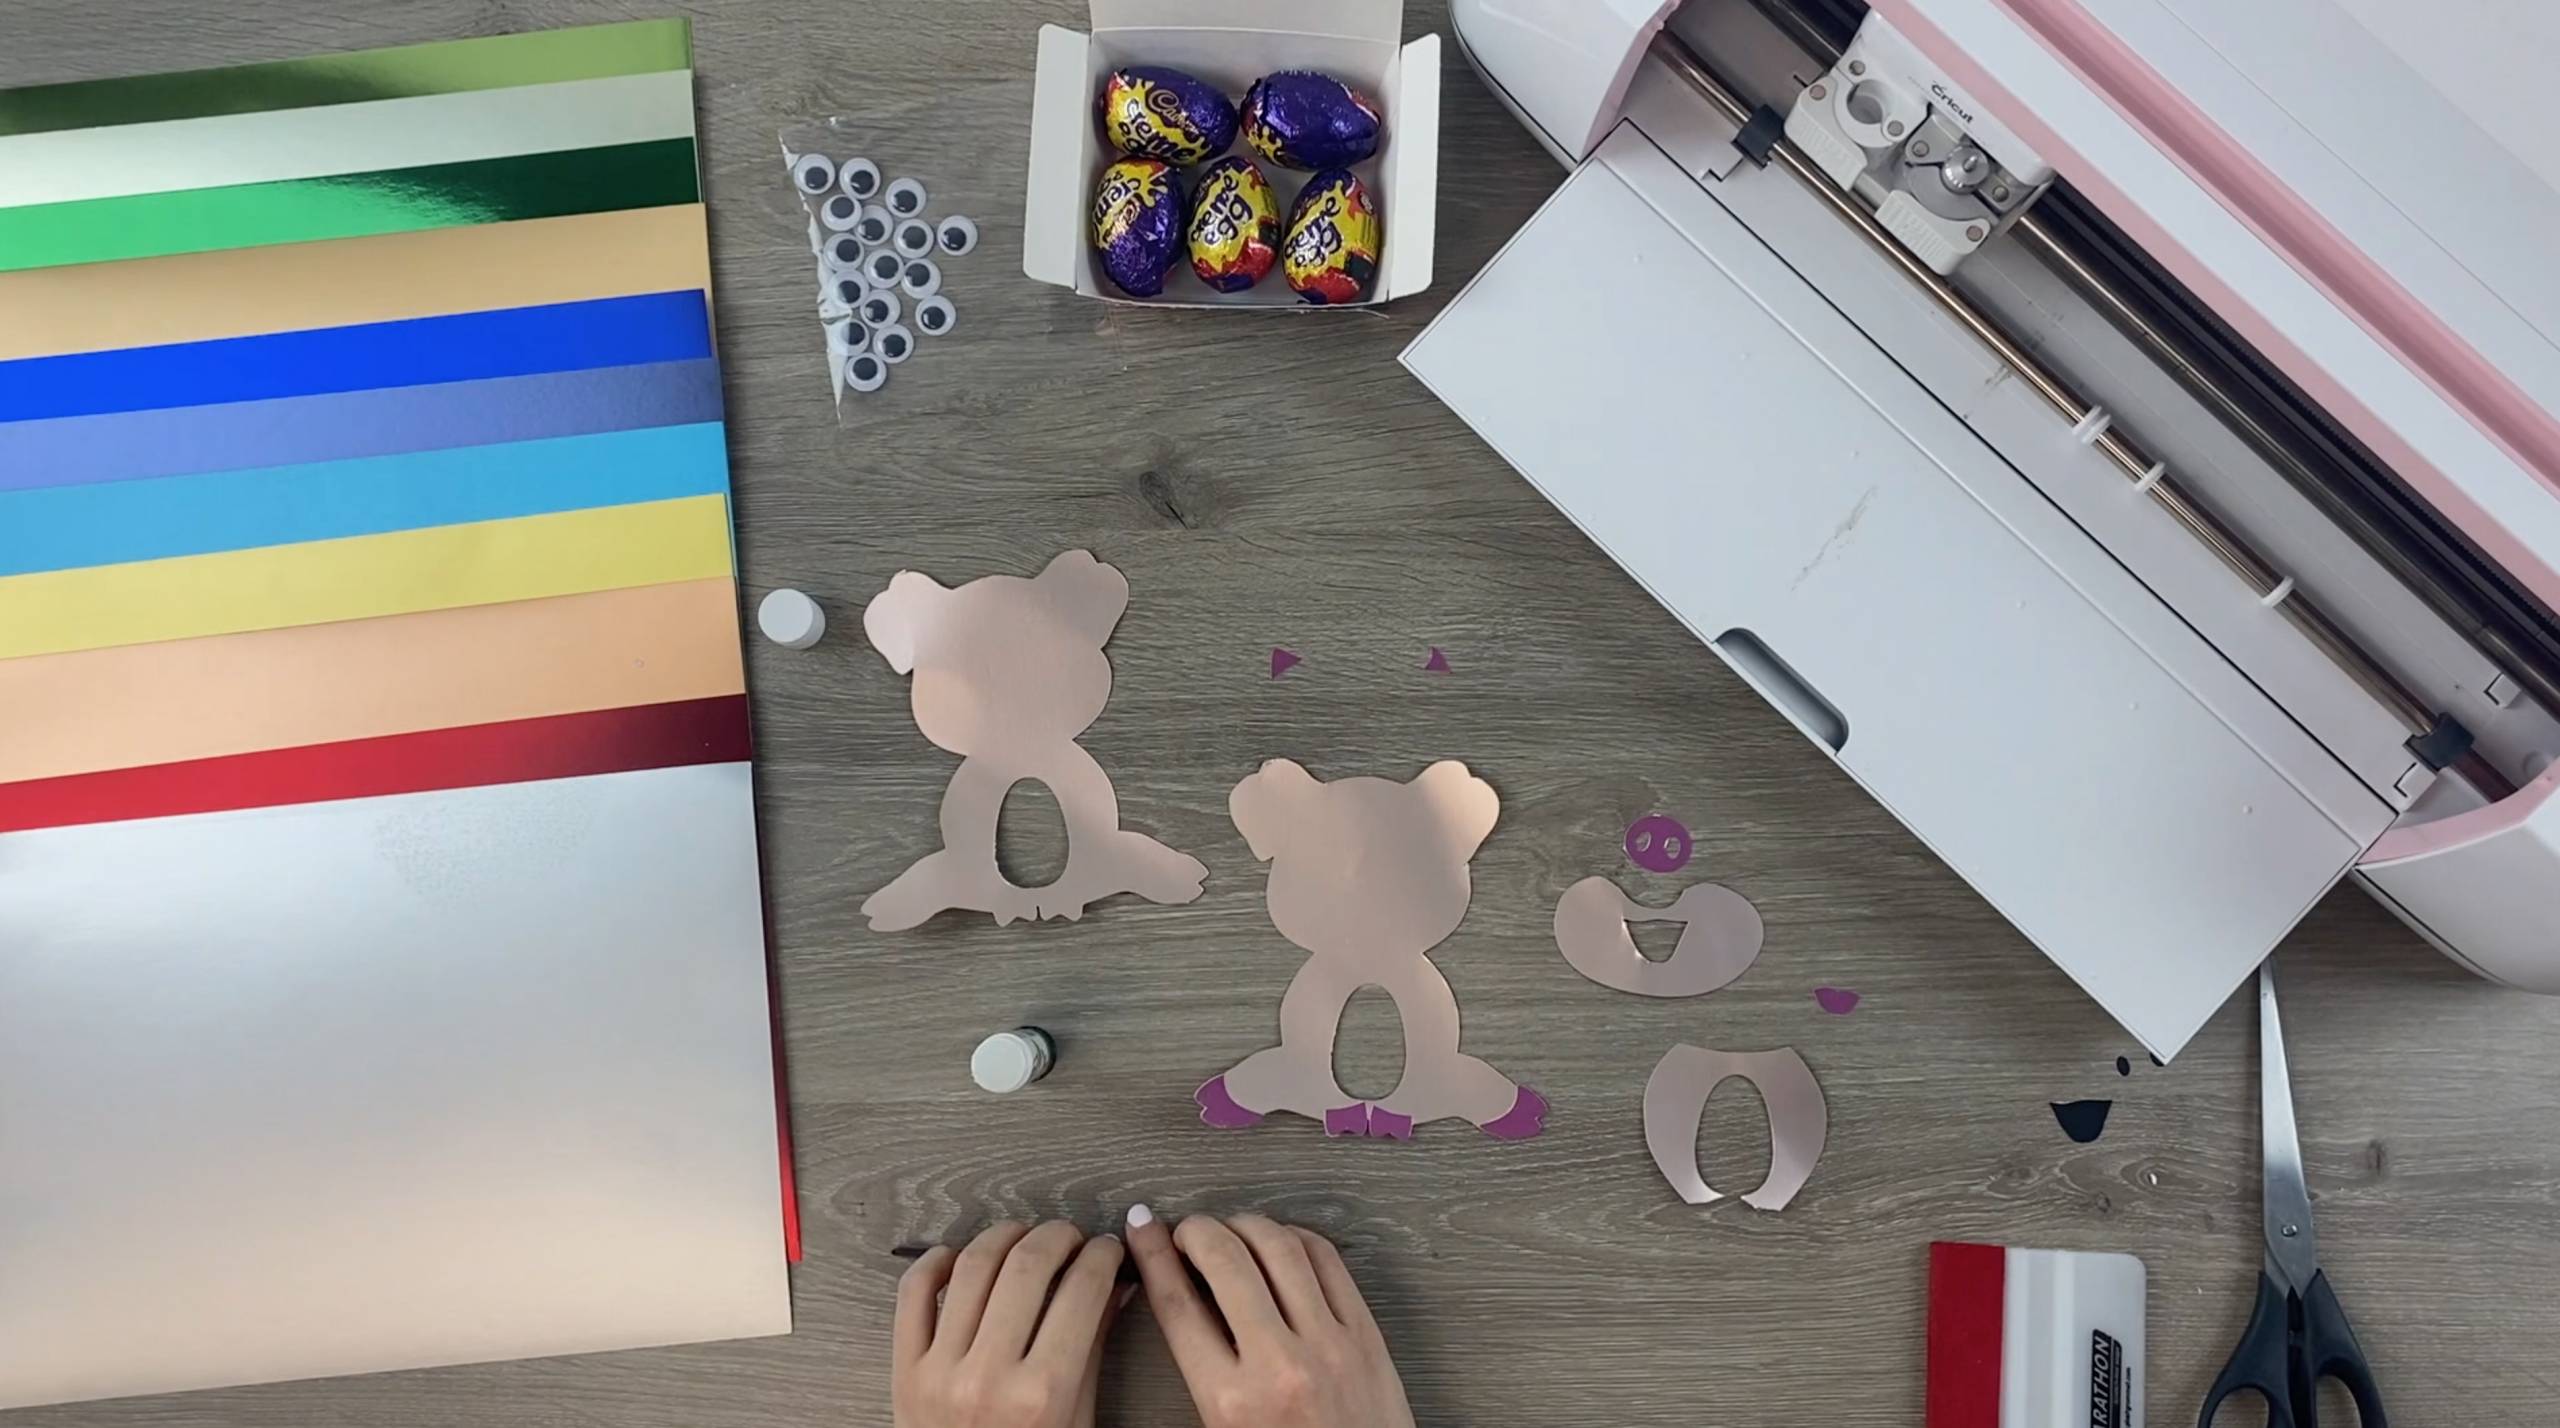
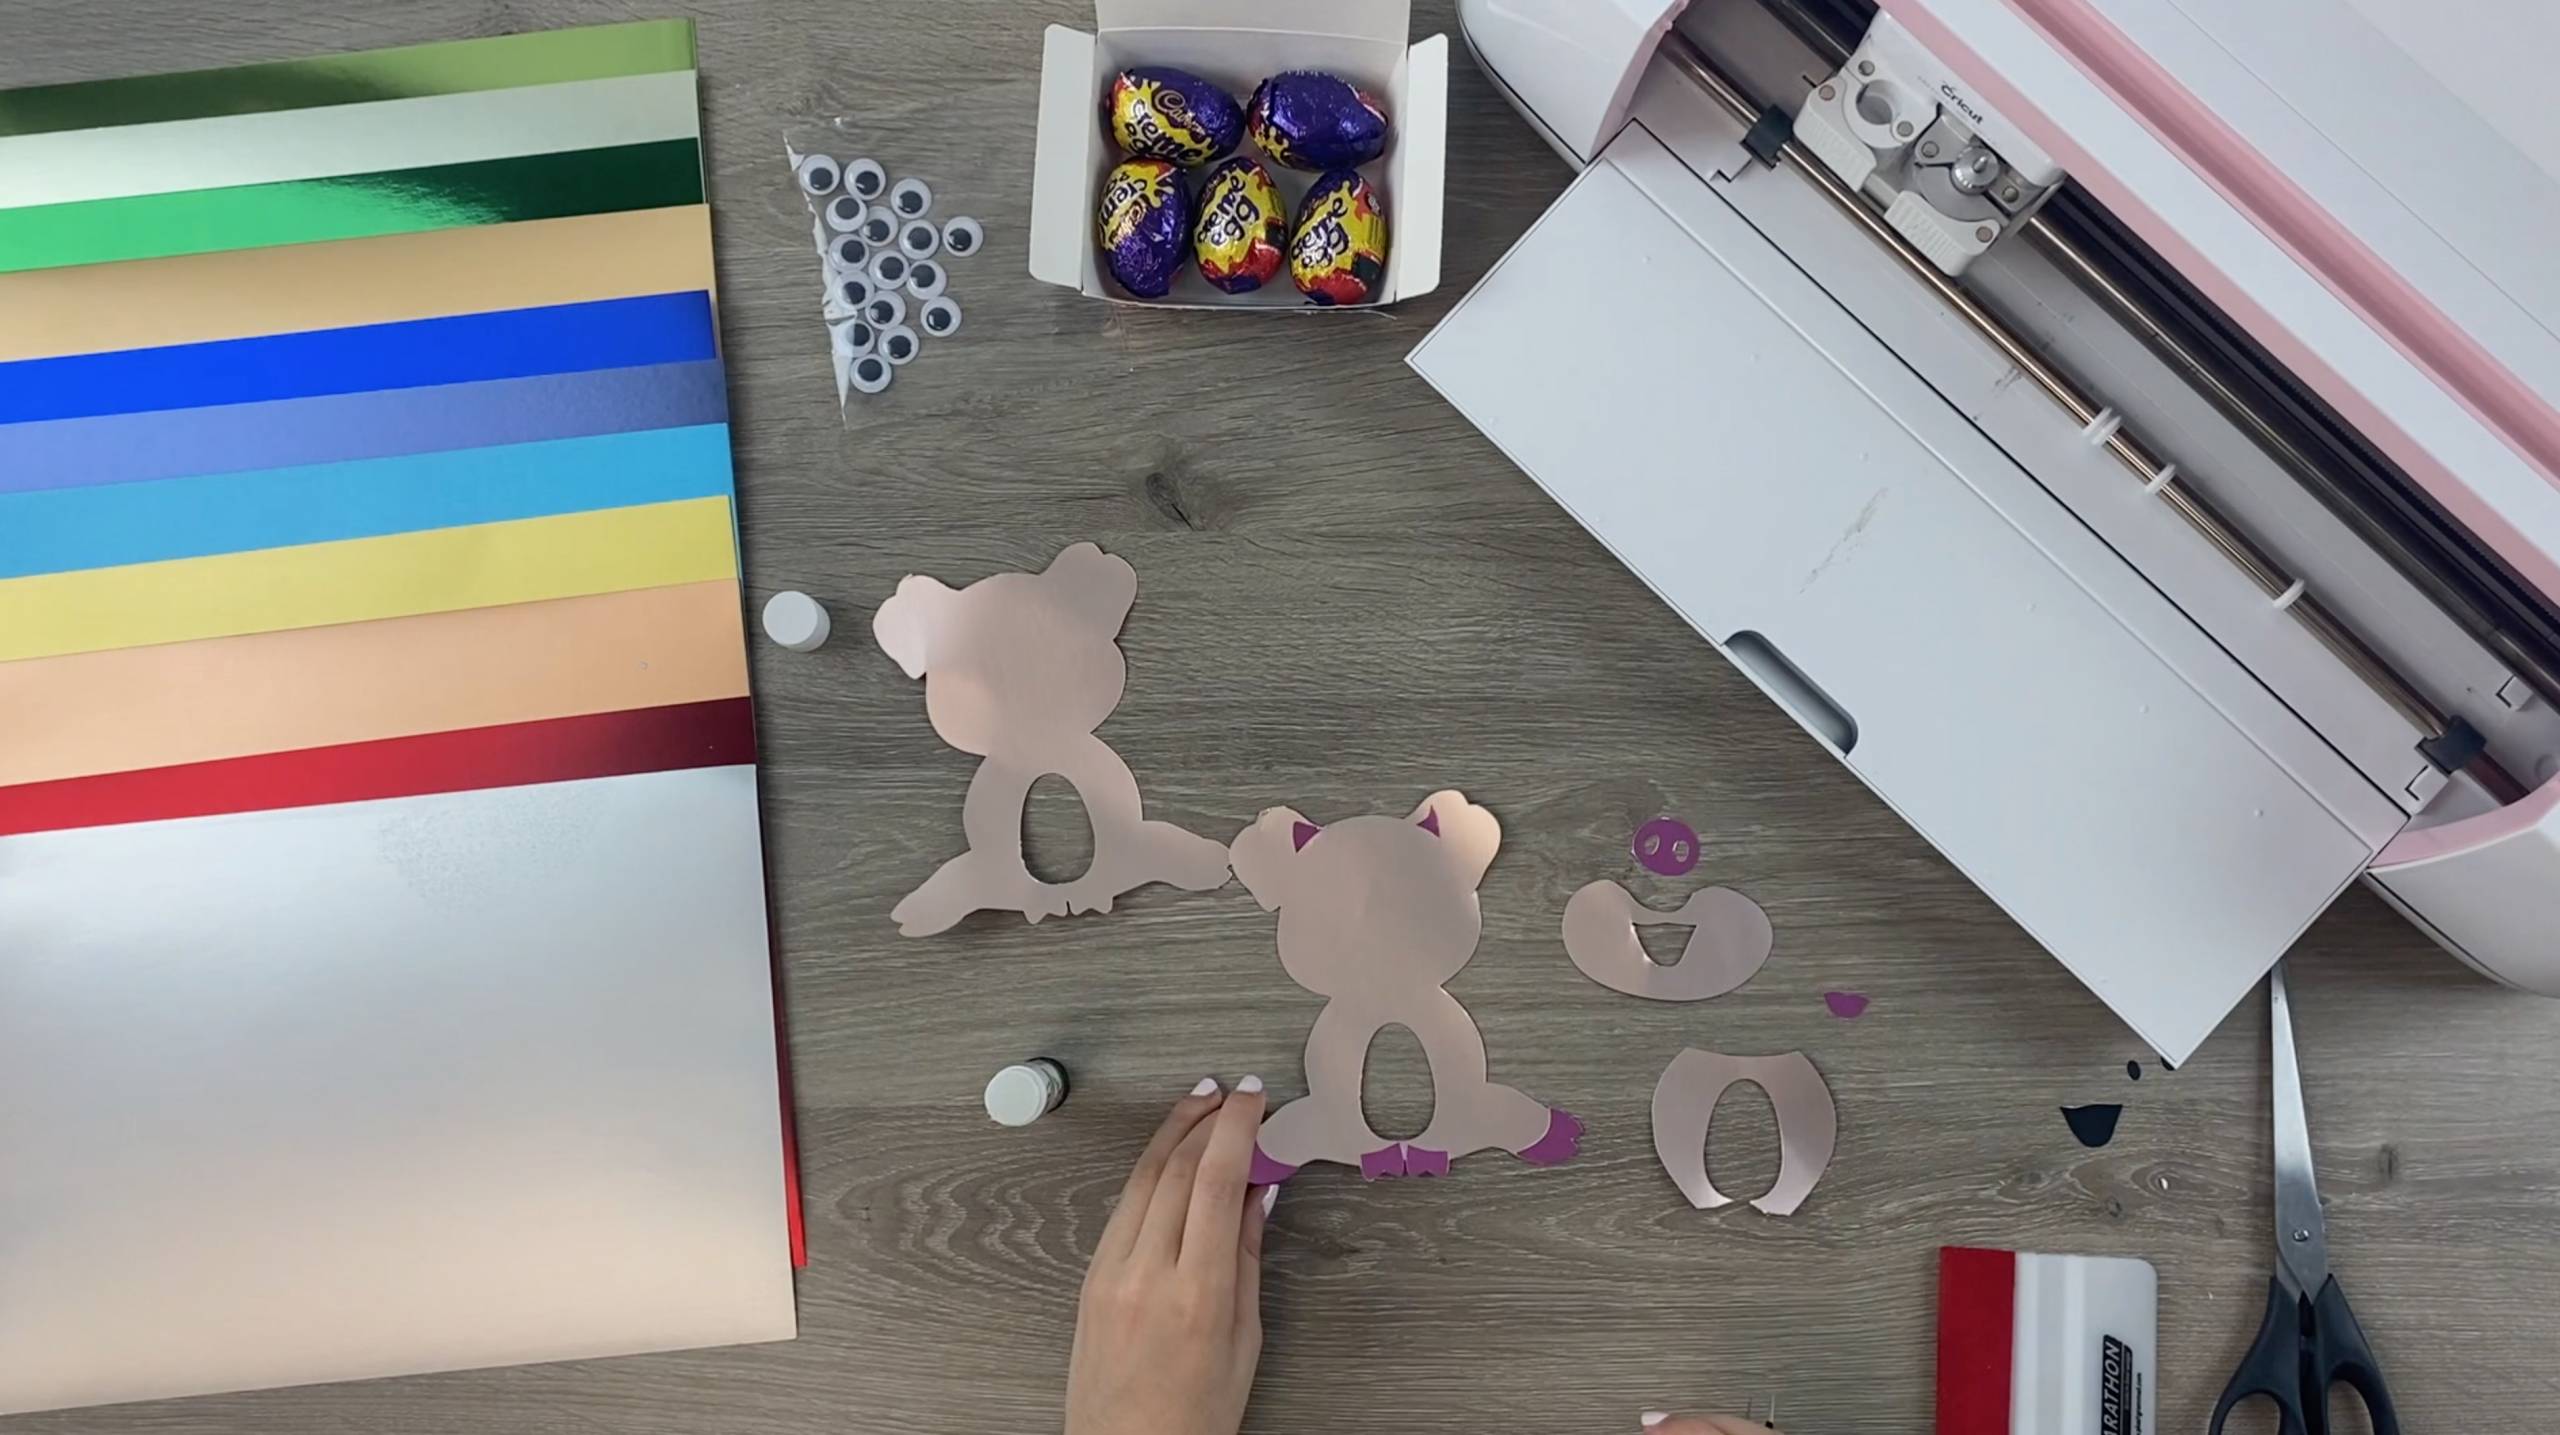
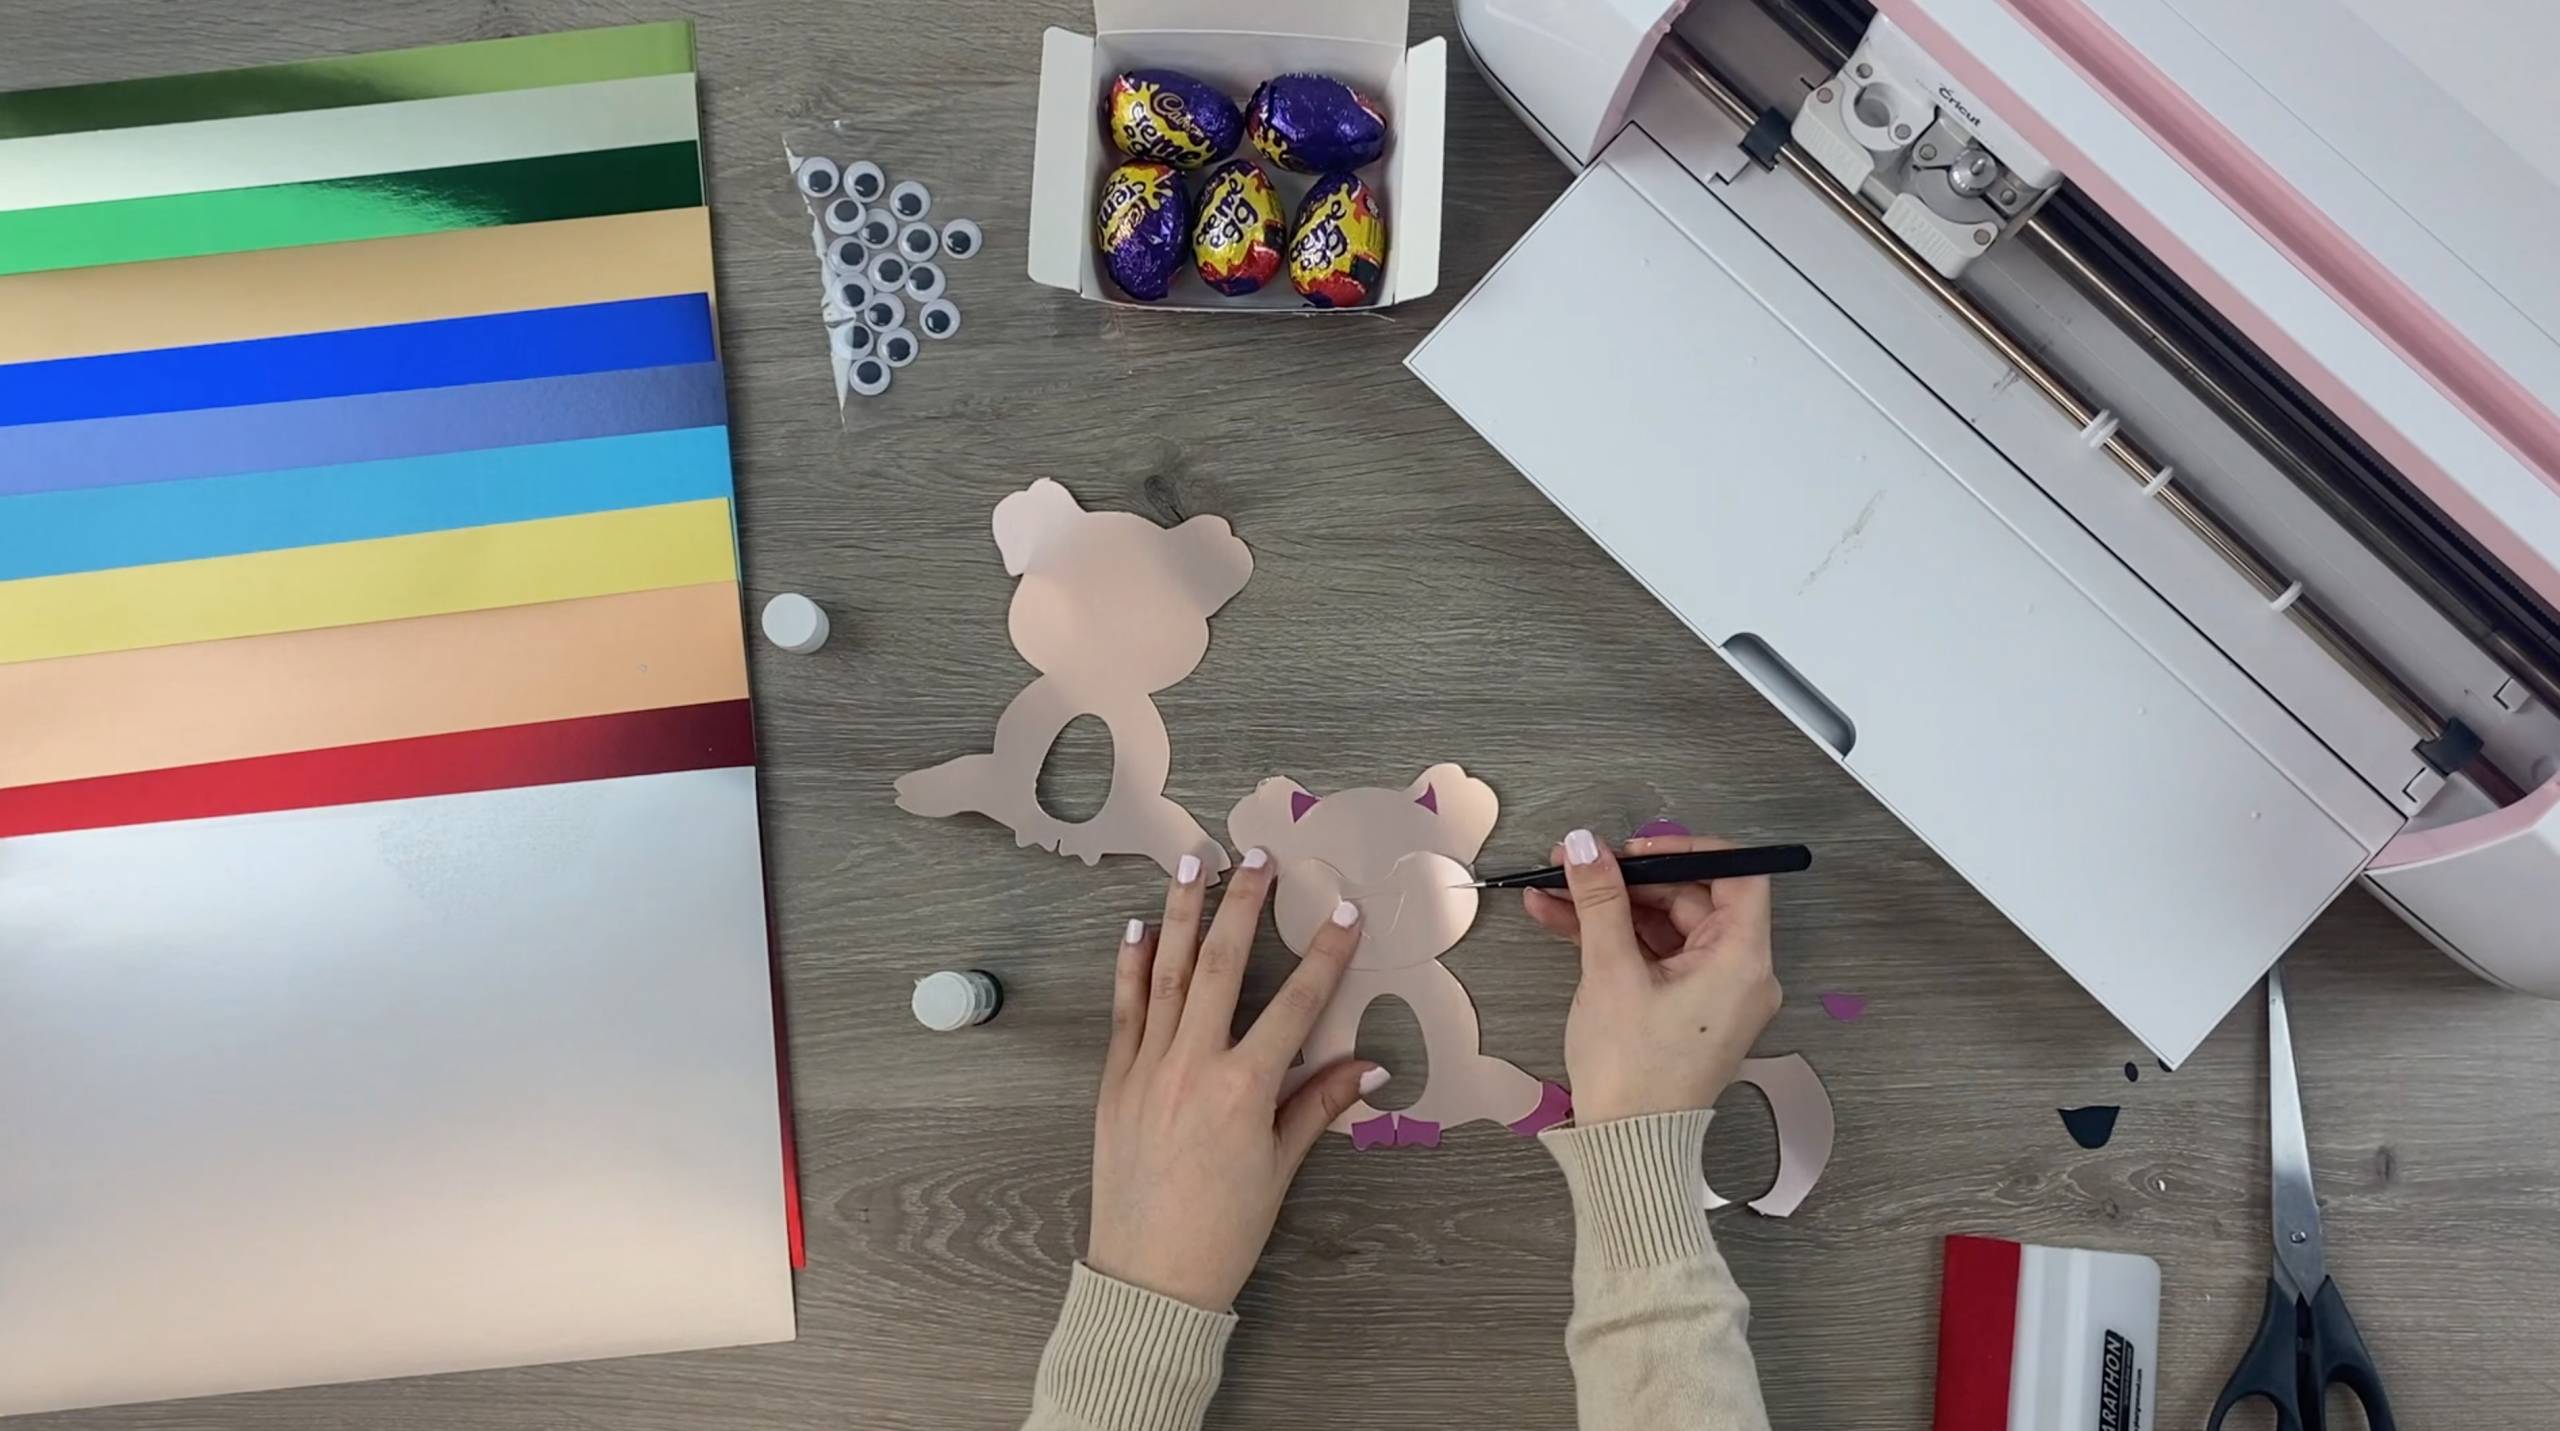
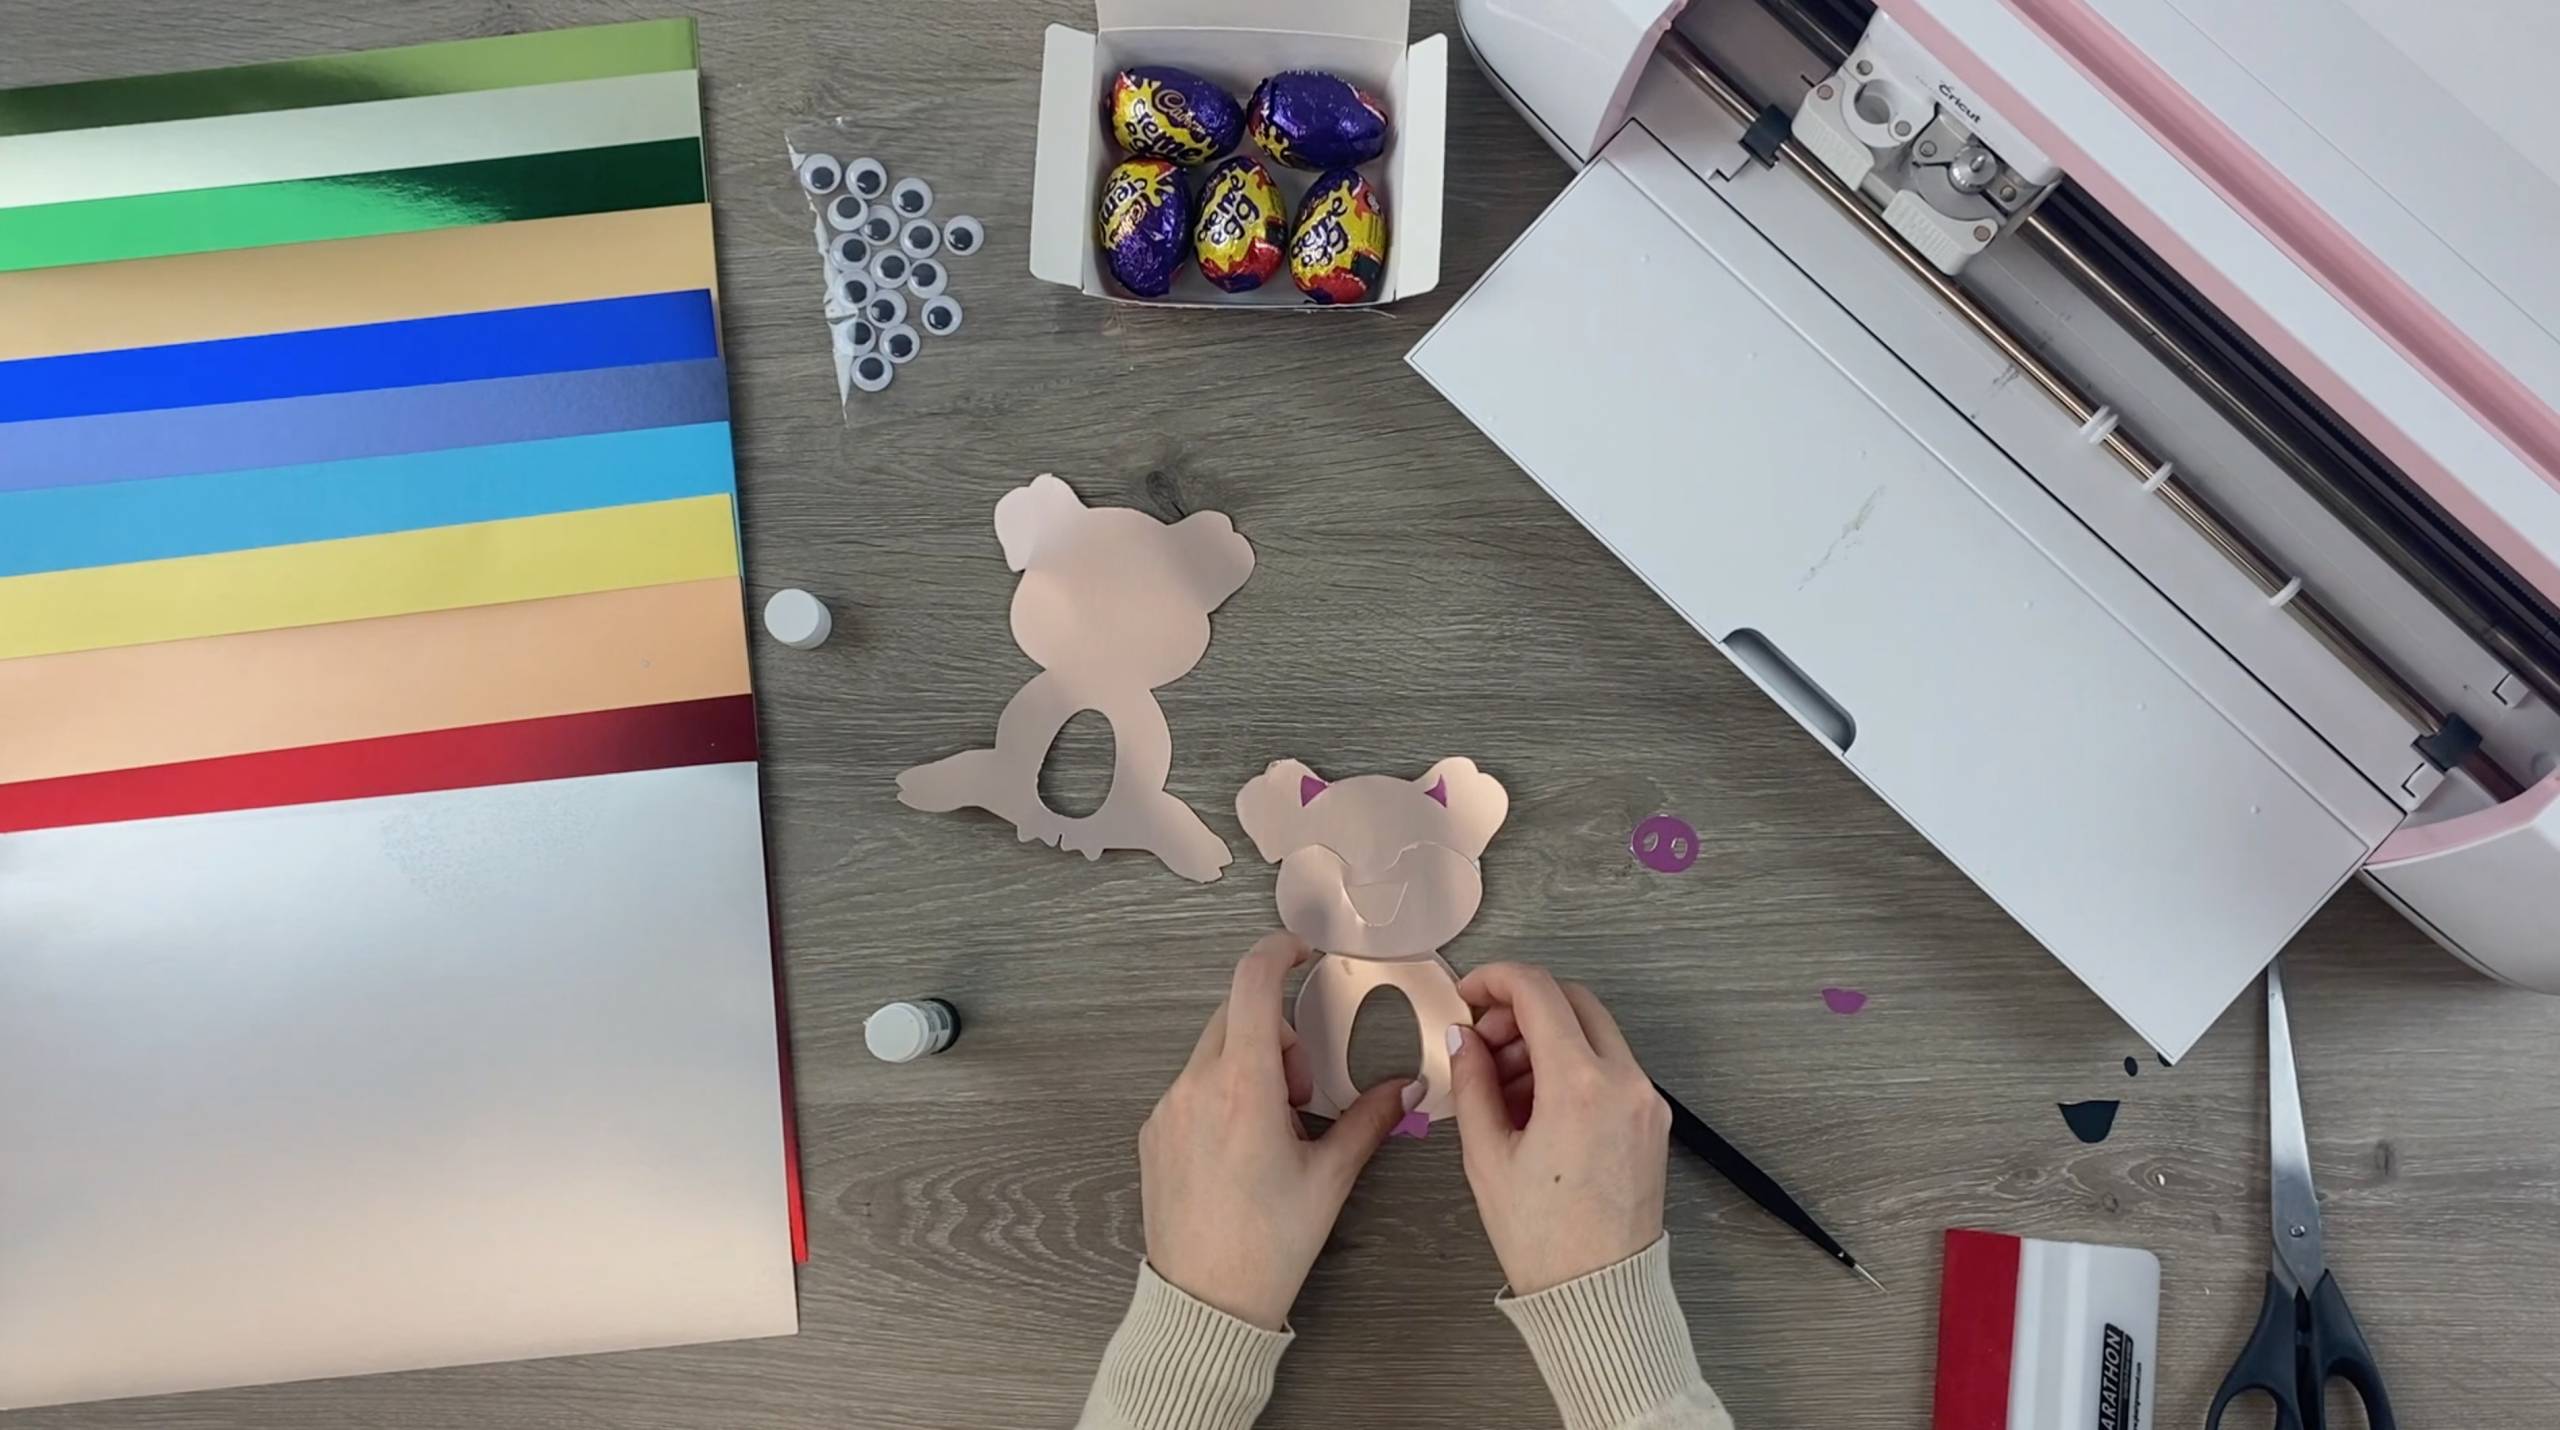
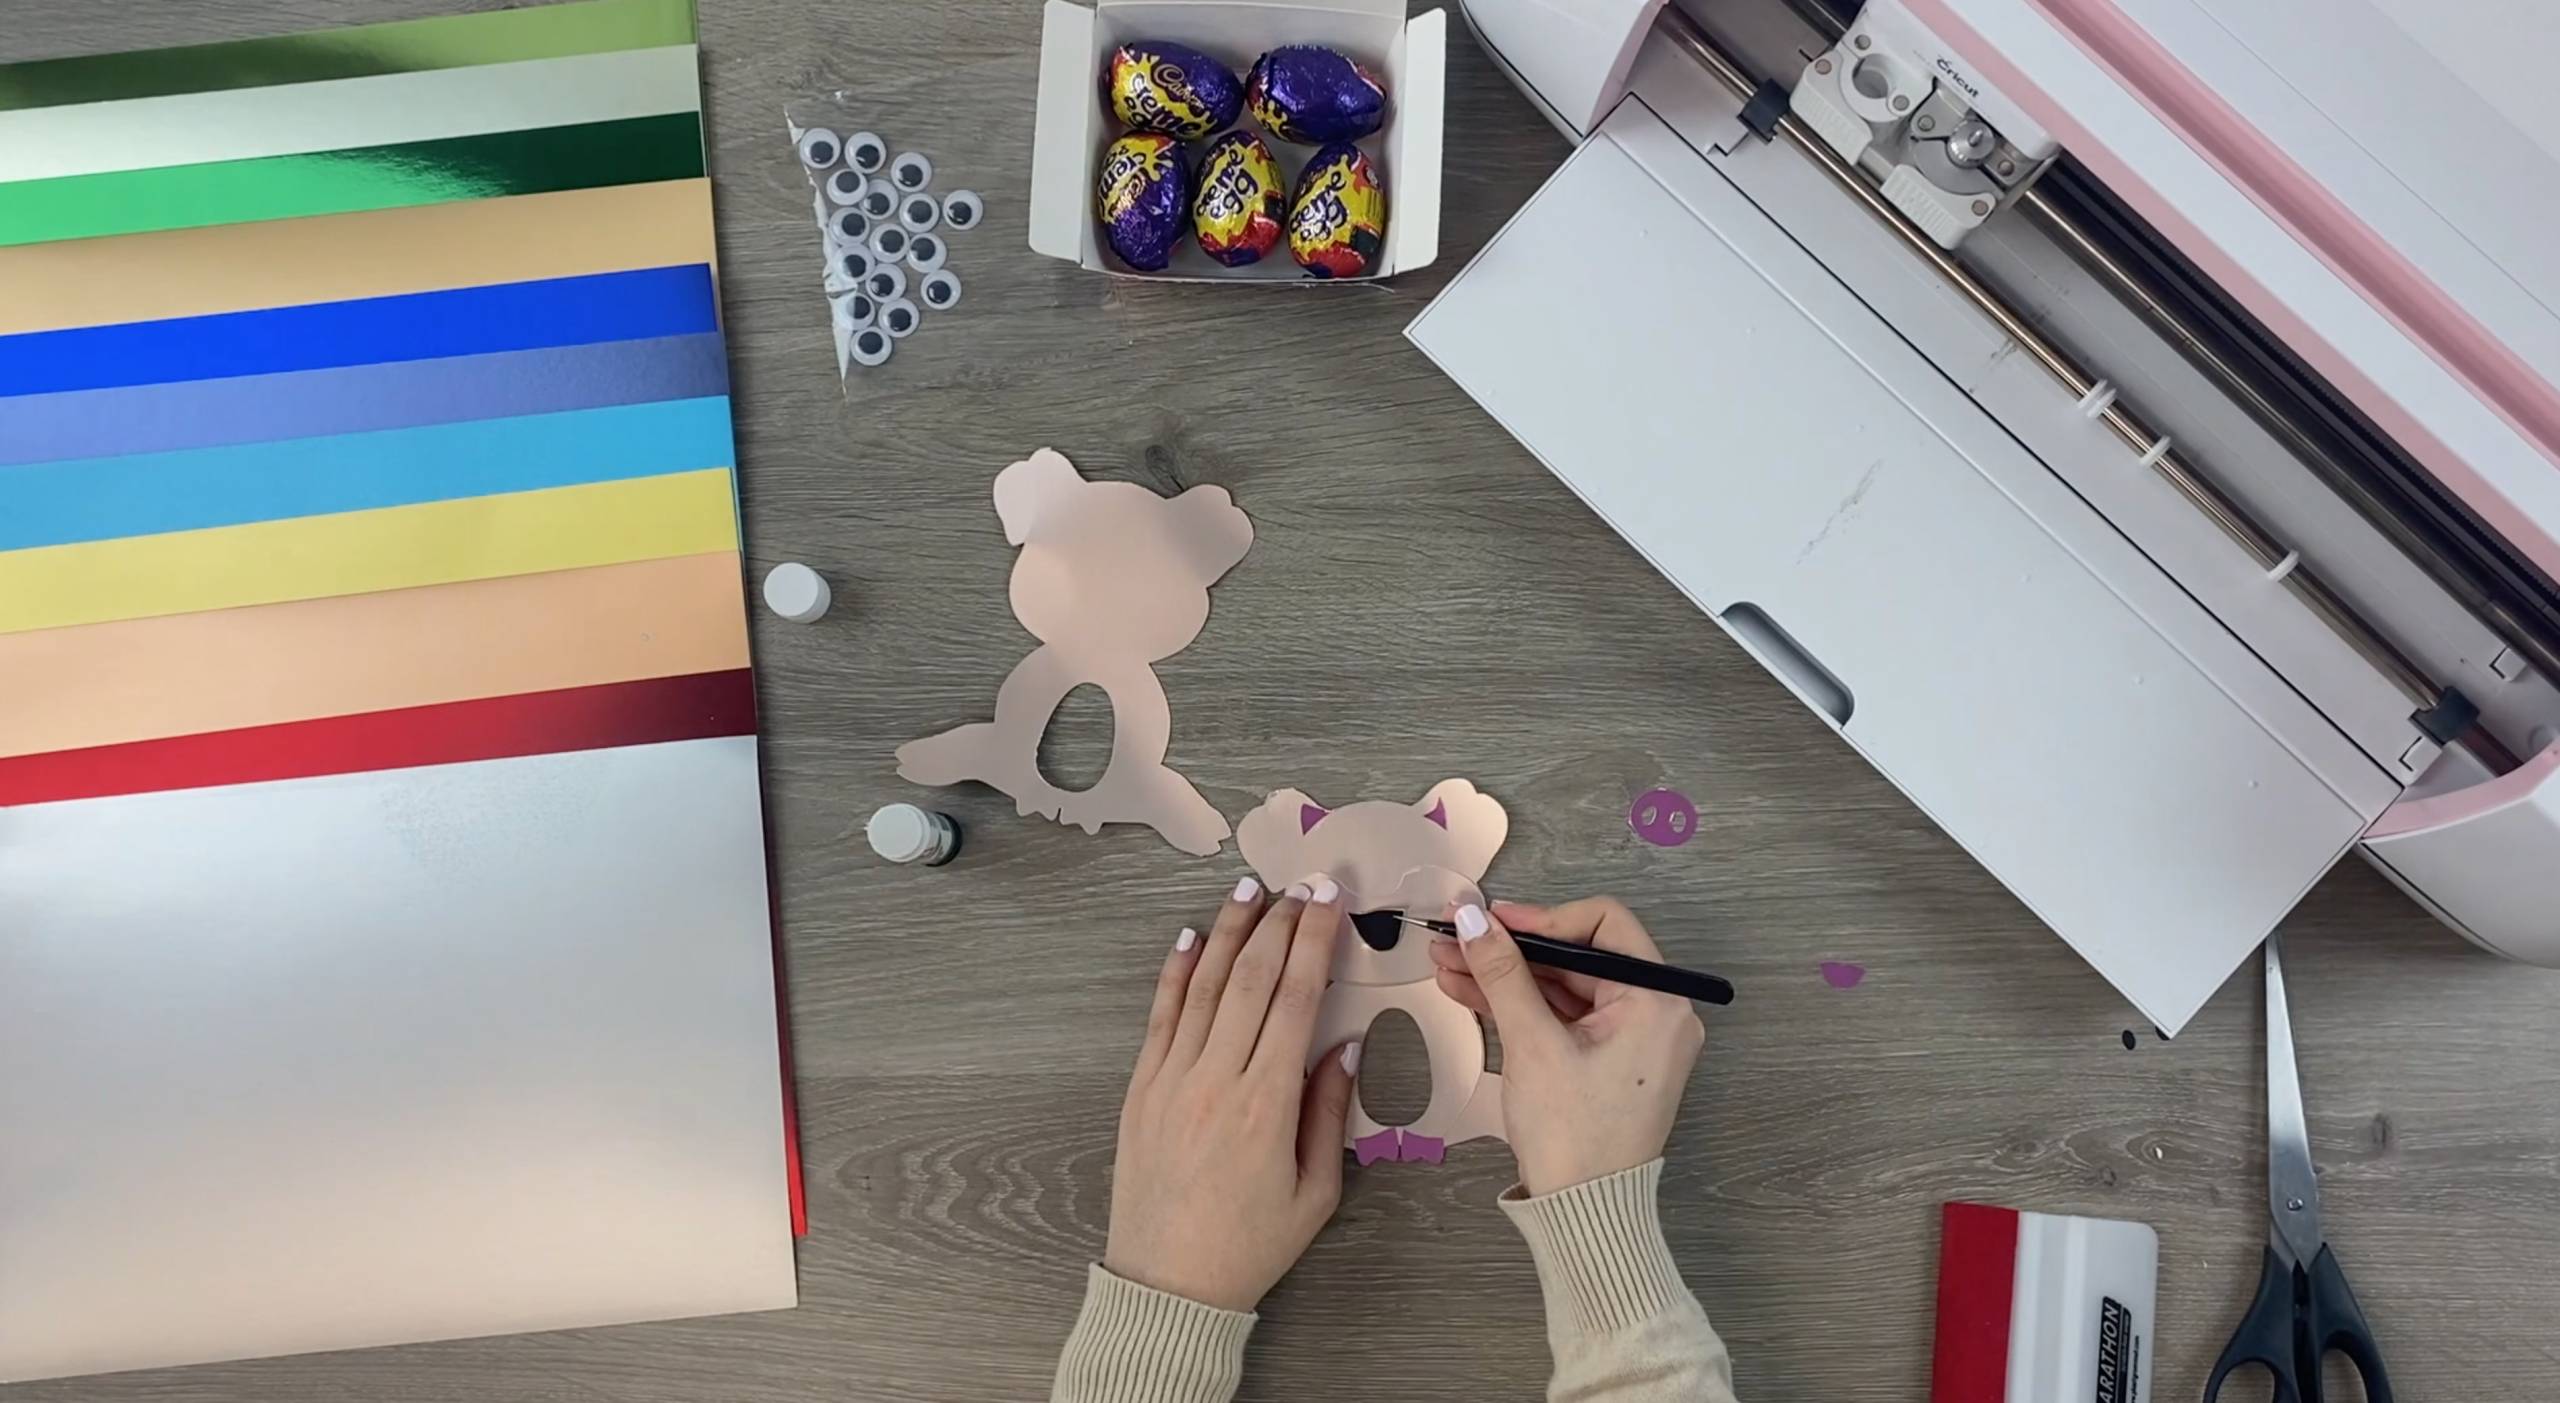
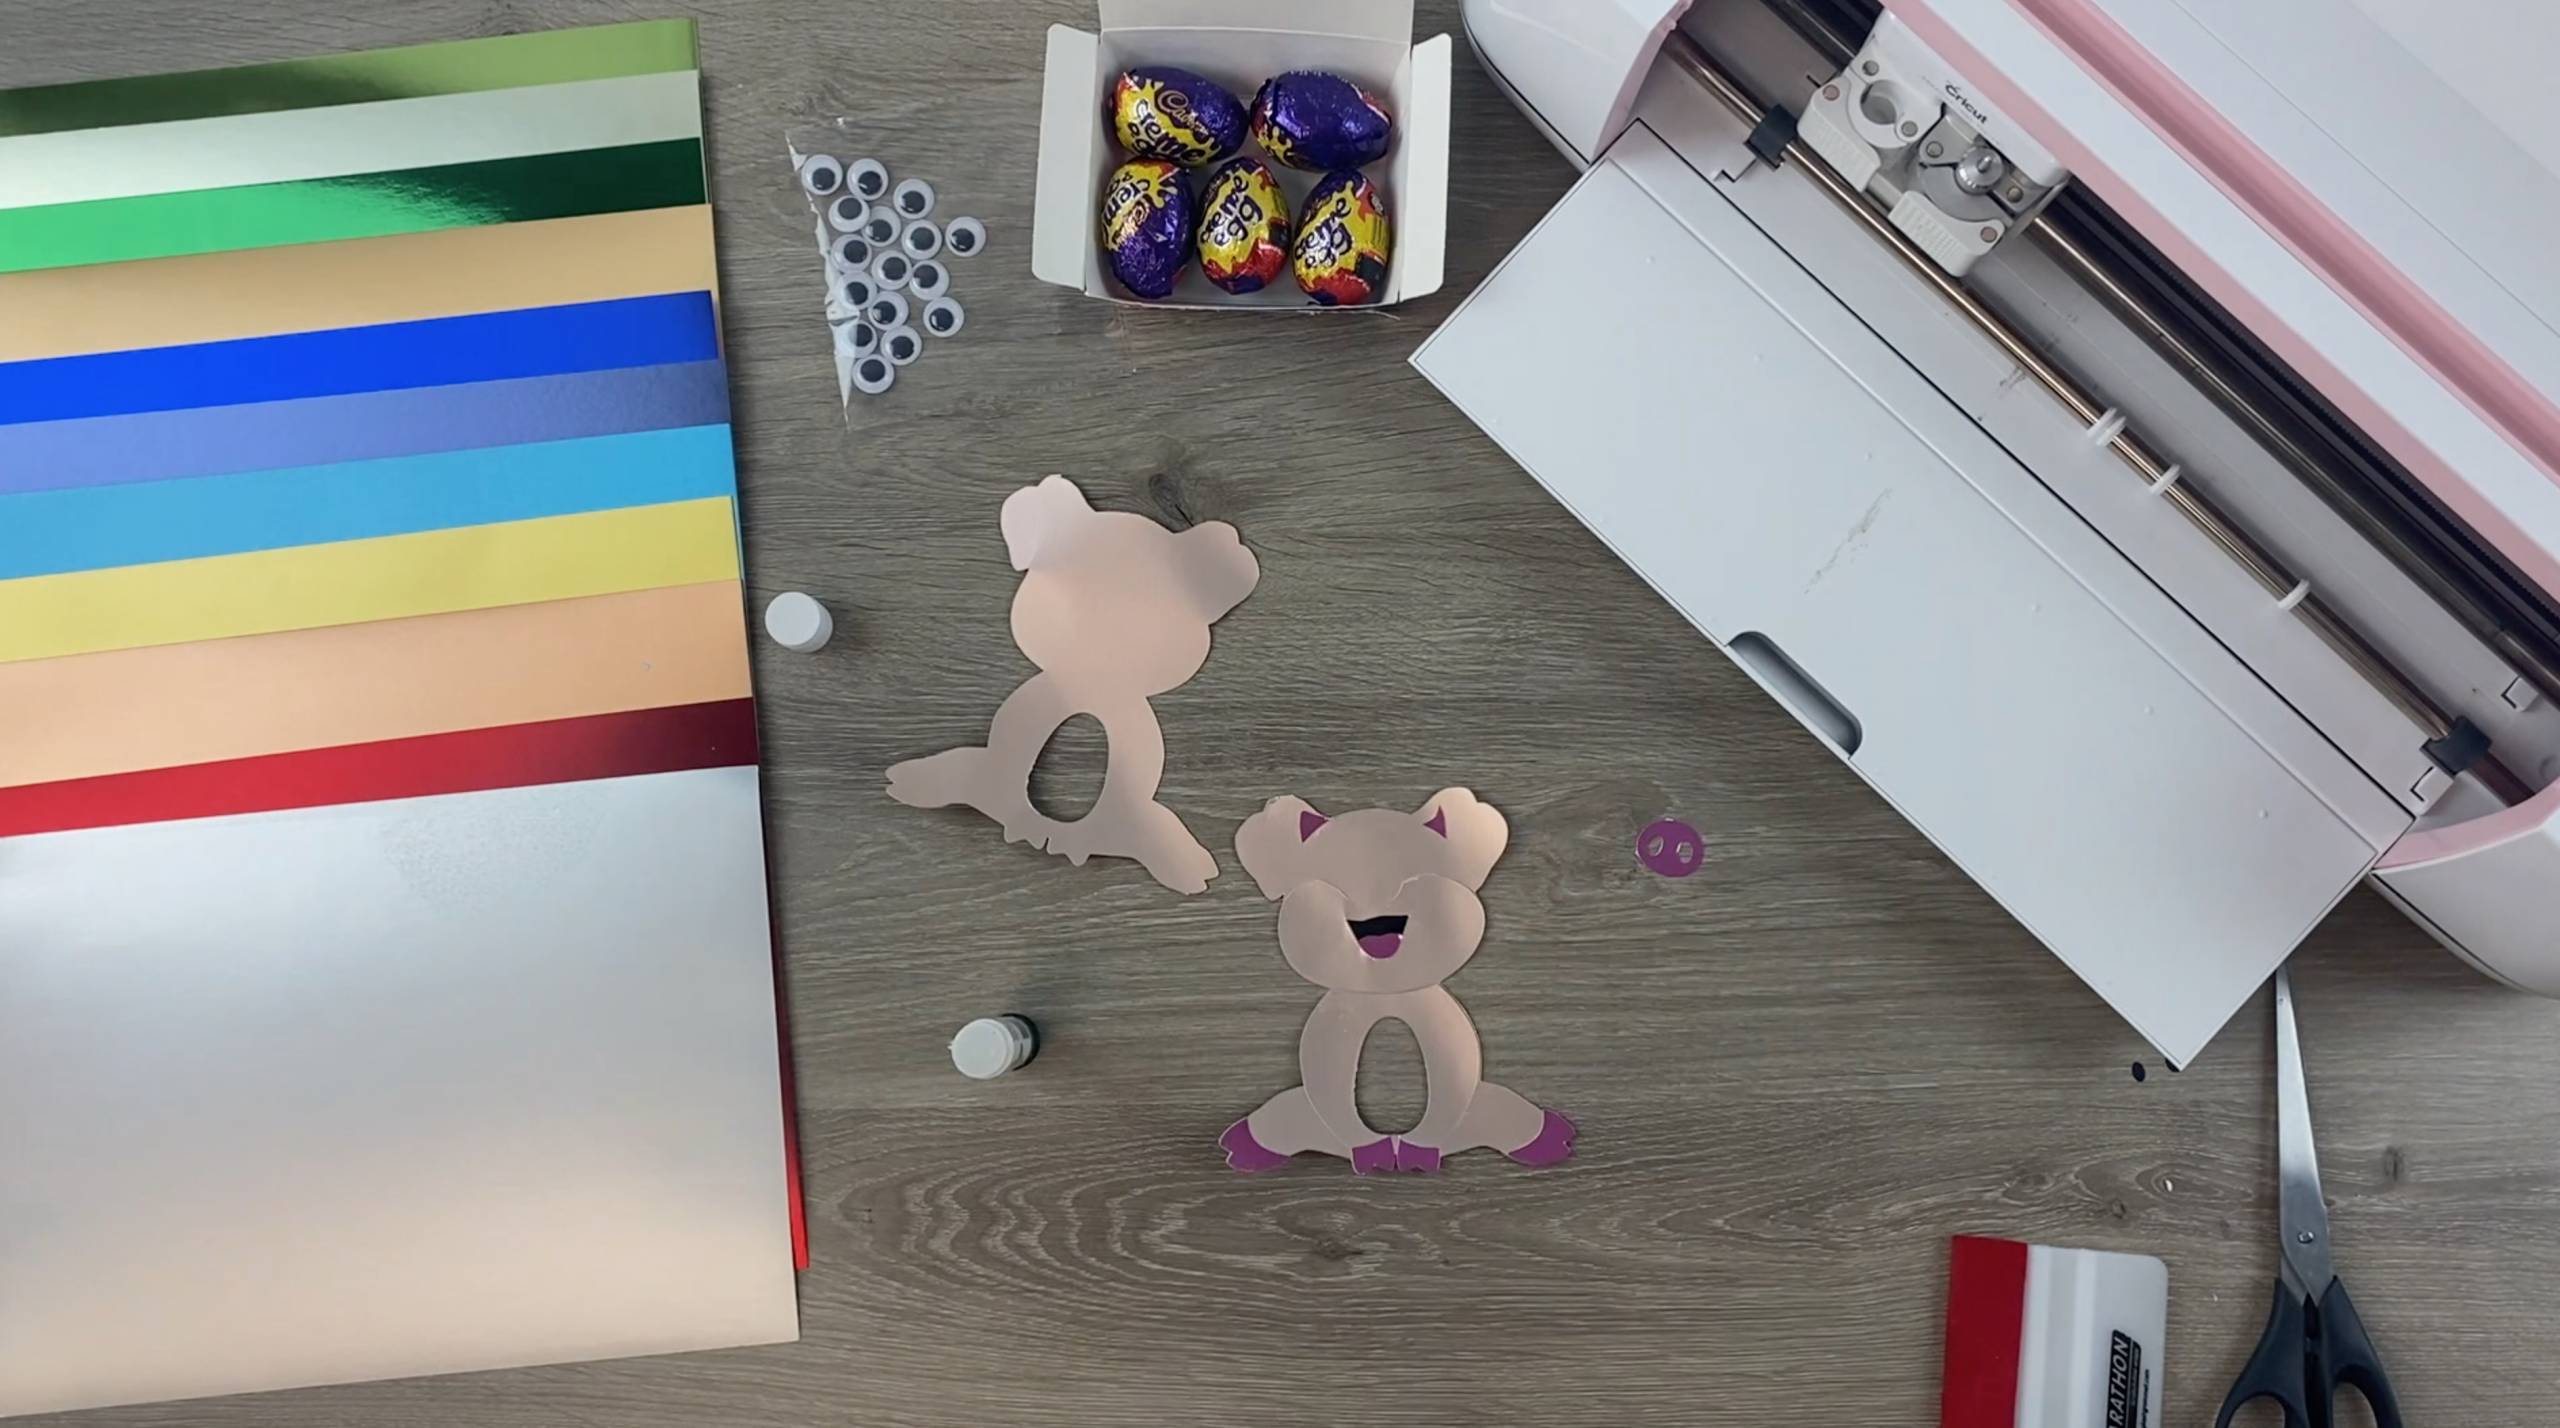
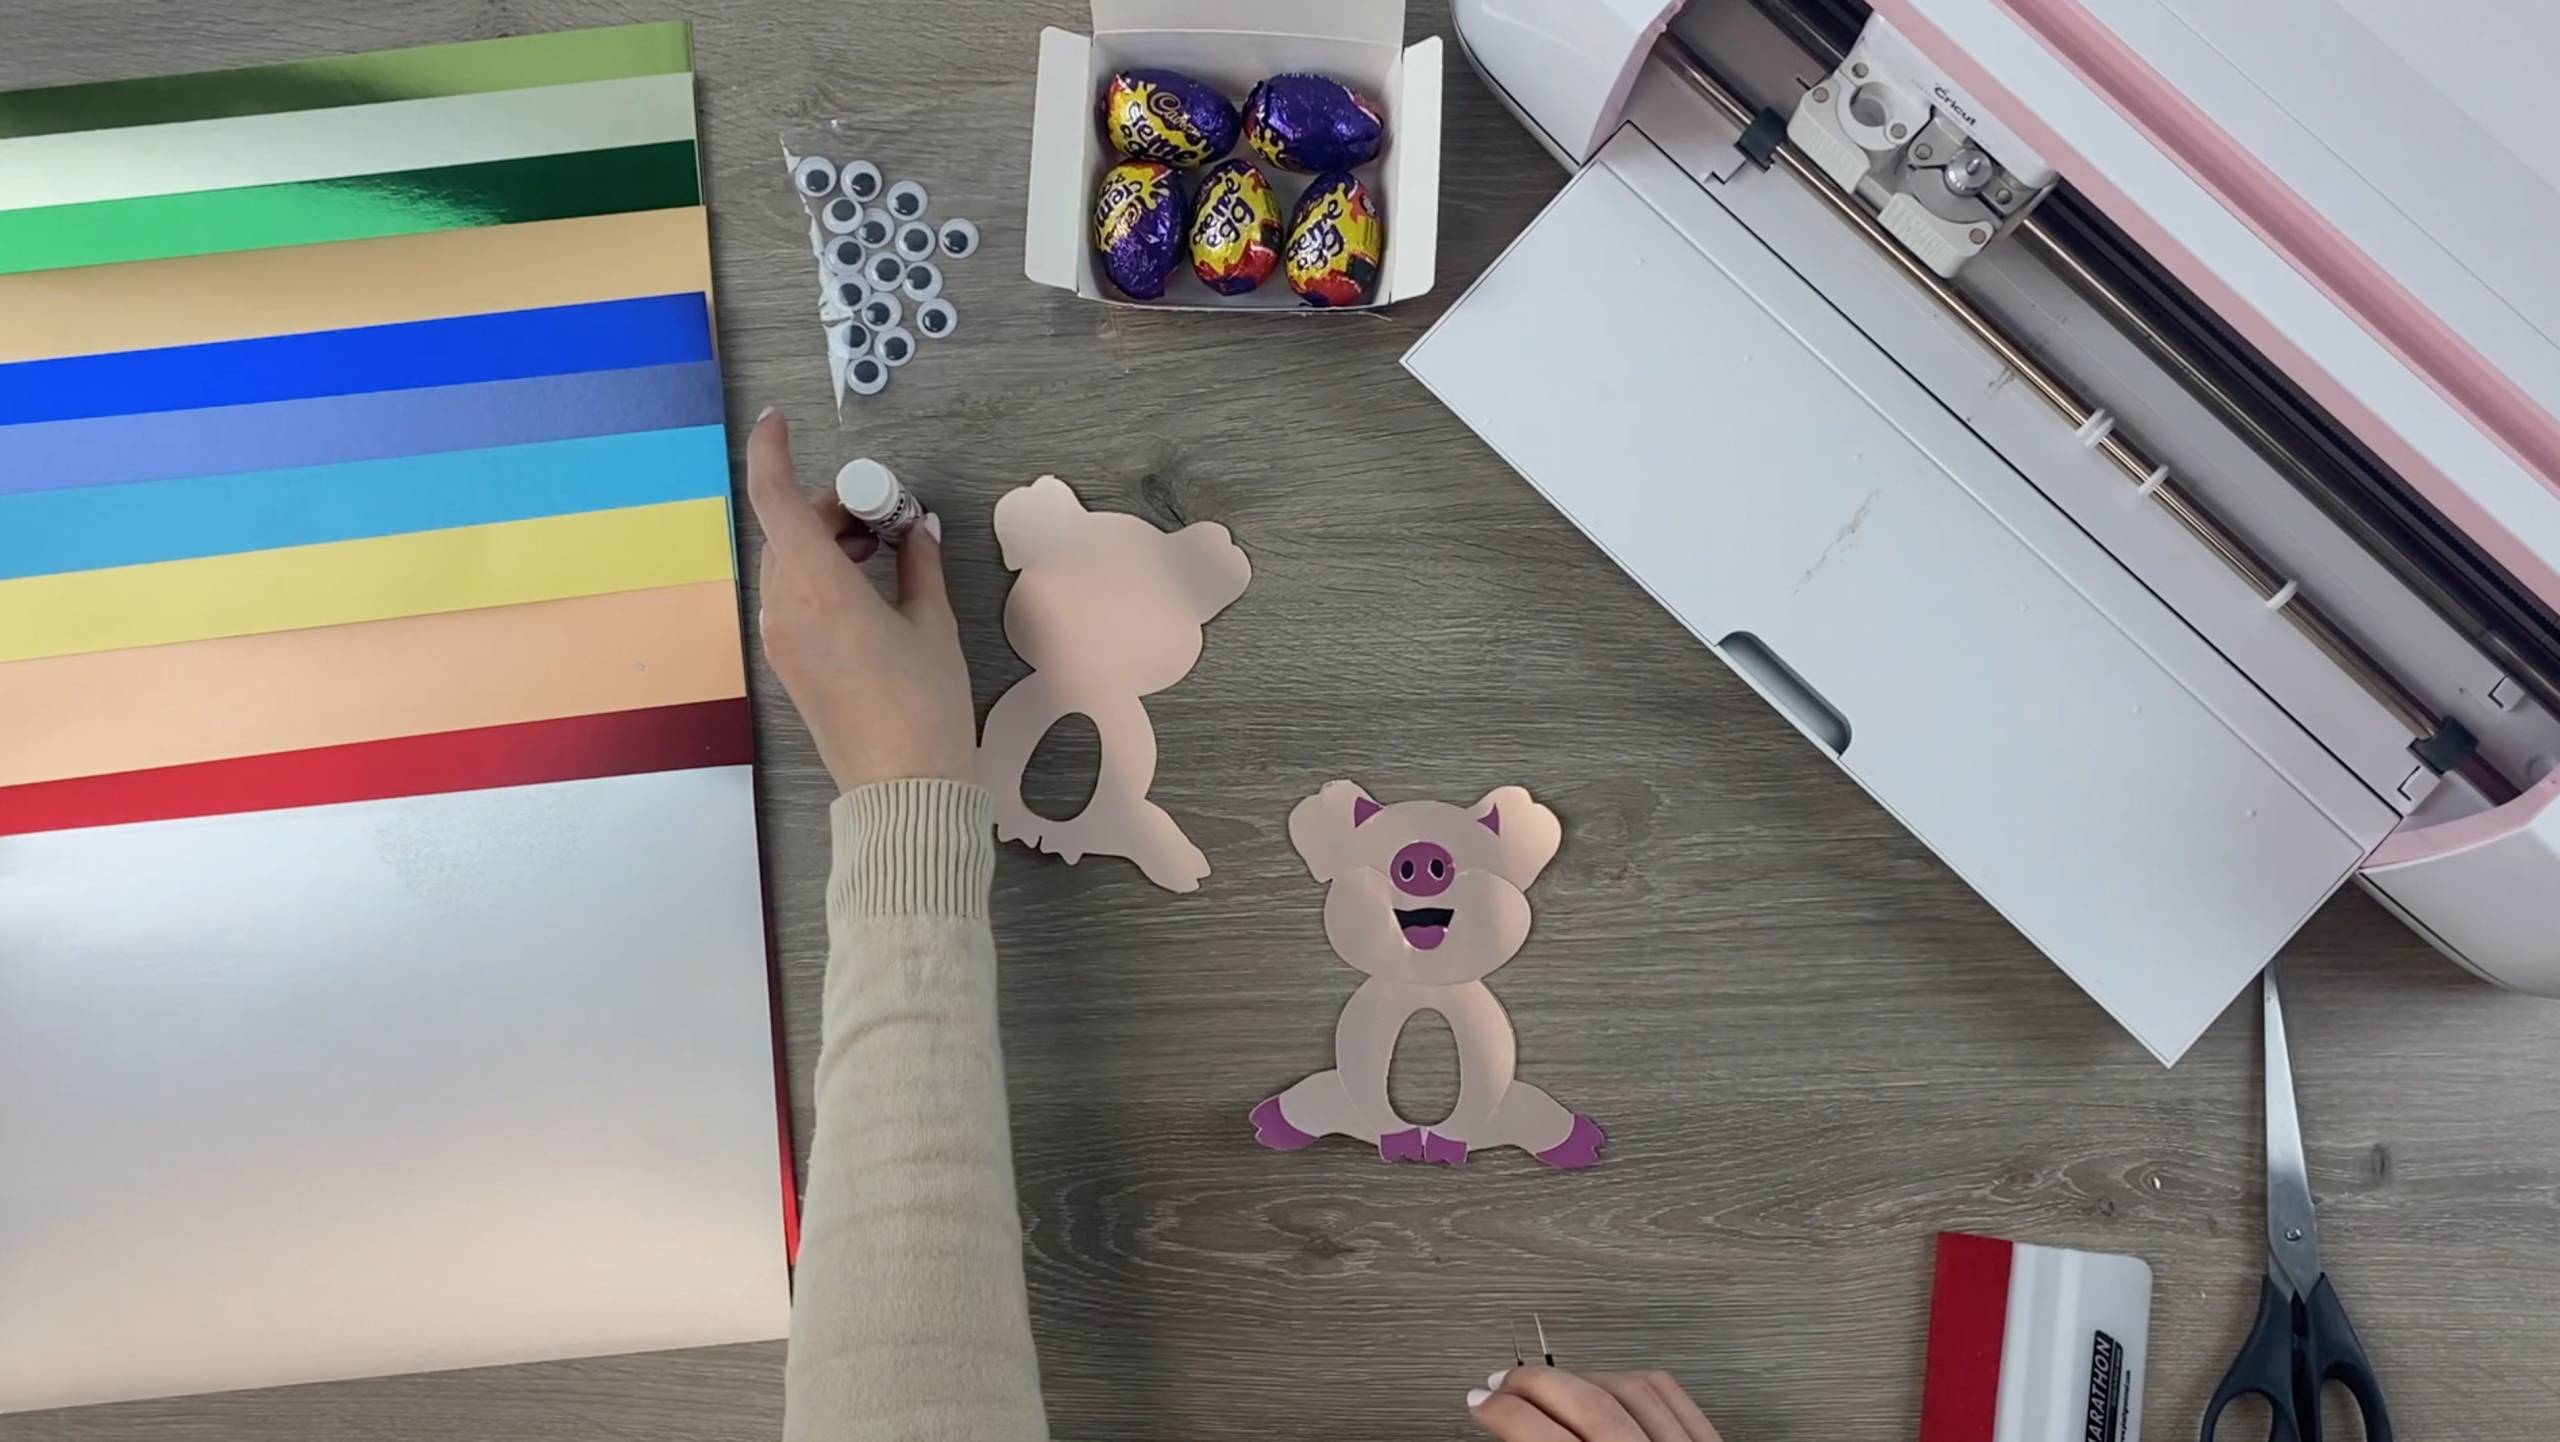
11. Apply the googly eyes!
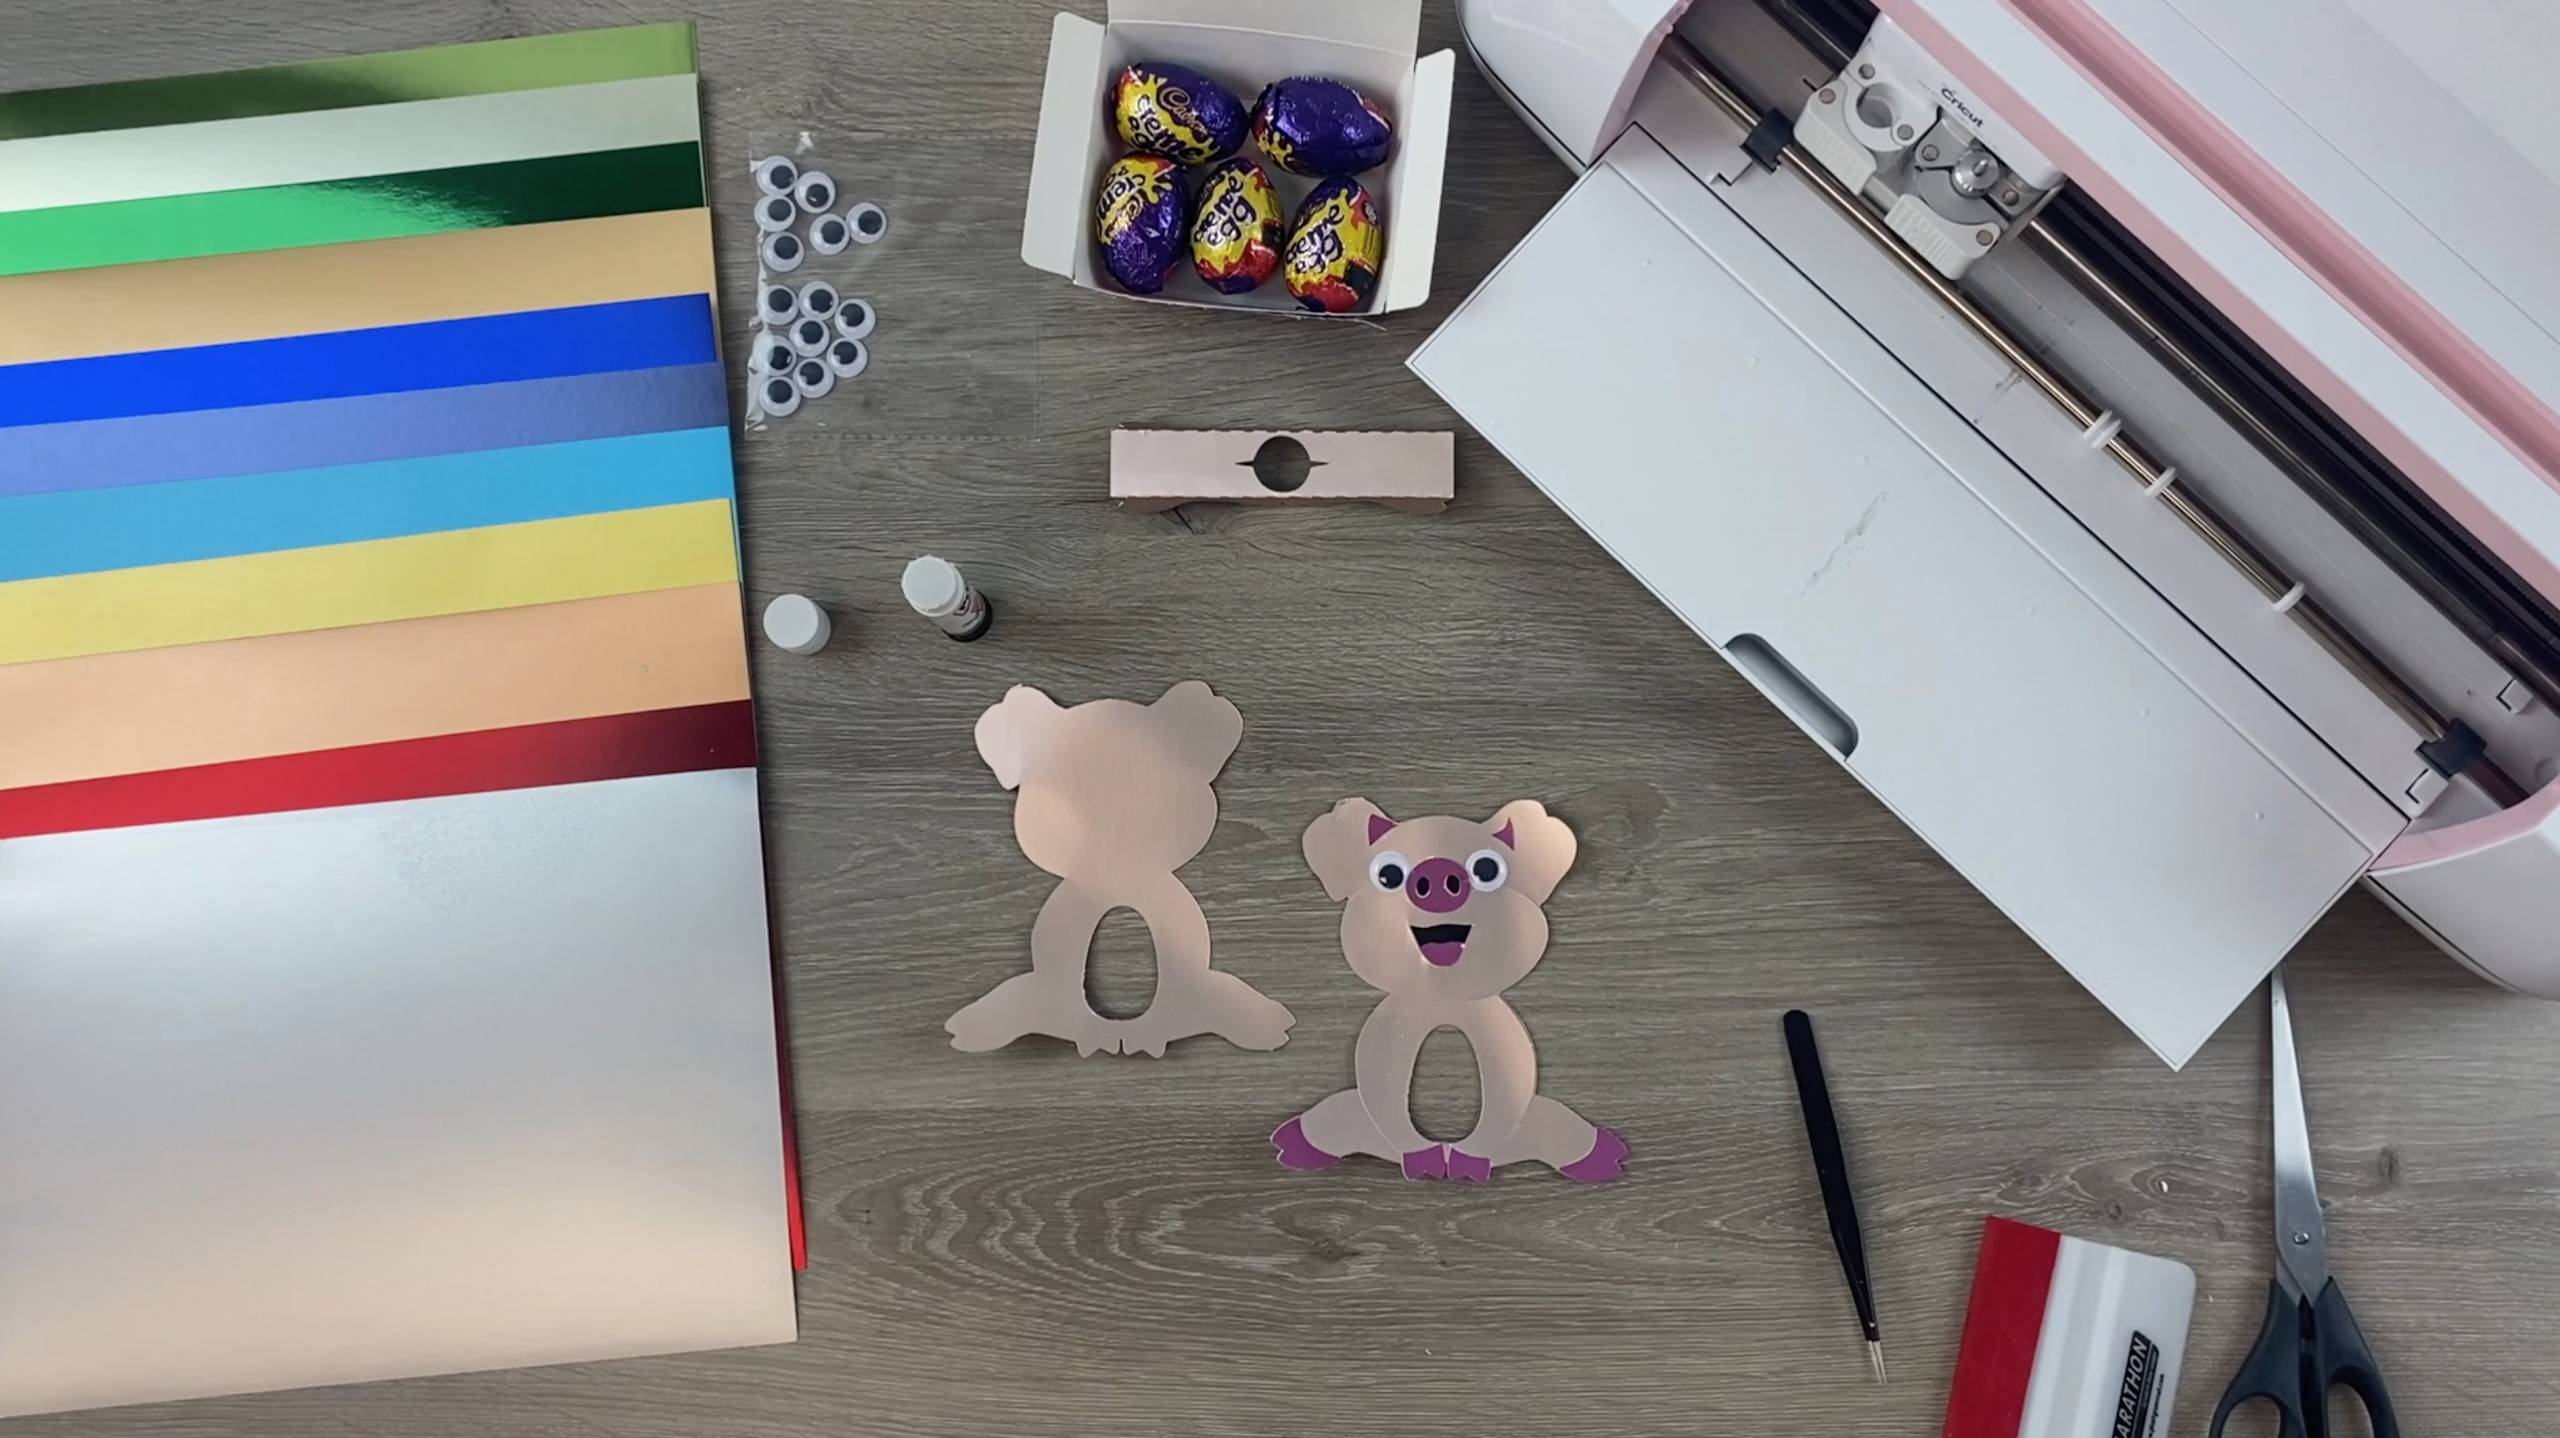
12. Fold the score lines on the bottom base card and apply glue to one edge. Stick the front of the Pig to this edge by lining it up with the bottom of the Pig.
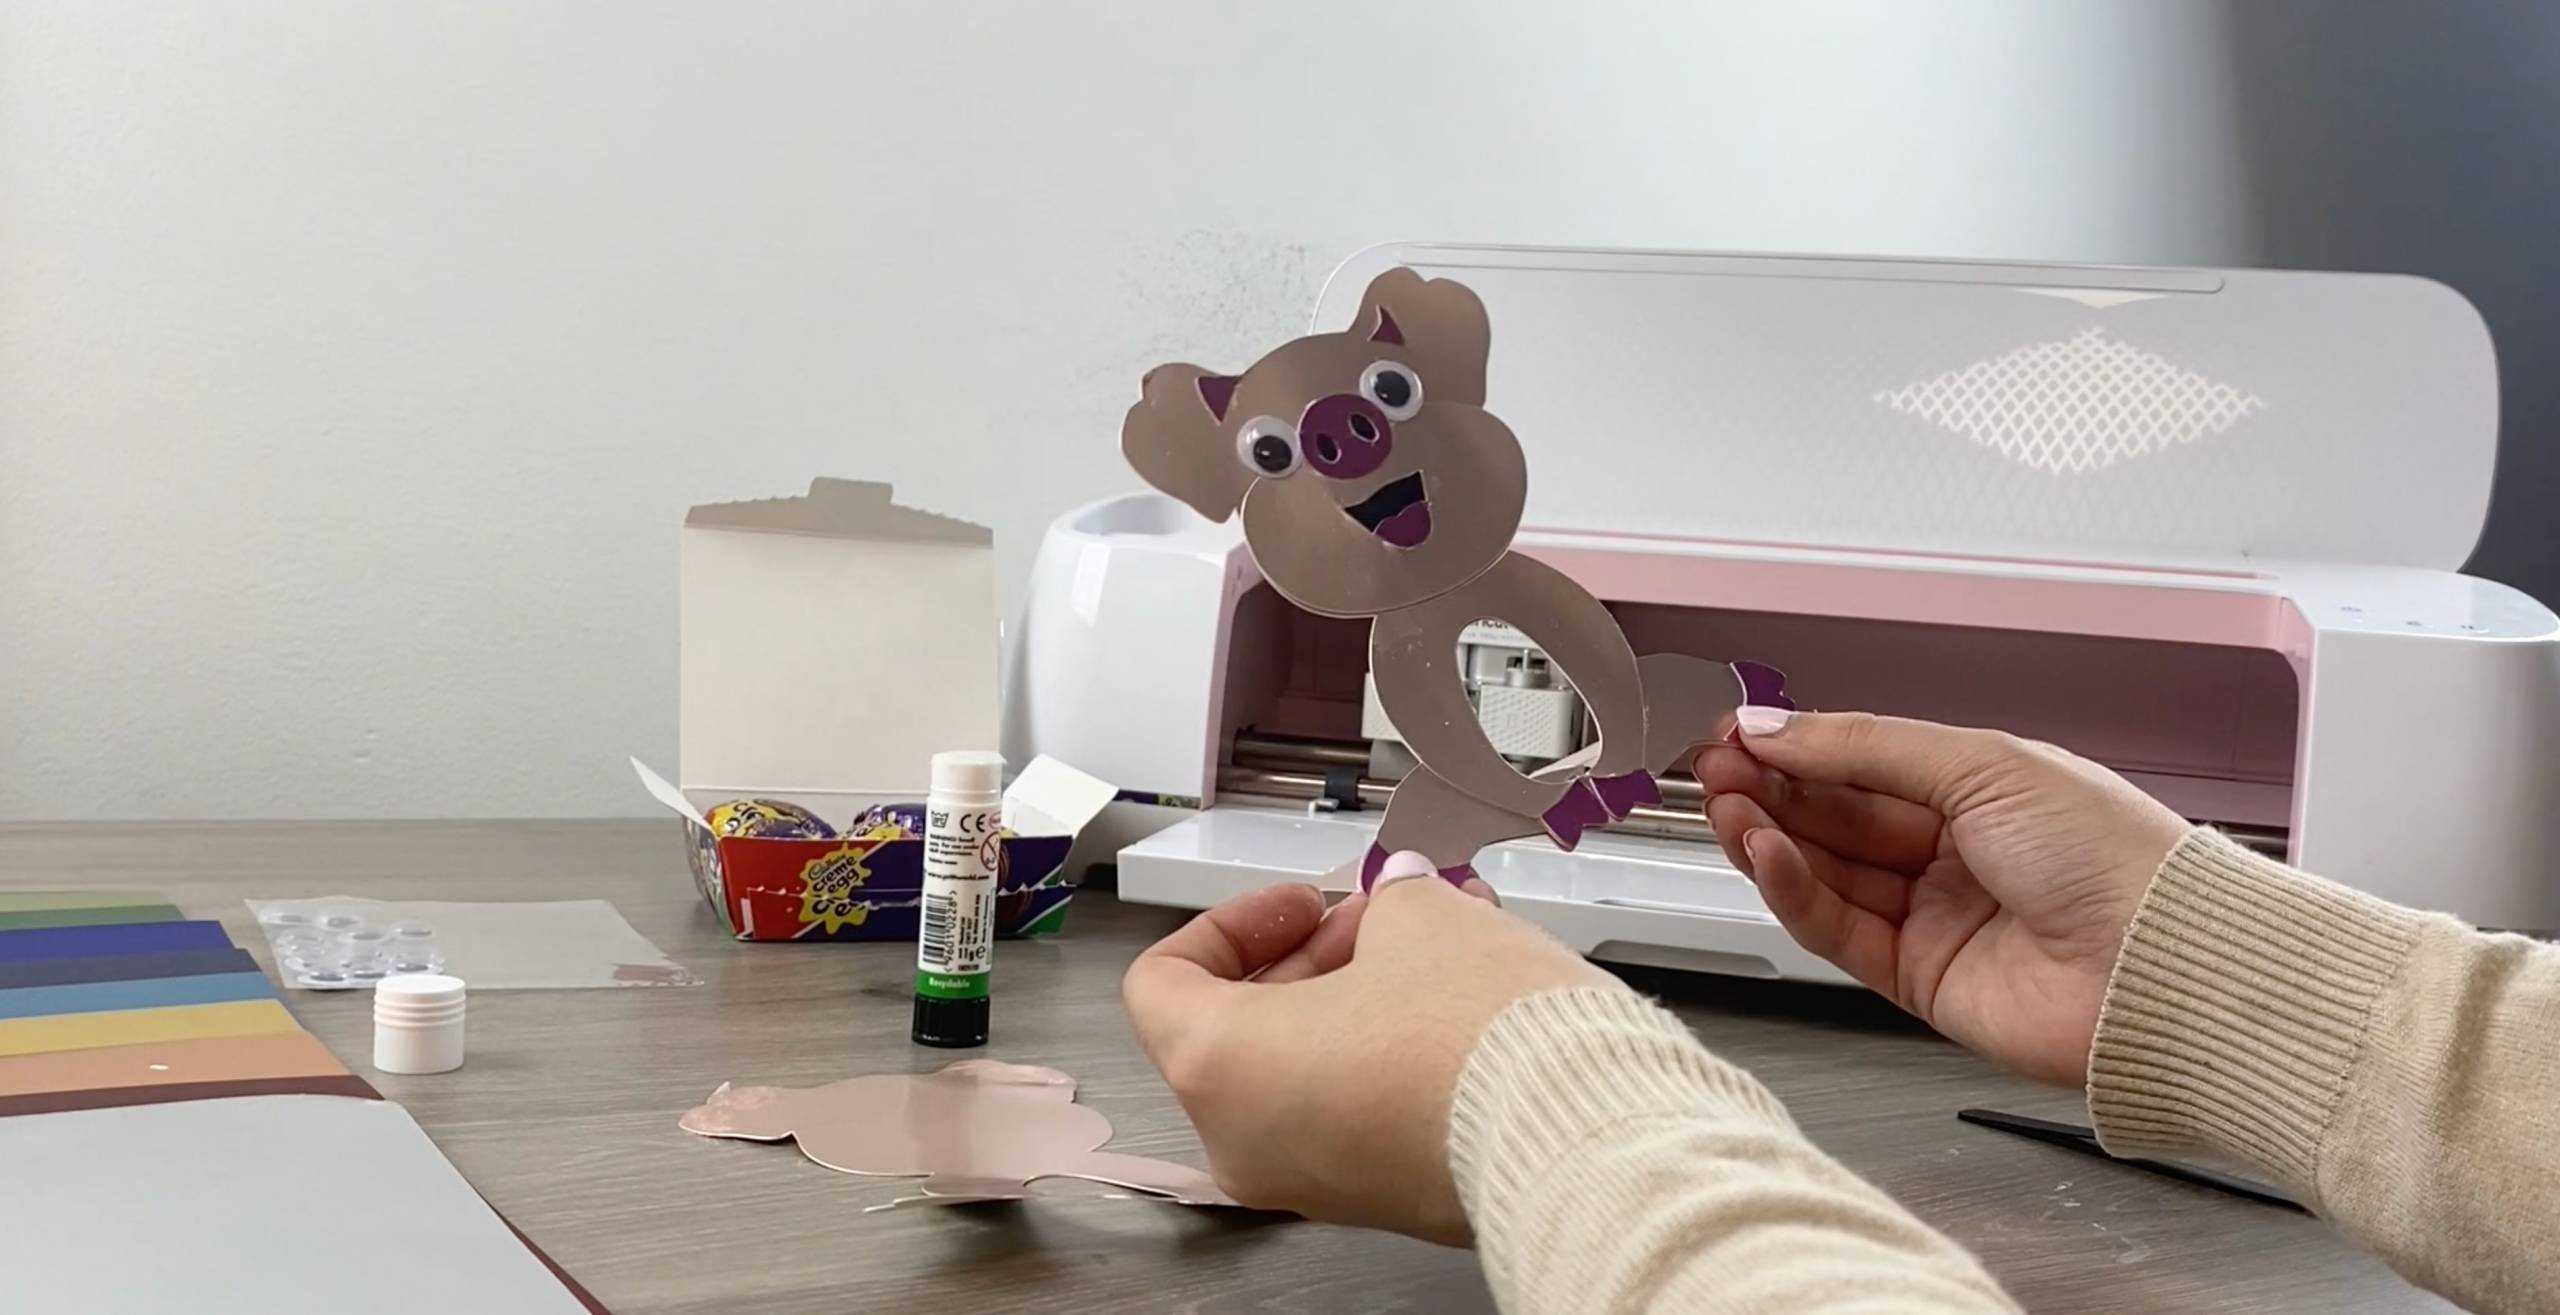
13. Apply glue to the the other edge of the bottom base card and stick the remaining plain Pig silhouette to it, the coloured side of the card should be facing forward.
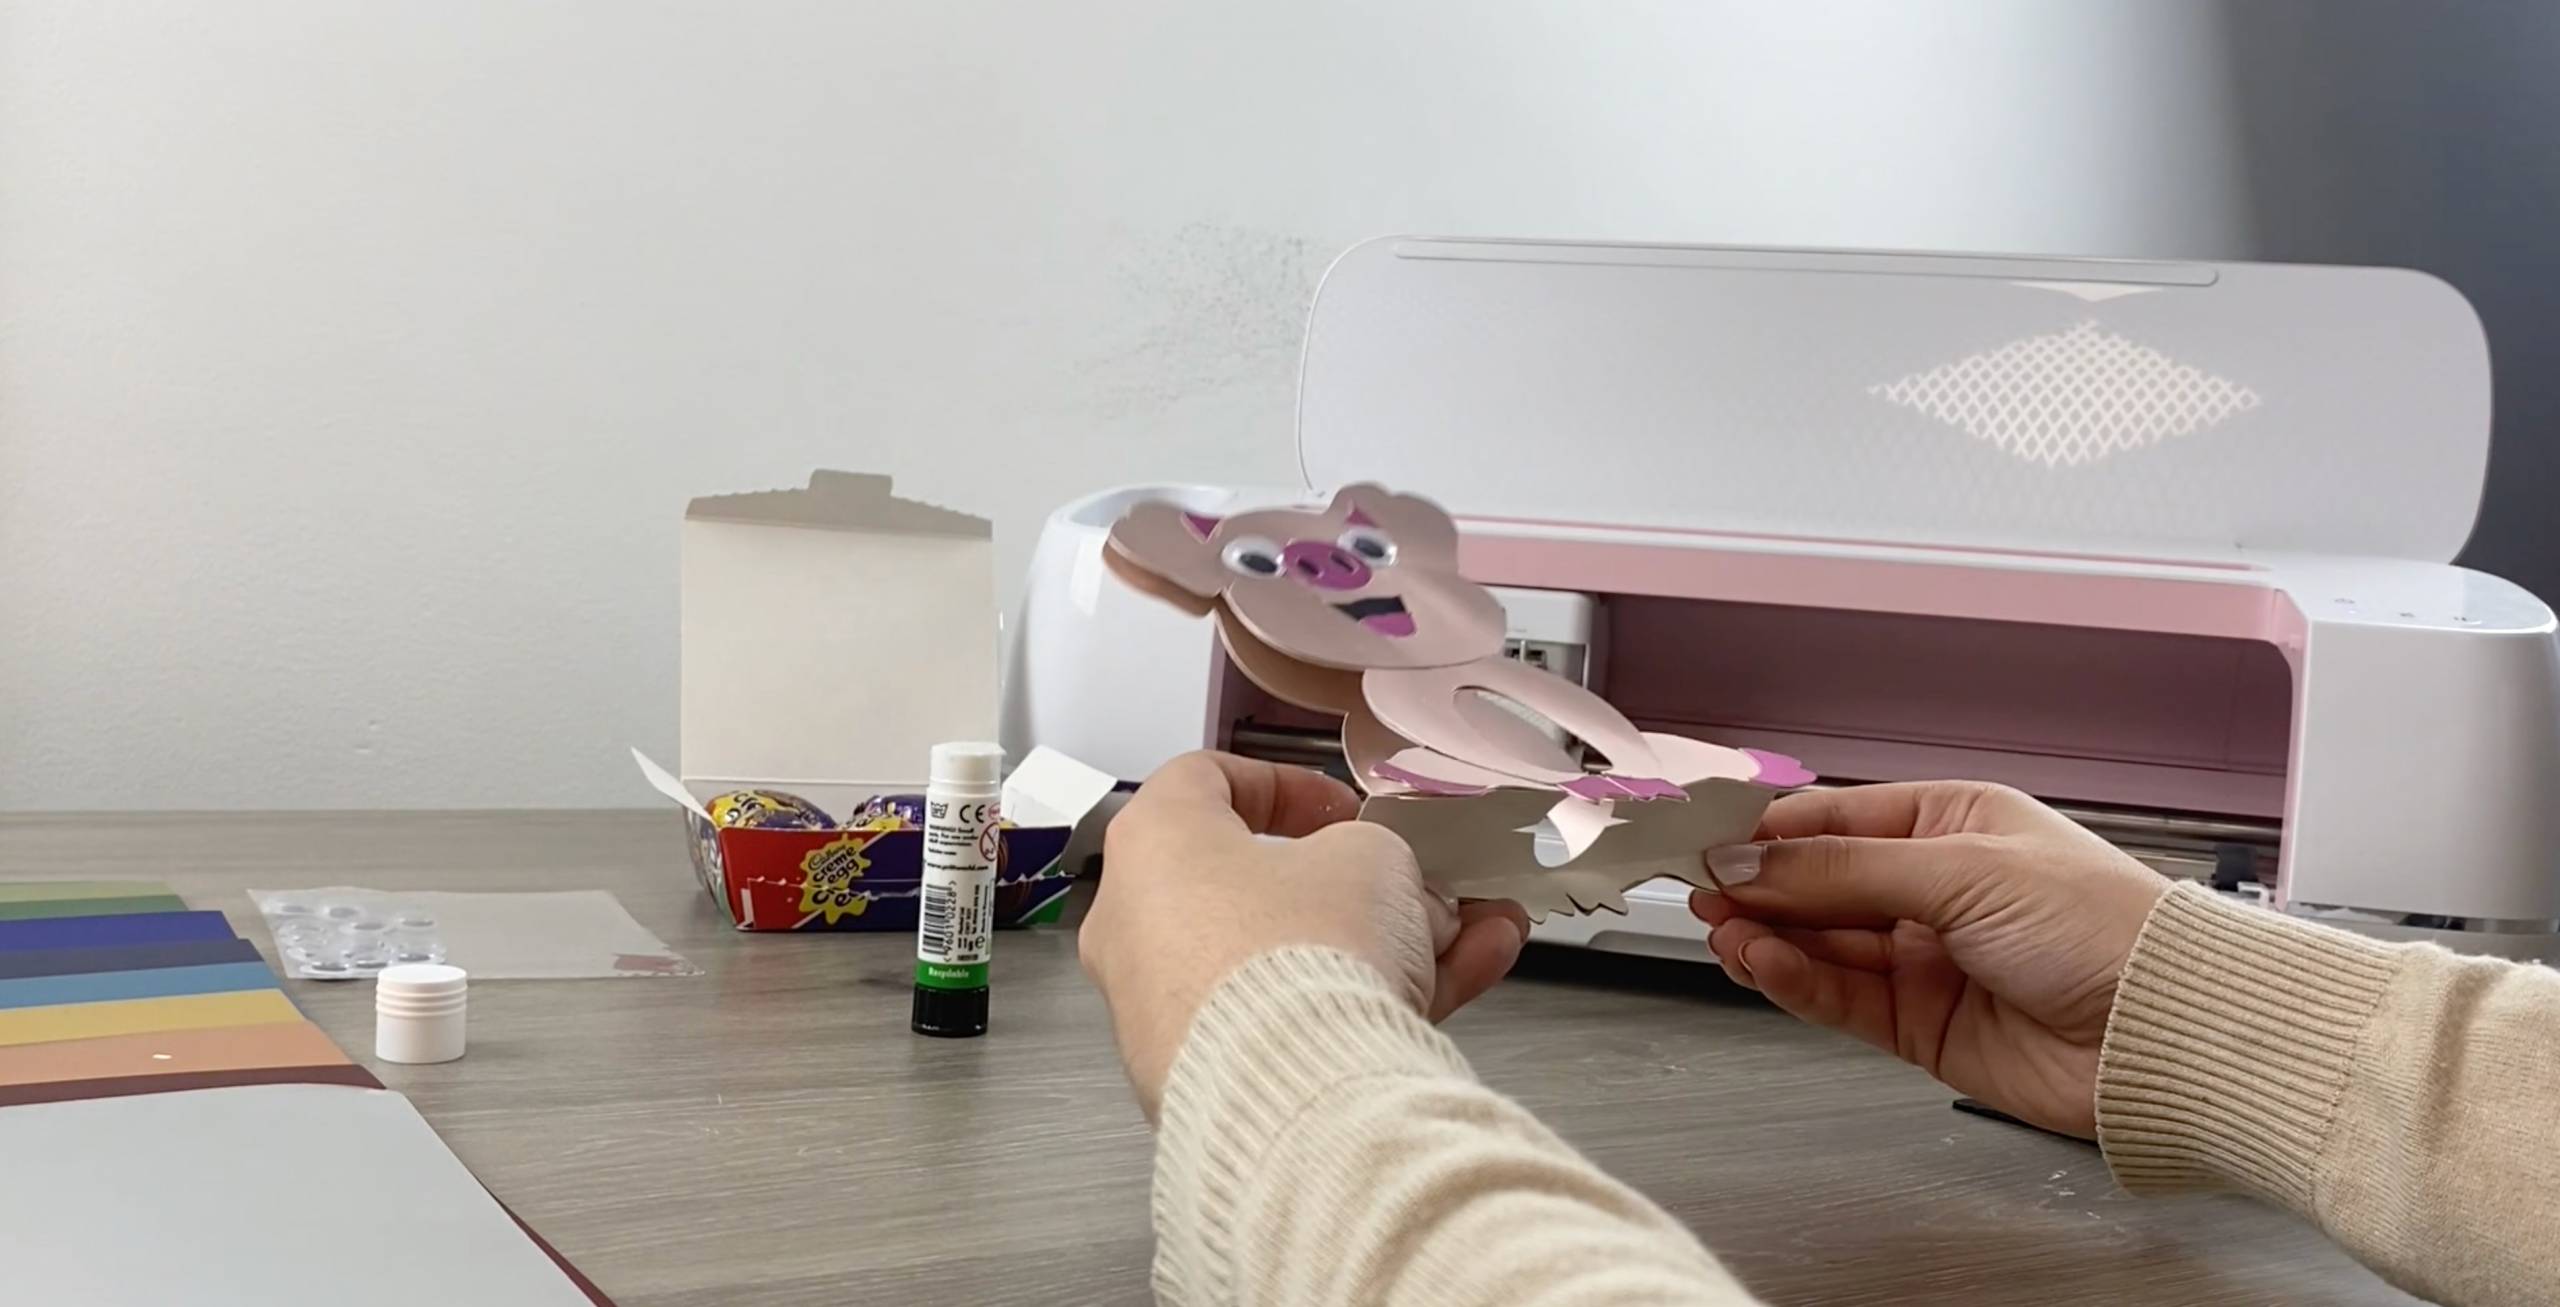
14. Apply glue to the inside of the top of the Pig’s head and then secure the two sides to each other.
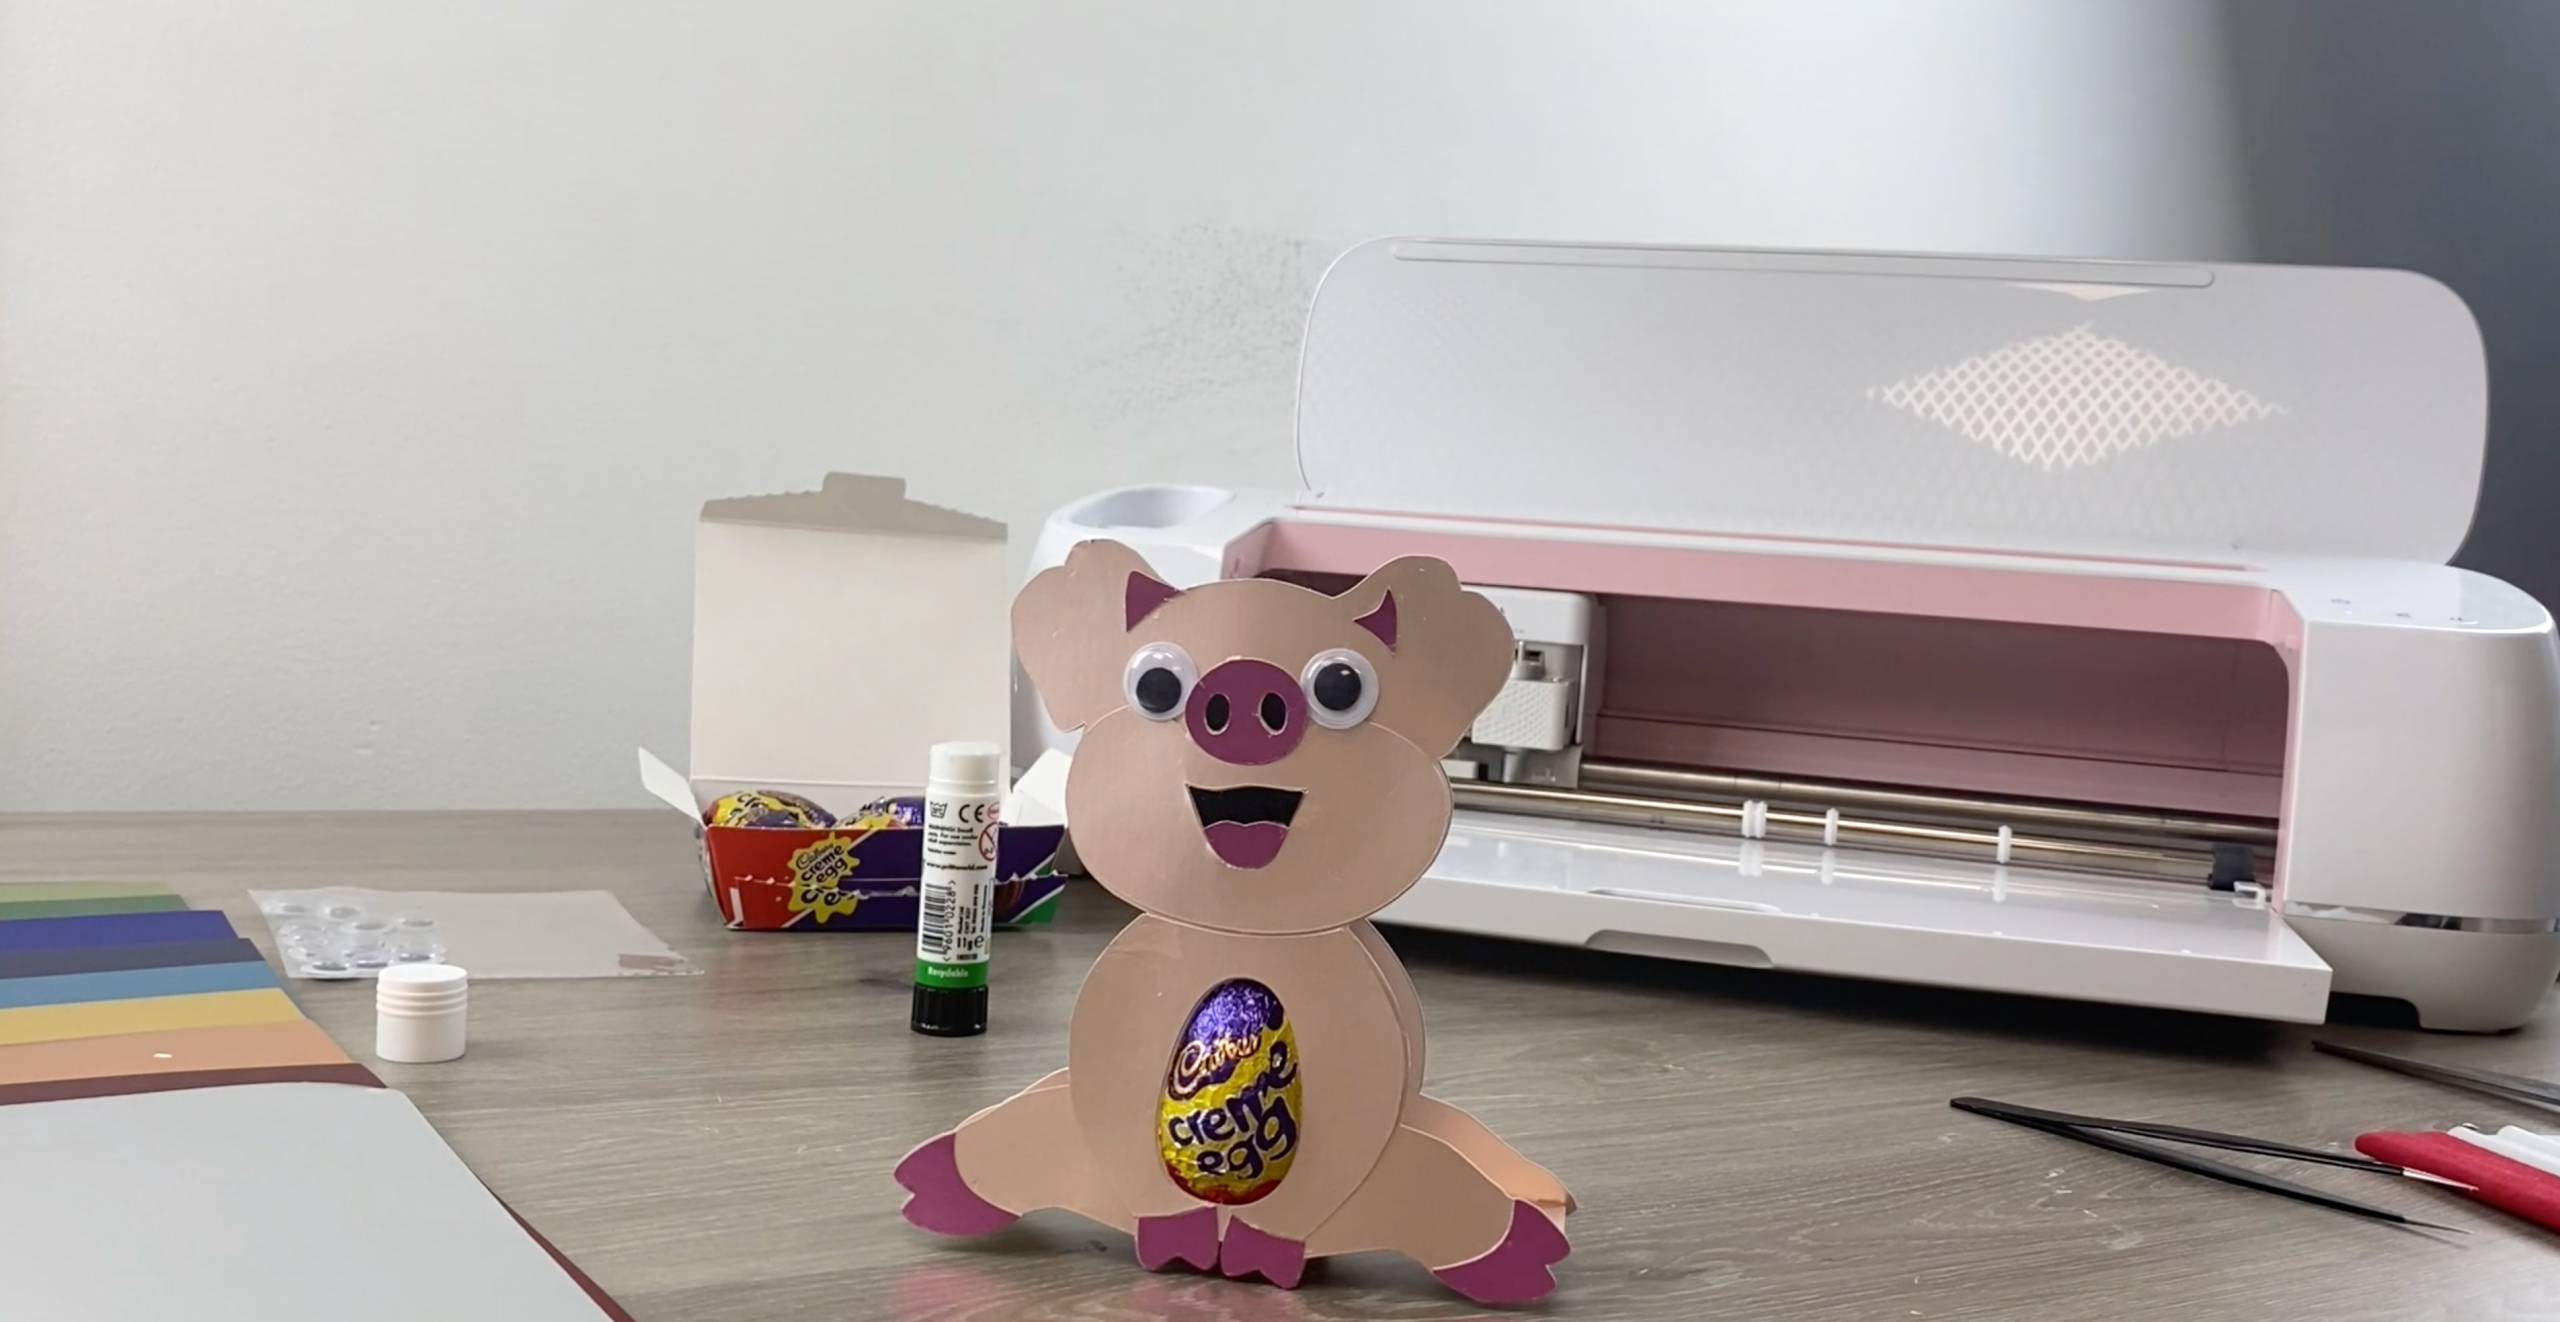
15. Slide your egg through the side to sit in the egg holder.
Silhouette Cut Files
Double-click on the Zip file to open it up and then open the cut file. When it opens in Silhouette studio all of the cut files will be on one mat, depending on which Silhouette machine your using you may need to move each of the different-coloured cut files onto different mats. If using a machine with a larger mat you can cut them all on one mat, just make sure each coloured card is in the correct position on the mat in correlation to the correct cut file.
Cut Setting: Cardstock Plain
Blade: 3
Speed: 4
Force: 20
Passes: 1
Brother Cut Files
After downloading and opening the zip file, please log in as usual to your design space account, open a new project mat, then left click on the SVG icon in the top left bar in canvas, this will then allow you to import your files. Once you left click this icon, a pop up box appears with you to choose where to import file from, choose to import the file from your downloads list or where you have chosen to save when unzipped.
Cut Settings:
Card:
Blade: 3.75
Speed: 1
Pressure: 0
Passes: 1
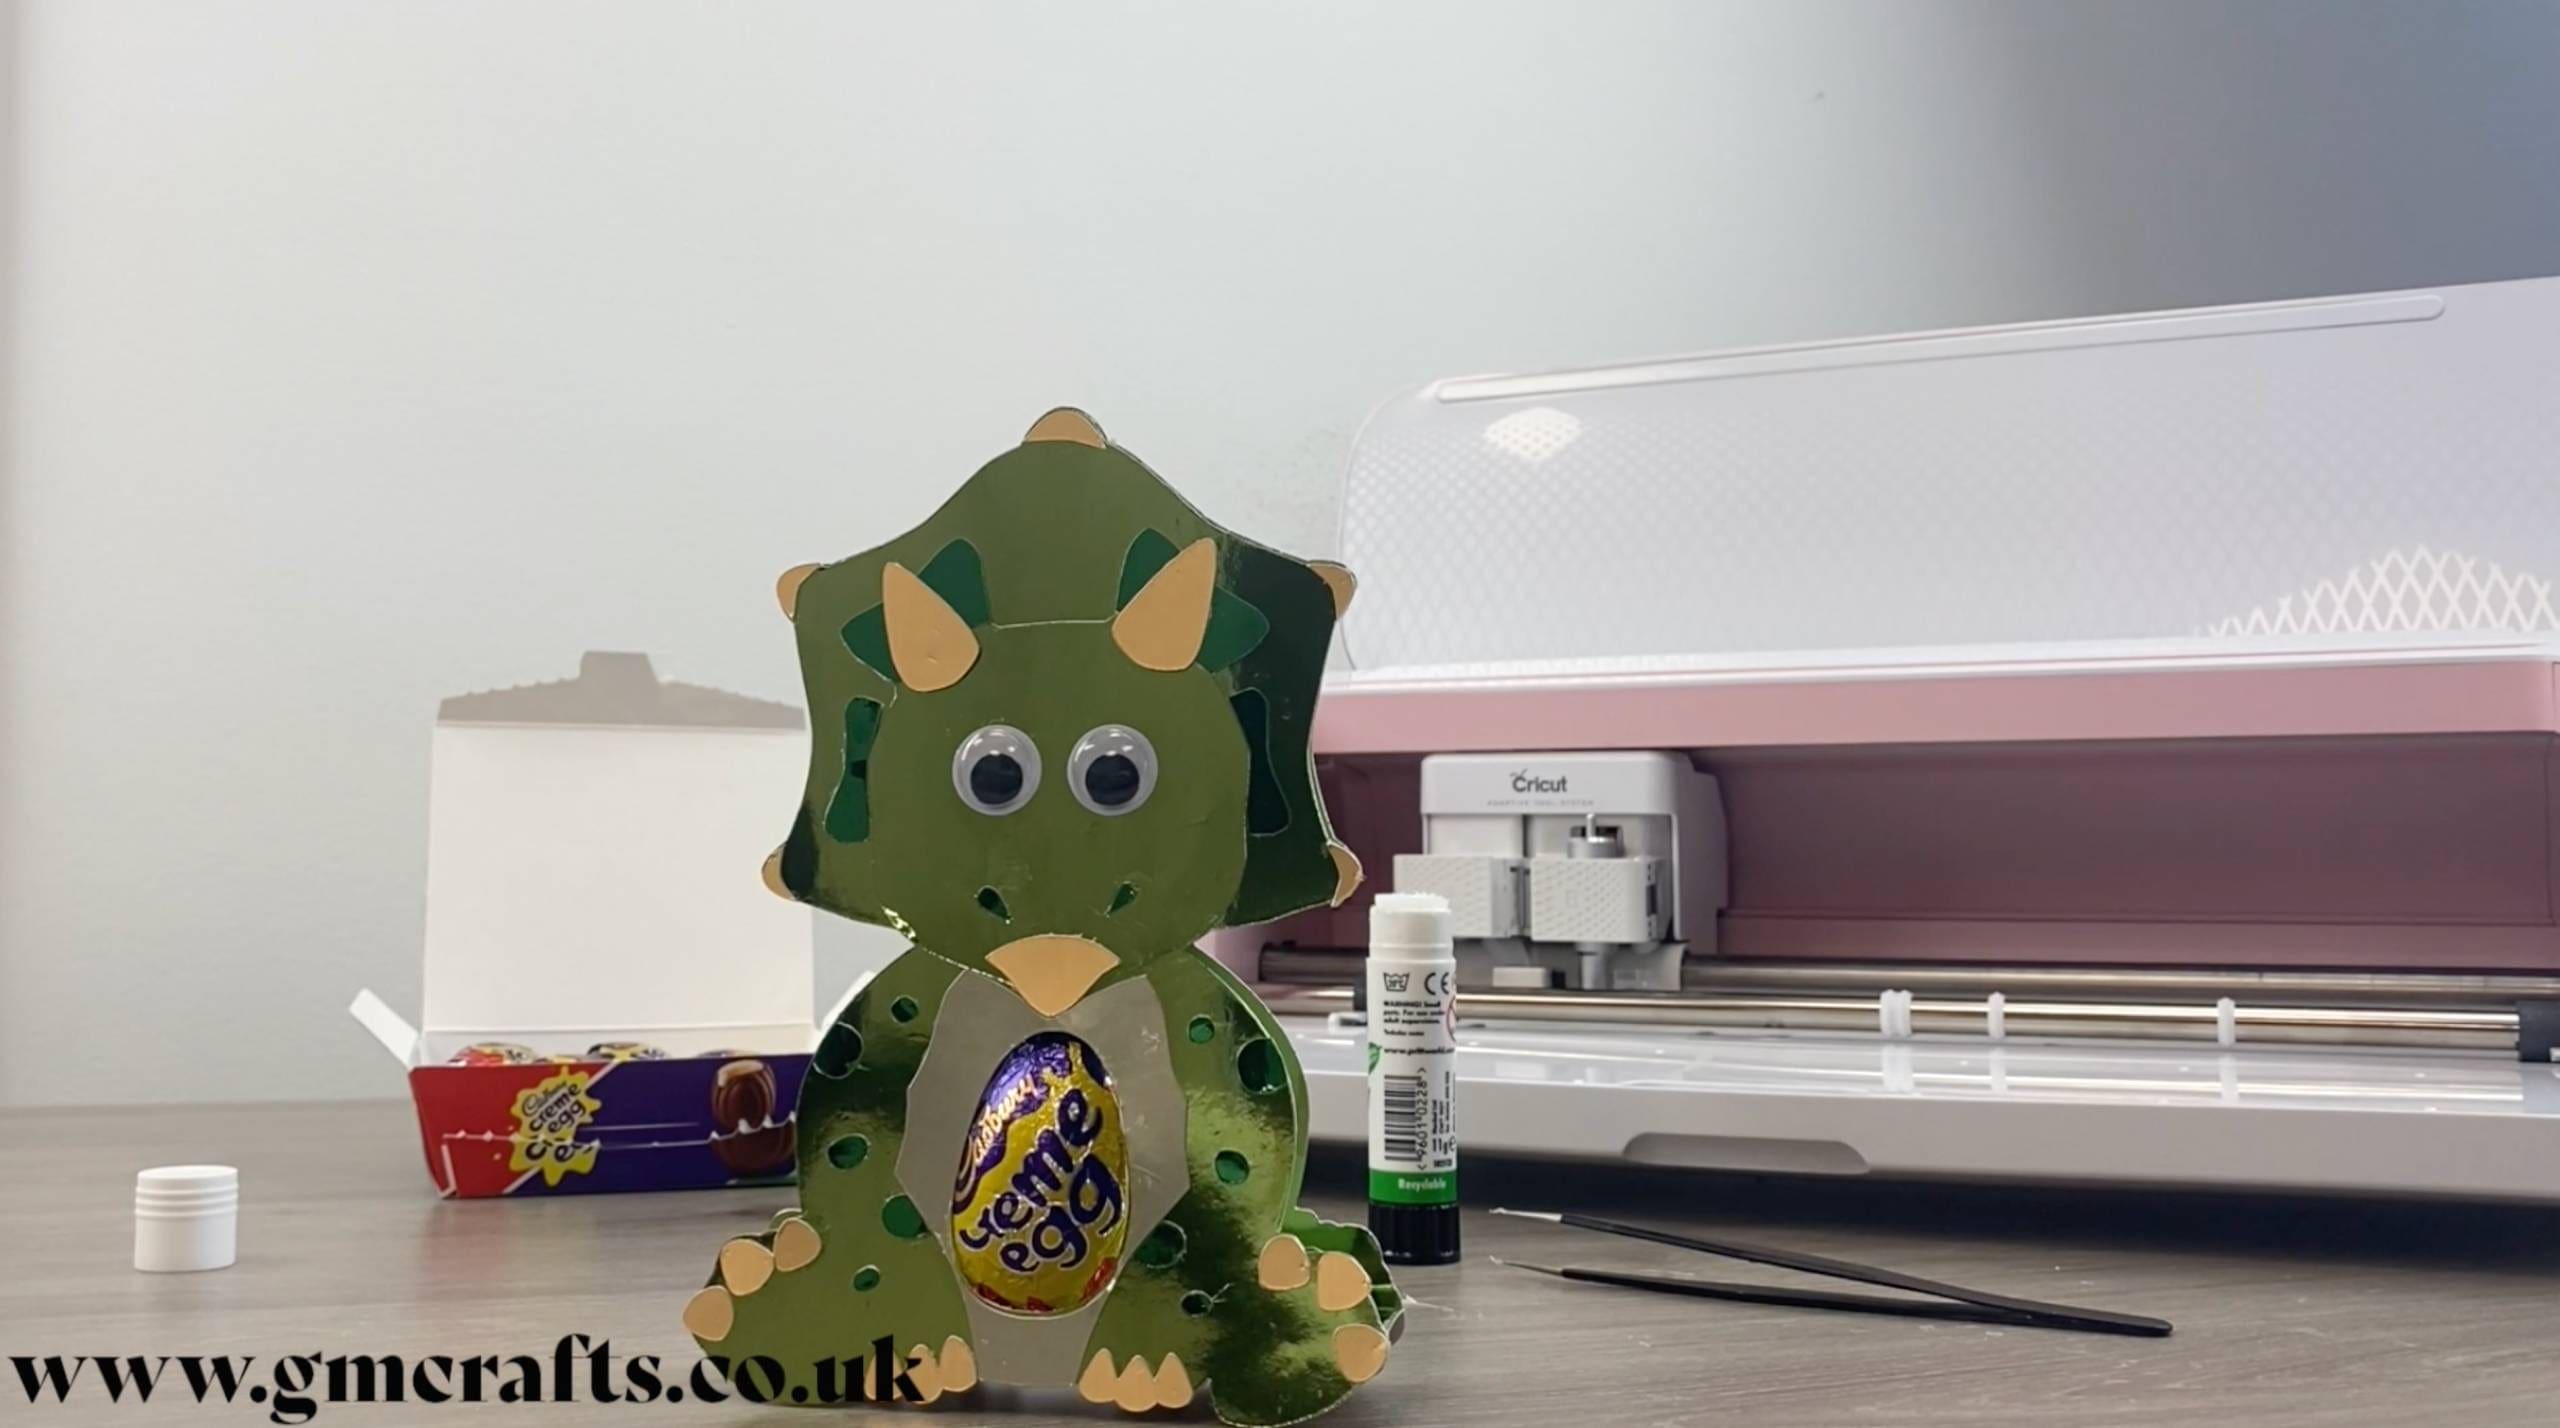
Dinosaur
What you’ll need:
- Cricut Maker. Available here
- Spring Green mirror and satin card. Available here
- Emerald Green satin card. Available here
- Vintage Gold satin card. Available here
- Weeding tweezers (optional but help to avoid finger marks on the card) Available here
- Squeegee (optional but an easier way of securing the card onto your cutting mat) Available here
- Googly eyes. Available here
- Glue stick. Available here
1. Download the Dino cut files and unzip them by double clicking on the file, which should open the file up. This zip file will have all the animal cut files in for you to select the ones you’d like to use.
2. Upload each Dino PNG into the Cricut Design Space and then insert them onto the canvas.
3. Resize them as soon as you have inserted them onto the canvas as they will all still be grouped. We re-sized them to the measurement shown below.
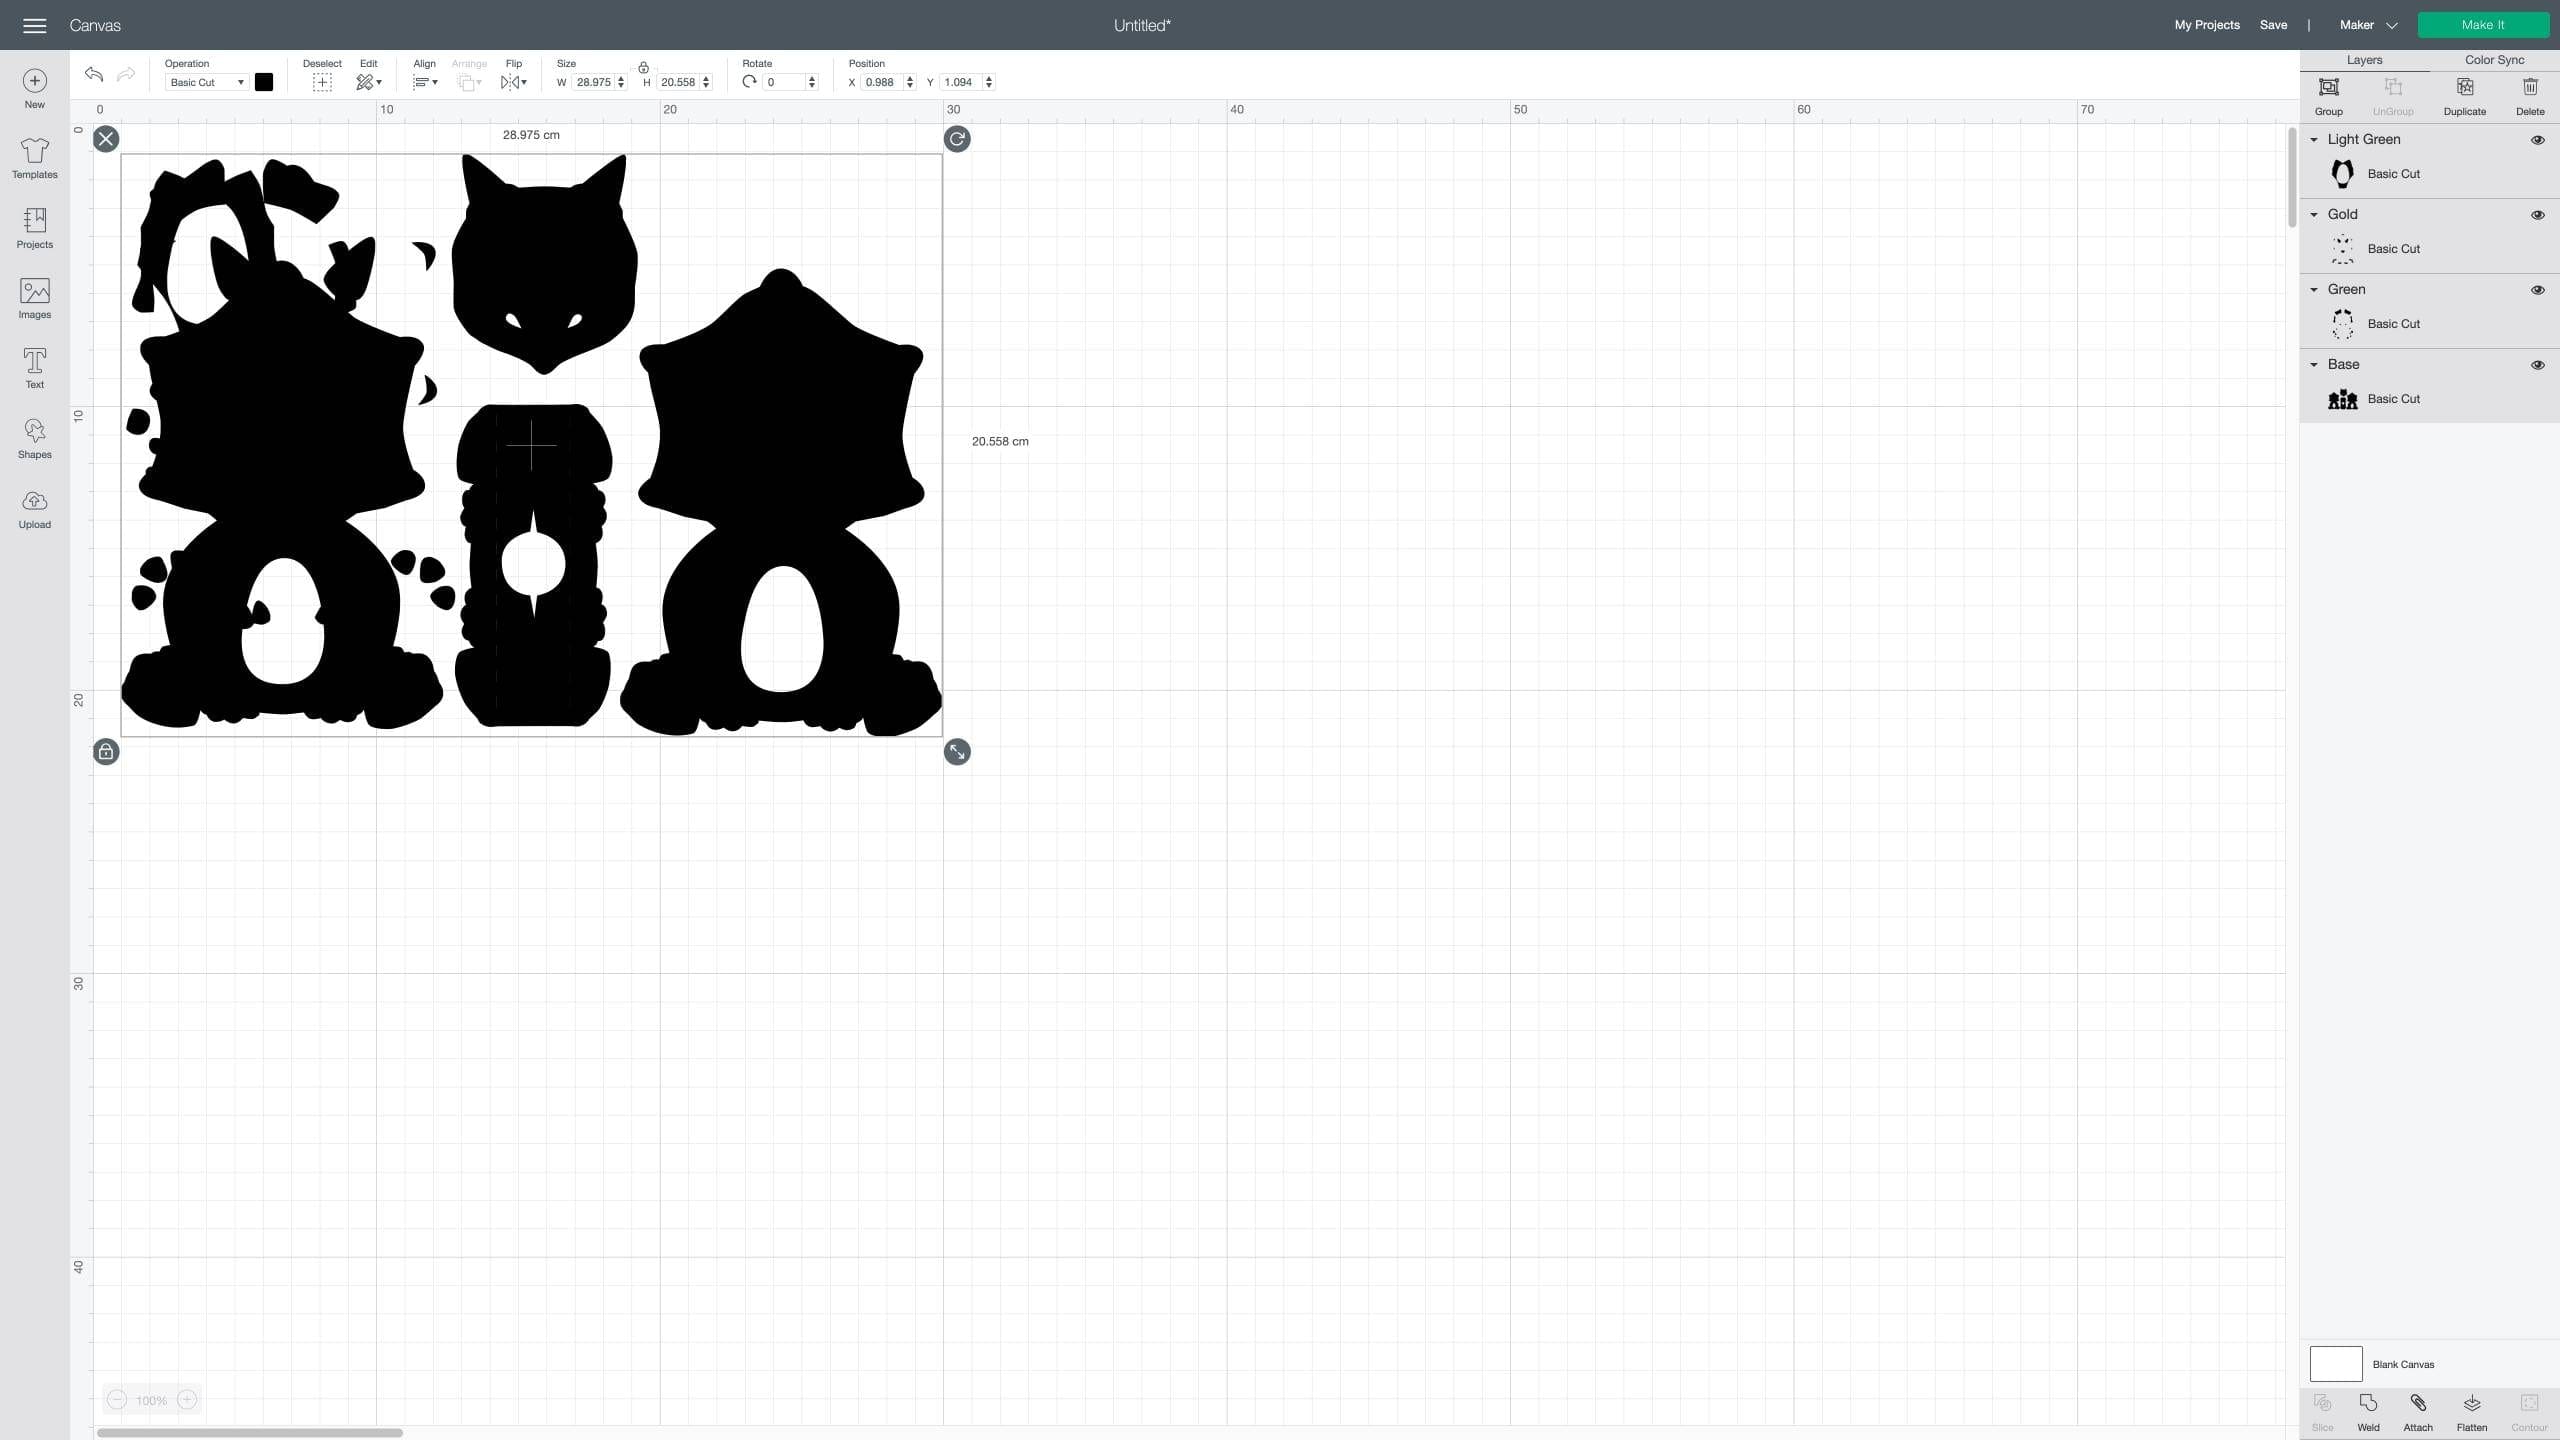
4. Position them so that all the layers are separated and select ‘Make it’ in the top right.
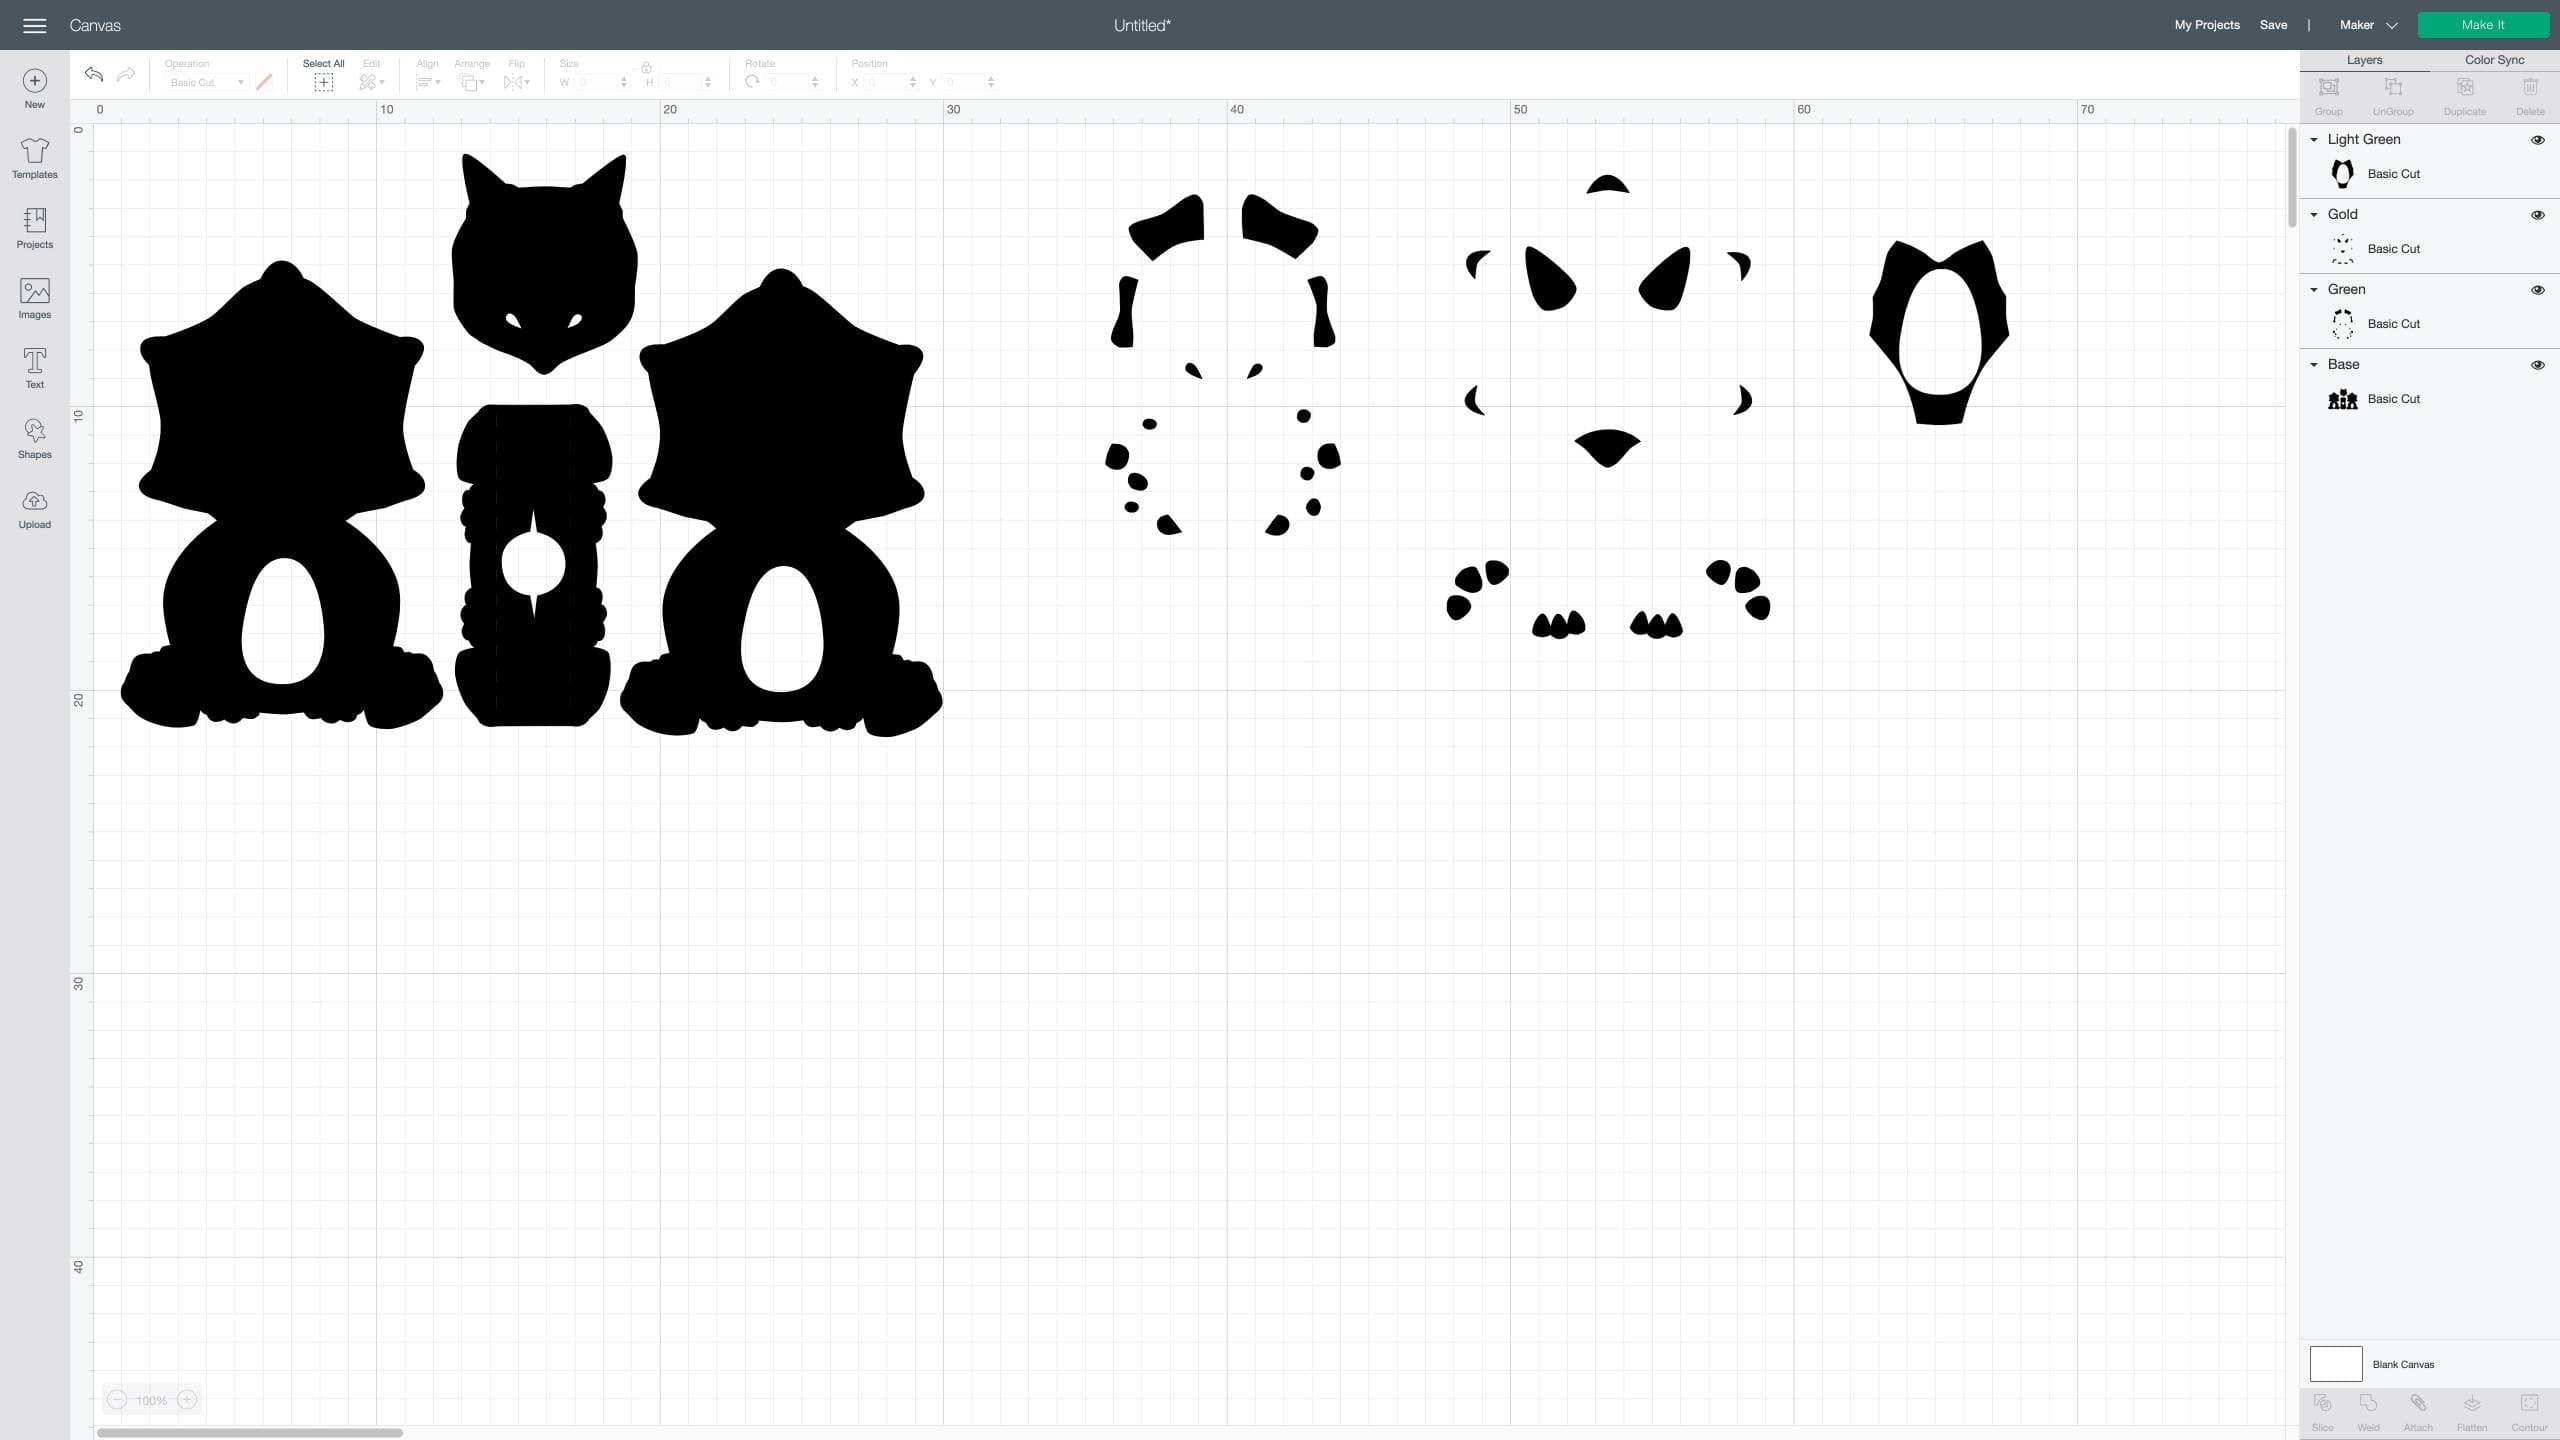
5. Move each layer so that each one is on a different cutting mat, as shown below. To make these instructions easier order them like this: 1. the base silhouettes, 2. Nostrils and markings, 3. Horns, toes, fingers and nose 4. Belly. Press ‘continue’ in the bottom right of the screen.
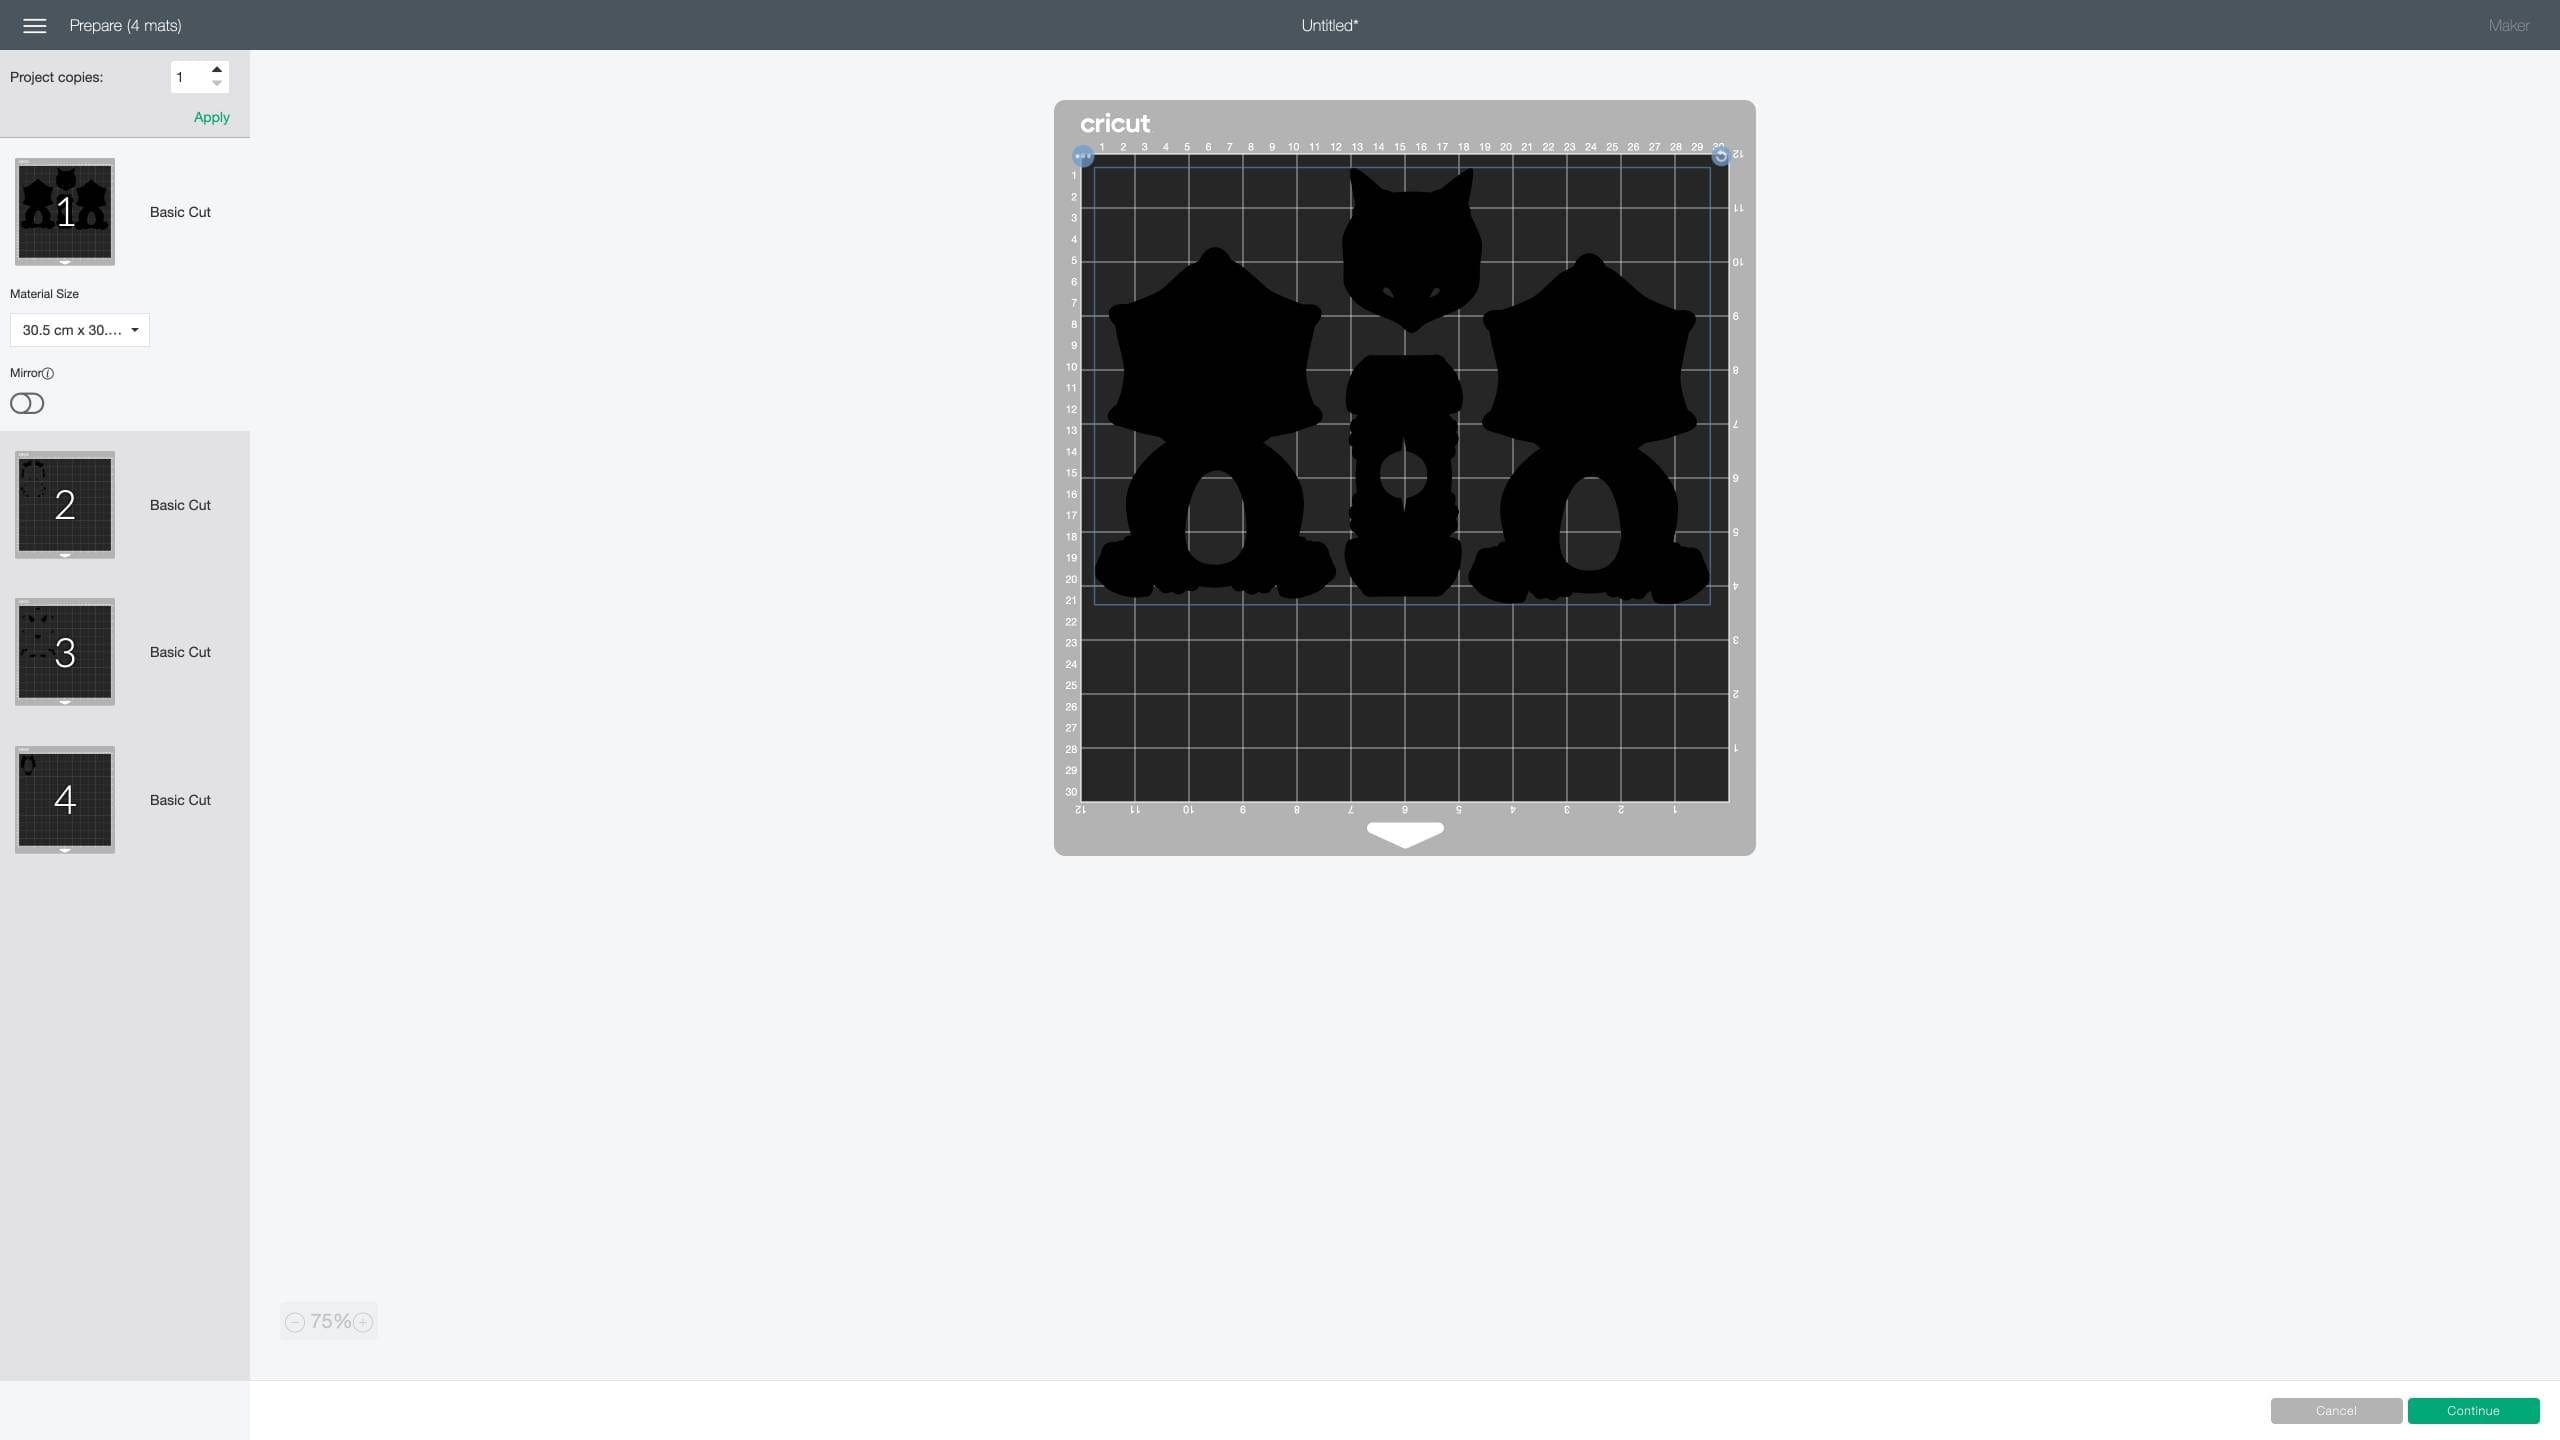
6. Select your Cricut device and set the base material to Heavy cardstock and Default pressure setting. Now you’re ready to cut.
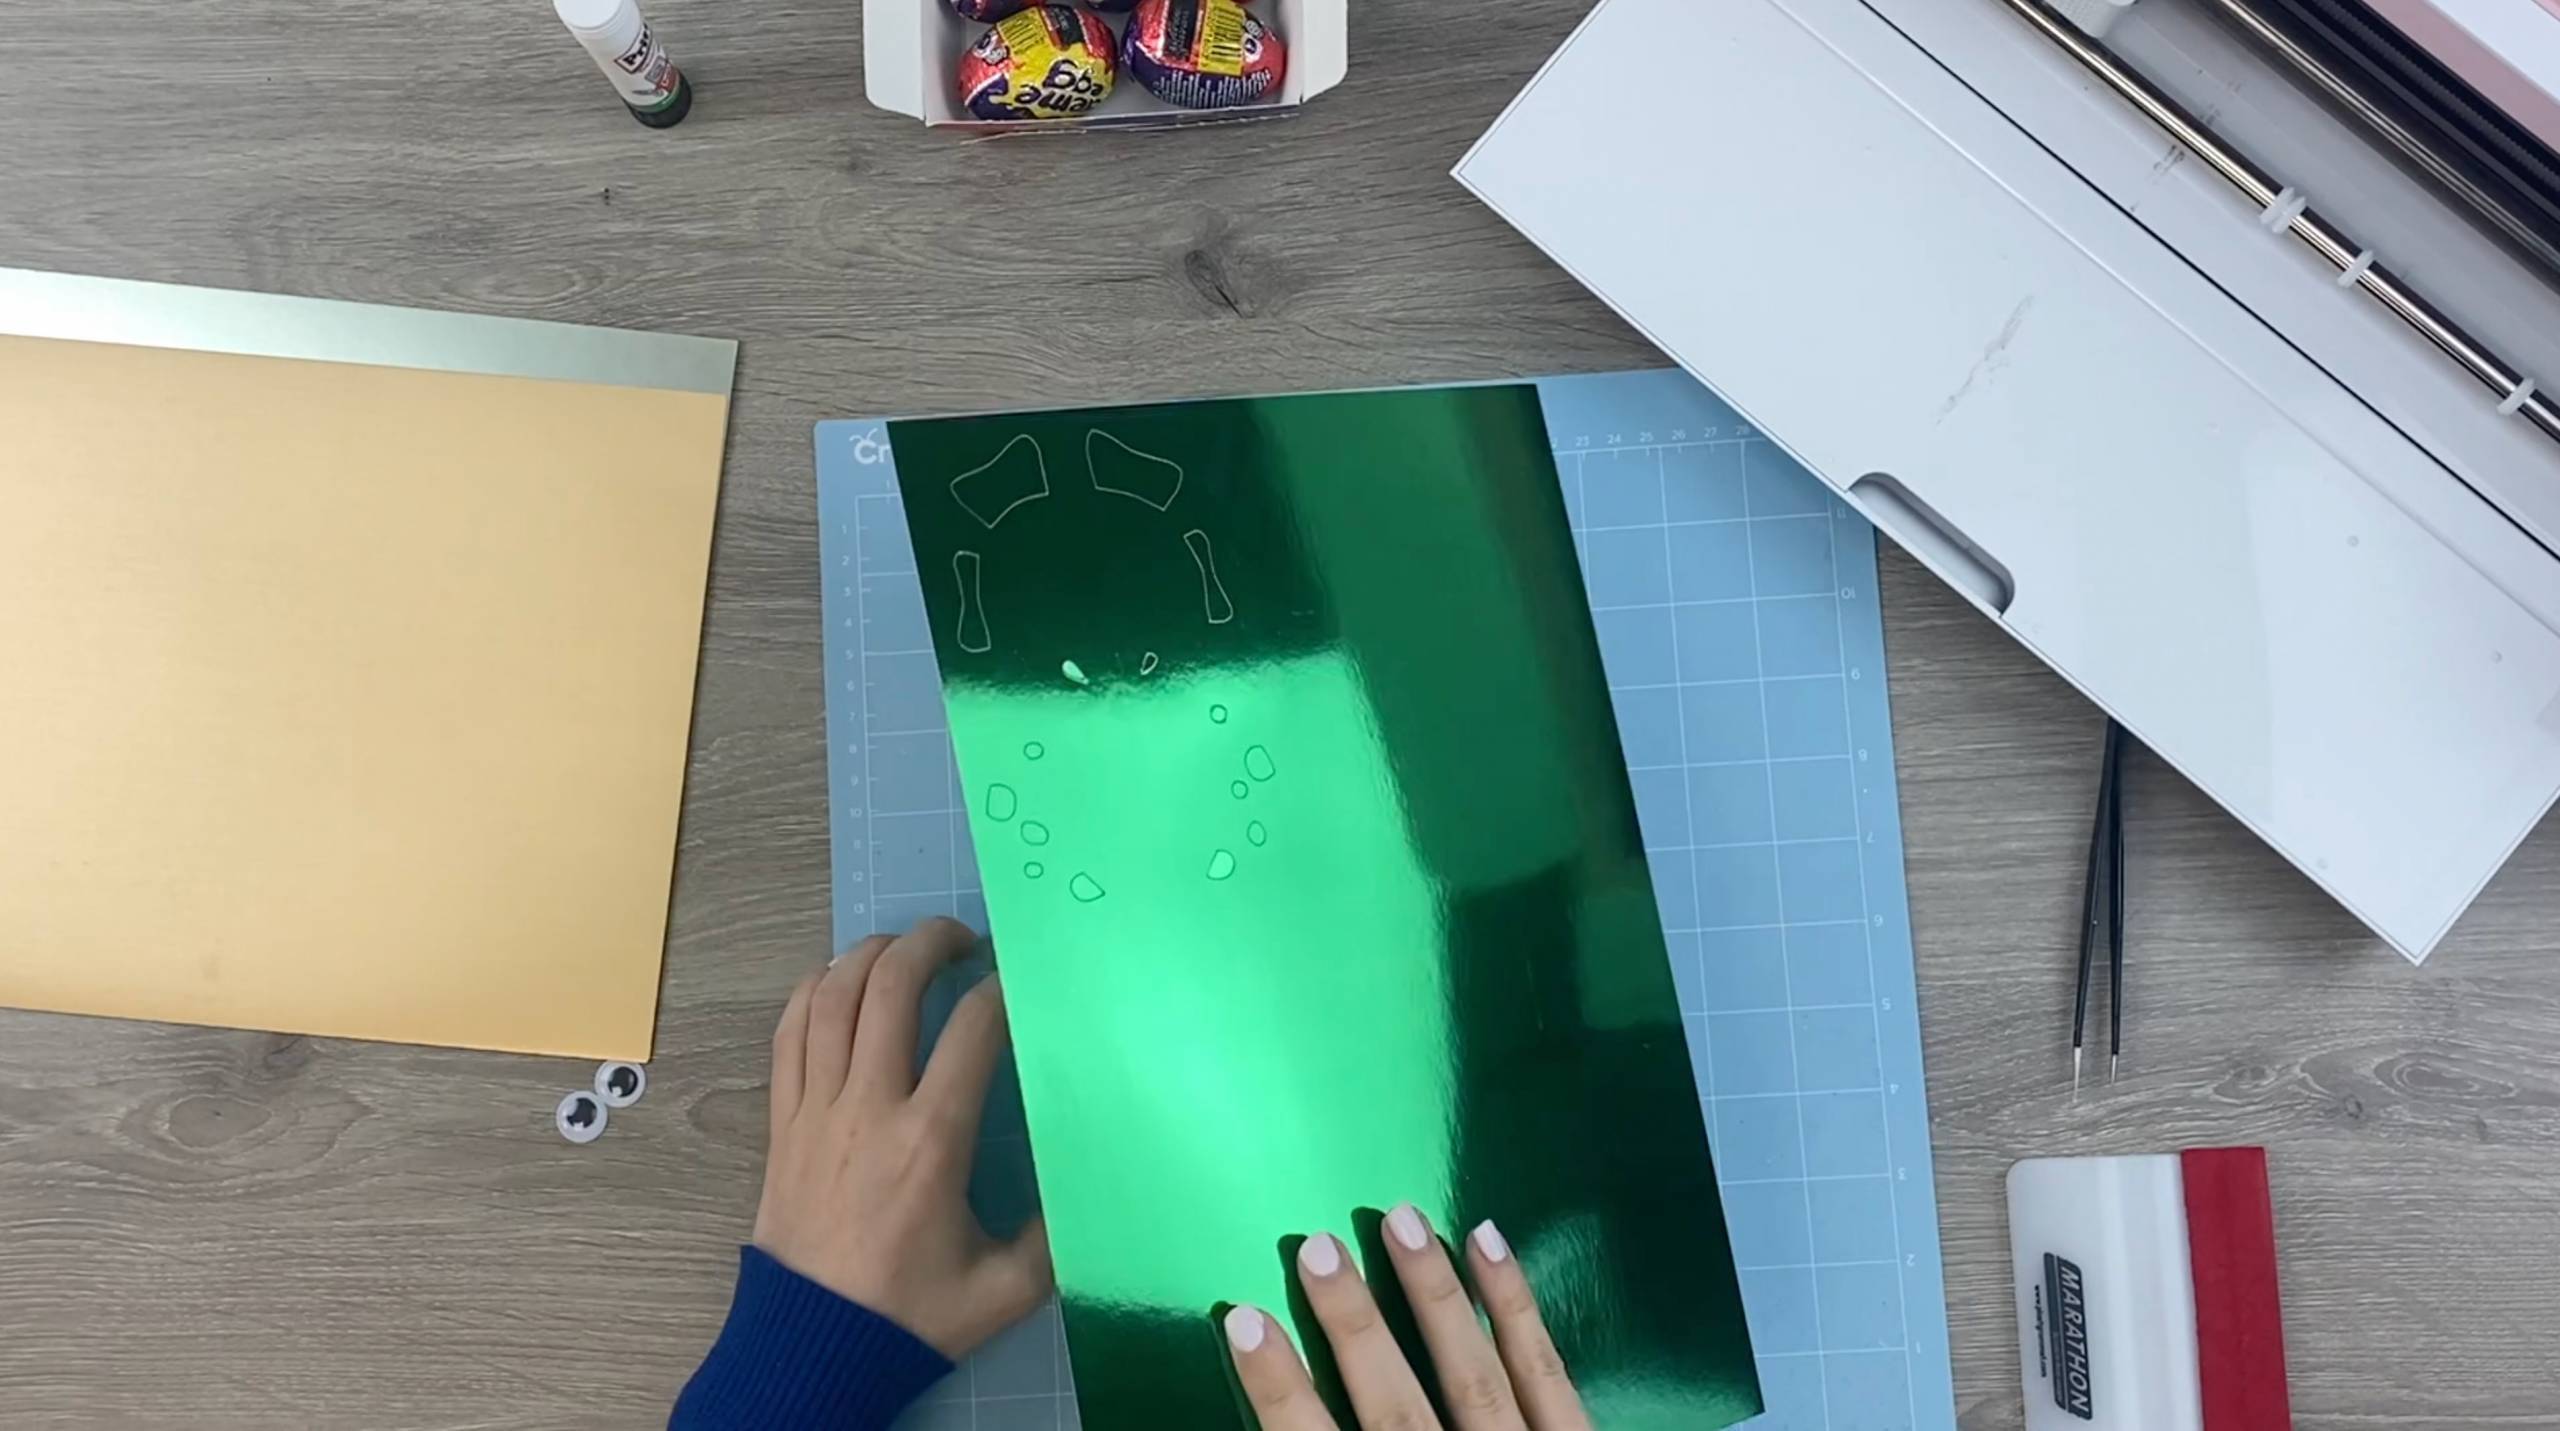
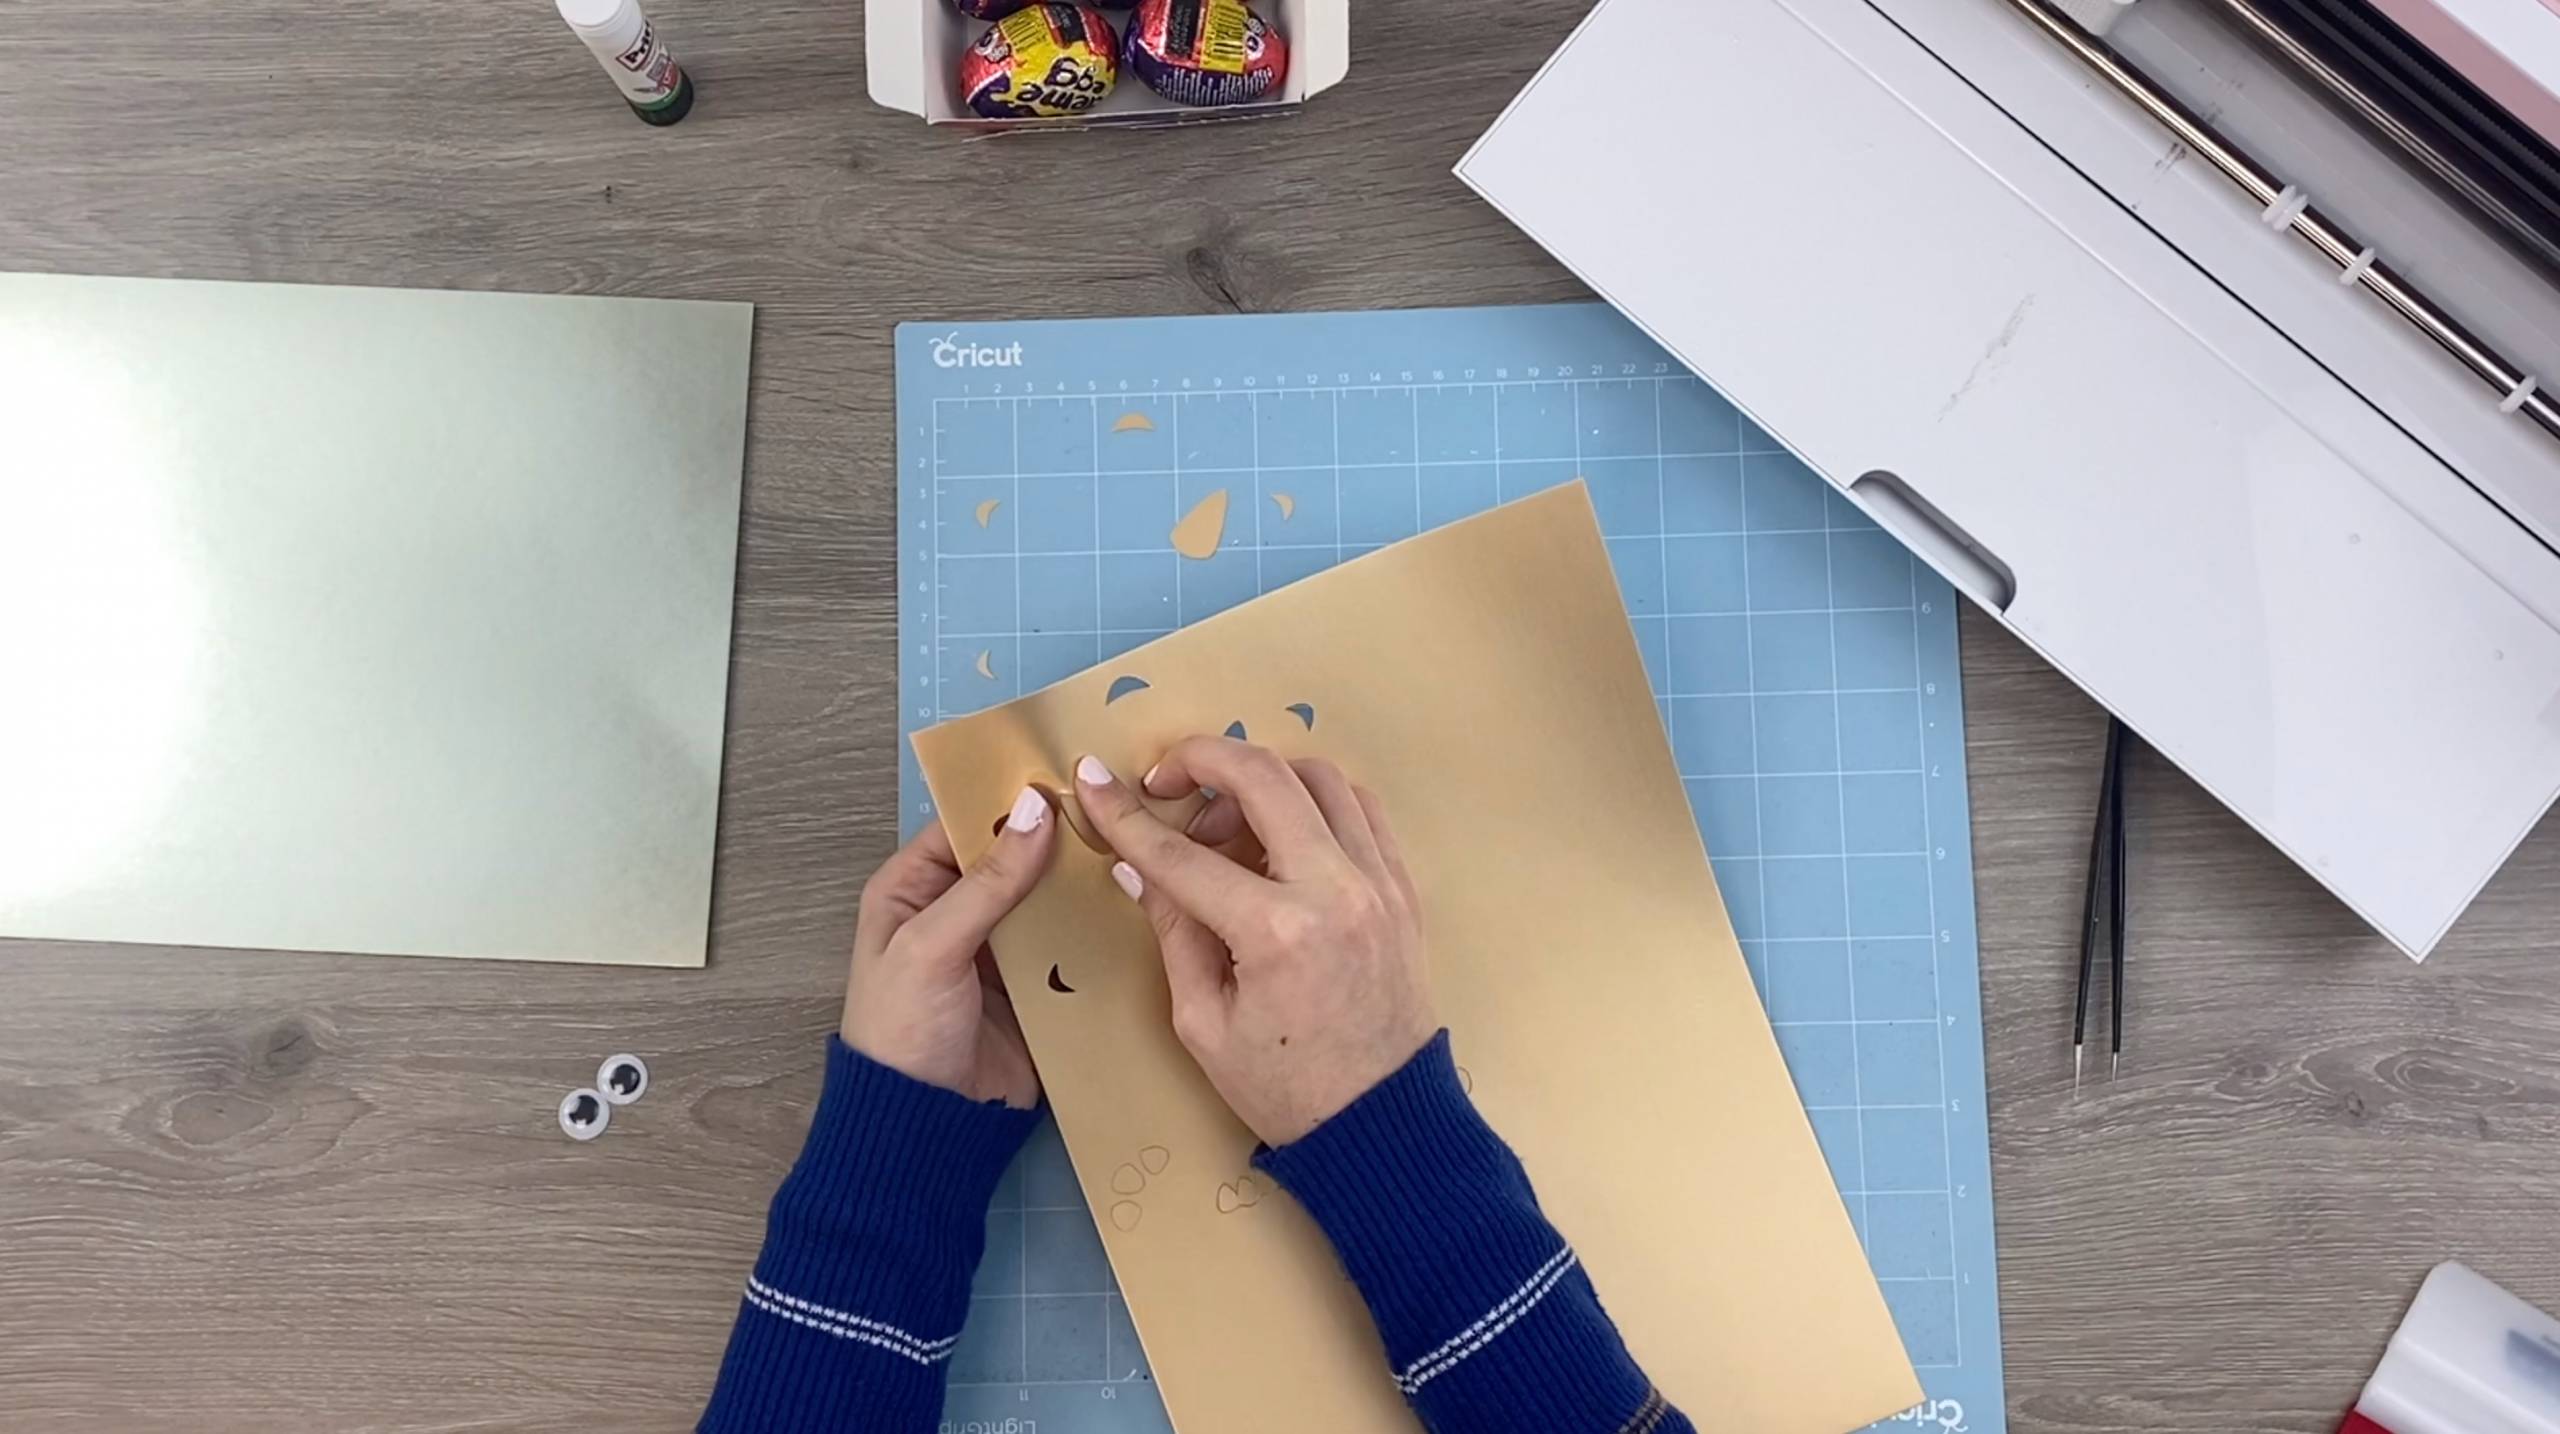
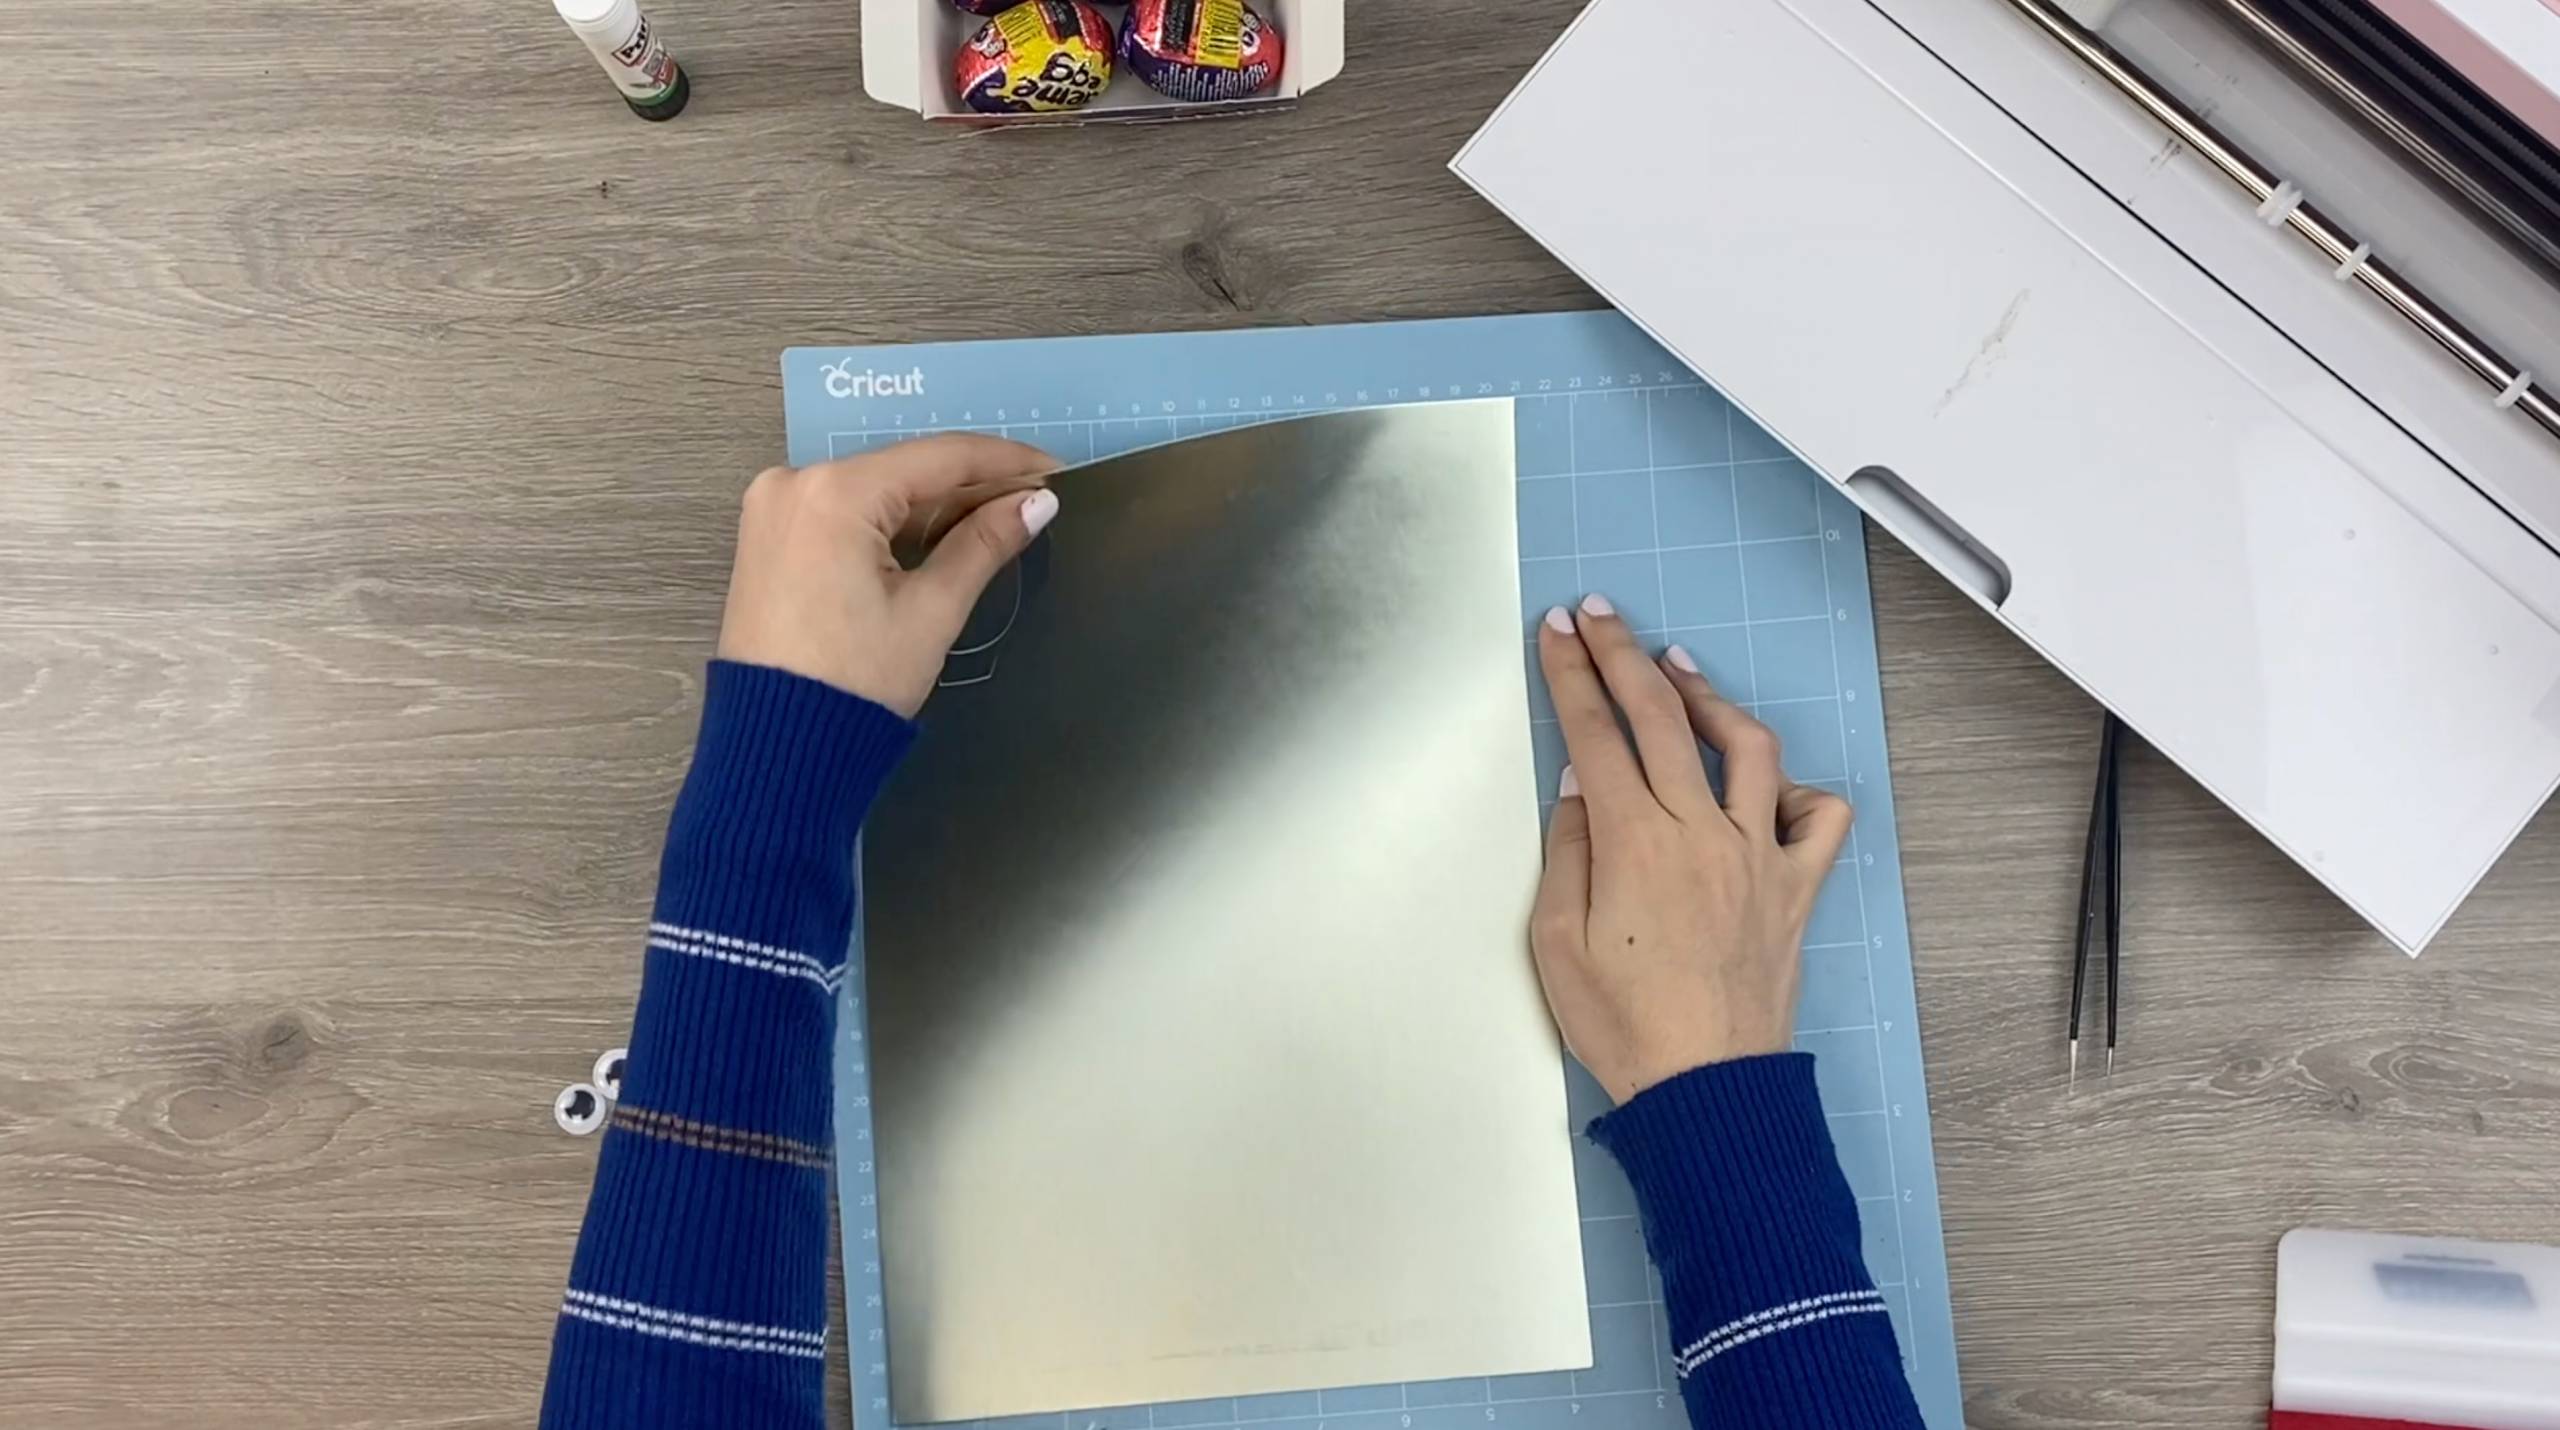
7. Place the Spring Green mirror card onto the cutting mat, rub gently to secure. Load onto the machine and press the cricut symbol to start the cut.
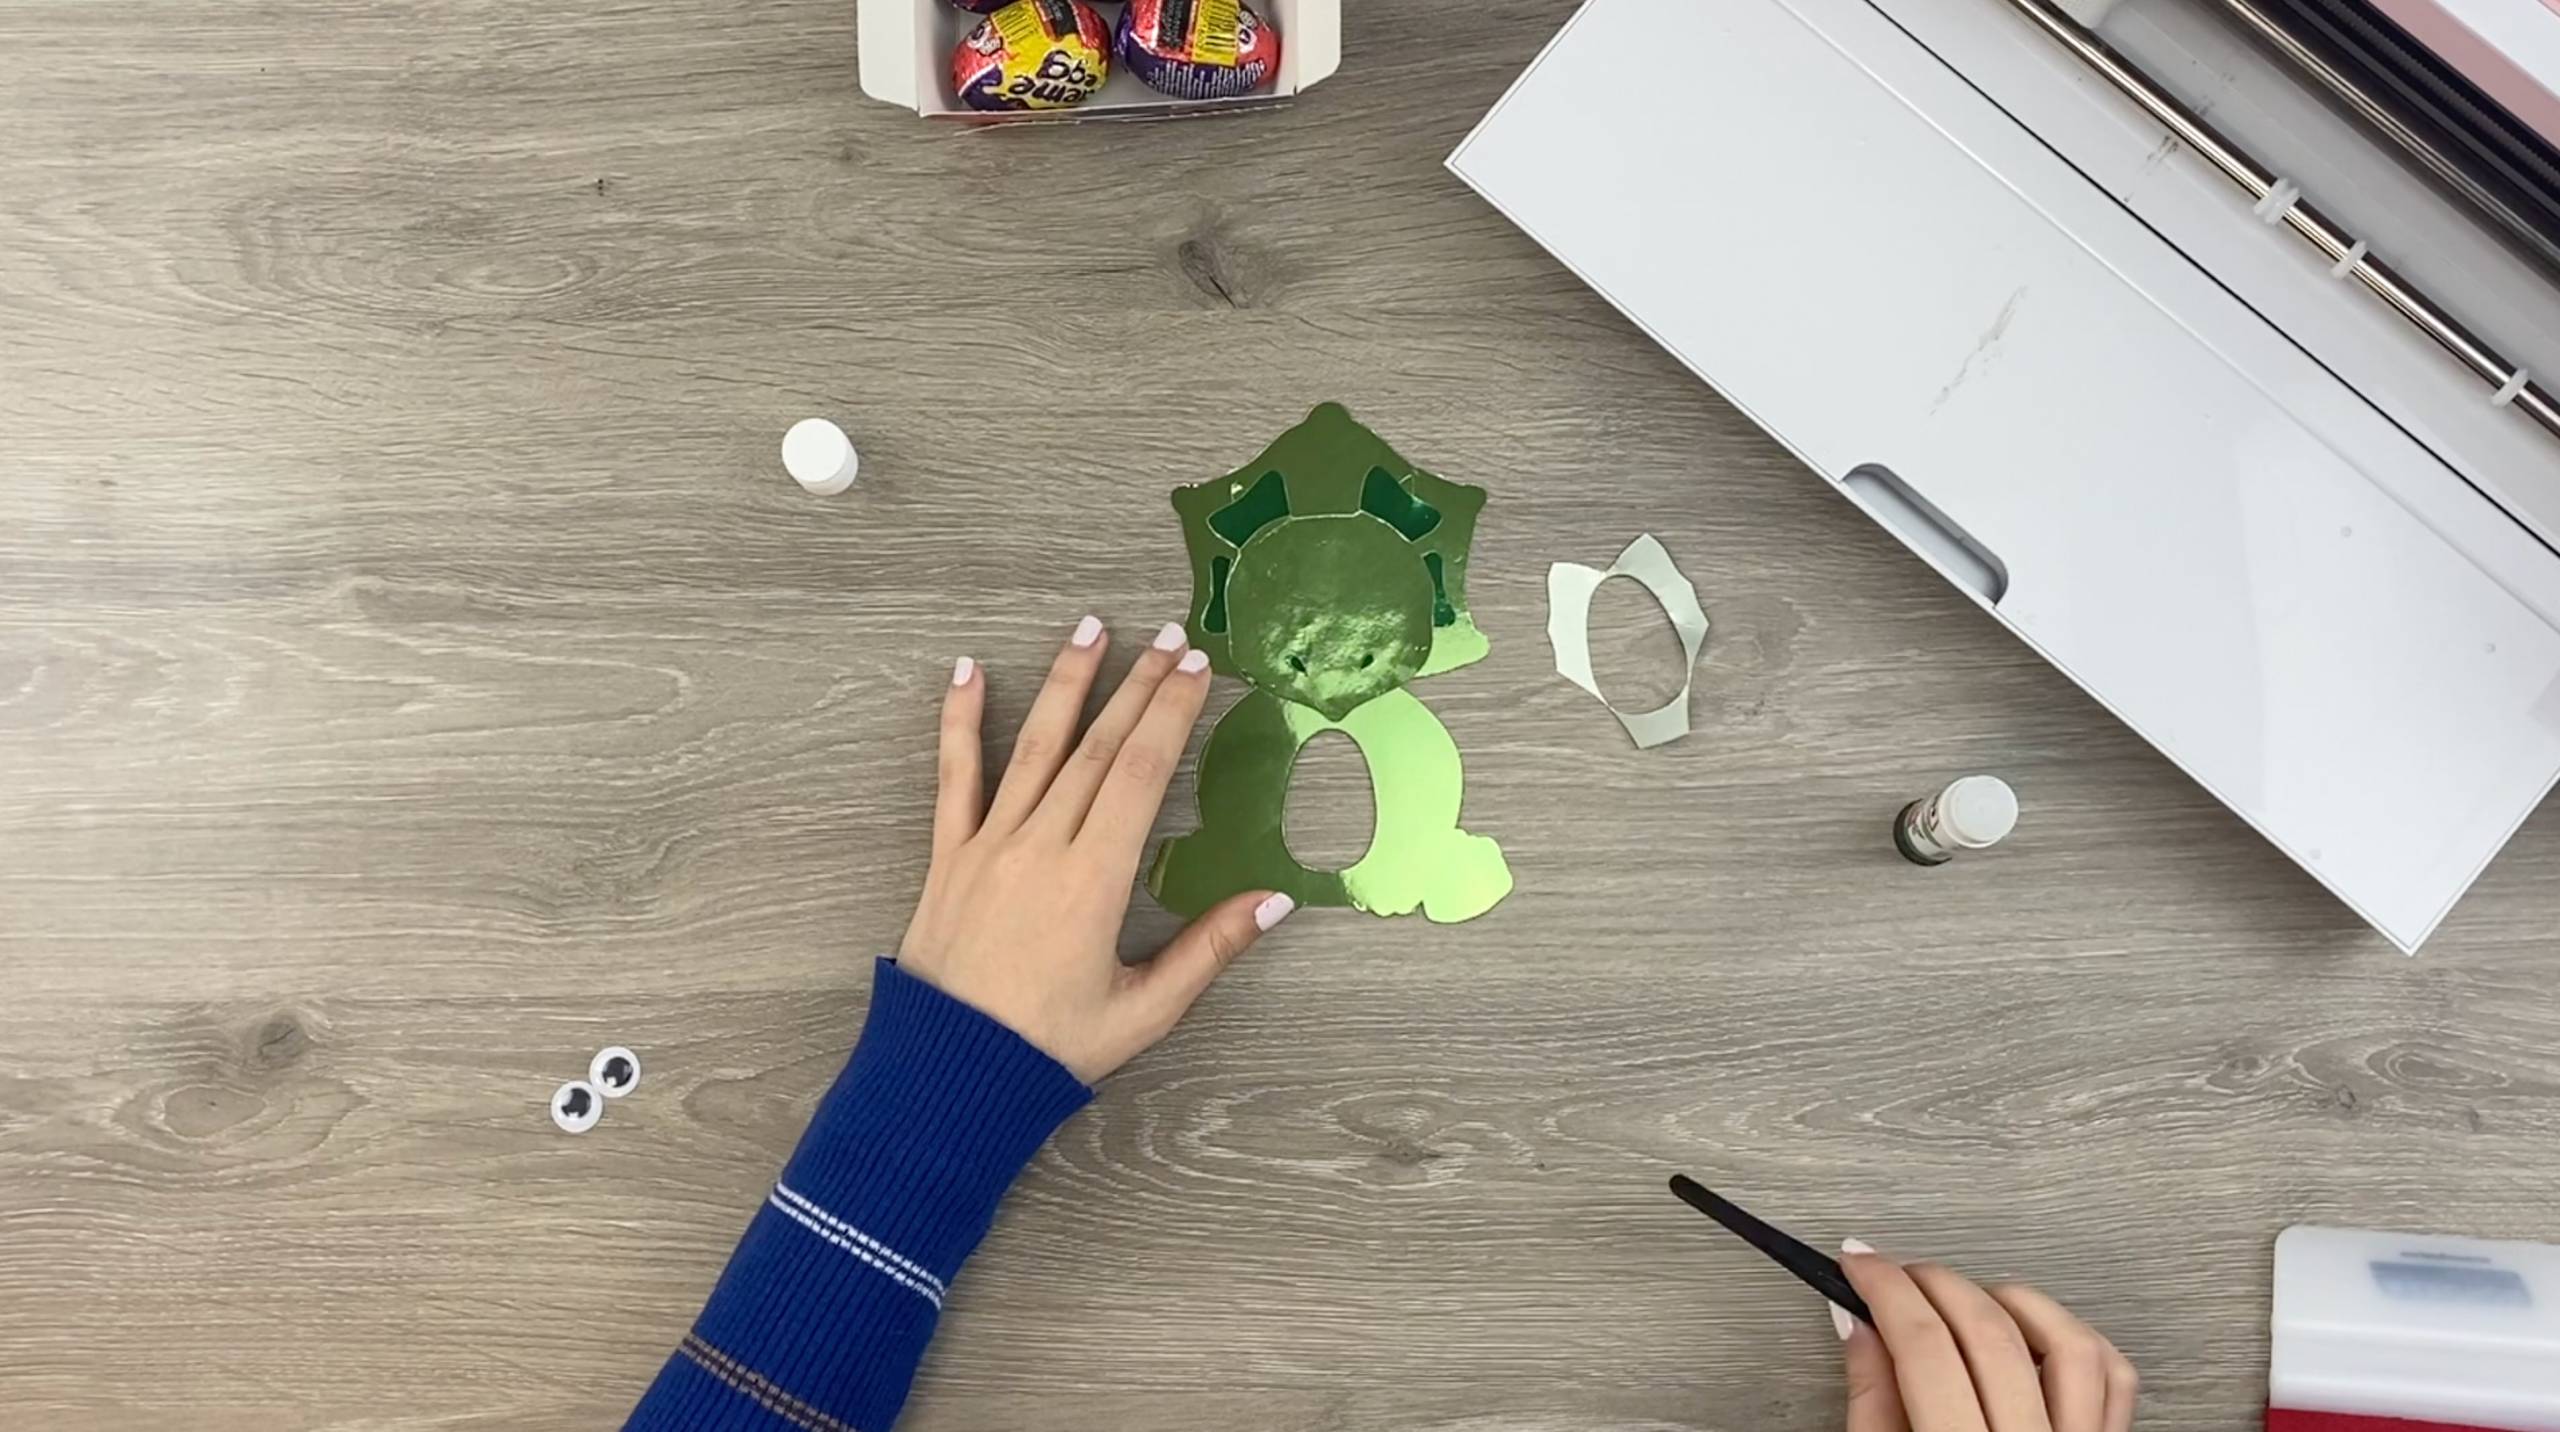
8. When done unload the mat and gently peel back the card. Some of the shapes will probably need to be popped out of the card. When all shapes are separated, place them to one side.
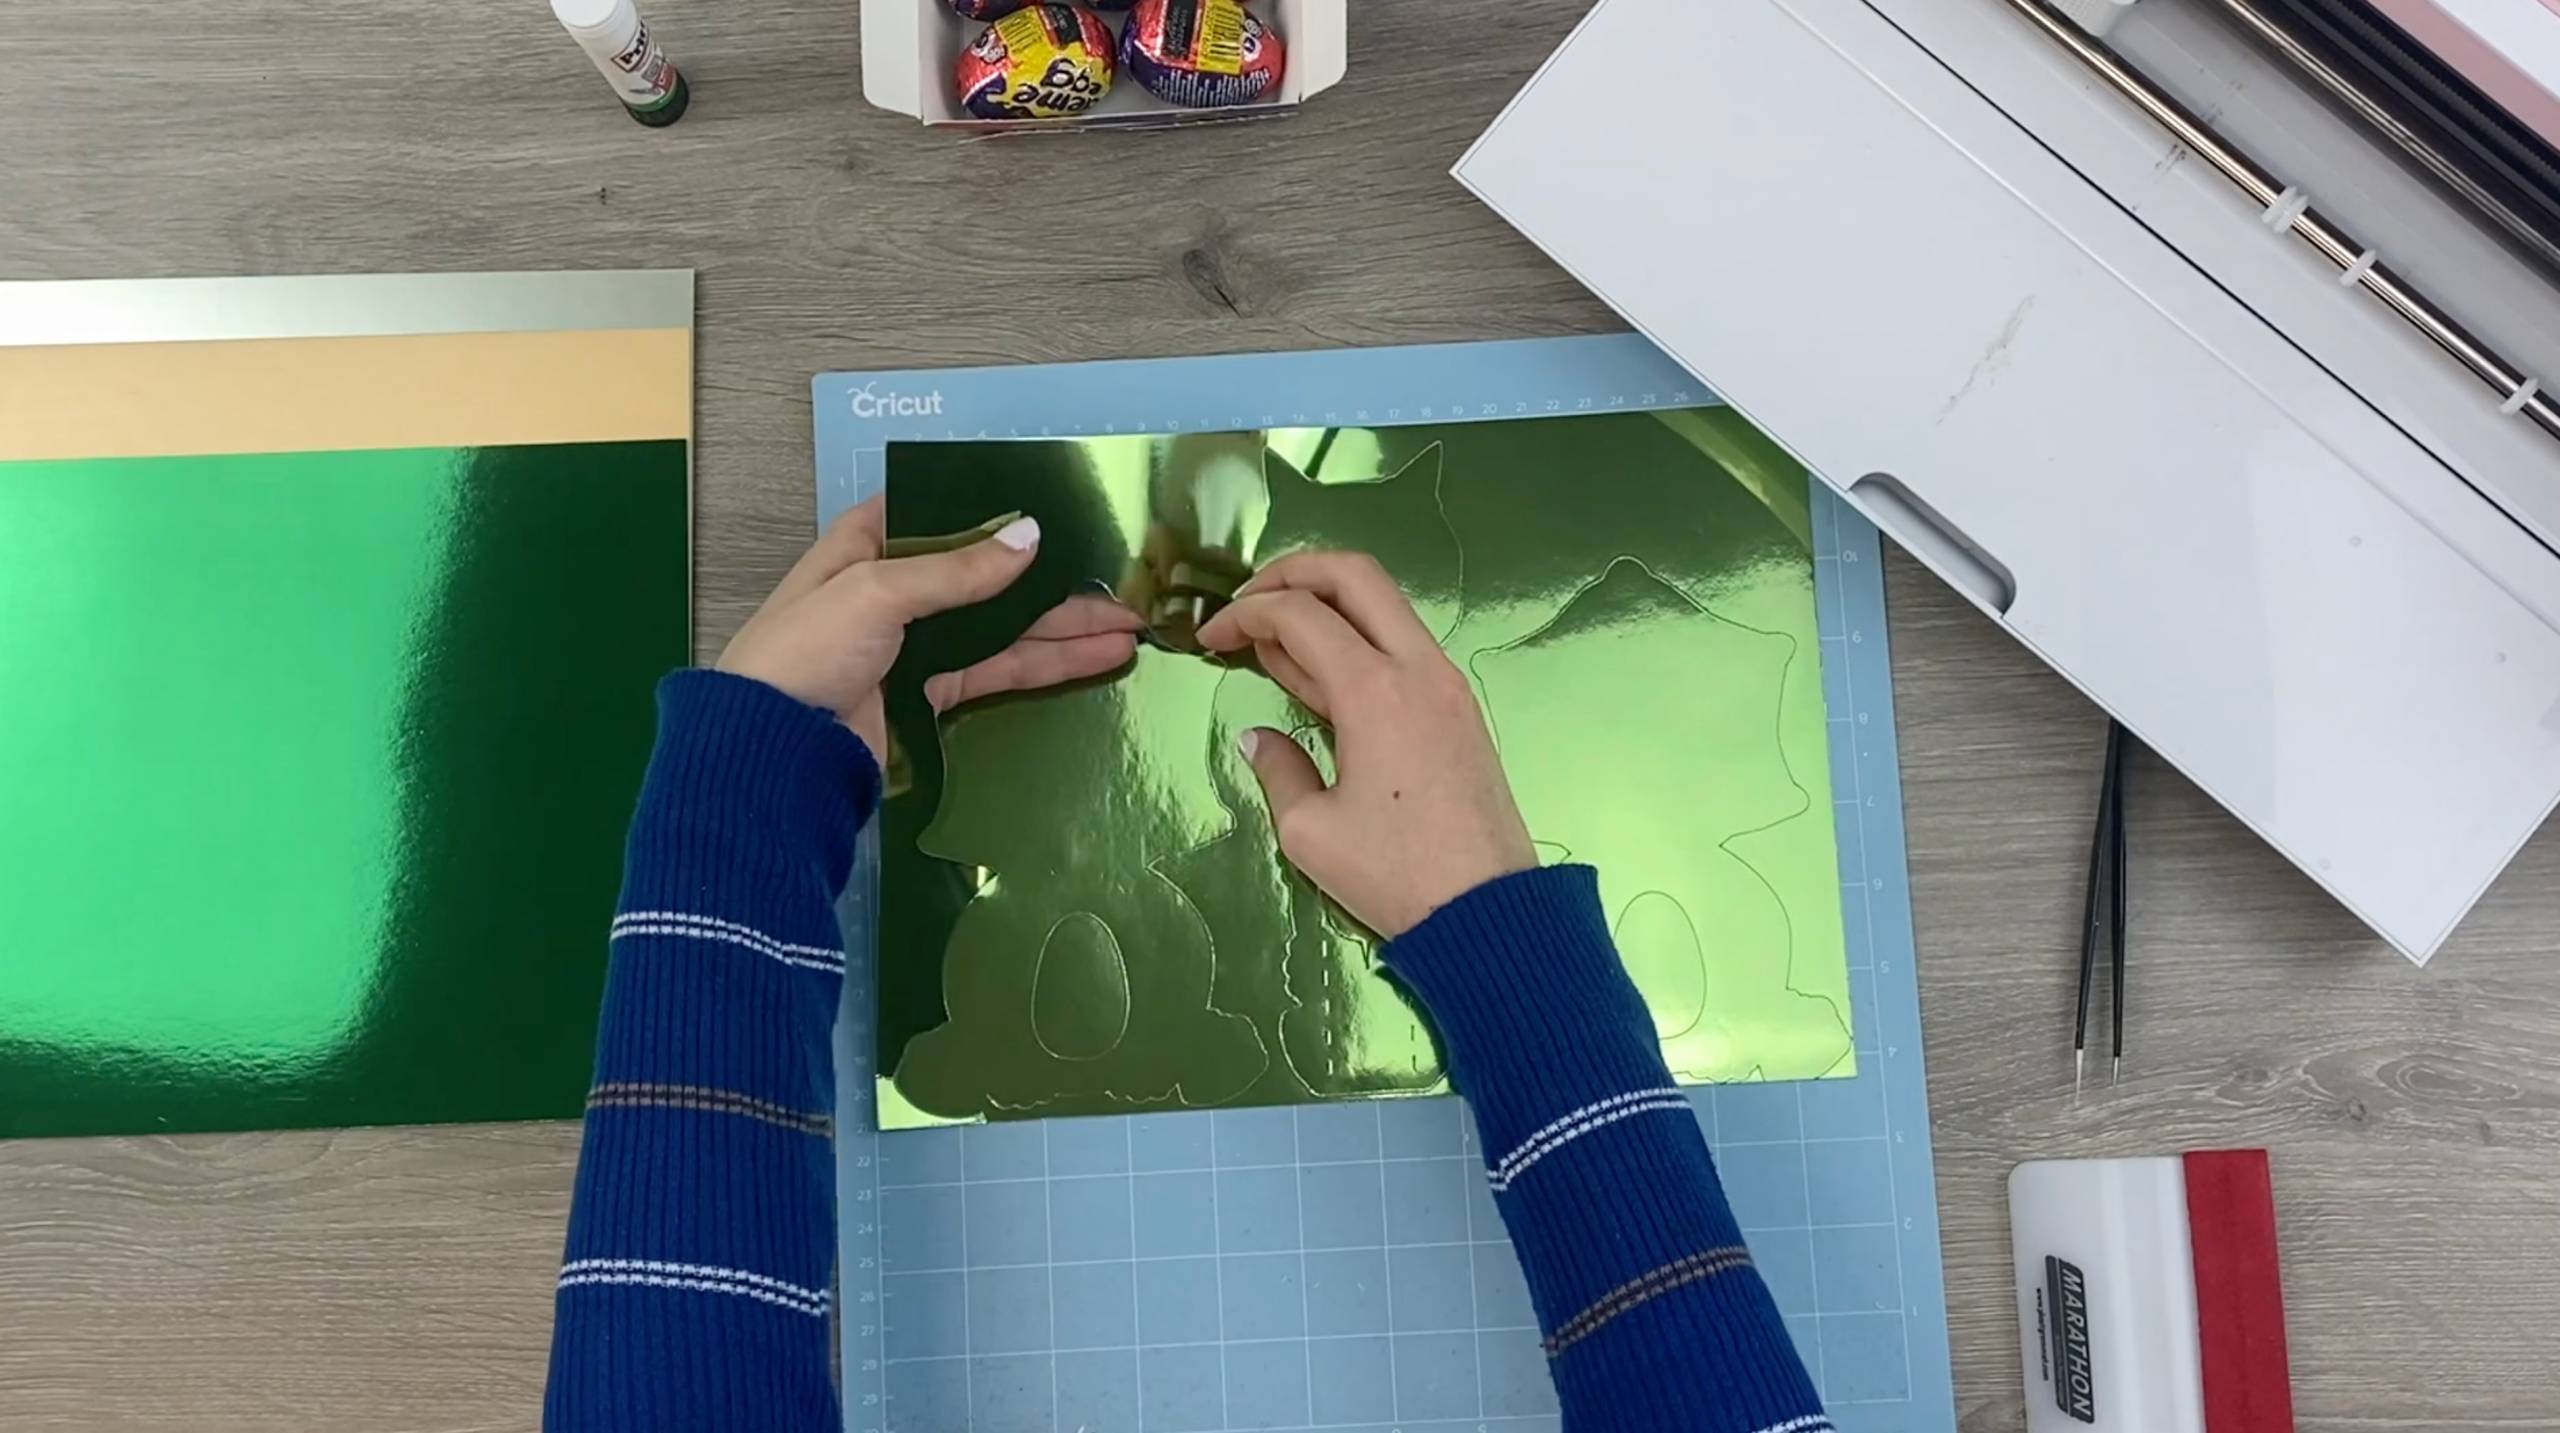
9. Repeat steps 7 and 8 with the remaining coloured card, in this order: Emerald Green satin card for the Nostrils and markings, Vintage Gold for the horns, toes, fingers and nose and Spring Green satin card for the belly.
10. Firstly, stick the separate head piece onto the base front, then the nostrils and head markings. Thirdly, apply the fingers, toes nose and horns and then finally the belly and the body markings.
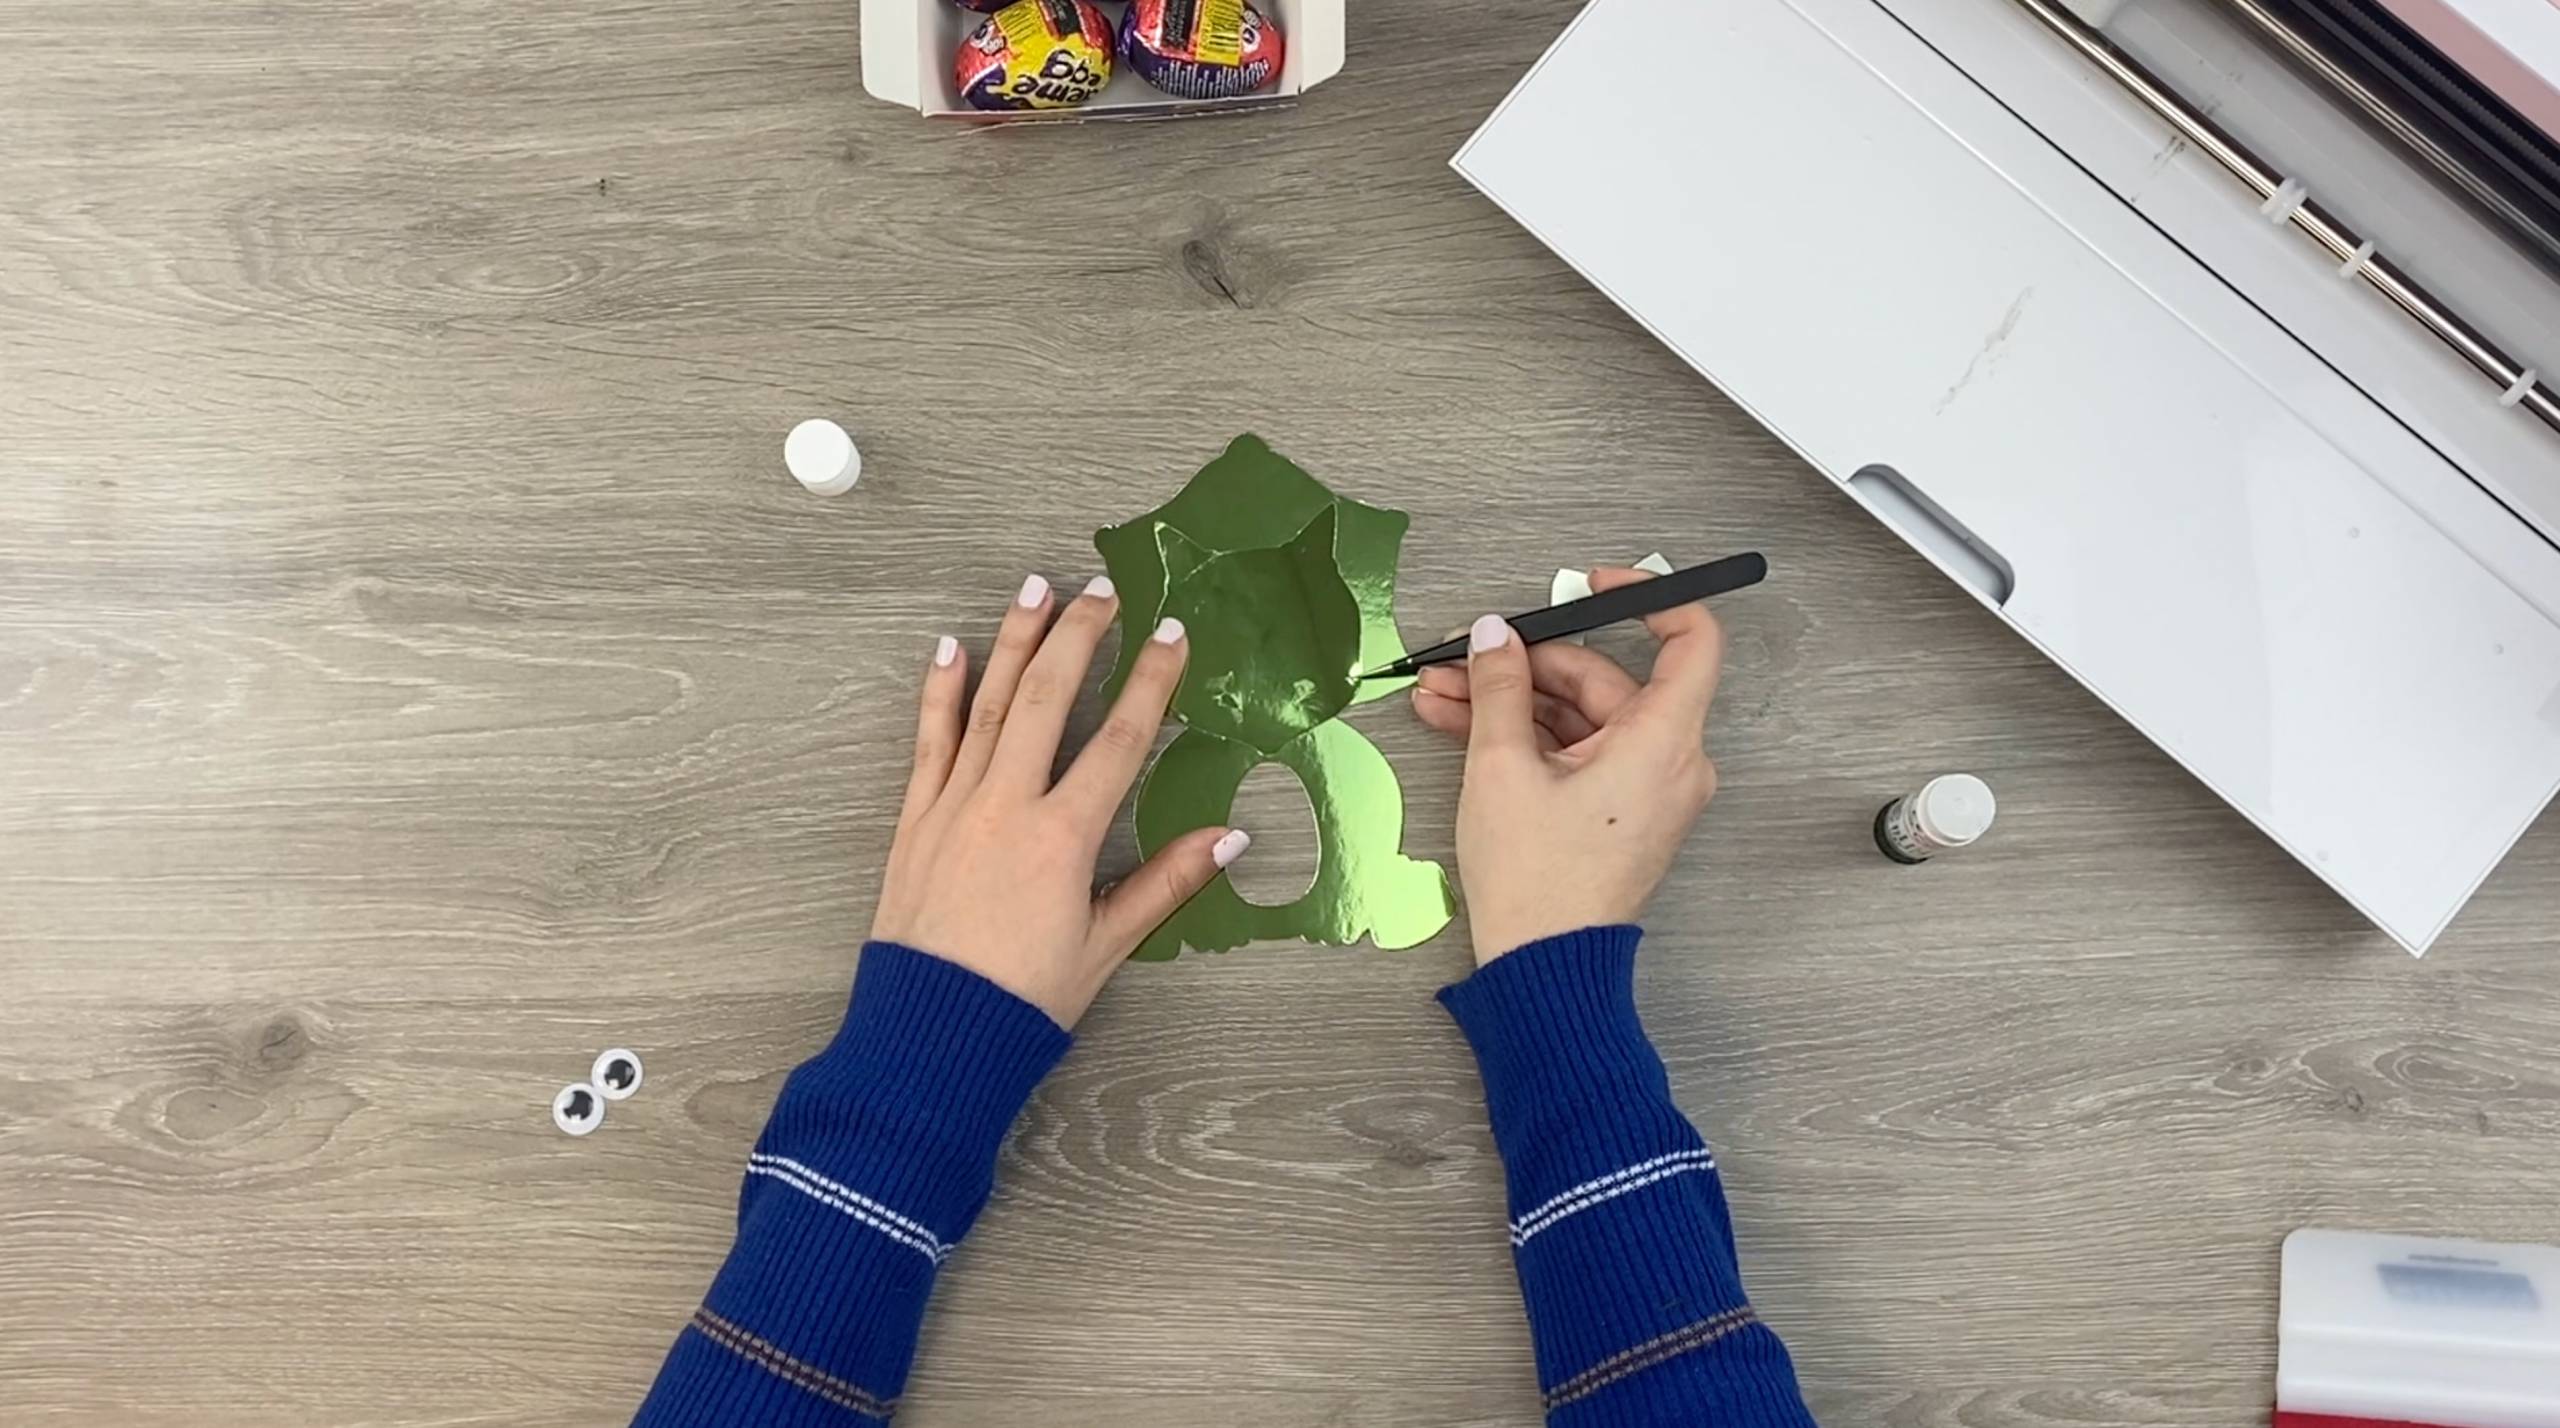
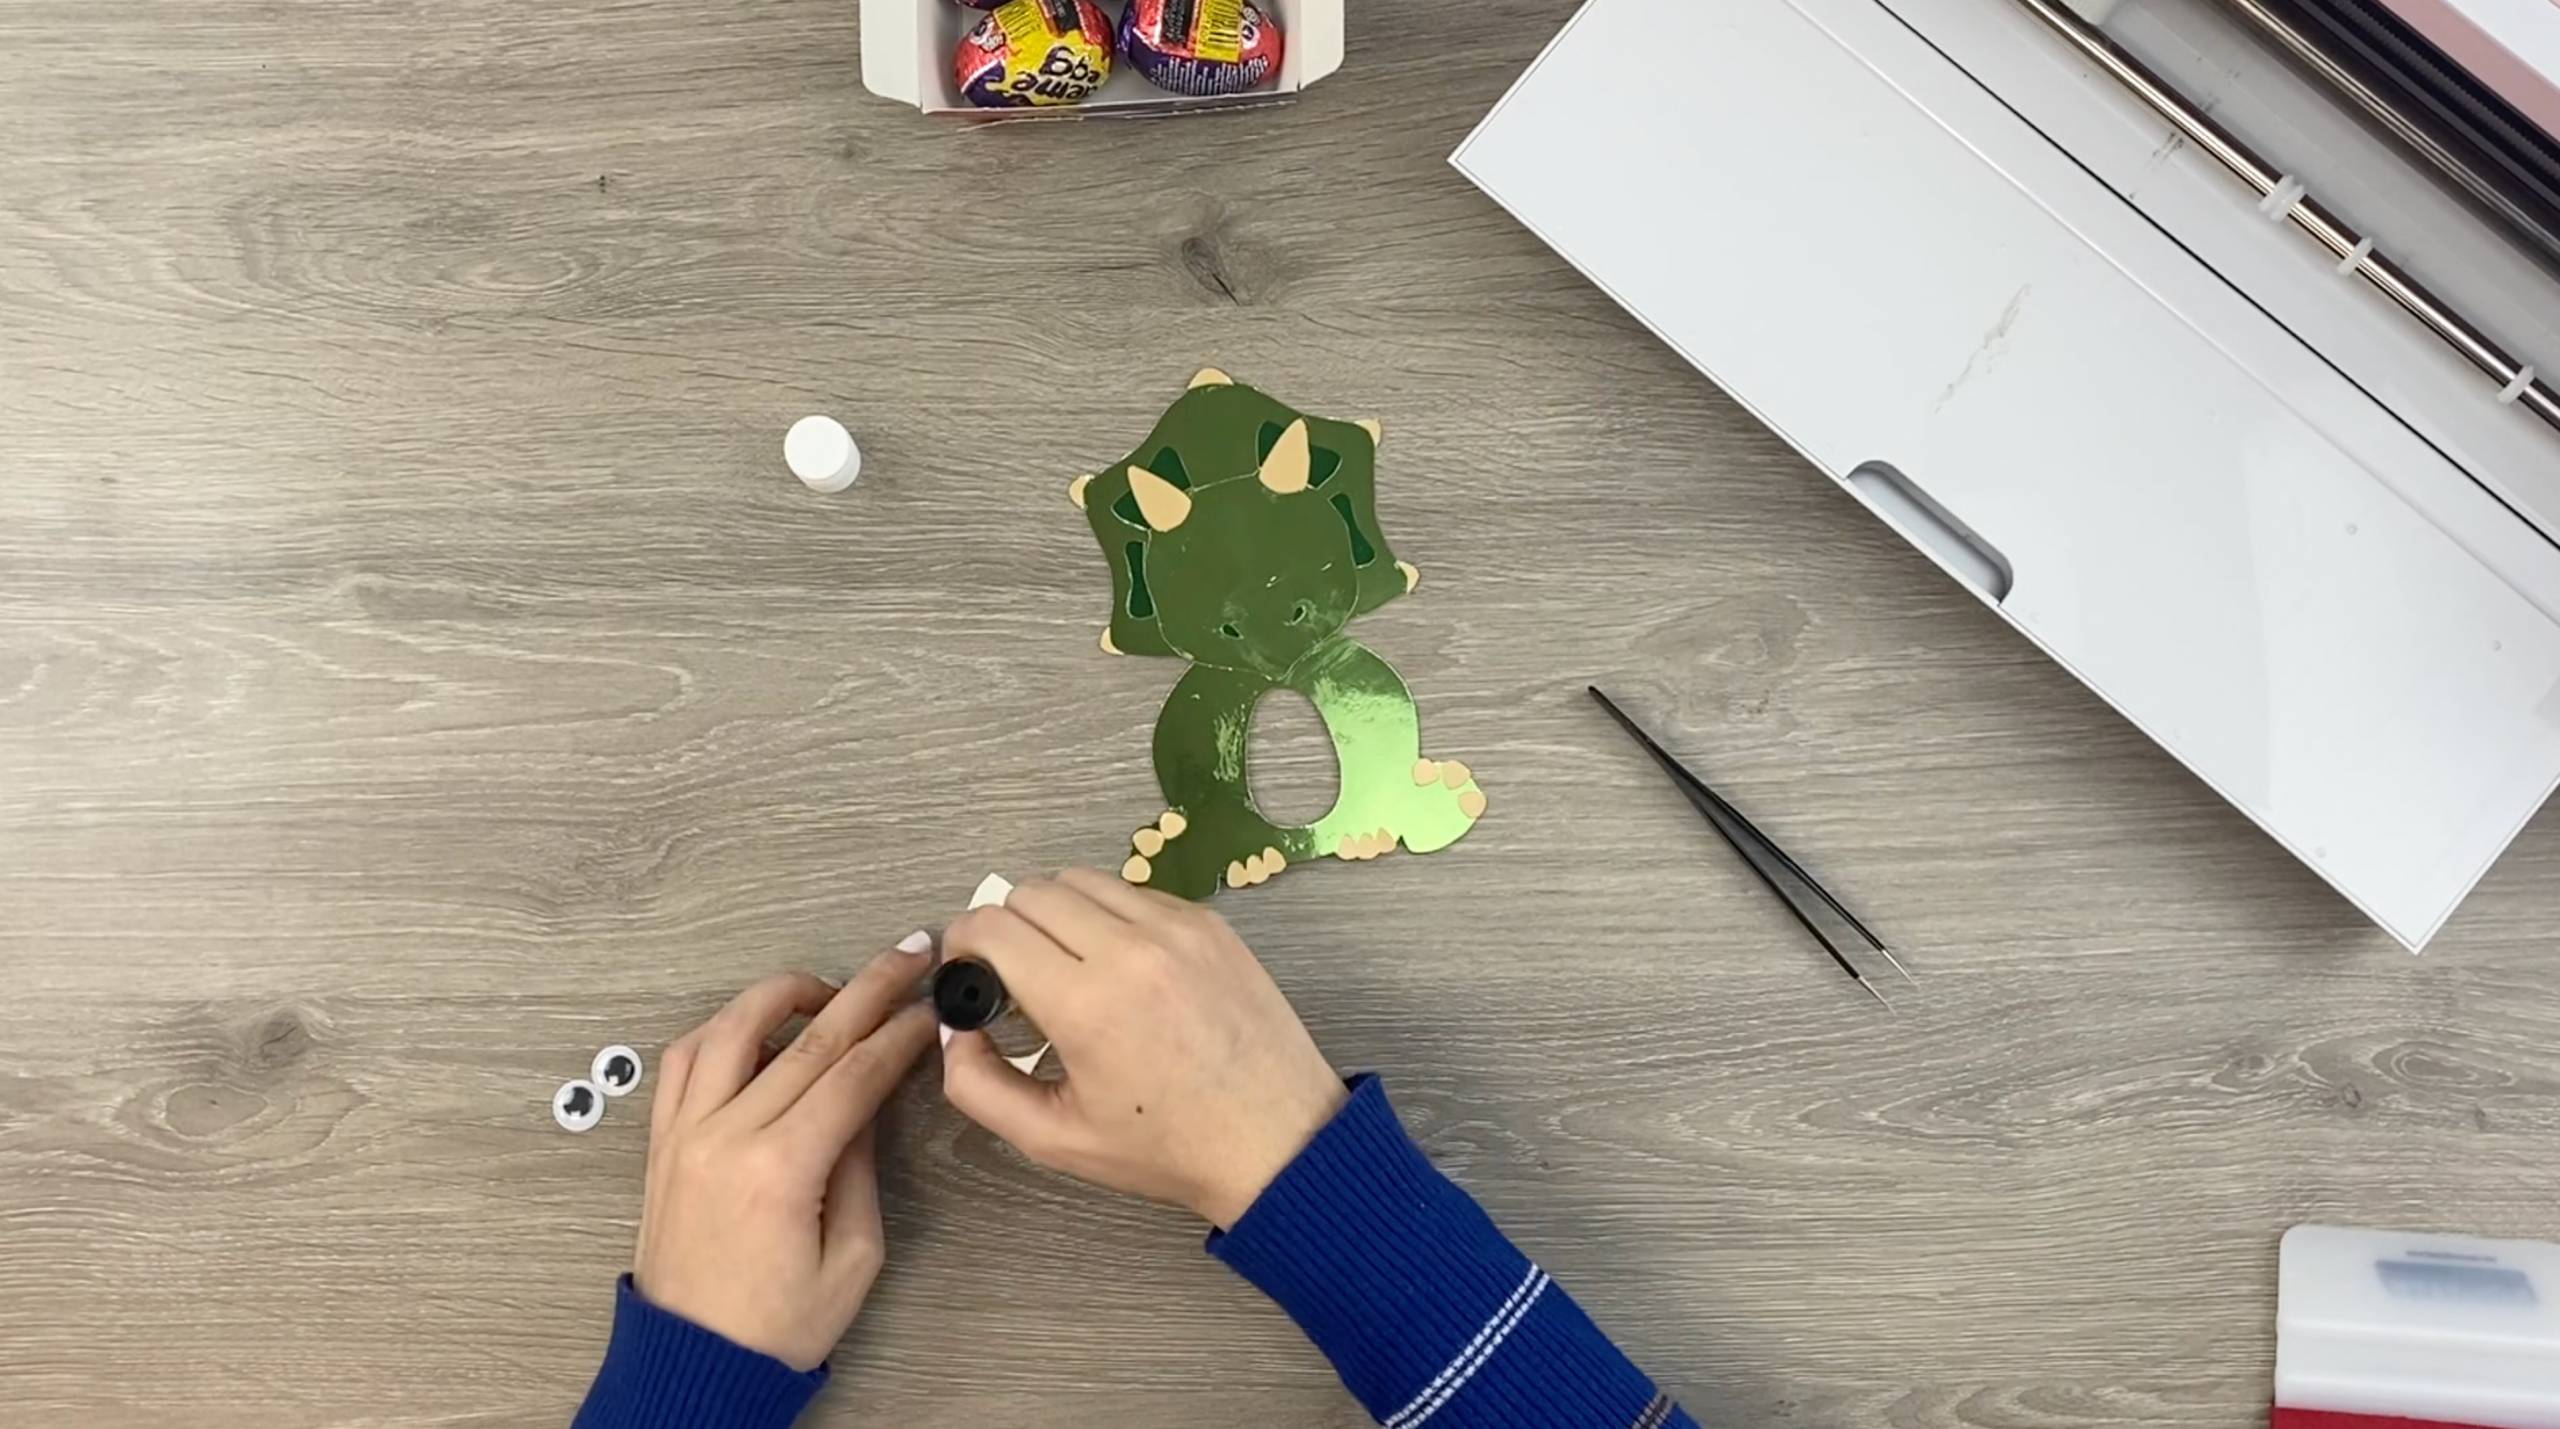
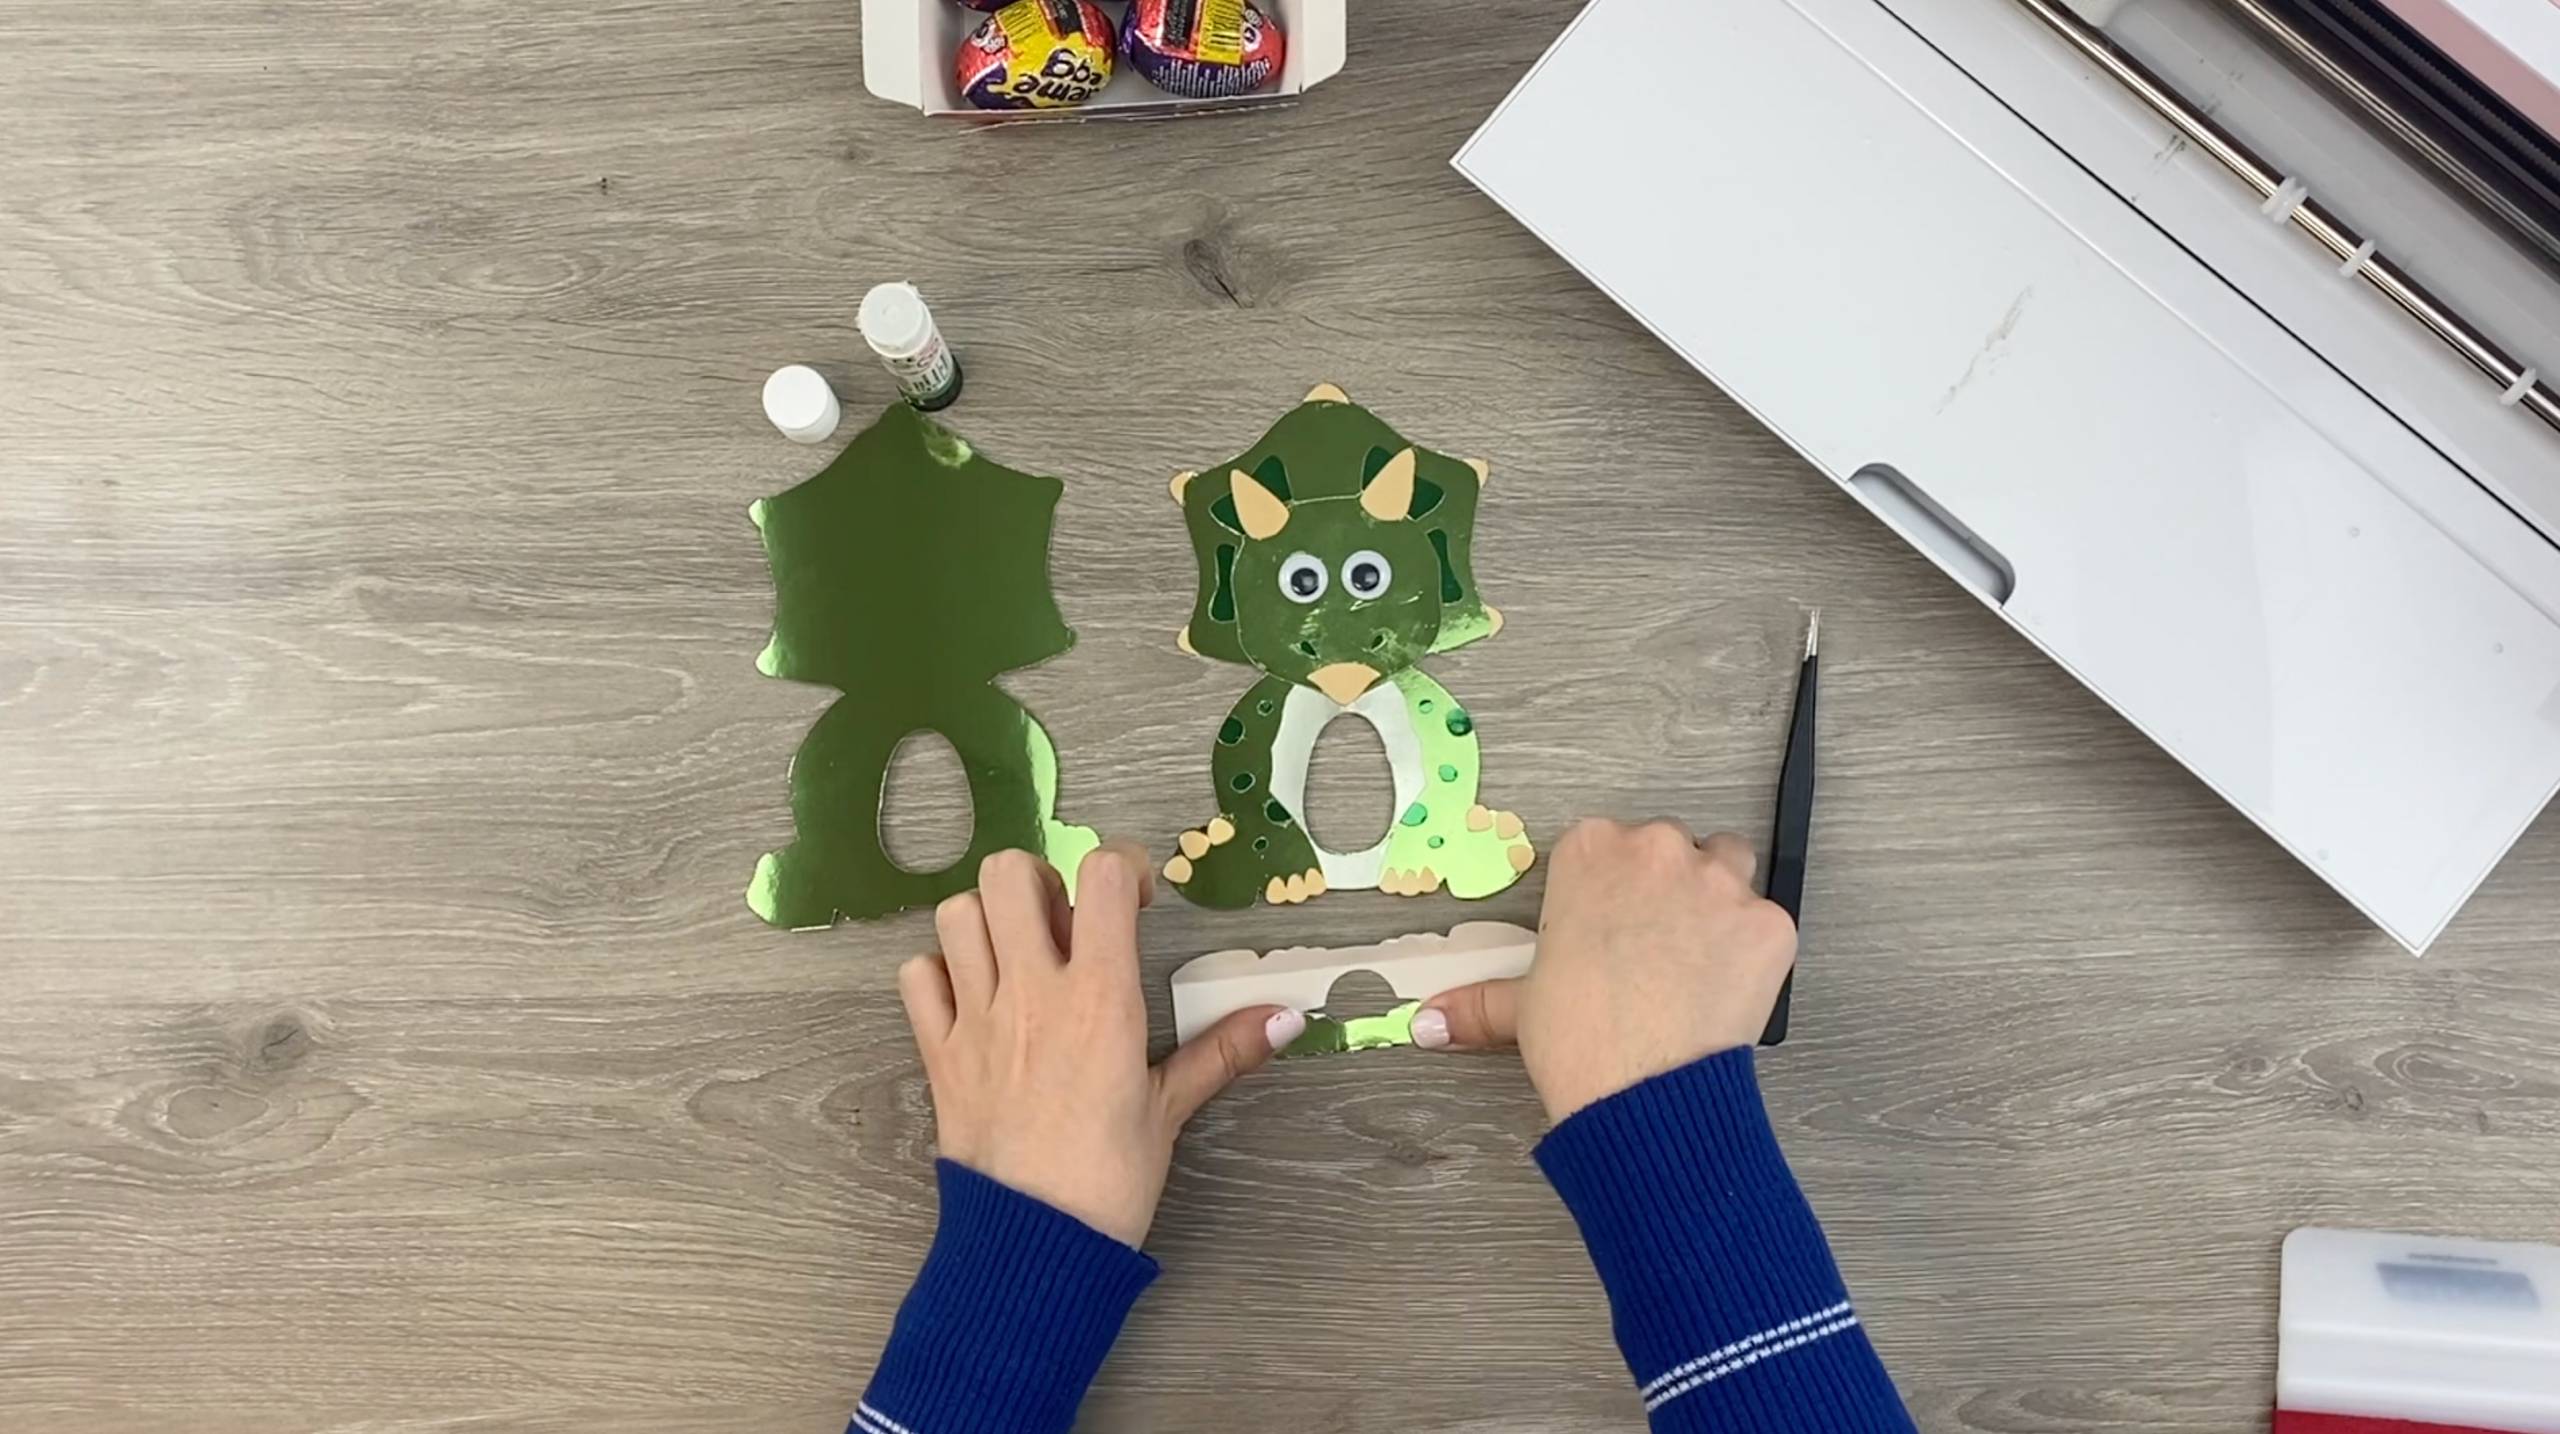
11. Apply the googly eyes!

12. Fold the score lines on the bottom base card and apply glue to one edge. Stick the front of the Dino to this edge by lining the edges up.
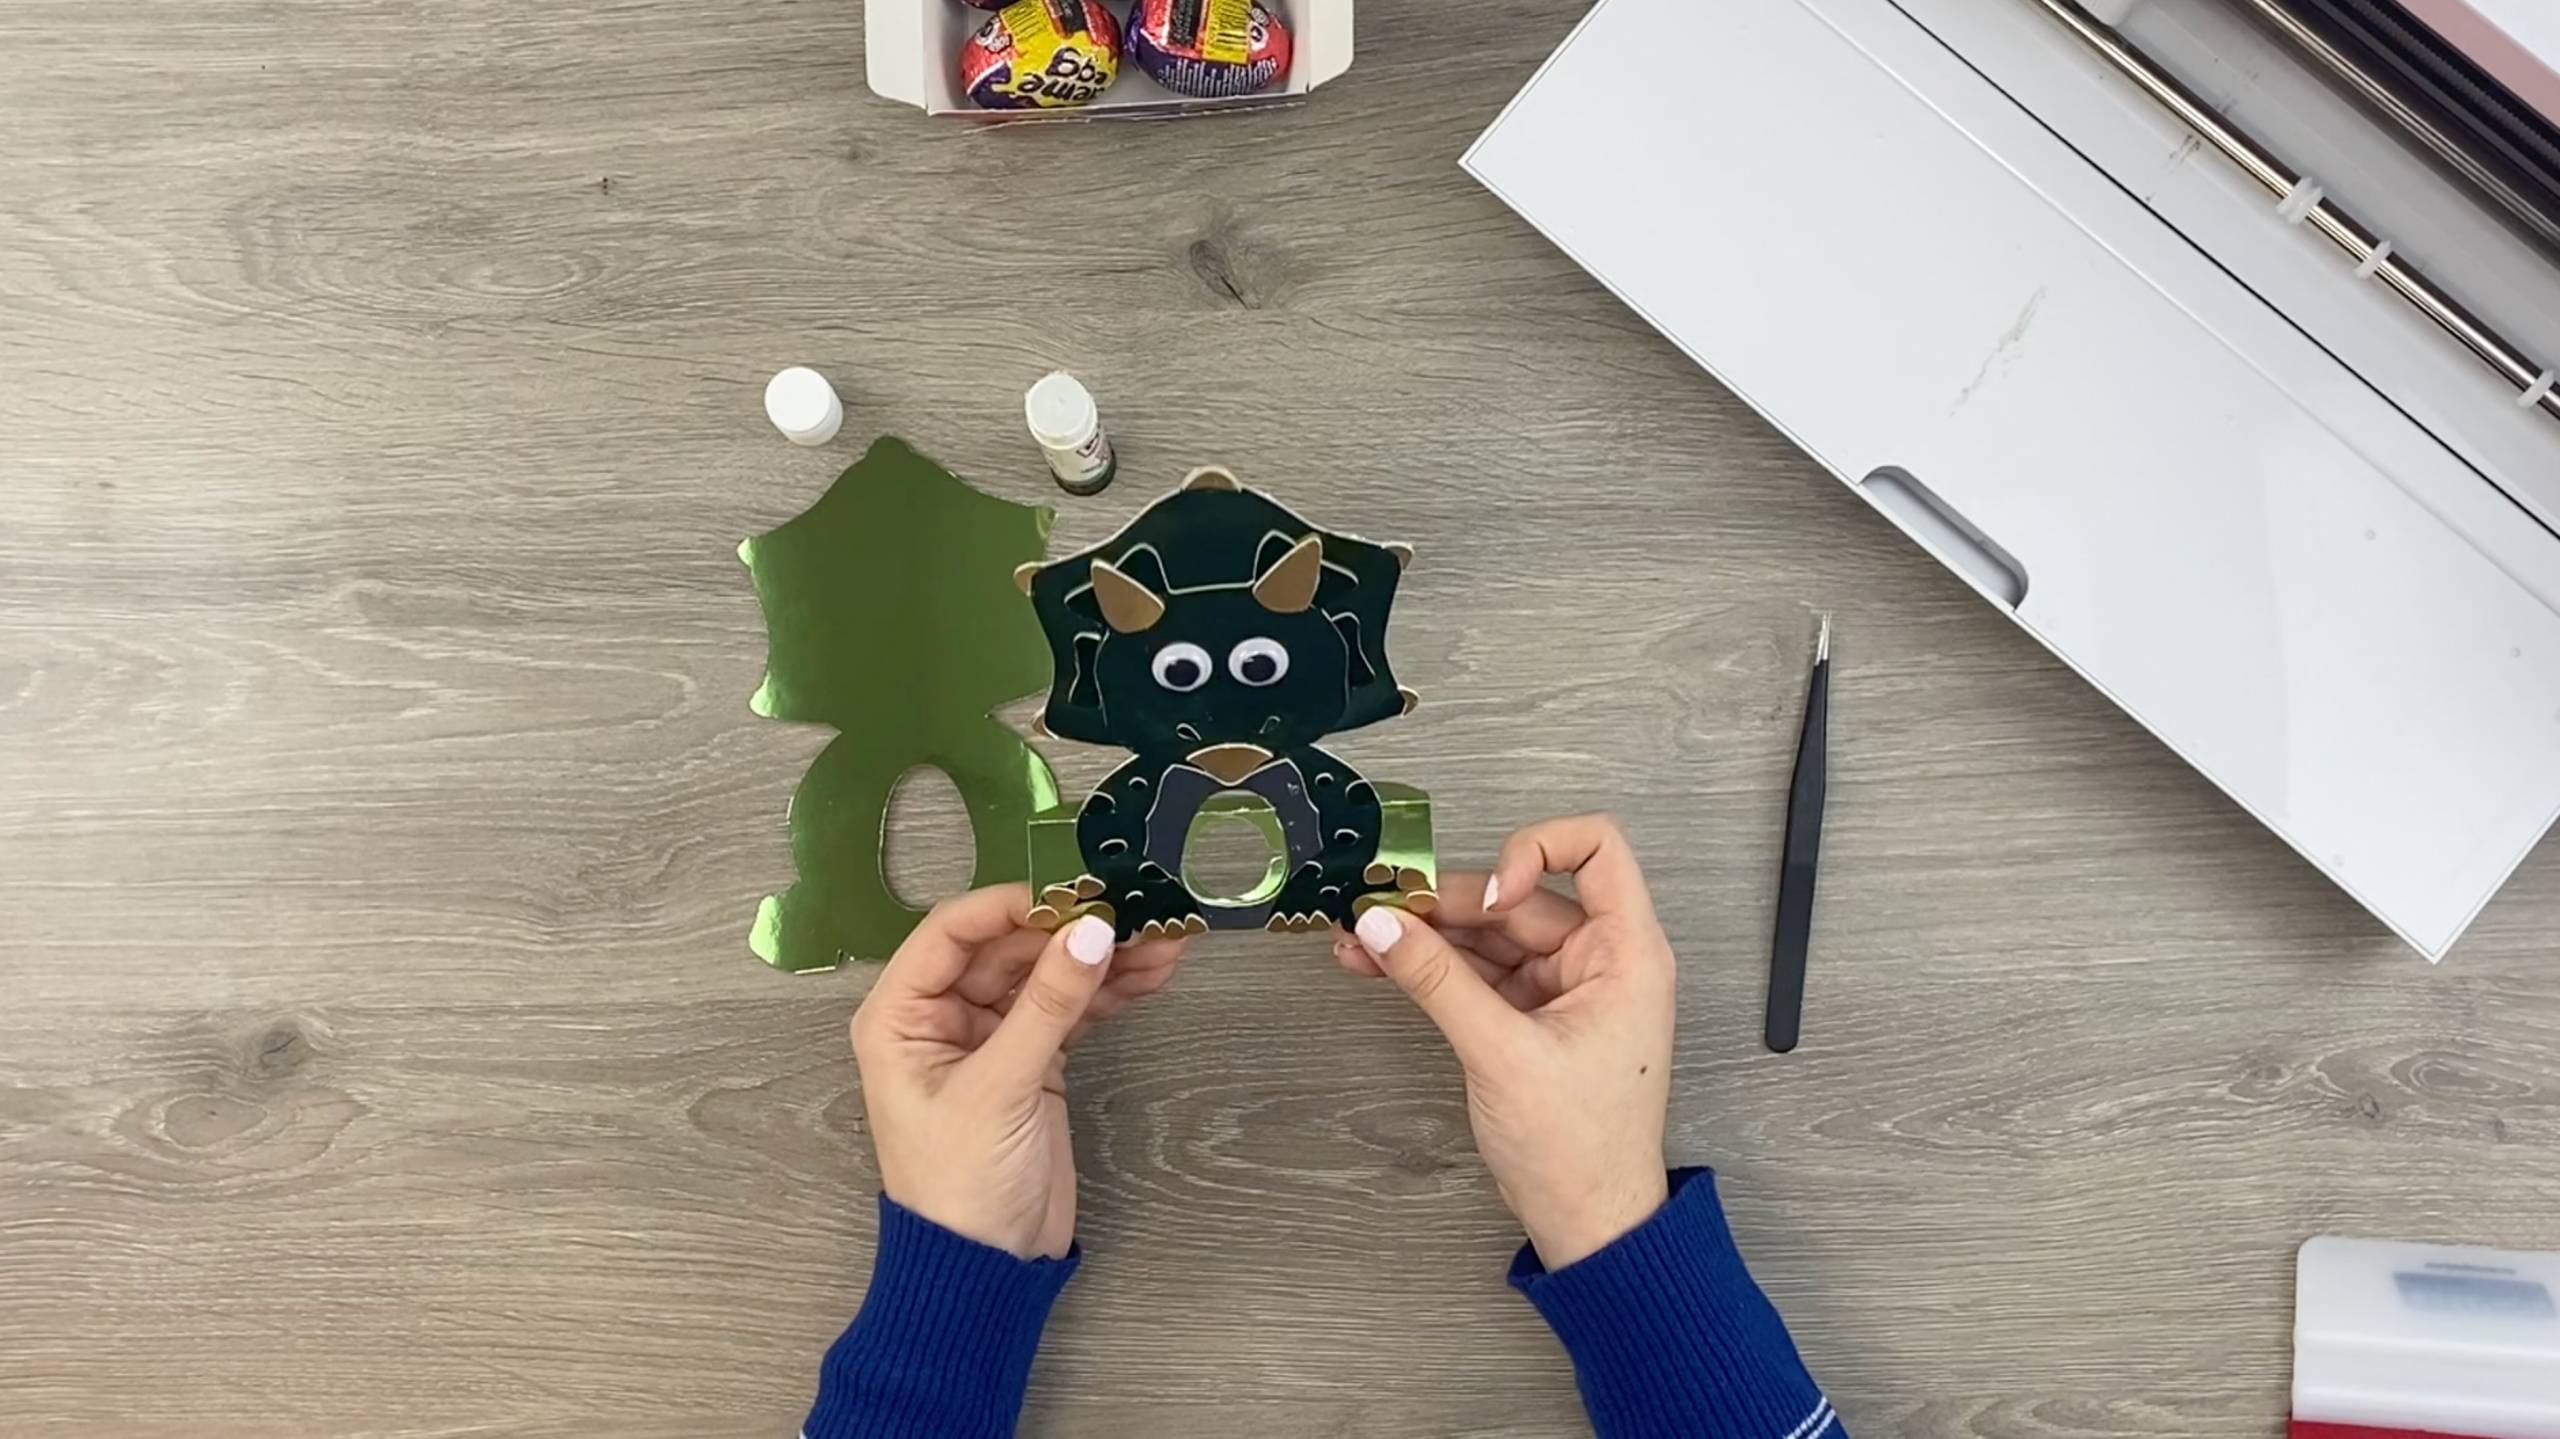
13. Apply glue to the the other edge of the bottom base card and stick the remaining plain Dino silhouette to it, the coloured side of the card should be facing forward.
14. Apply glue to the inside of the top of the Dino’s head and then secure the two sides to each other.
15. Slide your egg through the side to sit in the egg holder.
Silhouette Cut Files
Double-click on the Zip file to open it up and then open the cut file. When it opens in Silhouette studio all of the cut files will be on one mat, depending on which Silhouette machine your using you may need to move each of the different-coloured cut files onto different mats. If using a machine with a larger mat you can cut them all on one mat, just make sure each coloured card is in the correct position on the mat in correlation to the correct cut file.
Cut Setting: Cardstock Plain
Blade: 3
Speed: 4
Force: 20
Passes: 1
Brother Cut Files
After downloading and opening the zip file, please log in as usual to your design space account, open a new project mat, then left click on the SVG icon in the top left bar in canvas, this will then allow you to import your files. Once you left click this icon, a pop up box appears with you to choose where to import file from, choose to import the file from your downloads list or where you have chosen to save when unzipped.
Cut Settings:
Card:
Blade: 3.75
Speed: 1
Pressure: 0
Passes: 1
We hope you enjoyed this blog post and we hope you have a lovely Easter! Don’t forget to tag us in any Easter crafts you make over on our Facebook, Greenstik Materials, Instagram @GMCrafts or TikTok @GMCrafts. 🙂